SecureDoc OSA Linux Data Recovery Guide
Applies to SecureDoc v9.2SR1+
Contents
I. Uninstalling OSA and Unlocking the disk 3
Preparing the bootable OSA USB flash drive 3
Formatting the USB using wmboot utility 3
Creating the dbk file to unlock the system 7
Booting to the USB and Uninstalling 9
II. Recovering Data from the unlocked/unmanaged drive 12
Method 1: Attaching the unlocked drive to a working Linux system 12
Method 2: Booting to a live USB to recover data from unlocked drive 14
I. Uninstalling OSA and Unlocking the disk
Preparing the bootable OSA USB flash drive
USB key must have 2GB of space available
The key will be formatted by this process, so backup any data currently on the key.
The USB preparation process will need to be performed on a Windows system.
You will need to download the utilities needed to set up the USB for SecureDoc OSA purposes
Note: When following this process, have only the USB key intended for SecureDoc OSA purposes inserted to avoid accidental formatting of other drives.
On the SES server, create an OSA package (If you have an existing one – you may skip this step).
Copy or Download the OSA package to the system where you are planning to format and prepare the USB drive.
Formatting the USB using wmboot utility
Copy wmboot.exe and boot folder to your Desktop (or you can run it from current location).
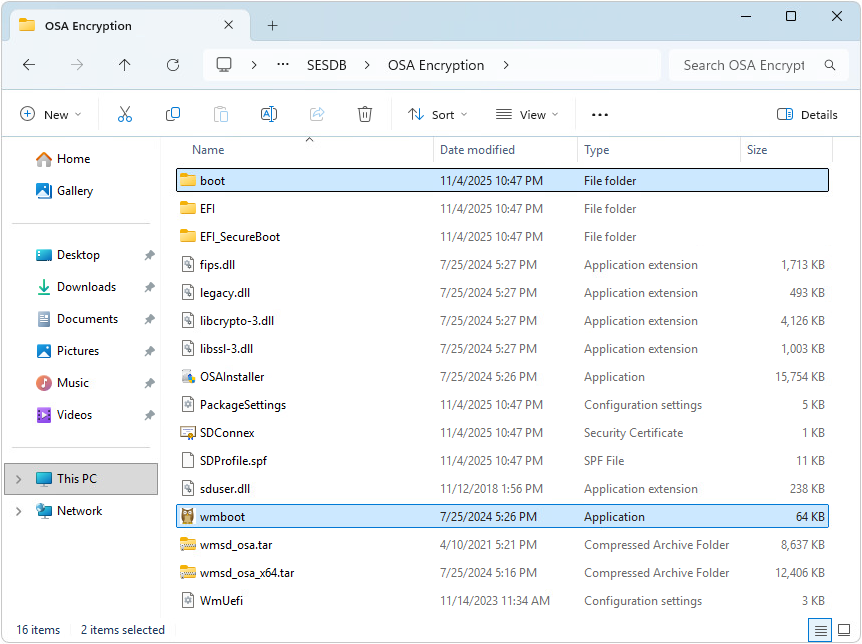
Remove all USB devices from the computer.
Run the wmboot.exe tool.
Note: Please make sure to right click on wmboot.exe and run as administrator. If you double click on the wmboot.exe it will produce the error “destination disk open failed, 0”
Plug in the USB key (the key will be formatted and all its data lost).
The wmboot.exe will automatically detect the USB as shown.
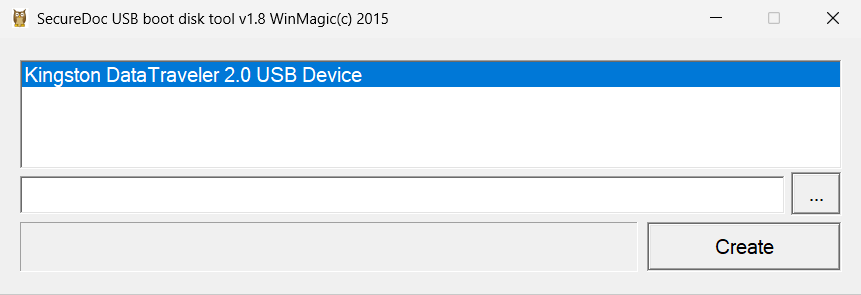
Select USB key name and click Format. Click OK to confirm the format.
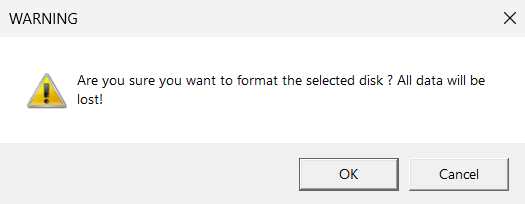
The formatting process may take a few minutes.
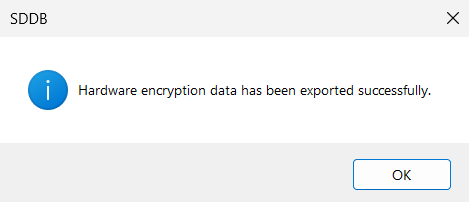
You should then get a prompt once the formatting completes. Click OK to confirm.
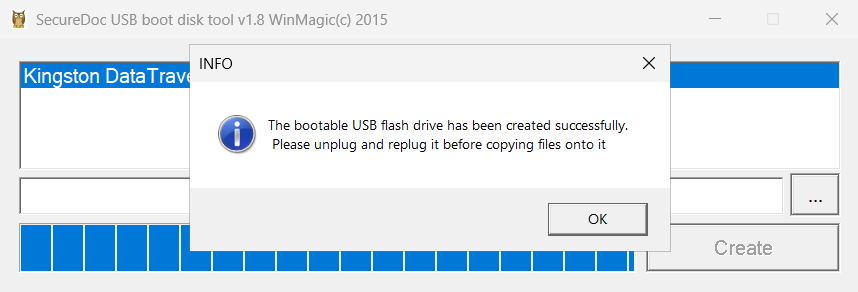
Close the wmboot.exe upon completion.
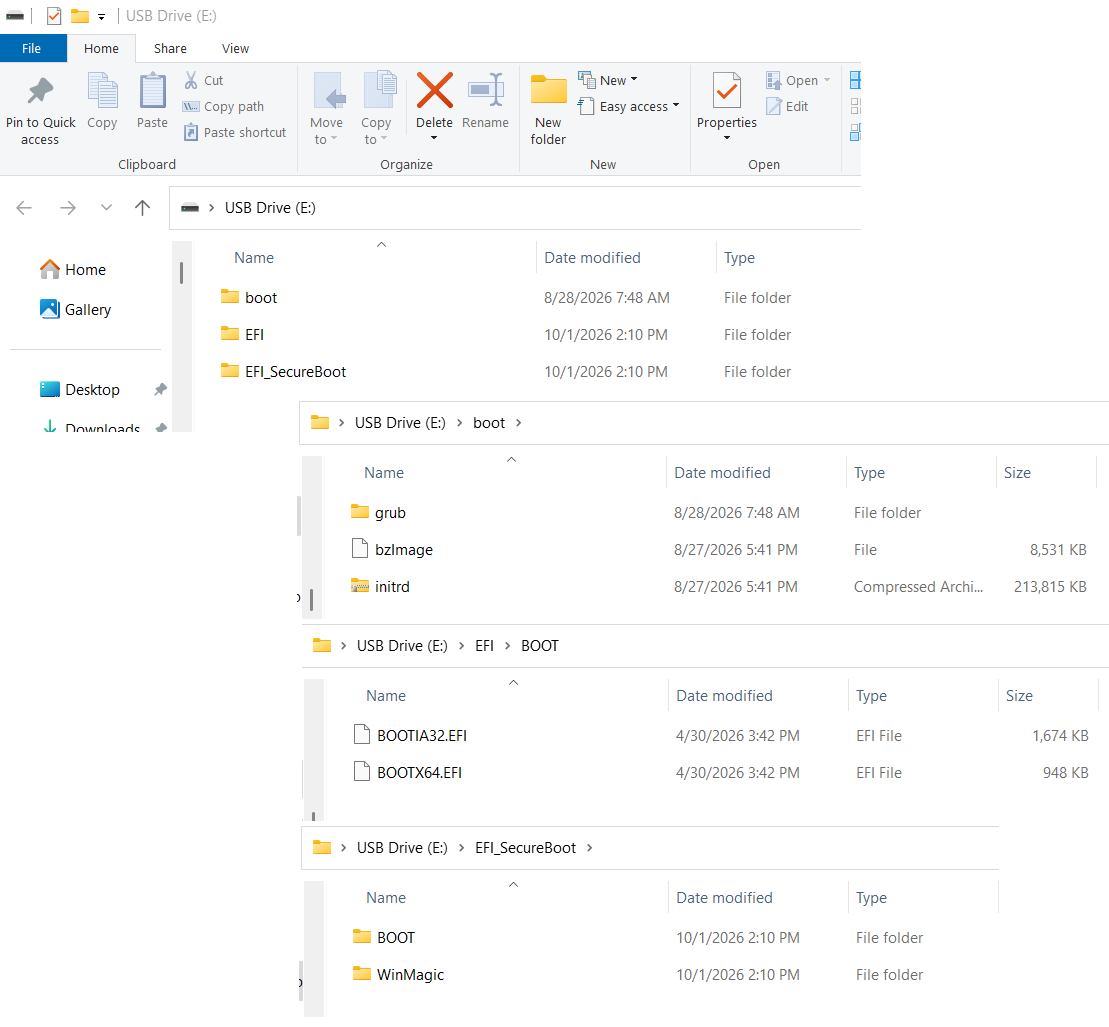
Copy the ‘boot’, ‘EFI’ and ‘EFI_SecureBoot’ folder from the OSA package on to your formatted USB drive (or drag and drop boot/EFI/EFI_SecureBoot folder over to root of the USB stick)
The contents of the boot folder should be shown as example:
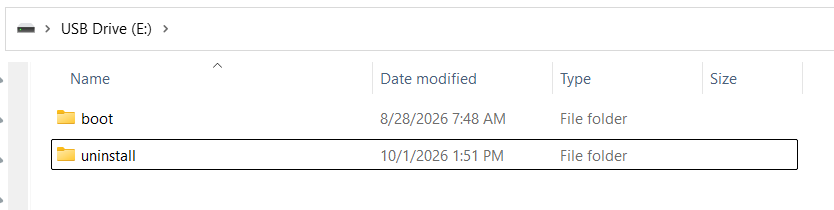
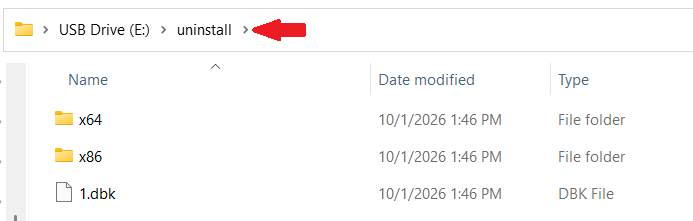
Create an uninstall folder in the usb drive (this will be where the .dbk file will be stored)
Creating the dbk file to unlock the system
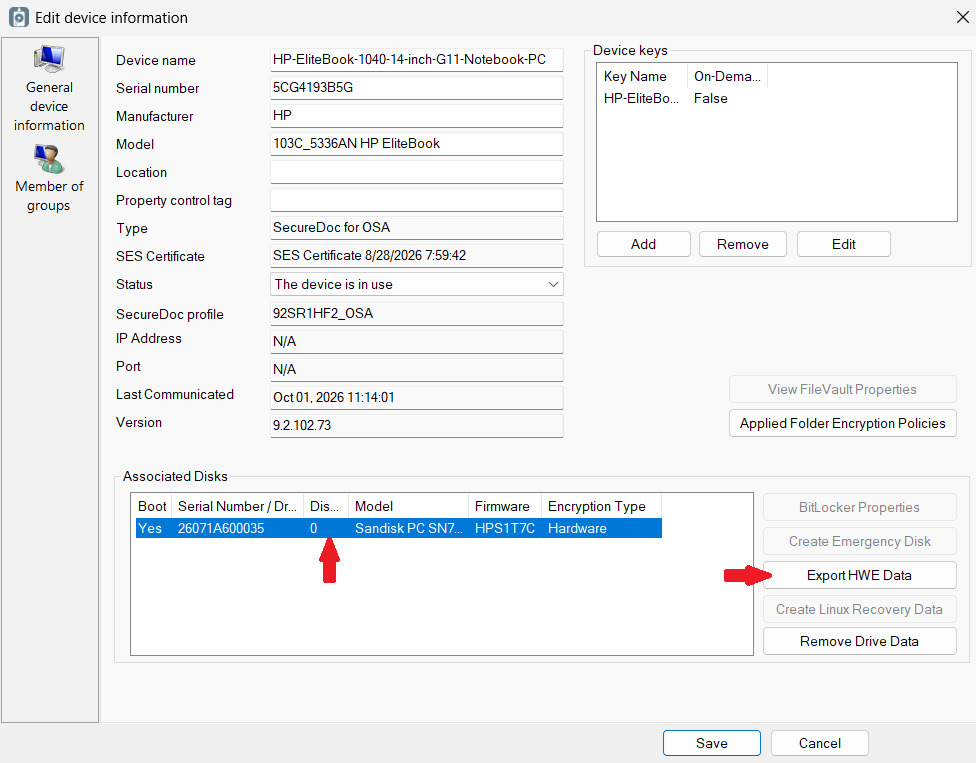
In the SES console, click on Devices tab, then double click on the target client computer from which you want to uninstall SecureDoc.
In the Edit device information window, select the disk under Associated Disks. Click on Export HWE Data.
Provide a name and password for the .dbk file then click OK.
|
|
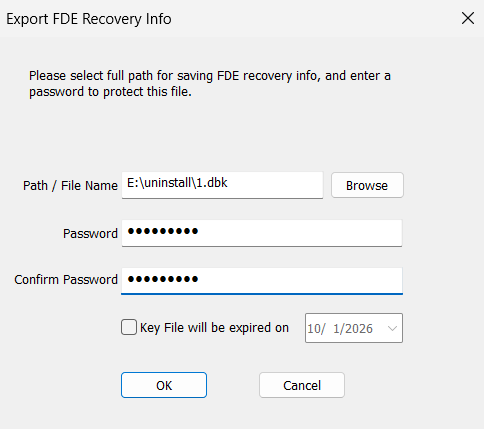
The .dbk file should be copied to the USB in the 'uninstall' folder
Booting to the USB and Uninstalling
Once the file has been saved, restart the client computer and boot to the USB.
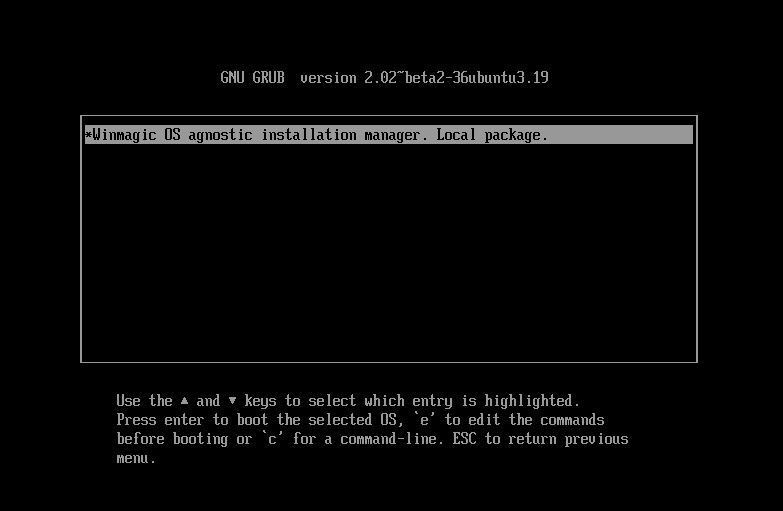
Once booted, continue or press enter at the selected option in the grub menu
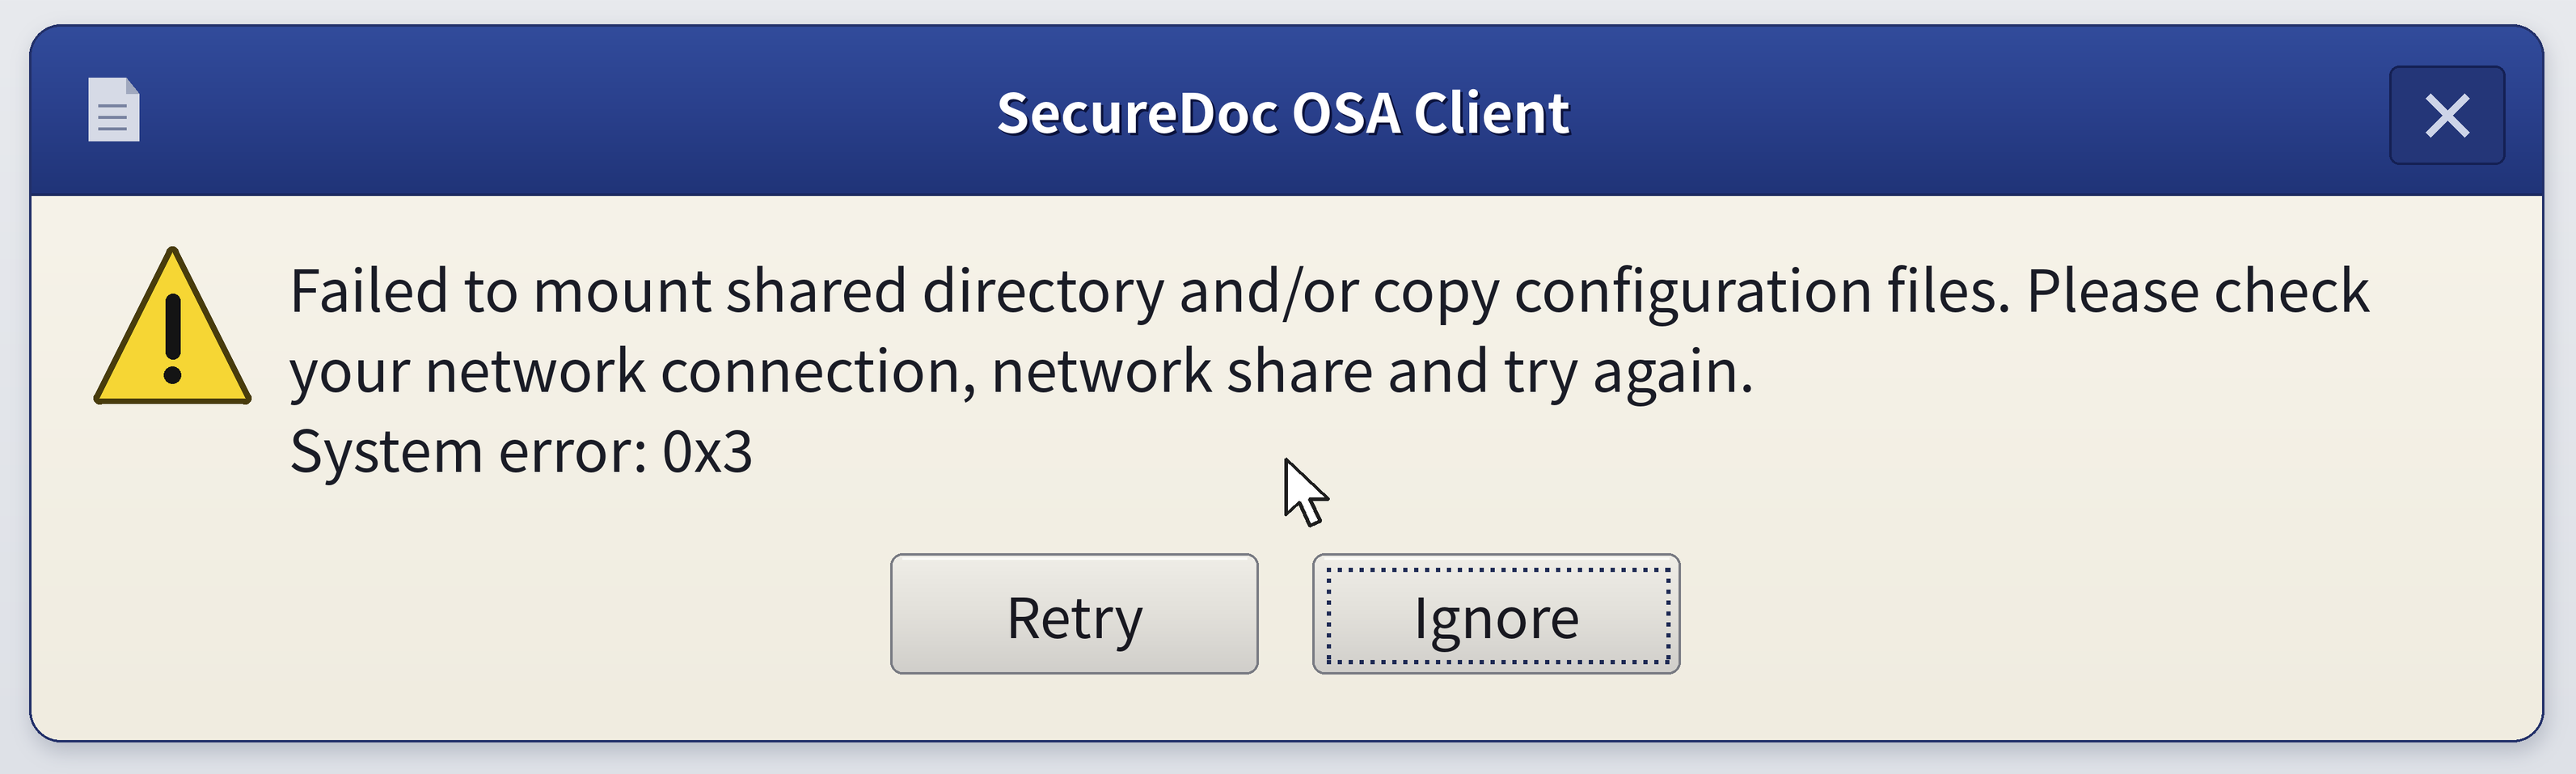
Note: If you encounter the window below when booting to the SecureDoc OSA Client for the first time, just select or click “Ignore” to continue.
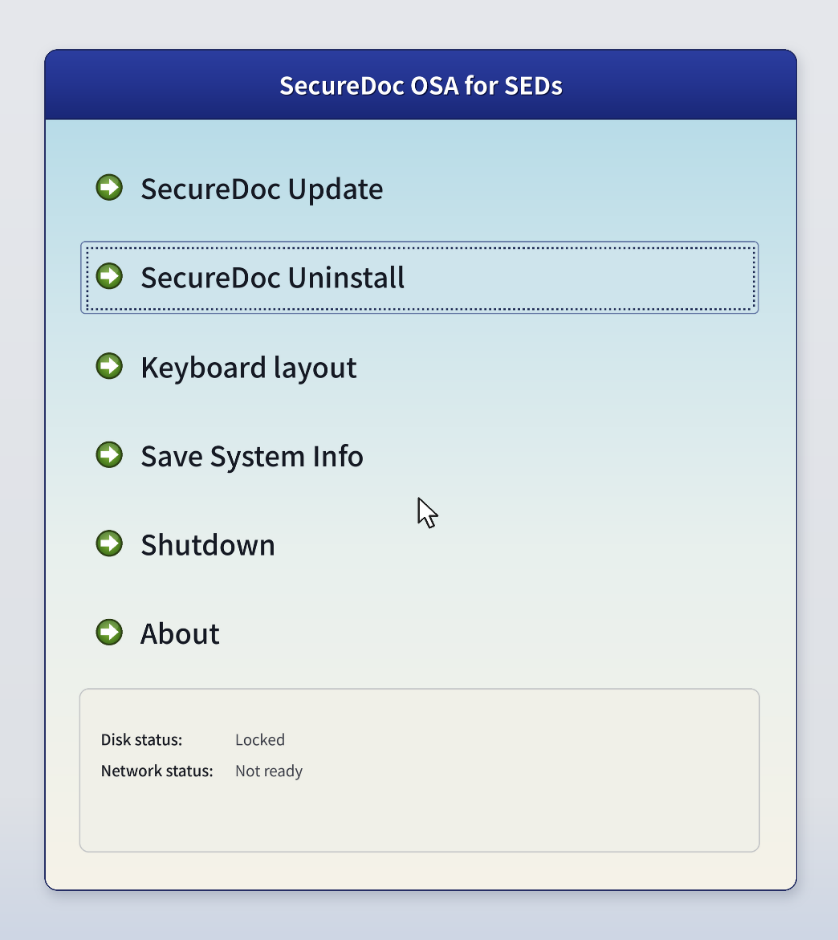
In the SecureDoc OSA for SEDs menu click SecureDoc Uninstall.
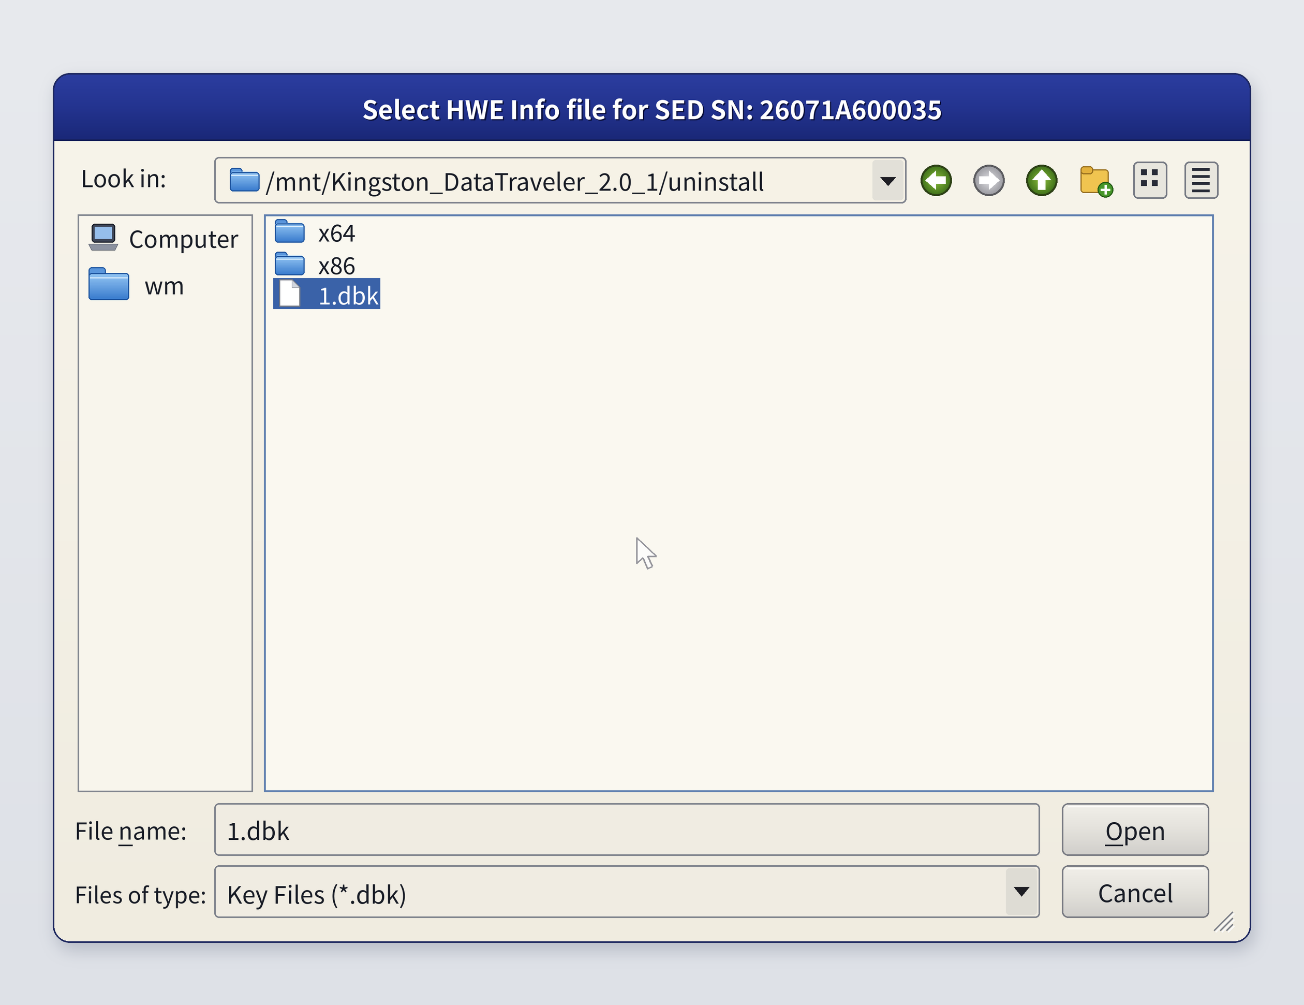
SecureDoc will scan the 'uninstall' folder on the USB and display the exported dbk files.
Select the dbk file for your machine and click Open.
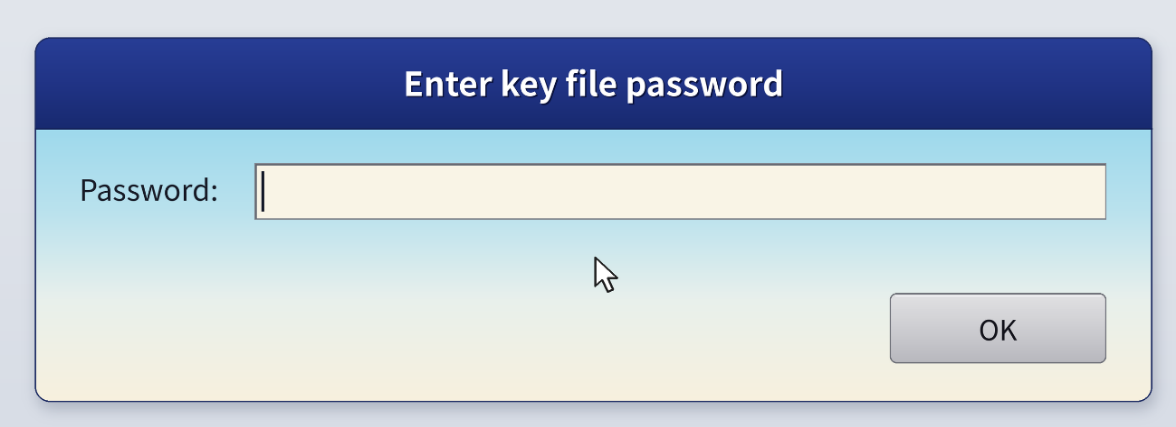
Enter the password previously entered and click OK.
A new screen showing the uninstall progress will appear.
When uninstall is complete, you will be prompted to shut down the computer: Click Yes.
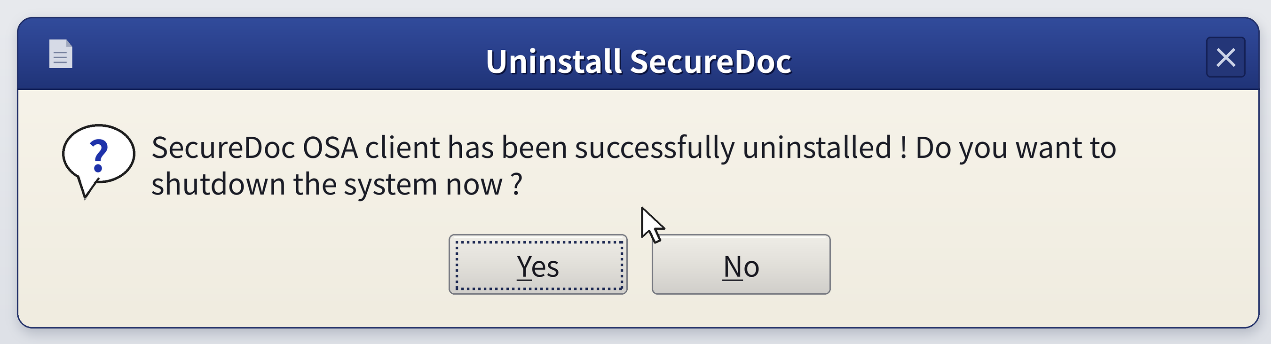
Remove the USB from the computer.
Boot up the client computer.
The device will now boot directly into your OS.
The SED is now unmanaged.
Note: If your system is having issues booting back to your OS after OSA has been uninstalled and the disk has been unlocked, proceed to the next section to recover the data from your disk.
II. Recovering Data from the unlocked/unmanaged drive
This applies for cases when:
After uninstalling OSA and unlocking the drives the system is still unable to boot back normally to the system.
Recover data from a drive after the machine no longer boot, and the drive needs to be slaved to another system.
Limitation: This procedure does not apply to systems that have been crypto erased
Requirements:
The system needs to have SecureDoc OSA uninstalled and the disk unlocked/unmanaged (Refer to: I. Uninstalling OSA and Unlocking the disk)
Method 1: A working Linux client to recover the data from the unlocked drive. OR
Method 2: A bootable live USB drive (See link here on how to create a bootable USB stick on Ubuntu) and an external backup disk drive.
Method 1: Attaching the unlocked drive to a working Linux system
Detach the drive from the system having issues booting up.
Attach the drive to a working Linux system:
Attach the drive to a second drive slot if one is available on the working system or
Mount the drive to an external enclosure and connect via USB
After attaching the drive to the working Linux system, open terminal.
Run ‘lsblk’ command to view if the attached disk has been detected.
If only one disk is showing up, run the following to do a scan of the disks again:
echo "- - -" | sudo tee /sys/class/scsi_host/host*/scan
Run the ‘lsblk’ command again to confirm if the attached disk is now appearing.
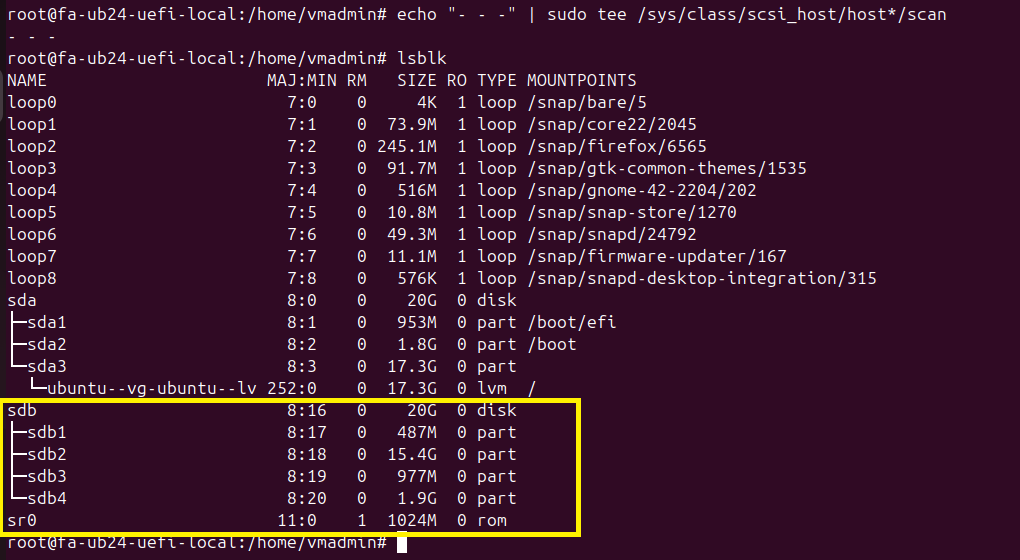
Mount the partitions for which you whish to copy the data from (from the example above this would be the 15.4G root ‘/’ partition):
Create a temporary directory to where to mount the partition: mkdir /temproot_sdb.
Mount /dev/sdb2 /temproot_sdb
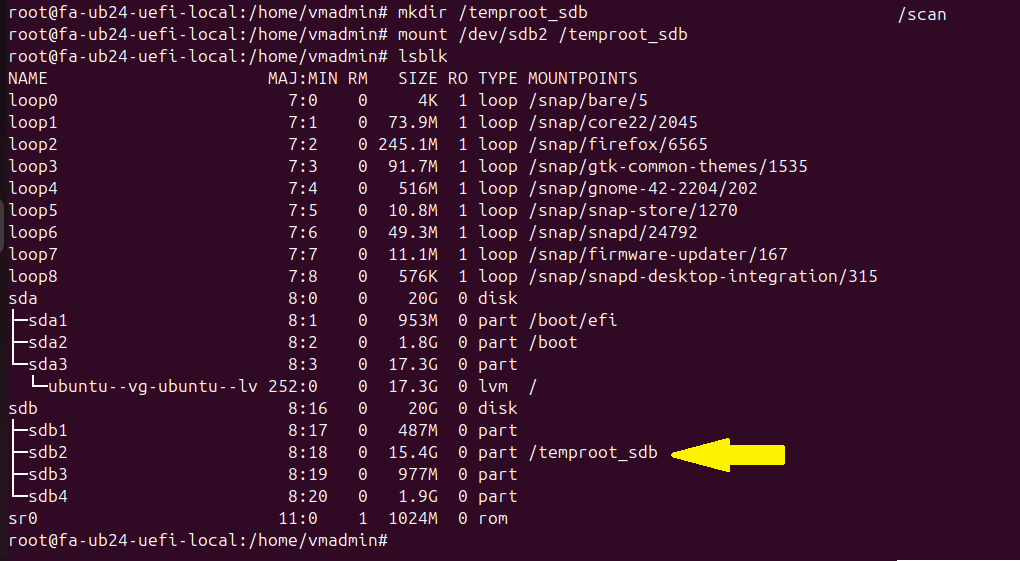
You should now be able to copy the data on the mounted partition over to your back-up drive.
(Optional) You can also copy your data to a network share if this is an option available for you.
Example: cp -r /temproot_sdb /mnt/netshare/back-up-data/
Method 2: Booting to a live USB to recover data from unlocked drive
Insert the bootable live USB to the system that just had OSA uninstalled (or the drives unlocked).
Once booted, open Terminal and run ‘lsblk’ command to view the disks present and what partitions to mount.
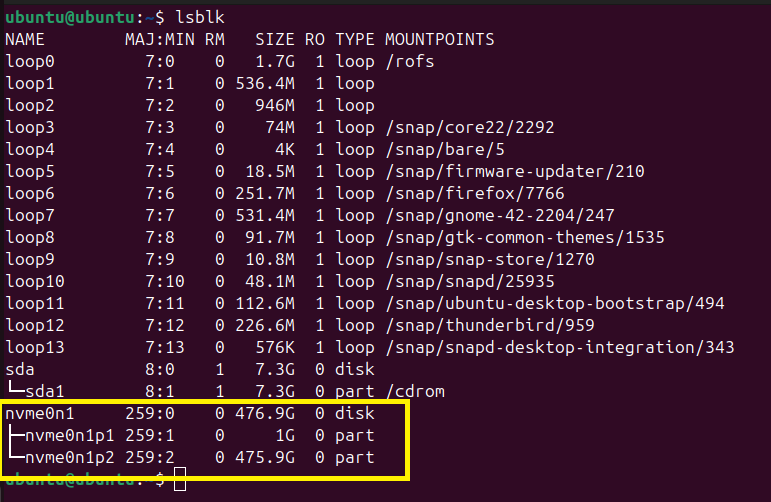
In the example above, we need to mount the 475.9G root volume of the nvme0n1 drive.
Create a temporary mountpoint for the volume: mkdir /tmproot, then
Mount /dev/nvme0n1p2 with Mount /dev/nvme0n1p2 /tmproot
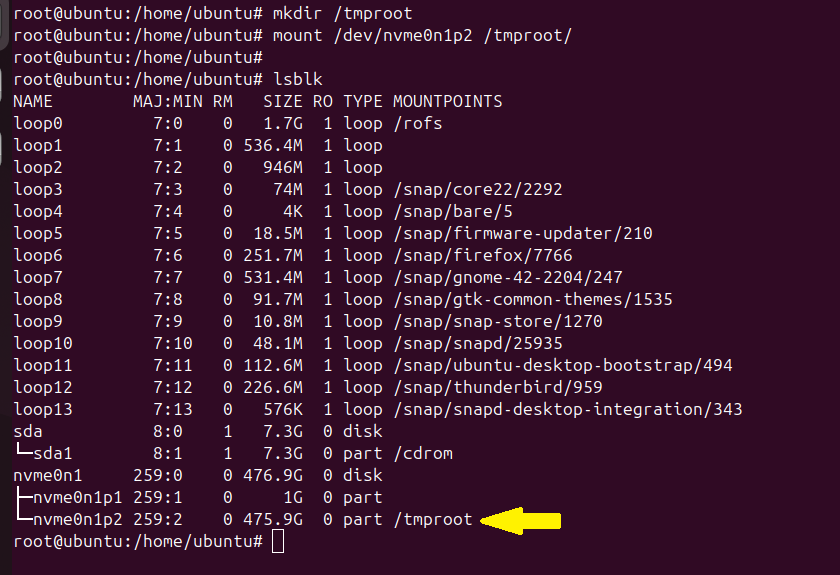
Plugin your back-up drive to the system and copy all the data from /tmproot. You can use the GUI to copy the files or run on terminal:
cp -rf /temproot /media/ubuntu/back-up-data/
(Optional) Similarly you can do the same if you have access to a network fileshare to copy the back-up files.
cp -r /temproot /mnt/netshare/back-up-data/