Use 2FA for Windows Login and RDP
Contents
Office Network
1. Config VPN to have access from Home network
2. Register a public DNS and enroll public SSL
3. Config Port Forwarding to SD IDP
4. Configre IDP server
6. Create SES package
7. Deploy Client
8. Install ME and Register user on phone
9. Use 2FA for Windows Login
Home Network
1. Connect to Office Network via VPN
2. RDP to Office client using 2FA
Troubleshooting: Lost phone, IdP is offline, machine has no internet, etc… and End-user was stuck at SDCP-2FA
Reference documents
(1) Add your custom domain name using the Azure Active Directory portal
(2) GoDaddy - Add an A record
(3) Getting started with Azure AD Connect using express settings
Access router and Open port for SD IDP, e.g. port 6500
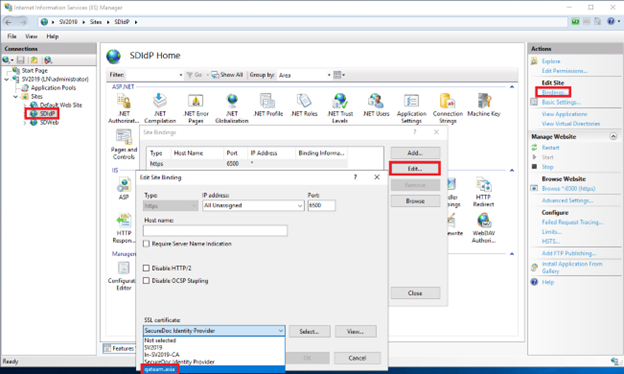
- Configure IDP server
- Go to IIS, select “SDIdP“
- Select “Binding”
- Click “Edit”
- Select Port: 6500
- Select your “SSL certificate” to your public SSL: e.g. qateam.asia
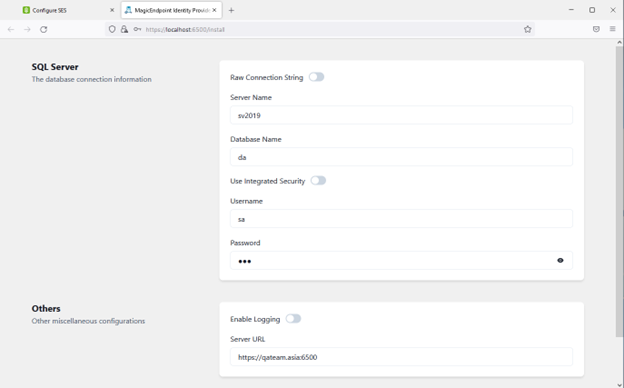
- Browse SDIdP page, enter valid information and click Save button
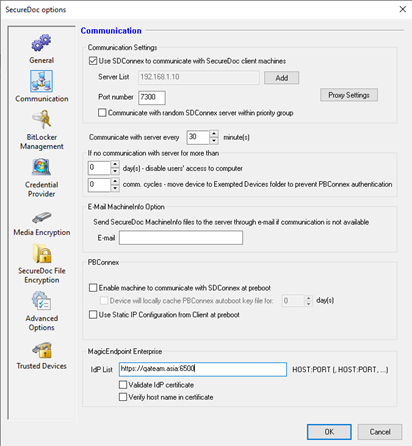
On SES, create a package with these options enabled
- MagicEndpoint Enterprise à IdP List: e.g.: https//qateam.asia:6500
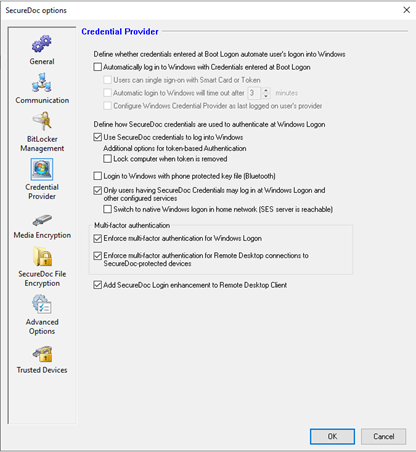
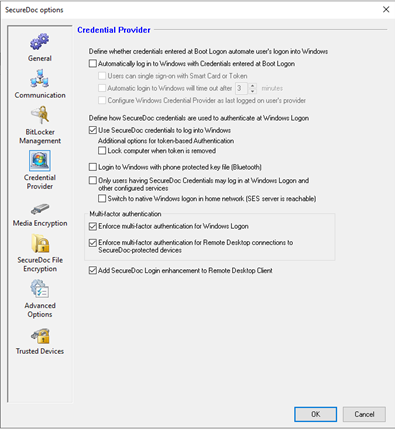
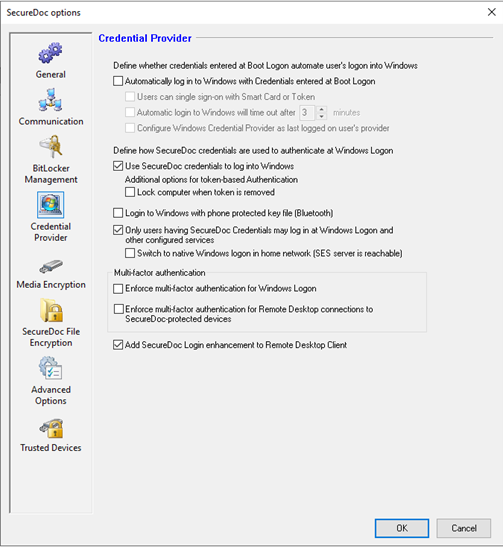
- In the Profile’s Credential Provider panel, select settings to enable Multi-Factor Authentication, as in the image below:
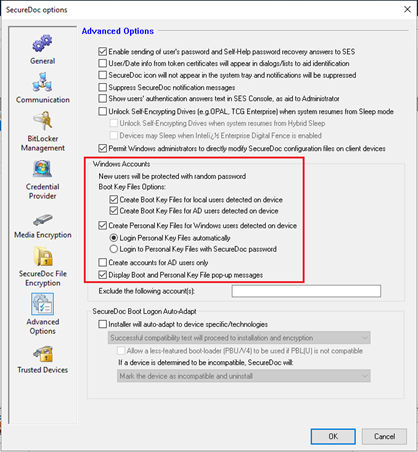
- In the Profile’s Advanced Options panel, choose the options shown in the Windows Accounts section, below:
- Deploy Client
- Copy the package to client devices and running SecureDoc.exe
- Boot Login is installed and the Hard Drive will be encrypted successfully
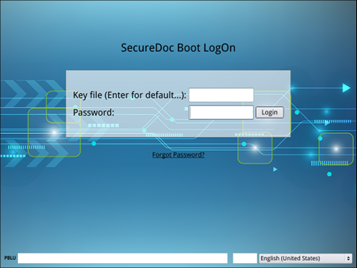
- Enter password to login Boot Logon
- Click OK button on the SecureDoc Credential Provider dialog
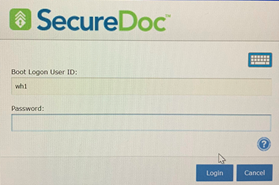
- Enter password and click Login button >> Login to Windows successful

- Install MagicEndpoint and Register the user on his/her phone
- Install MagicEndpoint_Enterprise.exe
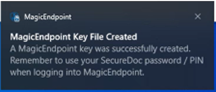
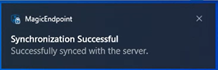
- Waiting some seconds, the MagicEndpoint key file will be auto-created and synchronized successfully, with the following “Fly in” messages shown at the right edge of the Windows screen near the system tray, as below
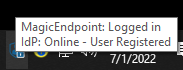
- Check status of MagicEndpoint – it should show “IdP: Online – User Registered”
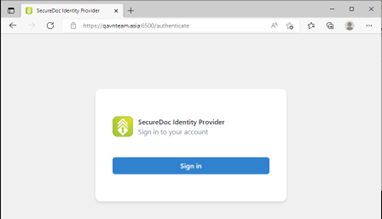
- Launch IDP portal and click “Sign in” button >> Login IDP portal successful
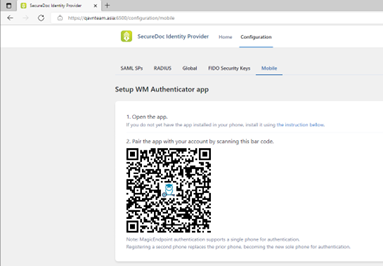
- Install the WM Authenticator app on phone, using whichever is your app store (Apple or Android).
- Open WM Authenticator app on your phone and scan the bar code shown on your IDP portal
- The User will be registered successfully, and will be shown on your phone


- Click OK button on SDCP dialog

- Enter password and click Login button >> Login to Windows successful

- A dialog will appear (as in the image below) indicating 2-Factor Authentication (2FA) will be used – as shown on Windows client
- A notification is pushed to phone >> You should Click the ‘Authorize’ button or authenticate by biometrics (in case ‘Use Authorization’ option enabled on WMAuth app)

>> Having completed this 2-factor authentication, your login to Windows is successful
On Home device, connect VPN to Office network
On RDP app, enter IP of the Office client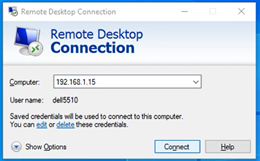
- Enter credentials

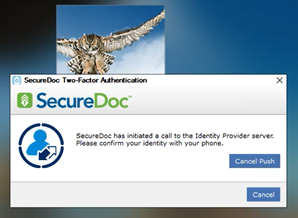
- Two-Factor Autenntication (2FA) is shown on the Windows client, as in the image below:

A notification is pushed to phone >> Click ‘Authorize’ button or authenticated by biometrics (in case ‘Use Authorization’ option enabled on WMAuth app)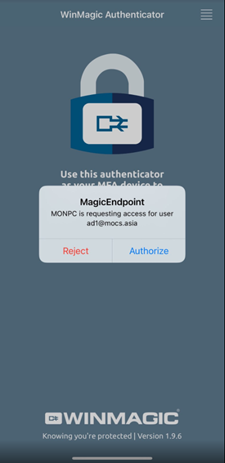
>> RDP to Windows successful
Troubleshooting: Lost phone, IdP is offline, machine has no internet, etc… and End-user was stuck at SDCP-2FA
Case 1: Disable options “Only user having SecureDoc Credential may log into Windows and other configured services”, updating the profile, as follows:
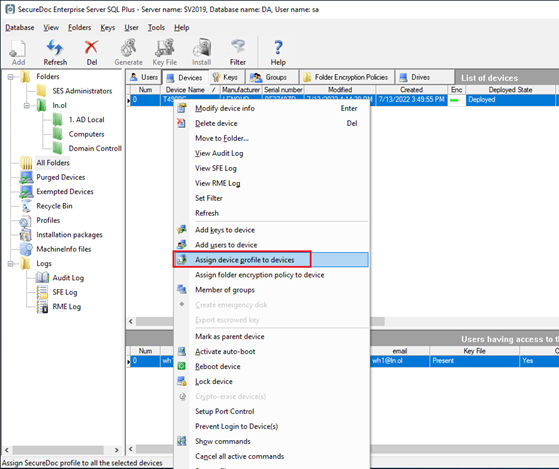
- In SES, edit profile for this device
- Right-click on device and select “Assign device profile to devices” – as in the image below: This will send the updated profile to the seleted device(s).

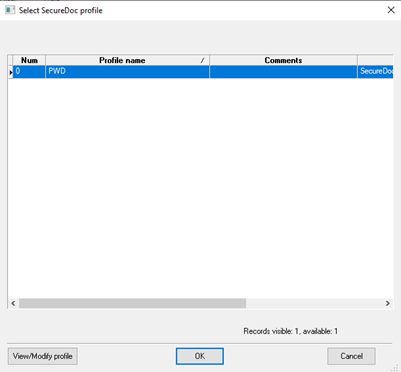
- Select the profile and click OK

- On SD client, waiting for a moment so that SD client can communicate with server
- After a moment, End-user can cancel SDCP or “SecureDoc Two-Factor Authentication”

- Native Windows logon show and End-user can login with native Windows Logon
Case 2: Disable “Multi-factor by Authentication” via updating profile
- In SES, edit profile for this device
- Right-click on device and select “Assign device profile to devices”
- Select the profile and click OK
- On SD client, waiting for a moment so that SD client can communicate with server
- After a moment, End-user can cancel “SecureDoc Two-Factor Authentication”

- End-user can login with SDCP (without 2FA) à Click OK button on SDCP dialog

- Enter password and click Login button >> Login to Windows successful
