How to Enable or Disable Device Signals in SecureDoc
SecureDoc Enterprise Server (SES) | Client Profile Configuration
Article ID: | 20260622 | Product: | SecureDoc Enterprise |
Created: | June 22, 2026 | Version: | 9.1 and above |
Author: | WinMagic Support | Applies To: | SES, SecureDoc Windows |
Overview
The Device Signals feature in SecureDoc records device access events to the Audit Log. When enabled, SecureDoc logs events such as device power-on, shutdown, lock, unlock, and login attempts to the SES Audit Log, giving administrators a full audit trail of endpoint activity.
This article covers two methods to enable or disable Device Signals:
Method 1 (Recommended): Via the SecureDoc Options UI inside SES 9.2 and above)
Method 2 (Advanced): By manually editing the profile INI file (9.1 and above)
Note: After updating the setting in the profile, the updated profile must be pushed to already-encrypted endpoints to apply the change. This is covered in Section 4. |
Prerequisites
Access to SecureDoc Enterprise Server (SES) with administrator rights
An existing SecureDoc client profile for Windows endpoints
Endpoints must already be enrolled and encrypted by SecureDoc
Method 1: Enable or Disable via SES Profile UI (Recommended)
Step 1 — Open the Profiles List
Log in to the SecureDoc Enterprise Server (SES) Management Console. In the left navigation panel, click Profiles to open the list of configured client profiles.
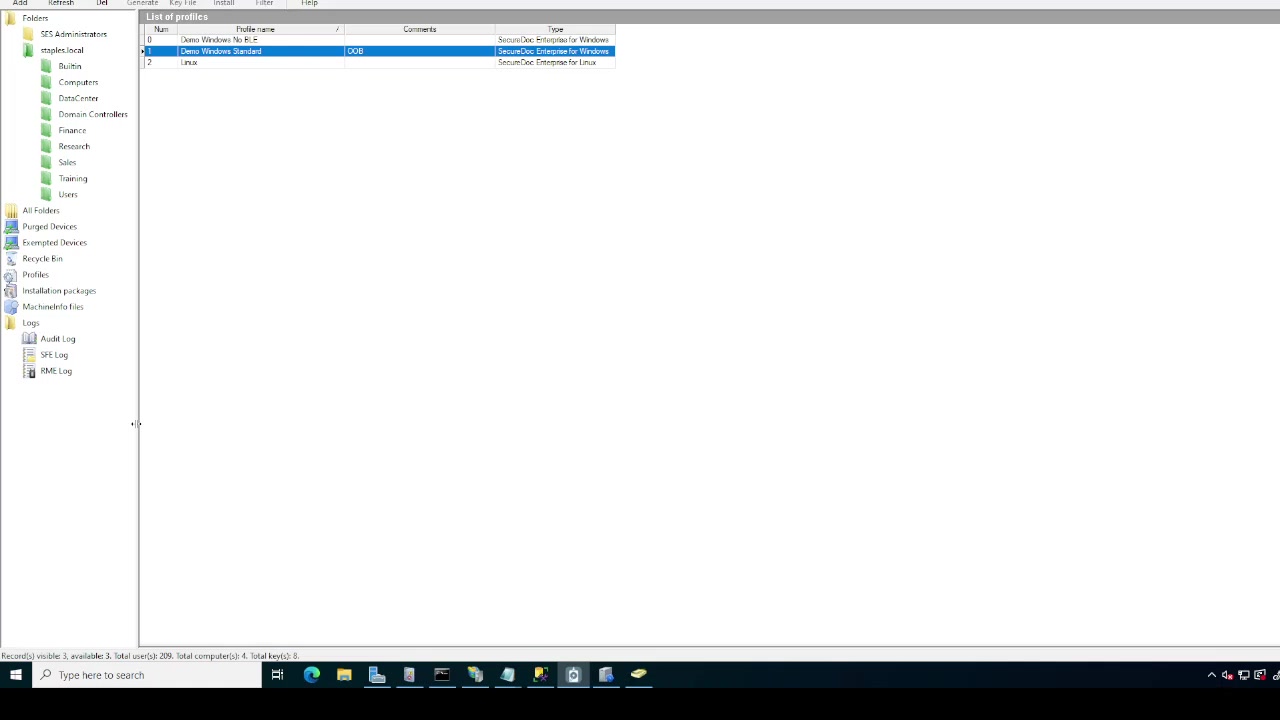
Figure 1: SES Management Console showing the List of Profiles
Step 2 — Open the Target Profile for Editing
Double-click the profile you want to modify (e.g., "Demo Windows Standard"). The SecureDoc Profile dialog will open, displaying profile metadata and access buttons for each configuration section.
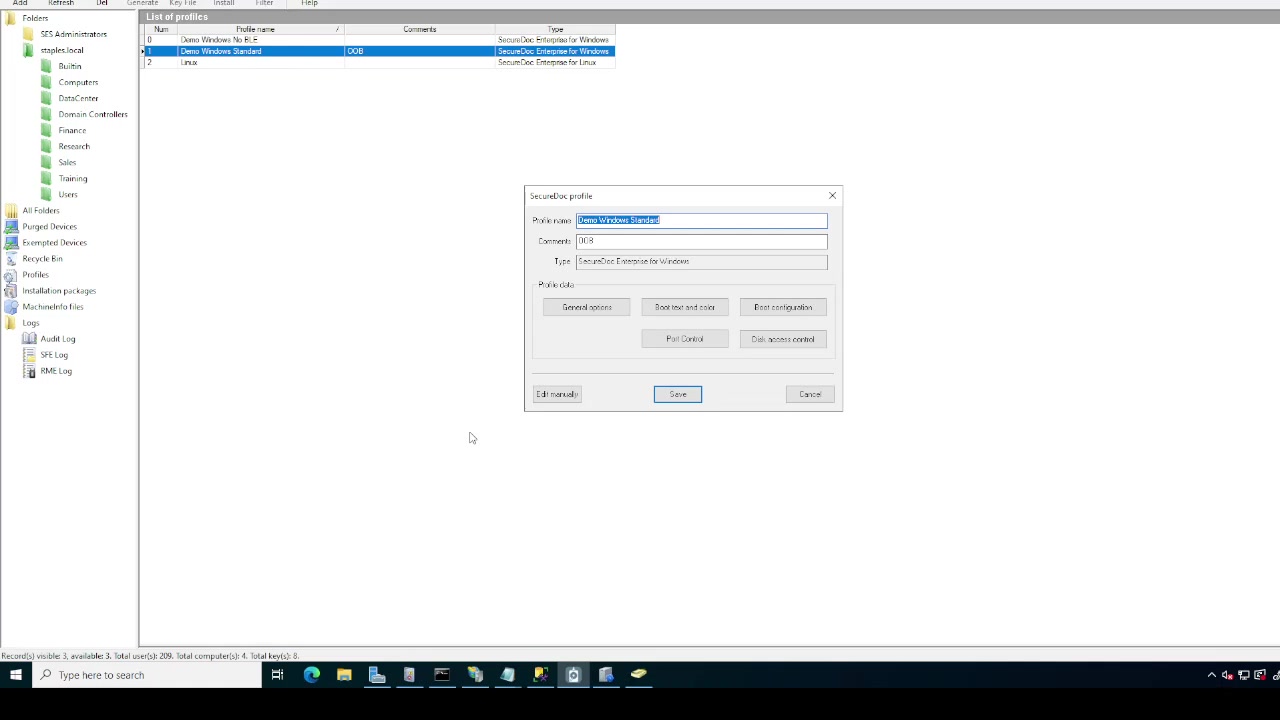
Figure 2: SecureDoc Profile dialog with configuration section buttons
Step 3 — Navigate to General Options
In the Profile dialog, click the General options button. The SecureDoc options window will open, showing the full list of configuration categories in the left panel.
Step 4 — Select "Device Signals"
Scroll to the bottom of the left-side icon list and click Device Signals. The Device Signals panel will load on the right, showing a single setting:
Enable device access logs
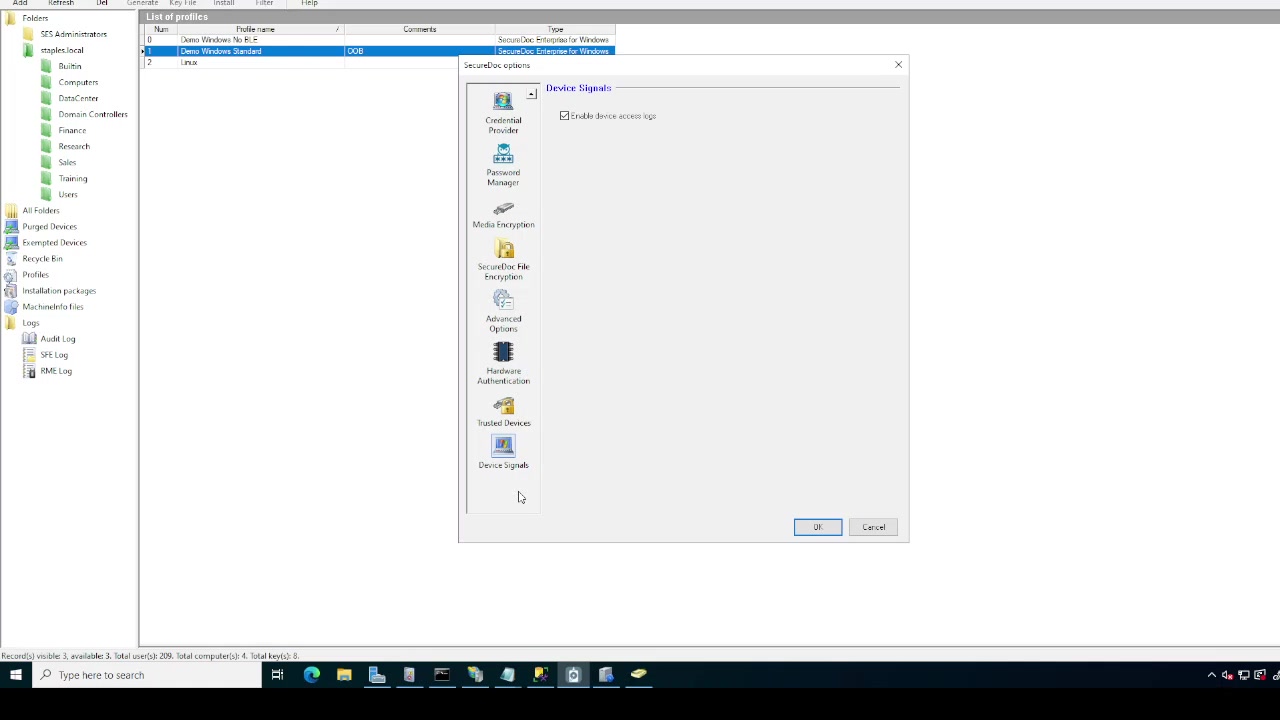
Figure 3: The Device Signals section in SecureDoc Options, showing the "Enable device access logs" checkbox
Step 5 — Enable or Disable the Setting
To ENABLE Device Signals: check the "Enable device access logs" checkbox (This may already be enabled by default)
To DISABLE Device Signals: uncheck the "Enable device access logs" checkbox
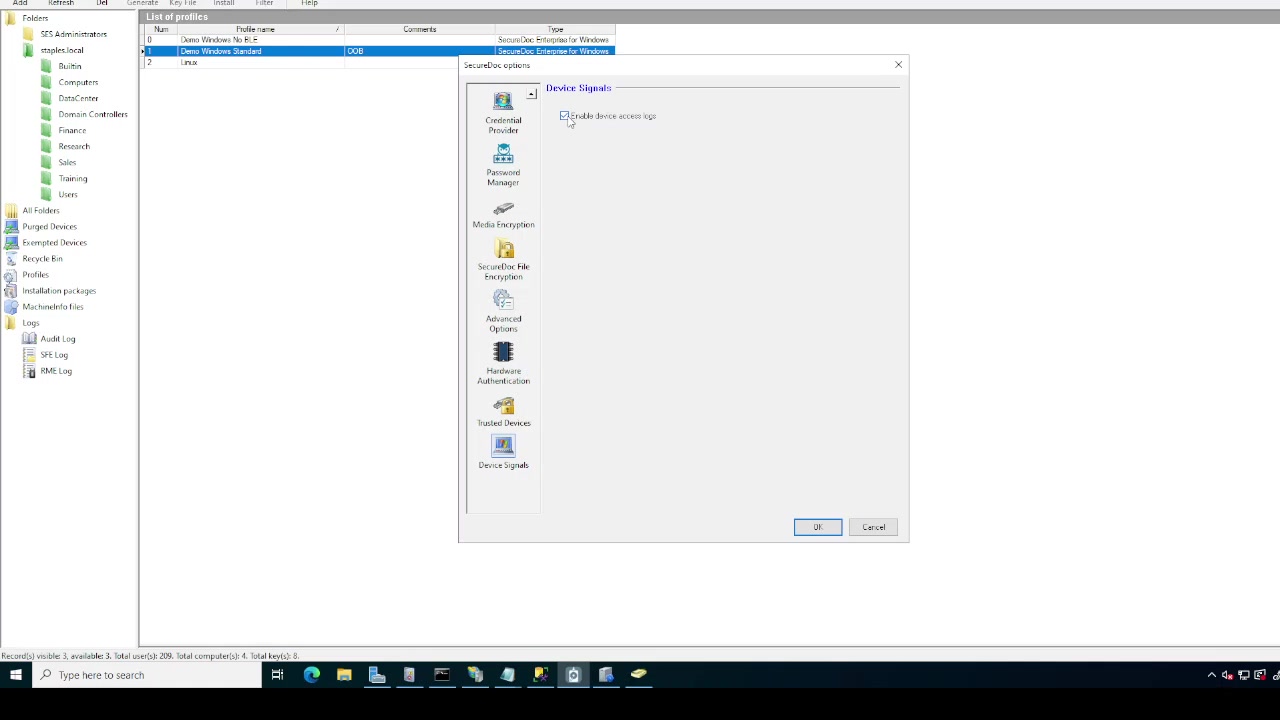
Figure 4: "Enable device access logs" checkbox enabled (checked)
Step 6 — Save the Profile
Click OK to close the SecureDoc Options window. Then click Save in the Profile dialog to commit the change to the profile. The profile is now updated in SES.
Method 2: Enable or Disable via Manual Profile Edit (Advanced)
This method is useful for bulk edits or scripted deployments where direct INI key modification is preferred.
Note: This method is for advanced administrators. Incorrect edits to the profile INI file can cause profile corruption. Always back up the profile before editing manually. |
Step 1 — Open the Profile for Manual Edit
In the Profile dialog (see Method 1, Step 2), click the Edit manually button at the bottom left. This opens the raw profile configuration file in Notepad.
Step 2 — Locate the LogDeviceAccess Parameter
Use Ctrl+F to open the Find dialog. Search for "access" to quickly locate the LogDeviceAccess parameter.
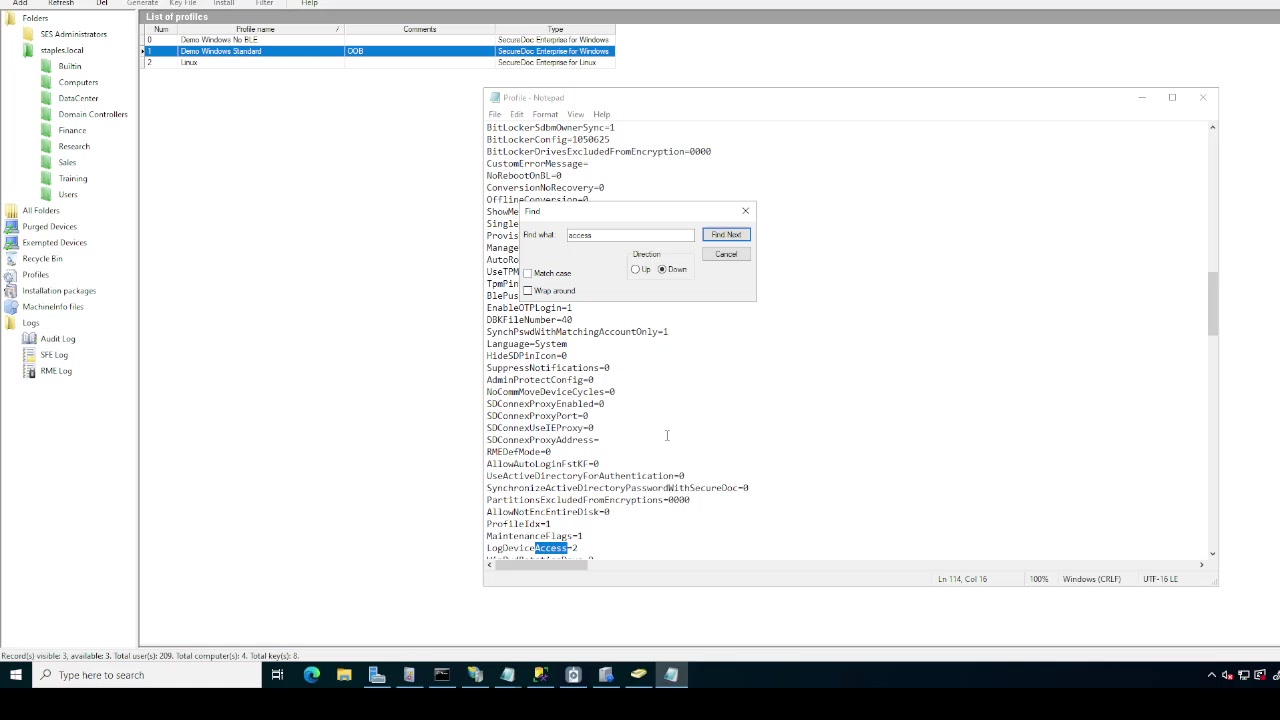
Figure 5: Profile INI file showing the LogDeviceAccess key (value = 2 when enabled)
Step 3 — Set the LogDeviceAccess Value
Locate the LogDeviceAccess key and set its value:
Key | Value | Effect |
LogDeviceAccess | 2 | Device Signals ENABLED - device access events are logged to the Audit Log |
LogDeviceAccess | 1 | Device Signals ENABLED - log events, store in a transfer file. Events will be sent along with other data upon next comm cycle device access events are logged to the Audit Log |
LogDeviceAccess | 0 | Device Signals DISABLED - no device access events are logged |
Step 4 — Save and Close Notepad
Save the file in Notepad (Ctrl+S). Return to the SecureDoc Profile dialog and click Save to apply the updated profile to SES.
Pushing the Updated Profile to Encrypted Endpoints
After saving the profile, the updated Device Signals setting must be pushed down to any already-encrypted endpoints that are assigned to this profile. The profile update does not apply automatically to endpoints that are already encrypted.
To push the profile to endpoints:
In the SES Management Console left panel, navigate to the folder or OU containing the target computers.
Select the target computer(s) .
Right-click and select Assign device profile to devices.
.png)
Select the updated profile and click ok. SES will push the profile to the selected endpoints on their next connection to SES.
.png)
Note: Endpoints must be online and able to reach the SES server to receive the profile update. The update will queue and apply when the endpoint next connects. |
Verifying Device Signals are Active
Once the profile has been pushed, verify that device access events are appearing in the SES Audit Log.
In the SES Management Console, expand the Logs section in the left panel.
Click Audit Log.
Perform a device action on a target endpoint (lock, unlock, or power cycle) and then refresh the Audit Log.
Confirm that the device access event appears in the log (e.g., "User locked device", "User logged in to device").
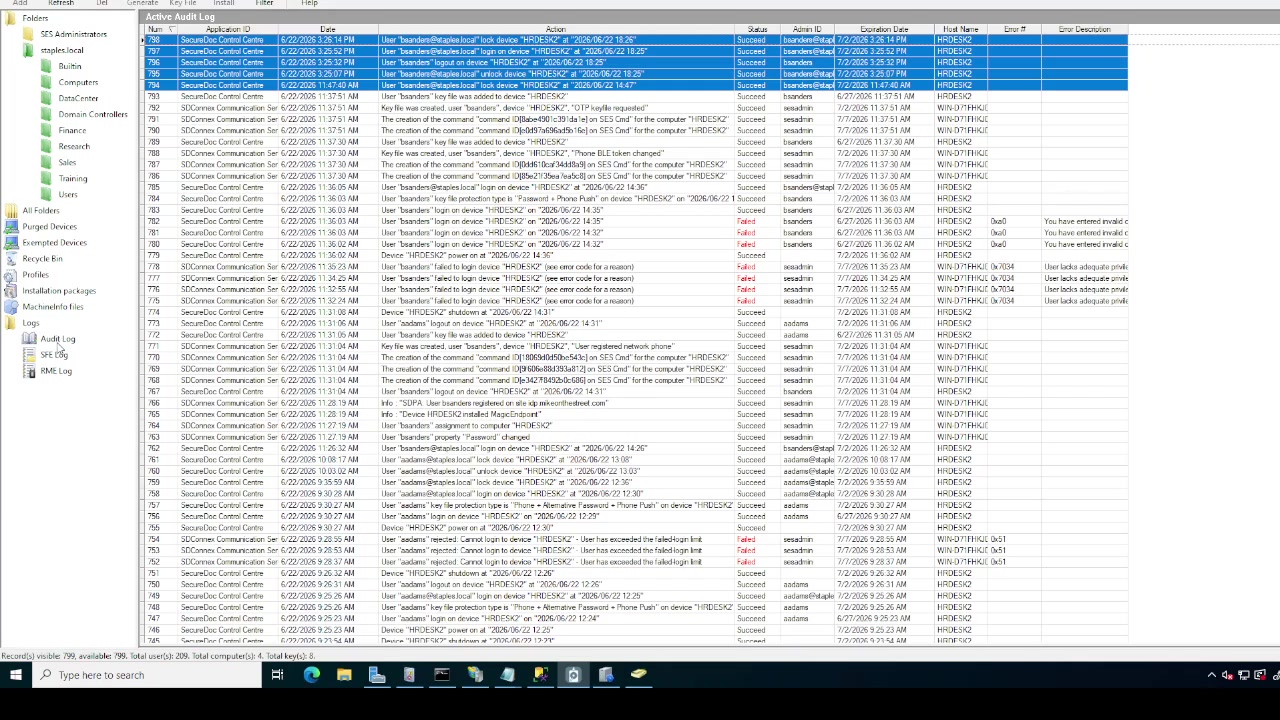
Figure 6: Audit Log in SES showing device access log entries after Device Signals is enabled