RMO Complete setup for SES Web and SaaS
WinMagic Support

How to Set Up Removable Media Only (RMO)
A step-by-step guide for administrators configuring SecureDoc RMO from the SES Web portal
Removable Media Operation (RMO) lets organisations control how removable storage devices — USB drives, SD cards, and similar media — are encrypted and accessed on managed endpoints. This guide walks through every configuration step in the correct order, explains why each action is necessary, and highlights the key decisions you will need to make along the way.
✅ Before you begin, confirm you have:
|
1 Create an RME Encryption Key |
💡Why this step is required RMO uses a dedicated encryption key to protect removable media. Creating a separate RME key rather than reusing an existing key isolates removable-media operations from full-disk encryption. This means you can revoke or rotate the RME key independently without affecting any other encrypted devices on your estate. |
Every piece of encrypted removable media in your environment will be protected by this key. It must exist before you can configure groups or profiles.
Log in to SES Web and select the Keys tab.
Click the Key dropdown menu and select Add New Key.
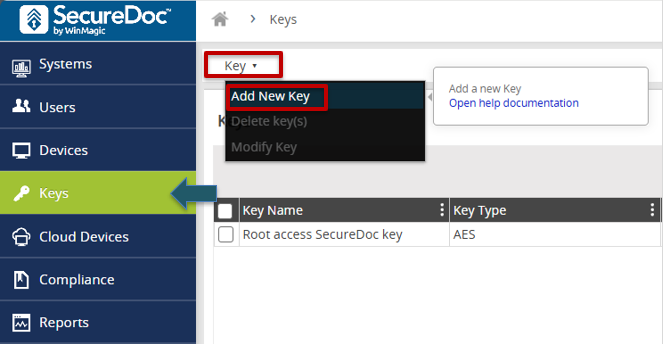
Fig. 1 — Key dropdown showing the Add New Key option
Enter a descriptive Name and an optional Description for the key. Choose a name that makes its purpose obvious, for example RME-Production-Key.
Leave the Protection Key set to the root key created during initial SES setup unless your security policy requires otherwise.
Click Save. The key will appear in the key list and is now available for group assignment.
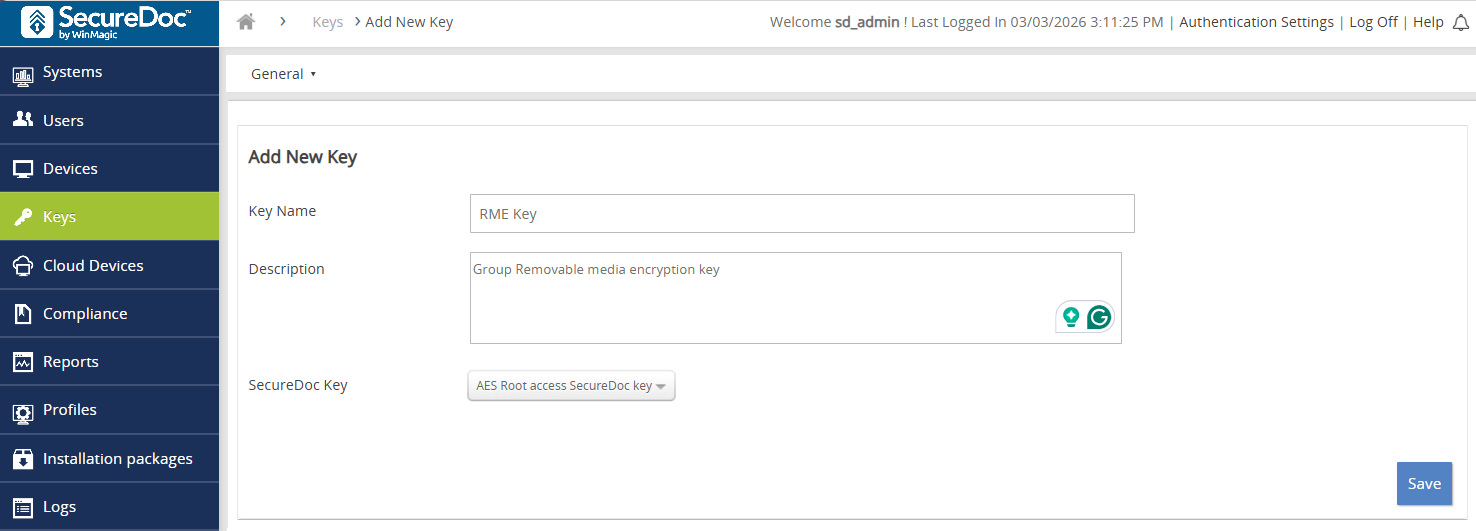
Fig. 2 — New key creation panel with Name, Description and Protection Key fields
💡Why this step is required SecureDoc uses groups to bundle together a permission set and an encryption key, then apply both to a defined set of users. Without a dedicated RME group, there is no mechanism to grant users the 'Convert Removable Media' permission or to associate them with the RME key created in Step 1. The group is the bridge between keys and users. |
This group will hold every user who is authorised to encrypt and access removable media. It must be configured with the correct permission and linked to the RME key before users are added.
Navigate to the Users tab.
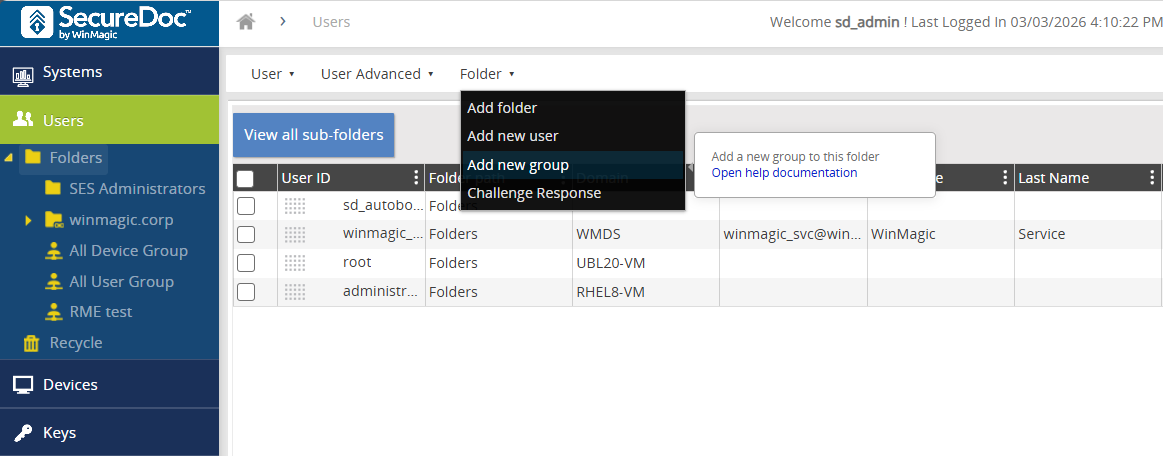
Fig. 3 — Users tab showing the folder and group structure
In the Folder Command Bar select Add New Group. The General panel opens.
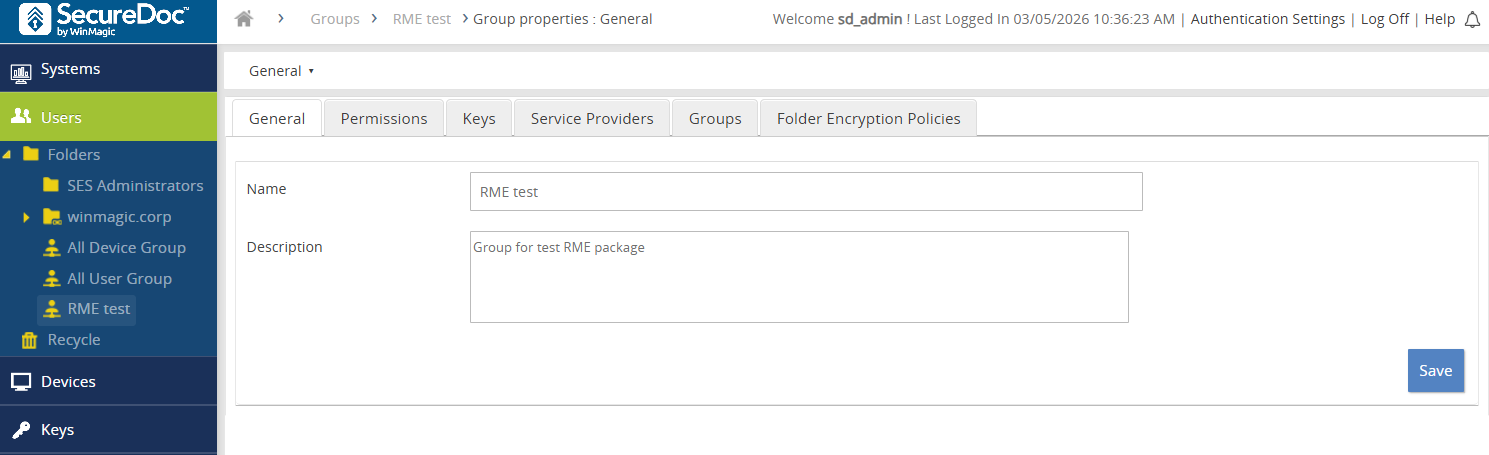
Fig. 4 — General information panel for a new group
Enter a Group Name (required) and an optional Description.
Set the group permission to Convert Removable Media. This is the specific permission that allows SecureDoc to encrypt and decrypt removable devices on behalf of the user. Without it, users will not be able to perform RMO operations even if the software is installed.
Click Save.
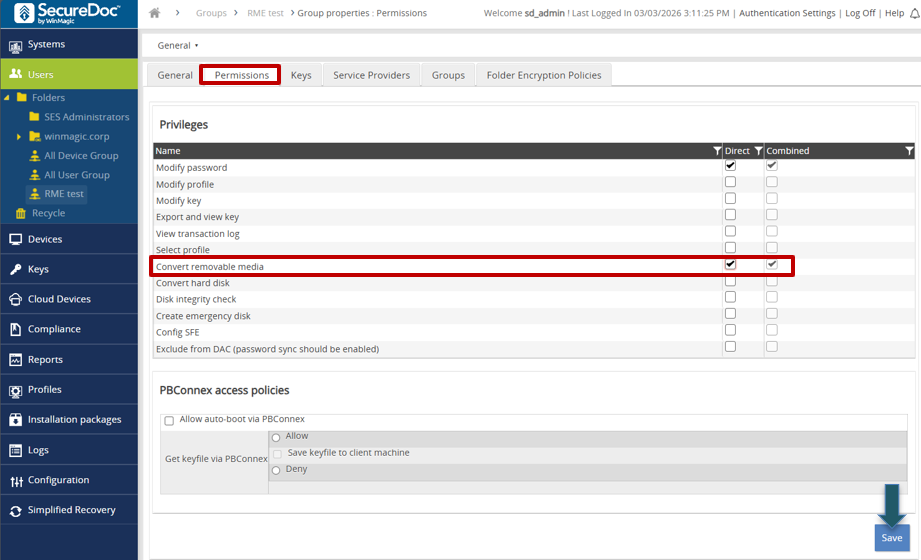
Fig. 5 — Permissions panel with Convert Removable Media selected
Still inside the group, click the Keys tab. Select the RME key created in Step 1. Linking the key here means SecureDoc will use this key — and only this key — when a member of the group encrypts removable media.
Click Save to finalise the group configuration.
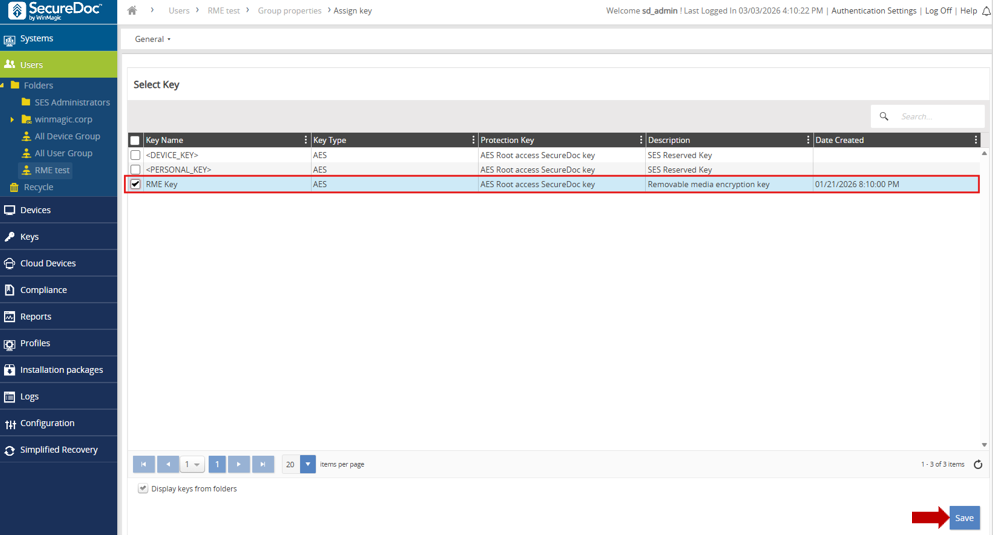
Fig. 6 — Keys tab showing the RME key assigned to the group
💡Why this step is required Permissions and keys are inherited through group membership. A user who is not a member of the RME group cannot encrypt or access RMO-protected media, even if SecureDoc is installed on their machine. Adding users to the group is the action that grants them the capability do not skip this step or assume membership carries over automatically. |
Add every employee who will need to use encrypted removable media. You can add more users later, but they will not be able to use RMO until they are group members.
Navigate to the Users tab in the navigation menu.
Check the boxes next to the user accounts you want to enrol.
In the Menu Bar select User → Add User(s) to Group.
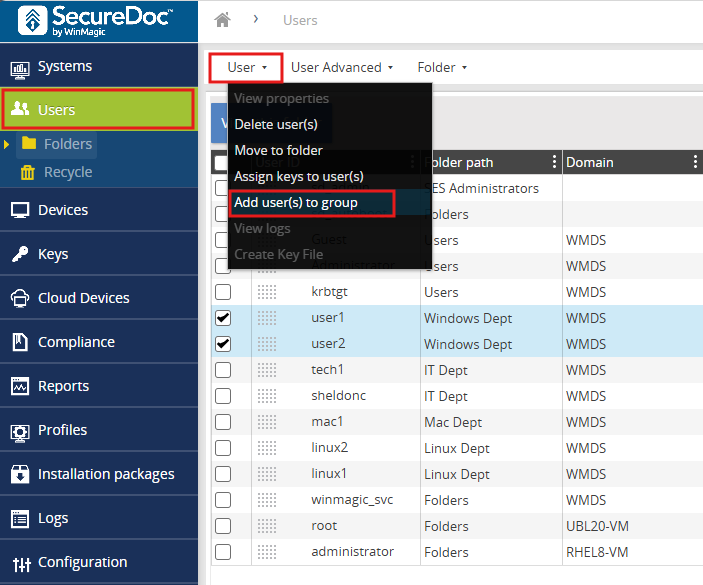
Fig. 7 — User list with checkboxes selected and the Add User(s) to Group menu option
The Select Groups panel opens. Locate and select the RME group created in Step 2.
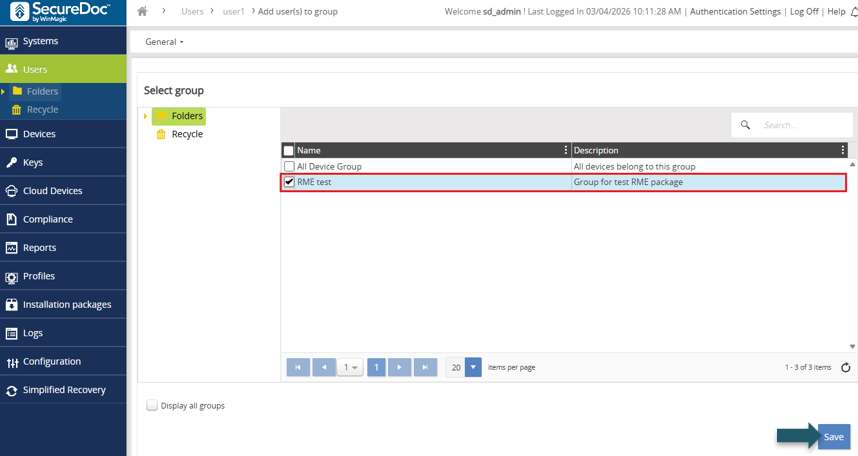
Fig. 8 — Select Groups panel
✅ Enable Show all groups if your RME group is not immediately visible in the list. |
Click Save. A confirmation notification confirms the users have been added.
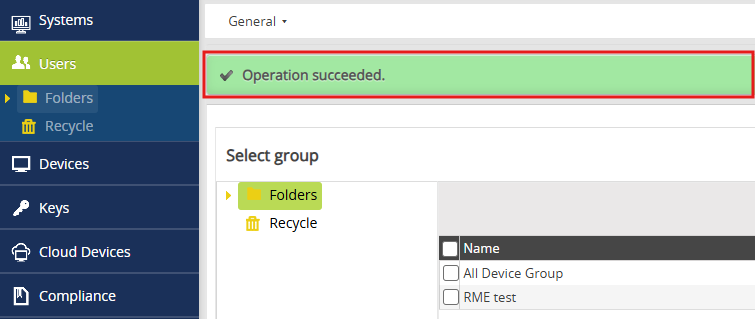
Fig. 9 — Confirmation notification after users are saved to the group
💡Why this step is required A Profile is a policy document that tells the SecureDoc Client how to behave on an endpoint. It controls which encryption modes are active, how media is accessed, what gets logged, how the client communicates with the server, and what users are and are not allowed to change. Without a profile, the installation package has no policy to enforce and the client will not know how to handle removable media. |
In the SES Portal, navigate to the Profiles page, click the Profile dropdown menu, and select Add Profile.
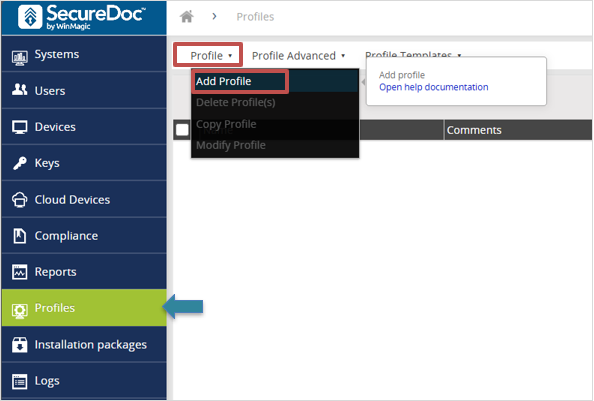
Fig. 10 — Profiles page with the Add Profile option in the dropdown menu
Page 1 — Basic Details
This page establishes the identity and scope of the profile. The Target Platform and Profile Type values control which installation packages can reference this profile, so set them accurately.
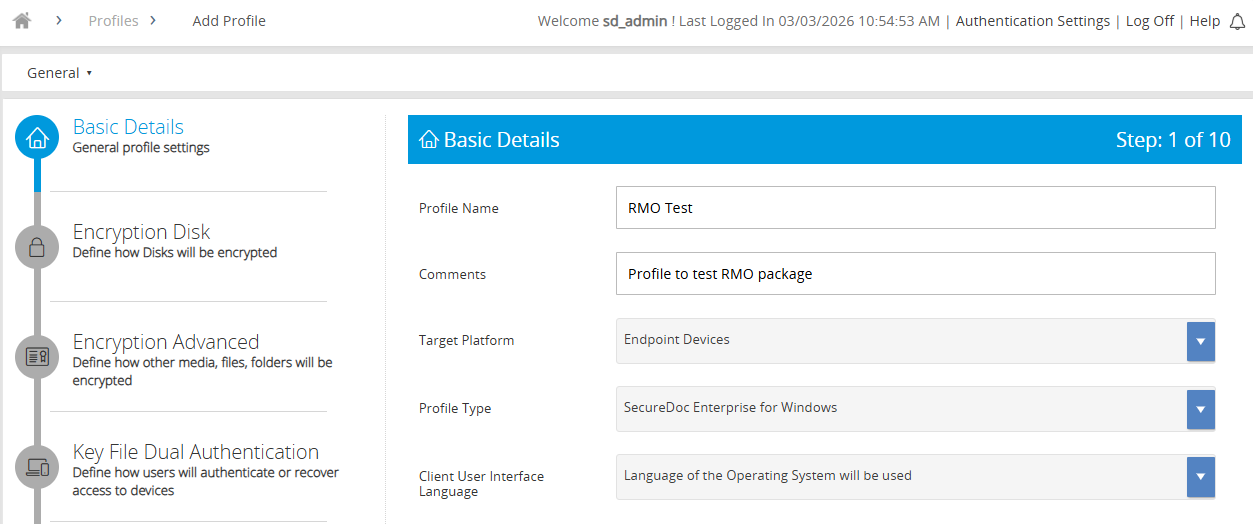
Fig. 11 — Basic Details page of the profile wizard
Profile Name — choose a name that reflects the deployment, e.g. RMO-Windows-v1
Comments — optional free-text for change-log or ownership notes
Target Platform — the operating system family this profile targets
Profile Type — select the type appropriate for RMO deployments
Client User Interface Language — sets the language shown to end users
Click Next to continue.
Page 2 — Encryption Disk
This page defines the fundamental encryption mode. For an RMO-only deployment you are explicitly telling SecureDoc not to encrypt the endpoint’s internal disks only removable media. This prevents accidental full-disk encryption on machines where it is not intended.
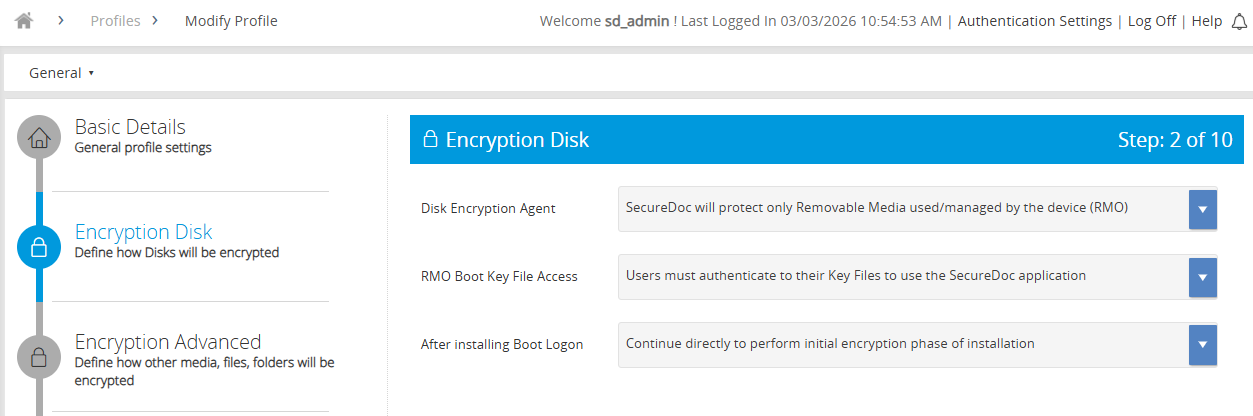
Fig. 12 — Encryption Disk page showing RMO-specific disk agent selection
Disk Encryption Agent: SecureDoc will protect only Removable Media used/managed by the device (RMO) — scopes encryption to removable media exclusively
RMO Boot Key File Access: Users must authenticate to their key files via the SecureDoc application
After installing Boot Logon: Continue directly to perform the initial encryption phase after installation
Click Next to continue.
Page 3 — Encryption Advanced
This is the most detailed configuration page. It defines exactly how removable media is encrypted and what gets recorded in audit logs. Each setting has a direct impact on security posture and usability.
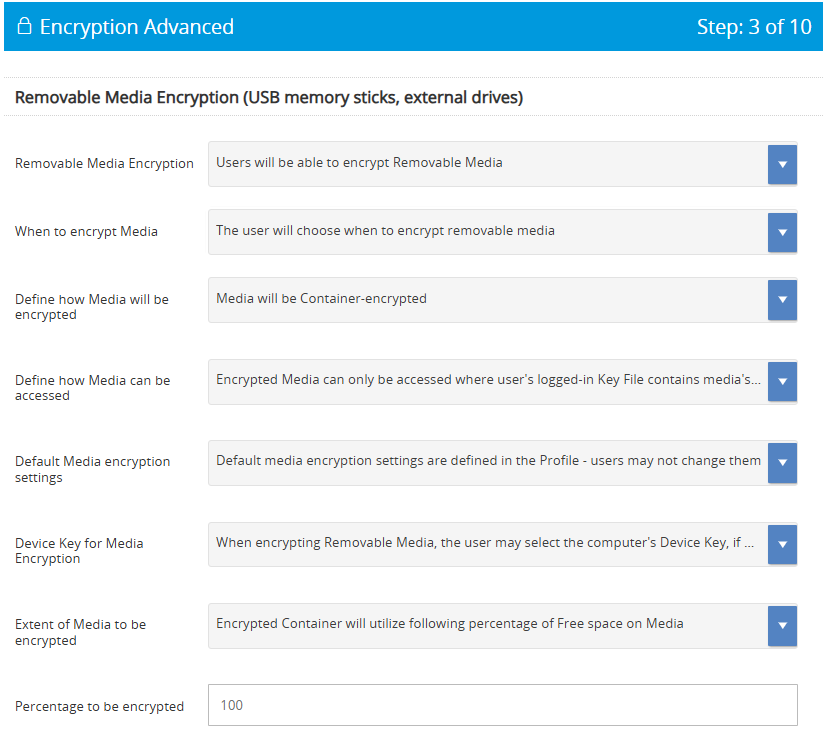
Fig. 13 — Encryption Advanced page, upper section (media encryption settings)
Removable Media Encryption: Enable. Without this, users cannot initiate encryption on any removable device.
When to Encrypt Media: Users must authenticate. This prevents unattended or automated encryption that bypasses user accountability.
How Media will be Encrypted: Container encrypted. Creates an encrypted volume on the device, leaving the remainder accessible for compatibility with devices that cannot read SecureDoc-encrypted media.
How Media will be Accessed: Password. Allows access on machines where SecureDoc is not installed — important for cross-device portability.
Default Media Encryption Settings: Defined in Profile — users may not change them. Locks down the encryption standard and prevents users from weakening it.
Device Key Excluded: Prevents a media container being silently unlocked by any device on the estate without the correct user credential.
Percentage to be Encrypted: Set between 0 and 100. Consider the typical file sizes your users work with.
Logging decisions are configured in the lower section of this same page:
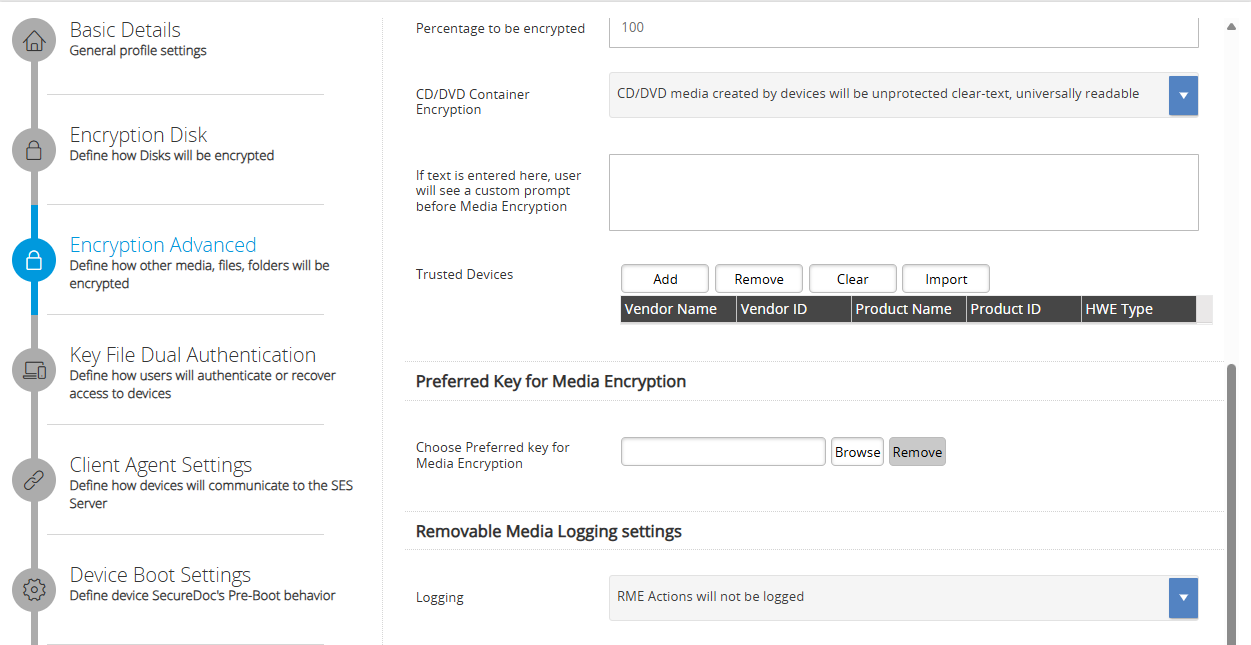
Fig. 14 — Encryption Advanced page, lower section (RME logging settings)
Option | When to use |
|---|---|
No logging | Lowest overhead. Use only where regulatory requirements do not mandate an audit trail. |
Log all RME actions | Recommended for most environments. Full audit trail of encryption, access, and transfer events. |
Obfuscate file names | Use when file names themselves may contain sensitive data. Replaces names with random strings in the audit log. |
Click Next to continue.
Page 4 — Key File Dual Authentication
Most settings on this page relate to Pre-Boot authentication and are not relevant to an RMO-only deployment. The key setting to confirm is Password Synchronization.
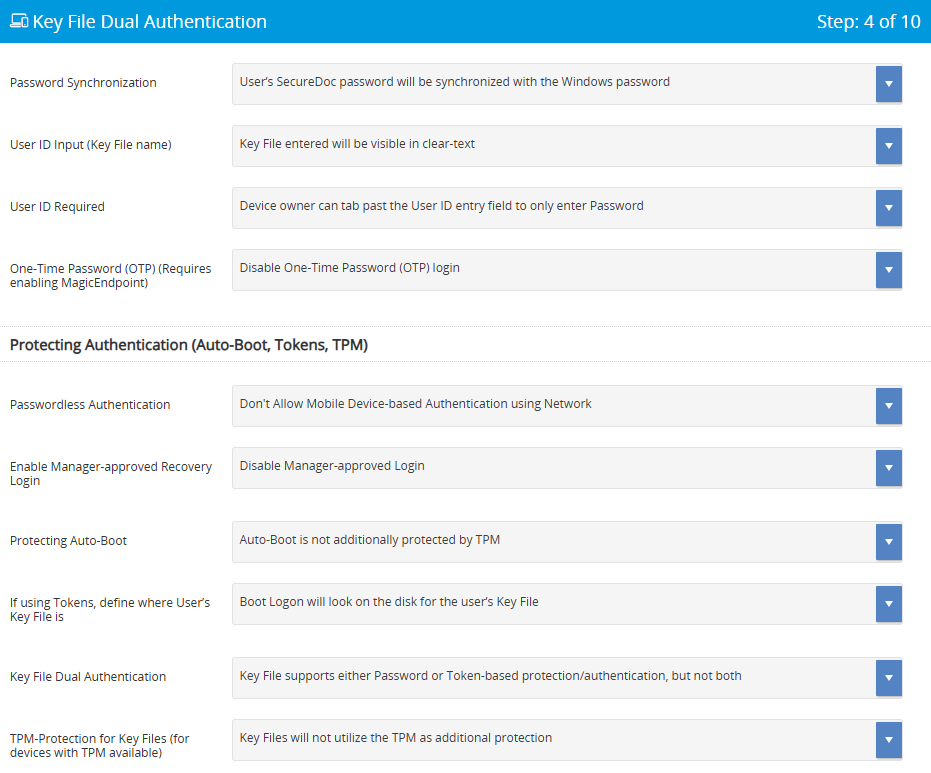
Fig. 15 — Key File Dual Authentication page
Password Synchronization: Synchronise SecureDoc and Windows passwords (recommended). Reduces friction for end users — they maintain a single password, which also reduces helpdesk calls for credential resets.
Click Next to continue.
Page 5 — Client Agent Settings
The Client Agent is the background service that keeps SecureDoc in contact with the SES server. Without correct communication settings, the client cannot receive policy updates, key changes, or revocations — meaning you lose central control over encrypted devices.

Fig. 16 — Client Agent Settings page, upper section
Port Number — must match your firewall rules
Communication Interval — how often the client checks in with the server
Offline access timeout — how long a user can work without server contact before access is revoked
TLS and Certificate settings — encrypts the management channel between client and server
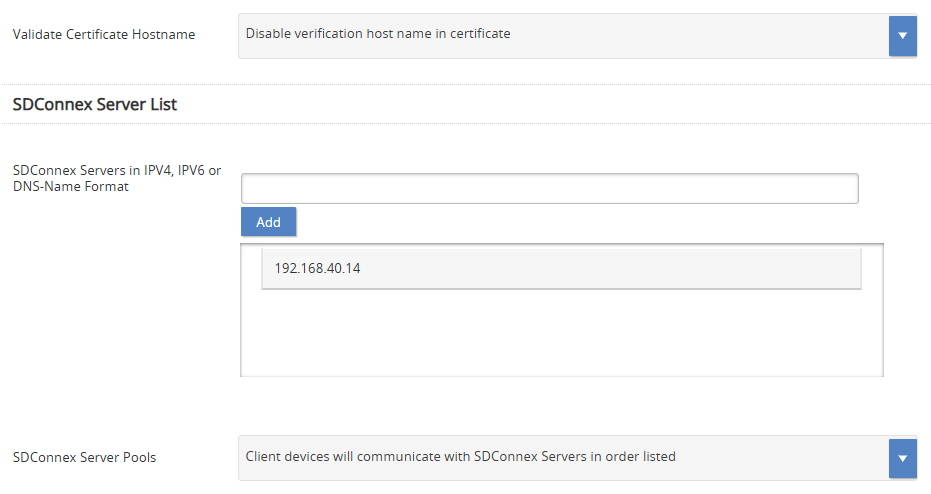
Fig. 17 — Client Agent Settings page, lower section showing SDConnex Server address field
SDConnex Server IP / FQDN — scroll down to confirm this value; it is the address the client uses to reach the server
Click Next to continue.
Pages 6 & 7 — Boot Settings / Boot Text and Colour Settings
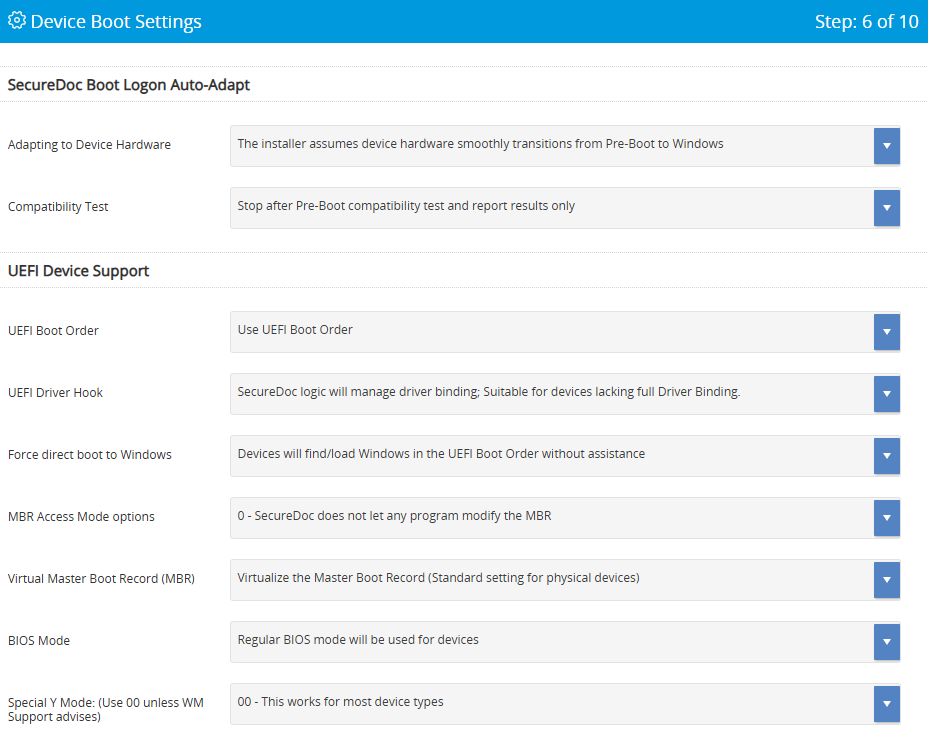
Fig. 18 — Boot Settings page
Fig. 19 — Boot Text and Colour Settings page
✅ These pages apply only to Full Disk Encryption deployments. For RMO-only, click Next on each page without making changes. |
Page 8 — Disk Access Control
This page is frequently overlooked but is critical for enforcement. Disk Access Control determines what happens when a user plugs in an unencrypted device. If access control is not configured, users may bypass RMO entirely by using unencrypted media. Setting appropriate restrictions closes that gap.
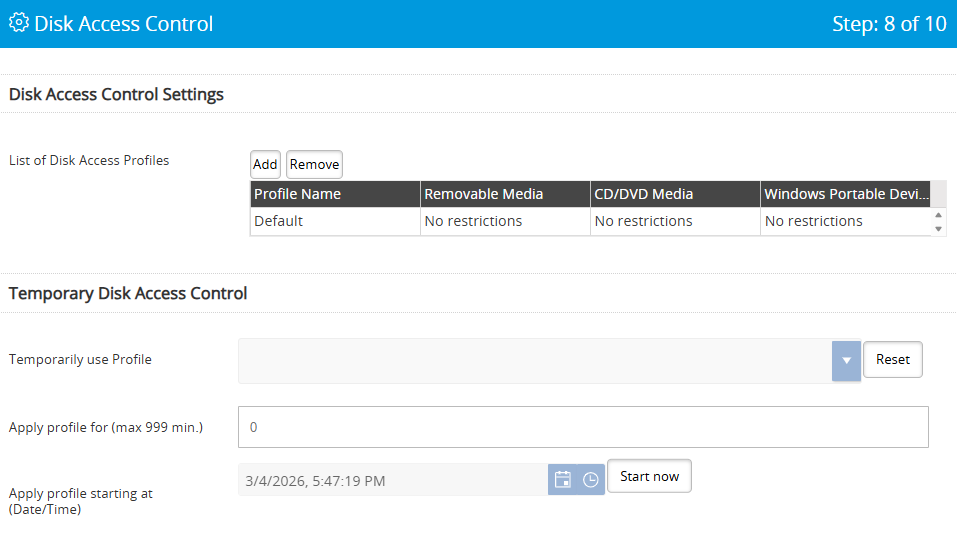
Fig. 20 — Disk Access Control page showing USB, CD/DVD, and Portable Device options
Option | When to use |
|---|---|
USB: Unrestricted | No enforcement. Any USB device works normally. Use only in low-risk environments. |
USB: Read-only unless encrypted | Users can read unencrypted media but not write to it. Encourages encryption without blocking work. |
USB: No access unless encrypted | Strongest option — blocks unencrypted USB entirely. Recommended for high-security environments. |
USB: Full read-only | All USB media is read-only regardless of encryption status. |
CD/DVD: Unrestricted or Read-only | Discs are write-once; read-only is the practical default for most environments. |
Portable Devices: options | Controls MTP/PTP devices such as phones and cameras: unrestricted, read-only, or no access. |
Page 9 — Password Manager
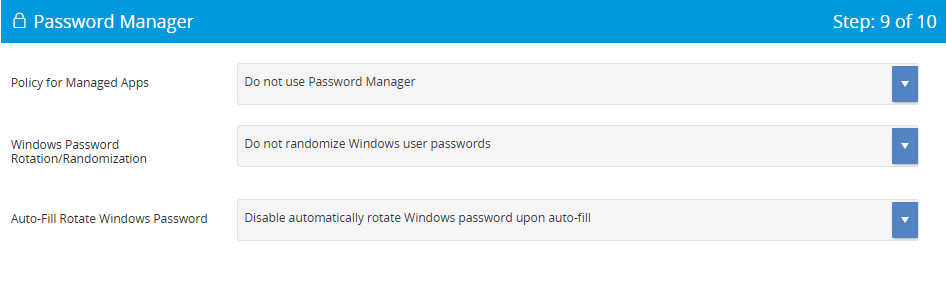
Fig. 21 — Password Manager page
✅ Password Manager is not required for RMO. Click Next to proceed. |
💡Why this step is required The profile you built in Step 4 is a policy it defines the rules but cannot deploy itself. The Installation Package is the deliverable that carries the SecureDoc Client software, the profile, and the user key files to endpoint devices. It is the mechanism that translates your policy decisions into working software on user machines. |
In the SES Portal, navigate to Packages and select Add Package. Complete each page as follows.
Page 1 — Installation Package Basis
Links this package to the profile and platform you configured earlier. Every setting here must align with the endpoint environment to avoid deployment failures.

Fig. 22 — Installation Package Basis page
Target Platform — must match the platform selected in the profile
Package Type — select the appropriate installer type for your deployment method
Profile to be Deployed — select the profile created in Step 4
Package Name — use a name that identifies the deployment batch
Page 2 — Installation Process Settings
Controls the installer’s behaviour during deployment. These settings directly affect end-user experience and the reliability of mass deployments.
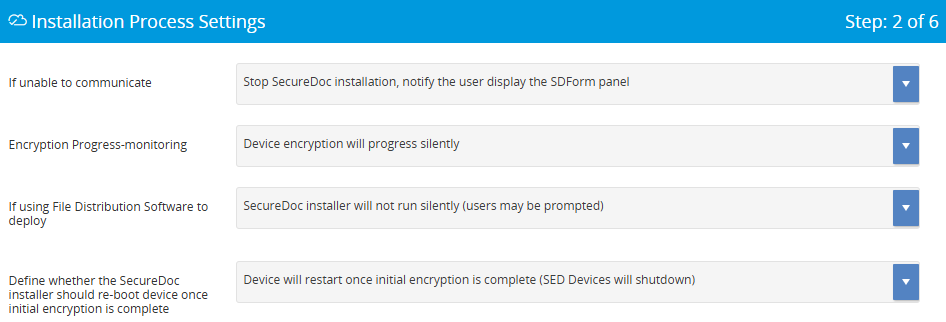
Fig. 23 — Installation Process Settings page, upper section
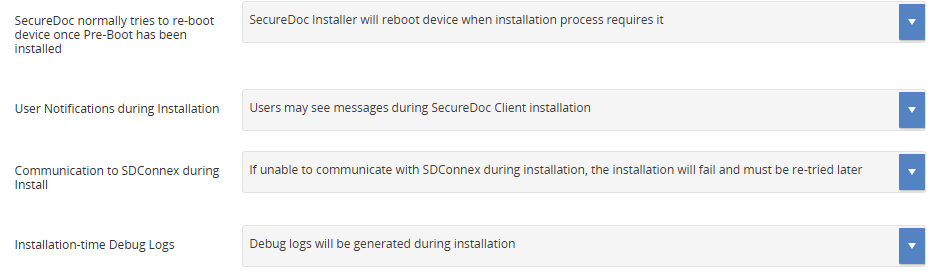
Fig. 24 — Installation Process Settings page, lower section
Option | When to use |
|---|---|
Stop if unable to reach SES (recommended) | Prevents devices being encrypted with a key the server does not yet know about. Ensures the device record is created before encryption begins. |
Continue offline | Use only where network access during installation is not guaranteed. Risk of creating orphaned device records. |
Silent installer | Required for SCCM, LANDesk, or other software distribution tools. Without this flag, installer prompts will block automated deployment. |
Silent encryption (recommended) | Encrypts in the background without interrupting the user. Show encryption monitor is useful for pilots. |
Retry communication (recommended) | Prevents failures caused by momentary network issues during installation. |
Page 3 — Device Information and Key-Creation Settings
Determines how the server creates a device record and names the device key. Correct folder placement is important because it controls which administrators can see and manage the device in SES.
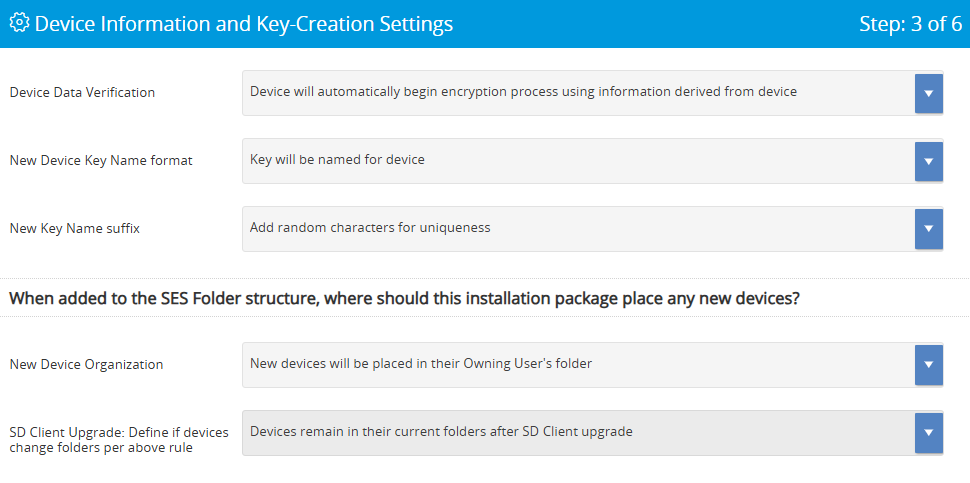
Fig. 25 — Device Information and Key-Creation Settings page
Device Data Verification: Automatic is recommended for large deployments. Manual verification adds a confirmation step useful during pilots.
Key Name Format: Named for device is easier to search and audit than a GUID. Use GUIDs only if your naming scheme would create duplicates.
Device Folder Placement: Owning user’s folder (recommended) places the device record alongside the user record, making it straightforward to locate and manage.
Page 4 — Device Provisioning and Access Settings
Defines the handoff between the technician deploying SecureDoc and the user who will own the device. Getting this right prevents situations where a device is encrypted but no one has the credentials to access it.
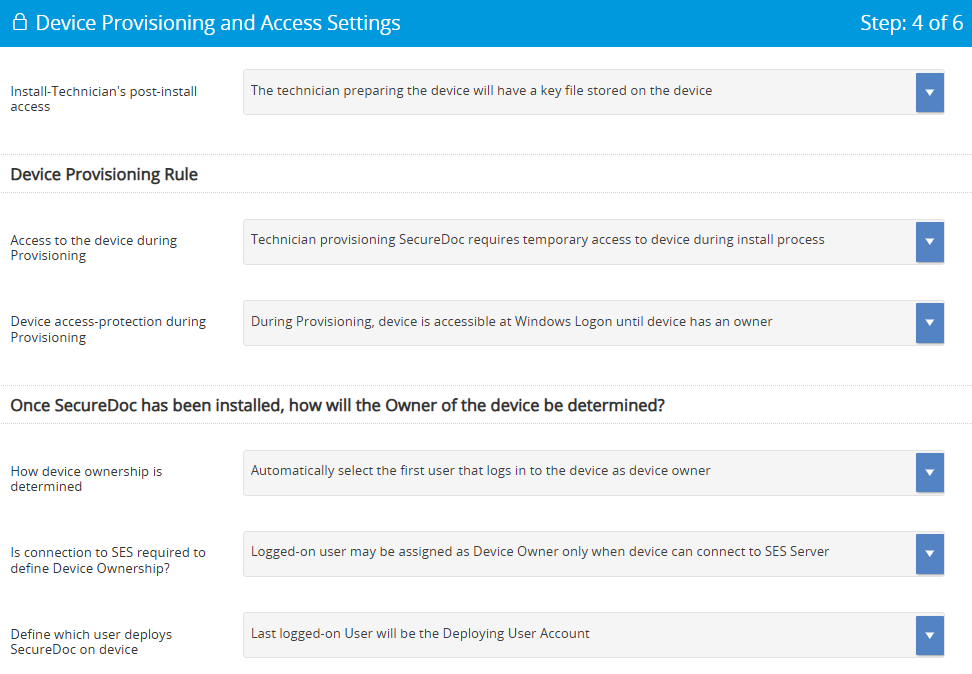
Fig. 26 — Device Provisioning and Access Settings page
Technician key file on device (recommended): Gives the deploying technician temporary access so they can verify the installation before handover. Without this, a failed deployment may leave the device inaccessible.
Automatic device ownership (recommended): The first user to log in becomes the device owner. Manual ownership prompting is appropriate where devices are shared or reassigned frequently.
SES connection required for ownership: Requiring a connection ensures the server records the ownership event. Allow offline ownership only where devices will be activated in locations with no network access.
Page 5 — New Users, Privileges, and Recovery Access
Embeds user key files into the installation package. This is what allows named users to authenticate to SecureDoc on first use, without needing separate provisioning after deployment.
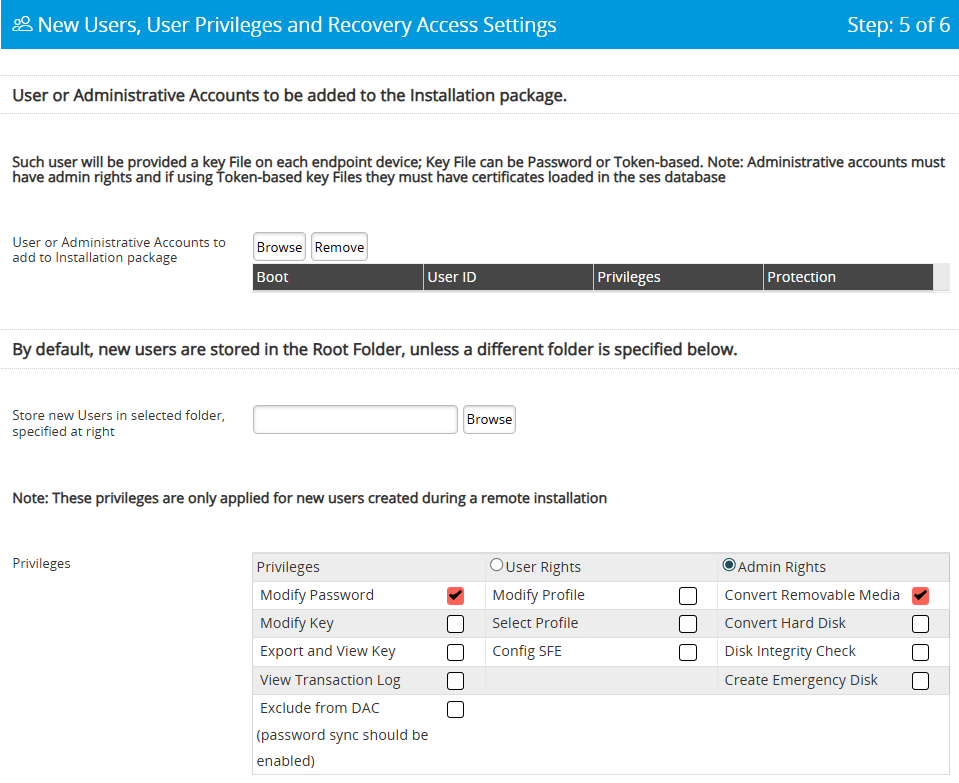
Fig. 27 — New Users, Privileges, and Recovery Access page
Click Browse and select the user accounts to include.
Each selected user will receive a key file on every device that uses this package. Select only users who are members of the RME group from Step 2 — including non-members creates key files that grant no useful permissions.
Configure User Privileges: User Rights (minimum) is appropriate for most RMO deployments. Admin Rights should only be granted to IT personnel who need full SecureDoc control on the device.
Page 6 — Confirm and Create
SES validates the entire package configuration before creating the installer. Review all settings carefully — once the package is deployed, changing the profile or key assignment requires reinstallation on affected devices.
Review all configuration settings displayed on the summary page.
Click Submit. SES validates the configuration.
No errors: the package is created and available for download and deployment.
Errors detected: SES highlights the specific panels that need attention. Return to the relevant page, correct the issue, and resubmit.
Setup Complete — What Happens Next
Once the installation package is deployed to endpoint devices, SecureDoc will enforce the policy you configured. Users in the RME group will be able to encrypt removable media using the RME key, subject to the access controls defined in the profile. Central management, key rotation, and audit log review all take place through the SES Web portal.
If users report that they cannot encrypt media, verify in order: (1) the user is a member of the RME group, (2) the RME key is assigned to the group, (3) the profile has Removable Media Encryption enabled, and (4) the client is communicating with the SES server.
✅ Recommended next steps after deployment:
|

11 – 80 Galaxy Blvd, Toronto, ON, Canada M9W 4Y8
Tel: (905) 502-7000 | Fax: (905) 502-7001
Web: www.winmagic.com | Email: [email protected]
WinMagic provides the world’s most secure, manageable and easy-to–use data encryption solutions. Compatible with all editions of Microsoft Windows Vista, 7, and 10 as well as Mac and Linux platforms, WinMagic’s SecureDoc protects sensitive data stored on portable media such as laptops and removable media including USB thumb drives and CD/DVDs. Thousands of the most security conscious enterprises and government organizations around the world depend on SecureDoc to minimize business risks, meet privacy and regulatory compliance requirements, and protect valuable information assets against unauthorized access. With a full complement of professional and customer services, WinMagic supports over three million SecureDoc users in approximately 43 countries. For more information, please visit www.winmagic.com, call 1-888-879-5879 or e-mail us at [email protected].
SecureDoc, SecureDoc Enterprise Server, Compartmental SecureDoc, SecureDoc PDA, SecureDoc Personal Edition, SecureDoc RME, SecureDoc Removable Media Encryption, MySecureDoc, MySecureDoc Personal Edition Plus, MySecureDoc Media, and SecureDoc Central Database are trademarks of WinMagic Inc. Other products mentioned here in may be trademarks and / or registered trademarks of their respective owner.
© Copyright 2011 WinMagic Inc. All rights reserved. This document is for informational purpose only. WinMagic Inc. makes NO WARRANTIES, expressed or implied, in this document. All specification stated herein are subject to change without notice.