SecureDoc Enterprise Server Version 9.2 SR1
Administrator Manual

© Copyright 1997 - 2026 by WinMagic Corp. All rights reserved.
Printed in Canada
Many products, software and technologies are subject to export control for both Canada and the United States of America. WinMagic advises all customers that they are responsible for familiarizing themselves with these regulations. Exports and re-exports of WinMagic Inc. products are subject to Canadian and US export controls administered by the Canadian Border Services Agency (CBSA) and the Commerce Department’s Bureau of Industry and Security (BIS). For more information, visit WinMagic’s web site or the web site of the appropriate agency.
WinMagic, SecureDoc, SecureDoc Enterprise Server, Compartmental SecureDoc, SecureDoc PDA, SecureDoc Personal Edition, SecureDoc RME, SecureDoc Removable Media Encryption, SecureDoc Media Viewer, SecureDoc Express, SecureDoc for Mac, MySecureDoc, MySecureDoc Personal Edition Plus, MySe- cureDoc Media, PBConnex, SecureDoc Central Database and SecureDoc CloudSync are trademarks and registered trademarks of WinMagic Inc., registered in the US and other countries. All other registered and unregistered trademarks herein are the sole property of their respective owners. © 2026 WinMagic Corp. All rights reserved.
Acknowledgements
This product includes cryptographic software written by Antoon Bosselaers, Hans Dobbertin, Bart Pren- eel, Eric Young ([email protected]) and Joan Daemen and Vincent Rijmen, creators of the Rijndael AES algorithm.
This product includes software developed by the OpenSSL Project for use in the OpenSSL Toolkit (http://www.OpenSSL.org/).
WinMagic would like to thank these developers for their software contributions.
Contacting WinMagic
WinMagic Corp.
11-80 Galaxy Blvd.
Toronto, ON | M9W 4Y8 | Canada
toll free: 1-888-879-5879
phone: (905) 502-7000
fax: (905) 502-7001
Sales: [email protected] Marketing: [email protected]
Technical Support: [email protected] For information: [email protected]
For billing inquiries: [email protected]
Who Should Read this Document
This document explains how to set up and use SES and is intended for an administrator audience. It assumes you have a working knowledge of your database and network infrastructure. This document explains only SES-specific procedures: you may also need to consult separate documentation, such as that provided by a token manufacturer.
Introduction to SecureDoc Enterprise Server (SES)
What SES Does
SecureDoc Enterprise Server is a robust encryption solution designed to protect company- wide devices with minimal administrative effort, enabling centralized security and protection for enterprise data. Using SES, you can automatically install WinMagic’s SecureDoc software on client devices in the enterprise, providing fixed disk and removable media encryption for all users while automatically creating the encryption keys and key files that protect those devices. All security-related information, such as keys, key files, user information and device information, is centrally stored and managed. SES also lets you remotely control client devices and helps you support users if they encounter encryption-related problems, such as a forgotten password.
With SES, SecureDoc can be deployed to all users, regardless of how or where they are connected to the company network, and whether they are using Windows, Mac, or Linux machines (desktop or laptop), including those with SEDs or Intel Anti-Theft protection. Users connected by LAN, WAN, VPN, dial-up or no connection at all can have SecureDoc disk encryption protecting their devices using the very strong AES encryption algorithm (256-bit). SecureDoc can even be used to protect the large drives and RAID controllers of servers.
Note: SES Console will require administration rights in order to function properly.
SES Components
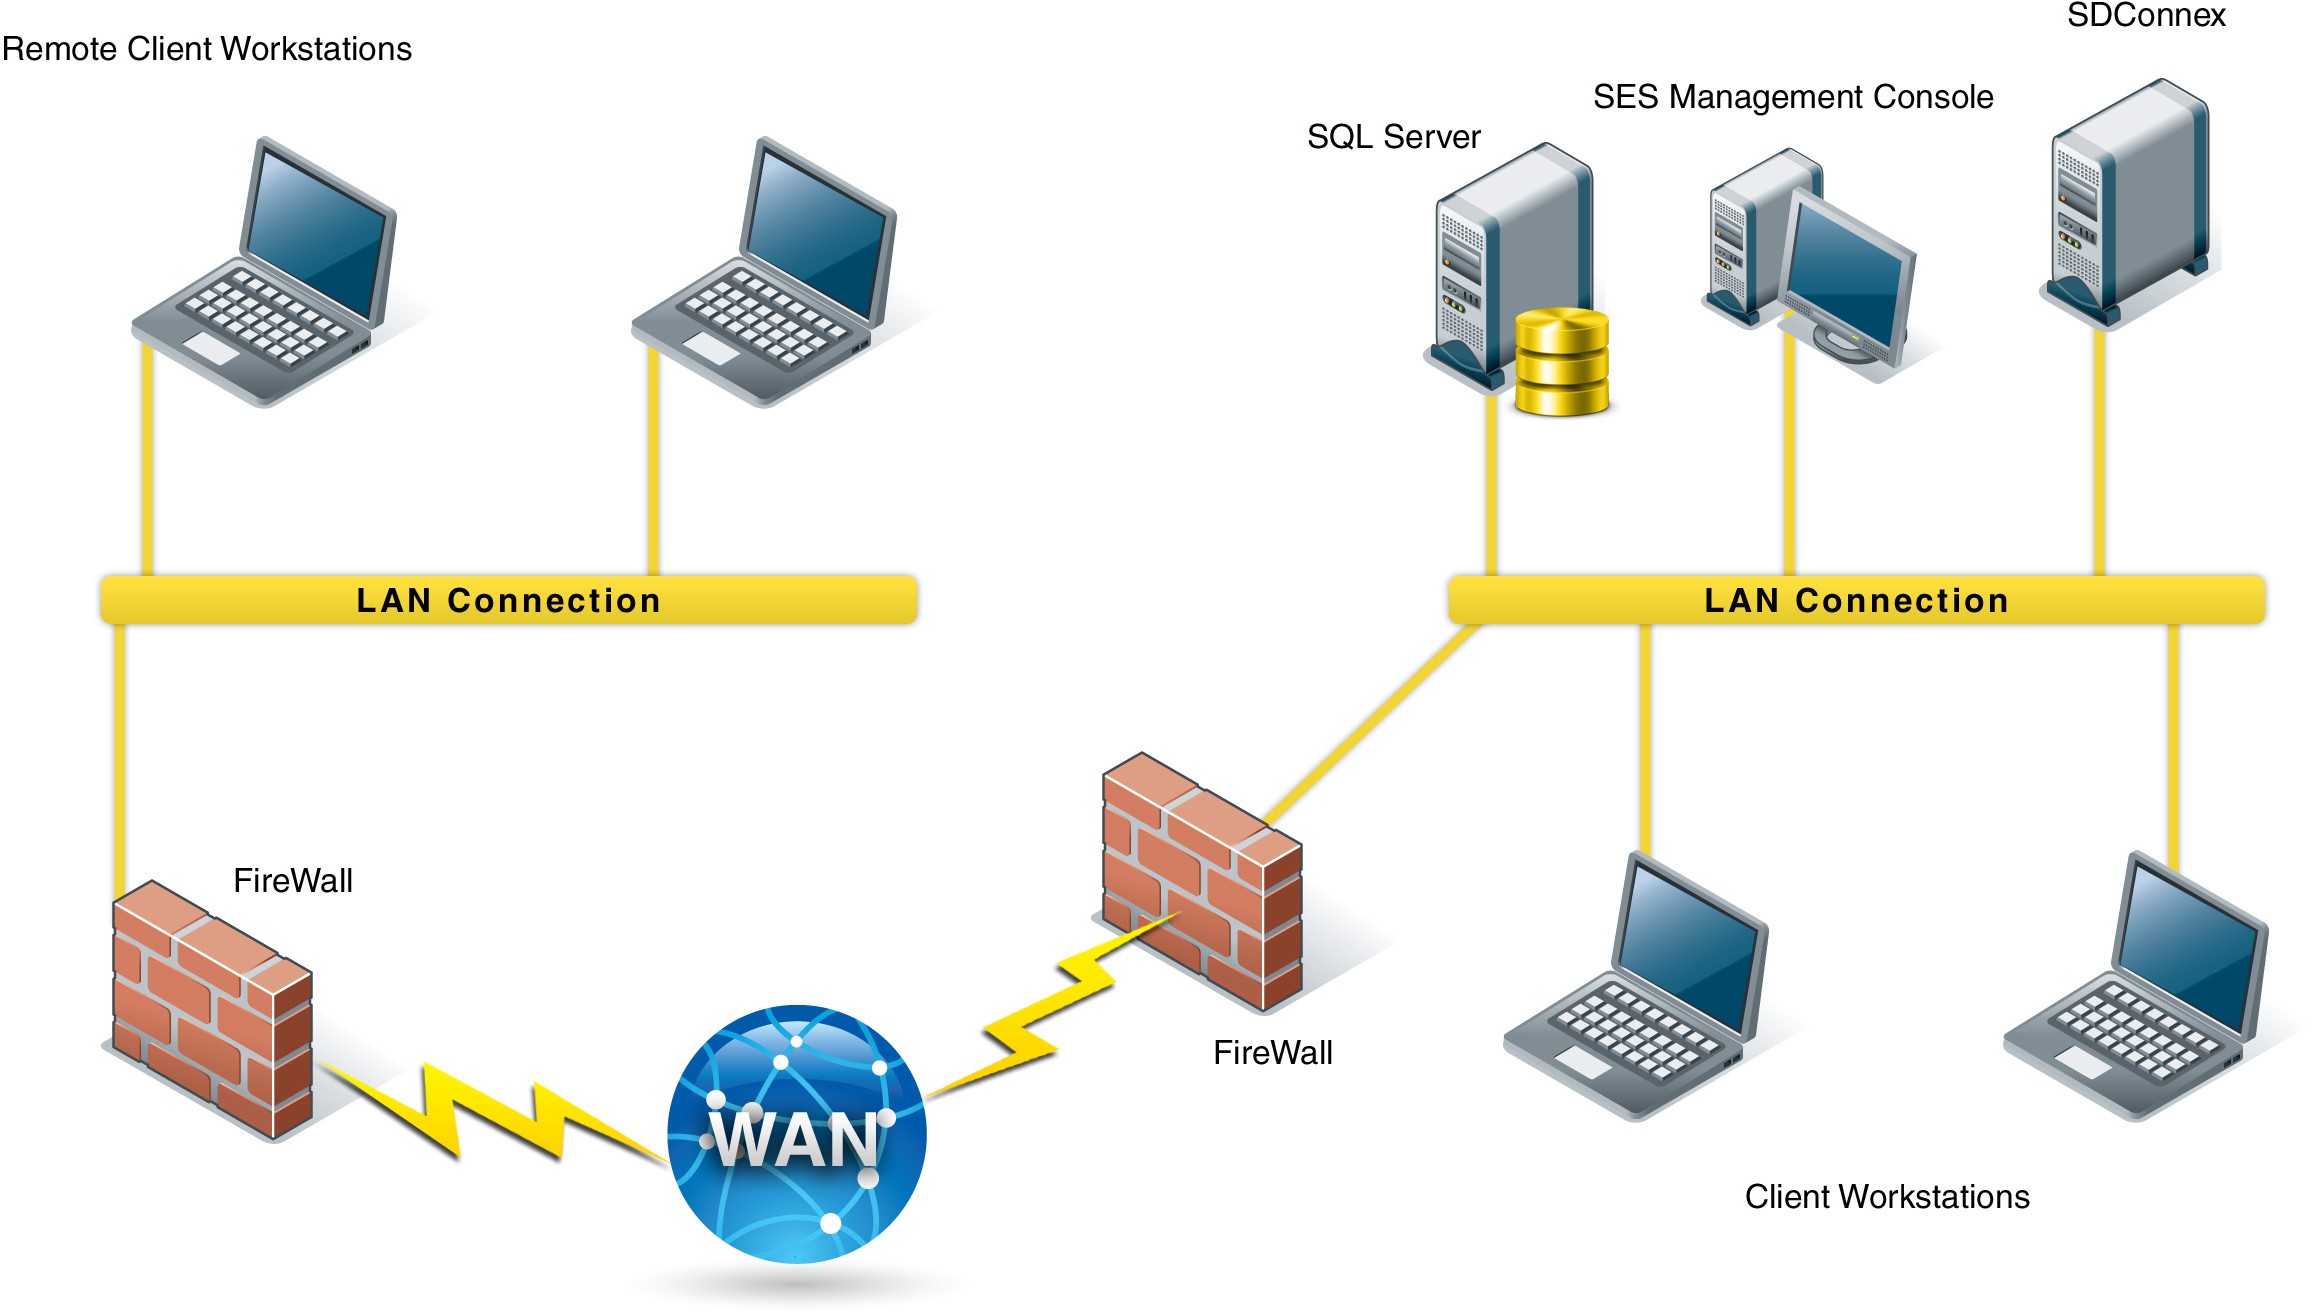
Database (SQL Server) - Repository of all SES Data
The SES database is a SQL Server database that contains information about users, devices, and encryption keys as well as other SES-related information. Access to the database from SES is secured through an encryption key.
SES Server/SES Management Console - Browser-based management of SES
The SES Management Console provides a secure and powerful means to define how SecureDoc is to be deployed, to remotely control client devices, to help users recover lost passwords, to manage user and device information, and to perform all other SES functions.
SES for Web
SES for Web (SES Web) is a web-based console that provides easy access to common SES features, offer- ing the means for administrators and help-desk technicians to assist end users in recovering access to their devices if they forget their passwords. It is described in the online help available from the SES for Web console.
SDConnex - Secure communication between Devices and the SES Server
SDConnex is the communication engine for SES: it must be running in order for information to be sent to and received from connected client devices.
In SES Version 8.5, for customers whose communication needs include SES access for devices that are frequently outside the office LAN, WinMagic has introduced Gateway Servers into the client-to-server communication equation.
Use of a Gateway Server permits substituting the SDConnex Server(s) that might have resided inside a Network DMZ (De-militarized-Zone), then standing up a dedicated SDConnex server in the main network to serve off-LAN users/devices.
About Lenovo Support
The Gateway server will listen on the same Port as other SDConnex servers, but the SDConnex server dedicated to off-LAN devices should listen on a different port number, so that there can be no blending of Off-LAN and in-LAN device traffic.
SDConnex runs as a Windows service.
To allow load balancing, up to 16 SDConnex servers and Gateway servers can be associated with a single SES Device Profile.
Each profile (see “Profiles and Packages” on page 32), assigns a priority number to each SDCon- nex/Gateway server.
Servers with the same priority number are considered part of a group or "pool". Client devices will attempt to establish communication with SDConnex/Gateway servers in order of group priority, and then either randomly or in order of configuration within a group.
For example, consider an environment where there are six SDConnex/Gateway servers. One package might assign priorities as follows:
priority 1 — servers A, B, and C
priority 2 — servers D, E, and F
Devices receiving that package will use either A, B, or C server and only if all those servers are unavail- able will they use D, E, or F.
Another package might assign priorities differently:
priority 1 — servers D and E
priority 2 — servers F and C
priority 3 — servers A and B
Devices receiving that package will use either D and E, then if necessary F or C, and finally, only if all other servers are not available, use A or B.
AD Sync - Synchronizing and leveraging your organization's AD or LDAP inform- ation
AD Sync, which runs as a service, is used to configure and monitor the synchronization of Active Directory information (users, folders, and groups) with the SES database.
About Lenovo Support
Rescue and Recovery
Lenovo’s Rescue and Recovery utility is supported: Lenovo devices with SecureDoc installed can use Rescue and Recovery to help recover from system crashes. However, Rescue and Recovery must be installed before installing SecureDoc.
Note that if this utility is used to create a custom disk image that includes a service partition, that service partition must be at least twice as large as the required contents to allow Rescue and Recovery to back up the partition. If there is not enough space available in the service partition, the Rescue and Recovery backup process will generate a user warning indicating the available disk space is insufficient for the backup. If this occurs, the user should accept the warning: all partitions will be successfully backed up except the service partition.
Deploying SecureDoc
Pre-Testing Candidate Devices for Compatibility with SecureDoc Pre-Boot
SecureDoc Enterprise Server (as of V8.3) offers a new "SecureDoc Pre-Boot Compatibility Test" tool, which will temporarily install SecureDoc's Pre-Boot, interrogate the details of the computer and determine whether the device should be compatible with SecureDoc's Pre-Boot Authentication, and will also produce - for each device type - guidelines that may indicate any needs for special handling.
All customers are strongly recommended to run this tool on an example of each make and model of device that will be installed with SecureDoc. This will provide customers insight into any device types that might require special handling.
More importantly, it permits customers to confidently move through the deployment of SecureDoc to the vast majority of device types that will install without any additional work.
Please see Appendix F for details on how to install and run the SecureDoc Pre-Boot Compatibility Test tool.
Profiles and Packages
SecureDoc is installed and initially configured on client devices using a set of files, known as an installation package, produced from SES. Those files reflect options set in several locations in SES that determine what SecureDoc features are available to users and how those features are configured:
the global options, which act as default values for all installation packages and which apply to keys pushed to devices (for example, users added to devices through the console)
the profile options, which are specific to a type of client device (Windows desktops/laptops/servers, Mac, etc.)
the installation package options, which are specific to a type of client device.
Once SecureDoc has been installed, changes to its configuration can be made by simply changing the profile.
Distribution Options
You can choose which users/computers should receive the installation package via SMS. You can choose to:
have all users of computers known to SMS receive the package and have their hard disks encrypted — this is the default behavior
have only those users of computers known to SMS and in the SES database receive the package and have their hard disks encrypted — you will need to configure SDConnex to perform the necessary checking
have machines encrypted without a known user
Installation packages can be configured so that the user is not notified that installation and encryption is in progress (“silent” install).
SES Certificates for Protected Communication
If you choose to limit encryption to those users in the SES database, you can populate that database from your Active Directory system. Follow the instructions in “Importing and Synchronizing User Records with Active Directory ” on page 61.
Note: Although SecureDoc can operate on dual-platform machines, deploying to such machines cannot be fully automated. In such circumstances, you should create an installation package configured to not run encryption automatically, then instruct the administrative user of that client device to follow the instructions in the SecureDoc documentation.
When to Use Remote Installation Packages
You should only consider using the alternative method, remote installation packages, if:
you want to encrypt only some disks of the client device (installation packages encrypt all hard disks on the client device)
you want to encrypt only some partitions of the client device (installation packages encrypt all partitions of the client device)
Computers set up using remote installation packages do not send information back to SES. As a result, they do not support the remote control or password recovery functions. Remote installation packages can be created only for users already in the SES database. For details, see “Appendix B: Creating Remote Installation Packages” on page 381.
SES Certificates for Protected Communication
An SES certificate is used to encrypt the initial communication between deployed installation packages and SDConnex, for ongoing communication with client devices, and to sign remote control commands so that the client can verify the command is legitimate. You can have as many certificates as you need, each stored in the SES database. Although one of the certificates will be considered the “active” one at any given time, other certificates can be used by SES.
For installation package communication, the initial communication is encrypted with the public key of the certificate that was active when the package was created. As long as that certificate is in the SES database at the time of installation on the client device, decryption is possible. The device’s record in the SES database will reflect the certificate used.
Any remote control command sent to the device will be signed with the certificate associated with that device in the database, even if that is not the active certificate.
In subsequent communications from a client device, SES attempts to send the currently active certificate to that device and, if successful, assigns the active certificate to that device’s record in place of the certificate used at installation. This occurs only when no remote control commands are queued up for that device.
You can import your own RSA keys as a PKCS#12 file from your certificate authority. The minimum key size must be 1024 bits. WinMagic recommends the use of 2048-bit keys to be compliant with NIST Spe- cial Publication 800-131A
The easiest way to obtain a PKCS #12 certificate is to install Windows Enterprise Certificate Authority service on your domain controller. Windows allows you to become your own Certificate Authority with the ability to manage certificates on your domain.
The other way of obtaining a PKCS #12 certificate is to purchase one from a public Certificate Authority like the following three public CAs.
Device Authentication Certificates
In Version 8.3, WinMagic has added an option to permit advanced device authentication certificates for those customers that require certificate-based device authentication to their 802.1X wired networks. This is typically required in order for those devices to be able to continue with any other network communication.
The configuration of such certificates is covered the sub-section entitled "Device Authentication Certs" within chapter C4 (which is entitled "Setting SES Global Options").
Password (Device Access) Recovery
Password recovery allows users to gain access to their protected device, at which point they will be required to specify a new password.
Depending on how SecureDoc has been configured on the client device, password recovery can be performed in one or more of the following ways:
users can perform their own self-help password recovery
users can contact an administrator who uses SES to perform password recovery (challenge/response)
Password recovery requires that authentication questions and answers for individual users be recorded in SES (see "Authentication Questions Options" on page 49).
To avoid needing password recovery, users may be able to record a password hint they can use to remind themselves of their password.
Password recovery is available on Windows and Mac client devices only.
Options for Encrypting Removable Media
WinMagic offers two options for Removable Media Encryption: Full Media Encryption (Sector by Sector) and RMCE (Container Encryption).
For full media encryption, opening encrypted media on a third party device which does not have SecureDoc installed, requires a media viewer application (downloadable from WinMagic's website) to be installed.
Note: Not all third-party recipients of devices encrypted using SecureDoc will have the necessary local administrator rights to install applications. Determine whether this option is truly suitable, given the third parties with whom you will be sharing encrypted information.
For RMCE, the viewer is copied directly onto the USB and the encrypted media can be opened on a third party device without needing to install a viewer application (the viewer is included in a small un- encrypted portion of the USB device).
Using Folders to Organize User Information and Share Keys
Using Folders to Organize User Information and Share Keys
Folders in the SES database are used to organize user and device records and to allow the dissemination of shared keys to users and devices. Shared keys allow shared access to:
department-specific partitions (performed on the client side)
encrypted removable media (full or container encryption) (either by distributing multiple keys to users or using server-based access control, where keys are retrieved from the server when needed)
network folders protected using SFE
shared devices for PBConnex purposes (see “Using Pre-Boot Connex (PBConnex)” on page75).
Folders can be manually created or imported from Active Directory (see “Importing and Synchronizing User Records with Active Directory ” on page 101).
Folders can contain groups, used to associate users and devices for PBConnex purposes. By default, SES provides a single (root) folder, and an Administrators folder. Folders have a hierarchical relationship with each other. All users must belong to a folder (users cannot
belong to more than one folder).
Folder properties consist of:
the keys assigned to them (these are inherited by users in any sub-folder or group in that folder)
the users belonging to them (you determine whether users also belong to subfolders) Users become part of a folder in one of the following ways:
membership is imported from Active Directory
users are manually assigned to a folder
users are automatically placed in the folder identified in the installation package used when SecureDoc is deployed to them (see “General Settings for Installation Packages” on page 144). Working with folders is explained in “Working with Folders ” on page 355.
SecureDoc File Encryption – Implementation Considerations
To implement SecureDoc File Encryption, there are several elements that contribute to deploying this functionality on an endpoint device such that it can be used by a user on that endpoint device.
SFE functionality (the ability to use SFE) is deployed to the Client Device through the Device Profile by enabling the SFE feature. Each device that has SFE enabled in its device profile will consume one SFE license, so enough licenses must be purchased to handle the number of devices that will permit their users to access SFE-protected files/folders.
In order for a SFE-capable device to actually encrypt/decrypt SFE-encrypted files or documents, it needs: A Policy, and a Key.
Each SFE Policy defines which FOLDER will be SFE-protected, and defines the KEY that will be used to protect the FOLDER contents.
The DEVICE holds the SFE policy information, and the DEVICE owns the SFE License-consuming SFE func- tionality through the Profile deployed to it.
SFE Policies can be either deployed:
directly to the device through changing the device properties, adding the policy to the device,
or the Policy can be applied to a Group, and the device added to the Group, through which the device will get the policy through attribution.
NOTE: Defining a Policy and applying it to a Client Device does NOT automatically send the required key to the users of the device. That step is still required.
The USER (of the device) must have, in his logged on Key File, the Key that will be used to read, update, write files into an in-policy FOLDER. Users can be provided the necessary Key in the usual ways
directly to the user record, to the Folder the user resides in, to a Group that the user can be made a member of, directly to a device the user is known to use, etc, and each of these key distribution meth- ods requires an understanding of SES Key Distribution, covered elsewhere in this documentation.
Deployment Options:
SFE Policies can be flexibly deployed to DEVICES via adding those DEVICES into a Group – and then adding the Folder Encryption Policy (which can have been previously created, or can be created at the point of adding to the Group).
SFE Encryption Keys can be flexibly deployed to users via adding those users into a GROUP or moving them into a FOLDER to which the necessary KEY has been attached. By attribution, Folder or Group member users will receive the needed SFE Key.
WinMagic recommends the use of Groups rather than Folders for easy deployment and revocation of SFE Keys, as it is much more flexible to add/remove a user to/from a Group than it is to move the user to another Folder, and users can belong to multiple groups concurrently, whereas they can only belong to one Folder at a time.
If desired, one could have both users and devices in a single Group that deploys both the needed Key (to the users) and the SFE Policy (to the devices) in the Group.
SFE can be defined on the server side, the client side, or both.
On the server side, SFE can be implemented in one or both of the following ways:
to apply SFE to shared network folders, create an SFE policy that points to those folders, choose the appropriate key, and send the policy to the appropriate devices (all users who should be able to view the shared network folder in decrypted form need the same key sent to them)
to apply SFE to local paths on a device, create an SFE policy containing the environment variable (for example, "APPDATA" to protect the contents of the folder C:\Users\Admin\AppData\Roaming) and send this policy to the appropriate devices; the machine key on each device will be used to encrypt the local path
Setting up and Using SES: Overview of Steps
On the client side, if a client device (Windows only) received a profile that enables SFE, and the user has the appropriate privilege ("Config SFE"), the user can choose to apply SecureDoc File Encryption to any folder to which they have access, using any key they possess in their key file.
Once a folder is encrypted, only a user who logs in to a keyfile that contains the encryption key can view the decrypted contents of the folder.
Files moved out of the folder are automatically decrypted and files moved into the folder are automatically encrypted; encryption and decryption occur transparently. Bear in mind, as mentioned earlier, it is also possible to have "housekeeping" devices running SecureDoc automatically monitor SFE Policy-protected Folders for new files that are not encrypted. Upon detecting any new unprotected files, such "housekeeping" devices will automatically encrypt them with the key defined in the policy for that folder. This provides a truly innovative solution, allowing for the automatic encryption of files generated even by non-SecureDoc devices or processes (such as processes that generate reports, medical or other images, log files or any other documents into a shared folder).
Setting up and Using SES: Overview of Steps
Install SES. See “Installing SES” on page 47.
Review the available features and options to decide what combination of items meets your enterprise requirements. This might involve choosing your security policies, considering how many different profiles you will need, deciding uses of different types of encryption (including removable media), choosing your distribution method, etc.
Set up global options that will apply to all client devices to which you will deploy SecureDoc. See “Setting SES Global Options” on page 56
Set up import and synchronization of user records from Active Directory. See “Importing and Synchronizing User Records with Active Directory ” on page 101.
Optionally, configure PBConnex. See “Using Pre-Boot Connex (PBConnex)” on page 119.
Create the profiles and installation packages your enterprise needs.
Deploy SecureDoc to client devices. See “Deploying SecureDoc Using Installation Packages” on page 339.
Using the various SES tools and options, manage encrypted devices as needed.
Installing SES
Choosing an Architecture
The components of SES (SES Management Console, SQL server database, and SDConnex) can all be installed on the same physical or virtual server, or on separate servers. All components need to be in the same LAN, which must also include client devices to be controlled via SES.
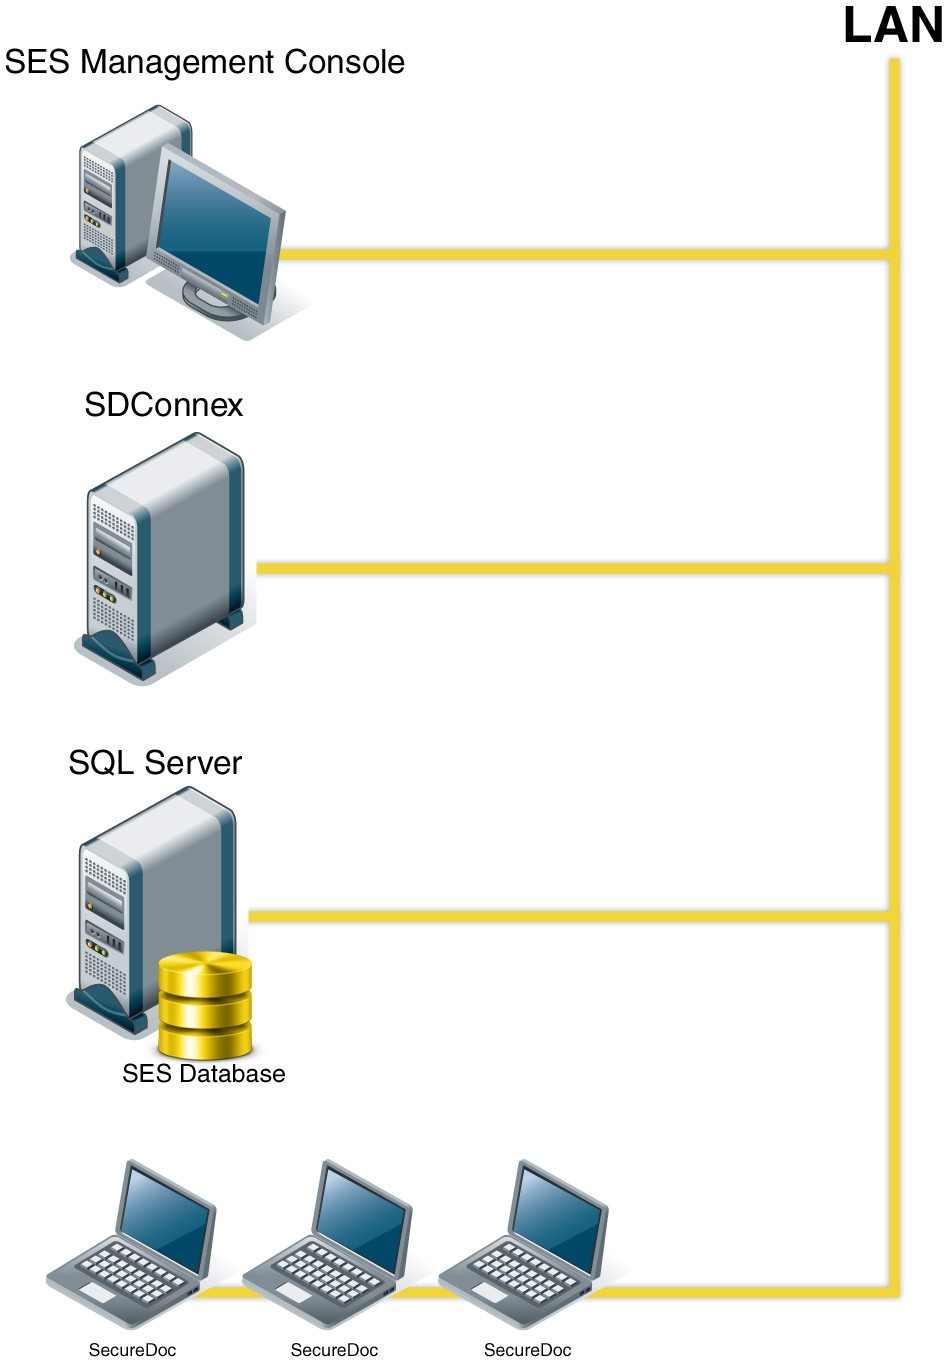
More than one SES Management Console may be installed on different machines within a single site, although each must point to the same database.
If desired, separate databases, each with their own SES Management Console, can be set up for dif- ferent sites. For example, you might have separate sites for different geographical areas. If you set up separate site-specific databases, each site distributes its own installation packages and encryption keys. This is useful if you want to keep the encryption methods of sites separate from each other.
The default communication time between client devices and the server is 60minutes (this is con- figurable for each profile). If you anticipate reducing this time, or if you expect to deploy SecureDoc to more than 10,000 clients, you should consider putting the SES Management Console and SDConnex on separate machines.
Step One: Installing the Software
System Requirements
Operating system, database, and hardware requirements for the SES Management Console are listed here (or at https://www.winmagic.com/support/technical-specifications if reviewing a printed version of this document).
Note: Please review these and ensure all server pre-requisites are satisfied before beginning to install SecureDoc Enterprise Server in your computer environment.
NOTE: For production implementations of SecureDoc Enterprise Server, WinMagic recommends that the Full Text Indexing feature be enabled in the database engine prior to the installation of SecureDoc Enterprise Server. Database Full Text Indexing is used to advantage in the SESWeb web-based console.
NOTE: IMPORTANT: In V9.0, SESWeb changes require that the URL Rewrite plug- in be installed into IIS before either installing or upgrading to V9.0.
This plug-in can be got at this web link: https://www.iis.net/downloads/microsoft/url-rewrite
– Please download this plug-in
– Execute the downloaded plug in executable and follow the steps indicated in the installer.
– Ensure the plug-in is enabled in IIS.
NOTE: For deployment and configuration of SESWeb, please utilize the Quick Deployment Guide; It provides a more easily-digested option for instruction on installing SES, generally, since it includes links to videos that cover most aspects of the SES Product initial installation.
SQL Security
SQL security is a major concern for the SES database, which will potentially contain all your encryption keys. It is natural for an administrator to worry about hackers and external attacks. Windows authentication is the recommended security mode, as it is more secure and you don’t have to send login names and passwords over the network.
Microsoft recommends that you implement common Best Practices to secure your SQL Server. Refer to
http://www.microsoft.com/downloads/details.aspx?familyid=da0531e4-e94c-4991-82fa- f0e3fbd05e63&displaylang=en
SQL Server Express Settings
Follow the SQL Server Express wizard, using the settings that conform to your corporate policies. In particular:
install only the database services (selected by default)
use of Windows Authentication Mode is recommended, but not required
enable both Enable User Instances and Add user to the SQL Server Administrator role
Step One: Installing the Software
SES Features and SQL Server User Rights and Roles Requirements
“Create new database” “Delete database” | requires existing login account with “System Administrator” server role |
“Upgrade of database”, if needed | requires existing login account with “System Administrator” server role |
“Create new con- nection” “Delete connection” | requires existing login account with ‘SELECT’, ‘INSERT’, ‘DELETE’, and ‘UPDATE’ permissions |
Using SES SQL | requires existing account login with ‘SELECT’, ‘INSERT’, ‘DELETE’, ‘UPDATE’ and 'EXECUTE STORED PROCEDURE' per- |
SQL Roles Required for SES
WinMagic has determined that the following are the minimum roles that must be applied to the SQL account used when using SES:
db_datareader db_datawriter db_ddladmin public SD_admin SD_user
NOTE: When installing or upgrading SES, the SQL account being used must also be provided with the
DBCreator and public roles at the database engine level, in order to be able to create the SES
Database's
temp database during the upgrade, and to back up the database. Once the database has been cre- ated or
upgraded, the DBCreator role can be revoked for this account.
Please ensure that the above roles have been selected for the account you will use when logging into SQL when using SES.
Using SES with a Firewall
SES uses the following network ports, which need to be opened on your firewall if the SQL Server connection goes across a WAN connection that has a firewall. SES Management Console and SDConnex need to update SQL with any configuration changes.
139 | TCP | NETBIOS Session Service |
1501 | TCP | Satellite-data Acquisition System 3 |
1433 | TCP | Microsoft-SQL-Server Registered Port |
Users must be able to share the \Microsoft SQL Server\MSSQL\Data folder.
When creating or upgrading the database, SES copies the database template files. In that case, the 139 and 1501 ports are used.
Note: For customers that have not installed SecureDoc before, please review Section 1 of the SES Quick Deployment Guide for a detailed understanding of the steps and user interface elements you will encounter during the installation of the SES software, or if desired, click on the following link to view a video that will guide you through the SES software installation steps: Video: https://youtu.be/T2J75QZTMQw Run-time: 2m24s
Installation Steps
Before you install SES, make sure no other programs are running.
Insert the CD, or download the installation file, and run Setup.exe.
Follow the instructions in the wizard.
The SES software is installed next. Follow the instructions in the wizard.
You can choose:
Complete setup — installs SES and SDConnex on the same machine (for normal usage).
Custom setup — allows you to choose whether to install SES or SDConnex, allowing you to install them on different machines, and/or to install multiple SDConnex connections (for large-scale implementations).
Step Two: Setting Up the SES Database and Key File
Introduction
SES information is stored in an encrypted database that is protected by a key file. The key file is protected using a strong password.
You can create both the database and key file at the same time (the system automatically creates the necessary encryption key) or, if a database or key file already exist, you can use them instead.
Note: Be sure to keep your key file for the SES database safe and secure, to protect the encryption keys it stores.
Setting Up a New SES Database
Run SES from the Start menu (Start >> SecureDoc Enterprise Server >> SecureDoc Enterprise Server). The Login to the database screen appears.
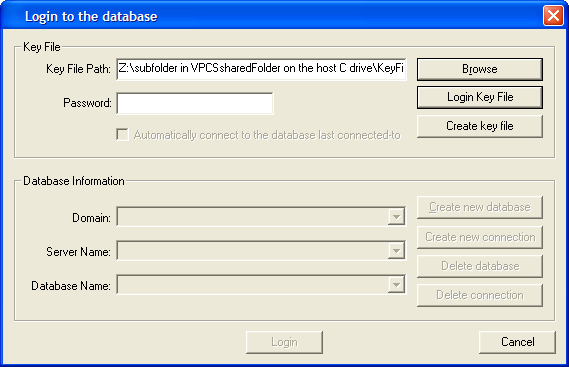
To use an existing key file, browse to its location, enter its password, and click Login Key File, then go to step 9.
To create a new key file, follow the steps below.
Click Create key file. The Create Key file screen appears.
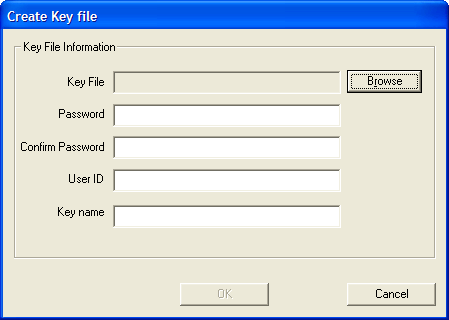
Click Browse, navigate to the location where you want to store the key file, and type a name for the key file.
Note: If possible, create the key file in the folder where the database files are stored.
Click Save. The name appears in the Key File field of the Create key file screen.
In the Password field, enter a strong password for the key file. This password should be kept secret. You need it to log in to the key file and to gain access to the SES database, so must take care to remember it. Confirm the password by re-entering it in the Confirm Password field.
In the UserID field, enter a unique userID for the key file. This UserID will be used by the administrator who logs in to SES, and does not have to be a domain user ID. This also identifies, in the audit trail, which user made which changes to the database.
In the Key name field, enter the name you want assigned to the key used to encrypt the SES database. This key will be used to protect the sensitive data stored in the SES database and is required when logging into SES, but is not used for any other purpose.
Click OK. The Login to the database screen re-appears.
Enter the password you assigned in step 5, and click Login Key File.
Click Create new database. The Create new database screen appears.
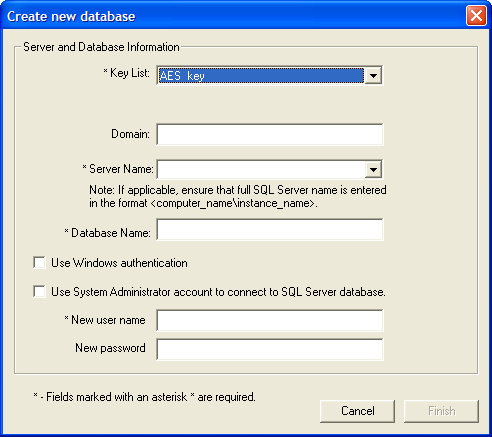
From the Key List, which shows a list of available encryption keys in the key file you logged on with, choose the encryption key to be used to protect SES. Any user who wants to access SES needs this key added to their key file.
In the rare case that the database server is located in a different Domain than the SES Server, enter the name of your Windows domain otherwise leave this blank.
From the Server Name list, choose the MS SQL Server on which you want used to create the database files.
Note: If you are using SQL Server Express, enter the server name in the format server_name\SQLExpress.
In the Database Name field, enter the name for the SES database, following the naming conventions of your organization. A folder with this name is created, under the folder where you installed MS SQL Server.
Choose how you want to connect to the database files:
Authenticate to Database using Windows Authentication
Check the Use Windows authentication radio button.
In the User name field, enter the user name and, optionally, domain of the user, who shouldbe given access to the SES database.
Click Finish. You are prompted to choose the default key for the user you created. See “Settingup Access Rights” on page 42.
Note: Windows authentication to the SQL database is considered more secure than SQL Account authen- tication because Windows Authentication details are sent across the network in encrypted form.
Authenticate to Database using SQL Server Authentication
Check the Use SQL Server authentication radio button. The prompts below will change to suituse of SQL Server authentication.
In the SQL Login ID field, enter the username of the SQL Account you havechosen to use. This could be the built in "sa" account or another. This account willneed SQL rights to create a database plus cer- tain other specific rights.
In the Password field, enter the password for the SQL Server account you hadchosen.
NOTE: SQL Account authentication is considered less secure than the use of Windows Authentication because SQL authentication details are sent across the network in clear-text.
Note: You must have a direct connection to the SQL Server to use this method.
Click Finish. You are prompted to choose the default key for the user you created. See “Setting up Access Rights” on page 42.
Setting up Access Rights
The access rights screen appears when you create a new database.
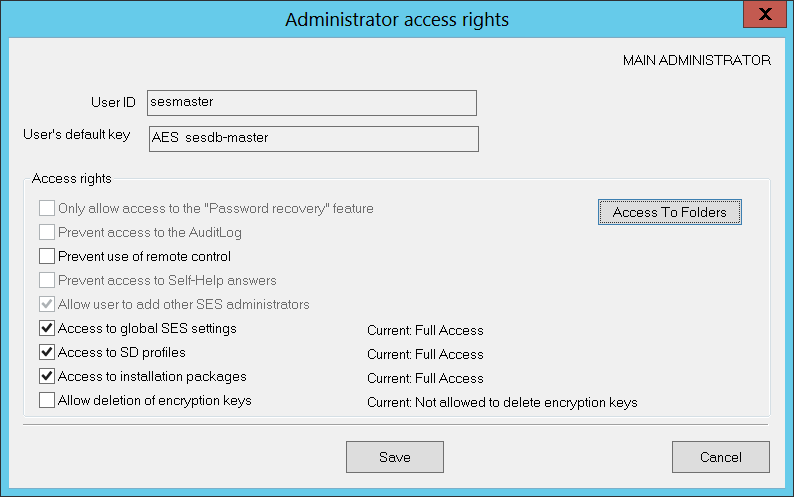
At this stage, you are configuring access rights for the main SES user. If you have more than one key available, choose the default key to be used to give this user access to the database.
Choose the rights this user should have. Some of the access right options are not available, because this is the main administrative user for the database. To set up additional administrative users and access rights to the database, see “Adding Administrative Users” on page 460.
Although you can choose which folders this administrator user has access to (by clicking Access To Folder), for an initial installation, which has only a single default folder, this is not
Backing up Your Key File
necessary. You can assign folder access later, when specific folders exist. For details, see
“Adding Administrative Users” on page 460.
Click Save. A message appears, indicating that server keys are being generated. When keys have been created, the SES Management Console opens (see “Understanding the SES Console” on page 96).
These server keys protect data being transferred between SES and the client devices. The server keys generated are shown in the RSA Server Keys screen (see "Server’s RSA Keys Options" on page 61) in the management console and can be changed to different keys if required.
Note: On installing, you have access to 10 SecureDoc licenses. To acquire more, follow the instructions in “Licensing Options” on page 86.
Backing up Your Key File
IMPORTANT: The DBK file and password should be backed up and stored for safekeeping (e.g. in a vault, safety deposit box, etc) since they provide the essential access to the encrypted database. If the key file should be destroyed or the password completely forgotten, then without these safely-stored backups it will no longer be possible to access the encrypted database and administer the SES environment.
Enhancing Mobile App for OTP and Number Matching on iOS/Android
Installing Mobile Application Setup
The mobile application on iOS and Android is being improved to support OTP (One-Time Password) and number matching. This upgrade aims to enhance security and provide a better user experience by allow- ing seamless OTP verification and numerical input verification for various purposes within the app.
To meet these requirements, we are implementing key enhancements to the iOS/Android mobile app. These improvements will elevate the app's functionality, ensuring a more secure and versatile user experience.
Steps to Enhance Mobile App for OTP and Number Matching:
Download and Install the App:
Go to the App Store (iOS) or Google Play Store (Android).
Search for the MagicEndpoint app.
Download and install the latest version of the app.
Enable OTP and Number Matching:
Open the MagicEndpoint app.
Navigate to the settings menu.
Enable the OTP (One-Time Password) feature.
Enable the number matching feature.
Set Up OTP Verification:
Follow the on-screen instructions to set up OTP verification.
Backing up Your Key File
Enter your phone number or email address to receive OTPs.
Verify the OTP received to complete the setup.
Configure Number Matching:
Follow the on-screen instructions to configure number matching.
This may involve setting up a numerical input verification process for added security.
Test the Features:
After setting up OTP and number matching, test both features to ensure they are working correctly.
Try logging in using OTP verification.
Use number matching for any applicable in-app verification processes.
Update User Credentials:
Ensure that your SCIM username and password are unique and saved in OKTA and the SCIM settings for basic access.
This ensures proper synchronization and access management. Additional Information:
Dynamic Lock Feature: This Windows feature uses Bluetooth to detect when your paired device (like a smartphone) is out of range and locks your PC for security.
MagicEndpoint App: This app facilitates secure authentication and access management, and it requires stable Bluetooth pairing to function correctly.
By following these steps, you can ensure that the MagicEndpoint app on iOS and Android is set up cor- rectly to use OTP and number matching, enhancing the security and functionality of the app.
Setting SES Global Options
To set up these options, choose Tools >> Options and then choose which options you want to configure.
Since these options apply to all profiles and installation packages created, take the time to be sure they are set up correctly.
General Options
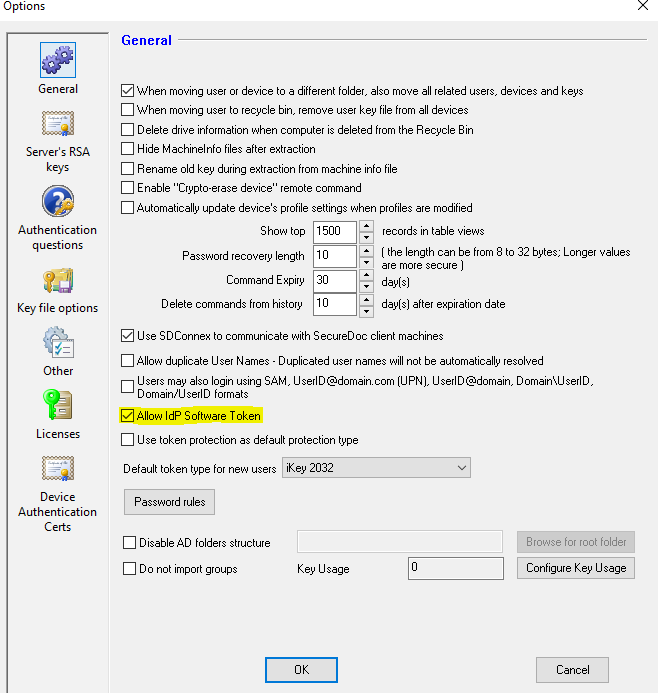 These options control the basic communication parameters for SES. In the Options screen, click General.
Option | Description |
When moving user or device to a different folder, also move all related users, devices and keys | Folders can be used to organize information about users and devices for easier management. Check this option to ensure that, if you move a user record to a different folder, all the user’s keys move as well. Clear this option to leave the user’s keys in their ori- ginal folder when a user record is moved. |
When moving user to recycle bin, remove user key file from all devices | When a user is deleted from SES, his/her key file will be removed from all the devices. |
Delete drive information when computer is deleted from the Recycle Bin | When a device is deleted from the Recycle Bin, also delete all disk drive information associated with that device record. |
Hide MachineInfo files after extraction | MachineInfo files are used to transfer user and device information to SES from client devices without a LAN/WAN connection. Once the files are received, their information must be extracted to the database (see “Loading MachineInfo Files into SES” on page 229). Check this option to not show those files in the management console once the extraction is complete. |
Rename old key during extraction from machine info file | Use to handle the special circumstance where a pre- viously encrypted client device is re-imaged, and there is no network connection from that client device when the installation package is sent to it. The resulting MachineInfo file will contain the key ori- ginally assigned to the device. If this option is checked, SES will rename the old key and create the new key to be used to encrypt this client device. |
Enable “Crypto- erase device” remote com- mand | Check this option to enable the remote command used to Crypto-erase (zeroize) a client device. To perform crypto-erase, see “Crypto-erasing a Client Device” on page 312. |
Automatically update device’s pro- file set- tings when profiles are modified | Check this option to automatically have a modified pro- file sent to the client device’s that received the profile originally, when the device next com- municates with Automatically update device’s pro- file settings when profiles are modified SES. This |
Option | Description |
option makes it easier to apply changes to a group of client device at once, but should be used with cau- tion, particularly if a large number of devices accessed by different users received the original pro- file. Profiles can be applied to selected devices through the console. Until the device has received the updated profile, the Devices tab indicates the profile is out of date. | |
Show top X records in table views | Determines how much data to show on a table view. Note: Filtering (explained in “Filtering Data in the Information Pane” on page 351) will locate records hidden as a result of this setting. |
Password recovery length | For challenge/response password recovery. Specify the maximum length of the response code used for this function. The longer the response string, the more secure the solution, but excessive-length recovery strings come at the expense of con- venience when the helpdesk is dealing with a recov- ery situation. The minimum length is 8 characters, with a value of 10, typically seen as offering a bal- ance between secur- ity and practicality. For Mac cli- ent devices, a max- imum of 30 characters is recommended. |
Command Expiry X day (s) | Specify the length of time for the remote control com- mands (except crypto-wipe command) to be retained for the client device. After the lapse of specified num- ber of days, the command will expire. The default value is 30 days. Note: For crypto-erase command, the expiry date is set to 10,000 days. Users cannot configure expiration of crypto-erase commands, so if a command has been issued that should not be executed, the administrator should cancel the command. |
Delete commands from history X days after expiration | Specify the length of time remote control commands for this client device will be retained before being dis- carded (for example, a remote control com- mand to update the profile for this device will expire if the device does not communicate with the server |
Option | Description |
within this number of days . | |
Use SDConnex to com- municate with SecureDoc client machines | Specify the way SES communicates to client devices (com- munication from client devices is set in the profile): Check this checkbox to enable SDConnex LAN- or WAN- based communication, so that user/device information will be returned to SES via SDConnex communication, and to permit remote mangement of SecureDoc-protected endpoint devices. NOTE: if multiple SDConnex communication pathways are available, you will specify the appropriate SDConnex Serv- ers in the Device Profile(s) for the client devices). Note:SDConnex communication is required for remote con- trol of client devices. SDConnex has its own configuration settings and its statistics can be monitored— see “Con- figuring SDConnex” on page 246. If this option is not checked/enabled, there will be NO communication between SES and the Client devices. While rare, this mode might be required for an envir- onment that does not have a network or where applic- ation network communication is not permitted (e.g. certain Military, Government uses of protected devices may bar non-military/non-government software products from communicating). In such cases, installation packages will need to be manually distributed and user/device information will be returned via MachineInfo files, covered elsewhere in this documentation. |
Allow Duplicate user names - Duplicated names will not be auto- matically resolved | If checked, this option instructs SES to tolerate duplicated User Names, and that it should make no attempt to resolve them to derive a single entry for that user name. |
Users may also login using SAM, User- [email protected] (UPN), User- ID@domain, Domain\UserID, Domain/UserID formats | If checked, this instructs SES to resolve user IDs in any of the stated formats during login to the user record that contains the entered information, regard- less of which of the formats is used. |
Allow IdP Software Token | If checked, users may use an IdP Software token during authentication. In Version 9.0SR3 SES and |
Option | Description |
MagicEndpoint IdP coordinated to store user soft- ware tokens in the SES database. | |
Use token protection as default protection type | Check to have token protection used by default for client devices. |
Default token type for new users | Choose the default token type to be used for key files generated (automatically or manually) by SES. Useful if most users in the enterprise have a par- ticular token type. Where there is no specific driver for the card type to be used, Administrators can now select "OpenSC" card type. Note that where SecureDoc does have specific existing support for a given "known" Card or Token, for best results Admin- istrators are cautioned to select that card/token type when configuring the authentication settings for users/devices on which the known card/- token type will be used. |
Password rules | Defines the rules users must follow when changing their password. Allows you to ensure users use strong passwords. Rules are stored in the key file. For details on the rule options, see “Appendix A: Password Rules” on page 378. If defining the use of Self-Help Recovery (which relies on user Self-Help Questions and the user's personal answers to those questions), it is necessary to first define the master list of questions before defining how many questions are required (see: Authentication Questions Options section in the following pages). For example: If intending to require users to answer 4 self-help ques- tions to recover access to a device, then at least 4 questions must exist in the master list before it is possible to define that 4 are required. Recommend that you first a) ensure that the questions list has been populated with strong recovery questions, and then b) return to define the password rules element that defines how many questions are required to per- form Self-Help Password Recovery. |
Disable AD folders structure | See “Setting up Active Directory-Related Global Options” on page 62. |
Server’s RSA Keys Options
The keys listed here are the ones that were created during SES database creation. At that time, a single certificate was created and set as the “active” one. For information on the use of the SES certificate (which contains an RSA pair), see “SES Certificates for Protected Communication” on page 42.
Changing the Server’s RSA Keys is optional. Under most circumstances, the keys created by the SES installation are sufficient. This needs to be modified only for strict security environments where you have to use certificates created from your own CA.
To work with SES certificates, in the Options screen, click Server’s RSA keys.
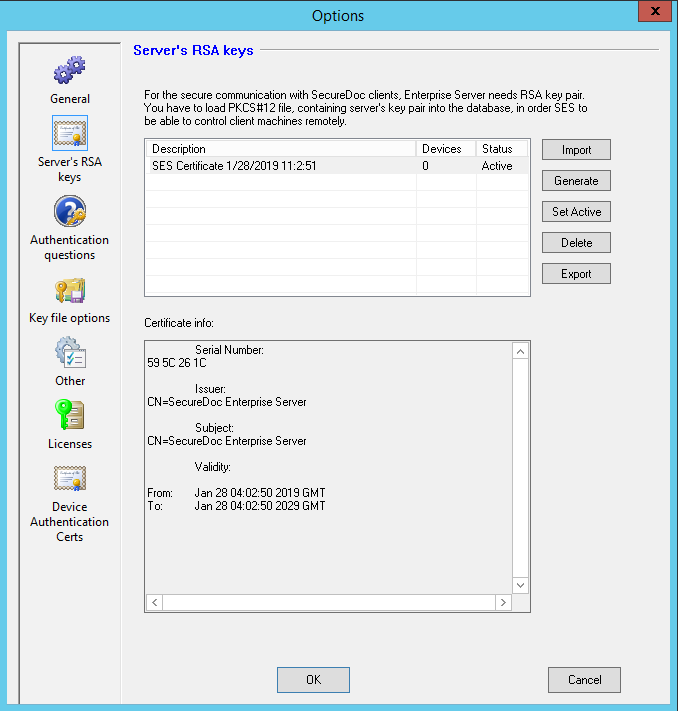
To add another certificate (it must contain, at minimum, a 512 bit RSA key), click Import and navigate to the PKCS#12 certificate’s location.
To generate another certificate, click Generate.
To make a certificate the active one, select it and click Set Active.
Note: The number of devices associated with the active certificate will gradually change as devices communicate with SDConnex. Once all devices have the active certificate assigned to them, the old certificate can be deleted.
To remove a certificate, select it and click Delete.
Note: You cannot delete a certificate that is associated with a client device.
Dynamic Update of Password Rules/Criteria Data from SES
Every time the admin makes changes to Password Rules (they will appear in Global setting only) the changes will be updated to ALL profiles (upon clicking OK on the UI).
There is a global option controlling the update of modified profiles to Clients in SES (Automatically update device's profile settings when profiles are modified). According to that option, the updated pro- file will be sent to the devices immediately or manually.
I. Keyfile Update (via SES Keyfile Push):
Previously, in older versions (< SES 9.1), after configuring "Password Rules" in the SES Console and deploying the package to the client, administrators could initially adjust the password rules in the "Global options" within the SES Server. Subsequently, they updated the key file using either the "Create key file" function or by modifying the user in the device tab.
However, with SES 9.1, administrators are only required to modify the "Password Rules" within Global Options. After modification, the administrator can apply the changes to all profiles by assigning them universally or selectively to specific endpoints upon profile update. (Refer to II. Profile for further details.)
Steps:
From SES Server, navigate to the main menu: “Tools/Options…/General/Password Rules”.
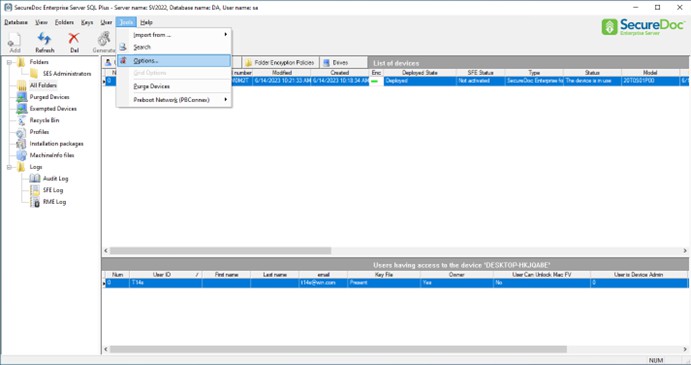
Option: “Automatically update device's profile settings when profiles are modified” is checked.
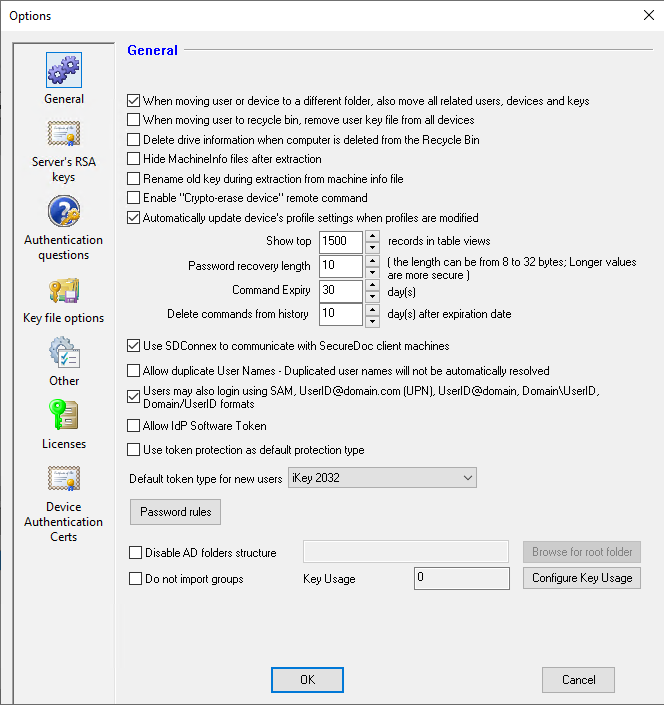
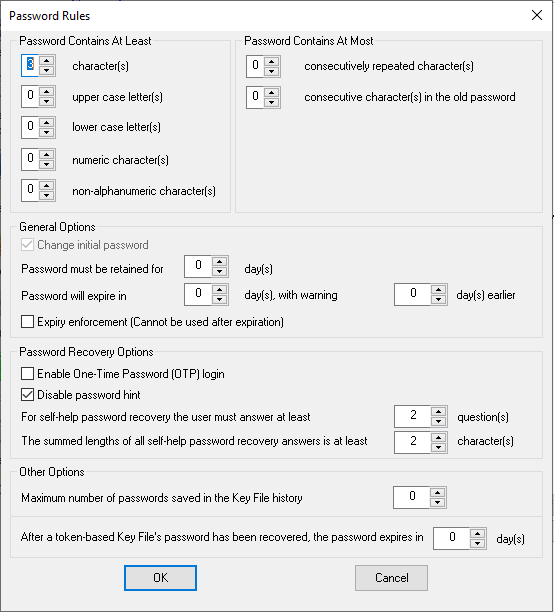
Modify any option in the “Password Rules” section. (Such as, changing the “Characters” = 3)
Click OK once to close the “Password Rules” dialog.
Click OK twice to close the “Global options” dialog.
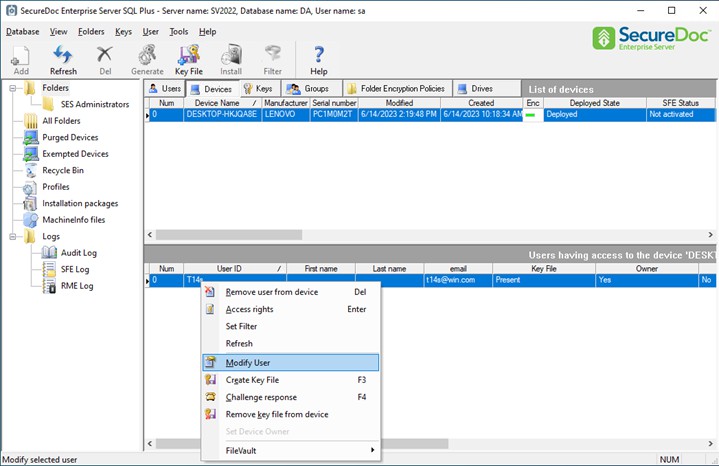
In the SES console, “Device” tab, Method 1: Create key file:
Right-click on the user and select “Create Key file” or press F3
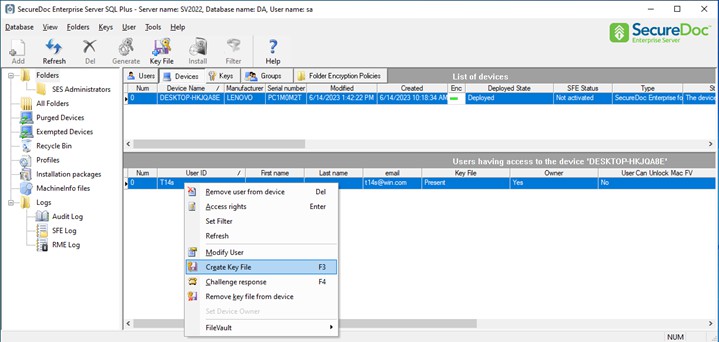 A new “Create key file” dialog shows:
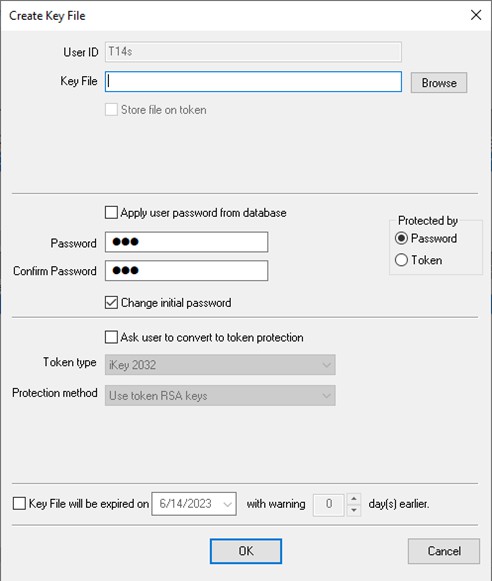
In “Create key file” dialog, try to modify these options:
Apply user password from database:
+ Check: Re-use the old password from the database for the key file.
+ Uncheck: Input and confirm the new password for the new key file.
Change initial password:
+ Check: The user must change the initial password after the first login.
+ Uncheck: Use the new password until the user would like to change it.
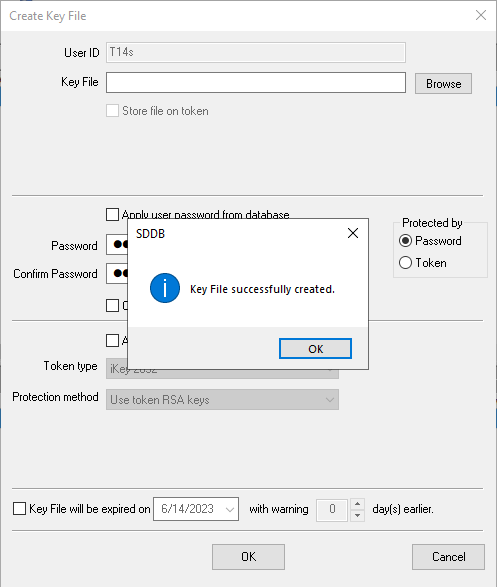
Click OK to create a new key file.
Method 2: Modify the user:
Right-click on the user and select “Modify User”.
 In the “Edit User Info” dialog, modify the password with the new password rules.
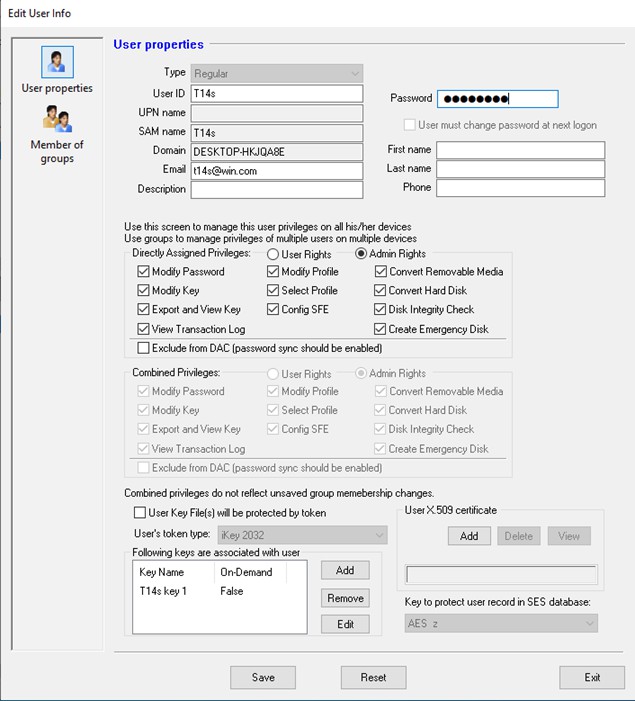
Click “Save”
On the SD client, communicate with server to receive the new key file.
Reboot and login BootLogon with the new password.
II. Profile (fully updatable with profile update)
From 9.1, the administrator can modify the “Password Rules” in Global options, these changes can apply to all profiles by assigning them to all profiles or just on the respective endpoints once updating the profile.
Steps:
From SES Server, navigate to the main menu: “Tools/Options…/General/Password Rules”.
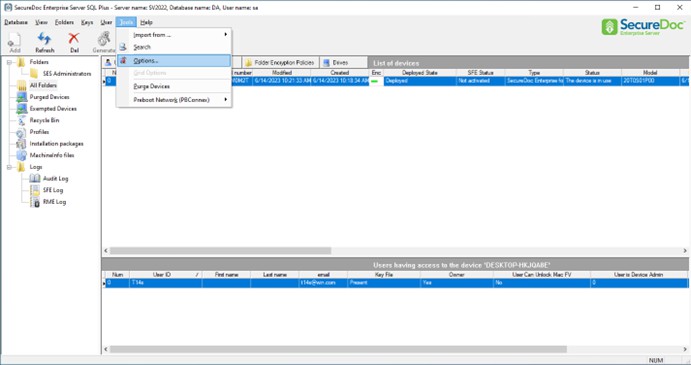
.
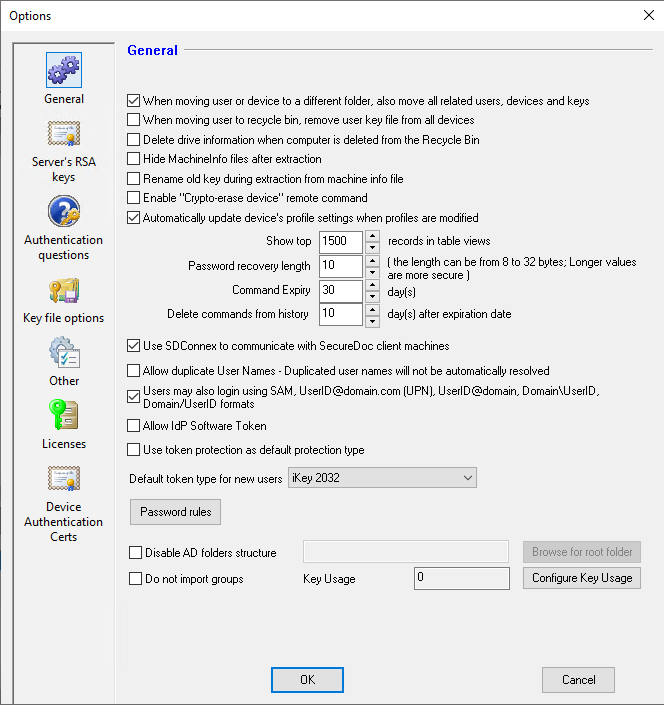
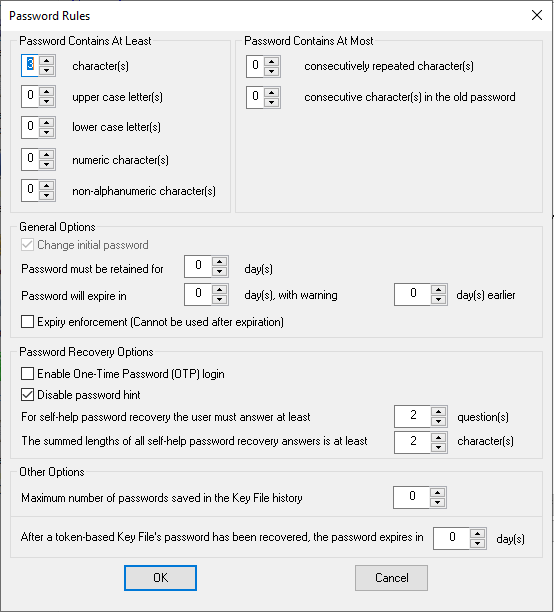
Modify any option in the “Password Rules” section. (Such as: Characters, letter, Self-help questions)
Click OK once to close the “Password Rules” dialog.
Click OK twice.
SDDB dialog shows:
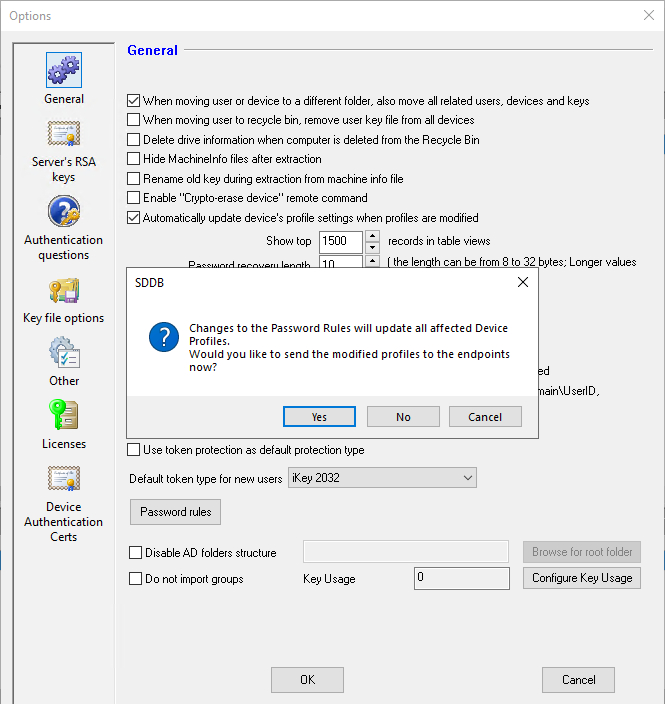
Modify any Authentication questions.
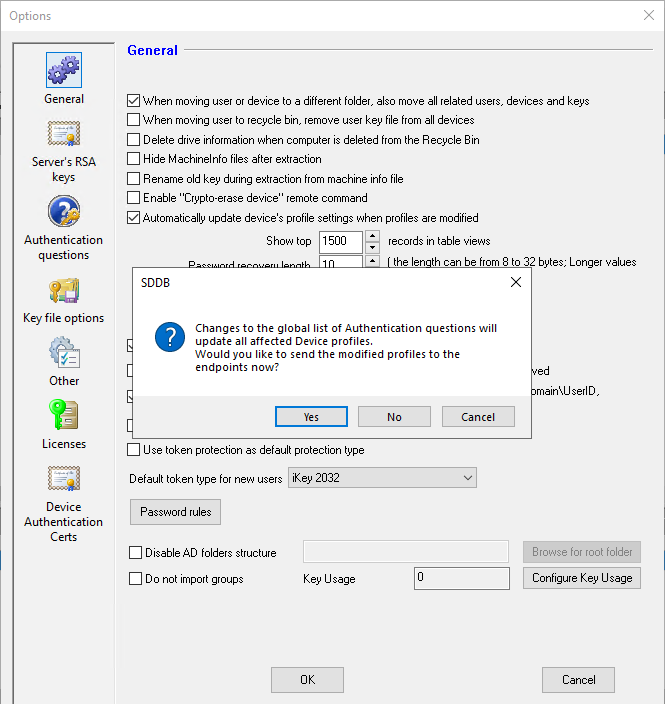
Administrator can choose 1 in 3 options:
Yes: Password Rules have been changed and it will send the modified profiles to all endpoints.
// Refer to the video clip: https://winmagicinc-my.sharepoint.com/:v:/g/personal/loc_nguyen_win- magic_com/ES-FKRXt1jFLsiAw3NdREPcBWpF1Gq7Fr2eDkoxeEtA7kA?e=GoVHE7
No: Password Rules have been changed but it will not send the modified profiles to all endpoints immediately. However, it will affect once the profiles are updated on respective endpoints.
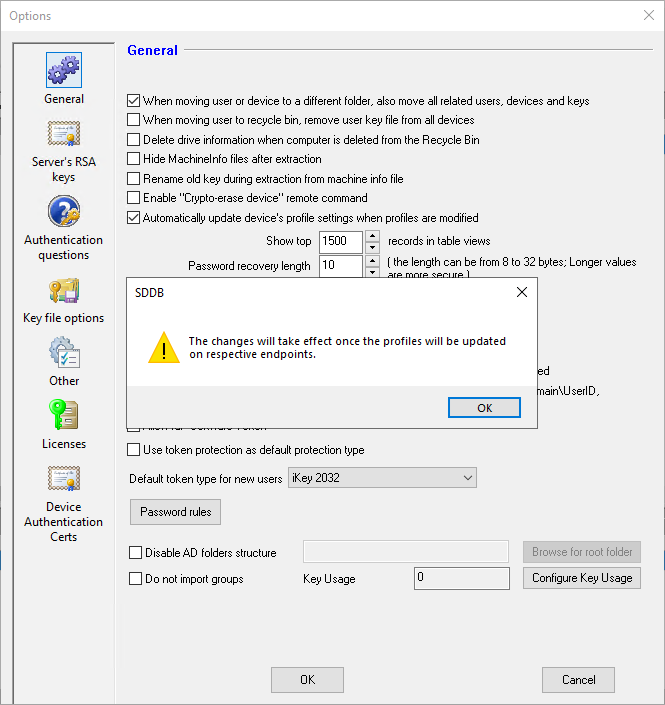
Update for “Authentication Questions”
The administrator must define the “Authentication Questions” before adding them to “Password Rules”.
The number of “Authentication Questions” must be more than or equal to the ones in “Password Rules”.
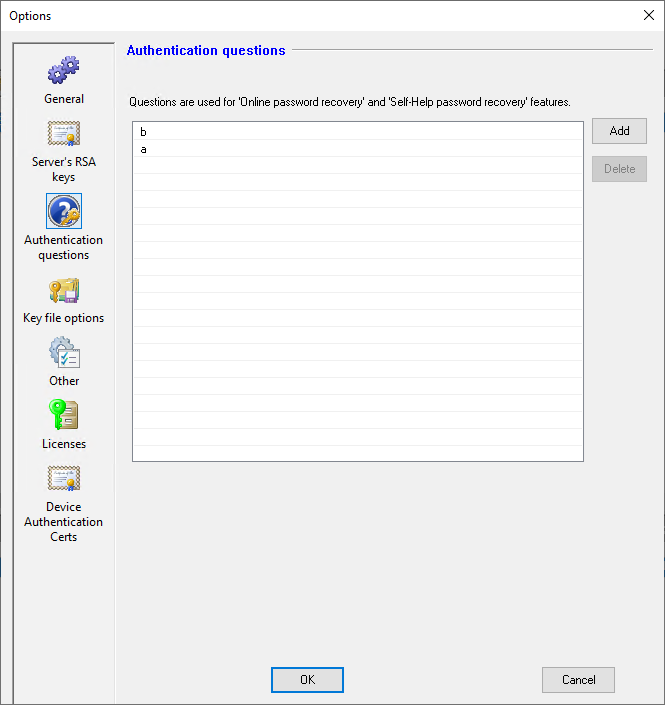
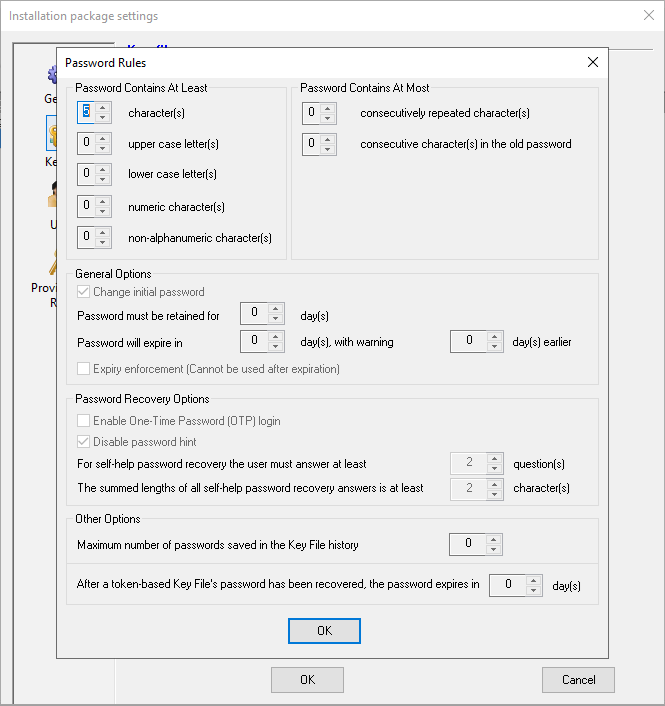
III. Installation package (password rules set once during package creation and are not up-datable)
In all SES versions, we cannot modify or update the “Password Rules” in the package. All are disabled.
Authentication Questions Options
Authentication questions are used during challenge/response password recovery. Questions should be chosen so that the questions are meaningful to users (so they can recall the response) and that answers will uniquely identify the user (for example, “what was your mother’s maiden name?”, or “what month was your father born?”, or “what are the last five digits of your driver’s license?”). Questions should not be too easy to guess. For example, “what year were you born?” or “what is your employee ID#?” are not good questions, since someone who is not the valid user could easily know that information.
Use this function to create a library of questions from which you will choose when setting installation package options. How many questions will a be asked depends on the Password Rules set on the General tab (see “Appendix A: Password Rules” on page 474. Which of these questions is posed to a user is determined when the installation package is created. Since answers to questions are posed, and answers collected, as part of SecureDoc installation, be sure to build this library appropriately so that it is available when creating the installation package. It is not easy to ask users different questions after installation.
In the Options screen, click Authentication Questions
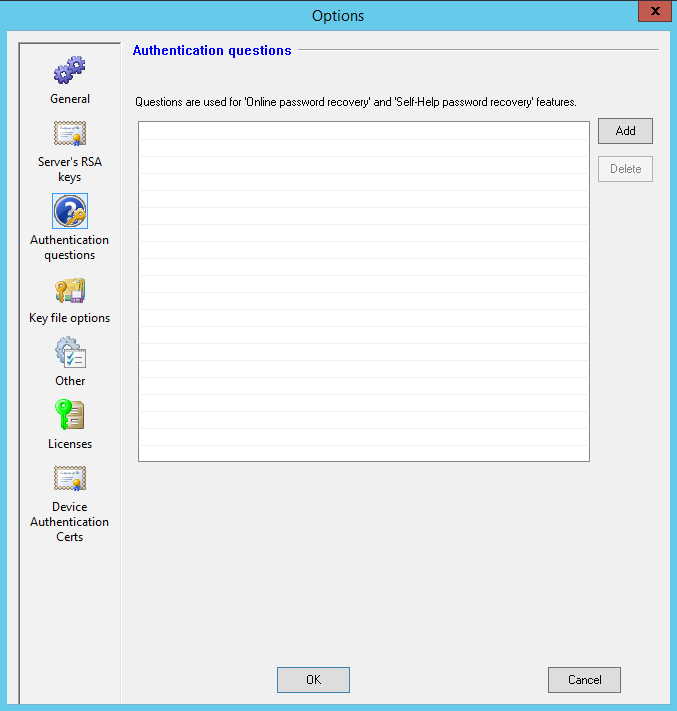
Enter the specified number of questions.
SES Administrator Manual
v9.2 SR1
NOTE: The required number of questions (or more) must exist in this list before the number of ques- tions can be defined in the Password Rule.
Key File Options
These options affect all key files created for all users whose installation of SecureDoc is based on this profile. Since key files are created automatically, and blindly, it is particularly important to ensure these settings are configured appropriately for your security needs.
In the Options screen, click Key file options.
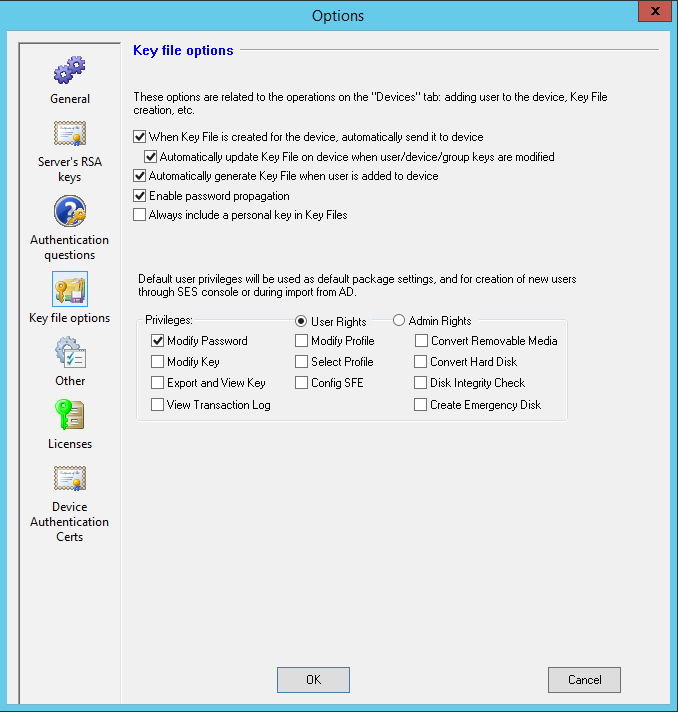
Option | Description |
When key file is cre- ated for the device, automatically send it to device | Check this option to ensure that, if you add a key file to a specific device using the Management Console, it is automatically sent to that client device. This is useful for giving multiple users access to the same device. You can also check the Automatically update key file |
Option | Description |
option. When this is checked, if you modify the key properties of a user, device, or group in the Man- agement Console, the key file will be automatically sent to the device. | |
Automatically gen- erate key file when user is added to device | When this option is enabled, whenever the Administrator changes the list of keys associated with a User, or with a Device, or with a Group, this option will trigger the SES Server to automatically create new Key Files to replace exist- ing key files for: -The affected User, or -The key files on the affected device for those users that have key files on the device, or -The Users that belong to the affected Group. |
Automatically gen- erate key file when user is added to device. | Check this option to have a key file automatically cre- ated for that user when that user is added to a specific device using the Management Console. |
Enable password propagation | Check this option to ensure that, wherever users have a relationship (usually a Key File) on more than one device, any time a user changes his Key File password on one device the SES server will deploy new replace- ment key files to the other devices, protected by the user's new password. NOTE: This feature requires you to enable the Allow sending of user’s password and self-help recovery answers to SES Option — see “Pro- file Advanced Options” on page 109. |
Always include a per- sonal key in key files | Check this option to have key file creation check to see if the user has a key named “<Username> key”. If that key does not exist, one will be created and included in each Key File that user has on any device. If a key for another user with the same name exists, the key will be named “<User- name> key n”, where n is a number (SES will try up to 1000 times to create a unique name) For example, for User1, a key named “User1 key 1" will be created. If that key exists but is not assigned to the user, then a key named “User1 key 2" will be created. |
Privileges | Default privileges used for all users created by SES, |
Option | Description |
whether those users were added manually, through import from Active Directory, or throughinstallation package deployment. Can be over-ridden by install- ation package settings. See “Appendix E: Privileges” on page 396 for details on these privileges. |
Note: The actions (sending and updating key files) that may be performed as the result of these settings are automatic, so do not appear in the “waiting commands” display used for remote control commands. They do appear, however, in the audit log.
Other Options
In the Options screen, choose Other.
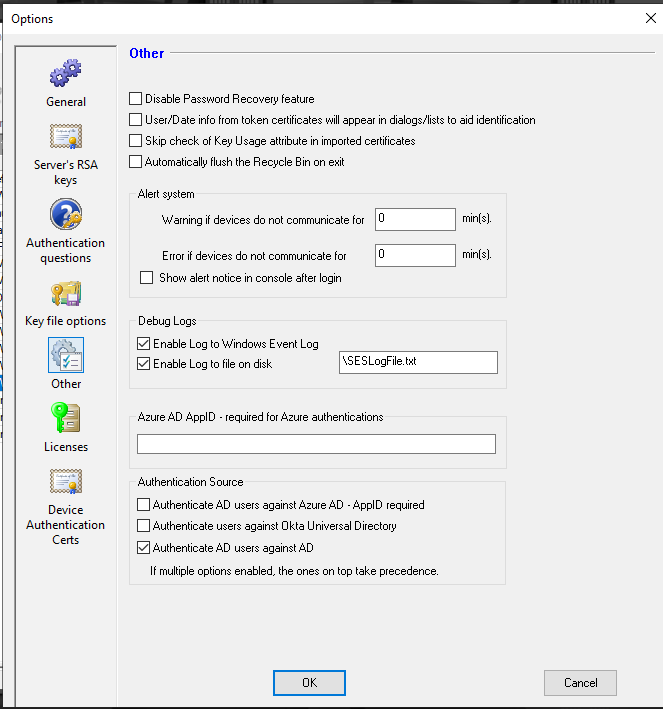
Option | Description |
Disable Password Recovery feature | Check to disable Password Recovery for all users in the enterprise (not recommended). |
Use information from certificates on token to represent them in the dialogs | Each userID must be unique within SES. If necessary, you can use these options to ensure this uniqueness:
|
Option | Description |
device’s name choose Add device name to the userID Choosing to add to the default userID helps ensure unique user IDs within SES, since users will be unique within the same domain or device. | |
Skip check of Key Usage attribute in imported certificates | When certificates are imported as part of a user record, SES checks to see if that certificate is sup- posed to be used for encryption and, if not, does not use it. Check this option to have the certificate used regardless. |
Automatically flush the Recycle Bin on exit | Automatically removes the contents of the Recycle Bin on exiting the console. This permanently removes the contents of the Recycle Bin and should be used with caution. |
Warning if devices do not communicate for x min(s). | Specify how many minutes of non-communication from endpoint devices to the SES server should be con- sidered of great enough concern that the SES Admin- istrator should be warned. Note: This reason this option expresses its alert times in minutes is it is primarily oriented toward Banking customers whose endpoint devices are Automated Banking Machines Such devices should be in very frequent contact with the SES server, so lengthy delays or cessation of com- munication from those devices will be of concern to the Administrator. |
Error if devices do not communicate for x min(s). | Specify how many minutes of non-communication from endpoint devices to the SES Server should be con- sidered of great enough concern that it should be marked as an error in the SES Console. Note: As above, this option is primarily oriented toward Banking customers whose endpoint devices are Automated Banking Machines, which should be in frequent contact with the SES server, so lengthy delays or cessation of communication from an endpoint device will be of ser- ious concern to the Administrator. Recommendation: |
Option | Description |
For non-Banking customers that still wish to use this alert methodology to monitor non-communication of devices over a longer time period, for reference there are 1440 minutes in a single day. If your tolerance for non-communication spans multiple days, multiply the number of days by 1440 minutes per day, and enter the result in the appropriate field. | |
Show alert notice in console after login. | Enable this option to ensure that the warning or error message functionality defined above results in an alert notice "pop up" message appearing once the Admin- istrator has logged into the SES console, advising how many devices are in a warning state, and how many are in an error state due to non-communication with the SES Server. |
Enable Log to Win- dows Event Log | Check to have audit log information stored in the Win- dows Event log as well as in the SES audit log. |
Enable Log to file on disk | Check to have audit log information stored in a log file as well as in the SES audit log, then specify the loc- ation of the log file to be used. |
Azure AD AppID - required for Azure authentications | Enter the Azure Active Directory AppID if using Azure AD. |
Authentication Source | |
Authenticate AD users against Azure AD - AppID required | Check this checkbox to authenticate users against Azure AD. Note that for this option to work, you must have entered the Azure AD AppID where indicated above. |
Authenticate users against Okta Univer- sal Directory | Check this checkbox to authenticate users against Okta Universal Directory. |
Authenticate AD users against AD | Check this checkbox to authenticate users against a (typically on-premises) Active Directory. NOTE: As indicated below this option, if you have selected mul- tiple checkboxes in this control set, users will be val- idated against these directory services in the order shown. |
Licensing Options
In the Options screen, choose License.
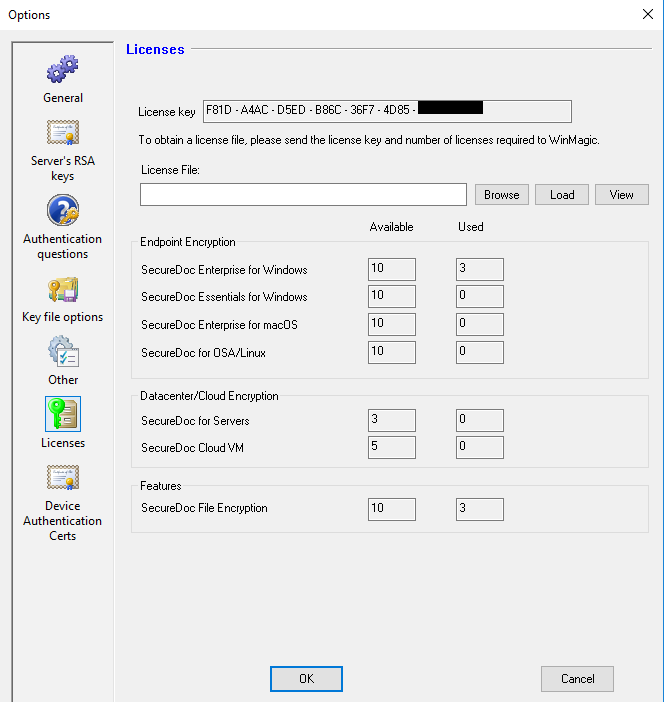
Devices section:
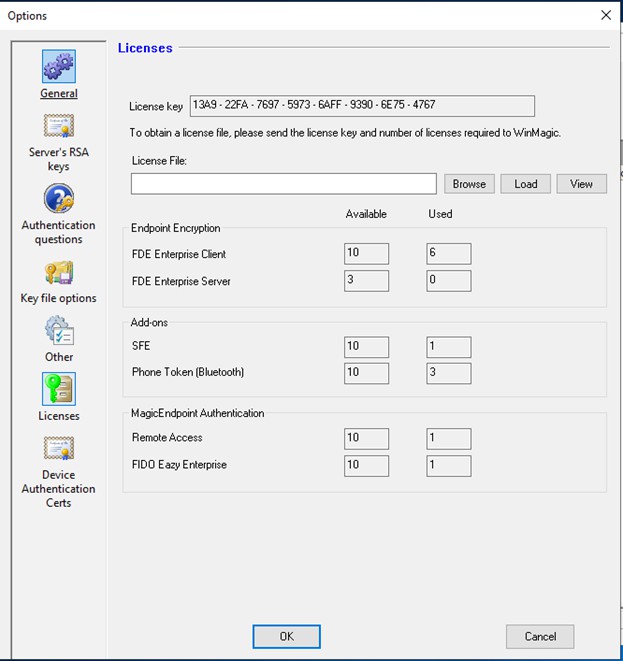
The Device section of the Licensing screen displays the Total license counts you have purchased of each of the device types offered by SecureDoc Enterprise Server. These totals are shown in the Available column.
As you deploy SecureDoc to client devices, the Used column cells will be updated to reflect the current numbers of deployed devices of that type. Each additional device will consume a SecureDoc License for its device type).
Features section:
Note that some features are licensed separately (though not all device types support all features), and so consumption of these Feature license counts will depend upon the deployment of these features by enabling those features in the Device Profile settings you have defined. The Used column here will reflect the current number of devices that are configured to utilize each of the licensed features (e.g.
SecureDoc File Encryption) among the deployed devices (each, again, consuming its appropriate SecureDoc License type.
WinMagic provides customers with License Files that contain the number of licenses of each type that they have purchased, so customers will use this screen to load license files in order to alter their license count totals within the product.
See “Acquiring SecureDoc Licenses” on page 353 for information on how to load a license file following purchase of your initial or any additional licenses.
Note: Devices in the Purged Devices area and int the Recycle Bin are excluded from license calculations: see “Purging and Restoring Devices” on page 452.
Device Type | Description/Notes |
SecureDoc Enter- prise for Windows | These licenses are for the full-featured SecureDoc Cli- ent for the MS Windows platform. |
SecureDoc Enter- prise for macOS | These licenses are for the SecureDoc Client for Apple macOS devices, which manages FileVault 2 on such devices. |
SecureDoc for OSA/Linux | These licenses are for both SecureDoc Enterprise for Linux, or SecureDoc OSA (OS-Agnostic) deployments (which may mean protecting Linux, *BSD or any other operating system not covered by other license types) AND which do not use TCG Enterprise Self-Encrypting Drives (SEDs). Note: Where SecureDoc for OSA/Linux is installed on a device containing TCG Enterprise Self-Encrypting Drives (SEDs), such devices will be considered to be servers and will consume a SecureDoc for Servers license count (see below) instead of a SecureDoc for OSA/Linux license count. |
SecureDoc for Serv- ers | These licenses are for client devices running Server- grade versions of Windows, or devices installed using SecureDoc OSA/Linux on TCG Enterprise self- encrypt- ing drives. See note above on SecureDoc OSA devices consuming Windows Server OS licenses. |
SecureDoc CloudVM | These licenses are for SecureDoc CloudVM Virtual Machine protection, and will be used for (for example) Amazon AWS, Microsoft Azure, and other IaaS envir- onments. |
SecureDoc File Encryption | These licenses are for SecureDoc File Encryption, which permit file-by-file encryption, for example loc- ally within the user's computer disk or within a network share. |
SES License
Implementing SES-Controlled Management of BLE License Pool involves consolidating all client endpoint types, comprising Win/Mac/Linux, into a unified pool, while keeping Servers distinct. The introduction of Bluetooth Low Energy (BLE) licenses within SecureDoc (SD) functions on a per-device licensing basis. SDConnex actively prevents devices from falsely claiming BLE protection for keyfiles.
Several scenarios and operational processes arise in this setup. For instance, if a client erroneously switches locally to BLE and wrongly reports keyfile protection as BLE on an unlicensed device, SES should supply a password-protected keyfile. Additionally, a script is deployed to generate a warning notification upon surpassing BLE limits, prompting the keyfile to revert back to password protection.
In a different scenario, if a client requests a BLE-protected keyfile from SES, the response will contain a password-protected keyfile. SES might include specific data attributes to alert the client of dwindling licenses, allowing the client to notify the user about the depletion of licenses.
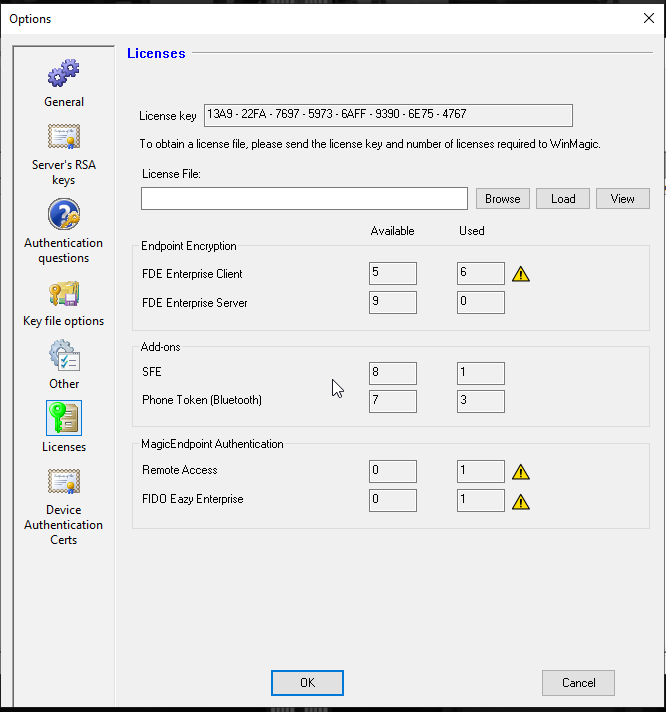
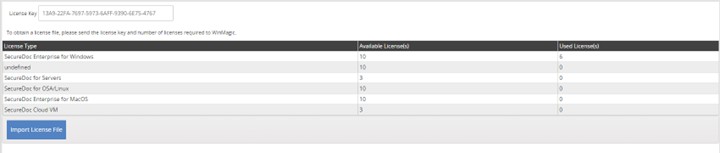
SES shows licenses that are available and used. SES Console:
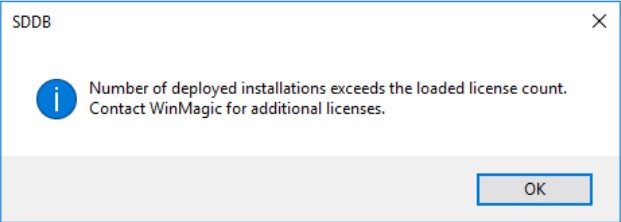
After exceeding the loaded license count, there is a warning message showing on SES Console : "Num- ber of deployed installations exceeds the loaded license count. Contact WinMagic for additional licenses."
SES Administrator Manual
v9.2 SR1
.
SES Web:
 Device Authentication Certs
As mentioned earlier, WinMagic has added an option panel that permits the definition and management of advanced device authentication certificates for those customers that require certificate-based device authentication to their 802.1X wired networks using a shared or global certificate that can be used by all devices and which may be required in order for those devices to gain certificate-authen- ticated access to a strongly secured network.
This new panel is entitled "Device Authentication Certs" and is located below the License Options panel in the SecureDoc Global Options section. Customers must have created or purchased Certificates which can be imported into the list shown in the panel below.
NOTE: ONLY customers that require shared/global Certificate-based Device Authentication to their net- work under 802.1X should import certificates using this panel, as the existence of imported certificates will mandate the use of those certificates in Device Profiles later in the implementation process.
If in doubt, please contact your Networking team to discuss whether your network requires Certificate- based 802.1X authentication.
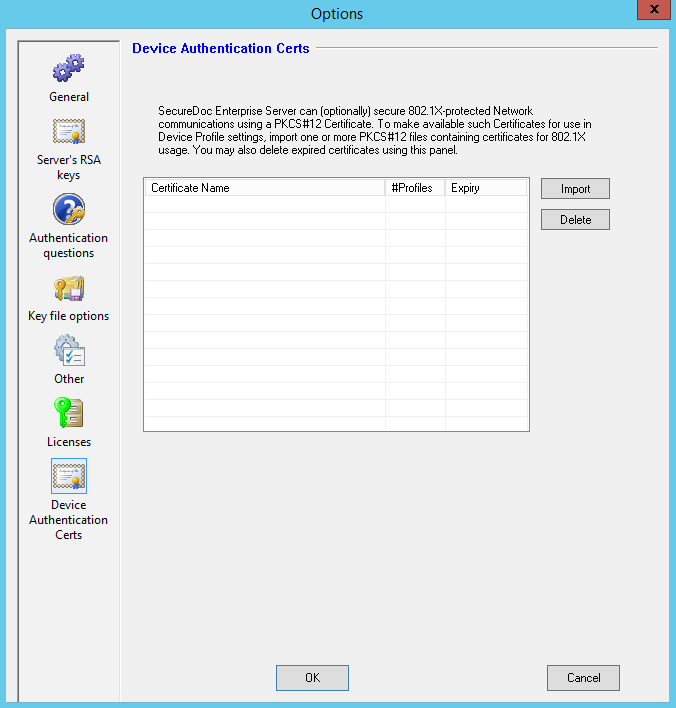
To insert a new Certificate into this list:
Click on the Import button, and in the file picker panel that will appear, navigate to the disk loc- ation where the certificate PKCS#12 file exists.
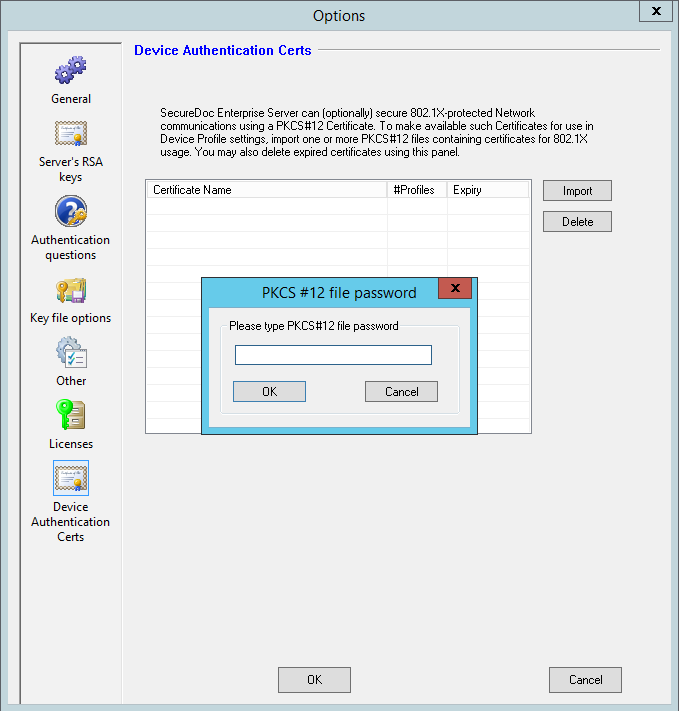
Choose the file, and click OK to accept it.
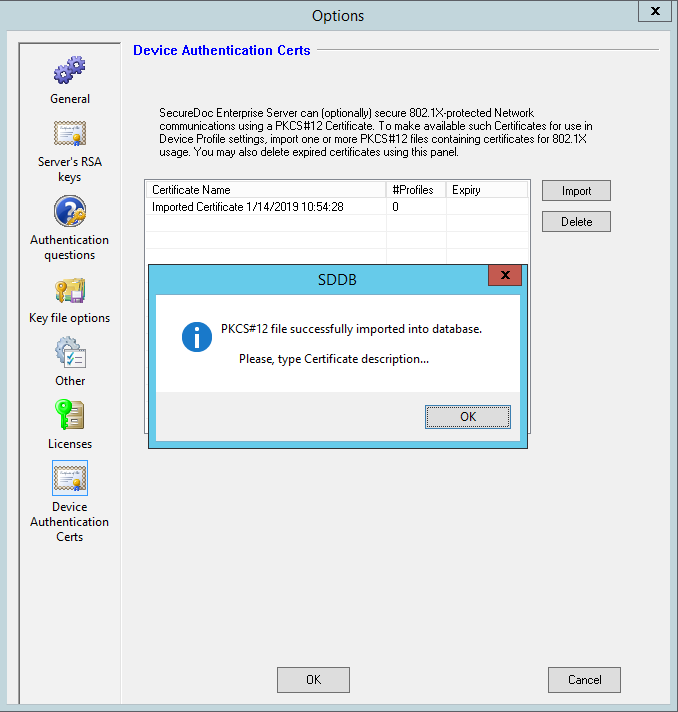
The file should now appear in the list of available Certificates.
To Delete an existing Certificate:
First, determine whether the certificate to be deleted is not referenced by any Device Profiles. Any cer- tificate whose "Profiles" column contains a value of 1 or greater cannot be deleted - such certificates are currently associated with one or more Device Profiles. The association to - or dissociation of Cer- tificates from - Device Profiles is covered in the Boot Configuration settings covered later in the Device Profile segments of this manual.
Understanding the SES Console
Running the SES Management Console Interface
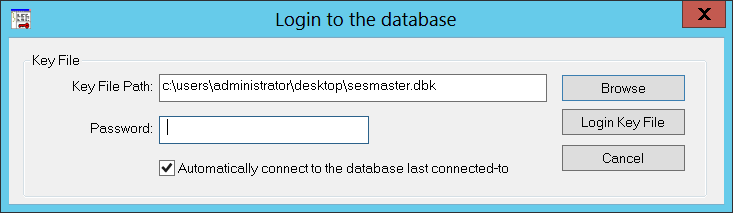
Choose Start >> All Programs >> Secure Doc Enterprise Server >> SecureDoc Enterprise Server. The Login to the database screen appears.
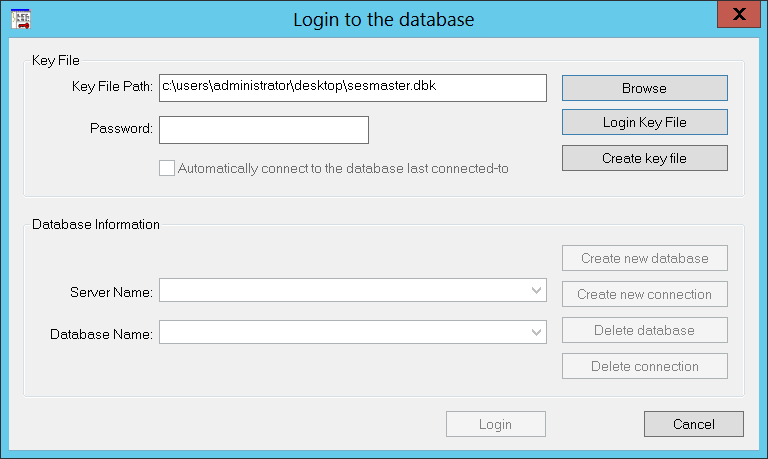
Note: The SES Management Console launches automatically once you have set up a database and key file.
To log in using the existing key file and an established connection, enter the password and log on.
To log in using a different key file or when establishing a different connection, follow the steps below:
Clear the Automatically connect... option. Database Information area fields appear.
If the correct key file does not appear in the Key File Path field, click Browse and navigate to it.
In the Password field, enter the key file password, and click Login Key File. The Database Information area becomes enabled.
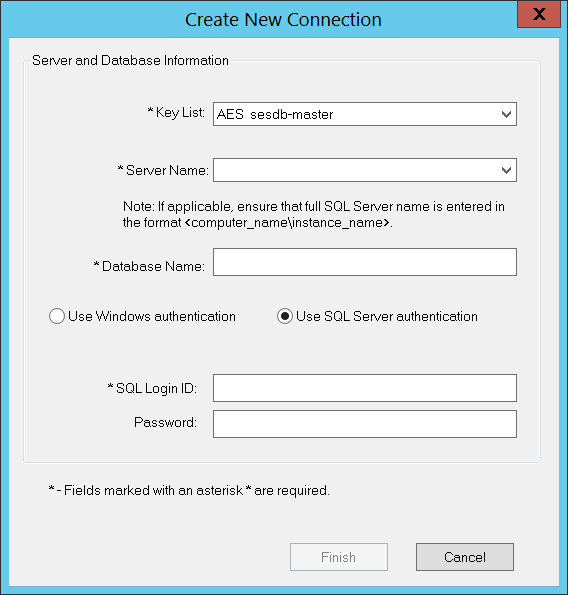
Specify the server and database you want to connect to, or click Create new connection to create a new connection.
Click Login.
SES Administrator Manual
v9.2 SR1
About the SES Management Console Interface
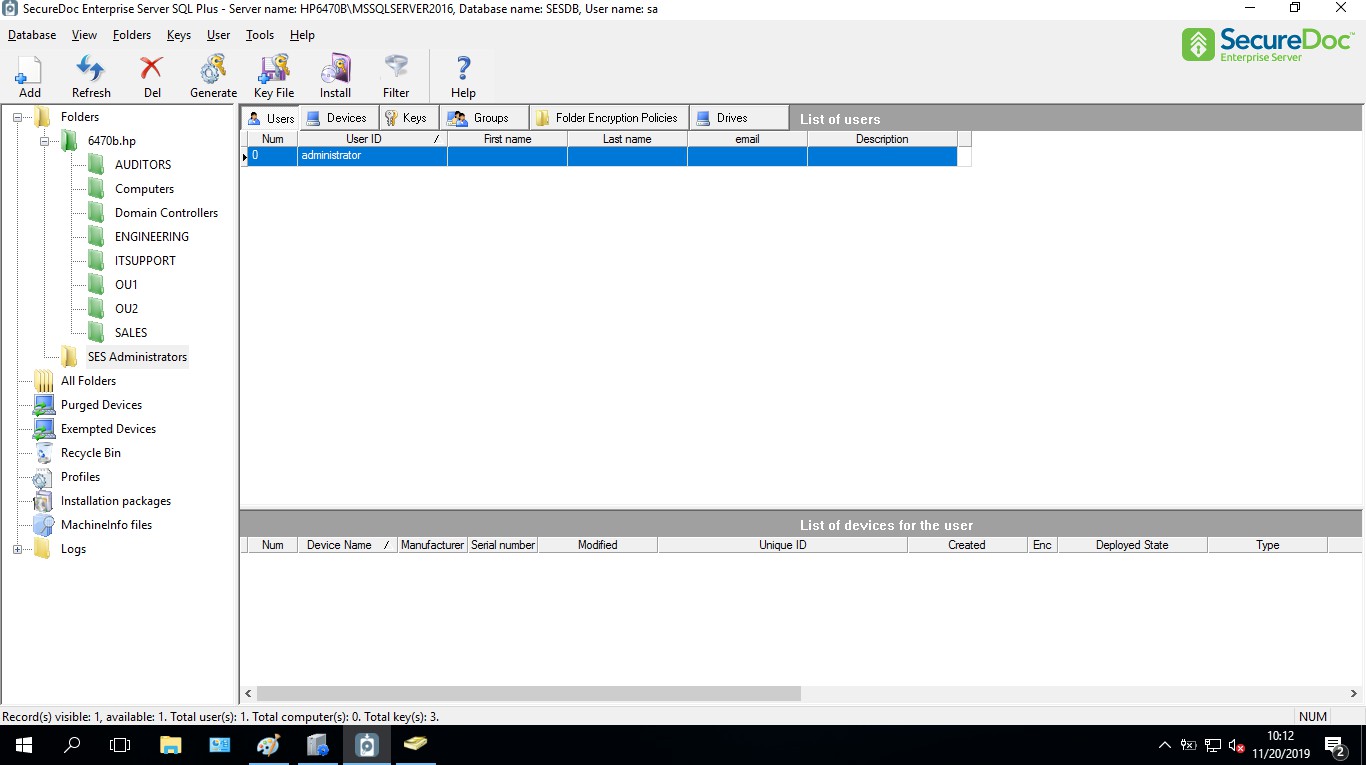
Console Components
The navigation pane (left side of the screen) is described below. The bottom of the information pane (right side of the screen) displays the total number of items of the selected type (for example, if the Groups tab is selected, the number of groups). If the alert option has been set (see “Other Options” on page 83), an alert appears in this area if a device has not communicated with the server for the specified number of days.
Adding, Modifying or Deleting Users, Devices, or Keys
This document explains how to add users, devices, and keys to the SES database. To modify any item, right-click on it and choose Modify from the pop-up menu. To delete any item, right-click on it and choose Delete from the pop-up menu, or press the Delet e key. Deleted users, client devices, and keys are moved to the Recycle Bin.
Navigation Pane Areas
Area | Description |
Folders | Contains information about users, client devices, keys, SecureDoc File Encryption profiles, and SEDs, organized into folders and groups (for more on folders and groups, see “Using Folders to Organize User Information and Share Keys” on page 44). Information pane shows information for the selected folder. |
Area | Description |
Folders shown in green are synchronized with Active Dir- ectory (see “Importing and Synchronizing User Records with Active Directory ” on page 101). | |
All Folders | Information pane shows all users, client devices, protected media, keys, and groups, regardless of which folder they are stored in. |
Purged Devices | Contains devices that have not communicated with SES for a configurable period of time: see “Purging and Restoring Devices” on page 452. |
Exempted Devices | The Exempted Devices folder contains any devices that have been moved to the Exempted Folder. Devices can appear in this folder either because they have failed to com- municate for the number of communication cycles defined in their Profile's communication settings, or in the case of CloudVM devices they are devices that have breached any of the settings defined (e.g. a CloudVM client has spawned too many clones, or has been started in a foreign Region, or with an IP address that is outside the permitted range). |
Recycle Bin | Contains users, devices, or keys that were deleted from SES. You can restore items deleted by accident, or per- manently delete them. Because of the risks of accidentally removing needed items from the Recycle Bin, you are prompted twice to confirm any deletions from the Recycle Bin. An option is available to automatically flush the Recycle Bin on existing SES: see "Other Options" on page 83 page 52. |
Profiles | Contains Device Profiles (used to apply security controls to indi- vidual client devices) for the different types of devices) under SES control. See the section entitled: Loading MachineInfo Files into SES |
Installation Packages | Contains installation packages (used in deploying SecureDoc). |
MachineInfo Files | Contains MachineInfo files, which contain information gathered by the installation package for client devices not connected via LAN or WAN. MachineInfo files are imported into SES. |
Audit Log | Use to view the audit log that tracks actions of all com- ponents of the SES environment, including client devices, SDConnex, AD Sync, etc. For details, see “Using the Audit Log” |
SES Administrator Manual
v9.2 SR1
Area | Description |
SFE Log | The SFE audit log records all the SecureDoc File Encryption- related activities in the SES Console as well as in the SESWeb. |
RME Log | If this feature is enabled the log contains the log file that tracks removable media functions for removable media under full disk encryption. For details, see “Using the Remov- able Media Log ” on page 459. |
Interpreting Data
For information on the icons and symbols used in the console interface, choose Help >> Legend.
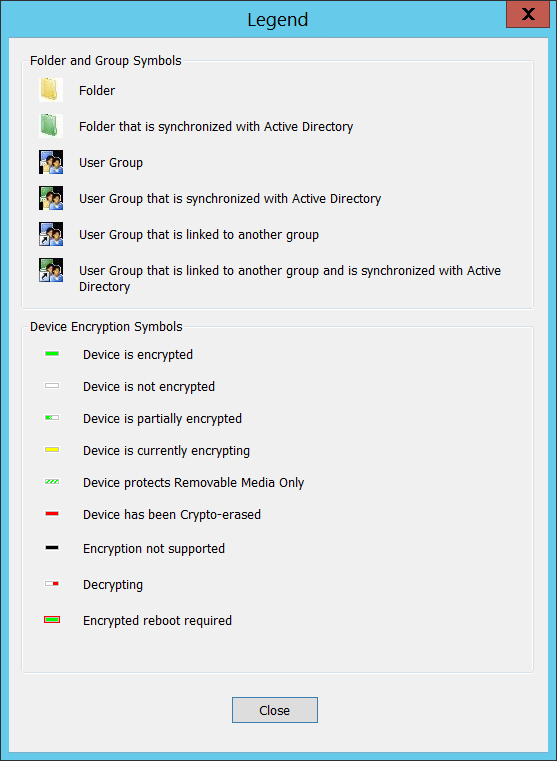
Importing and Synchronizing User Records with Active Directory
Overview
SES’s integration with Active Directory imports AD information into the SES database and keeps it synchronized as AD is updated.
Note: Although it is possible to create or modify users, devices, and groups in the SES Console and SES for Web Console, such changes will not be synchronized back to AD. If an AD entity is manually adjusted in one of the consoles, those changes will be over-written at the next synchronization.
Synchronization takes two forms:
partial, where only the changes to the synchronized items since the last synchronization of the domain are picked up
full, where all specified objects are re-imported, capturing all changes including deletions.
Note: Password changes made in AD are not synchronized to SES.
The following SES components are involved:
SES General Options, which set global settings for what is to be imported (although these are read each time full synchronization is done, it is recommended that you set them before using AD Configuration the first time): see “Setting up Active Directory-Related Global Options” on page 102
the AD Configuration utility, used to select the objects to be imported from Active Directory, mapping them to specific tables and fields in the SES database: see “Setting up the AD Configuration Utility” on page 105.
the AD Sync service, which keep data synchronized
the AD Sync Configuration Console, where AD Sync is configured and monitored: see
“ADSync results in SES Console” on page 110
Setting up Active Directory-Related Global Options
In the SES Management Console, choose Tools >> Options.
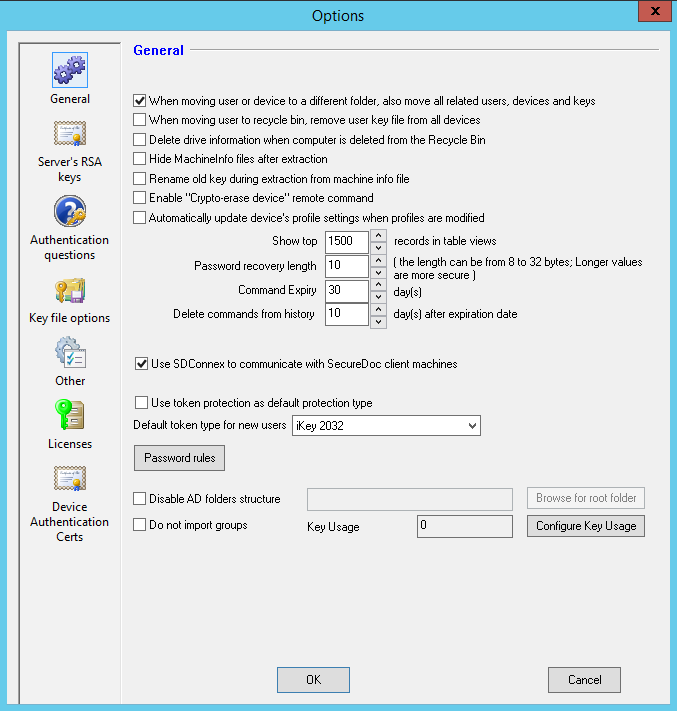
Although the majority of customers find it valuable to import their Active Directory information in the form (Organization units full of users) to become Folders full of Users in SecureDoc, it is possible to not import such structures from AD, and instead only import Users. In such a case, the following options should be understood and utilized, if desired.
Option | Description |
Disable AD folders structure | Check to have all users and groups imported from Active Directory placed in the same folder, rather than using the Active Directory folder structure, regardless of your choices in AD Configuration. Click Browse for root folder and choose the folder to be used for imported users and groups. |
Option | Description |
Choosing to not import the AD folder structure (through the use of this option) can be useful in the scenario where your Active Directory is not struc- tured in a way that will help organize your access to SecureDoc-protected Devices and Users. In that case, you may fine it more valuable to disable the AD folders structure, import the device and users into a single folder, then create your own folder structure and move users and devices into that struc- ture for easier management. | |
Do not import groups | Check to not import or synchronize Active Dir- ect- ory groups. These groups can be used for PBConnex: see “Using Pre-Boot Connex (PBConnex)”. Note: The use of Active Directory-derived groups can play a valuable role in managing access to devices through PBConnex, access to encryption keys, and for other purposes. |
Configure Key Usage | Click to be able to choose which key usage (cer- tificate purpose) should be considered for importing certificates from Active Directory. Leave at the default value of digitalSignature (0) to have all types of certificates imported. Choose other values to import specific cer- tificates only, for example only ones that have userSMIMECertificate values. |
Click OK.
Note: When new AD Sections (e.g. OUs, other structures) are being added to the definition of what to import from active directory, it is important to restart the ADSync service after changes have been so that the ADSync service will read and utilize the altered definition list. Otherwise, ADSync will continue to synchronize only the objects in the definition list as it was when the service started. ADSync only reloads its configuration definition list when the service starts or is restarted.
AD Data Synchronization Default Behavior
Default Mapping
AD Configuration, by default, will map only the following objects:
organizational unit (mapped to SES folders)
group (mapped to SES groups)
built-in domain (mapped to SES folders)
Default Configuration
By default, synchronization occurs as follows:
partial synchronization every hour (if errors occur during this process, an attempt is made to repeat it every 20 minutes)
full synchronization whenever the AD Sync service begins
By default, log files are rolled over at midnight or when they reach one million messages. Only the past 30 log files will be retained.
By default, four AD Sync service workers are configured, with only one scheduled to run and scheduled to sleep every 5 seconds.
To change any of these settings, modify the configuration file (see “Changing Default Configuration” on page 115).
Certificate Use
If users have more than one certificate, AD Configuration chooses the first certificate that meets the following criteria:
has the most recent “issue date” (creation date)
has not expired
has appropriate key usage (if specified in SES options) — see “General Options” on page 56.
If such a certificate is found and can be used by SecureDoc, it is used. If not, the user is not assigned a certificate.
Note: The AD Sync service can import from Active Directory DER-encoded X.509 certificates.These are stored in an attribute as separate values, or in the content of a PKCS7 envelope.
Setting up the AD Configuration Utility
Getting Started
The AD Sync service is configured with the SecureDoc Service Configuration console.
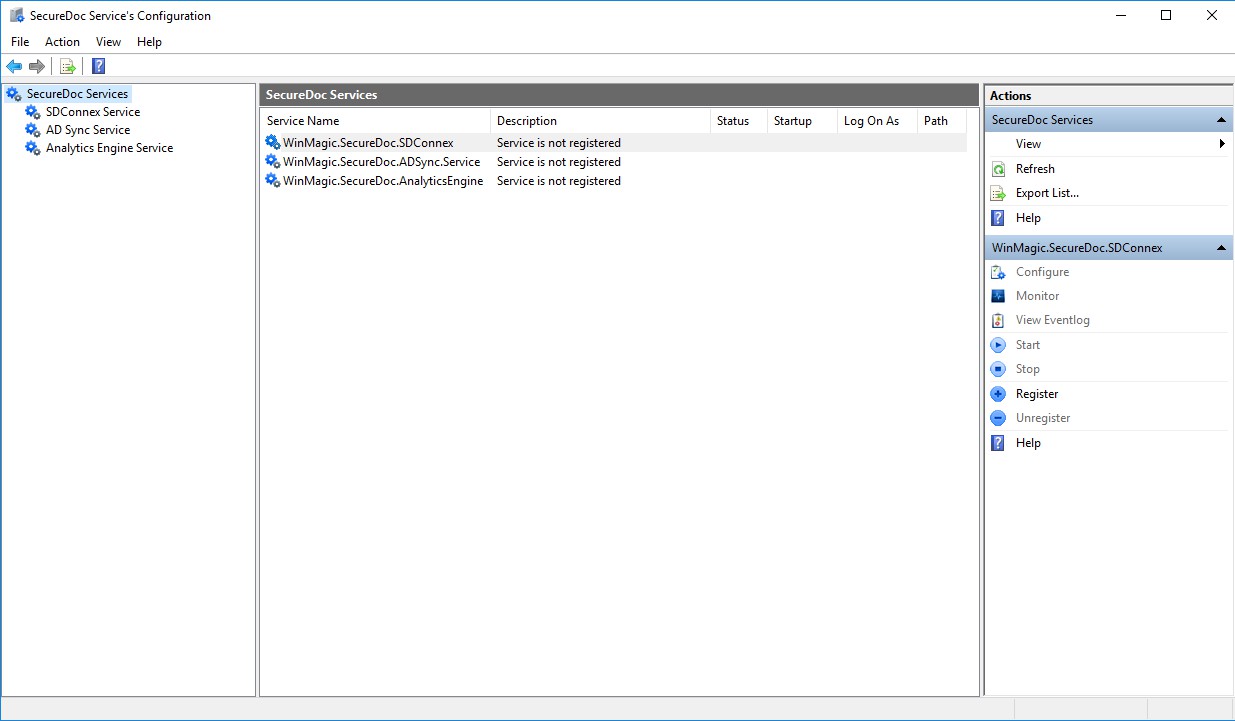 From the Start menu choose SecureDoc Enterprise Server >> SecureDoc Services Configuration.
Click AD Sync Service (in the left pane). The AD Sync Service Register View screen appears.
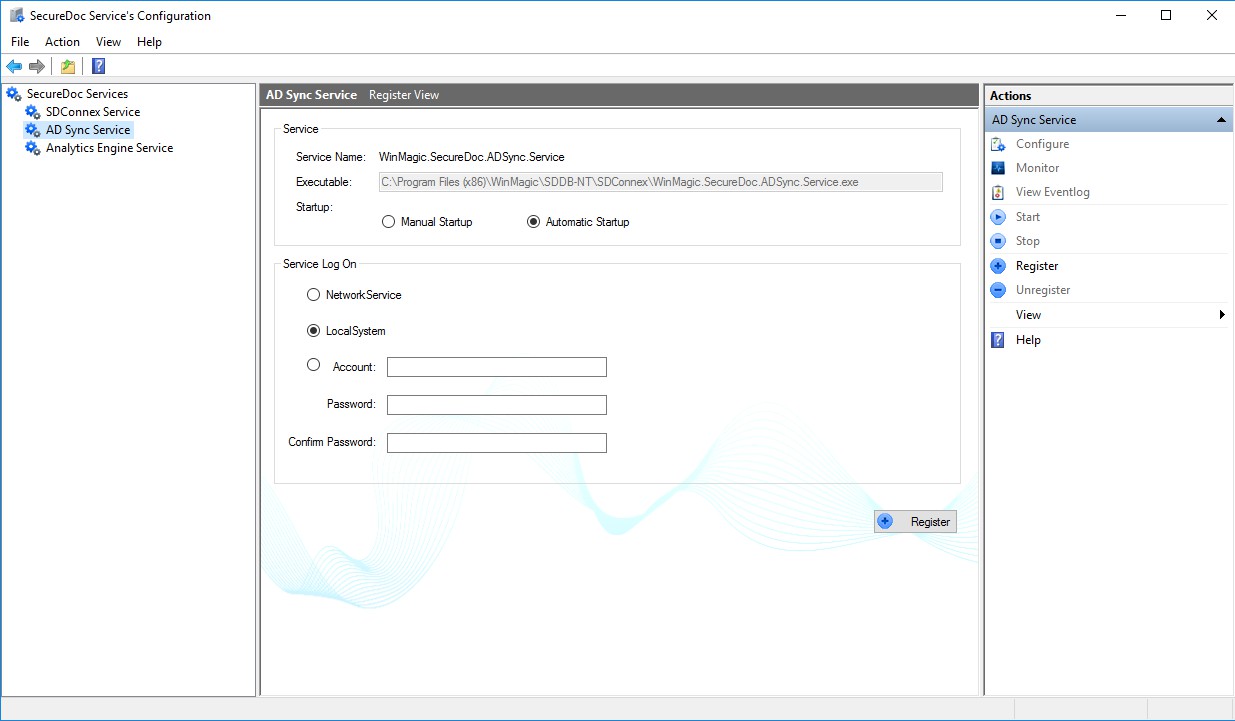
Choose whether you want the service started automatically (when the server starts) or manually. Automatic Startup is recommended.
Service Log on. This set of radio buttons determines how the SDConnex Service will run, and under which security account. Choose whether you want the service to log on to your network service or local system. Consult your Microsoft documentation for clarification of how these accounts work, and what settings might be required to use them, particularly where your Database engine is not running on the same server as ADSYnc, in order to determine the appropriate setting for your environment.
Alternatively, enter an account name and password that has access to the localservice or network service. This may be the preferred method in Domain implementations,, and is usually recommended by WinMagic since it allows for the setup of a Domain Service Account that can be provided the needed rights within SQLServer, and which can be set with a complex, never- expiring password so the service will always start when the server starts (if start up is automatic).
Click Register. The AD Sync Service screen changes to show two configuration tabs.
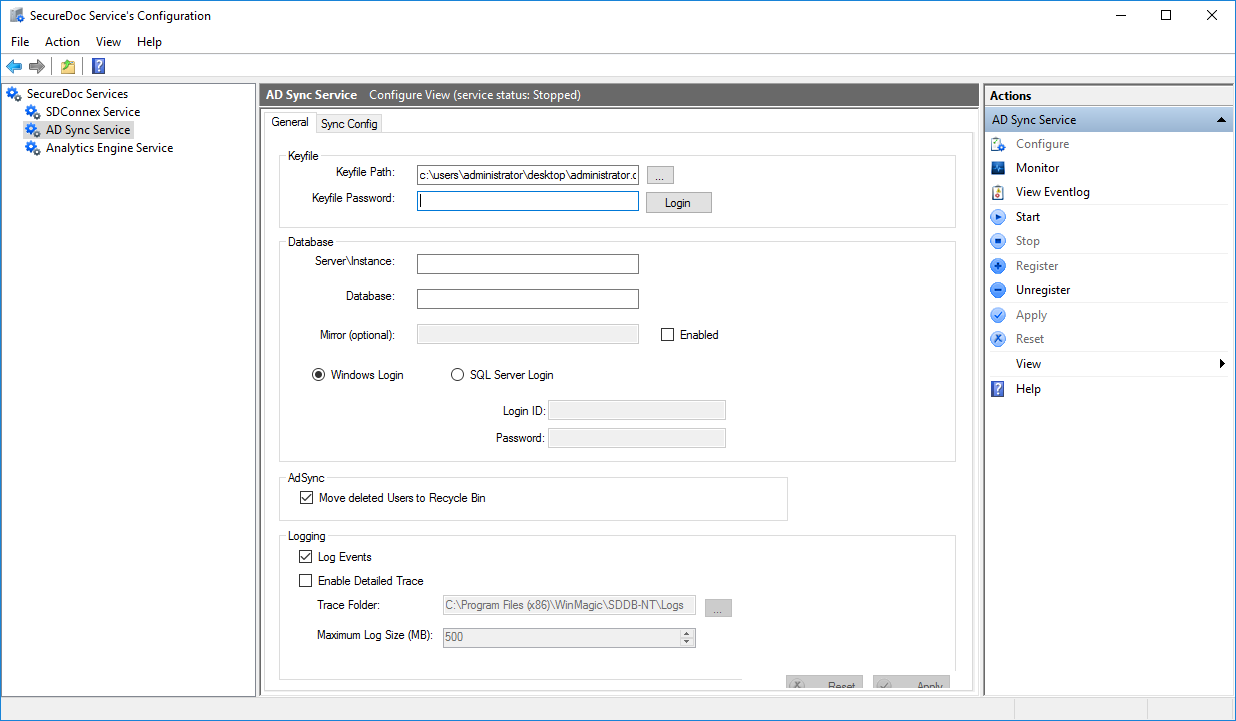
Complete the SecureDoc Services Configuration tab.
Field | How to Complete |
Keyfile Path Keyfile Password | Specify the keyfile and password to be used by AD Sync for accessing the SES database. Note: Although all Active Directory objects are shown in the tree, the SES Console is only able to show Organization Units, Groups and Users; However, the SESWeb console shows imported devices within the Compliance Reporting Management tool section. |
Server\Instance | Specify the name of the SQL server. If using either Microsoft SQL Server Express edition, or your SQL Server is configured to use named instances, you will need to add a backslash \ followed by the instance name - whoever configured your SQL Server (e.g. your DBA) may need to provide this to you. SQL Server Express edition uses a default instance named SQLEXPRESS. |
Field | How to Complete |
Database | Specify the name of the SES database created during installation. |
Mirror (optional) | If using database mirroring, click the "Enabled" button to make the mirror definition field accessible. Once accessible, enter the name of the mirrored database. |
Windows Login | Check this option to require the database to use Windows authentication (it will use the account under which the Service is registered -see the pre- vious page). Clear this option touse SQL authen- tication. |
SQL Server Login | Check this option to use SQL authentication. |
LoginID & Password | If using SQL authentication, specify the user name and password for the SQL server. |
ADSync Move deleted Users to Recycle Bin | Check this option to move the deleted users to recycle bin. Check this option to move into the Recycle Bin any user records that have been deleted by the Domain. Any such AD-deleted user records will be moved into the Recycle Bin at the next ADSync syn- chronization (either partial or full synchronization). |
Log Events | Check to generate events in the System Applic- ation Log. |
Enable Detailed Trace | Check to log messages for debugging purpose. The information is saved in the specified file. |
Click Login, then click the Sync Config tab. This tab shows, on the left, an expandable tree structure of the servers (domains) and objects in the AD structure to which you have connected. On the right it shows the attributes of the currently selected object. When first opened, it shows the contents of the current forest, that is, the forest to which the machine you are logged on belongs.
Note: Although all Active Directory objects are shown in the tree, the SES Console is only able to show Organization Units, Groups and Users; However, the SESWeb console shows imported devices within the Compliance Reporting Management tool section.
Choosing Items to Be Imported
To add a new domain to the tree, right-click on Root of Tree View and choose Add Domain. The Add Domain screen appears.
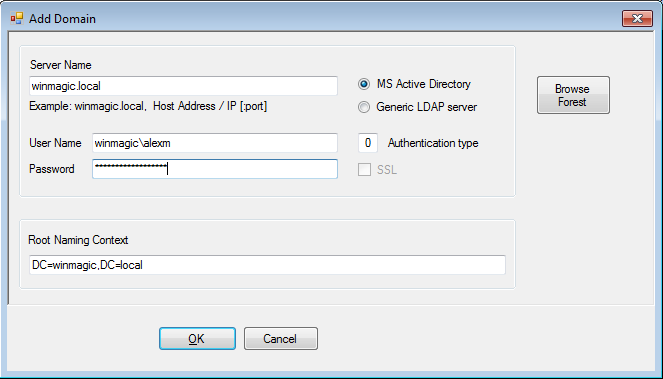
If AD Sync is running on the same MS network as AD, click Browse Forest and choose the target domain from the tree, then click OK.
The Server Name and Root Naming Context will be automatically populated.
Select whether the server is MS Active Directory or Generic LDAP server.
Note: Due to issues in this and some prior versions regarding support for LDAP, in V9.0SR1 the Generic LDAP Server option has been disabled and customers can only choose MS Active Directory. This has been done to prevent customers attempting to configure LDAP when such configuration would be problematic.
Field | How to Complete |
Server Name | Specify the DNS name or IP of the server host- ing AD. |
User Name Password | Specify the user domain name an password to authenticate to AD. |
Authentication type | Choose the appropriate type: 0 = Negotiate 1 = Anonymous 2 = Basic 3 = Digest 4 = Kerberos |
Root Naming Context | Enter the fully qualified name of the top entry in the AD structure (the entry point for the search). |
Click OK. Once successfully registered, expand the tree to browse the domain. (To connect and expand a previously added domain, click on it and authenticate.)
Select the entries to be imported/synchronized. Click any object in the domain to see its properties on the right side of the screen. Checking the box adjacent to an object indicates that the object, and all relevant objects under it, should be imported and synchronized. To de-select an object, expand the tree and clear the box for that object.
Right-click on a domain and choose Parameter Settings.
A new screen appears, showing server parameters (which cannot be changed) in the top part of the screen. To change any of these parameters for a domain, copy and paste the parameter to the bottom part of the screen and change the value appropriately. These settings affect all imported objects in the domain. For details on parameters, see “Domain Parameter Settings” on page 111. If it is necessary to synchronize information from several Active Directories, define each of the additional Active Directories as follows:
Right-click on Root of Tree View.
From the pop-up menu that will appear, click on the option entitled "Add domain".
In the Add Domain panel that will appear, add the information about the domain.
NOTE: It is not possible to use the Browse Forest button for second or subsequent Domains - you will need to add the Server Name, User Name, Password and Root Naming Context information manually. Once you click OK, the additional domain will appear below the existing domain(s), and you can expand it to select the entries to be imported and synchronized as you had done in step 6, above.
Forcing Full Synchronization (Optional)
To force synchronization, do one of the following:
to synchronize all domains, click the Full Synch button
to synchronize the objects of a specific domain, right-click on the name of the domain and choose Full Domain Synchronization
Full synchronization will begin the next time the AD Sync service begins.
To force synchronization immediately, stop then restart the ADSync service.
Removing Items From Being Imported
Removing items from the tree does not affect AD: these are simply removed from the SES database at the next full synchronization.
To remove items:
to remove all domains and objects, right-click on the Root of Tree View (top part of the tree) and choose Discard Forests
to remove a domain and all its objects, right-click on the domain name and choose
Discard Domain
In all cases, you are prompted to confirm the removal.
Saving Your Changes
To save your configuration settings, click Save Sync.
ADSync results in SES Console
When AD information has been imported, the results appear in the SES Management Console.
Monitoring AD Configuration/AD Sync Service
Click the Monitor action to monitor the progress of the AD Sync service.
Note that “active” threads are the AD Sync Service Workers currently running (see “Service Worker Settings” on page 118).
Domain Parameter Settings
LDAP Attributes Parameters
This set of parameters defines various LDAP attribute names used by the service to import user and group information.
Name | Type | Default | Description |
adsync.ldap.attr.name | String | 'name' | Mapped to SES group name. |
adsync.ldap.attr.guid | String | 'objectGUID' | Mapped to SES user- /group GUID. |
adsync.ldap.attr.sid | String | objectSID | Mapped to SES user- /group SID. |
adsync.ldap.attr.description | String | 'description' | Mapped to SES group description. |
adsync.ldap.attr.member | String | 'member' | Used to obtain group members. |
adsync.ldap.attr.deleted | String | Used to determine if a user- /group is deleted from dir- ectory. | |
adsync.ldap.attr.createtime | String | 'whenCreated' | Mapped to SES user- /group cre- ate time. |
adsync.ldap.attr.modifytime | String | 'whenChanged' | Mapped to SES user- /group |
Name | Type | Default | Description |
modify time. | |||
adsync.ldap.attr.deletetime | String | ‘whenDeleted' | Mapped to SES user- /group delete time. |
adsync.ldap.attr.user.id | String | 'sAMAccountName' | Mapped to SES user id. |
adsync.ldap.attr.first.name | String | 'givenName' | Mapped to SES user first name. |
adsync.ldap.attr.last.name | String | 'sn' | Mapped to SES user last name. |
adsync.ldap.attr.email | String | 'mail' | Mapped to SES user email. |
adsync.ldap.attr.phone | String | 'homePhone' | Mapped to SES user phone num- ber. |
adsync.ldap.attr.certificate | String | 'userCertificate' | Mapped to SES user cer- tificate. |
adsyn.ldap.attr.cl.change.type | changeType | Descriptors of the changes made in the Directory. Used to select changes for download. | |
adsyn.ldap.attr.cl.change.time | changeType | Descriptors of the changes made in the Directory. Used to select changes for |
Name | Type | Default | Description |
download. | |||
adsyn- .ldap.attr.cl.change.number | changeNumber | Descriptors of the changes made in the Directory. Used to select changes for download. | |
adsyn.ldap.attr.cl.target.dn | targetDN | Object Distin- guished Name | |
adsyn.ldap.attr.cl.target.guid | targetUniqueld | Object UUID | |
adsyn.ldap.filter.cl | (objectClass=*) | Generic search filter | |
adsyn- .ldap.filter.cl.deleted.entries | (&(objectClass- s=changeLogEntry) (changeType=delete)) | Filter for deleted objects | |
adsyn- c.ldap.filter.cl.modified.entries | (&(objectClass- s=changeLogEntry) (changeType=modify)) | Filter for modified objects | |
adsync.ldap.filter.cl.all.entries | Fiter for all changes |
LDAP Search Parameters
This set of parameters defines various values used to perform LDAP searches.
Name | Type | Default | Description |
adsync.ldap.attr.account.control | User Account Control | ||
adsync.ldap.filter.user | String LDAP search filter used to find users in dir- ectory. | ||
adsync.ldap.filter.computer | String | '(&(objectClass=user)(| | |
Name | Type | Default | Description |
(objectCategory=person) (isDeleted=TRUE)))' | |||
adsync.ldap.filter.group | String LDAP search filter used to find groups in directory. | ||
adsync.ldap.connection.timeout | Integer | 2 | LDAP server connection timeout in seconds. |
adsync.ldap.search.timeout | Integer | 3600 | LDAP server search timeout in seconds. |
Integer | 3 | LDAP protocol version. | |
Database Parameters
This set of parameters defines various values used to perform database queries.
Service Parameters
This set of parameters defines the behavior of the service when importing entries from directory.
Name | Type | Default | Description |
adsync.service.append.domain | Integer | 0 | Indicates whether to append the domain name to the user name when creating SES user id or just use the user name as is. Any non-zero value will set this flag to True. |
Additional Service Parameters
For most customers, the NETBIOS name will typically be the same as the domain prefix (e.g. if Domain name=Domain1.name.local, then NetBIOS name=Domain1). However some customers may utilize a dif- ferent NETBIOS name (e.g. name=Domain1.name.local, but NetBIOS name=americas) which can cause difficulties in user import through ADSync if not handled through the addition of an ADSync setting defined here:
Name | Type | Default | Description |
adsync.service.domain.netbios.name | Integer | 0 | If set to 1, this option indicates that the NetBIOS name differs from the domain name prefix, and so will be used when ADSync imports User information from AD. |
NOTE: During ADSync configuration, administrators may see a reminder phrased something like this:
REMINDER: Format is NetBIOSname\user. NetBIOS name is usually the same as the domain name prefix. (e.g. if Domain name=Domain1.name.local, then NetBIOS name=Domain1).
If NetBIOS name is different: Use ADSync Configuration tool. a) Right-click on domain; b) Open Para- meter Settings; c) Set the "adsync.service.domain.netbios.name" parameter to 1.
NOTE: This is covered in some additional detail in Knowledge Base Article number 1921.
Changing Default Configuration
To change default configuration values, edit the WinMagic.SecureDoc.ADSync.Service.exe.config file (located in the WinMagic installation folder).
Synchronization Settings
Change the values of one or all of the parameters in the <appSettings> section.
<appSettings>
<add key="settingsCache" value="5"/>
<add key="eventTrackingTime" value="20"/>
<add key="defaultADSyncSchedule" value="60"/>
<scheduleFullSyncPeriod="1"/> scheduleFullSyncHour="3"/>
<add key="defaultADSyncOnExceptionSchedule" value="20" /> recreateAdSyncPerfMon="false"/> MoveDeletedUsersToRecycleBin="true"/>
</appSettings>
Parameter | Description |
settingsCache | Frequency (in minutes) with which the database Settings |
Parameter | Description |
table used to store con- figuration values should be re- read. Setting this value to 0 (zero) forces the application to never expire the settings cache. This value (in minutes) defines the interval between attempts to re- read the database Settings table. Setting this value to 0 (zero) will force the application to never expire the settings cache. | |
eventTrackingTime | Frequency (in minutes) with which a repeatable critical error is logged to the logging tool and the Windows Event Log. This avoids logging unne- cessary repeatable errors that can occur multiple times in a very short period of time (50+ per second), for example, try- ing to establish a database con- nection when it's down or not connected. This value (in minutes) defines the interval between attempts to log a repeatable AD Sync critical error to the Windows Event Log. This is to avoid logging unnecessary repeatable errors that can occur multiple times in a very short period of time (i.e. 50+ per second). An example of such a repeatable error could ocur if ADSync is trying to establish a data- base connection when the data- base is down or unavailable. |
defaultADSyncSchedule | Frequency (in minutes) with which partial synchronization should occur. This value (in minutes) defines the interval between AD resyn- |
Parameter | Description |
chronization attempts. This value should not be less than 1. This value only takes effect if there exists no matching value in the database Settings table. | |
defaultADSyncForceFullSchedule | Frequency (in days) with which full synchronization should occur. This value (in days) defines the schedule interval for FORCED AD synchronizations. This value should not be less than 1. This value only takes affect effect if there exists , no matching value in the database Settings table. |
defaultADSyncOnExceptionSchedule | Frequency with which, if a par- tial or full synchronization fails, the synchronization should be retried. This value (in minutes) defines the interval duration before an AD resynchronization should be attempted, if a previous attemp- ted had failed due to an unex- pected error. This value only takes affect effect if there exists no matching value in the database Settings table. |
recreateAdSyncPerfMon="false" | When set to "true", this option will cause ADSync to reset its performance monitor counters to zero and restart tracking per- formance anew each time the ADSync service is started. If set to "false" (the default), ADSync will continue using the performance monitor counters as they had been, providing a longer-term sense of per- formance. |
Service Worker Settings
<rsSettings>
<workManager applicationName="WinMagic.SecureDoc.ADSync.Service" waitOnTerminateThread="10000" >
<worker mode="on" name="ADSync.Service.1" assembly="WinMagic.SecureDoc.ADSync.ServiceWorker" type="WinMagic.SecureDoc.ADSync.ServiceWorker.ADSyncWorker" workSleep="5000" /
<worker mode="off" name="ADSync.Service.2" assembly="WinMagic.SecureDoc.ADSync.ServiceWorker" type="WinMagic.SecureDoc.ADSync.ServiceWorker.ADSyncWorker" workSleep="5000" /
<worker mode="off" name="ADSync.Service.3" assembly="WinMagic.SecureDoc.ADSync.ServiceWorker" type="WinMagic.SecureDoc.ADSync.ServiceWorker.ADSyncWorker" workSleep="5000" /
<worker mode="off" name="ADSync.Service.4" assembly="WinMagic.SecureDoc.ADSync.ServiceWorker" type="WinMagic.SecureDoc.ADSync.ServiceWorker.ADSyncWorker" workSleep="5000" /
</workManager>
</rsSettings>
Use to determine how many AD Synchronization Service Workers are scheduled to run. Each worker is defined in its own node: in the example above, four workers have been configured.
The worker mode property indicates whether the worker is running (“on”) or not. As a best practice, you should have active no more than 2 service worker threads per processor.
The workSleep property denotes, in milliseconds, the sleep cycle before the WorkManager reinitiates the execution of the worker. Recommended to retain at the default value (5000 = 5 seconds).
Using Pre-Boot Connex (PBConnex)
About PBConnex
PBConnex allows user credentials to be authenticated against SES and AD at SecureDoc's Pre- Boot, before the operating system loads, either from a connected device or through a wireless connection (using supported wireless cards). Multiple users can have access to multiple devices through their group and folder membership.
NOTE: Only devices that have a SecureDoc Pre-Boot stage can make use of PBConnex. Please bear in mind that since SecureDoc's Pre-Boot for Apple macOS devices (aka SDOTFV2) was removed from the product in SES V8.2SR1, there is no further PBConnex functionality for FileVault 2-protected devices installed with SecureDoc V8.2SR1 or subsequent versions, macOS devices installed with 8.2SR1 or later will not respond to any PBConnex-defined functionality. However, macOS devices running earlier ver- sions of SecureDoc for macOS will continue to work with PBConnex if so configured.
PBConnex can be combined with the AutoBoot feature. Implementing this for users requires the fol- lowing to be set:
the group needs to have the AutoBoot option enabled
the PBConnex AutoBoot option needs to be enabled for the SDConnex being used for the user's device to communicate with SES (set in the communication options of the installation package -see "Profile Communication Options" on page 137 for Windows packages, page 1 for Mac packages)
the selected SDConnex needs to be configured to support PBConnex AutoBoot (see "Registering and Configuring SDConnex Service" on page 345)
The AutoBoot feature either sends a temporary keyfile to the user's machine each time it boots, or the keyfile can be cached and used for subsequent authentication requests, with the user providing the pass- word to the keyfile. Caching is set up in the communication options of the installation package (see "Pro- file Communication Options" on page 137 ), When keys/assignments to device/groups change, a new preboot keyfile will be sent, with a new AutoBoot keyfile cache. Since AutoBoot keyfiles are created with a random password, in this circumstance the password may fail, but users can request that the AutoBoot keyfile be sent again in those circumstances.
About Groups, Folders, and PBConnex
Overview
Since devices actually perform the step of connecting to the SDConnex server where PBConnex network- brokered device access is being configured, either
Users need to be in the same group as the devices to which they are to be permitted access, or
the Users must be in a sub-group of the Device Group.
Devices can be
manually added to groups or
About Groups, Folders, and PBConnex
their membership in a group can be imported (in the same ways as Users, below), or
devices can be located in a folder that is associated with a group.
Users can become members of groups (or of sub-groups) in one of these ways:
•they are manually moved to a group
•their group membership was established in Active Directory and the Active Directory wassynchronized with SES (through ADSync).
Note the following: PBConnex network authentication and auto-boot functionality depends on thegroup containing Devices.
Users can be associated with device groups either by
•adding them to the Group, or
•by making a user group become a sub-group to the Device-containing group
Note: If a group of devices is a sub-group to a group of Users, the PBConnex settings in the UserGroup will have no effect for PBConnex authentication or auto-boot purposes.
Note: A simple rule of thumb to remember this is that it is the Device that is reaching out to PBConnex at Pre-Boot on behalf of the User.
An example will illustrate:
If PBConnex-driven Auto-Boot is required for a number of devices, those devices should be added into a Group and the PBConnex Auto-Boot Settings applied to that device-containing group.
So, if (say) one were to set the PBConnex Auto-Boot settings in a group that contains only Users, even though a device sub-group is added to it, that entire group structure will not Auto-Boot since the mas- ter group does not directly contain any devices. The Auto-boot settings of a User-Only or User super- group will not be used in either PBConnex Auto-Boot or PBConnex Network-brokered Authentication.
To correct this, make the User Group into a Sub-Group of the device group in question, and the devices would auto-boot correctly when they can reach the SDConnex server running PBConnex.
Similarly, if it is desirable that users be able to perform PBConnex-brokered authentication using their domain credentials, then the User Group containing those users should be a sub-group of the Device Group on which they wish to authenticate.
That the Device group should take the superior position in group relationships is made particularly clear when considering the use of PBConnex Auto-Boot:
In that scenario, there is no need at all for Users to be considered; Devices in a PBConnex Auto-Boot Group will communicate with PBConnex before a user enters any credentials. As soon as the device communicates, PBConnex will check the device’s Device group settings to determine if it is going to per- mit it to Auto-Boot.
The fact there may be a user present is of no consequence during PBConnex Auto-Boot - the user will not be asked to authenticate until the device Auto-Boots to the Windows Login screen.
More About Groups
In addition to the normal purpose of a group, for PBConnex purposes, group membership determines whether members of that group have or do not have access to the devices in, or associated with, that group.
For example, say that all members of the sales department can, in general, use any of the devices associated with that department. However, only the sales manager should have access to device X, which houses the sales tracking system. To handle this situation, you could have two groups:
one containing all members of the sales department and all devices in that department (either directly added or contained in a folder associated with the group), granting access to the devices for all those users
one containing all members except the sales manager and device X, denying access to that device for those users
Since “deny” is processed before “allow”, a user other than the sales manager will not gain access to device X.
Groups do not have a hierarchical relationship with each other. However, groups can be associated with other groups by being specified as a “sub-group” of another group.
Membership in a sub-group is the same as membership in a group.
Sub-groups inherit the properties of groups. For example, making Group A a sub-group of Group B means that all members of Group A have access to Group B’s keys. The group and sub-group remain separate entities, however, and are subject to change due to synchronization with Active Directory.
More About Folders
The allow/deny policy of a group is inherited for devices in folders associated with that group. However, it can be either inherited or blocked from devices in sub-folders. Using the example above, you could have:
one group containing all members of the sales department except for the sales manager
one group containing just the sales manager
one folder containing all but device X, with device X in a subfolder
You associate the first group and the folder, with an “allow” policy, but for the subfolder you do not inherit this policy, therefore denying access to that device to all members of the sales department. You associate the second group and the subfolder with device X and grant access to that device for that group (which has only a single member).
Group Properties
Group properties consist of:
the keys assigned to them (keys are shared with other related groups)
the privileges that determine the kinds of functions users can do with the devices in the group
whether or not AutoBoot is in effect for devices in this group (see “About Preboot Authentication (PBA)” on page 35 for details) — this remains distinct even if groups are related
Configuring PBConnex
whether users in the group are allowed or denied access to the devices in the group (either placed there directly or through association of their folder to the group) — if a group has neither allow or deny access defined, it has the access defined for the groups to which it is a sub-group; if those groups contain both “allow” and “deny” access, however, the “deny” access takes precedence
whether or not users in the group will, on first connection through PBConnex, have a local copy of the key stored on their machine (this will be used, if a wired or wireless network connection cannot be made, for PBA)
parent groups (the groups the group is related to)
FFE network folders (view only)
Note: Although groups specify privileges, users also gain privileges based on the settings in the key file created for them during deployment. Those privileges are combined with those in the group. For example, a user with admin rights in their key file will also have admin rights to all group devices they have access to, even if the group privileges grant only user rights.
Configuring PBConnex
Follow these steps to configure PBConnex:
Place users in groups manually (right-click on the user and choose Member of Groups, or right-click on the group and choose Add Users to the Group) or through Active Directory synchronization — see “Importing and Synchronizing User Records with Active Directory ” on page 101.
Set global options for PBConnex — see “Setting PBConnex Global Options” on page 122.
Deploy, to all relevant devices, a profile that grants the use of PBConnex on that device — see
“Profile Communication Options” on page 137.
Set up group PBConnex access policies — see “Setting PBConnex Access Policies (Group)” on page 124.
Add devices to groups either manually (right-click on the user and choose Member of Groups, or right-click on the group and choose Add Devices to the Group) or through association (see “Associating Devices (in Folders) with Groups” on page 124).
Note: Until groups are configured for PBConnex, users created through the deployment process will still be able to access their encrypted devices by using their local key.
Setting PBConnex Global Options
Choose Tools >> Preboot Network (PBConnex) >> PBConnex Global Options.
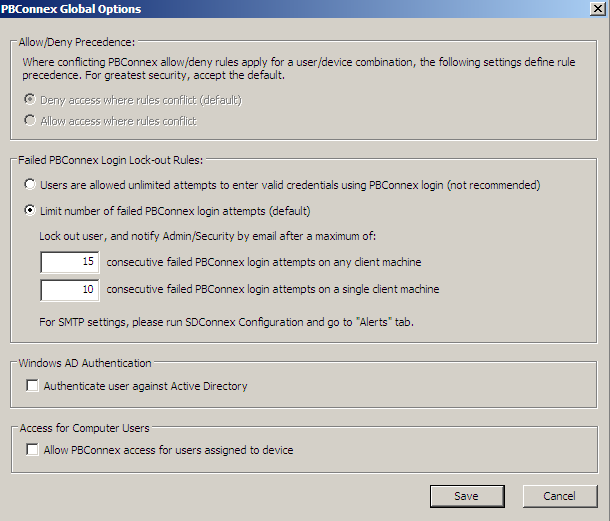
Option | Description |
Allow/Deny Pre- cedence | Choose how to handle allow/deny conflicts (for example, if a subgroup allows access when its parent group does not). |
Failed PBConnex Login Lock-out Rules | Set the number of consecutive failed login attempts that are allowed on any client device in the group, and that are allowed on a single client device. For example, you might allow five attempts on all devices, but only three on a single device. Once the limit has been reached, an alert is sent to administrators via SDConnex (see “Viewing the Event Log” on page 405). SDConnex can be configured to send an alert email when the limit has been reached: see “To access the SDConnex Management Console, choose Start >> SecureDoc Enterprise Server >> SecureDoc Services Configuration. The SDConnex Configuration screen appears.” on page 399. (Lim- its for attempts using the local key are set in the profile used for the device: see “Boot Configuration General Options” on page 232.) |
Windows AD Authentication | When this option is cleared, the user’s User- ID/Password will be checked only by SES. When this option is checked, the user’s User- ID/Password will be checked both by SES and Active Directory, that is, the user needs to be valid in the Win- dows domain as well as existing in the SES database. |
Allow PBConnex access | When this option is used, AutoBoot can be based on the user- |
Setting PBConnex Access Policies (Group)
Option | Description |
/device relationship rather than the group relationship. |
Setting PBConnex Access Policies (Group)
Open the group (double-click on the group name in the console or right-click and choose
Group Properties) and click PBConnex Access Policies.
Choose whether group users are allowed (Allow) or not allowed (Deny) access to devices in this group.
If you want the key file protecting the device to be stored on the client device (allowing conventional authentication, that is, authentication done locally, not using the network), check Save Key File to client machine.
Note: A user whose Active Directory account is locked cannot gain access to a device unless the Save Key File option is chosen.
Parent groups are listed on the Member of Groups tab of the group properties.
Sub-groups are listed on the bottom-right pane of the SES console as “Group members of the group”.
Note: Although it appears that you can set different access policies for sub-groups, in reality they inherit the policies of their parent group.
Associating Devices (in Folders) with Groups
Right-click on the folder containing the devices you want associated with the group (and, therefore, with the users in that group) and choose Member of Groups, then choose the groups to which the devices in the folder should be associated.
- or -
In the folder properties of a folder containing the devices you want associated with the group, click on Member of groups, click Add Group, and then choose the group to which the devices in the folder should be associated.
Checking PBConnex Access
To see which devices a user is allowed or denied access to, choose Tools >> Preboot Network (PBConnex) >> Check PBConnex Access >> By User and choose a user from the list, or right-click on the user record and choose Check PBConnex Access.
To see which users are allowed or denied access to specific devices, choose Tools >> Preboot Network (PBConnex) >> Check PBConnex Access >> By Device and choose a device from the list or right-click on a device record and choose Check PBConnex Access.
Resetting User Login
Once login limits (see “Setting PBConnex Global Options” on page 122) are reached, you need to reset them in order to allow users access to shared devices again.
Choose Tools >> Preboot Network (PBConnex) >> Reset User’s Failed Login and do one of the following:
To reset the failed login of a specific user on a specific client device, select a user and a client device and click Reset.
To reset the failed login of a specific user on all client devices in the groups, select a user and click Reset User.
To reset the failed login on all users and client devices in the groups, click Reset All User.
Deleting Groups
Deleting a group will not delete its users/devices, its sub-groups, or the users/devices in its sub-groups. What will be deleted is the relationship between the group and its contents. To delete a group, select it and press Delete, or right-click on it in the Groups tab and choose Delete Group.
Depending on which Device Category you chose, the available Device Profile Types available will be one Installation Packages for Windows
When SecureDoc server is upgraded to version 9.1 from previous ver- sions (6.5 or earlier)
Note: Starting from SecureDoc Enterprise Server V9.0 a new feature that permits tracking the deployedF state of endpoint devices installed with SecureDoc. This functionality did not exist for clients still running an older version of the client software (e.g. V6.5 or earlier). Since those earlier-version Installation Packages did not have settings that would have define the Deployed state of devices, any devices installed from previous-version installation packages will have a Deployed state of "Unknown". By editing the Deployment rules and saving the Installation Package, that will bring it up to Version 9.0 compatibility, and devices installed from it after the change will show their correct Deployment status.
Profiles | If the generic password option (General ->Advanced Options) is enabled in the older installations, then it will be changed to random password option. |
Installation Pack- age Settings | If the older installation packages (version 6.5 or earlier) have the Hide pre- boot credentials (silent deployment) option enabled, then
> Automatic owner identification in the new installation packages
installation packages Note: If the Hide pre-boot credentials (silent deployment) option is not enabled, then this will transform to Non- provisioning state (users will be prompted to confirm device ownership) in the new installation packages. |
If the older installation packages have the Default User ID option enabled, then this option will be upgraded to No Provisioning State with Manual iden- tification of the device owner option. Note: If the Default User ID feature is used in the older installations and if the SES Administrators want to delete this |
When SecureDoc Server is upgraded to V9.0SR2 from previous versions (including to V9.0)
When SecureDoc Server is upgraded to V9.0SR2 from previous versions (including to V9.0)
Testing Candidate Devices for Compatibility with SecureDoc Pre-Boot
In V9.0, WinMagic has introduced a new "SecureDoc Pre-Boot Compatibility Test" tool, which will tem- porarily install SecureDoc's Pre-Boot, interrogate the details of the computer and determine whether the device should be compatible with SecureDoc's Pre-Boot Authentication. Please see Appendix F for details on how to install and run the SecureDoc Pre-Boot Compatibility Test tool.
Overview of Steps For Creating Windows Installation Packages
Set up SES options (see “Setting SES Global Options” on page 56).
Create Create a device profile (see "About Device Profiles" on page 128).
Set installation package options (see "Configuring Installation Package Settings" on page 253).
Create installation package files (see "Creating Installation Package Files" on page 288).
Once you have completed this whole process once, thereafter any changes you make to the profile can be manually applied to a client device (by right-clicking on the device) or to an entire folder of devices (by right-clicking on the folder) and choosing Assign profile to devices.
Alternatively, you can have changed profiles automatically apply to those client devices that originally received them by using the Automatically update device's profile settings when profiles are modified option in the SES General Options (see “General Options” on page 56).
Note: Automatic profile updates using the last-mentioned SES General Option is convenient, but customers should be cautioned that in organizations with a lot of devices, it can cause mass profile updates to endpoint devices. SecureDoc has mitigated this network load by not permitting the SES server to notify client devices that such changes are pending, but rather it applies these changes to the devices when the client devices perform their next available network "touch point" with the SDConnex server.
Note: Recommendation: The ideal time to make profile changes that will affect a large number of devices is (if practical) to apply the change to the profile details in the SES Server at a point after the normal periods of high SES communication load (such as first thing in the morning as users log on to their computers for the first time). In this way, as client devices "touch base" with the SDConnex server, they will download and apply the profile changes in a more or less time-staggered way, and do it during a point in the work day where immediacy of communication with the SDConnex server is not as important as it is during the start of the working day.
About Device Profiles
A profile sets most of the parameters that will define the long-term behavior of the SecureDoc client, as well as some of the SecureDoc installation settings that you want performed on client devices. Once you have set up a profile, you associate it with installation package settings to have it used in the package sent to client devices. Unlike package settings, profile settings can be changed, and can be deployed to devices that had previously been installed with the SecureDoc client software and take effect, after installation has taken place.
The profile determines general aspects of how SecureDoc will behave and look on the client device, for example, what the Preboot Authentication (Boot Logon) screen looks like, what kind of communication is available between the client device and the SES server, and so on. You can create as many profiles as are necessary — for example, you might create one profile for stand-alone client devices and another for those on the network. Alternatively, you might use different profiles for different groups in your enterprise.
Each profile consists of the following groups of data:
General options, to specify how SecureDoc behaves on the client device — see "SecureDoc Profile General Options " on page 131
About Device Profiles
boot text and color options, to specify the appearance and content of Boot Logon program on the client device — see "Text, Color and Logo Options for Boot Logon (PBA)" on page 224
disk access control to limit or monitor access to encrypted or decrypted disks — see "Disk Access Control (SecureDoc Enterprise for Windows clients only)" on page 229
boot configuration options, to specify other options of the Boot Logon program on the client device — see "Boot Configuration Options " on page 231
port control options, to optionally specify which devices can be attached to a client device
— see "Port Control Options (SecureDoc for Enterprise for Windows Only)" on page 251
Note: In Version 8.2, WinMagic introduced into SES a pre-configured XML file called KnownConfigs.xml that contains "ideal" device type-specific settings for specific makes and models of computers, as a means of ensuring that customers always have the most up-to-date configuration settings where such settings are helpful in deploying SecureDoc to devices that have unusual or specific requirements. Such settings are helpful in deploying SecureDoc to devices that have unusual or specific requirements. the application of such an XML file, instances of devices encountering issues during the installation SecureDoc and subsequent initial encryption will be dramatically reduced.
Note: As new device types come into the market, Administrators can simply download the newest version of the override XML file and proceed with SecureDoc installation by including the updated XML file into their existing Installation Packages. The XML file will be automatically copied into each installation package from the "master" copy, which is stored in the same directory in SES (normally C:\Program Files\WinMagic\SDDB- NT\Binary Installation Files\WindowsPC) where the version's installation executables are stored (and from which they are copied into individual installation packages).If for some reason a customer decides not to use this file, it can simply be deleted from the package before deploying the package to endpoints.
To create a profile:
Click Profiles in the navigation pane.
Right-click on the information pane and choose Add profile. A Selection prompt screen will appear, as in the image below. Across the top can be seen 3 radio buttons which define Device Categories. The category options are: Endpoint (typically a hardware client type, such as a laptop or desktop); VDI, which is for a Virtualized Desktop environment such as XenDeskTop from Citrix, or VMWare Horizon 7; or CloudVM which is for a Public or Private Cloud-hosted Infrastructure-as-a-Service virtual device. Note that when you choose one of these Device Category radio buttons, the list of available Device Profile types will be filtered to show only those Profile Types that can be defined for that Device Category.
Select the desired Device Category radio button, then from the drop-down list, select the desired Device Profile type.
Click OK and the SecureDoc Profile screen appears.
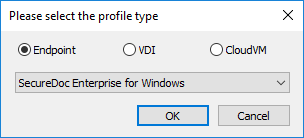
Depending on which Device Category you chose, the available Device Profile Types available will be one or more of:
Option | Description |
SecureDoc Enterprise for Windows | This option permits the Administrator to define the settings for a full Enterprise Windows client |
SecureDoc Enterprise for macOS | This option permits the Administrator to define the profile settings for managing FileVault 2 on devices running Apple's macOS operating system (or OS X as it was called in earlier versions). |
SecureDoc Enterprise for Linux | This option permits the Administrator to define the settings to manage SecureDoc's new client for Linux devices, which offers software-based encryp- tion (it does not rely on SEDs like SecureDoc for OSA below). The configuration of this new Linux cli- ent type is the same as the SecureDoc Enterprise for Linux CloudVM device type, but is intended for physical desktop/laptop devices running Linux. |
SecureDoc OSA | This option permits the Administrator to define the settings to manage SecureDoc's OS-Agnostic man- agement for Self-Encrypting Drives. This option can be used for Linux for other non-mainstream operating systems, such as FreeBSD, NetBSD, Solaris for Intel, etc, as well as for dual-boot com- puters where the user wishes to have a selection of operating systems installed. It was previously called "SecureDoc OSA for SEDs". |
Click the profile data buttons to define the profile:
General (SecureDoc) options — "Profile General Options " on "Profile General Options " on page 131
Boot text and color options — "Text, Color and Logo Options for Boot Logon (PBA)" on "Text, Color and Logo Options for Boot Logon (PBA)" on page 224
Port control options — see "Port Control Options (SecureDoc Enterprise for Windows clients only) on "Port Control Options (SecureDoc for Enterprise for Windows Only)" on page 251
Boot configuration options — see "Boot Configuration Options " on "Boot Configuration Options " on page 231
Disk access control — see "Disk Access Control (SecureDoc Enterprise for Windows clients only)" on "Disk Access Control (SecureDoc Enterprise for Windows clients only)" on page 229
SecureDoc Profile General Options
Profile General Options
Options in the General screen set the general parameters for SecureDoc behaviour on all the client devices that receive the installation package associated with this profile.
To access the tab, open the Profile screen (either as part of creating a profile or by double- clicking an existing profile) and click General options.
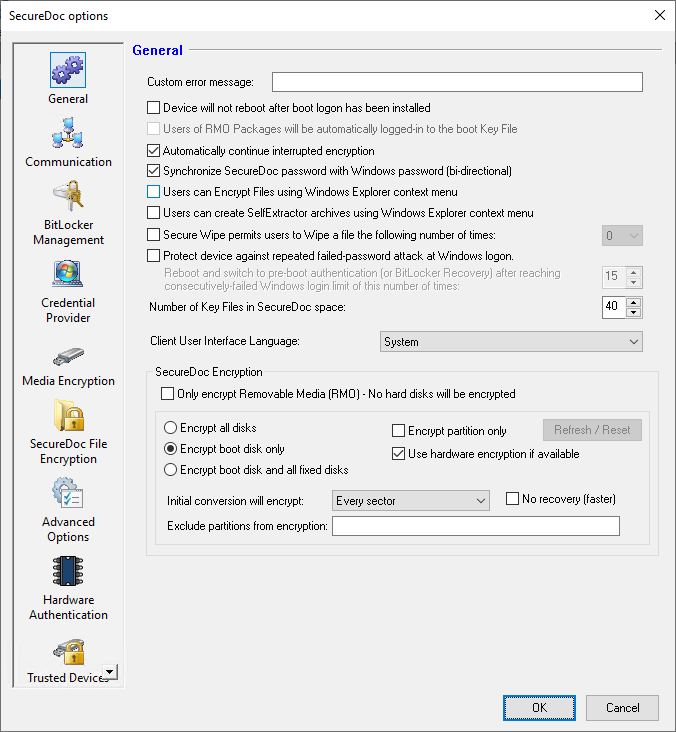
Option | Description |
Custom Error Message | The custom error message typically "wraps" low |
Option | Description |
(Enterprise Client Only) | level or operating system errors that may be brought to the surface indirectly through SecureDoc, but are often not SecureDoc-triggered errors. As an example, if logical or physical damage were detec- ted at the disk level during SecureDoc's attempt to write to disk, the operating system would trigger an error message relating to that problem. That error would be sent up to the requesting application (the SecureDoc Client) that initiated the original write to disk but SecureDoc did not, in fact, cause the error at the disk level and would not have been able to foresee and handle that kind of hardware-level problem. |
Device will not reboot after boot logon has been installed" (Enterprise Client only) (This option had been entitled "Disable reboot fol- lowing boot logon install- ation" in earlier versions. | By default, in SES environments, client devices do not reboot after Boot-Logon is installed (so encryp- tion can begin automatically). Clear this option to force a reboot. |
Users of RMO Packages will be automatically logged-in to the boot key file (Enter- prise Client only). (This option was previously called: "Allow to login the boot key file automatically (For RMO packages only)" in earlier versions of SES. | Used if the Removable Media Only option is chosen. If this option and the following option are enabled, users on the client device do not need to enter a password to use the SecureDoc interface, since they will not have to log on to Boot Logon and so will not know the appro- priate password. For this function to operate, the user must exist in the SES database with the Use account to enforce Auto Boot option enabled (see “Adding Administrative Users” on page 362) and must be added to the profile (see “Boot Configuration General Options” on page 127). |
Automatically continue interrupted encryption (Enterprise Client only) | Enabled by default: When enabled (checked) this will ensure that, in the event the device halts or encryption is interrupted (power failure or other machine halt scen- ario), initial encryption will resume automatically once the device has been restarted. |
Synchronize SecureDoc pass- word with Windows pass- word (bi-directional) | Check to have the user’s Windows password used, automatically, as the SecureDoc key file password. Changes to the password occur bi-directionally: changes to the Windows password automatically |
Option | Description |
apply to SecureDoc and changes to the SecureDoc password apply to Windows. Whether or not changed passwords return to SES depends on whether you have specified that the user’s password and self-help recovery answers are to be returned. Note: The user’s Windows password must not be blank. Optionally, also check Synchronize with match- ing Windows Accounts only to have password synchronization done only if the name of the Win- dows account is the same as the SecureDoc account name. | |
Users can Encrypt Files using Windows Explorer con- text menu (Enterprise Cli- ent only) (This option had been called "Enable Encrypt File option in Windows Explorer context menu") | Reserved for future use. |
Users can create SelfEx- tractor archives using Win- dows Explorer context menu. (Enterprise Client only) (This option had been called "Enable SelfExtractor option in Windows Explorer context menu" in previous versions of SES). | Allows users to create encrypted executable archives in order to share share files (and folders) from a fully encrypted disk with other users: see “Access to Encryp- ted Files (SelfExtractor)” on page 26. Self Extractor archives are encrypted executable files that, when executed, will self-expand their contents on a destination device once the archive recipient has entered the correct password. |
Automatically TPM-protect Password-protected Key Files if TPM suit- able/available. (Enterprise Client only) (This option was previously called " Use TPM chip, if available" in earlier ver- sions of SES). | Check to have key files automatically converted, without user intervention, to TPM protection. This is available only for password-protected key files and will be done only if the TPM chip is usable by SecureDoc (for example, is initialized with the Infineon software version 2.5). |
"Secure Wipe permits users to Wipe a file the | If selected, this option will add an option into the File Manager right-click context menu, permitting |
Option | Description |
following number of times" | the user to wipe a file from the disk by overwriting its contents the number of times specified in the drop-list to the right of this option, which becomes accessible only when this option is enabled. |
"Protect device against repeated failed-pass- word attack at Windows Logon" | If selected, this option enables the Administrator to fur- ther define, using the spinner control that will become accessible in the line below, how many failed-password attempts will be permitted, after which further attempts will be considered attacks. To the left of the spinner control is a brief narrative of what the device will do if it detects an attack, to wit: "Reboot and switch to pre-boot authentication (or BitLocker Recovery) after reaching consecutively failed Windows login limit of this number of times", followed by the spinner control to define the number of times. |
Number of key files in SecureDoc space (Enterprise Client Only) | By default, each client device can store a max- imum of 40 key files. Use this option to specify a different number for client machines receiving this package (minimum of 16, maximum of 200). |
Client User Interface Lan- guage (This option had been called "Language" in pre- vious versions of SES). | Choose the language to be used by default for the SecureDoc user interface deployed to computers using this profile. System" uses the language currently selec- ted for the computer and will automatically choose from the list shown below, or will default to English if the automatically-chosen language is not in the list below. |
SecureDoc Encryption (Enterprise Client only) | Check to use SecureDoc (software) encryption. The options are: Only encrypt Removable Media (RMO - no hard disks will be encrypted (This option had been called "Don't encrypt any hard disk (Removable Media Only)" in previous versions of SES).. Enable/check this option to enable protection for removable media only; the hard disk will not be encrypted. Check to not encrypt the hard disk, allowing removable media encryption only. Encrypt all disks – All drives, including any internal disks, external disks (e.g. USB-connected, eSATA-connected, Firewire, etc) will be encrypted automatically, either during initial encryption or subsequently. Encrypt boot disk only – Only the physical drive |
Option | Description |
from which the machine is booted will be encryp- ted (typically this will be the drive containing the C:\ partition). Encrypt boot disk and all fixed disks - All drives installed on the devices’s internal SATA or IDE controller will be encrypted automatically dur- ing initial encryption. Encrypt partition only – Defines that only non- excluded partitions will be encrypted automatically during initial encryption. See the "Do not encrypt partitions" option, where a list of partitions that are to be excluded from encryption can be defined. Use hardware encryption if available – This informs the SecureDoc Client Installer that if it detects a Self-Encrypting Drive (e.g. Opal or the older Seagate DriveTrust FDE.x Momentus drives) that drive will be automatically managed as a Self- Encrypting Drive, and will not be software-encryp- ted. NOTE: It is recommended that this option be enabled at all times. It will be ignored for non-SED drives, but leaving it enabled will ensure that no SED drive will inadvertently be software-encryp- ted. Do not encrypt partitions- This field permits the administrator to define partition identifiers that are not to be encrypted. Due to the vagaries of par- tition naming, partitions are identified ordinally, as P1, P2, P3, rather than as C:\, D:\, etc. The entries made here must be comma-separated, and must not include any spaces (e.g. P1,P2,P4). Every Sector: Choose this option to fully encrypt all sectors on the drive. This option is recom- mended for any device whose disk drive has not just been setup from new. Any disks that have had even nominal use before initial encryption is applied may have deleted sectors that contain sensitive information. Since deletion and reformat- ting do not wipe information, they only mark the sectors as available for re-use, such sensitive information could be un-deleted or forensically retrieved. Data Only (faster): Select this option if speed of initial encryption is of primary importance. With this option selected, only those sectors where data resides will be encrypted. (This option is recom- |
Profile Communication Options
Options in the Communication tab specify the communication available from client devices (those that receive the installation package built on this profile, or have this profile applied by the SES Administrator to replace a previously applied/installed profile), click General options, then click Communication.
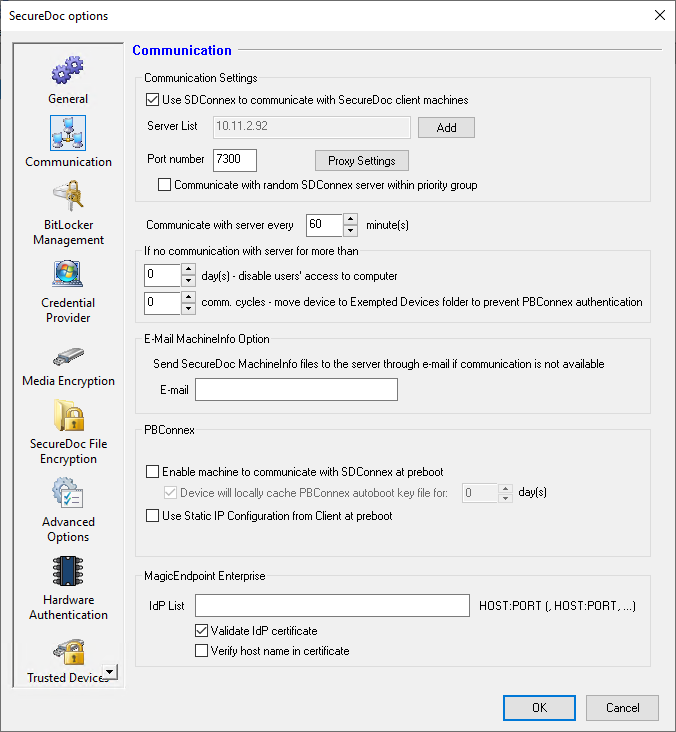
Option | Description |
Use SDConnex to com- municate with SecureDoc client machines (enabled | Use if client devices communicate with the SES server via a LAN or WAN. Specify the server’s IP address or network name |
Option | Description |
and port number. Proxy Settings Use this option to let the client devices connect to SDConnex (and thereby the SES server) through network data communication proxy server. You can either manually configure the proxy settings or use Internet properties. During initial SecureDoc installation, User/computer information will be returned to the SES Server via SDCon- nex communication on (one of) the SDConnex servers defined in this list (or to to an SDConnex server via a SecureDoc Gateway server if the device is communicating from outside the LAN). If more than one SDConnex server or SecureDoc Gateway server exists in the SES configuration, click Add. The SDConnex Address list panel shown below permits the SES Administrator to define a list of up to 16 SDCon- nex/Gateway servers through which client devices installed with this profile can communicate. To add a server or gateway (to the maximum of 16), enter its IP address or server name in the top (depending on which option is selected). For each server, if required set the override Port Number (if not the default), then set the priority it has for devices receiving this installation package: servers will be selected in priority order (starting with 1 as the highest priority). | |
Communicate with server every... | Specify how often the client devices should com- municate with the SES server. |
Selected number of days value, followed by "day(s) - disable users' access to computer | Enter a value to ensure protection in the case where client device do not remain connected to the server. If this option is set, after the specified time has elapsed since the user last logged in, all the user’s key files will become locked, at the next Boot Logon, until an Administrator logs in to an admin key file or until Challenge/Response password recovery is car- ried out (see “Using SES-Based (Challenge Response) Pass- word Recovery” on page 472). |
If no communication with server for more than | This GroupBox contains the following 2 settings relating to how devices should protect themselves against loss of communication with the SES Server. |
Selected number of minutes> comm. cycles - move device into Exempted Devices folder to prevent PBConnex authen- | In the second option, the Administrator can define the number of communication cycles (based on the com- munication cycle number of minutes defined above) that a device can be permitted to fail to communicate before |
Option | Description |
tication. | the SES Server will move the device into the Exempted Devices folder to prevent it from Auto-Booting. The objective of this option is to strengthen the security of unattended always-on endpoint devices (e.g. IOT devices, Automated Teller/Banking machines, kiosk devices, etc.) by moving non-communicating devices to a group that does not authorize PBConnex AutoBoot (or optionally PBConnex network-brokered User Authentic- ation). Any extended inability to "call home" to SDConnex can indicate that such a device might be under attack or at risk (e.g. during a period of non-communication) and so should not be permitted to auto-boot back into a working operating system following such a communication outage. This new-in-V8.5 feature is primarily oriented to cus- tomers that utilize SecureDoc to protect unattended always-on equipment that would normally auto-boot into Windows, but for which any sustained inability of the device to communicate to SDConnex is a serious concern which merits deeper investigation or remediation before the Administrator might move the device to a group that does permit network-brokered Auto-Boot. NOTE: Clicking the X button at the end of this option per- mits the Administrator to disable this feature by setting the number of cycles to zero, clearing any previously- selected Group (the Group will display ** Not selected **). |
E-Mail MachineInfo option (Enterprise Client Only) | Enter the e-mail address that should be used for communication of MachineInfo files (as email attach- ments) in the event that network connections are lost between SecureDoc client devices and the SES Server. Use this e-mail address exclusively for this purpose, to send a MachineInfo file from the SecureDoc client device where it originates to an email in-box. The SES Administrator will import those Machine Info files into the SES database. |
PBConnex | This set of options allows the choice whether or not cli- ent devices that receive this profile should be able to use PBConnex at pre-boot (see “Using Pre-Boot Connex (PBConnex)” on page 76). The first option: "Enable machine to communicate with SDConnex at pre-boot" defines whether or not clients can utilize PBConnex communication at pre-boot. The indented option below it, named "Device will locally cache PBConnex autoboot key file for": defines |
Option | Description |
whether, once sent to a client device, the PBN AutoBoot key file can be securely retained and re-used on the device for a specified number of days before expiring and optionally indicates how long the cached key file should be retained (see "About PBConnex" on page 76. This option was formerly called: "Enable PBN AutoBoot key file caching". PBConnex-brokered user authentication will be available only to the users, and for the devices, for which it has been set up in the group properties. PBConnex-brokered AutoBoot only takes devices into account (since users will not need to identify themselves at pre-boot), so PBConnex Autoboot groups need only have devices in them, though no harm occurs if such groups also have users defined in them, for other pur- poses. If the client uses a static IP instead of DHCP check "Use Static IP Configuration from client at pre-boot." | |
MagicEndpoint Authentic- ation | |
IdP List: | If utilizing SecureDoc Enterprise Server's IdP func- tionality, enter the Server Names (or IP addresses) and Port numbers of the installed SecureDoc IdP servers as a comma-separated list. The Port number is separated from the server id using a colon (:). The resulting list will follow this format: Server- name1/IP address:Port, Servername2/IP address:Port e.g. idpserver1:7333,idpserver2:7333 |
Note: The use of Bitlocker is covered in Chapters 10, and customers wishing to utilize Bitlocker for disk encryption should see Chapter 10 before continuing with the remainder of the Device Profile settings.
Profile Communication Options
Implementation of HTTPS / TLS 1.3 for Pre-Boot Login (PBL) is introduced within SecureDoc. This fea- ture enables support for alternative Transport Layer Security (TLS) modes in SDConnex and Profile, offering three distinct settings:
Compatibility with HTTPS or TLS 1.3 where available.
Mandatory use of TLS 1.3.
Mandatory use of HTTPS.
Please note, while TLS 1.3 is supported, it does not currently support Pre-Boot Unlock (PBU) as ref- erenced in issue SD-41290. Similarly, HTTPS support, though enabled, does not currently support Pre- Boot Unlock (PBU) as outlined in issue SD-45618.
For environments running SES 9.1 and above, the process involves configuring SDConnex. Access the Communication tab on SDConnex and navigate to the Transport Layer Security (TLS) settings, where you'll select the option "Force use of HTTPS."
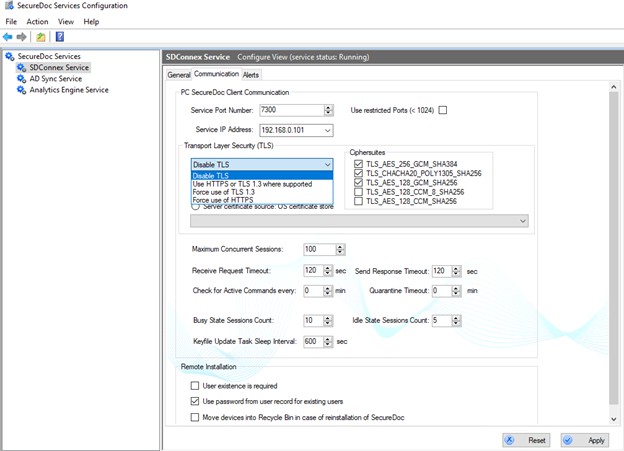
Create a package by following these steps: begin by establishing a profile that includes the Password key file and enforces the usage of HTTPS. Within PBConnex, enable the setting for "Force use of HTTPS" under the "TLS Encryption" section.
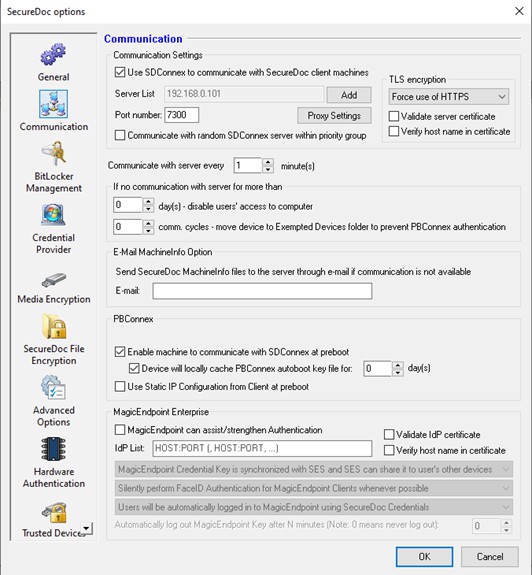 Regarding PBLU Preboot, it's important to note that HTTPS for PBU is not supported in version 9.1 (ref- erenced by issues SD-41290 and SD-45618). If TLS 1.3 or HTTPS is enabled, a warning message will be displayed.
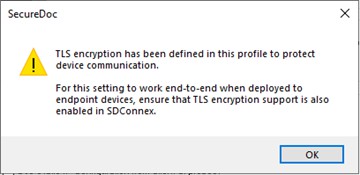
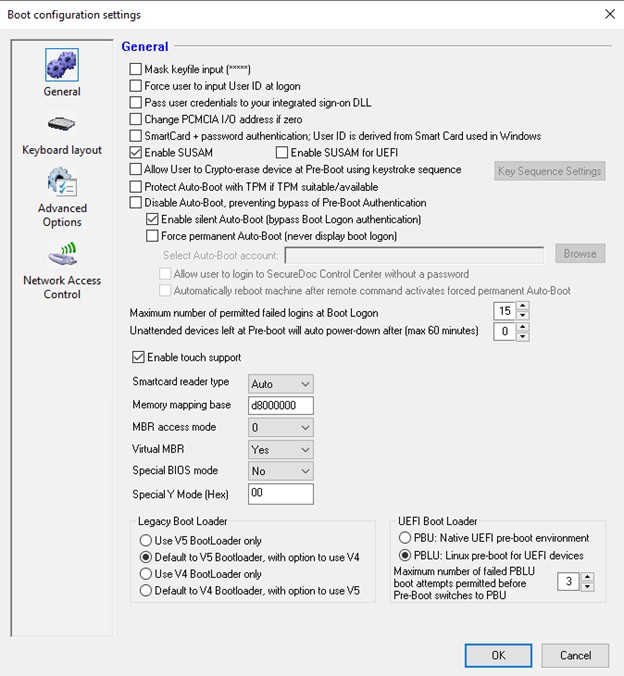 Develop a profile including Network phone settings and enforce the usage of HTTPS. Within PBConnex, set the "Force use of HTTPS" feature and configure the Network phone settings along with the Identity Provider (IDP) list.
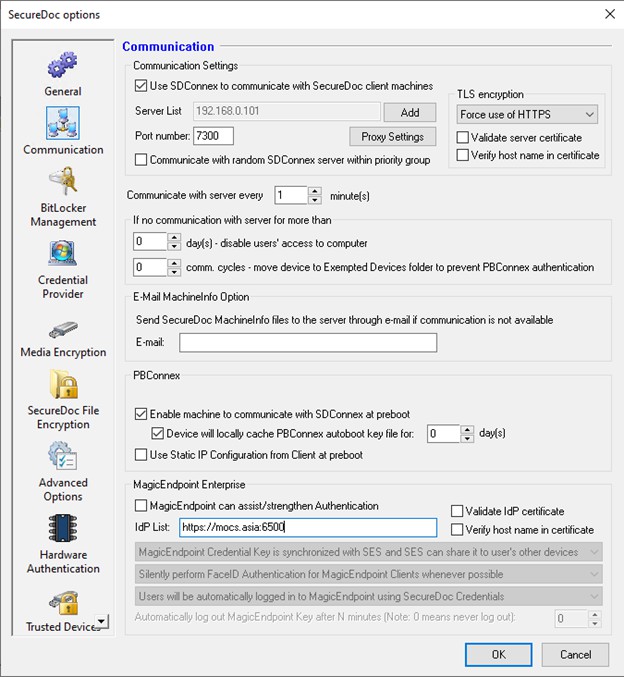
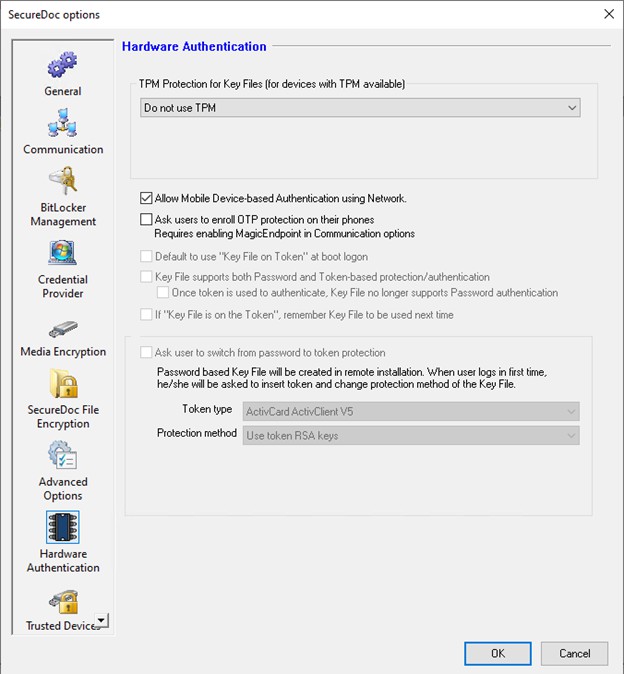 PBLU Preboot currently does not support HTTPS for PBU in version 9.1, a limitation highlighted by issues SD-41290 and SD-45618. However, the out-of-band (OOB) feature for PBU will be implemented and supported in version 9.2.
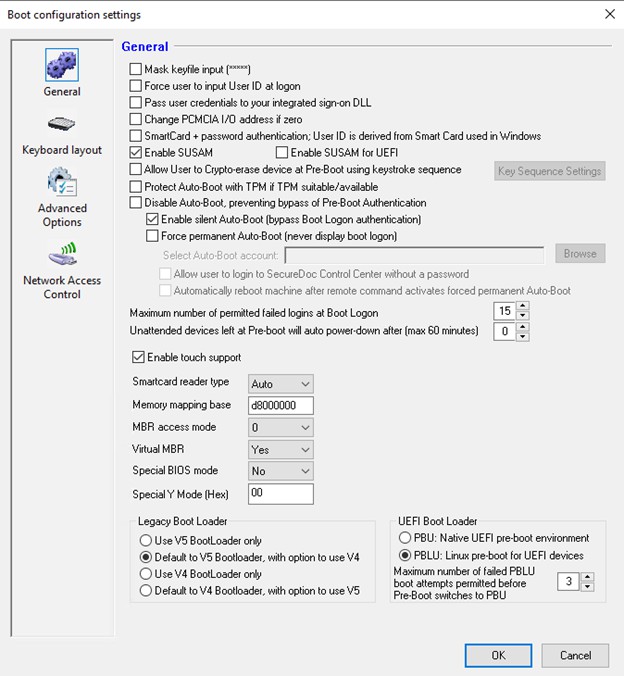 Utilize the Profile/Package from step 3.1 to deploy the client, resulting in a successful deployment of the package on the client. Subsequently, apply the Profile/Package from step 3.2 for the second client deployment, also achieving a successful client package deployment. Moving forward, within SES, create a PBN group inclusive of PBN Autoboot/User settings.
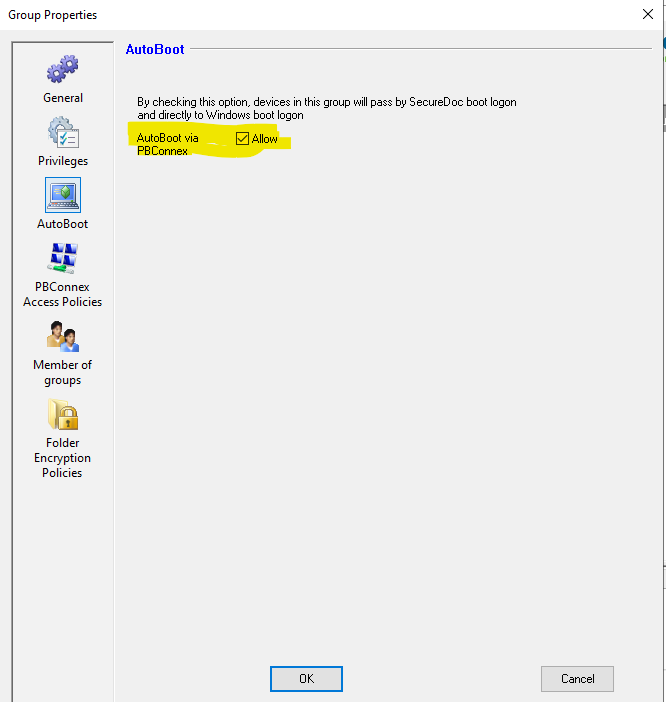
Add device to group
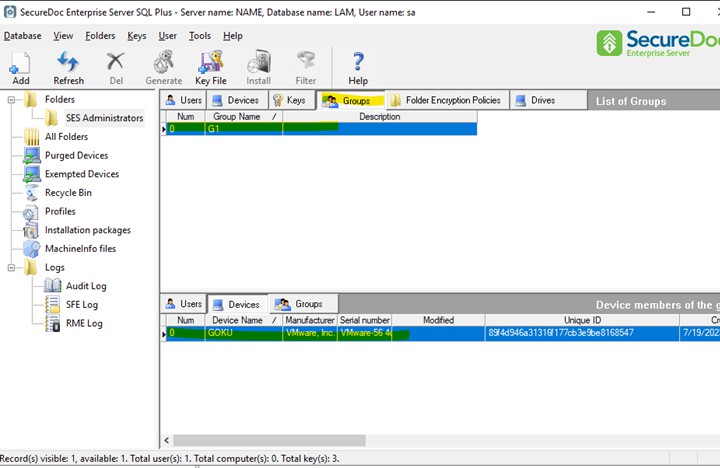 Install the ME Enterprise application and ensure that the ME status reflects as 'Online – User Registered'.
Access the IdP portal page for login and navigate to the Mobile tab. Follow the instructions provided there to successfully register the user on the phone.
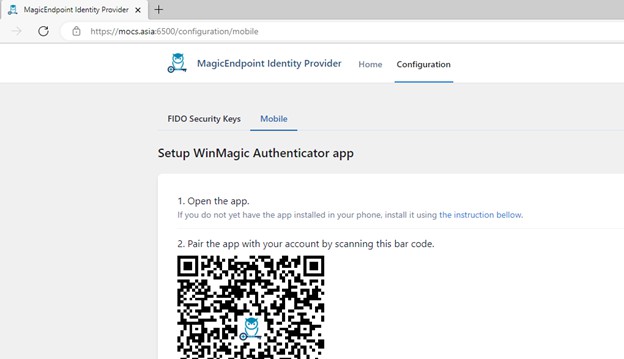 User will be shown on phone as below
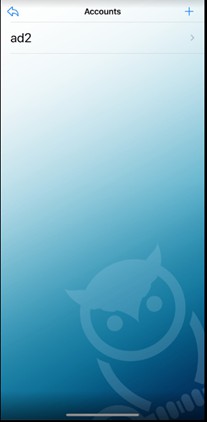 Sign in to preboot by using the Out-of-Band (OOB) method. Wait for the PBConnex icon to turn green at preboot and then position the cursor in the Password field to activate the OOB function.
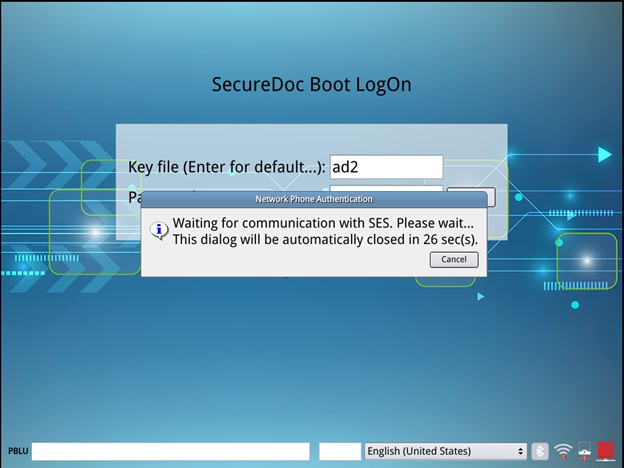 The Authentication prompt is shown on phone
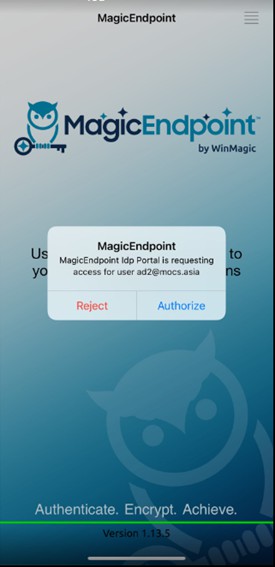 Approve it, authenticate by FaceID/TouchID then Login Preboot successful
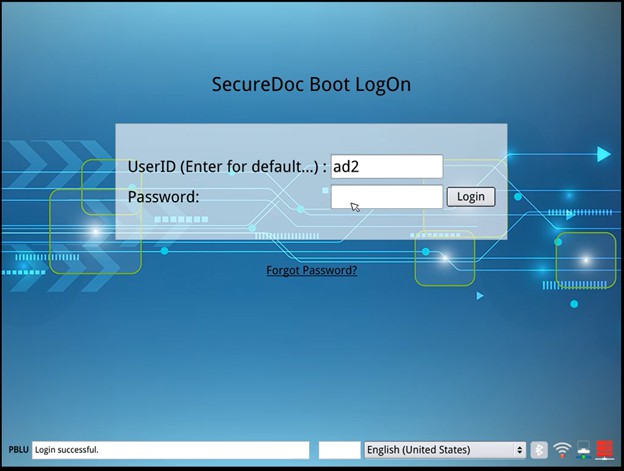 Access preboot login by using the PBN Autoboot/User method. Wait for the PBConnex icon to turn green at preboot.
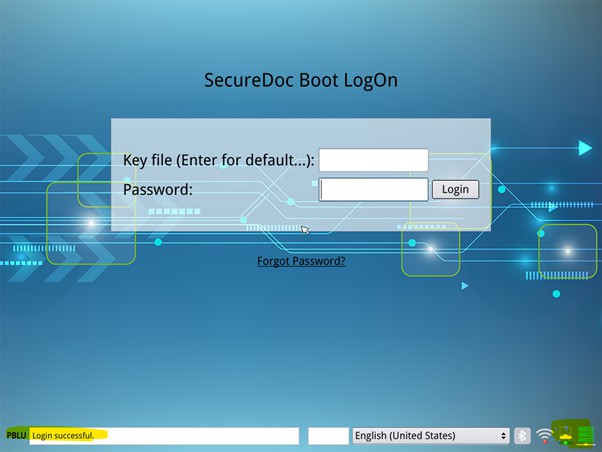 Access SDCC login using the Out-of-Band (OOB) method, which is supported for versions 9.0 SR3 and above. Open SDCC and select the Login button. A blue pop-up will display with the message "Please ensure you have the WinMagic Authenticator app open on your phone to perform network authen- tication."
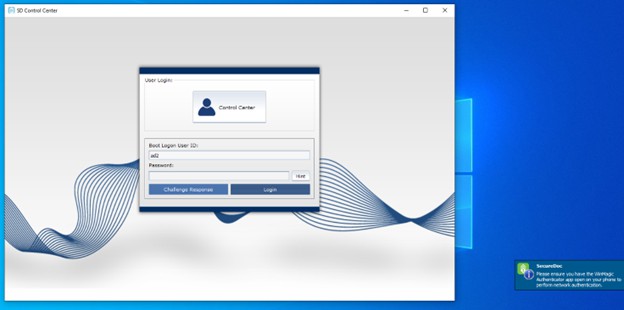 The Authentication prompt is shown on phone
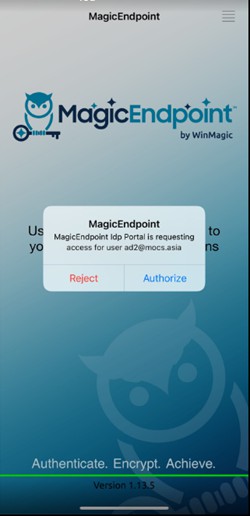 Approve it, authenticate by FaceID/TouchID then Login SDCC successful
Profile Credential Provider Options
Options in the Credential Provider tab affect the way Boot Logon functions on all Windows clients that install the installation package built on this profile. Operating Systems affected by Credential Provider settings are: Windows 7, Windows 8/8.1, Windows 10 and Windows 11 client devices, as well as Win- dows Server 2008 and later versions.
To access the tab, open the Profile screen (either as part of creating a profile or by double- clicking an existing profile), click General options, then click Credential Provider
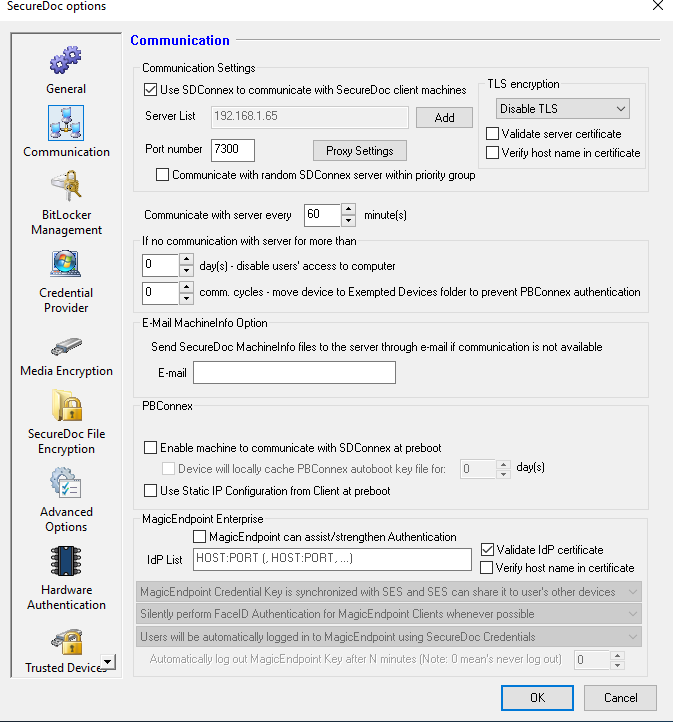
Options | Description |
Automatically | Check to have Windows login information stored so that |
Options | Description |
log in to Win- dows with cre- dentials entered at boot logon | logging into boot logon automatically logs users into Win- dows as well (single sign-on). |
Users can single sign on with Smart Card or Token (Enterprise client only) | This functionality allows you to permit and manage Single Sign On (SSO) when using Smart Cards or Tokens. Having authenticated with a Smart Card or Token, the user's underlying credential will be accessed and utilized to com- plete the single sign on process, transitioning the user into the Windows desktop directly without requiring further authentication. |
Automatic login to Windows will time out after [3] minutes (Enterprise cli- ent only) | This option, when enabled, will ensure that if a user screen-locks his device, only the credentials of his cur- rently logged-on session appear, making it clear which ses- sion to resume. Note that if the user presses the ESC key while in the screen lock screen, other credential providers may be displayed. |
Configure Win- dows Credential Provider as last logged on user's provider (Enter- prise client only) | If this security feature option is used, it will define that a cli- ent device that completes its automatic login to Windows and on which there is no user interaction (keystrokes, mouse movements), the SecureDoc client agent will auto- matically engage the Windows Screen Lock. This is inten- ded to protect what SecureDoc considers to be an unattended device against possible access/attack to the user's desktop. |
Use SecureDoc Credentials to log into Windows (Enterprise client only) | This option, if enabled, permits a SecureDoc Client device to automatically switch into Windows native login mode when the client device has been able to connect to the SES server, indic- ating that the device is in its "home" network (and therefore in a secure location). Check to ensure that only users with SecureDoc credentials can access the system. |
Lock computer when token is removed" (Enterprise client only) | Check to have SecureDoc screen lock take effect whenever the token is removed and to require users to insert their token to dismiss screen lock. |
Login to Win- dows with | This option permits customers to define that they will use Bluetooth-based authentication to the WinMagic Authentic- |
Options | Description |
phone protected by Bluetooth | ator app hosted on their phone. The phone must be active and logged into, and the WinMagic Authenticator App must be running. |
Only users having SecureDoc cre- dentials may log in at Windows Logon (Enterprise client only) | The way this works is that, unless the user attempting to log in also has a Key File on the device, he/she will not be permitted to login at the Windows logon. This additional layer of security protects SecureDoc-protected devices whose users have logged out of Windows, ensuring that a second user cannot log in at the Windows logon, unless that user also has a key file on the device. This guards against the risk that this second user might be able to log in successfully at Windows using his Domain credentials, where in fact this second user has no business or security jus- tification or accessing the first user's device. |
Switch to native Windows logon in home network (SES server is reachable)(Enter- prise client only) | Use of this option permits SecureDoc-protected client devices to use Windows' own Login screen when the device is in the secure corporate network (determined by the device's ability to com- municate with the SDConnex server), rather than using the SecureDoc Credential Provider logon (which is the default beha- vior if this option is not enabled). Even with this option enabled, if the device is unable to reach the SDConnex server, the client device will use the SecureDoc Credential Provider login instead of the native Windows login. This feature is used primarily where customers are using SmartCard or Token-based Authentication at Pre-Boot but wish to have the ability (when the device is in their company's secure network) to just log in using their Windows credentials. |
Enforce Multi- factor authen- tication for Win- dows logon (Enterprise cli- ent only) | This option set is new in V9.0SR2, and it defines whether users must utilize multi-factor authentication when logging in to Windows using native Windows logon (as opposed to when SecureDoc Credential Provider handles Windows logon). |
Enforce Multi- Factor Authentic- ation for native Windows Logon | This option set is new in V9.0SR2, and it defines whether users must utilize multi-factor authentication when logging in to Windows using native Windows logon (as opposed to when SecureDoc Credential Provider handles Windows logon). |
Enforce Multi- | When users authenticate to a Remote Desktop device |
Options | Description |
factor authen- tication for Remote Desktop Client (Enterprise Cli- ent only) | (upon which this feature has been deployed), that device will utilize the user's multi-factor authentication at Win- dows (typically requiring the user to authorize login using the WinMagic Authenticator app running on the user's phone). |
Add SecureDoc Login enhance- ment to Remote Desktop Client | This option set is new in V9.0SR1, and it defines whether SecureDoc will permit the SecureDoc Login Enhancement to be applied when connecting to other devices via Remote Desktop (RDP), providing strengthened authentication the device being accessed remotely. Un-checked (default) - the SecureDoc Login Enhancement will not be added to Remote Desktop Client. No changes will be applied to the remote endpoint when logging in via Remote Desktop. Checked - If selected, the SecureDoc Login Enhancement will be applied to the endpoint being installed with this Profile. Note: Both the endpoint accessing another device using Remote Desktop PLUS the device being remotely accessed MUST have this option enabled for this feature to work. Use this option to provide strong yet easy to use automated authentication to the remote endpoint device when using Remote Desktop. |
Authenticate to Remote Desktop using MagicEndpoint - requires no user action | This option (which depends upon having selected the Add SecureDoc Login enhancement to Remote Desktop Client option above), when selected/checked, will define that MagicEndpoint authentication functionality will be used/- conveyed to the remote endpoint during authentication, such that the user currently logged into the origin device (using MagicEndpoint) will be automatically and silently logged into the remote desktop. |
Password Provision Options
Introducing UI settings for Password Provision options, this feature enables the provision of the Win- dows password to requesting applications using a hotkey or clipboard functionality. It enables the auto- matic pasting of the Windows password into password fields, facilitating the auto-submission of login forms on third-party applications or websites. Additionally, this feature includes the functionality to enable the automatic alteration (rotation) of the Windows password once it is submitted via the pass- word provisioning hotkey. Following the password provisioning event, SecureDoc initiates an attempt to
change or rotate the Windows password within 15 seconds. Functionality to provision Windows pass- word to requesting applications via a hotkey or clipboard.
Enable Windows password autofill to third-party applications (with a hot-key combination).
Allow for the automatic insertion of the Windows password into password fields and the automatic sub- mission of login forms for third-party applications or websites. The functionality of the settings below is dependent on the activation of this feature.
Enable Windows password rotation upon autofill.
Activate the automatic alteration (rotation) of the Windows password after its submission using the password provisioning hotkey. The subsequent option (AutoRotateWinPwd) will operate when this set- ting is enabled.
Automatically rotate Windows password upon autofill.
When enabled, SecureDoc will attempt to alter or rotate the Windows password within 10 seconds fol- lowing the password provisioning event. If this feature is disabled, users will receive a notification prompting them to rotate the password. Clicking on the notification with the left mouse button will trig- ger the password rotation process, and the outcome (success or failure) will be displayed through another notification. Upon rotation, the new password will be randomly generated, adhering to a
length equal to or greater than the minimum password length specified in the SecureDoc keyfile. The Windows password rotation function aligns with the Password Sync (PwSync) setting of SecureDoc.
PwSync operates fully until the Windows password is randomized during rotation, at which point PwSync is paused, and only the user knows the SecureDoc password. Activating the "Enable Windows password autofill" setting will prompt a reverse synchronization during the subsequent Windows login or unlock, where the Windows password will revert to the SecureDoc password, and the user's ENC file will be updated. A notification will be presented to the user in this scenario.
Note: Windows AD password policy may not permit changing Windows password more often than once per 24 hours. In this case, password change will happen next time possible upon password rotation request or Windows password resyncing back to SD password.
Note: Autofill password will not work at Windows Logon. Instead, SDCP should be used to manage this case. There is no need to change the managed Windows password on LogonUI, SDCP will prompt you to do so if required.
Important items to note about this feature in the first phase.
SecureDoc Password Provision should ONLY be used for applications that use your current Win- dows password. For applications not using Windows passwords, users will need to know and man- age passwords for third-party apps.
Specific permissions are needed in Azure AD to rotate passwords.
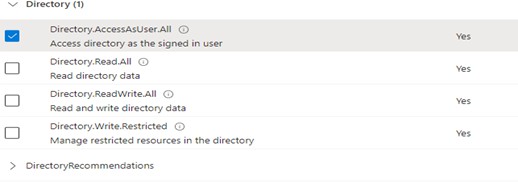
Presently, this feature exclusively caters to Windows passwords. Upon the rotation or alteration of the password, users will be required to re-authenticate with their federated applications. It's important to note that this functionality is solely compatible with Windows and does not extend support to Mac, Linux, or mobile devices.
In the subsequent phase, our aim is to expand our support to manage other applications and passwords, not limited to Windows passwords, thereby offering a more comprehensive range of support services.
UI Setting in SES Console:
Access the Password Manager Options located within Profile > General > Credential Provider in the nav- igation menu.
Note: If the option “Use SecureDoc Credentials to log into Windows” is disabled, the “Password Man- ager Options” will be grayed out.
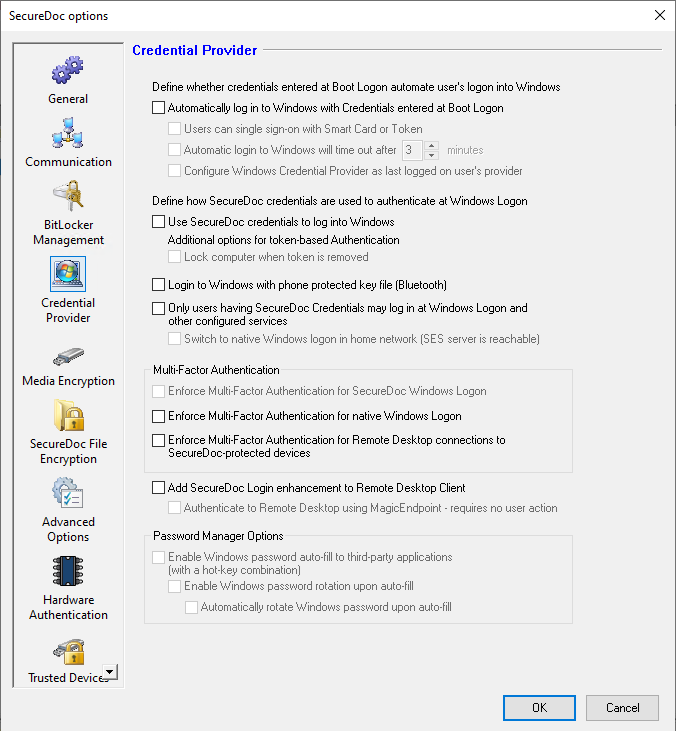
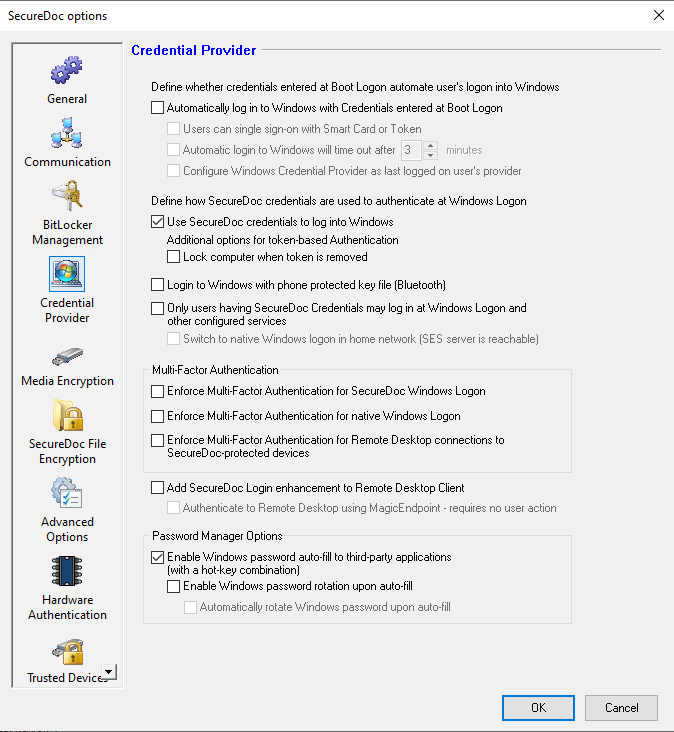
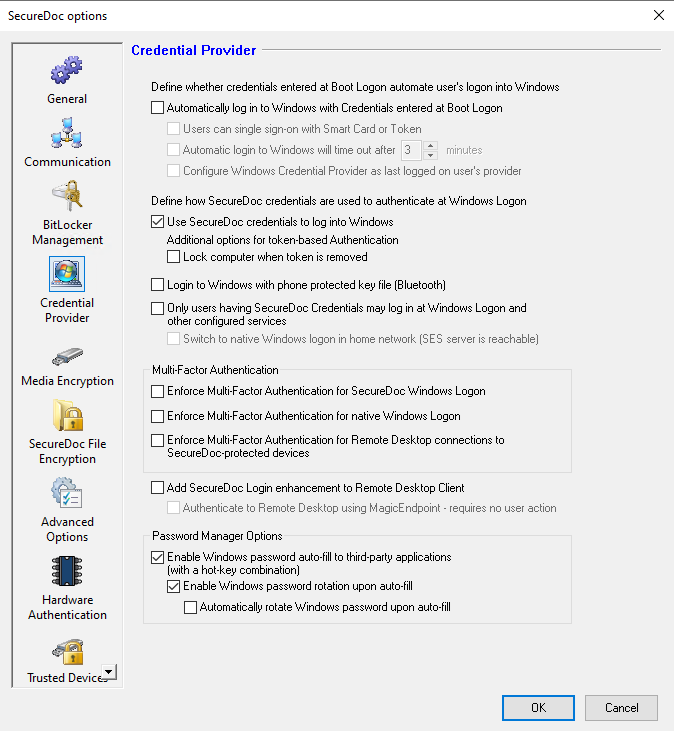
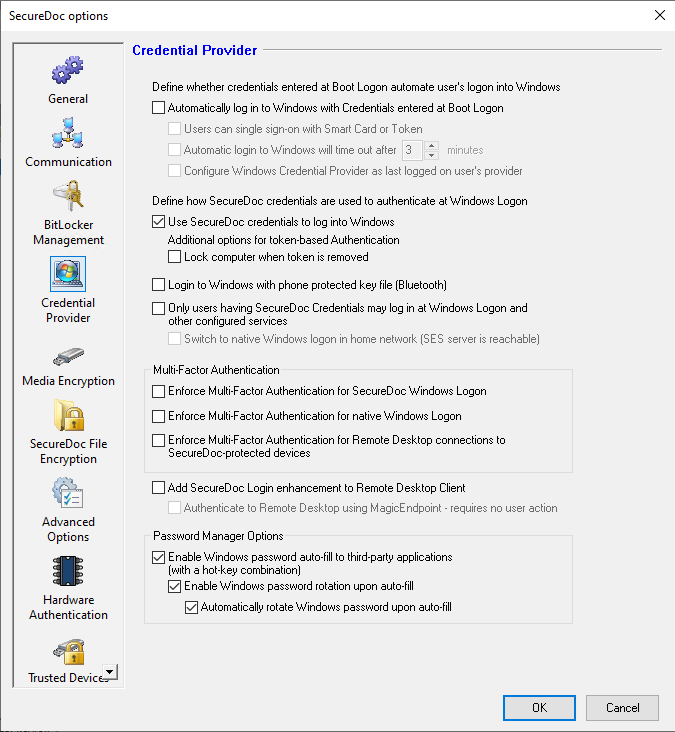 UI Setting in SES WEB:
Access the Password Manager Options under Profile > Key File Dual Authentication in the navigation menu.
 Note: If the option “Use SecureDoc Credentials to log into Windows” is disabled, the “Password Man- ager Options” will be grayed out.
UI Setting in SD Control Center:
Access the Password Manager Options within the Options menu under Credential Provider.
Note: If the option “Use SecureDoc Credentials to log into Windows” is disabled, the “Password Man- ager Options” will be grayed out.
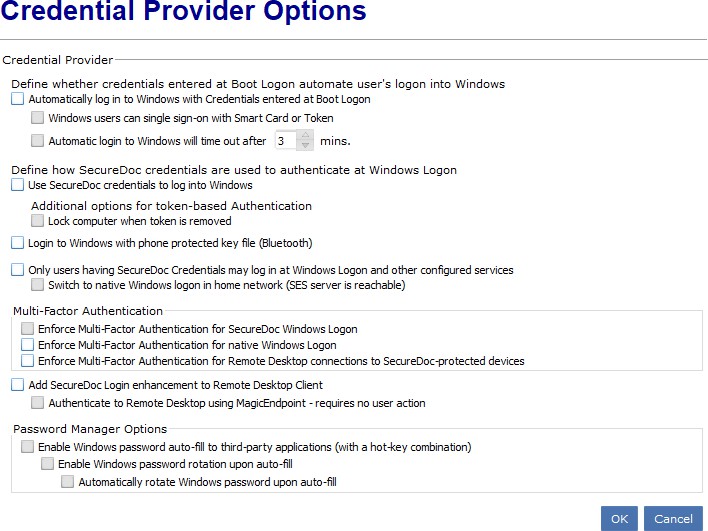
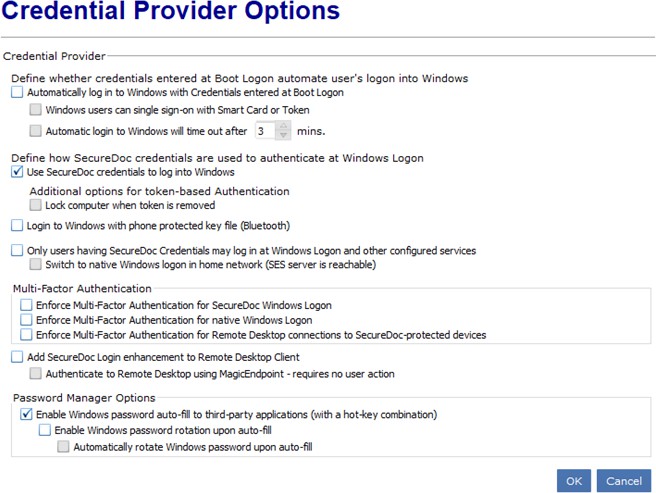
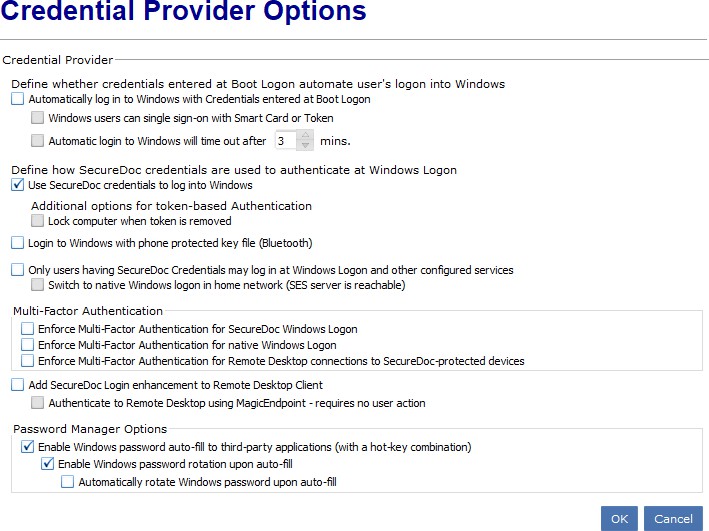
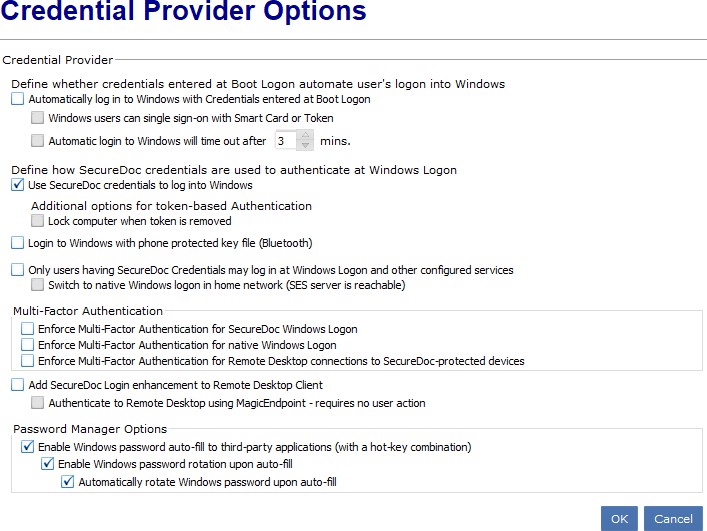
After enabling Password Manager Options, right-click on SDPin’s icon in the system tray Select Win- dows Password Options
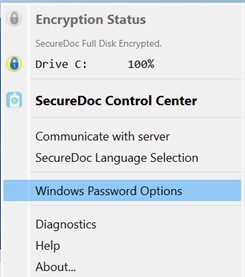 Windows Password Options show with default hotkeys: Meta+Ctrl+Alt+V (Meta is called Windows key with a window icon)
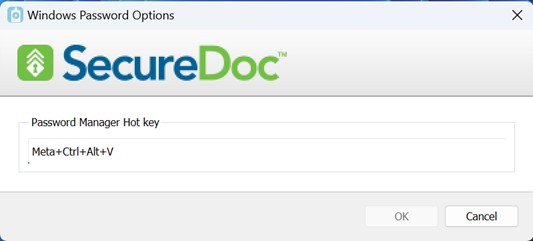
End-user can change the hotkeys to anything else. (e.g., Ctrl+Shift+T…)
How to Windows Provision Options Work
Enable Windows password autofill to third-party applications (with a hot-key combination).
If this option is the sole one enabled, the passwords for both the SecureDoc (SD) keyfile and Windows have been synchronized. When an end-user logs in to a third-party application or a website using the same password as the one for SD/Windows, they simply input the valid username and press the des- ignated combination keys in the password field. This action enables the proper functioning of the auto- fill Windows password.
Example:
SD package has been deployed to the client
After the primary user has achieved the secure moment, SD keyfile’s password will be synchronized with the Windows password.
Try to log in to https://www.office.com or Outlook365 application, fill in the valid Windows user- name (Azure AD account) then press the combination keys in the password field The password will be auto-filled in, and log in to the website successfully.
Enable Windows password autofill to third-party applications (with a hot-key combination) and Win- dows password rotation upon autofill.
Once the Windows password has been automatically filled in, SecureDoc (SD) will generate a noti- fication to inquire whether the user intends to change the password to a random one or not.
Example:
SD package has been deployed to the client
After the primary user has achieved the secure moment, SD keyfile’s password will be synchronized with the Windows password
Try to log in to https://www.office.com or Outlook365 application, fill in the valid Windows user- name (Azure AD account) then press the combination keys in the password field The password will be auto-filled in, and log in to the website successfully.
SDPin will prompt a notification
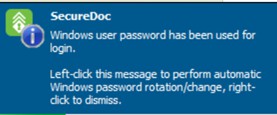
Right-click to dismiss the notification or left-click to automatically change Windows password
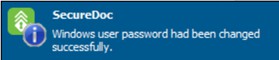
Note: Windows AD password policy may not permit changing Windows password more often than once per 24 hours. In this case, password change will happen next time possible upon password rotation request or Windows password resyncing back to SD password.
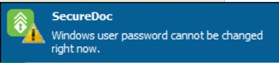
After changing Windows password to a random one, right-click on SDPin’s icon in the system tray
Select Windows Password Options
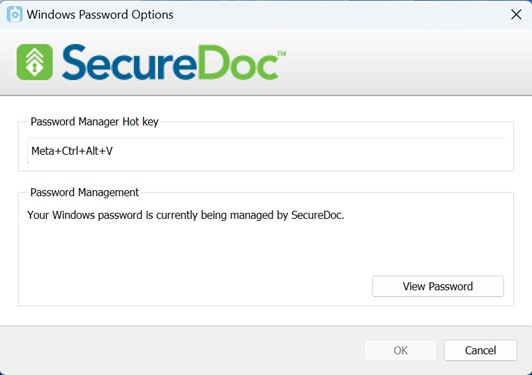 Click “View Password”
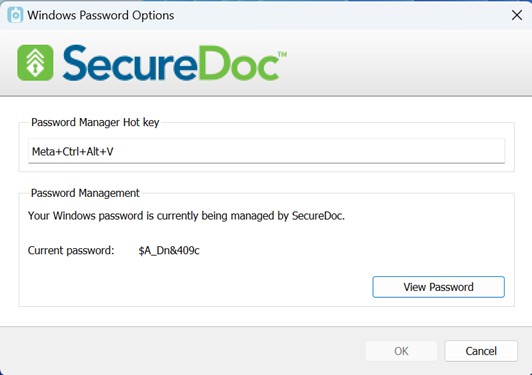
Note: Currently there is no protection against viewing the password. In future versions, a request to view managed Windows passwords will require authentication to SecureDoc keyfile.
Note: The random password will be applied to Windows only. It means:
Windows login or access to websites and applications through native Windows Logon will utilize the random password provided.
For Preboot, SDCP, SDCC, SES Web, or IDP Portal logins, the system will use the old password.
The combination keys will not function during native Windows logon, SDCP, or SDCC access attempts.
Enable Windows password autofill to third-party applications (with a hot-key combination), Win- dows password rotation upon autofill and automatically rotate Windows password upon autofill.
When activated, SecureDoc will attempt to alter or rotate the Windows password within 10 seconds fol- lowing the password provisioning event.
A notification will appear after the password has been changed. Subsequently, this notification will van- ish after 10 seconds.
Profile Media Encryption Options
These options allow you to control how users encrypt their removable media. Unless you have specified a default key, removable media is encrypted with the first key in the key file that was not used to encrypt the full disk (typically, this is a user’s group key), standard encryption and no media-specific password. If you use these options, make sure users know the choices they have available and ensure that the key file deployed by this installation package has the Convert Removable Media privilege.
Note: Removable media does not include floppy disks.
To access the tab, open the Profile screen (either as part of creating a profile or by double- clicking an existing profile), click General options, then click Media Encryption.
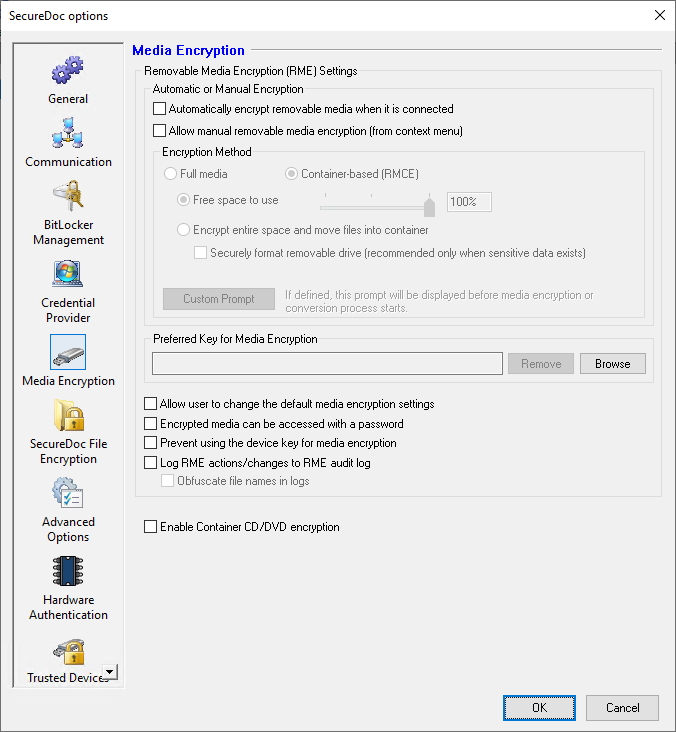
Option | Description |
Automatically encrypt | Check to automatically encrypt removable media, |
Option | Description |
using the selected method, when media is inserted directly or through a USB hub or card reader into the device. This includes SD memory cards connected directly or through an SD card reader. This option must be checked to use the removable media con- tainer encryption feature. Note: Media that is already encrypted cannot be re- encrypted and encryption cannot be resumed if inter- rupted. | |
Allow manual remov- able media container encryption (from con- text menu) | Check this option to permit users to manually encrypt removable media by right-clicking on the media mount point, and opting to encrypt it from the Windows Explorer context menu. |
Encryption Method | The "Encryption method" radio buttons become enabled when the automatic encryption option is selected. Click to select the encryption method to be used for removable media. If you choose Container based, specify the percentage of available free space on the removable media that the container is to use. Note that even with a setting of 100%, there will be space available for the media viewer that allows the encrypted media to be accessed on a machine without SecureDoc installed. Important: Since an Encrypted Container is effectively a file, its maximum size is limited by the File System (e.g. FAT, FAT32, NTFS) used when the media was formatted. FAT32 has a 4GB maximum file size, so media larger than 4GB will contain unprotected space amounting to the ori- ginal media size minus 4GB (plus the small amount of space occupied by the viewer and key file). So, for large media that is to be Container-encrypted, WinMagic recommends formatting the media as NTFS or ExFAT, though this may limit cross-platform accessibility. |
Encrypt entire space and move ... | Used to encrypt the entire removable media and save the existing data onto a temporary folder in (users/Appdata/local/temp/{foldername}). The data is then moved back to the container upon com- pletion. |
Option | Description |
Note: It is extremely important to not disconnect the removable media during this process as file corruption may occur on the removable media. | |
Securely format remov- able media (recom- mended only when sensitive data exists) | This will perform a "Full Format" on the removable media, as per Windows standards. Time necessary for this format- ting process can range from a few minutes to hours, depending on device speed and the size of the removable media. |
Button Custom Prompt | If clicked, this will prompt the Administrator to enter the text of a message to the user which will provide guidance or steps to be followed during the media encryption attempt. Recommendation - Among any other guidance you may wish to provide your users, consider adding a caution that users should not remove USB media during the encryption process, at the risk that the media will be corrupted. |
Preferred key for Media Encryption | Full media encryption of removable media, by default, uses the first (often the only) key in the key file, standard encryption, and no media-specific password. Container encryption, by default, prompts the user to choose from the keys available in their logged-in Key File. To assign a default key to be used to fully encrypt or encrypt a container in all removable media for users receiving this profile, click Browse and, from the list of keys that will appear, select the desired key. Ideally, where the media is to be primarily used internally (ie. among devices that will be running SecureDoc) be sure to select a key that will have been (or will be) provided to end users who will receive this profile who will receive this profile. In that way, since they will already have logged into their Key Files, such users will have transparent and automatic access to the full-media encrypted media or container-encrypted media. Where the media is primarily intended for secure use out- side the sphere of SecureDoc protected devices, the spe- cific key to be used may be thought of as a secondary consideration, since such media will be accessed through |
Option | Description |
the use of a strong password. | |
Allow user to change the default media encryption settings | Check to allow the user to use the SecureDoc inter- face to control removable media encryption, for example, to use another key for it. |
Encrypted media can be accessed with a password | Enable/Check this option to allow password-based access to removable media so that it is accessible to users that are a) logged in to a SecureDoc-protected device, or b) have the SecureDoc Media Viewer installed and who know the password established for the removable media at encryption time. Users of SecureDoc-protected devices that do not have the key that was used to encrypt the media in their logged-on key file will be prompted to enter the pass- word. When not enabled, the lack of this option ensures that encrypted media is not password- accessible at all, meaning that it is only accessible to users logged in to a device with SecureDoc installed on it, and that those users have with access to the key used to encrypt the media. Note regarding Pass- word Strength: The password rules that apply to the login key file's password will apply for the media password. IMPORTANT: If encryption is interrupted, the password will not be applied. However a pass- word can be added later, after the media is fully encrypted using SecureDoc. |
Prevent using the device key for media encryption | This checkbox (disabled by default for compatibility with earlier versions of SES), if enabled, prevents the SecureDoc client software from including the Device Key in the list of keys available for use to pro- tect/encrypt removable media such as USB sticks or CDs/DVDs. When not checked, option permits users to have the choice of using the Device Key to pro- tect/encrypt removable media. |
Log RME actions/changes to RME audit log. This option was formerly called: Enable RME audit log (Enterprise client only) | Check to log actions related to removable media under FDE. |
Option | Description |
"Obfuscate file name in logs" (Enterprise client only) | If used, this option will render the file names in the logs unreadable. |
Enable RMCE CD/DVD Encryption (Enterprise client only) | Check to alllow RMCE (container-based) encryption of CD/DVD media. NOTE: In SES V8.5 and later, CD/DVD encryption has been changed to be solely Container-based encryption, due to incompatibilities with the old full-media CD/DVD Encryp- tion third-party libraries under Windows 10. Container- based encryption provides a number of major benefits - there is no longer a need to download and install the Media Viewer Application. The media is written/burned as a normal CD or DVD, except that the Container is encryp- ted, not the whole media. In a similar fashion to Password-protected Removable Media, those users of SecureDoc-protected devices that have access to the key that protects CD/DVD media will have transparent access to the Container contents in decrypted form, whereas those who do not have access to the key will need to enter the password that protects the Container. Users of devices that are not SecureDoc-protected no longer need to download and install the Media Viewer application, since the media contains a Viewer applic- ation automatically. Such users will need to know the password that protects the container. Encryption will be done, by default, using the first of the user’s keys that is not used to encrypt their hard disk (typically, this is a group key). |
To control what users can do with encrypted removable media, set up the disk access settings: see “Disk Access Control (SecureDoc Enterprise for Windows clients only)” on page 229.
Removable Media Encryption has been designed to interact with environments depending on the level of security which is required. It is important to determine the level of security which is needed before customizing the options in SES for the users. Through these customizations users will be able to interact with SecureDoc to create a secured removable media device.
The following is a summary of the different levels of security which can be used for encrypting a removable media device.
Security | Summary of Benefits |
Portable and Secured |
exchanged amongst SecureDoc users by using a shared key (no password required)
SecureDoc device by setting a password
Select the following options:
word |
Portable and Secured Cor- porate Environment |
devices by setting a password (Media Viewer must be downloaded and installed) Select the following options:
word |
Secured Corporate Environment | l. Full RME, secure sector by sector encryption
|
Security | Summary of Benefits |
users to decide not to encrypt a given item of media. c. Select the desired key d. Decide whether users can choose to use a different key by changing default media encryption settings. d. Decide whether users can set a password, or not. Without a password, only users with the key can access the media contents. |
Encrypted Full-Media-Encrypted media protected by a password can be accessed from a machine that does not have SecureDoc installed on it. Install Media Viewer (downloadable from WinMagic’s web site, http://www.winmagic.com/resource-centre/software-downloads) on the machine and, when prompted for the removable media password, enter it to gain access to the encrypted media.
Profile SecureDoc File Encryption Options (SecureDoc Enterprise for Windows only)
Note: The File and Folder Encryption (FFE) functionality in the previous versions of SecureDoc has now been renamed as SecureDoc File Encryption (SFE).
The SecureDoc File Encryption configuration through the profile simply determines whether or not the profile allows the possibility for client-side SecureDoc File Encryption. Users must have the Config SFE privilege in order to use SecureDoc File Encryption through the added functionality in the Windows Explorer right-click context menu on an endpoint device. If the user already exists, modify his/her user record record to grant him/her the Config SFE privilege, then remove the user from the device, and add them again to it, to trigger the transmission of a new key file (containing the added Config SFE privilege) for that user to the device. When this option is selected, the device users will be able to view the SecureDoc File Encryption option in SecureDoc icon in the Windows taskbar menu. Using this option, the client device users can create the SecureDoc File Encryption policies locally.
Note: Server side SecureDoc File Encryption is handled through SFE policies. See "Creating and Assigning SFE Policies" on page 314 and “Creating Installation Packages for Windows” on page 81.
SFE Global Application Access Lists
The SFE Global Application Access Lists application enables the SecureDoc client device users to view and control the applications that access the encrypted files in a SecureDoc File Encryption folder. The client device users can allow or deny access to these applications.
The SFE Global Application Access Lists consists of two lists:
White List: - Applications in this list can decrypt the files within SecureDoc File Encryption folder(s) and display their contents in clear text. White-List applications will be able to open, read, write, move, or delete files, with no restrictions.
Gray List: - Any unwanted applications (e.g. malware, antivirus, background applications, etc.) can be put into the Gray List in order to keep the sensitive files stored in the SFE folder safe and secure. Similarly, this can be used to ensure that certain document types (e.g. Word, Excel, etc) cannot be decrypted when used as attachments to emails, by gray- listing Outlook.exe or similar email applications. The “Gray List” applications cannot decrypt the files. Thus, the contents cannot be viewed (or saved) by gray-listed applications in clear text.
Many applications (e.g. svchost.exe, SearchProtocolHost.exe) may be trying to access the files in the background. Each time an application accesses a file and if this application is not in both the lists, a pop-up “An application wants to access an encrypted file” appears (only if the Config SFE option in SES Console is enabled) asking you to determine whether that application should be put in the White List or Gray List.
For example, if “Dropbox” application is added to the Gray List, the files are synchronized to the cloud in encrypted form. If these files are accessed using the Dropbox application, then the contents of those files will not be decrypted. Thus, data will always remain encrypted and secure. Similarly, if a Microsoft program (e.g. Word) is added to the White List and when these files are accessed using Microsoft Word application, then the contents of these files will be decrypted. The files can be edited, moved or deleted.
IMPORTANT: All applications or processes not listed under the White or Gray Lists, will automatically be considered a Gray List application, and therefore won’t be able to decrypt SFE files.
Persistent Encryption
This feature helps retain the encrypted files/folders are always encrypted even when they are trans- ferred to other locations and/or media.
Limitations for Persistent Encryption
IMPORTANT: Persistent Encryption should not be applied to the User Profile folder - it can result in data corruption or loss, since many applications and services require access to files in the user profile. If any of these applications are in the Gray List of persistent encryption, the system can become unstable, so WinMagic's recommendation is to NOT use Persistent Encryption on the entire user profile folder.
Users must have administrator privileges to run executable (.exe) files from SFE folders.
If Explorer.exe and Dllhost.exe is in the Gray List, the Send to Compressed File option will not work for SFE.
If dllHost.exe is in the Gray List, users will not be able to view image files using Windows Photo Viewer, as Windows Photo Viewer uses dllhost.exe for processing.
If dllhost.exe is in the Gray List, the "Send to Compressed (zipped) File" option in the Windows Explorer context menu will not work for SecureDoc File Encryption (SFE).
Google Drive and One Drive root folders (e.g. C:\Users\<user name>\Google Drive; C:\Users\<user name>\One Drive) cannot be encrypted using SecureDoc File Encryption.
The video, audio, and executable files added to the encrypted Google Drive older cannot be encrypted. Only text-related files are encrypted in this folder.
On Windows 8, 10 and 11 Operating Systems, if explorer.exe is included in the Gray List, the Windows Metro Apps will not be able to open files in the SecureDoc File Encryption (SFE) folder.
On Windows 8, 10 and 11 Operating Systems (OS), the pre-existing files on Google Drive will not be encrypted on the cloud after adding the Google Drive Folder to the White List using SecureDoc File Encryption (SFE).
Note: Persistent Encryption has been dropped from the SES product as of version 9.1. Due to issues brought about in Windows 11, stability issues that resulted in the creation of duplicated files, as well as low consumer uptake of this feature, it has been decided that Persistent Encryption will be dropped from the product in version 9.1.
Enabling SecureDoc File Encryption:
Note: Select the Config SFE option from the user Privileges groupbox (Tools -> Key File) to allow the device users to create SFE policies locally.
Open the Profile screen (either as part of creating a profile or by double-clicking an existing profile).
Click General options.
Select SecureDoc File Encryption.
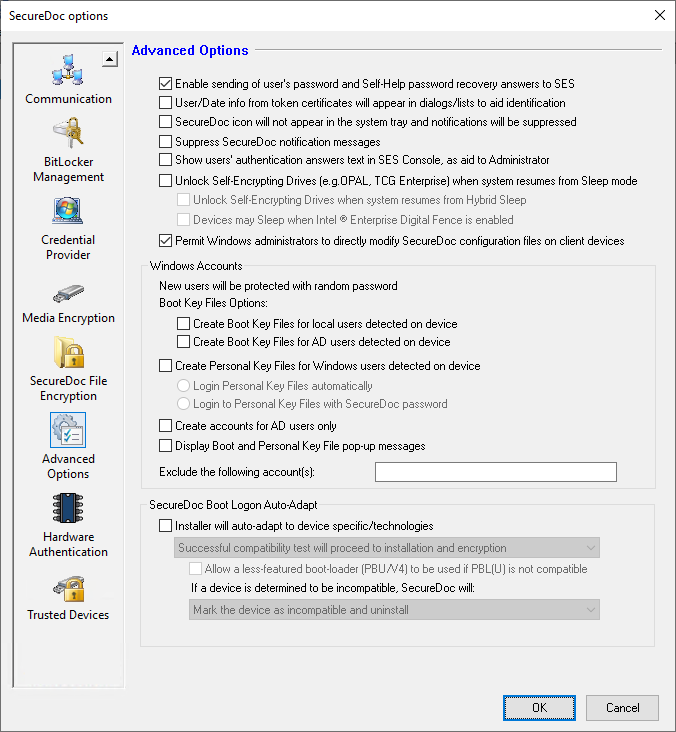 Select the desired option(s):
Users may encrypt specific Files and Folders: When this option is selected in conjunction with the Config SFE option in the global options, the SecureDoc File Encryption
functionality defined by SecureDoc File Encryption Policies will become access- ible/enabled on any devices that have the combination of a profile with this option enabled, a SFE policy, and the user has been provided with the Key that the SFE policy defines as being used to encrypt the in-policy folder(s). This option was formerly called: Enable SecureDoc File Encryption.
Allow users to decrypt and encrypt files using the Windows context menu: This option allows the client device users to decrypt and/or encrypt files locally. When this option is selected, the Encrypt (or Decrypt) with SFE Utility option will be available in Windows context menu.
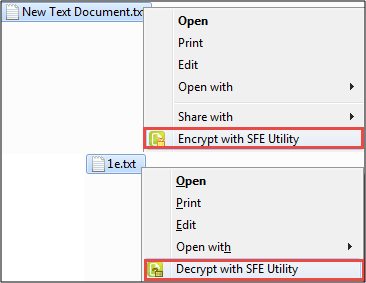
Profile Advanced Options
To access the tab, open the Profile screen (either as part of creating a profile or by double- clicking an existing profile), click General options, then Advanced Options.
These options control other, more advanced, aspects of SecureDoc operations.
Note: All the new users will be protected with a random password. The Protect new users with Generic password is no longer available from SES v7.1 onwards. If the generic password option is enabled in the older installations (e.g. version 6.5 or lower), then it will be upgraded to random password option when the SecureDoc server is upgraded to version 7.1.
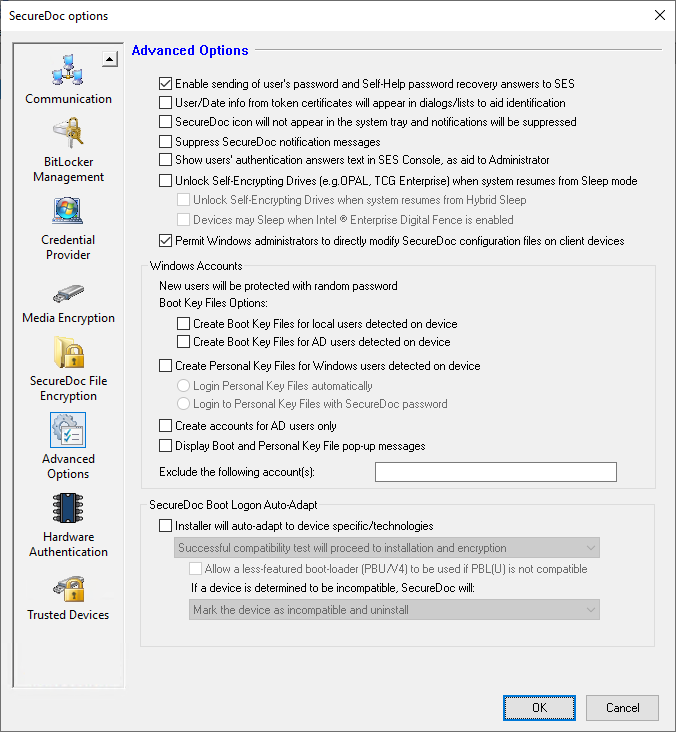
Options | Description |
Enable sending of user's | When checked, this option will ensure that user's Pass- |
Options | Description |
password and Self-Help recovery answers to SES | words and their personal answers to the Self-help Ques- tions (for Password Recovery) are stored in the SES data- base. Clear to not have answers to self-help recovery questions and user passwords returned from client devices to the SES database. |
User/Date info from token certificates will appear in dialogs to aid identification (Enterprise only) | Enable/check this option to name tokens/objects based on a combination of the user name and the date cer- tificate was issued, for example This User 11/08/04. This aids in their identification and provides a context for their use/application. |
SecureDoc icon will not appear in system tray and notifications will be suppressed (Enterprise only) | Enable/check this option to prevent the SecureDoc icon (indicating encryption status) from appearing in the client device's system tray. When this option is disabled, the SecureDoc icon will appear in the client device's system tray. |
Suppress SecureDoc notification messages | This option, when enabled, will suppress the display of notification messages on the SecureDoc client, in order to avoid distracting users with information that does not require an action from the user. Errors and other serious messages will still appear. |
Show user's authen- tication answers text in SES Console, as aid to Administrator (this option was formerly just called: Show authentication answers text") | Enable/check this option to display (to the SES administrator) the answers to the user's Chal- lenge/Response password recovery questions in clear text (rather than being represented by asterisk place holder characters). (See "Using SES-Based (Challenge Response) Password Recovery" on page 368). If this option is not selected, the SES Administrator will not be able to see the user's answers (and will not, for example, be able to use them as an aid to validating the identity of the end-user during a Password Recovery call). In this case, each answers will be replaced with a string of asterisk (*). (this option was formerly called just "SecureDoc icon will not appear in system tray"). |
Devices may Sleep when Intel(R) Enterprise Digital Fence is enabled: Unlock Self Encrypting Drives (e.g. OPAL, TCG Enterprise) when systems | Sleep mode should only be used when the PC is in an approved physical security zone because the credential required to unlock the drive upon resuming from sleep are cached in memory, which makes the memory vul- nerable to direct attacks. Available on select PCs with SEDs. |
Options | Description |
resumes from Sleep mode. (Enterprise only) (this option was formerly called: "Unlock Self- Encrypting Drives (OPAL and drive Trust) when sys- tem resumes from Sleep mode. | Note: Use this option before enabling hybrid sleep in Windows for Opal and TCG Enterprise SEDs. When this option is selected, the computer can be allowed to be put into sleep only mode if it is inside a defined secure zone (e.g. work/home). If the device is in an unsecured zone, then it can not be put into sleep mode, but instead is forced to hibernate, encrypting the disk, and the user must perform pre-boot authentication. Intel Digital Fence technology puts a "digital fence" around the company or employee's home. This new func- tionality allows the SES administration to unlock the Self- Encrypting Divers (SED's) when Digital Fence option is enabled in SES console. This new option works with the devices that are equipped with the Intel Digital Fence technology. If Digital Fence functionality is not enabled, on a device, SecureDoc will not allow that device to go into the sleep mode, but force it to hibernate and authenticate at pre-boot logon. Note: When this option is selected, the Devices may Sleep when Intel(R) Enterprise Digital Fence is enabled option on the client option in SecureDoc Control Center (SDCC) is automatically enabled. Users can manually enable/dis- able this option on the client devices. |
Protect SecureDoc con- figuration files from dir- ect modifications by administrative users | This option, when enabled, ensures that admin- istrator-level users cannot alter the configured beha- vior of SecureDoc client devices by ensuring that they cannot directly modify the contents of the SecureDoc profile data files on the device. |
ADM - Override Device- based Settings with User- based Settings (Enterprise only) | Use to allow certain SES functionality normally defined at the device level to be overridden by similar settings defined using ADM at the user level. Choose which kinds of SecureDoc settings can be overridden. Communications Settings: These can overlay/replace communication settings such as the list of SDConnex serv- ers, and frequency of communication to the server. Disk Access Profile Settings: These can overlay/replace the settings related to allowing/limiting/blocking access to removable media and CDs/DVDs. Removable Media Encryption Settings: These can over- lay/replace the settings related to how and if media should be encrypted. |
Options | Description |
Create Boot key file for local Users (s) before device reboot (this option was previously called Create Boot key file for Windows User (s) ) | Windows Accounts The Windows Accounts feature is designed to perform the following main tasks:
For example: logs in to the user personal key file when the user logins their Windows account.
|
Create Boot key file for ADUser(s) detected on device (this option was previously called Create Personal key files for Windows User (s)) | Enable/check this option to ensure that users' personal key files will be created before the first reboot of the cli- ent device, avoiding issues as noted above. If the deploy- ing user's personal key file has been modified on SES since deployment, those key file changes will become available on the user’s next login to the device. NOTE: Where a user's account information is stored only in Azure AD, there will be no UPN name available (since under Azure AD no UPN name is stored in the user's Win- dows account), so the user's SAM name will be utilized to create a Boot Key File for such users. |
Create Personal Key File for Windows Users detected on device | If selected, this option will create a Personal (Windows- level) Key File for each Windows user found on the device. The following subordinate options define how the user will log on to his/her personal Key File. NOTE: the "Login Personal Keyfiles" and "Log in to Personal Keyfiles with SecureDoc Password belong to this row, not "Create Boot key file for AD users" Login Personal Keyfiles automatically. Select this option to have newly-created Personal Keyfiles be automatically logged in. |
Options | Description |
Login to Personal Keyfiles with SecureDoc password. Select this option to require users of newly-created Per- sonal Keyfiles to authenticate using their SecureDoc Pass- word. | |
Create accounts for domain users only. | When selected, this option will ensure that only Domain users can be provided with a Personal key file on endpoint devices. |
Display Boot and Per- sonal Key File pop-up messages. | If enabled, this option will ensure that users will be notified via a pop-up message when events occur that affect their Boot or Personal Key File (such as changes applied to their endpoint devices that affect their Boot or Personal Key Files). |
Exclude the following Account(s) | Certain categories of users are unlikely to become the “owning” users of devices. Commonly, this will include the IT technicians or Desktop administrators that prepare or “stage” devices for other users. SecureDoc permits such technicians/admins from being considered as pos- sible device “owners” by adding them to an Exclusion list defined in the Device Profile. If wishing to exclude one or more specific users from being the owner of a device, define a list of such excluded users in the exclusion list of users (Profiles Advanced Options, option name “Exclude the following accounts(s), shown in image below, near the bottom of the panel. To exclude multiple users, use a comma delim- ited list (e.g. JohnD,FrankF). NOTE: The user accounts included in this exclusion list can NEVER be the owners of the device. The exclusion list can be modified. However, if the SecureDoc deploying user is included in the exclusion list, and if the SES admin- istrators do not want to send down the deploying users’ key files to the client device, then select the Do not cre- ate and send down deploying user keyfile option in the Provisioning Rules settings panel. |
Installer will auto- adapt to device spe- cifics/technology (this option had previously been in the Installation Package settings) | Check to allow the SecureDoc Pre-Boot installer to make automated attempts to determine which set- tings will provide a successful transition from Pre- Boot to allow booting into the Windows OS. This option is disabled by default. This option provides substantial improved success in deployment varying device makes/models. |
Hardware reset OPAL Self-Encrypting Drives following warm reboot.
Due to the nature of OPAL SED management, such disk drives will remain in an unlocked state if their host devices is warm-rebooted.
Although this can be a useful feature for non-encrypted disks, it also constitutes a security vulnerability since devices could be subjected to a "Forced Restart Attack" (see article: "4 SED Attacks and How to Mitigate Them" at https://www.winmagic.com/blog/4-sed-attacks-and-how-to-mitigate-them/).
To combat this vulnerability, it is possible to leverage the Hardware Reset drive firmware feature which will, when enabled, force the OPAL SED to lock upon Warm Reboot of the device.
WinMagic has incorporated functionality into the Device Profile to support such a Hardware Reset, which will force devices to go through full Pre-Boot Authentication upon warm reboot.
This feature is not enabled by default. A new flag in SDProfile.spf informs the SecureDoc client during deployment as to whether or not it should attempt to enable the Hardware Reset feature on a sup- ported OPAL SED.
To enable this functionality, manually add the following section and settings clause to the Profile's .SPF file.
[SED]
SEDHardResetEnable=1
Note: If a user doesn't yet have a key file on a computer and the expectation is that PBConnex-brokered access to the device should trigger the transmission of a new Key File for that user onto the device, then either: A) The PBConnex group that governs PBConnex-brokered access to the device must have the option entitled "Save key file locally" enabled, or… B) The “Create Boot key file for Windows User(s)” feature in the Device Profile’s Advanced Options panel must be enabled.
Hardware Authentication
The Hardware Authentication panel is new in version 9.1, as in the images below:
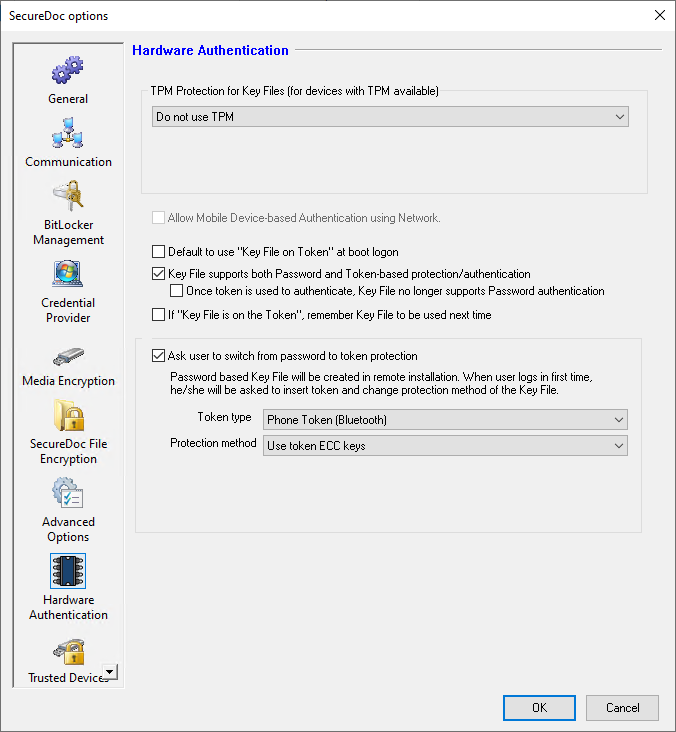 TPM protection for Key Files (for devices with TPM available). This option consists of a drop-list that defines whether or not the device TPM will be used to further protect Key Files stored on the device. It contains the following options:
Options | Description |
Do not use TPM | Key files will not be TPM-protected. |
Automatically TPM-pro- tected Password-pro- tected Key Files | Key Files that are currently password protected will automatically become TPM-protected on the device. |
Create Key Files pro- tected by TPM and PIN instead of a Password | Instead of using a Password, key files on the device will be protected using the TPM and a PIN the user must enter to unlock the TPM so that it will release the cipher it uses to protect the Key File. |
Checkbox: Allow Mobile Device-based Authentic- ation using Network | If selected, this option will permit the SecureDoc user to invoke SES functionality (using the MagicEndpoint IdP) to perform mobile device (phone)-app based authentication using a network communication link to the user's phone. Note that when selecting this option, all the remaining options on this panel will be dis- abled). Use of this option at the client will require the user to have the WinMagic Authenticator app open on his/her mobile device, so that the user can authorize the authentication. NOTE: The “Allow Mobile Device-based Authentication using Network” option and “Ask user to switch from password to token protection” options are actually mutually exclusive. If on opening an existing profile one is not access- ible/grayed out, uncheck the other to be able to access it. |
Checkbox: Default to use "Key File on Token" at boot logon Checkbox: Key File supports both Password and Token- based pro- tection/authentication. | This option permits the Administrator to define that both Password and Token-based authentication is pos- sible against Key Files defined for devices running this Profile. Check this checkbox to instruct the SecureDoc Client to permit you to define both Password and Token- based authentication into Key Files on devices installed using this Profile. NOTE: Where the Key File's Token support uses the WinMagic Phone-based token, it is important to dis- |
able certain functionality at Pre-Boot which is incom- patible with this, including Advanced ATR Mode and the Web Browser, among others. Until a better way to handle disabling those features has been created, you will need to manually ensure that these features are disabled by inserting the fol- lowing clause into the PROFILE.INI file before gen- erating your installation package. [SDSpace] PrebootFeaturesDisable=2147483647 | |
Sub-option: Checkbox: Once token is used to authenticate, Key File no longer supports Password authentication. This option depends upon the option above it having been checked/enabled. | This option, if checked, means that once users have converted their Key File to Token-pro- tection, then password authentication is no longer permitted for such key files. If this option is left unchecked/ disabled, the user may con- tinue to use Password-based authentication to a Key File that has also been defined to permit Token-based Authentication. |
Checkbox: If "Key File is on the Token", remember the Key File to be used next time | Check this option to remember the key file on the token each time. |
Checkbox: Ask user to switch from password to token pro- tection (Enterprise client only) | Check to prompt users to convert their password-pro- tected key file to a token-protected key file instead. If using this option, select the appropriate token type and us the Protection Method drop-down to select the appropriate/desired method from among the available for the token type. To expand support for additional Smart Cards and Tokens that can be used for pro- tection SecureDoc Key Files, WinMagic has added new options “Generic Cards”, “PIV Cards” and “OpenSC Cards” as new types. The “Generic Cards” and “PIV Cards” will permit the Administrator or User to select any smart card supported by Microsoft CSP (Cryp- tographic Service Providers) and to configure the key- file with the desired certificate protection schema. Protection schemas include: certificate-on-token- certificate-in-file certificate-from-windows-store The “OpenSC Cards” option will use OpenSC PKCS11 mid- dleware, which can be downloaded from https://www.opensc-project.org/ . This token type |
will support all token methods (PIN-on-token, Cert-on- token, RSA-on-token, but the card itself may not. Where using these options, WinMagic strongly recom- mends that customers investigate the token type func- tionality available within the tokens they will be using, and to test on candidate devices before full deployment. NOTE: The “Allow Mobile Device-based Authentication using Network” option and “Ask user to switch from password to token protection” options are actually mutually exclusive. If on opening an existing profile one is not access- ible/grayed out, uncheck the other to be able to access it. |
One Time Password
Developing the OTP feature, aiming to facilitate users' access to Windows by implementing a One-Time Password (OTP) generated on their mobile devices. The goal is to assist users in authenticating to a SecureDoc-protected Endpoint by offering a recovery and login method through an OTP received on their phones.
Examples supporting this need include scenarios where Bluetooth Low Energy communication is dis- abled, the user is offline, or the Mobile Device's TPM is unavailable. The proposed solution entails allow- ing users to log into Windows using an OTP from their mobile device, entered at Pre-Boot, thereby enabling the SecureDoc-protected endpoint to boot into Windows.
This feature ensures the use of OTP for logins in Preboot, SDCP, SDCC, and Remote Desktop, while also providing the capability to bypass MFA checks for Windows login using OTP.
Setup OTP phone:
Create a profile with options
MagicEnpoint Enterprise - Identity Provider list, for instance: https://doremi.asia:7100
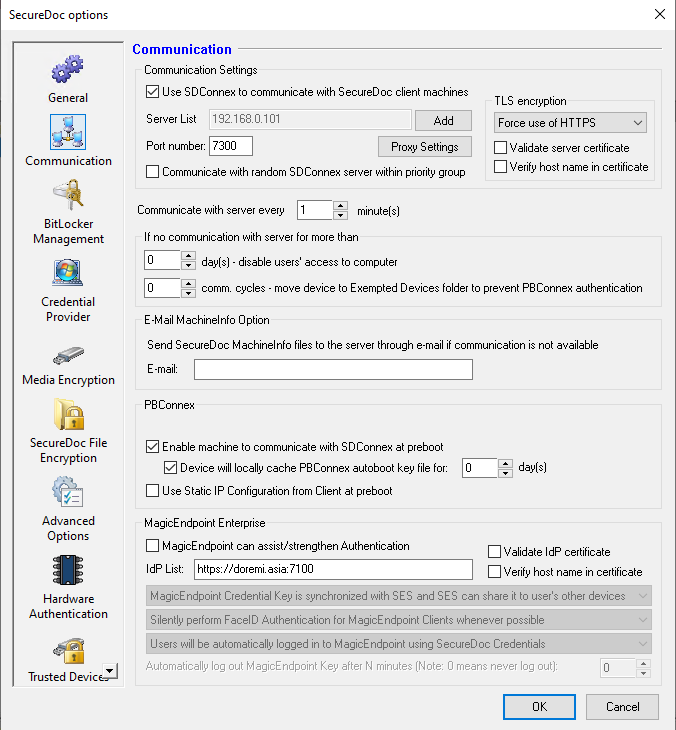 Under "Hardware authentication," activate the setting to prompt users to enroll OTP protection on their mobile phones. This action necessitates enabling MagicEndpoint in the Communication options.
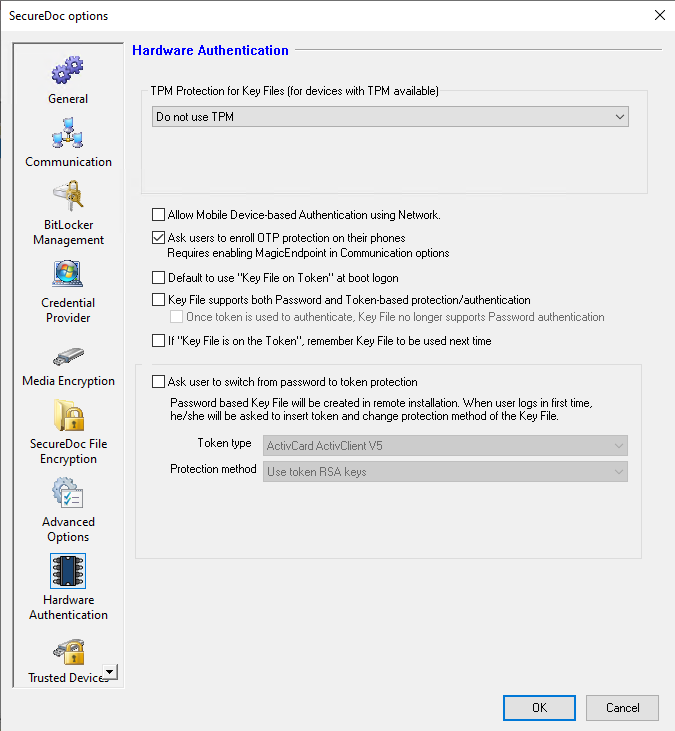 Deploy the package to the client
After the primary user has been achieved
SD prompts a warning to setup OTP
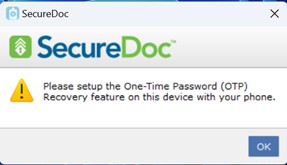 Click OK
SD prompts a dialog “Enroll Phone One-Time Password (OTP) Recovery”
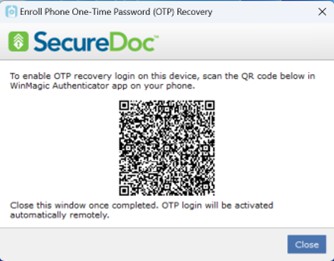
Use the phone (Android/iPhone) and launch WMAuthenticator app
Navigate to Menu/Accounts/[+] then Scan the QR code Now OTP setup has been updated successfully.
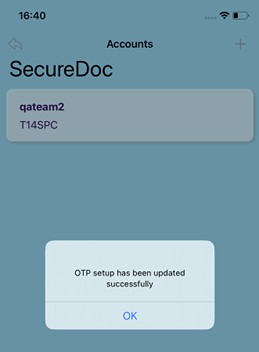 Click on the user then The One-Time Password is shown as asterisks.
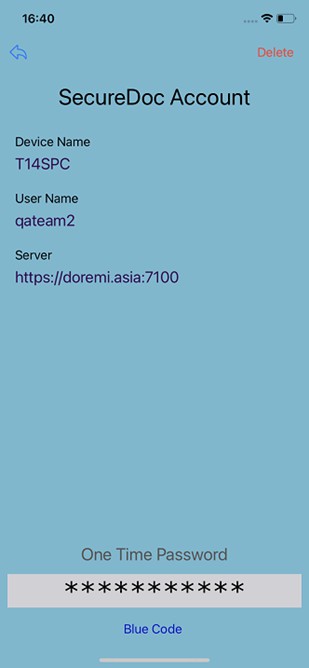 Close the dialog “Enroll Phone One-Time Password (OTP) Recovery”
Login Preboot with OTP phone
At preboot, enter the UserID
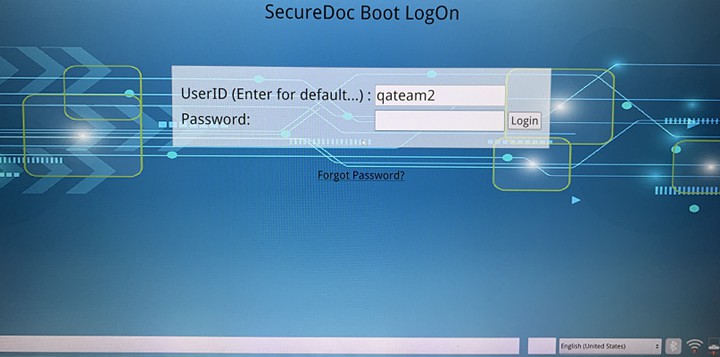
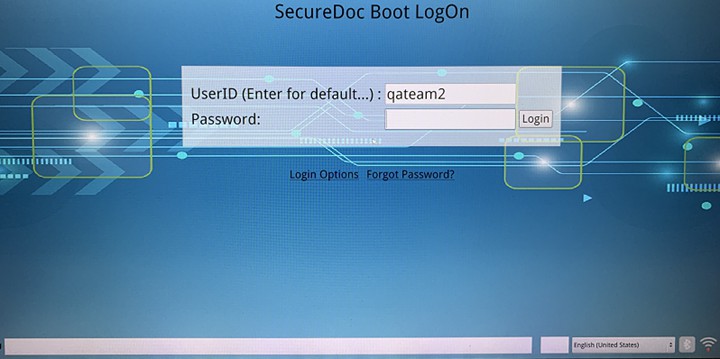 Click “F6" then “Login Options” shows
Select “Login Options”
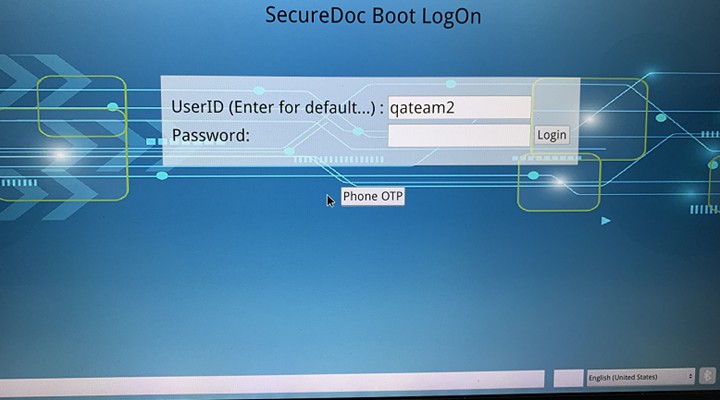
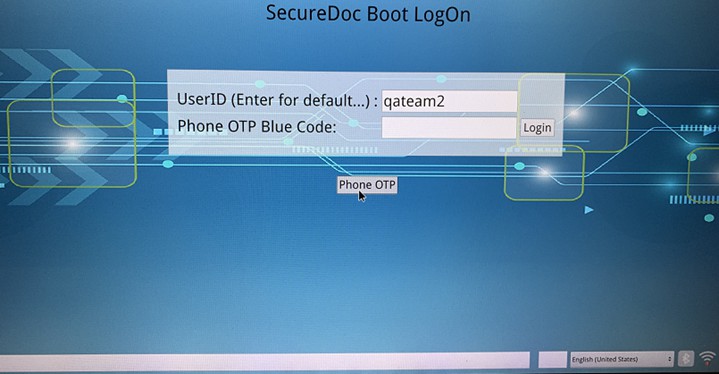 Select “Phone OTP” then The “Password” field changes to “Phone OTP Blue Code”
Launch WMAuthenticator on phone then Menu then Account then Select the account name
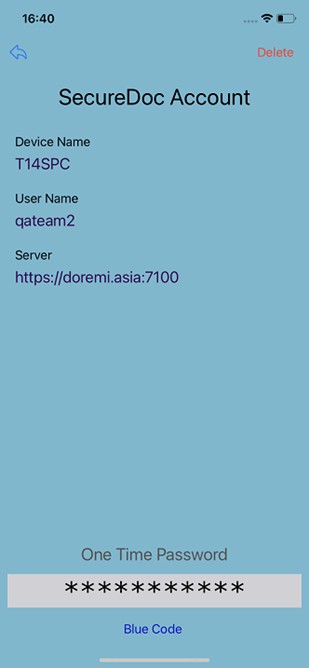
Tap on the “Blue Code” and verify on phone then The One-Time Password is shown.
SES Administrator Manual
v9.2 SR1
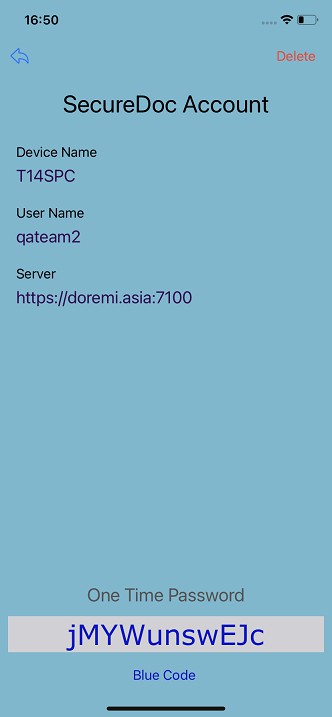 Enter the One-Time password to SD
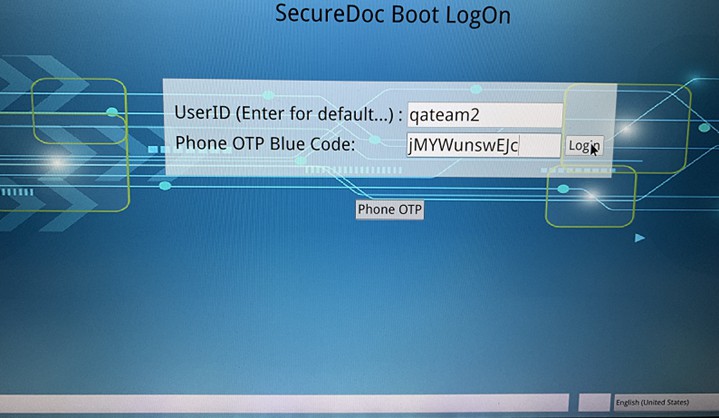 Click “Login” then Login preboot with OTP successfully and load Windows automatically without entering Windows’s password.
In Windows, SD requires to change the SD’s password.
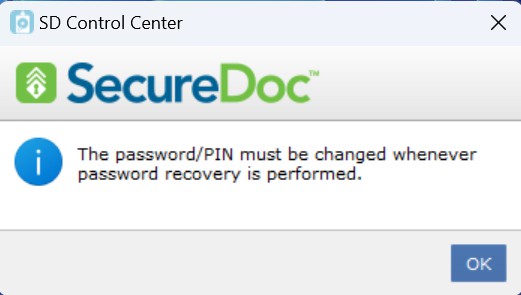
Click OK
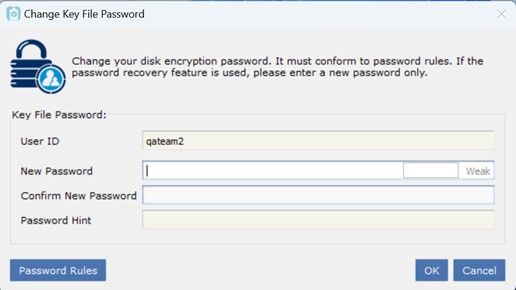
Enter and confirm the new password and click “OK” then SD’s password has changed successfully and synchronized to Windows’s password.
Login SDCP with OTP phone
Precondition:
- Enabled option: “Use SecureDoc Credentials to log into Windows”
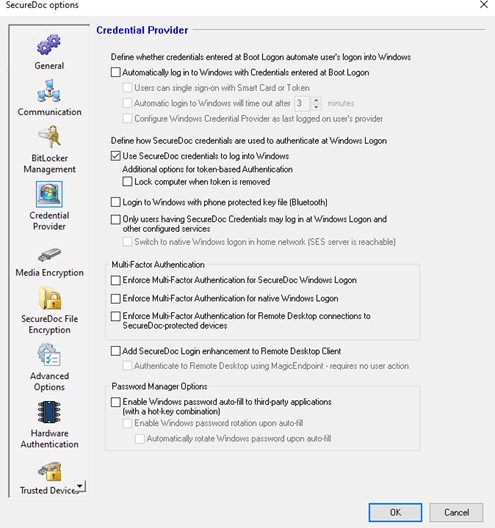
At SDCP screen
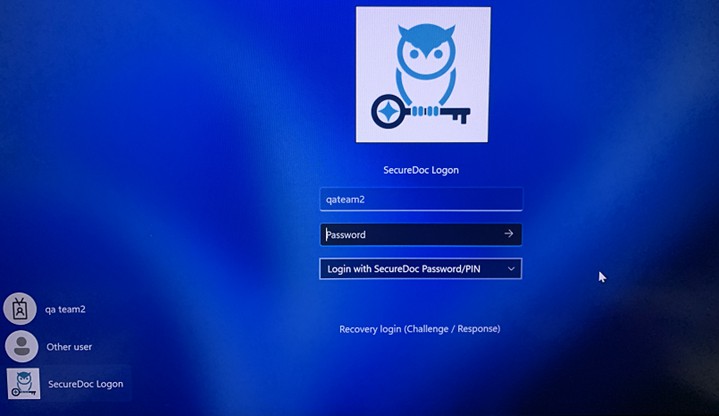 Click on “Login with SecureDoc Password/PIN” to change to “Login with Phone OTP”
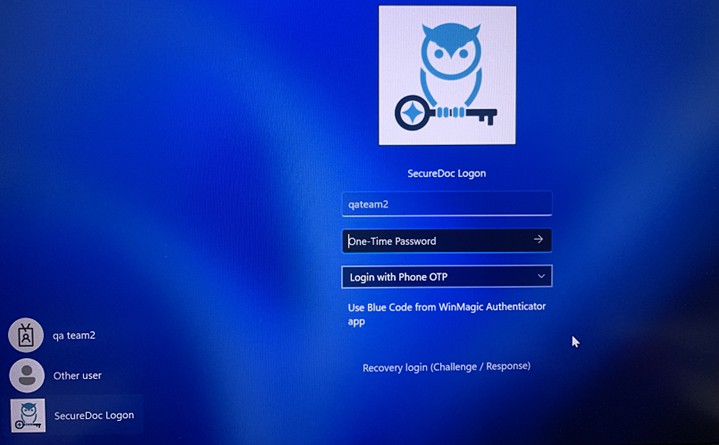 Launch WMAuthenticator on phone to get the One-Time password.
Enter the One-Time Password in SDCP
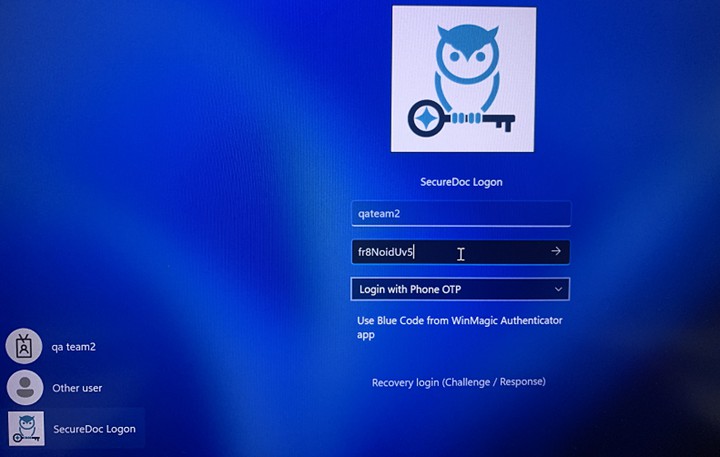 Click the arrow button to log in Login SDCP successfully with OTP
In Windows, SD will require to change SD’s password.
Login SDCC with OTP phone
Launch SDCC
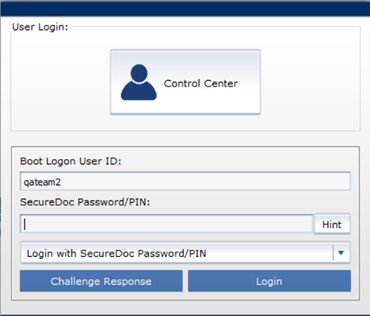 Click on “Login with SecureDoc Password/PIN”
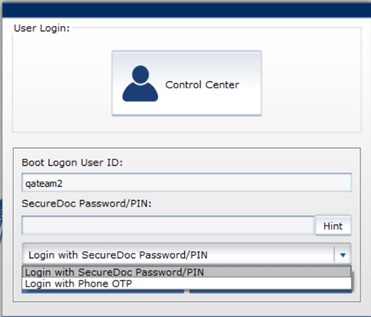
Select “Login with Phone OTP”
Launch WMAuthenticator on phone to get the One-Time
Enter the One-Time password to SDCC
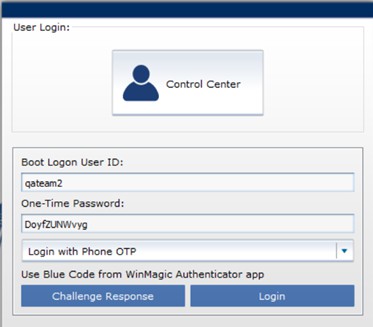 Click “Login” then Login SDCC successfully and SD will require to change SD’s password.
Login SDCP with OTP phone and bypass Multi-factor Authentication
Precondition:
Enabled option: “Use SecureDoc Credentials to log into Windows”
Enabled option: “Enforce Multi-factor Authentication for SecureDoc Windows Logon
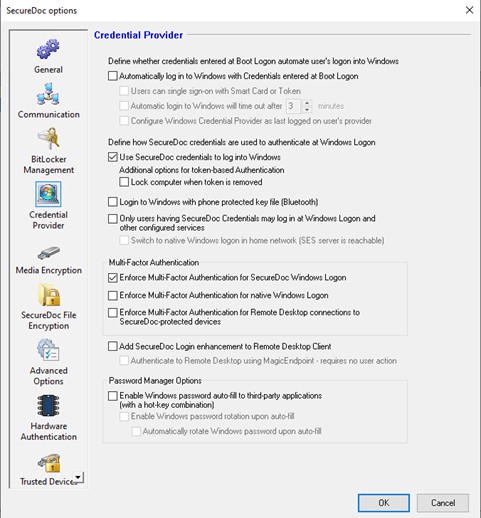 At SDCP screen
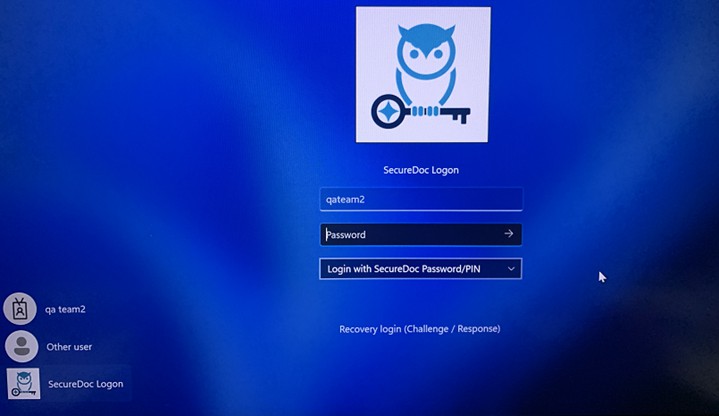 Enter the SD’s password and login.
Multi-factor Authentication is required.
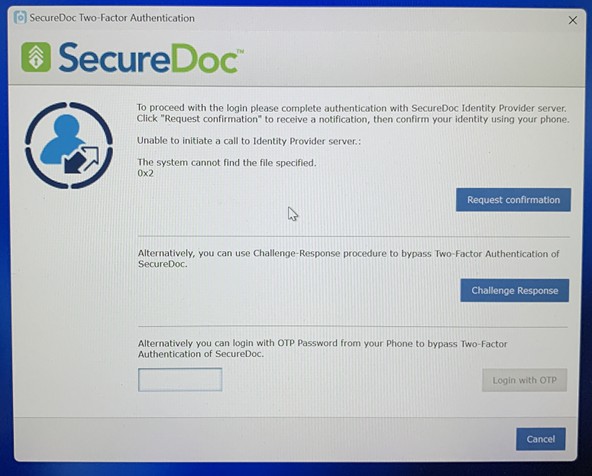 Launch WMAuthenticator on phone to get the One-Time
Enter the One-Time password to the blank box at “Alternatively you can login with OTP Password form your Phone to bypass Two-Factor Authentication of SecureDoc
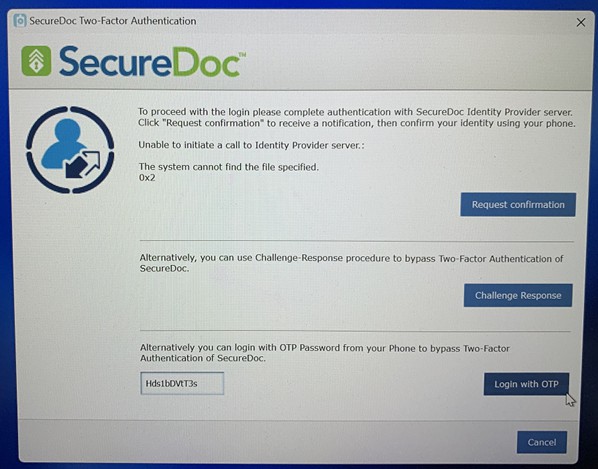 Click “Login with OTP” Login SDCP successfully without MFA.
In Windows, SD will require to change SD’s password.
Login Remote Desktop (RDP) with OTP phone
Precondition:
Enabled option: “Add SecureDoc login enhancement to remote desktop client”
Primary laptop with SD installed
Loaner laptop with/without SD installed
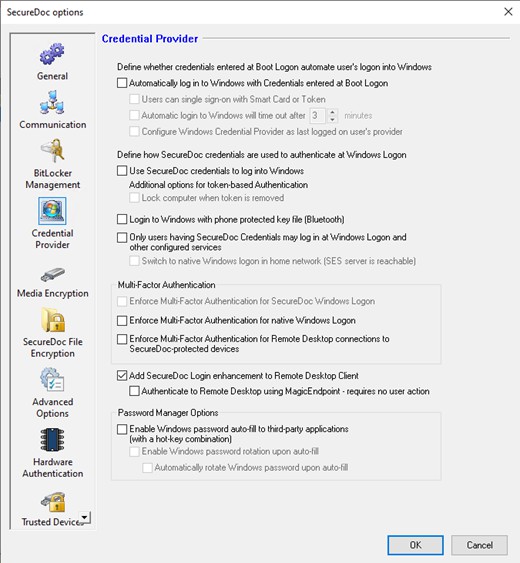 On Primary user, run “Remote Desktop Connection”
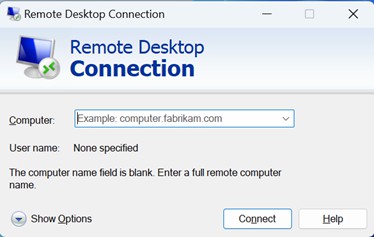 Enter IP address of loaner laptop
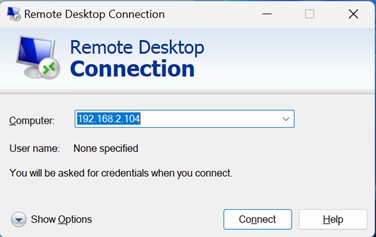
Click “Connect” button
Click On “Login with SecureDoc Password/PIN”
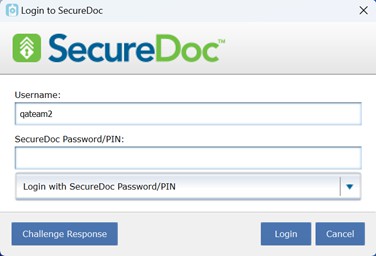 Select “Login with Phone OTP”
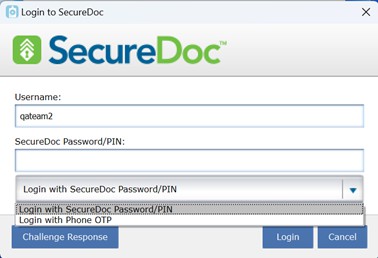
Launch WMAuthenticator on phone to get the One-Time
Enter the One-Time password to the “One-Time password” field
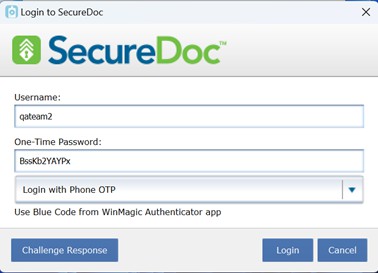
Profile Trusted Devices (SecureDoc for Enterprise Only)
Use this feature to specify which USB-connected SEDs are to be considered trusted, that is, allowed to be used as is on the client device and whose innate encryption functionality is considered to be strong enough.
Devices not on this list will be encrypted automatically (if so configured in the Media Encryption set- tings) or will prompt the user to encrypt them (if so configured in the Media Encryption settings).
To access the tab, open the Profile screen (either as part of creating a profile or by double- clicking an existing profile), click General options, then Trusted Devices.
WinMagic provides a list of common trusted SEDs: to load the list, click Load Default List. If necessary, you can remove a selected SED from the list or click Add to add a new one. You are prompted to either enter the device details or trust a device model. If you select Enter device details to trust, when you click Next you are prompted to enter identifying information (VID, PID, etc.) about the device.
If you select Trust a device model, when you click Next you see a list of the device models currently attached to the machine on which the SES console is operating. Select a model and click Add Selected Device Model.
For devices that are attached to the Trusted Devices list, the Disk Access Control (DAC) restrictions will not be applied.
Text, Color and Logo Options for Boot Logon (PBA)
Boot text and color options control the way Boot Logon appears on all client devices that install the installation package using this profile. These options enable you to customize Boot Logon to reflect information relevant to your enterprise.
To access the options, open the Profile screen (either as part of creating a profile as explained on "About Device Profiles" on page 128 or by double-clicking an existing profile), and click Boot text and color.
You can set the appearance of the header, the prompt text, the logo, and the colors of the Boot Logon screen. You can enter text that will appear as prompts or, for visually impaired users, you can enter special text that will invoke sounds that act as prompts.
Note: If visually impaired users enter incorrect information, no sound is emitted.
If you plan to use a customized background, the graphic file needs to meet these requirements:
24 bit .bmp format
1024 x 768 pixels
when zipped (SecureDoc zips the file for you), no larger than 0.5MB (you will be warned if your file exceeds this size)
Only computers with a high resolution monitor (the most common type) will display the customized logo — other monitors will show the default Boot Logon display. Customized logos will also not appear on devices using Permanent AutoBoot, which do not show the Boot Logon screen.
Note: Although the Device Profile settings can specify a Customized Background image to be used, once defined in the Device Profile such customized background images can only be applied to new SecureDoc installations. It is not possible to define a customized background in a Device Profile, then deploy that new customized background to an existing SecureDoc-protected device by changing the Device Profile through use of the remote command functionality (e.g. Apply Device Profile). Other aspects of the new Device Profile (e.g. feature settings) will be applied, but
Note: a) must be applied on the device itself through the SecureDoc Control Center by a user having Administrative rights, or b) using the bkimport.exe tool that became available in SES V8.2, which is installed on the client device as a standard element of the V8.2 installer. For more information on bkimport.exe, please consult section C 23, in the subsection entitled: Using bkimport.exe to alter the Pre-Boot Background image
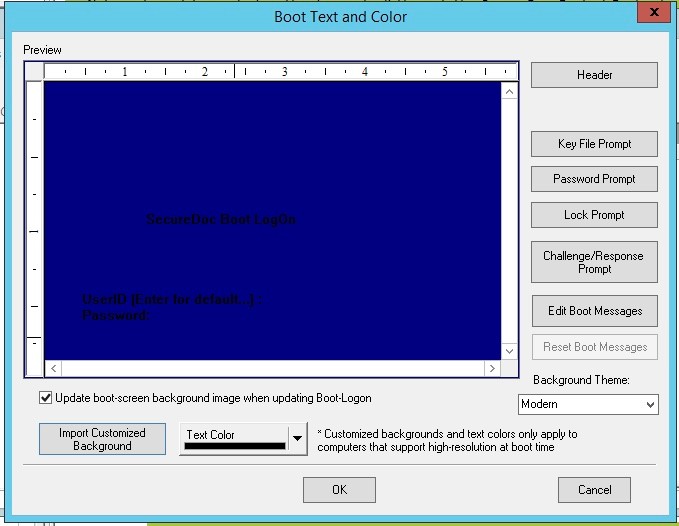 Change the settings as desired by clicking the button corresponding to the prompt area you want to customize. A new screen appears, allowing you to enter new text for that area.
Note: Lock Prompt text (which appears when three unsuccessful attempts to login to the encrypted device have been made) cannot exceed 16 lines of text, with a maximum of 81 characters (including spaces) per line.
For visually impaired users, enter the words “</beep1, beep2/>”, etc. as prompt texts: each trailing number (1, 2, 3, etc.) indicates a relative pitch/frequency setting, with 2 being higher than 1, 3 being higher than 2, and so on. Add as many beeps as you want. For instance, to have different sounds for the key file and the password prompt, you could enter:
“</beep1, beep2/>” at the Key File prompt, or
“</beep1, beep2, beep3, beep4/>” at the Password prompt.
Note: Use of beep codes for visually impaired users does not work for devices that boot into UEFI, so the above settings will not have any effect on devices that utilize SecureDoc's Pre-Boot for Native UEFI Devices (PBU).
When the new prompt text is complete, click OK. You are returned to the previous screen.
Note: The total prompts (header, password, and key file) should be no more than 23 lines of text, with 81 characters (including spaces) per line.
To change the color of the prompt text, click Text Color. For standalone SecureDoc users, this option is available only if Boot Logon is installed and you have a high resolution monitor. If using
the standard Boot Logon screen, which has a white background, you cannot choose the white or grey text color.
Optionally, click Import Customized Background and browse to the location of a graphic file to use as the background for the Boot Logon screen. (See file requirements on the previous page.) Check Update boot-screen background image when updating Boot Logon: the new background will appear at the next Boot Logon.
As you change text and color options, the screen previews how Boot Logon will appear to the user.
"Background Theme:"
Its options are "Modern" or "Classic"
The option chosen determines whether the new Modern pre-boot Background is dis- played, or the Classic. Modern offers some beneficial additional functionality, such as automatic typeface re-scaling, to permit use of longer strings without run-on or having strings overlay other screen objects.
Note: Imported customized backgrounds will not be previewed. A message appears beside the OK button to indicate that one has been imported.
Boot Logon Prompt Area | Default Value |
Header | “SecureDoc Boot LogOn” |
Key File prompt | “User ID (Enter for default…)” |
Password Prompt | “Password” |
Lock prompt | “You have incorrectly logged into the computer. If you know your User ID and password, please press Ctrl+Alt+Del and try again. If you don't know your User ID or Password, please contact your Help Desk for assistance.” |
Challenge/Response Prompt | None, this field is blank. You may use it to provide information to users that need to perform Chal- lenge/Response password/device access recov- ery, such as information on where to call, or help with the recovery process. |
Edit Boot Messages | The message defaults are capable of being altered through the use of this button. Clicking it will open file boot_msg.txt in Notepad.exe which will contain the default messages. These can be altered as the cus- tomer sees fit (e.g. changing to other languages, or altering content to better conform to the customer's needs. A new message block is created from a template |
Boot Logon Prompt Area | Default Value |
(including comments) and displayed in Notepad. The administrator can define/leave/uncomment a subset of messages that are to be customized for users. Once saved and the profile Editor is closed, t ?> ... he messages are added to the profile itself. At this point all comments will be stripped off, leaving only actual message content. Next time they are opened same way and available for further modifications. To remove the customizations it is enough to simply empty that file. The messages ported to endpoint devices during SecureDoc installatino retrieved from a profile, and are saved to SDSpace. Messages can be updated via profile update and will be dynamically updated in SDSpace as well. NOTE: These message changes take priority over lan- guage localization, ignoring standard localized mes- sages should pre-boot language change. | |
Reset Boot Message | The “Reset boot message” button will become enabled AFTER the user has altered any of the boot messages. If it is clicked, it will reset the list of boot messages to beas it had been before any changes were applied (effectively it resets it to be the default list of message texts). |
Background Theme | The Background Theme option dropbox permits SES Administrators to choose whether the SecureDoc Pre-Boot environment is to be presented in either the same mode and typeface as have been used for many years (now called Classic theme) or in a new “Modern” theme, which uses a larger typeface for the User ID and Password prompts as well as a different WinMagic- provided background image. Theme options are: Classic – The Original SecureDoc background image and typeface sizes will be used (this retains the familiar look and feel of the SecureDoc pre- boot as it has been for a number of years). NOTE: For customers upgrading from any previous version of SecureDoc Enterprise Server that pre-date the advent of Themes (in other |
Disk Access Control (SecureDoc Enterprise for Windows clients only)
Disk Access Control (SecureDoc Enterprise for Windows clients only)
Disk Access Control options let users lock or monitor functions performed on the different disks (both encrypted and not encrypted) on their computer. It is typically used to prevent sensitive data from being copied onto unencrypted removable media. Setting up these options in your installation package determines the default behaviour for those users. For example, you might want to ensure that, by default, users cannot write to unencrypted removable media.
Each profile contains a default access control profile. You can also set up temporary disk access control profiles, if necessary. Once those expire, the default access control profile will be used.
You can set up disk access control profiles that determine access to each possible drive and for any removable media drive. Disk access control affects drives, not media. For example, a zip drive can be under disk access control, and that control applies to any zip disk put in that drive. However, each separate flash drive inserted into a USB port is treated separately as a virtual drive.
Note: The new removable media settings apply any time the media (for example, the zip disk) is inserted into the drive, even if that media has been inserted before.
Disk access control can be used, for example, to:
block all write access to a USB drive, thereby preventing data from leaving the device or preventing data being written to it while on the Internet
block read/write access to a USB drive, thereby preventing others from loading software onto the machine.
This function protects against accidents rather than malicious attacks. If a disk is not encrypted, restricting access to it is not enough — a user could still boot from a DOS diskette and bypass the restriction altogether.
Disk Access Control (SecureDoc Enterprise for Windows clients only)
To access these options, open the Profile screen (either as part of creating a profile as
explained on "About Device Profiles" on page 128 or by double-clicking an existing profile), and click Disk Access Control. The Disk Access Control screen appears:
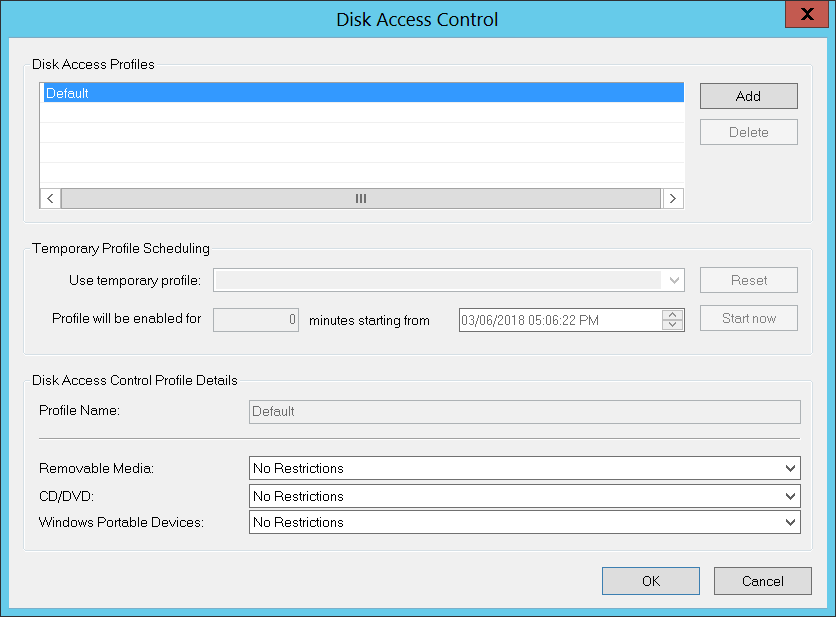
To create a temporary disk access profile:
Click Add and enter a profile name in the Access Control Profiles area.
Select the new profile in the Access Control Profiles area and from the Use temporary Profile drop-down list below it.
Set the Duration in Mins. and the Start Time for the temporary profile.
Select the desired options for the Removable Media / WPD devices. For more information on these options, see the table below :
Note: The Windows Portable Devices feature only supports devices that are connected through USB; it does not support other connections, i.e. Bluetooth or other wireless connections to Windows Portable Devices. It supports the Media Transfer Protocol (MTP) mode only, thus devices that are not using this mode should be considered standard storage, and the Removable Media option within the Disk Access Control settings should be used for this case.
Restriction | Access to Non- Encrypted Disks | Access to Encrypted Disks |
Read Only, unless Encrypted (this permits users to view USB media that is not encrypted, but prevents them from | read only | full |
Restriction | Access to Non- Encrypted Disks | Access to Encrypted Disks |
writing to such media until it is encrypted) | ||
No Access, unless Encrypted | none | full |
Read Only Access | read only | read only |
No Access | none | none |
Note: By default, No Restrictions is enabled and it means that there are NO POLICIES on the devices. The users can perform all tasks as usual.
Note: It is recommended that you do not use the "no access'" option for USB keys, since Windows will assume these are unformatted and prompt for formatting, repeatedly.
Boot Configuration Options
Boot Configuration options control the different customizable options for Boot Logon on the client devices that install the installation package built on this profile.
The options are organized into four categories:
General options (see “Boot Configuration General Options” on page 232)
Keyboard layout options (see “Displaying optional numeric-only Challenge Text in Challenge Response” on page 242)
Advanced options (use only in consultation with WinMagic technical support)
Wireless settings (see "Depending on which Device Category you chose, the available Device Profile Types available will be one Installation Packages for Windows" on page 126
Boot Configuration General Options
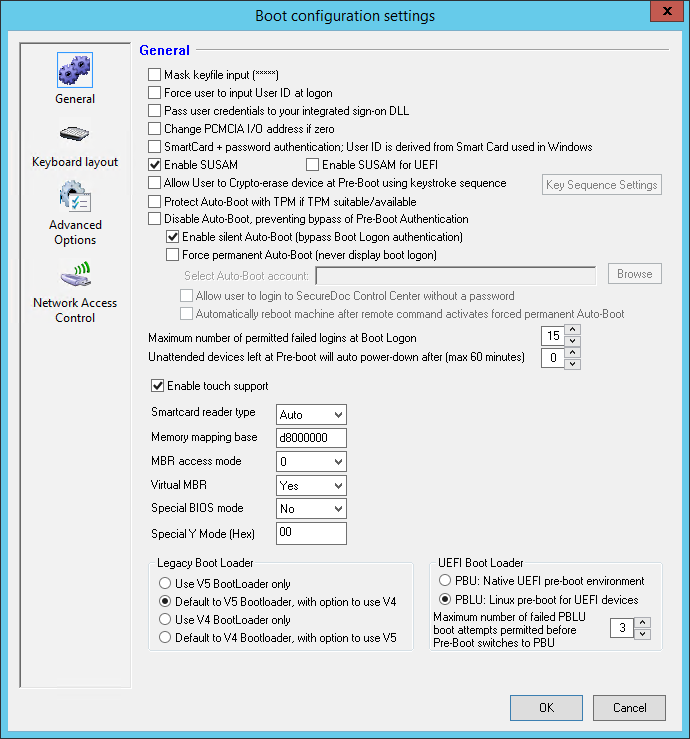
Option | Description |
Mask keyfile input | This option hides all user input at the Boot Logon, repla- cing it with asterisks (passwords are by default always treated this way). |
Force user to input UserID at | Check to require user to enter their User ID at Boot Logon rather than using the default user ID/key file. |
Option | Description |
Pass user cre- dentials to your integrated sign- on DLL (this was formerly called: "Enable simplified sign on") (Enter- prise client only) | If you have a DLL set up to accept parameters from SecureDoc, and want that DLL to retrieve the user name and password entered at Boot Logon, check this option. |
Change PCMCIA I/O address if zero (Enterprise client only) | If Boot Logon has problems locating a PCMCIA reader in a laptop, it may be an addressing problem. Users may need to change the PCMCIA I/O address on their laptop to the default address D0000000 to help SecureDoc detect it. |
Enable SUSAM | Use if uncertain whether hardware is supported by the preboot environment. Check to ensure user access to cli- ent device, even if on unsupported hardware. |
Enable SUSAM for UEFI | Use if uncertain whether UEFI hardware is supported by the preboot environment. Check to ensure user access to UEFI client device, even if on unsupported hardware. |
Smart Card + pass- word authen- tication; User ID is derived from SmartCard use in Windows (Enter- prise client only) | Check this to allow users to log in at pre-boot just by entering their password (no need to enter their User ID / User Name any- more).This option comes very handy in a scenario where users perform pre-boot login using their smartcards, especially the smartcards that have very long User ID. Note 1: This feature works with .net Gemalto V+ smart cards only. Note 2: When the SmartCard + password authentication; User ID is derived from SmartCard use in Windows option is selec- ted in SES Console, the “SmartCard + password authen- tication; User ID is derived from Smart Card used in Windows” option in SecureDoc Control Center (SDCC) is automatically enabled. For information on how to configure the environment to use this feature, see the "Smartcard + password authentication; User ID is derived from Smart Card used in Windows" on page 240 section in this document. |
Allow user to Crypto-erase device at Pre-Boot using | Check to allow user to Crypto-erase a device (remove the encryption key from the device, rendering it inac- cessible). Click Change Key Sequence and, in the new |
Option | Description |
keystroke sequence. (This option was formerly called: "Enable Pre- Boot Crypto-erase Sequence") (Enter- prise client only) | screen that appears, specify the three key strokes to be used for this purpose. Supported keys are Function keys (F1, F2, etc.), alone or in conjunction with the Shift, Ctrl, or Alt key. For example, the sequence could be SHIFT+F1, CTRL+F2 and F3. To allow the user to cancel the Crypto-erase function, enter the number of seconds of delay before the Crypto- erase will be carried out. |
Protect Auto-Boot with TPM | When enabled, this option will protect the Auto-Boot Key File by protecting it using the device's TPM. This ensures that the device's drive cannot be auto-booted to the oper- ating system if an attacker were to transplant the drive into another device since no two TPM devices will ever render the same protection cipher. Thus, the Auto-Boot Key File is "bound" to its original device it was in when SecureDoc was installed, and will not Auto-Boot suc- cessfully in any other device. |
Disable Auto-Boot, preventing bypass of Pre-Boot Authentication (This option was formerly called 'Disable “Auto-Boot” fea- ture')(Enterprise cli- ent only) | Clear to enable Auto-Boot, which allows an administrator to temporarily bypass Boot Logon on client devices receiving this profile. You activate this bypass and con- figure how long it will stay in effect (until a configured time period has elapsed and/or a configured number of reboots has been reached) through remote control: see “Rotating Key Encryption Keys on Endpoint Devices” on page 408. For more on Auto-Boot, see “Bypassing Pre-Boot Authentication through Auto-Boot” on page 36. |
Enable silent Auto-Boot (bypass Boot Logon authen- tication) | Check to allow Auto-Boot to be run even if a user has not yet been authenticated through Boot Logon. If this option is un- checked, auto-boot can be used only for reboots subsequent to a user successfully logging on through Boot Logon. On SEDs, auto-boot will be canceled once the time limit is reached, regardlessof the number of reboots. |
Force permanent Auto-Boot (never display boot logon) | Check to have users of encrypted client devices not see Boot Logon but simply log on to Windows as usual. Use of this option requires selection of a Pre-Boot User Account (this account must already exist among the list of accounts). Selection of this account is described below: |
Select Auto-Boot Account | Click Browse and choose the user’s account as the Auto- Boot account. Only users with Use account to enforce Auto Boot option checked will be able to be viewed or selected (to create such a user, see “Adding, Modifying, and Deleting Users ” on page 437. You will also need to have set the |
Option | Description |
Allow to login the boot key file automatically option in the profile’s general options (see “Profile General Options ” on page 131). | |
Allow to login SecureDoc Con- trol Center without password | Check to allow users to log in to SecureDoc Control Center without authentication. Requires that the pre- vious option be enabled as well. Available only if per- manent Auto-Boot is enabled. |
Automatically reboot machine after remote com- mand activates forced permanent Auto-Boot. (This option was formerly called: "Auto- matically reboot machine after act- ive force permanent Auto-Boot by remote command") (Enterprise client only) | If permanent Auto-Boot is used, users will not be able to log in to Control Center because the key used to encrypt their computer is a randomly generated key not known to them. To have the user-specific key file used for per- manent Auto-Boot instead, check this option. |
Disable auto boot (activate Boot Logon) after max- imum number of permitted failed logins reached. (This option was formerly called: "Monitor failed login attempts") | This option causes the SecureDoc client to monitor and count the number of failed login attempts to either a) Boot Logon (if used) or b) to the Windows account if permanent Auto-Boot is being used. When the maximum number of failed login attempts (whose configuration is described below) is reached the client device will be locked if the maximum failed logins occurred at Boot Logon), or it will be rebooted if the maximum failed logins occurred at the Windows login. |
Maximum number of permitted failed logins at Boot Logon. (This option was formerly called simply "Maximum number of failed logins") | For increased security, you can define a maximum number of times that unsuccessful logins can take place. After that max- imum number is reached, that user's key file is automatically locked, regardless of its permissions. To unlock the device, a user having an admin permissions rights key file must log in (to a non-locked key file), or the locked-key file user must perform password recovery. Any time a successful login of another key file takes place, the locked key file will be unlocked and the failed login counter will be reset to zero, to begin a new count of failed logins if needed. |
Option | Description |
Disable auto boot (activate Boot Logon) after max- imum number of permitted fails Unattended Devices left at Pre-Boot will auto-power down after (max 60 minutes) (Enterprise client only) | This option will cause devices to power off if the user has not logged in at the Pre-Boot Login screen within the maximum number of minutes specified in this setting. This is primarily an energy-saving option, helping to avoid the possibility that devices will display the Boot Logon screen security per- petually. To have client devices power themselves off, enter the desired maximum time limit (in minutes). Entering a 0 (zero) disables this feature and boot logon display time will be unlimited. |
Tablet PC support | If SecureDoc is to be installed on a Tablet computer, and the user wants to use the Tablet’s on-screen keyboard, select the Tablet PC manufacturer from the list. If the manufacturer and model are not listed, the on-screen keyboard may not be supported (this means that, if the user doesn’t have a physical keyboard, they cannot authenticate at Pre-Boot on such devices; Auto-Boot may be a viable interim option until on-screen keyboard support is available in a future version). The package must also use the V4 bootloader: see "Depending on which Device Category you chose, the available Device Profile Types available will be one Installation Packages for Windows" on page 126. In SES version 6.5, a new "Auto-detect" option has been added to the drop-down list. This option allows for auto- detection of Tablets, in order to improve the process of determining the On-screen keyboard. For example, the ILITEK Multi-Touch device found on Getac v110 Tablet computers is now a supported device type in the V5 Pre-Boot. SES Administrators can con- figure such devices using a new "Auto-Detect" option. Once installed on a Getac v110 device, the user will be prompted to go through the initial calibration process, after which the ILITEK Multi-Touch device will work with the on-screen keyboard at Pre-Boot |
Smartcard reader type (Enterprise cli- ent only) | If Boot Logon has difficulty recognizing a token, you may have to specify the type of reader (e.g. USB, PCMIA) for which Boot Logon should search. If this problem seems to recur for a specific device manufacturer, you may |
Option | Description |
need to set this option for all client devices accessed by tokens from that manufacturer. This option should only be used if such problems arise. | |
Memory mapping base address (Enter- prise client only) | If Boot Logon has problems locating a PCMCIA reader, it may be due to the memory mapping of the device. You may need to change the memory mapping address according to the device, and this option may need to be specified for all client devices. Setting this option here makes this process easier. This option should only be used if such problems arise. |
MBR access mode | Specify whether or not to use simplified sign-on access to MBR:
gram modify the MBR
gram that wants to write to the MBR to believe it was modified although it was not (rarely used)
of the partition table |
Virtual MBR | Always leave at default of “yes” |
Special BIOS mode | Used in some circumstances when a hardware controller is affecting booting of the device. |
Special Y Mode | Use under circumstances where want to change priority of MBR — use in consultation with WinMagic Technical Support. For SED users in particular, if the computer is unable to boot due to BIOS incompatibilities, set this to “04” to enable a soft reboot. The YMode options available (at the time of this writing) and the order in which they should be tried to circumvent problems are: YMode=00. This is the default mode. This is a secure mode. YMode=04. Use this when YMode=00 doesn't work, e.g. if device fails to boot Windows, has Windows hardware problems i.e network, sound card etc. This is a secure mode. YMode=40. Used when YMode=04 doesn't work. This is con- sidered a less secure mode. |
Option | Description |
YMode=10 Use this if Ymode=40 does not work. Can be used Used for certain environments necessary SecureDoc boot information is destroyed at Windows boot time (for example under AWS, Citrix virtualization environments). This is a secure mode YMode=14. Use this when YMode=10 doesn't work. This is a secure mode. YMode=50. Use this mode when Ymode=14 does not work. This is a less secure mode | |
Legacy Boot Loader | This version of SecureDoc includes two Boot Logon versions. By default, SecureDoc is configured to use the V5 loader and, if it fails, use the V4 loader as fallback. If users report consistently finding the V4 version is needed, or if the user will be using a tablet PC, you can choose the Use V4 Boot Loader option. Use this option with caution: this option will apply to all devices that receive this profile and the V4 boot loader does not support PBConnex, Wireless PBConnex, or SecureDoc OSA. SecureDoc will, by default, install 32-bit PBL on legacy sys- tems, unless the profile overrides this rule. Please see the note below relating to changes starting in V8.3SR1 relating to UEFI devices. |
UEFI Boot Loader Note: PBU and PBLU options have the same functionality in Windows 7 as well as in Windows 8, 8.1, 10 and 11. | PBU: Native UEFI pre-boot environment: - (Default) Select this option to use the SecureDoc UEFI Pre-Boot for UEFI devices. When this option is selected, the SecureDoc PBU boot loader will be installed on the client and the users will be able to perform pre-boot authentication in the SecureDoc native UEFI-pre-boot environment. Note: PBU is the default setting as it supports a wide variety of devices. PBLU: Linux pre-boot for UEFI devices: - Select this option to use the Linux-based Pre-boot on UEFI client devices Windows). When this option is selected, PBLU boot loader will be installed on the client and the users will be able to perform pre-boot authentication. Use of PBLU offers several advantages over PBU, including sup- port for WPA -enterprise secure communications over Wireless / Wired connections, Touch/Pen inputs and all network pro- tocols. Also, PBLU has the ability to use Linux-based third- party libraries and tools, which is crucial for Smart card sup- port. SES Administrators may use this option with regular SecureDoc packages for Windows devices. |
Option | Description |
NOTE: As of SES V8.3SR1, SES Profiles will automatically default to utilizing a 64-bit Boot Loader for UEFI Devices (both PBU and PBLU), unless overridden by an entry in the known- configs.xml file, which might be required if UEFI firmware requires a 32-bit boot loader (rare these days) or if customers encounter issues when using 64-bit PBU/PBLU. | |
Maximum number of failed login attempts per- mitted before Pre- Boot switches to PBU | This option consists of a single spinner control, through which the Administrator can define how many failed login attempts will be permitted, after which the device will switch over to using the "native" (non-Linux) Pre-Boot for UEFI devices. If set to 0 (zero), this option will not be used. |
NOTE: If you configure a device to utilize the PBLU Pre-Boot, AND that device encounters Pre-Boot errors under PBLU, after a defined maximum number of failed Pre-Boot errors it will "fail over" to PBU (which is more tolerant of variable hardware).
In SES V8.5, a new option has been added to the Profile .spf file which permits defining a specified num- ber of failed Pre-Boot Linux for UEFI (PBLU) boot attempts before SecureDoc Pre-Boot automatically switches from PBLU to Pre-Boot for Native UEFI (PBU) boot processing.
Customers had encountered issues booting into PBLU (e.g. where they either did not have an attached monitor connected to an enabled port, or their devices have had certain ports disabled to work around a known issue with Intel GFX combined with Sleep mode, which can cause Blue Screen halts when using PBLU using all display ports).
This new option permits the SES Admin to manually define (in the Profile's .spf file) a more lenient num- ber of Pre-Boot attempts under PBLU, thereby permitting technicians more time to resolve any issues before the device would switch permanently to PBU mode (after which it would require the additional steps of having a user with Admin rights logging in to SDCC to switch it back and then updates boot logon to reinstate PBLU-based Pre-Boot).
To enable this (optional) override, manually add the following to the SecureDoc Profile for the device (s):
Section name: "SDSpace"
Key name: "PbluFailureCounterMaxValue" Valid key values: 0...255
Key value meanings:
0 - PBLU Failure counter is disabled (never switch to PBU)
1...255 This new PBLU Failure counter may take a value between 1 and 255.
NOTE: If the above override is not applied to the Profile's .spf file, the client continues to be hard- coded to default to 3 failed PBLU load attempts before auto-switching to PBU, as before.
Smartcard + password authentication; User ID is derived from Smart Card used in Windows
Note: This section applies only to SecureDoc Enterprise for Windows client device profiles.
This option comes very handy in a scenario where users perform pre-boot login using their smartcards, especially the smartcards that have very long User ID. It is difficult for users to remember and key in these long User IDs at pre-boot logon screen.
Using the Smartcard + password authentication; User ID is derived from Smartcard use in Windows option in SES Console allows the users to log in at pre-boot just by entering their password (no need to enter their User ID / User Name anymore).
Enabling the Smartcard option in SES Console:
Note: This feature works with .net Gemalto V+ smart cards only.
Before enabling this feature, you must configure the environment required to use this feature by per- forming the following steps:
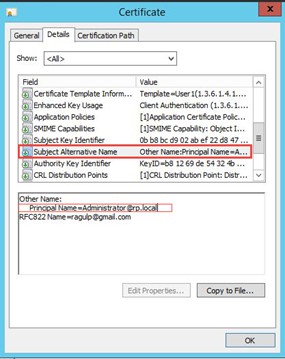
Note: Make sure Gemalto smartcard certificates are valid and contain the Principal Name in the Subject Alternative Name field.
Create a token-protected keyfile by loading the Gemalto smart card certificate into the user account that you desire to use for testing purposes.
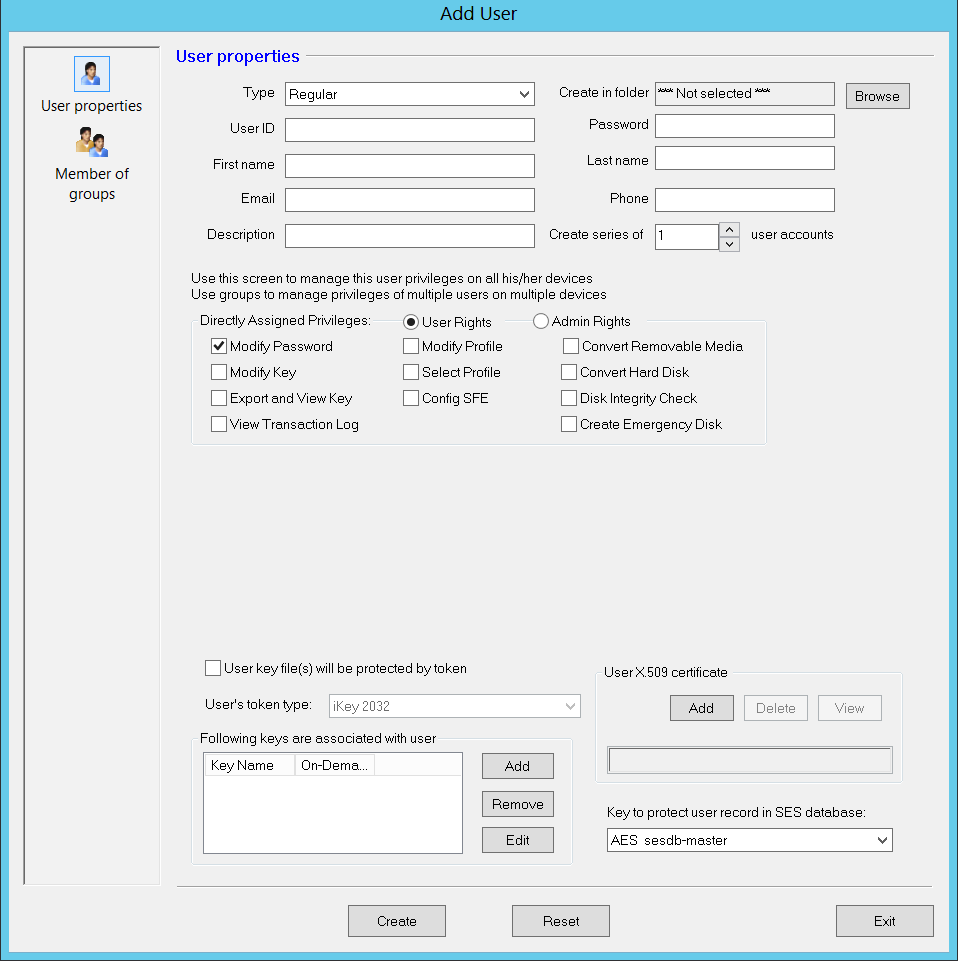 From the Boot Configuration window, select the SmartCard + password authentication; User ID is derived from SmartCard use in Windows option. This option allows the smart card users to login at pre-boot using their passphrase only (without entering their user ID / user name).
Note: When this option is selected, the Enable enhanced smartcard authentication option in SecureDoc Control Center (SDCC) is automatically enabled. Alternatively, if this option is not enabled in SES console, users may manually enable this feature in SD Control Center.
Note: For UEFI devices, select the PBLU: Linux Pre-boot for UEFI devices option from the UEFI Boot Loader group-box.
Click OK.
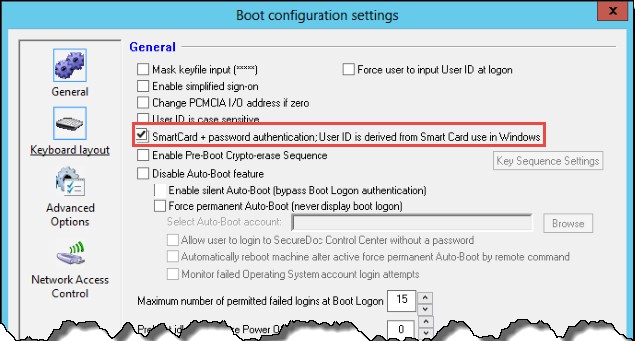
Once the package is deployed onto a client device, the pre-boot logon screen will not show up the user ID field.
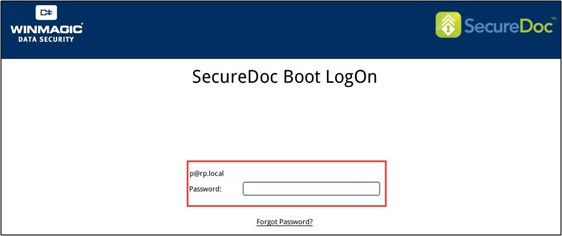
Displaying optional numeric-only Challenge Text in Challenge Response
Although Challenge-response device access recovery applies to most device types plus RMCE-encrypted media, a new option has been added that permits displaying a second numeric-only Challenge String. This has been included to permit optional integration with a customer's own Interactive Voice Response (IVR) systems, so that users may enter a Chal- lenge string into their IVR system using only the numerals on a telephone keypad.
To enable this functionality, customers must manually enter a new value into the SecureDoc Device Profile, entitled "ShowNumericChallenge", so an example of this new setting would be:
ShowNumericChallenge=1
When this value is set to 1, SecureDoc's boot logon should display both the usual hexa- decimal "Challenge Number", followed on the line below by a numeric-only Challenge Num- ber.
Boot Configuration Keyboard Layout Options
Option | Description |
Prevent Boot Logon from remapping keys | Check to use a normal layout. |
Permit Boot Logon to remap keys according to the following layout | Check to use an atypical layout: check, then choose the lay- out to be used. |
Automatically get Windows local key layout while installing Boot Logon | Check to automatically use the Windows keyboard layout for use by Boot Logon. |
Support Foreign keyboards | Check if a foreign keyboard is used. For example, German keyboards often have an ALT-GR key. |
Boot Configuration Advanced Options
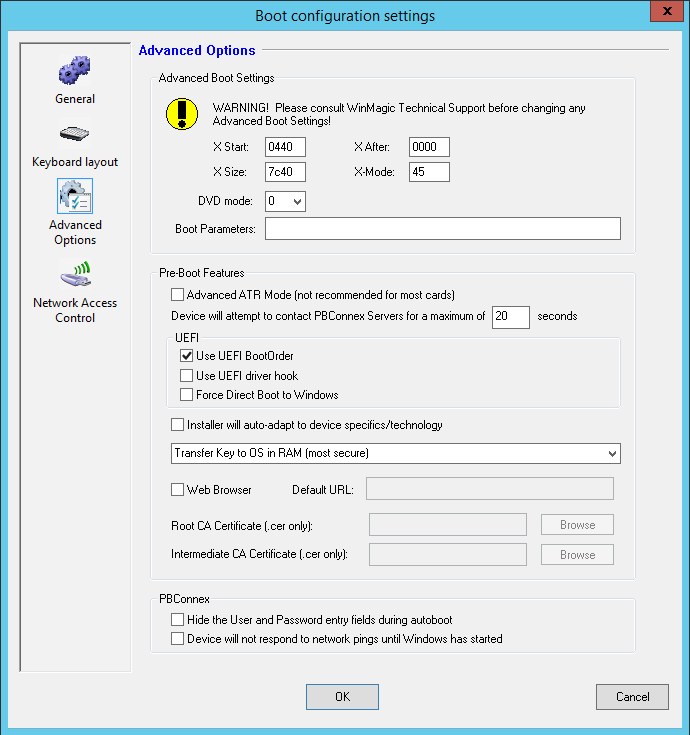
In Advanced Boot Settings, the options listed are as follows:
Note: Note: It is strongly recommended to contact WinMagic Technical Support before altering these values
Option | Description |
X Start | This option defines very specialized low-level functionality of the SecureDoc client product: The SES Administrator should not enter any other values than the defaults shown, or nor should profiles be deployed to endpoint devices where these options have been |
Option | Description |
altered from their defaults, except under specific guidance from WinMagic Technical Support. | |
X Size | This option defines very specialized low-level functionality of the SecureDoc client product: The SES Administrator should not enter any other values than the defaults shown, or nor should profiles be deployed to endpoint devices where these options have been altered from their defaults, except under specific guidance from WinMagic Technical Support. |
X After | This option defines very specialized low-level functionality of the SecureDoc client product: The SES Administrator should not enter any other values than the defaults shown, or nor should profiles be deployed to endpoint devices where these options have been altered from their defaults, except under specific guidance from WinMagic Technical Support. |
X-Mode | This option defines very specialized low-level functionality of the SecureDoc client product: The SES Administrator should not enter any other values than the defaults shown, or nor should profiles be deployed to endpoint devices where these options have been altered from their defaults, except under specific guidance from WinMagic Technical Support. |
DVD Mode | DVD Mode applies to the V4 pre-boot environment ONLY, and allows that preboot environment to deal with an EHCI USB con- troller in the specific case where such a controller might not report or interface with some authentication tokens correctly if a DVD device is inserted. Unless advised specifically by WinMagic Technical Support to use a different value in this field, this should be set to the default value of 0 (zero). |
Boot Para- meters | This column can be used by the SES Administrator (under guid- ance from WinMagic Technical Support), typically where a work- around is required for certain endpoint device models to alter Pre-Boot behavior or in transitioning to Windows. When left at it's default value (a blank or empty string) the nor- mal default boot parameter values that are natural to the current version of the SecureDoc client will be applied to all endpoint devices that receive this profile. If, in consultation with WinMagic Technical Support, it is necessary to enter any different or addi- tional parameters in this field, Technical Support will provide the exact format of those parameters. |
Advanced ATR Mode (not | ATR mode refers to the signature of an authentication card (e.g. Smart Card) that can cause some conflicts between certain cards. |
Option | Description |
recommended for most cards) | NOTE: This option should only be enabled if the device is to be authenticated to with a (London, UK) Metropolitan Police Purple Smart Card. Selecting this checkbox will enable use of the Metropolitan Police Purple Smart Card, while disabling any use of any other card types for authentication at SecureDoc Pre-Boot. |
Devices will attempt to con- tact PBConnex Servers for max- imum of", fol- lowed by a number of seconds. | This numeric value defines how many times a PBConnex server will attempt to send a Key File to a client device across a net- work connection before it treats the device as unreachable. |
Use UEFI BootOrder | This option allows the SES administrators to define UEFI boot order for the devices. By default this option is checked. |
Use UEFI driver hook | This option permits the SES Administrator to define that driver binding for UEFI can be explicitly enabled or dis- abled. By leaving this option disabled, SecureDoc’s own logic will be used to manage such devices, which will work better for devices that do not have full implementations of Driver Binding. By enabling this option, the assumption is that the devices receiving this profile will have full implementations of Driver Binding for UEFI. UEFI driver binding is special protocol, providing functions for starting and stopping drivers, as well as a function for determining whether a given driver can manage a par- ticular controller. |
Force Direct Boot to Win- dows | Check "Force Direct Boot to Windows" in order to ensure that certain UEFI device types that a) have SED drives installed; b) have PBU native pre-boot for UEFI devices, and c) which have difficulties loading Windows following successful authentication to now be able to successfully load the Windows OS. |
Drop -List: Transfer Key to OS in RAM (most secure) | This droplist offers two options: "Transfer Key to OS in RAM (most secure)" will ensure that the logged-in Key File's data encryption key is passed to the Operating system using RAM Memory, b)"Transfer Key to OS using Persistent |
Option | Description |
Storage" will transfer the logged-in Key File's data encryp- tion key to the Operating System by temporarily placing it in an area on disk. This second option, while slightly less secure, can help offset issues that can be encountered where the Computer's hardware resets/wipes the contents of RAM memory (including the Key) when switching over from the Pre-Boot environment to the Windows loader. | |
Web Browser (Enterprise cli- ent only) | Check this option to enable access to your firm's online password reset website from within the SecureDoc Pre- Boot environment, permitting users to reset their Domain Password in the event they have forgotten it. |
Default URL (Enterprise cli- ent only) | Enter the URL of your online Password Reset website. For most firms, this will be an intranet website, not exposed to the broader web. |
Root CA Cer- tificate (.cer only) (Enter- prise client only) | If your Password Reset website requires Certificate-pro- tected access, browse to and locate the certificate (.cer) file. |
Intermediate CA Certificate (.cer only) (Enterprise cli- ent only) | If your Password Reset website requires an intermediate Certificate to protect access, browse to and locate the cer- tificate (.cer) file for that. |
Note: Advances in BIOS and EHCI controllers have made this setting unnecessary, and it will be removed in a future version of SecureDoc Enterprise Server and the SecureDoc Client.
In PB Connex, the options listed are as follows:
Option | Description |
Hide the User and Password entry fields dur- ing autoboot (Enterprise client only) | This option (disabled by default) will ensure that if the device determines that it is to start in AutoBoot mode (ie. without the user needing to log on with his own credentials), then it will suppress the display of the User ID and Password fields (and their prompts) during pre-boot. |
Prevent pings until windows has started | This option (disabled by default) ensures the device running this profile will not respond to a network ping while at Pre- Boot Logon (i.e. not until after Windows has started). |
(Enterprise client only) | Where customers use ping to determine whether computers are capable of being managed remotely (and for other pur- poses), so use of this option will prevent “false positive” responses to such pings while the device is still at Pre-Boot Logon. Once the user has successfully completed Pre-Boot Authentic- ation and Windows is running, at that time the device will suc- cessfully respond to network pings. |
Boot Configuration Network Access Control
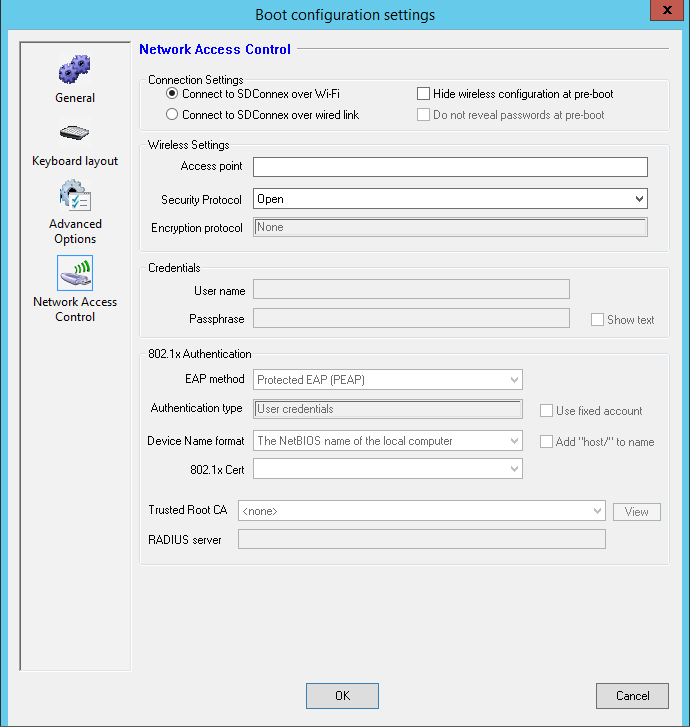
Option | Description |
Connect to SDCon- nex over Wi-Fi Connect to SDCon- nex over wire link | Use of these radio buttons will determine whether you are defin- ing the communication settings for either Wireless or Wired access to SDConnex at Pre-Boot. NOTE: Choosing either one will determine which of the lower panel option and entry elements are available to define your com- munication settings. |
Access point | Enter the default access point (target network) for users of devices receiving this profile. Users will be able to scan for other access points. |
Security Pro- tocol | Choose the protocol For example, (WPA, WPA 2 Enterprise, etc) to be used when users connect wirelessly. |
Encryption Pro- tocol | Depending upon which Security Protocol was chosen above, this item will show the recommended Encryption protocol for the selected Encryption protocol. This option is not accessible. |
Username | Enter the login password or passphrase for WPA2 accsss. |
Passphrase | Enter the login password or passphrase for WPA2 accsss. |
EAP method, Authentication Type | This option provides two alternatives, only accessible when "Con- nect to SDConnex over wire link" has been selected. The options are: Protected EAP (PEAP) and Transport Layer Security (EAP- TLS). Note that depending up on which of these has been chosen, other on-screen options may become either protected or capable of accepting settings. |
Device Name format | This option defines the format of the name the device will use when communicating. This option only becomes available for change only when defining connection to SDConnex over wire link combined with EAP method "Transport Layer Security (EAP-TLS)", whereupon the options available are: The DNS name of the local computer; The NetBIOS name of the local computer; or The fully qualified DNS name of the local computer. NOTE: If using any of the options mentioned above, a further checkbox becomes enabled, entitled: Add "host/" to device name, which permits forcing the communication string to include "host/" before the device name. |
802.1X Cert | This option permits customers that require this functionality to choose which of the Device Authentication Certificates imported into the Device Authentication Certs panel will be used by this Device Profile to permit devices to authenticate to a certificate- authenticated 802.1X network. (The definition and management |
Option | Description |
of these certificates was covered in the Global Settings, Device Authentication Certs panel, earlier in this manual). Note: Since only SecureDoc Enterprise Windows and SecureDoc OSA client types permit complex Network Access Control settings, the following applies to these device types only. Using the drop-down list (as shown in the image above), choose the desired Certificate from among those imported into SES. This will update the profile with the desired Certificate. NOTE: When certificates are going to expire, as they eventually will, it is important to import a new Certificate that has a longer expiration date than the current certificate, and then attach that new certificate into the Device Profiles whose certificates will expire, replacing the reference to the expiring certificate. As devices communicate with the SES Server, the server will notify them that their Device Profiles are out of date, and will send down the updated profile which will include the replace- ment certificate. Once there remain no Device Profiles that still reference a given (generally expiring/expired) certificate, that certificate can safely be deleted from the list of Device Authentication Certs (see the certificate deletion discussion in the Global Settings panel entitled "Device Authentication Certs", earlier in this manual). | |
Trusted Root CA | Choose the appropriate CA for certificate validation. |
Enter the DNS name of the server. |
Additional considerations for users requiring 802.1X-protected wired network communication
Customers using 802.1X-protected wired network environments, and which utilize SecureDoc's native UEFI (PBU) at Pre-Boot will experience issues with their SecureDoc Clients spending excessive time at pre-boot, which may become unacceptable if there are multiple SDConnex Servers.
The reason for the delay is that these devices using SecureDoc's native UEFI (PBU) at Pre-Boot will attempt to connect to each of their SDConnex Servers and then need to wait for these SDConnex server connections to time-out since Certificate-protected 802.1X communication is not possible within the context of UEFI. The greater the number of SDConnex servers, the greater the delay before control would be returned to the user.
This issue does not occur if devices are configured to use either Pre-Boot Linux (PBL) or the Linux-based Pre-Boot for UEFI (PBLU), which do support 802.1X-protected networks.
Port Control Options (SecureDoc for Enterprise for Windows Only)
The solution for this (if it applies to your organization) is implemented in this version which permits
PBU to act like SecureDoc's V4 pre-boot in legacy mode, permitting deployment of a single profile, which retains PBLU networking, but disables PBU networking, thus ensuring there is no lengthy pause while PBU tries each of a lengthy list of SDConnex servers.
This solution is implemented by adding a new optional setting into the SecureDoc Profile:
To make this change: Add new option "PbuIgnoreNetworkStack" manually to the SecureDoc profile. When set to a non-zero value, PBU-configured devices will ignore the UEFI Network Stack.
For customers that require this functionality, this non-zero option must be added to the [SDSpace] sec- tion of SD profile as follows:
---------- beginning of SDProfile.spf file ----------
... <other settings > [SDSpace]
... <other settings > PbuIgnoreNetworkStack=1
... <other settings >
---------- end of SDProfile.spf file ----------
Once the above clause has been added to the SDSpace section of SDProfile.spf, close and save the updated SDProfile.spf file and use it inside the Installation Package to deploy SecureDoc to endpoint devices.
Port Control Options (SecureDoc for Enterprise for Windows Only)
Basic user interface devices such as keyboards and mice are white listed by default, as are hardware-based encrypted USB devices.
Click the Port Control profile option. The Port Control screen appears.
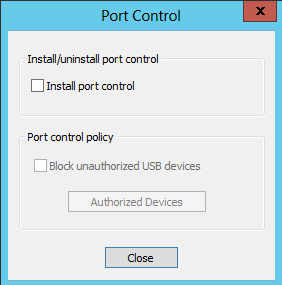
Note: USB storage devices attached to ports are locked by default: to allow them to be accessed, use Port Control to authorize access by specific devices.
Check Install port control.
Port Control Options (SecureDoc for Enterprise for Windows Only)
To block unauthorized USB devices, check the Block unauthorized USB devices option
and click Authorized Devices. (You are warned of additional steps needed for token-based key files.) Follow the steps below.
A list of currently authorized devices appears.
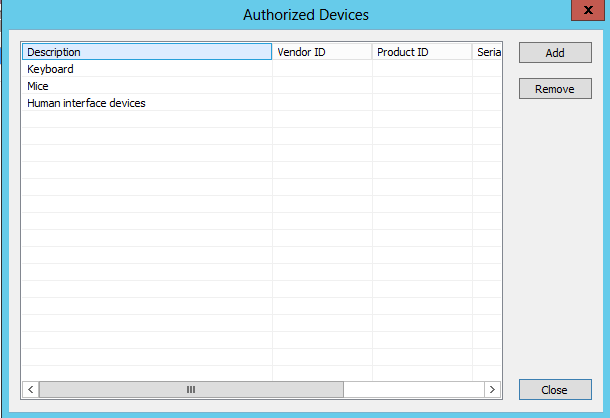
To authorize more device types, click Add. A panel will appear, as in the image below, which will prompt you to choose an authorization method based on device class, device model, or distinct device. If you authorize devices by model, the device’s vendor ID and product ID are the factors used to determine if a device make/model is authorized. Note that more than one device could match these conditions, for example if one has multiple USB sticks of the same make and model. If you choose the “distinct device” option, the device’s vendor ID, product ID, and serial number are used to determine if a device is authorized. Only one device (e.g. a single USB memory stick) could match these criteria.
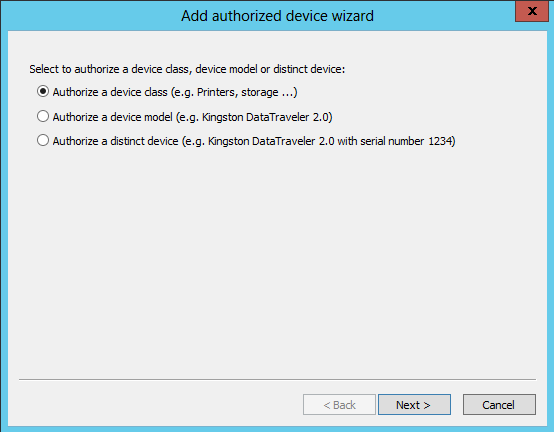
If authorizing a new USB device, insert it into the computer.
Choose the authorization method and click Next. A list of the USB devices previously inserted and currently inserted in the computer appears.
To limit the display to only those devices currently connected, clear the Show previously connected devices option.
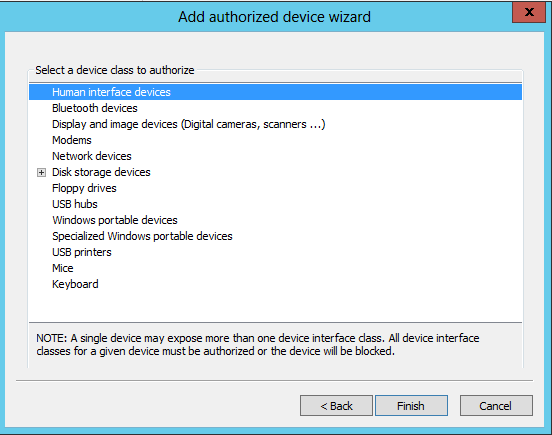
Select a device and click Finish. The device is added to the list of authorized devices.
Continue to add as many devices as you wish.
Configuring Installation Package Settings
Overview
Installation package options specify:
the general behavior of the installation on the client device (see "General Settings for Installation Packages" on page 255)
the privileges to be stored in the key file created for the client device as part of the automatic process (see "Key File Settings for Installation Packages" on page 260)
authentication questions to be asked of users receiving this installation package (see "Authentication Question Settings for Installation Package" on page 261)
administrative settings for this installation package (see "Users Settings for Installation Package" on page 262)
Once you have created an installation package (which is essentially as a set of parameters in the SES database), you use it to create the actual installation package files that are distributed to client devices.
Installation packages must be associated with a specific profile. The same profile can be associated with any number of installation packages.
Click Installation packages in the navigation pane.
Right-click on the information pane, and choose Add Package. A Selection prompt screen will appear, as in the image below. Across the top can be seen 3 radio buttons which define Device Categories. The category options are: Endpoint (typically a hardware client type, such as a laptop or desktop); VDI, which is for a Virtualized Desktop environment such as XenDeskTop from Citrix, or VMWare Horizon 7; or CloudVM which is for a Public or Private Cloud-hosted Infrastructure-as-a-Service virtual device. Note that when you choose one of these Device
Category radio buttons, the list of available Installation Package types will be filtered to show only those Package Types that can be defined for that Device Category.
Click the Endpoint radio button, then select the desired Installation Package type, and the SecureDoc Installation Package screen appears.
Set the options (as described in following sections) and click OK.
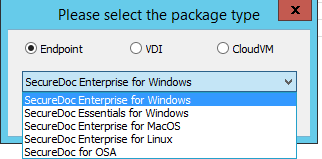
General Settings for Installation Packages
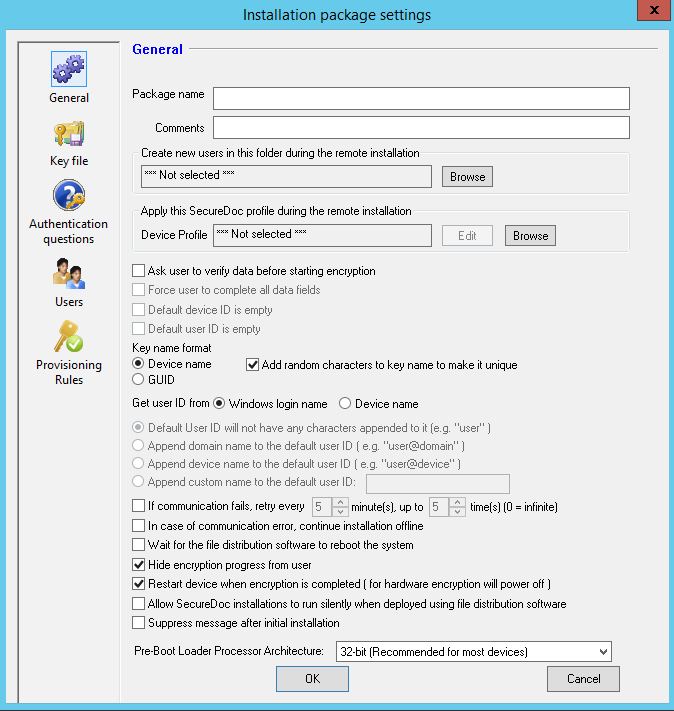
Setting | Description |
Package name/ Comments | Enter a descriptive name and comments for this package. |
Create new users in this folder during the remote installation | Click Browse and navigate to the location of the folder to which users created when this package is deployed should belong. If the user of a client device that receives this package is not currently in the SES database, this is the folder in which their record will be stored. |
Setting | Description |
For more on folders, see “Using Folders to Organize User Information and Share Keys” on page 44. | |
Apply this SecureDoc pro- file during the remote installation | Click Browse and navigate to the location of the SecureDoc profile to be associated with this install- ation package. If necessary, you can then click Edit to open the profile for editing. Note: If the installation package has already been distributed, associating a new profile will cause the new profile to be sent to all client devices that received the original installation package. |
Ask user to verify data before starting encryp- tion | Check to have the SecureDoc installation pause so the user can confirm or modify the installation information. Not typically used, since requires user intervention. If selected, choose one or both of the following: Default Device ID is empty— forces user to type a computer ID during SecureDoc installation. Default User ID is empty — forces user to type a user ID during SecureDoc installation. |
Force user to complete all data fields | Check to require that, during SecureDoc install- ation, users needs to complete all the data fields they see. |
Key name format | This option permits the SES Administrator to ensure that any device key names auto-generated by SES do not contain the endpoint device name within in the actual key name. Instead, when this option is enabled, random key names will be gen- erated for device keys, and a reference to the device to which it belongs will be incorporated into the Key. Device name: Select this radio button to use the endpoint device name in the actual key name. Add random character to key name to make it unique: Check to make the endpoint device key name unique. GUID: Select this radio button to omit the end- point device name in the actual key name. |
Get userID from | Choose whether to create user IDs from the user’s Windows login name (the name of the last user |
Setting | Description |
who logged in, or the user currently logged in) or the device name. If you choose the Windows login name, the user currently logged in, or the last one to log in, is used. | |
Default userID settings | These settings are disabled. |
In case of communication error, continue installation offline (Enterprise client only) | When checked, if communication between the SES server and a client device fails, the client device will create a locally-stored MachineInfo file for transmission to SES. When this option is not enabled, an error mes- sage will appear and the installation will not continue. Use Case/Considerations: Use of this feature should be avoided, except in a few scenarios, such as where a brand new device (or a device that does not contain valuable information) can simply be re-imaged and the SecureDoc installation retried if installation/initial encryption problems occur. Use of this option creates the real risk that (until communication becomes pos- sible) the only copy of the device's encryption key will be on the device itself and so is never recommended where encrypting devices that contain valuable or irre- placeable data. As long as there is no copy of the key stored in the SES Database, if there were to be problems occurring dur- ing initial encryption it will not be possible to recover any encrypted data. Where devices do not already con- tain important data, this option can save time and allow installation to proceed. If initial encryption is successful and the device sub- sequently communicates to the server, at that point it will send a copy of its encryption key to the SES Server to be stored in the database, so the period of risk is largely limited to the duration of initial installation and encryption up to the point that the device can com- municate to the SES Server. |
Wait for the file dis- tribution software to reboot the system | Starting with Version 7.5, the installation package setting has been improved to include additional reboot settings to accommodate additional use case scenarios. Previously this setting only allowed for pausing the reboot after installation of the Pre-Boot envir- onment. This improvement has added the capability to |
Setting | Description |
pause the installation at 3 different points, as well as the ability to have a combination of any or all points. The new behavior is governed by manually adjust- ing the “WaitReboot” parameter in the Installation Package Settings; at present there is no pro- grammatic user interface through which to make this change. The new options are as follows:
for a reboot after the Pre Boot Environment has been installed but before encryption starts – SDWaitRebootB.txt is created
bootE.txt is created These values can be combined for multiple reboot pauses. For example, WaitReboot = 3 is the equi- valent of (1 + 2). Starting in 7.5, enabling this setting in this Pack- age configuration panel will set a default value of “6”, which is a combination of 2 and 4 above. In addition, an empty text file is created to facil- itate software that can monitor for this file and ini- tiate the reboot via settings you can configure in your third-party installation management soft- ware. This capability will provide for additional flexibility when creating captured images as well are sim- plify the control of the reboots during the SecureDoc installation process. | |
Hide encryption progress from user | Check to hide the encryption progress bar from the user. |
Restart device when encryption is completed (for hardware encryption will power off) | Check to have the client device restart auto- matically once encryption is complete. For SED, will power off. |
Suppress message after | Check to suppress the default "end of encryption" |
Setting | Description |
initial installation | message that normally appears at the end of ini- tial encryption (conversion). Use Case/Considerations: Similar to disabling the pre- vious feature, enabling this feature can permit end users using their devices during initial encryption to have an uninterrupted user experience by ensuring they don't see an encryption completion message. |
Preboot loader Processor Architecture | The Pre-Boot Loader Processor Architecture option defines whether SecureDoc’s Pre-Boot must be a 32-bit architecture (which had been the default up to V8.3), or must be forced to be 64-bit (which had been required for specific devices such as Microsoft Surface series, which cannot boot using 32-bit boot logon code). |
Key File Settings for Installation Packages
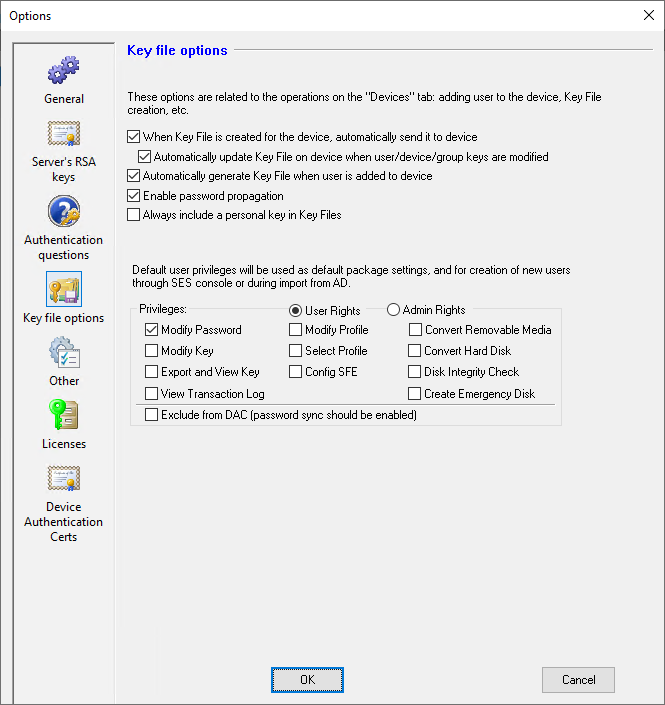
Setting | Description |
Password Rules | Set the password rules for the password of the key file |
Setting | Description |
created for client devices on which this installation package is run. See “Appendix A: Password Rules” on page 474 for details on how to set these rules. | |
Privileges | Set the privileges for the user key file created for client devices on which this installation package is run. Users with user privileges can only change (or recover) their own password. Users who need to encrypt removable media, and those using SecureDoc OSA, need admin privileges. See “Appendix E: Priv- ileges” on page 491 for details on these privileges. |
Use hardware token to protect key file (Enter- prise client only) | Check to specify that users of client devices on which this installation package is run need a token to suc- cessfully log into their encrypted computer. The token needs to contain the certificate associated with the user. To use this option, you need to first import user cer- tificate information into SES from Active Directory. For more on this import process, see “Importing and Syn- chronizing User Records with Active Directory ” on page 101. If you check this option and a user does not have a certificate identified in SES, a password-pro- tected key file is created for that user. The token type defaults to that specified in the SES options (see "About Device Profiles" on page 128). |
Authentication Question Settings for Installation Package
Choose which of the authentication questions created through SES global options (see “Key File Options” on page 80) you want used for this installation package. This is required for self-help password recovery to work.
To add a question from the list established in SES global options, click Add and choose from the available questions. To remove one from the installation package, select it and click Remove.
Note: The number of questions (n) a user must answer is defined in the Global settings (Tools | Options, General Panel, click on the Password rules button). The Administrator may opt to include up to seven questions to the Installation Package, even if the Password Recovery settings define that the user must answer fewer than seven questions.Doing this provides users with a degree of choice as to which (n) of the up to seven the user will answer, so they may choose those questions whose answers they're most likely to remember over the long term.
Note: Questions can be any number of characters long, though for the sake of clarity and readability, and so that they are not truncated or wrap to a new line, WinMagic recommends the questions be kept reasonably short (e.g. <= 70 characters).
Users Settings for Installation Package
Use this screen to add a user (administrative or other) to the package and, therefore, to add that user’s keys to the key file for the package. This gives such users access to the encrypted device. Administrative users must have admin rights and, if protection is token-based, a loaded certificate.
Note: Users defined here will be added to the client device before encryption begins.
Click Add and choose the admin user to add (these are organized by folder). This function results in a second key file being created on the client device, protected by the admin user’s certificate or user’s password.
Note: Password-based key files for these users will be created only if the client device can connect to SDConnex.
Setting up Device Provisioning Rules
Background
SecureDoc Key File deployment has been re-designed to make SecureDoc Full Disk Encryption process less disruptive, yet seamless and more robust by eliminating certain complexities and challenges that were associated with the key file deployment in the previous versions of SecureDoc.
Sources of complexity, such as:
expiry of initial passwords that could lock out a device,
unknown password changes or users forgetting their passwords, these frustrating issues have been either eliminated or substantially mitigated. Key Features
The following will explain the key points surrounding new Key File deployment functionality:
Provisioning State
This is useful in a scenario where the intended owner of a device is not known at the point when SecureDoc is being installed or the SES administrators do not know who runs SecureDoc installation on a device.
When the Provisioning State option is used, devices will be encrypted but SES will send down the key files to the devices only when the owner(s) of the devices are identified. Until that time, the device continues to be in a provisioning state. Device provisioning can be set up with or without pre-boot
logon, i.e. silent deployment or pre-boot logon using the temporary user credentials provided by the SES administrators.
Auto-boot: This is similar to silent deployment where users do not perform pre-boot authentication.
In this scenario, there will be automated authentication to the device (through auto- boot) which permits the user to authenticate to the device at Windows as usual
This option will prove to be valuable where devices may be installed and made ready, but then may sit in storage or be shipped to the user(s) that will ultimately be the “own- ers” of the devices
It also eliminates the need to provide users with temporary credentials to log in to the
device (often referred to as an “Initial password”.
Device access requires Pre-Boot Authentication to a Temporary user account: To use this mode, the SES administrators will previously have created a temporary user account (Creation of temporary user accounts is covered later in this document).
This option is valuable in the scenario where yet again the intended or the ultimate user of the device may not be known at the time the device is going to be installed with SecureDoc, but it is desirable to ensure that only someone that knows the temporary user credentials can access the device at pre-boot.
The device users can gain access to devices so installed by using the temporary login
credentials provided by the SES administrators. For information on how to create tem- porary user accounts, see the Add Temporary User Accounts in SES Console section in this document.
Note: As soon as the owner of a device has been identified, the key files of the owner will be made available on that device and the temporary user’s key files will be removed. Thereafter the temporary user account can no longer be used to log into that device.
Non-Provisioning State (Device Provisioning is not configured)
In this state, devices will be encrypted as soon as the owner of the device is identified and his/her key files are sent down to the device immediately.
Note: When using the Non-Provisioning state, if the user decides not to assume ownership of a device (by cancelling the dialog panel that prompts the user to confirm the device ownership), then the deployment of the device will not proceed.
Note: If it is intended to user Tokens or Smart Cards to protect authentication to devices, this option must be used, since it moves very quickly to ensure that the user will convert from a Password-protected key file to Token-protected key file.
Visual Status Indicators for Deployed State and Device Owner
Along with the improvements relating to provisioning devices and defining access during the installation and provisioning stages, the SecureDoc administrators can now view a device’s current deployed state (i.e. Deployed; Temp user; Temp autoboot; Unknown; and No Provisioning) as well as the identification of the owner statuses (i.e. a given user will have Yes/No defining whether that user is the owner of a given device, or not) in the SES Console under the Devices tab.
The Provisioning Rules tab allows the SES administrators to define the provisioning rules for devices. The devices can be in either provisioning or non-provisioning states, as defined below:
Lastly, the Provisioning Rules tab allows SES Administrators to define whether the Deploying User is to be the last user that logged into the device or a specific (defined) user account.
NOTE: If the option is taken to use a specific account as the Deploying user, then the checkbox at the top of the panel "Do not create and send down deploying user Key File" must not be checked/enabled.
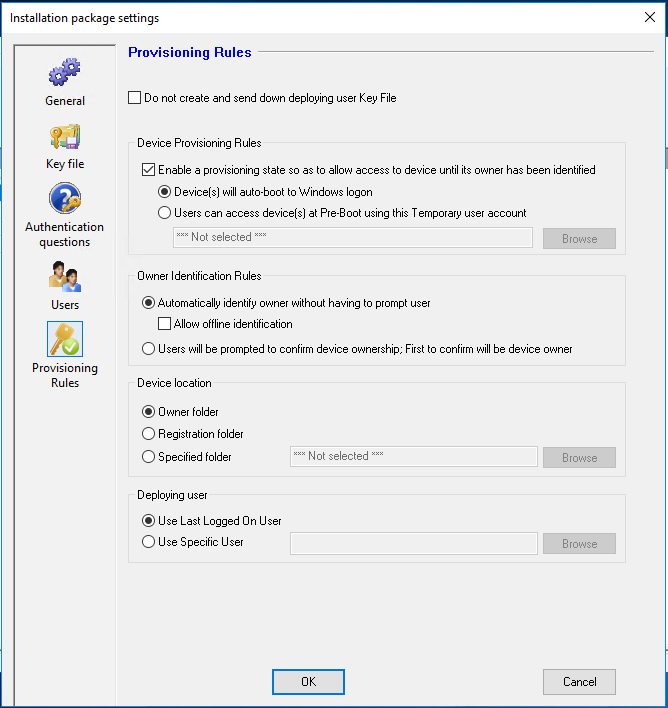
Configuring Device Provisioning Rules Setting up environment
Select key file option(s) for Windows Accounts in SES Console
Select the desired options for key files for Windows accounts. For more details, refer to the Profile Advanced Option section in this manual.
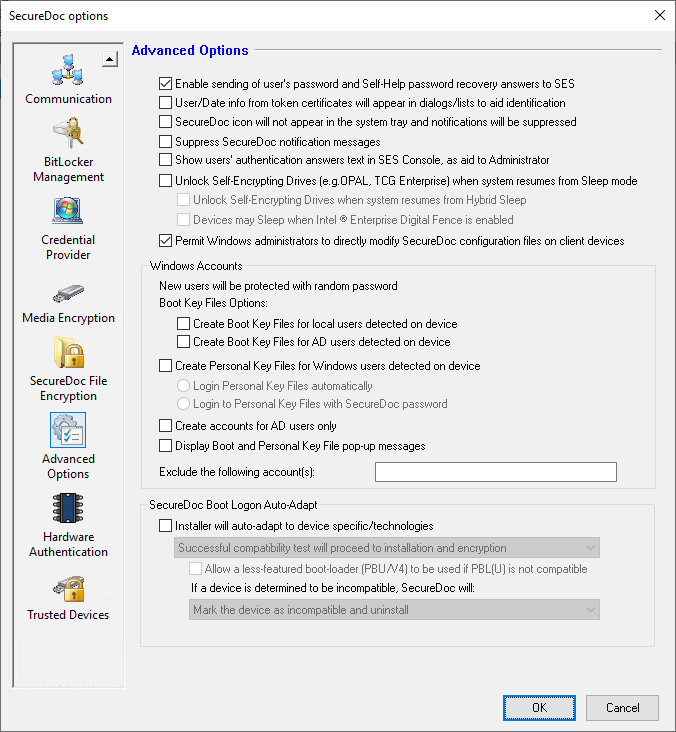
Add users to the Exclusion List
Note: Ignore this if you have already added users in the exclusion list while creating Profiles.
Certain categories of users are unlikely to become the “owning” users of devices. Commonly, this will include the IT technicians or Desktop administrators that prepare or “stage” devices for other users. SecureDoc permits barring such technicians/admins from being considered as possible device “owners” by adding them to an Exclusion list defined in the Device Profile.
If wishing to exclude one or more specific users from being the owner of a device, define a list of such excluded users in the exclusion list of users (Profiles Advanced Options, option name “Exclude the fol- lowing accounts(s), shown in image below, near the bottom of the panel. To exclude multiple users, use a comma-delimited list (e.g. JohnD, FrankF).
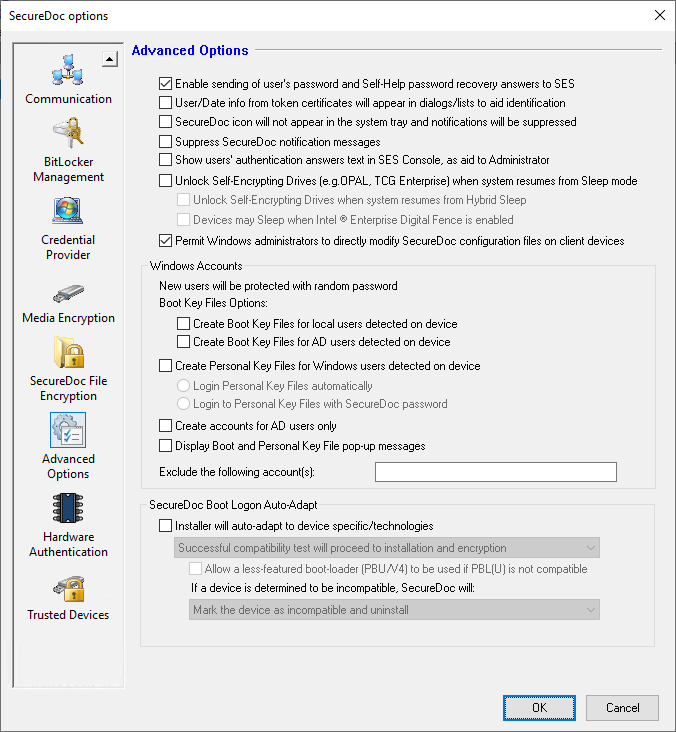
Note: The user accounts included in this exclusion list can NEVER be the owners of the device. The exclusion list can be modified. However, if the SecureDoc deploying user is
Add Temporary User Accounts in SES Console
included in the exclusion list, and if the SES administrators do not want to send down the deploying users’ key files to the client device, then select the Don’t send down deploying user key file option in the Provisioning Rules settings panel.
If wishing to set up a provisioning state where users can gain access to devices by logging into them using temporary login credentials, a pre-requisite is to have previously defined one or more temporary user accounts in SES Console. The “temporariness” trait is a new element in the User Record within SES, and can only be applied to NEW user accounts (so, for example, an AD-imported user account or any other pre-existing user account cannot be subsequently turned into a Temporary account).
The temporary users have the least privileges. They are primarily only used for logging in at pre-boot. They can log in to SecureDoc Control Center (SDCC) as well , but they cannot perform any operations. The password of a temporary user cannot be changed on the client. However, the password can be changed from SES console.
Note: For the client devices that are enabled with Fast Startup, the Temp User is shown in the System Slot 0; however, please be advised that the key file of this Temp User is removed from device(s).
Note: Only password-based temp user accounts can be created, not the token-based temp user accounts.
Log into SES console.
In the Users tab, right-click anywhere and select the Add User option.
Select the Temporary option from the Type drop-down menu.
Enter the password and the other details of this user.
Click Create.
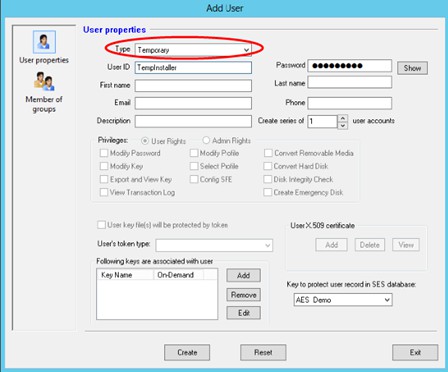 Key File Deployment Options and Use Case Scenarios
Note: When the SES administrators make changes to the global password rules, then the existing package(s) password rules will not change. However, when a key file is created and sent down from SES during online installations, the changed global password rules will be applied, not the old password rules of the existing package(s).In case of offline installations, the old installation package rules will apply.
The following table explains the various options and use case scenarios for the key file deployment:
Option | Use Case |
Auto-boot and automatically identify the device owner without any prompt | This option is useful in a scenario where SES administrators know that the first logged in Windows user is the owner of an end-point device. This is useful in scen- arios where devices will be put into use quickly after initial installation of SecureDoc. This very direct methodology ensures that the device will automatically treat the first non-excluded logged-in Windows user as the device owner or primary user, ensur- ing the device moves immediately to a pro- visioned or deployed state. |
Auto-boot and manually identify the device owner with a prompt | This option is useful in a scenario where SES administrators do not know the owner (s) of the end-point device(s). |
Option | Use Case |
This simple form allows the device to remain in an un-provisioned mode until a user takes ownership of the device through a confirmation prompt. If the user cancels out of this prompt, the device will remain in un-provisioned mode awaiting the next reboot, after which the prompt will again appear. | |
No auto-boot (users will authenticate at pre-boot using temporary user accounts) and automatically identify the device owner without a prompt | This option is useful in a scenario where SES administrators do not know the owner (s) of the end-point device(s). This more secure scenario is useful in situations where devices may be installed with SecureDoc, but then may need to be shipped or stored before being provided to their end users. This method is more secure, in that the temporary user account credentials must be known in order to get to windows, after which the system will automatically make the first non-excluded logged-in Windows user be the owner of the device. Once the device owner is identified, the temporary user account can no longer be used at pre-boot. |
No auto-boot (users will authenticate at pre-boot using temporary user accounts) and manually identify the device owner (users will be prompted to confirm device ownership; First to confirm will be device owner) | This option is useful in a scenario where SES administrators do not know the owner (s) of the end-point device(s) As in the above two scenarios, this more secure scen- ario is also useful in situations where devices may be installed with SecureDoc, but then may need to be shipped or stored before being provided to their end users. This method offers excellent security because the device cannot be booted into Windows unless the user logs in at SecureDoc's Pre-Boot using the temporary user account credentials (which must be known to that user), but the device will remain in an un-provisioned mode until a user confirms ownership of the device by entering and confirming his own credentials. As soon as that con- firmation is complete, the Temporary User Account will be eliminated from the device, and only authorized user(s) will be |
Configuring & Deploying Installation Package with Provisioning State
Option 1: Auto-boot and automatically identify the device owner without any prompt
Note: This option is similar to NOT selecting the "Hide Pre-boot Until User's Credentials are synchronized" option and the user must log into the Boot Logon with initial password during encryption. (That option had been available in earlier versions of SES, up to and including version 6.5). In this scenario, the device owner is identified automatically as the first User to log in at the Windows login screen.
The first logged in Windows user (except those users listed in the excluded Windows users list) will auto- matically be considered the owner of the device. In the event an excluded user should be first to log in, then until such a time as a non-excluded user logs in to Windows, the device will continue to auto-boot into Windows logon and remain in the provisioning state.
Note: If any Windows user (e. g. Technician) has been added to the exclusion list (Profiles -> Advanced Options) then this user will NEVER become the owner of that device. The device will remain in the provisioned stage until its proper owner has been identified.
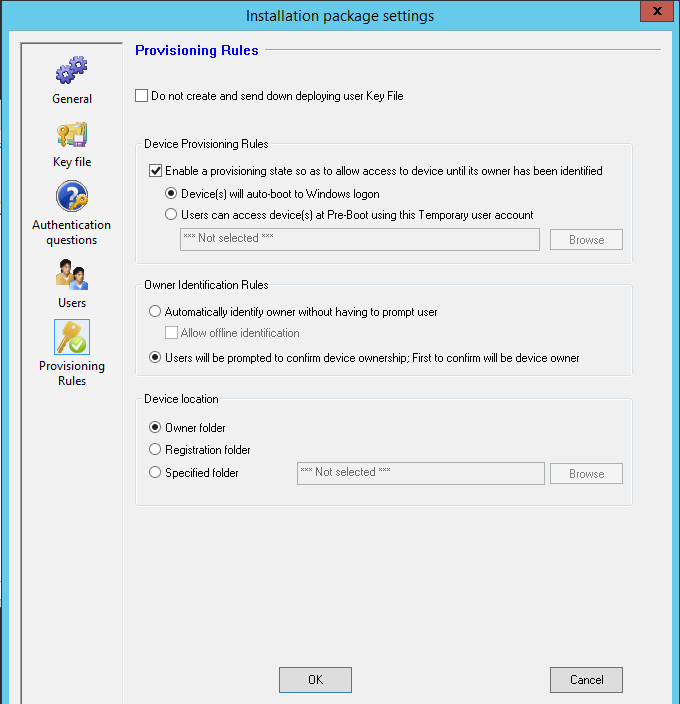 Log into SES console.
Set up the desired global options (Tools – Options)
In the Profiles window, click the General tab.
Select the Synchronize SecureDoc with Windows password (bi-directional) option to have the user’s Windows password used, automatically, as the SecureDoc key file password. Changes to the Windows password automatically apply to SecureDoc and changes to the SecureDoc password apply to Windows.
Note: The user’s Windows password must not be blank.
Select the Synchronize with matching Windows Accounts only to have password synchronization apply only if the name of the Windows account is the same as the SecureDoc account name. (Optional)
Click OK.
In the Installation Package settings window, select the Provisioning Rules tab.
Select the Enable a provisioning state to allow access to device until its owner has been identified option.
Select the Device(s) will auto-boot to Windows logon option.
If you do NOT want to send the key file for the deploying user, select the Do not create and send down deploying user keyfile option. If the "Automatically identify owner without having to prompt user" option is enabled, a sub-option becomes available, entitled: "Allow offline identification". If this sub-option is enabled, it permits the SecureDoc Client to complete the recognition of the logged-in user as the Owner of the device, and will create a local key file for that owning user, even though the device might not be capable of communicating with the SES Server at that moment (e.g. device is offline).
In the Owner Identification Rules group box, select the Automatically identify owner without having to prompt user option.
In the Device location group box, choose the location where the device should be stored in SES during and after SecureDoc deployment.
Owner Folder: Choose this option if you desire to store the device in the same folder as the user account who performs the secure moment during the deployment. This is a default option.
Registration Folder: Choose this option if you desire to keep the device in the folder the computer was originally created under during the initial registration process.
Specified Folder: Choose this option to select the exact folder the device will be saved during the registration.
Click OK.
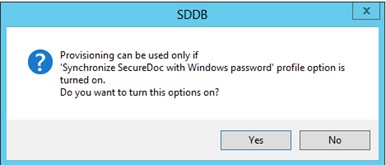
Note: If the Synchronize SecureDoc with Windows password (bi- directional) option is not selected in the Device Profile associated with this Installation Package, a message will appear that states: “Provisioning can be used only if Synchronize SecureDoc with Windows password profile option is turned on. Do you want to turn this option on?”. If such a message appears, Click Yes on it, which will cause the Windows password sync and the Password- sync only when Windows Account matches SecureDoc Account options to be enabled automatically within the device profile associated with this Installation Package.
Deploying Packages
Create Installation Package files.
Deploy the package to the client devices.
After the SecureDoc installation, the Windows login screen appears.
Enter the password and the device will log into Windows. The SecureDoc will be deployed on this device and the deployed state is shown as “Deployed” in the SES Console under the Devices tab.
Note: Until a non-excluded user logs in to Windows, the device will continue to auto- boot into Windows logon and will remain in the provisioning state. In such a scenario, the deployed state will be shown as “Temp Autoboot” in the SES Console under the Devices tab.
Option 2: Auto-boot and manually identify the device owner with a prompt
Note: This option is similar to using the "Hide Pre-boot Until User's Credentials are synchronized" (Silent Deployment) option that was available in the earlier version of SES (version 6.5 or lower). In this scenario, the device owner is identified manually.
The SecureDoc agent will display a message (after auto-booting into Windows logon) prompting the logged-in Windows user to enter his/her login credentials if he/she is the owner of that device.
Once the user confirms the ownership of the device, then that user will be considered as the owner of the device.
Until ownership has been confirmed, the device will continue to auto-boot into Windows logon, and will keep displaying the ownership confirmation screen, remaining in the provisioning stage.
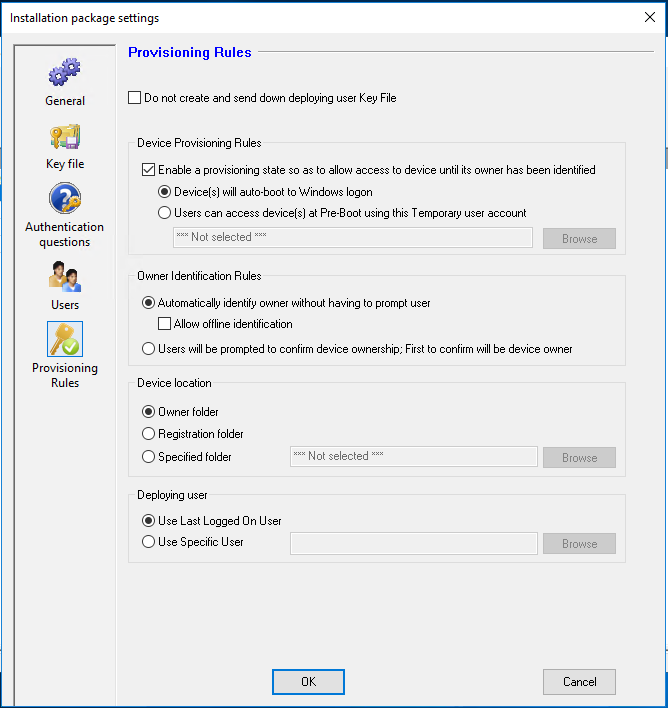 Perform the steps 1 through 10 described in the Option 1.
In the Owner Identification Rules group box, select the Users will be prompted to confirm device ownership; First to confirm will be device owner option.
Perform the step 13 described in the Option 1.
Click OK.
Note: If the Synchronize SecureDoc with Windows password (bi-directional) option is not selected, a message “Provisioning can be used only if Synchronize SecureDoc with Windows password profile option is turned on. Do you want to turn this option on” is displayed. Click Yes. The Windows password sync and the Synchronize with matching Windows accounts only options will be turned on.
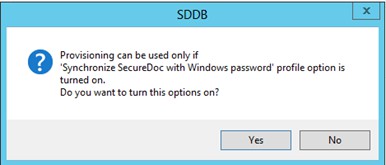 Deploying Packages
Create Installation Package files.
Deploy the package to the client devices.When the SecureDoc installation is complete, the computer reboots and the Windows login screen appears.
Enter the password and the device will log into Windows and a confirmation prompt appears, as in the image below:
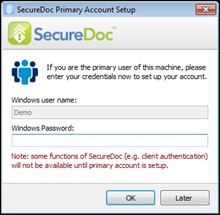
Enter the Windows login credentials, if the user is the owner of the device.
Click OK.
Note: If the user is NOT the owner of the device, click the Later button. In this scenario, the device will keep displaying the ownership confirmation screen, remaining in the provisioning stage. In such a scenario, the deployed status will be shown as “Temp Autoboot” in the SES Console under the Devices tab.
After the completion of encryption, the boot logon screen appears.
Enter the login credentials. SecureDoc will be deployed on this device and the deployed state is shown as “Deployed” in the SES Console under the Devices tab.
Note: If the logged in user is a non-excluded Windows user (see discussion of excluded users earlier in this document), then SES will push down the key files of this user to the device.
Option 3: No auto-boot (Using the Temporary user accounts) and automatically identify the device owner without a prompt
Note: This option is similar to when NOT using the "Hide Pre-boot Until User's Credentials are synchronized" option and the user must log into the Boot Logon with initial password during encryption that was available in the earlier version of SES (version 6.5 or lower). In this scenario, the device owner is identified automatically.
Any user that knows the defined temporary login credentials can access the device; however, once the “owner” of the device has been identified, the device will be provisioned and the defined temporary account CANNOT be used to log into that device anymore.
Note: The SES administrators have the option to exclude certain users (e.g. Technicians) from being automatically identified as the device owners by adding their User IDs to the exclusion list in the Profiles – Advanced Options.
 Perform the steps 1 through 8 described in Option 1.
Select the option entitled Users can access device(s) at Pre-Boot using this Temporary user account. This option prompts the users to authenticate at pre-boot logon using the temporary user ID and Password associated with the Installation Package under which SecureDoc was installed.
Click the Browse button to navigate to temporary users window.
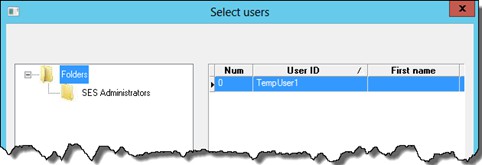 In the Owner Identification Rules groupbox, select the Automatically identify owner without having to prompt user option.
Perform the step 12 described in the Option 1.
Click OK.
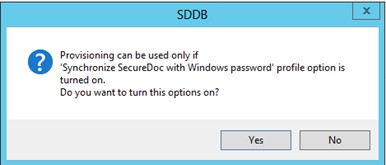
Note: If the Synchronize SecureDoc with Windows password (bi-directional) option is not selected, a message “Provisioning can be used only if Synchronize SecureDoc with Windows password profile option is turned on. Do you want to turn this option on” is displayed. Click Yes. The Windows password sync and the Synchronize with matching Windows accounts only options will be turned on.
Deploying Packages
Create the Installation Package files.
Deploy the package to the client devices. When the SecureDoc installation is complete, the Pre- boot logon screen appears.
Use the temporary login credentials to authenticate at pre-boot. SecureDoc will be deployed on this device and the deployed state is shown as “Temp User” in the SES Console under the Devices tab.
Note: When the first Windows user logs into Windows, the key file(s) of that user will be sent down to the device and the temporary user’s key file(s) will be removed from that device. The temporary user login credentials can no longer be used to log into that device. The deployed state will change from “Temp User” to “Deployed”.
Option 4: No auto-boot (Using the Temporary user accounts) & manually identi- fying the device owner with a prompt
Note: For the client devices that are enabled with Fast Startup, the Temp User is shown in the System Slot 0; however, please be advised that the key file of this Temp User is removed from device (s).
Note: This option is similar to when NOT using the "Hide Pre-boot Until User's Credentials are synchronized" option and the user must log into the Boot Logon with initial password during encryption that was available in the earlier version of SES (version 6.5 or lower). In this scenario, the device owner is identified manually thorough a prompt.
Any user that knows the defined temporary login credentials can access the device; the SecureDoc cli- ent agent will display a screen (after the user has authenticated at Windows logon with legitimate Win- dows credentials) that prompts the user to confirm if he/she is the device’s owner. Once the user has confirmed ownership of the device, then that user will be considered as the owner of the device. Until then, the device needs to be authenticated at pre-boot, displays the confirmation message and remains in a provisioning stage.
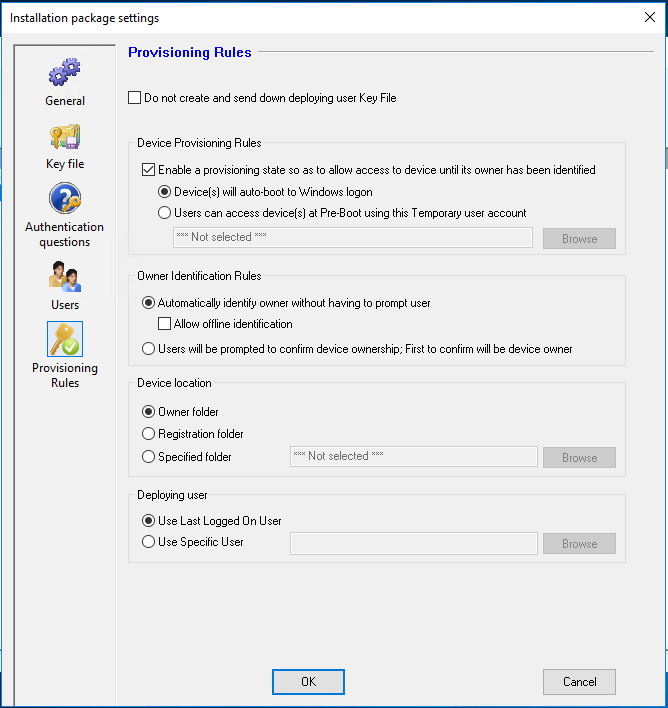 Perform the steps 1 through 3 described in Option 3.
In the Owner Identification Rules groupbox, select the Users will be prompted to confirm device ownership; First to confirm will be device owner option.
Perform the step 13 described in the Option 1.
Click OK.
Deploying Packages
Create the Installation Package files.
Deploy the package to the client devices.
When the SecureDoc installation is complete, the computer reboots and the Windows login screen appears.
Enter the password and the device will log into Windows and a confirmation prompt appears:
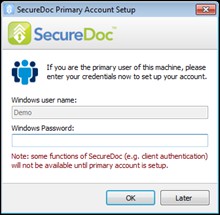 Enter the Windows password.
Click OK.
Note: If the user is NOT the owner of the device, click the Later button. In this scenario, the device will re-display the ownership confirmation screen after each reboot, remaining in the provisioning stage.
After the completion of encryption, the boot logon screen appears.
Enter the login credentials. SecureDoc will be deployed on this device and the deployed state of the device will be shown as “Deployed” in the SES Console under the Devices tab.
Note: If the logged in user is a non-excluded Windows user (see discussions of excluded users earlier in this document), then SES will push down the key files of this user to the device.
Note: For the client devices that are enabled with Fast Startup, the Temp User is shown in the System Slot 0; however, please be advised that the key file of this Temp User is removed from device(s).
BLE: New Keyfile Protection Type: Phone Push Integration New Feature: Keyfile Protection Type for Phone Push
We're adding a new keyfile protection type, `KF_PROT_PHONE_PUSH = 0x00000400`. The client needs to send this type to the server.
This ensures the server knows if the keyfile needs to be updated when switching from BLE PUSH to BLE only.
What's Needed:
Keyfile Update: The client should send the new protection type to the server.
Profile Change Handling: Update the system to handle changes from BLE PUSH to BLE only, updating the keyfile if needed.
Steps:
Add the new keyfile protection type.
Ensure the client sends this protection type to the server.
Update the system to handle profile changes and update the keyfile if necessary.
By adding this new feature, we'll ensure keyfile management is accurate and improve security and func- tionality for users.
Resolving MagicEndpoint App Issues with Android Phones and Windows Dynamic Lock
BLE Pairing and Dynamic Lock Test: Resolving Issues with MagicEndpoint App and Android Phones Using Windows Dynamic Lock
To ensure a seamless experience with the Dynamic Lock feature in Windows and the MagicEndpoint app, it is essential to understand the functionality and compatibility of your devices. Dynamic Lock enhances security by automatically locking your PC when your paired Bluetooth device is out of range. However, certain Android phones may change their device name, leading to issues with Bluetooth pair- ing and password conversion.
The Dynamic Lock feature in Windows may not function correctly with certain Android phones due to changes in the device name, causing issues with Bluetooth pairing and password conversion.
Using iPhone Devices:
iPhones do not experience this issue and work seamlessly with the Dynamic Lock feature. Pair your iPhone with your PC to ensure reliable operation of the Dynamic Lock feature.
Recommendations for Android Users:
If you encounter issues with Dynamic Lock on your Android phone, consider using an iPhone for this fea- ture.
Stay updated with the latest software versions for both your Android phone and the MagicEndpoint app, as future updates may address these issues.
Additional Information:
Dynamic Lock Feature: This Windows feature uses Bluetooth to detect when your paired device (like a smartphone) is out of range and locks your PC for security.
MagicEndpoint App: This app facilitates secure authentication and access management, and it requires stable Bluetooth pairing to function correctly.
By following these steps and recommendations, you can ensure a reliable and secure experience with the MagicEndpoint app and Windows Dynamic Lock, allowing for smooth and automatic locking of your PC when your Bluetooth device is out of range.
Configuring and Deploying Installation Package with Non-Provisioned State
This option is useful in a scenario where the SES administrators do not want to keep a device in a pro- visioning stage and intend to use the password confirmation option so that the users will be prompted to confirm their login credentials. The device will be “provisioned” when the first Windows user logs into that device.
Note: If the user cancels out of the confirmation prompt, the installation will fail and the device will NOT be encrypted. The confirmation prompt will re-appear at each device reboot until the owner of the device has been defined, after which encryption will be able to continue through to completion.
Note: Offline installation for non-provisioning packages is not supported.
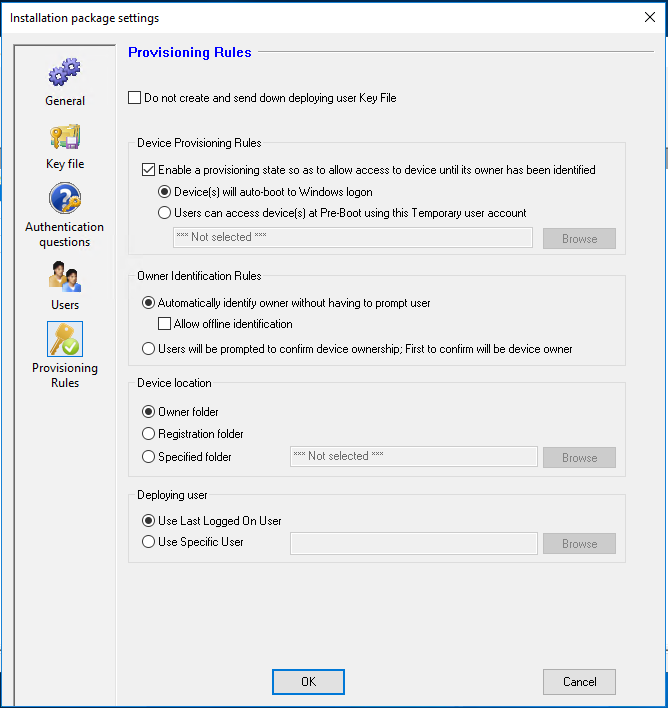
Log into SES console.
Set up the desired global options (Tools Options).
(Optional - For Active Directory Users only). In the Profiles window, click the General tab and select the Synchronize SecureDoc with Windows password (bi-directional) option to have the user’s Windows password used, automatically, as the SecureDoc key file password. Changes to the Windows password automatically apply to SecureDoc and changes to the SecureDoc password apply to Windows.
In the Installation Package settings window, select the Provisioning Rules tab.
In the Owner Identification Rules section, select the Users will be prompted to confirm device ownership: first to confirm will be device owner option.
Perform the step 13 described in the Option 1.
Click OK.
Deploying Packages
Create the Installation Packagefiles.
Deploy the package to the client devices.
When the SecureDoc installation is complete, the SecureDoc confirmation prompt appears:
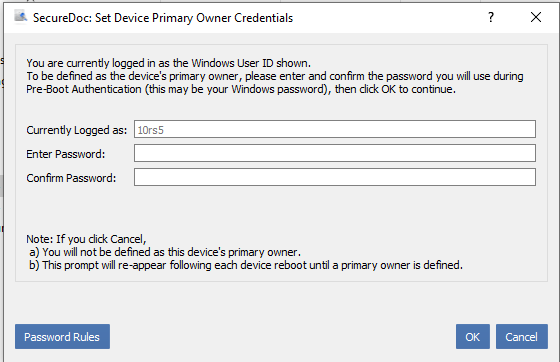
Enter the Windows password and confirm the same.
Click OK. The SecureDoc will be deployed on this device and the deployed state is shown as “Deployed” in the SES Console under the Devices tab.
Viewing the deployed and device owner statuses Deployed Status
A new column called Deployed State has been added in the Devices tab in the SES console. This column indicates the SecureDoc deployment status of a device, i.e. deployed, temp user, temp auto- boot , unknown, and No Provisioning.

Status | Description |
Deployed | The owner of the device has been identified. Note: Please be noted that the statuses of the devices whose boot logon |
Status | Description |
have been removed (hardware or software enc.) will be shown as "Deployed". This issue will be fixed in a future release. | |
Temp User | The owner of the device has NOT been identified yet. The boot logon screen appears. |
Temp Autoboot | The owner of the device has NOT been identified yet. The boot logon screen does NOT appear. |
For Mac devices only and previous-version SecureDoc clients |
Device Owner Status
 In the Users having access to the device table under Devices tab, a new column called Owner has been added. This column provides the details regarding the device’s ownership – whether or not the user is the owner.
Creating Installation Package Files
Creating Installation Package Files
Once installation package settings are configured, you can create installation package files:
Right-click on the installation package in the information pane and choose Create package files.
The files necessary for the installation package are created in the RemotePackage folder created by SES installation, in a subfolder given the package name, under a subfolder given the database’s name.
Note: Once installation package files have been created, they are automatically updated when any changes are made to the profile or installation package options.
Numerous files are created by this process:
Boot_msg.txt - which contains all the possible error messages a user could see at boot logon time — you can edit this file if necessary
PackageSettings.ini- configuration file
SecureDoc_64.exe - installation executables for 64 bit client machines
SDConnex.cer - certificate file used to validate client machine connecting to SDConnex server
SDProfile.spf - file containing profile settings media encryption, disk access, port control, CD/DVD encryption, etc.)
SecureDoc_32.exe - for non-64 bit client devices EXE files require user intervention.
KnownConfigs.xml - Newly added in V8.2 is the KnownConfigs.xml file that will contain information the SES Installation process will incorporate regarding installation requirements of specific makes/models of computer. The contents of this file will guide the SecureDoc installer to handle potentially problematic device types by applying known-to- be-appropriate configuration options that are unique per device type.
NOTE: Although it is recommended to leave this file in place and allow the SecureDoc installer to use this "best practices" approach to handling potentially problematic hardware, if you do not wish to util- ize this auto-configuration functionality, simply delete or change the file extension of this file (e.g.
KnownConfig.xml.NotUsed).
SCIMSync - Directory Synchronization Service Based on SCIM 2.0 Protocol
SCIMSync - Directory Synchronization Service Based
SCIMSync - Directory Synchronization Service Based on SCIM 2.0 Protocol
SCIM simplifies managing user identities in cloud applications by standardizing how information is shared. This reduces the time and errors involved in adding and maintaining user data, ensuring secure and organized availability across different platforms.
SCIMSync manages user and group data between the client and server. The client sends requests, and the server responds. The client controls how often to sync, whether daily or more frequently. SES acts as the server to handle adding, deleting, and listing users and groups. SCIM focuses on syncing users, not logging them in. The SCIM username and password are unique and should be saved in OKTA and the SCIM settings for basic access.
SCIM Sync Support
The System for Cross-domain Identity Management (SCIM) specification is designed to make managing user identities in cloud-based applications and services easier. The specification suite seeks to build upon experience with existing schemas and deployments, placing specific emphasis on simplicity of development and integration, while applying existing authentication, authorization, and privacy mod- els. Its intent is to reduce the cost and complexity of user management operations by providing a com- mon user schema and extension model, as well as binding documents to provide patterns for exchanging this schema using standard protocols. In essence: make it fast, cheap, and easy to move users in to, out of, and around the cloud.
Pre-requisites:
SES installed and configured
IDP installed and configured Configuration Steps:
Launch “SeucreDoc Services Configuration -> SDConnex Service -> SCIM Server” tab then enable the service
Add SCIM Client registration by clicking “Add” button at panel SCIM Client registration
Client Name: Any name you wish to
Client Type: Microsoft Entra ID for Azure or Other for any other Service Providers
Auth Type: Bearer or Basic (it depended on SP supported)
Username, password and Bearer are defined any by admin
After settings configured, click “Apply” button at bottom of the panel then restart the SDIDP web ser- vice
Test the SCIM synchronization (e.g. uses SCIM Test app integrated in OKTA and using Runscope app for testing as below)
NOTE: Default SCIM server url -> https://<IDP Host:PORT>/scim This suite runs the following tests:
SCIMSync - Directory Synchronization Service Based on SCIM 2.0 Protocol
Check that the integration exists in your Okta org.
Add a new random user in Okta.
Assign that user to the integration in Okta.
Verify that the user was created on your SCIM server.
Update the user firstName attribute in Okta.
Verify that the user attribute was updated on your SCIM server.
Deactivate the user in Okta.
Verify that the user was deactivated on your SCIM server.
Reactivate the user in Okta.
Reassign your integration to the user in Okta.
Verify that the user was reactivated and assigned on your SCIM server.
Remove your integration from the user in Okta.
Verify that the user is deactivated on your SCIM server.
Creating Installation Packages for Mac FileVault 2 Computers
SecureDoc can manage the encryption of Apple Mac computers through management of Apple's native encryption tool for OS X, Apple FileVault 2.
Follow the instructions here to create a profile/package for FileVault 2 implementations. See "Creating Installation Packages for Mac Computers" for instructions on how to create a SecureDoc for Mac profile/package.
Creating a Profile/Package for FileVault 2
Currently, installation packages for Mac cannot be sent remotely by SES and must be copied to CD, USB media, or a shared network drive and then run on the client machine to start SecureDoc installation. SED users should not use sleep mode on their encrypted devices.
The steps involved in creating a Mac installation package and installing SecureDoc on a FileVault 2 client device are as follows:
Set up SES options (see “Setting SES Global Options” on page 56)
Create a profile to manage a device using the native encryption engine ("Creating FileVault2 Profile " below
Set installation package options for FileVault 2 (" Creating Installation Packages for Mac FileVault 2 Computers" above).
Create installation package files ("Creating Installation Package Files " on page 302) on page 183.
Install the software on the Mac computer (see the separate User Guide). All the accounts on the device receiving this package are added to the Unlock List and given access to the encrypted disk. Changes to Unlock List membership can be made through SES: "Mac FileVault2-Specific Commands" on page 415
About Profiles
A profile sets most of the parameters for the SecureDoc installation that you want performed on client devices. Once you have set up a profile, you associate it with installation package options to have it used on client devices. Unlike package settings, profile settings can be changed, and take effect, after installation has taken place.
The profile determines general aspects of how SecureDoc will behave and look on the Mac, for example, what kind of communication is available between it and the SES server, how many failed logins are allowed, and so on. You can create as many profiles as are necessary, or use different profiles for different groups in your organization.
Creating FileVault2 Profile
Click Profiles in the navigation pane.
Right-click on the information pane and choose Add profile. Click the Endpoint radio button, then from the dropdown list, choose SecureDoc Enterprise for macOS.
The Mac FileVault profile dialog appears.
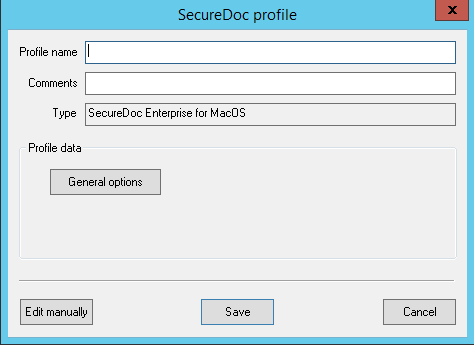
Enter a profile name.
Click General Options.
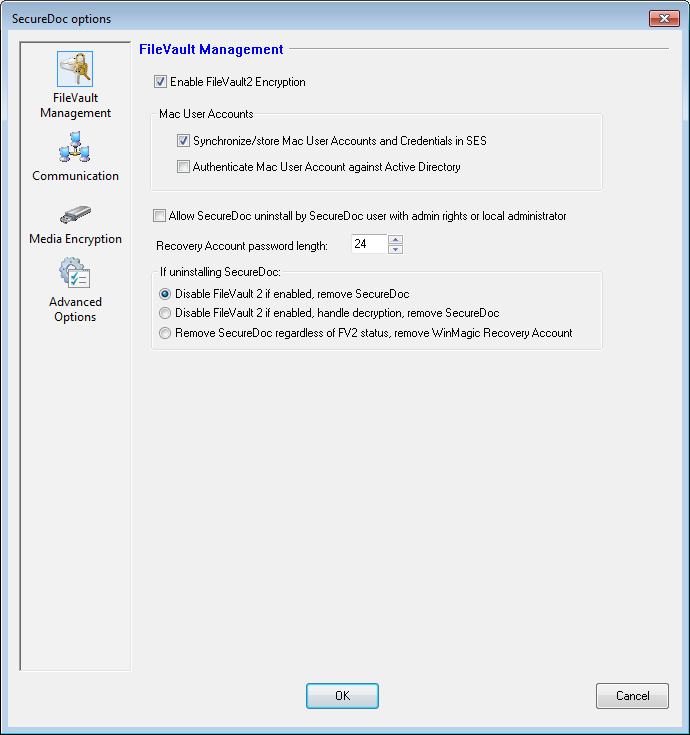
Complete the FileVault Management tab.
Check this checkbox to enable the use of FileVault2 encryption on Apple Mac endpoint devices.
Enable FileVault2 Encryption
Note: In SES V8.2SR1 the SecureDoc Pre-Boot for macOS devices (SecureDoc "On Top" of FileVault 2, abbreviated as SDOTFV2) was removed from the product line. As a result, any settings for SDOTFV2 have been removed, such as the settings in this panel that were in previous versions, as well as the Boot Text and Color panel, which no longer applies. Further, since the SecureDoc Pre-Boot for FileVault 2 no longer exists, any macOS devices installed with the SecureDoc V8.2SR1 (or later version) client software will no longer be able to participate in PBConnex groups for network-brokered authentication or PBConnex AutoBoot. However, macOS
devices running earlier versions of the SecureDoc client software will continue to be able to work with PBConnex in the ways described above.
Mac User Accounts:
Synchronize/store Mac User Accounts and Credentials in SES | When enabled, user Account and Credential (e.g. Password) information will be sent to the SES server for secure storage, and may be used in cer- tain areas such as Password Propagation. |
Authenticate Mac User Account against Active Dir- ectory | When enabled, users authenticating to a Mac device will be authenticated against Active Dir- ectory. |
Allow SecureDoc unin- stall by SecureDoc user with admin rights or local admin- istrator | If enabled, this option will permit a SecureDoc user (that has been granted SecureDoc Admin rights), or a Mac local administrator to uninstall the SecureDoc client agent software. |
Recovery Account password length (default is 24-bytes) | Use this option to define the length of the FileVault2 Recovery Account’s password. The default length is set to 24 bytes. Note: This recovery account password will automatically be replaced every 30 days with a new random pass- word. |
Disable FileVault 2 if enabled, remove SecureDoc | When uninstalling SecureDoc, FileVault 2 will be disabled and the SecureDoc uninstallation pro- cess will not wait for decryption to complete done. It will remove all SecureDoc-related files and folders, and will (optionally) show a mes- sage to user requesting the user reboot the device. |
Disable FileVault 2 if enabled, remove SecureDoc, force restart | Is similar, except that it forces restart of the device. Since the SecureDoc driver can only be be removed totally after reboot, the second option is a more robust way to uninstall SecureDoc. The forced restart will happen imme- |
diately during uninstall process, so it may inter- rupt client side job, so Administrators should be aware of this side effect of choosing this option. | |
Remove SecureDoc | |
regardless of | Only removes the SecureDoc-related files and |
FileVault 2 status, | folders, leaving FileVault in whatever status it |
remove WinMagic | currently has. |
Recovery Account |
Complete the Communication tab.
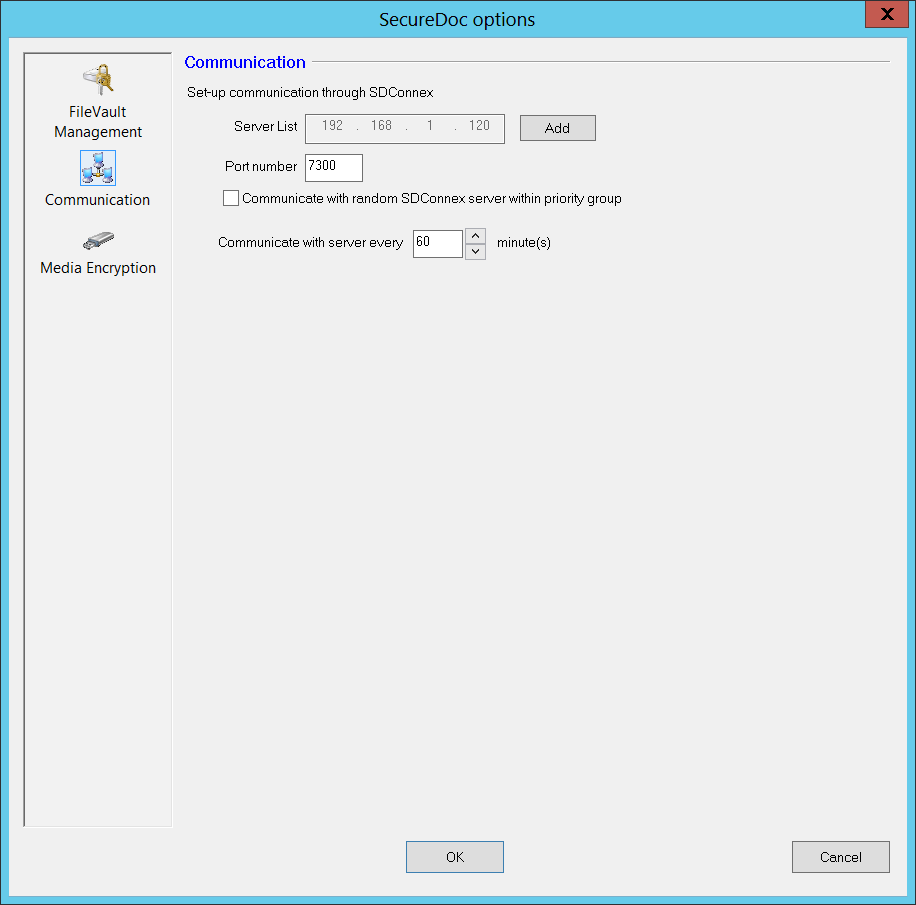
Option | Description |
Server IP address/Server’s | Purpose: User/computer information will be returned to the server through communication via SDConnex. |
Option | Description |
Specify the server’s IP address or network name and port number. To add one or more SDConnex server connection(s) (or SecureDoc Gateway servers) for this Device Profile, click the Add button to display a sub-panel, as in the image below. To define additional SDConnex/Gateway servers, enter their IP addresses or server names (depending on which option is selected), then click the Add button to add the entered server IP address or Server's DNS name to the list.
For each server, set the priority it has for devices receiving this installation package by selecting the item, then clicking the Move Up or Move Down button to move it up or down within the list, or to change its Priority. More than one server can have the same pri- ority (see "SES Components" on page 38). The client devices configured with this profile will choose one of these connections, starting with those that have priority 1. By default, SDConnex connections are chosen starting with the first one in the group and continuing to the next only if the first connection is not available. | |
Communicate with | To have client devices randomly choose one of the |
random SDConnex | available connections in the group, check Com- |
server within priority | municate with random SDConnex server within |
group | priority group. |
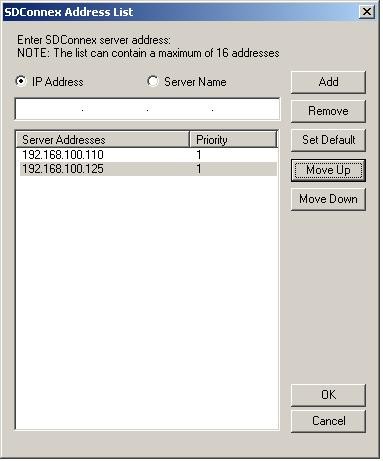
Option | Description |
Preferred address type for backwards compatibility | Choose whether to use the DNS name or the full IP address of the SDConnex server. |
Communicate with server every x minutes | Specify how often the client devices should com- municate with the SES server. |
Optionally, complete the Media Encryption tab (for more about media encryption, see "Media Encryption Options").
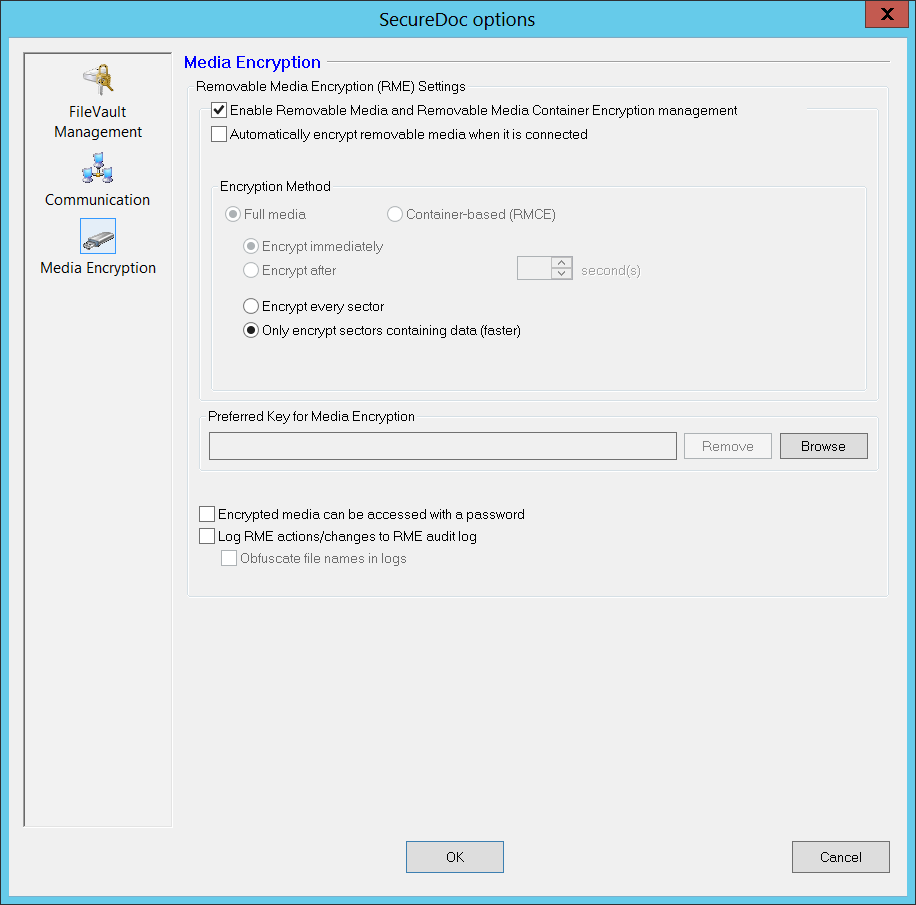
Option | Description |
Enable Removable Media and Removable Media Container Encryption man- | This option defines whether (or not) the device pro- file should enable Removable Media Encryption and/or Removable Media Container Encryption. |
Option | Description |
agement | NOTE: If neither FV2 Mode nor RME/RMCE handling are enabled/checked, then such a profile defines that the Mac device will be configured in what SecureDoc refers to as "idle mode", which means that only SES communication will be active. |
Automatically encrypt removable media when it is connected | Check to automatically encrypt removable media, remov- able media (with client’s key, if no default key) when it is connected, when it is inserted directly or through a USB hub or card reader into the device. This includes SD memory card connected directly or through SD card reader. Encryption is done based on the settings in the Control Center, but by default uses the first (often the only) key in the key file, standard encryption, and no media-specific password. To prompt the user to confirm encryption of removable media, click Encryption will start after and enter the appropriate value in seconds. To automatically encrypt removable media without prompting the user, users should click the "Encrypt immediately" radio button. Note: Media that is already encrypted cannot be re-encryp- ted and encryption cannot be resumed if interrupted. |
Encryption Method | These radio buttons are enabled when automatic encryption option is selected. Check the encryption method to be used for remov- able media. If you choose Container based(RMCE), specify the percentage of available free space on the removable media that the container is to use. Note that even with a setting of 100%, there will be space available for the media viewer that allows the encryp- ted media to be accessed on a machine without SecureDoc installed. |
Free Space to Use | (Option appears only when using Container-based encryp- tion) Specify the percentage of available free space on the removable media that the container is to use. Note that even with a setting of 100%, there will be space available for the media viewer that allows the encrypted media to be accessed on a machine without SecureDoc installed. |
Encrypt entire space and move files into con- tainer | Used to encrypt the entire removable media and save the existing data onto a temporary folder in (user- s/Appdata/local/temp/{foldername}). The data is |
Option | Description |
then moved back to the container upon completion. Note: It is extremely important to not disconnect the removable media during this process as file cor- ruption may occur on the removable media. | |
Securely format remov- able drive (recom- mended only when sensitive data exists) | This will perform a "Full Format" on the removable media, as per Windows standards. This option can range from a few minutes to hours, depending on the system and the size of the removable media. This is primarily recom- mended only when the drive had previously contained unprotected sensitive data. |
Full Media | Opting for Full Media encryption presents a number of options that do not apply for Container-Based (RMCE) encryption, such as defining whether to immediately encrypt or to provide the user a defined number of seconds to change his/her mind, as well as options to encrypt every sector or only those sectors containing data. |
Encrypt Immediately or Encrypt after a defined number of seconds | This pair of radio buttons permit the Administrator to
|
Encrypt every sector, or Only encrypt sectors con- taining data (faster) | These radio button options permit the Administrator to define whether
Consideration: Where media has contained information in the past that was not encrypted, and that data was deleted or the media was reformatted, vestiges of that data may remain on the media and those remnants could be forensically recovered using freely-available tools. If that former data was of a sensitive nature, WinMagic recommends the use of the Every Sector option. It will take longer because it will encrypt the entire media, but it will provide the best possible protection for current data as well as any previous data remnants residing on the media. |
Option | Description |
Preferred Key for Media Encryption | To assign a default key to be used to encrypt all removable media for users receiving this profile, click Browse and navigate to the location of the key. Be sure to select a key that is available to the users who will receive this profile: if not, the user’s boot key will be used for removable media instead. Note: This fea- ture does not apply to floppy disks. |
Encrypted media can be accessed with a password | Clear this option to have encrypted media usable only by users logged in to a device with SecureDoc installed on it, with access to the key used to encrypt the media. Check this option to have removable media usable by users logged in to a device with SecureDoc or SecureDoc Media Viewer installed on it, who know the password established for the remov- able media at encryption time, but do not necessarily have the appropriate key. The password rules of the login key file's password will apply for the media pass- word. If encryption is interrupted, the password will not be applied. However a password can be added later, after the media is fully encrypted using Control Center. Note: This feature does not apply to floppy disks. |
Log RME action- s/changes to RME audit log (this option was formerly called: "Enable RME audit log") | Check to log actions related to removable media under FDE. |
Obfuscate file names in logs | This will render the file names in the logs unreadable. |
Creating Installation Packages for FileVault2
Click Installation packages in the navigation pane.
Right-click on the information pane and choose Add package. When prompted for a package type, Click on the Endpoint radio button, then choose SecureDoc Enterprise for macOS.
The Mac FileVault package dialog appears.
Creating Installation Packages for FileVault2
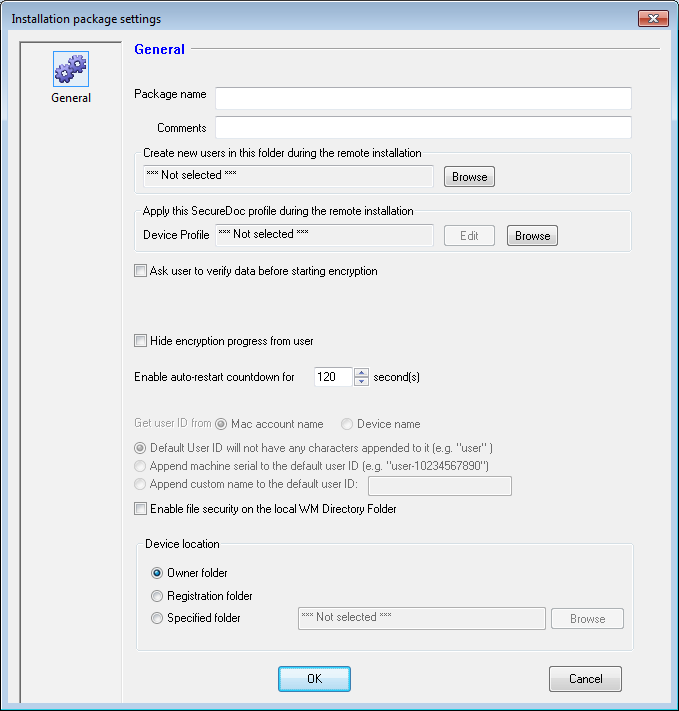
Set the options (as described below) and click OK.
Setting | Description |
Package name Comments | Enter a descriptive name and comments for this package. |
Create new users in this folder or group during the remote installation | Click Browse and navigate to the location of the folder or group to which users created when this package is deployed should belong. |
Apply this SecureDoc pro- file during the remote installation | Click Browse and navigate to the location of the SecureDoc profile to be associated with this install- ation package. If necessary, you can then click |
Creating Installation Package Files
Once installation package settings are configured, you can create installation package files:
Right-click on the installation package in the information pane and choose Create package files.
The files necessary for the installation package are created in the RemotePackage folder created by SES installation, in a subfolder given the package name.
Creating Installation Packages for BitLocker o Windows Machines
n
10
Enterprises may choose to use Microsoft's BitLocker Full-Volume Encryption instead of SecureDoc encryp- tion for various reasons such as ease of configuration, low purchase costs and better OS compatibility or they may be slowly migrating from BitLocker to SecureDoc and are looking for support in transitioning from BitLocker encryption to SecureDoc. To satisfy those customers, SecureDoc supports management
of devices encrypted with BitLocker as well as configuration to enable BitLocker encryption when deploying a SecureDoc package.
Crypto-Erase Function
The "Crypto-erase a device" option is no longer available for BitLocker devices in SES starting from ver- sion 9.0. This is because, unlike SWE encryption, BitLocker cannot be recovered once crypto-erased.
Re-enable the crypto erase function for BitLocker managed devices (SDOT/SDBM) in the SES console and SES Web UI.
Important Note: After crypto-erasing, the system is not recoverable. Users must be aware that once a BitLocker device is crypto-erased, there is no way to recover the data.
BitLocker Management
SecureDoc offers two different types of BitLocker management.
SecureDoc PreBoot for BitLocker – This method configures the machine with SecureDoc’s own PreBoot so all of SecureDoc’s current PreBoot functionalities can be used as well as managing BitLocker encryption, reporting and recovery.
SecureDoc BitLocker Management – This method configures the machine with BitLocker
PreBoot protection and SecureDoc will manage BitLocker encryption, reporting and recovery.
Creating a SecureDoc Profile
The following steps will guide an administrator through the process of creating a SecureDoc BitLocker Profile.
Highlight profiles in the left pane then right-click on the information pane, and choose Add profile. When prompted for a profile type, choose when prompted for a profile type, click the Endpoint radio button, then choose SecureDoc Enterprise for Windows.
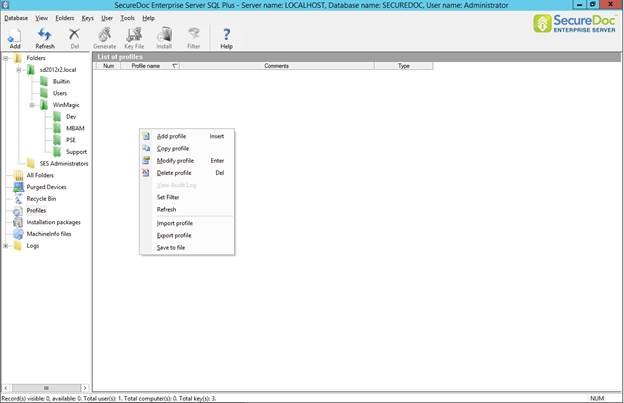
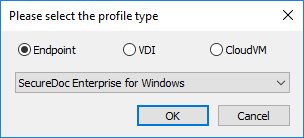
Enter a name and optional comments.
SES Administrator Manual
v9.2 SR1
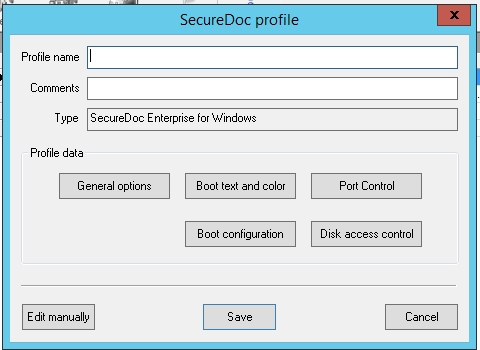
Click on the General tile on the left pane.
To minimize reboots during installation, please Check “Disable reboot following boot logon installation.
If password synchronization is desired between SecureDoc and Windows account,
please enable the following:
Synchronize SecureDoc with Windows Password
Synchronize with matching Windows Accounts only
Please leave the “Protection Providers” options as default.
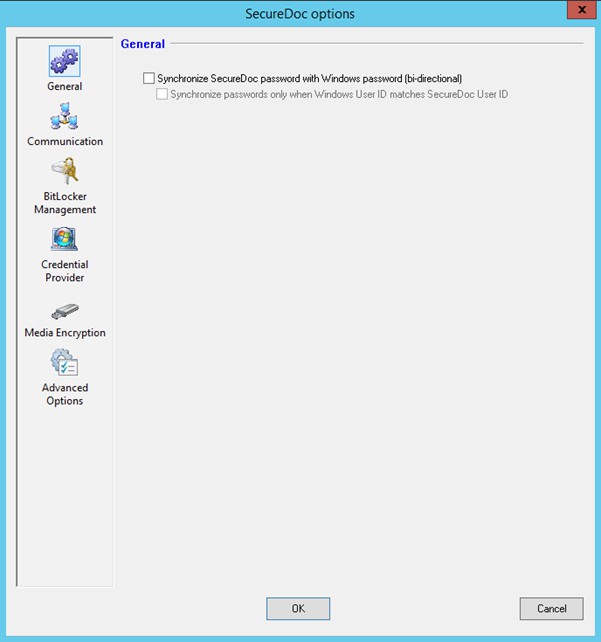
Click on the Communication tile on the left pane
Please confirm IP address in the SDConnex section. If more SDConnex servers are desired, click on ADD and we can add more by IP or DNS.
If PBConnex is desired with SD PreBoot, please enable the following options
Enable machines to communicate with SDConnex at PreBoot
OPTIONAL: Enable PBConnex autoboot key file caching
SES Administrator Manual
v9.2 SR1
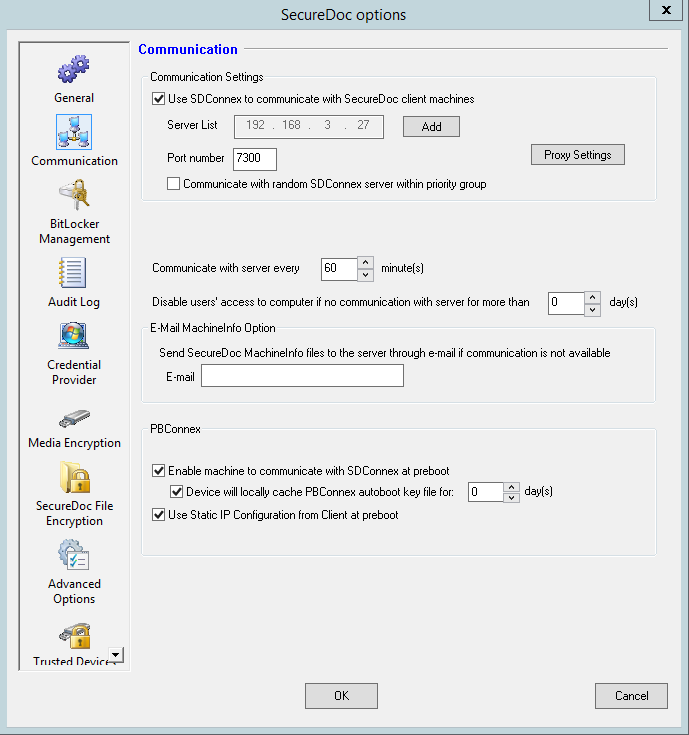
Please click on the BitLocker tile on the left pane.
Enable BitLocker Encryption. There will be 2 options, please select the desired option:
SecureDoc PreBoot for BitLocker: This method configures the machine with
SecureDoc’s own PreBoot so all of SecureDoc’s current PreBoot func- tionalities can be used as well as managing BitLocker encryption, reporting and recovery. (If SecureDoc Pre-Boot for BitLocker is selected, please pro- ceed to section "BitLocker Conversion Options" below).
Microsoft BitLocker PreBoot: This method configures the machine with
BitLocker PreBoot protection and SecureDoc will manage BitLocker encryp- tion, reporting and recovery.
BitLocker Protection Methods – This section allow administrators to configure
which BitLocker protection method to use for BitLocker PreBoot
Upon SecureDoc installation, SecureDoc will guide the user in setting up these protectors if user interaction is required. Eg. Setting up PIN / Pass- word
NOTE 1: TPM and Password are mutually exclusive and cannot be set at the same time. If both are selected, Microsoft BitLocker Preboot will first try to use TPM, if not available, it will failover to Password. If TPM and some pass- phrase is required, please select TPM + PIN. Microsoft BitLocker Preboot will automatically enable enhanced PIN (If available) which accepts a PIN of 4 to 20 alphanumeric characters.
NOTE 2: If Microsoft BitLocker Preboot is being installed over a machine
with BitLocker enabled, the BitLocker Protection method selected in the pro- file will supersede and take precedence over the current method.
BitLocker Conversion Options:
Bitlocker Cipher Strength: AES-CBC or XTS-AES modes, using either 128 or 256-bit ciphers.
Enforce Drive Encryption Type: Full encryption (Full volume encryption) or
Used Space Only (Data only)
Drives to Encrypt: OS Drive Only (only the C partition) or OS and Data drives (all partitions on the disk with a drive letter assigned)
Drives to be excluded: Volume that should be excluded. Please enter in the
drive labels separated by Comma or Semi colon.
Install SecureDoc encryption on devices that do not support BitLocker.
If this profile is used on OS [Home versions of Win7/8/8.1 or machines that do not support BitLocker, SecureDoc encryption will be used.
The second Advanced option is "Use hardware encryption if available". If
this option is enabled, and if the device detects the presence of an Opal or TCG Enterprise Self-Encrypting Drive (SED), the SecureDoc client will use the drive's built-in hardware encryption to protect it. If disabled, the SecureDoc client will use Bitlocker software encryption to protect the drive, regardless whether it is an SED or a regular drive.
BitLocker Tamper Protection SecureDoc's support for Bitlocker also offers several
options that can be engaged to ensure that a user that has elevated rights on a given SecureDoc/BitLocker-protected device cannot tamper with the BitLocker functionality on the device.
Option / Description
Prevent unmanaged decription / This option, if enabled, prevents a user with elevated rights from using BitLocker functionality to decrypt the drive.
Prevent volume protection suspension / This option, if enabled, prevents a user with elevated rights from suspending BitLocker protection on the drive(s) in a device protected by SecueDoc and BitLocker.
Disable management application (manage-bde.exe) / This option, if enabled, prevents a user with elevated rights from accessing Windows' own bitlocker management tool manage-bde.exe.
SES Administrator Manual
v9.2 SR1
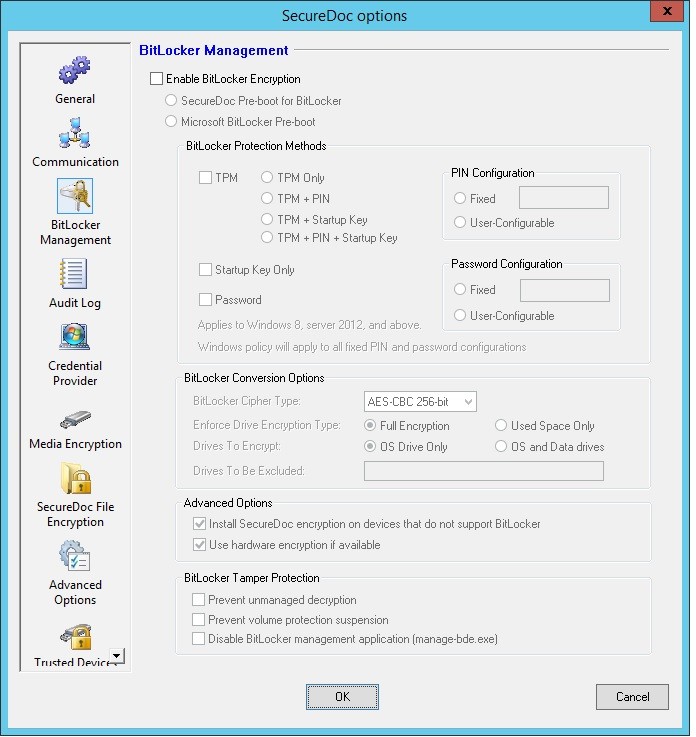
If Single Sign-on is desired, please click on the “Credential Provider” tile on the left pane.
Enable the following option(s):
Automatically log in to Windows with Credentials entered at Boot Logon
OPTIONAL: Automatically login to windows will time out after x mins.
Click OK at the bottom.
Click Save to save the Profile.
Create SecureDoc BitLocker Management Installation Package
Right-click on the installation package pane and choose Add Package; select “Win- dows Device”.
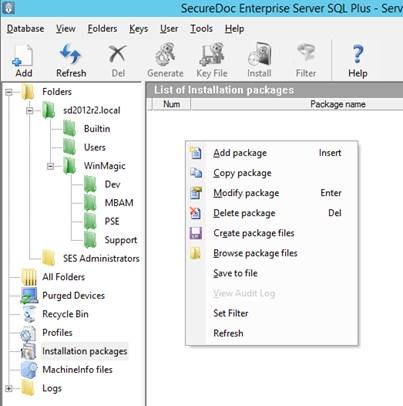
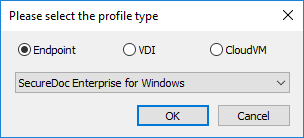
Label the installation package
Select the Profile by clicking on “Browse”
Select the desired BitLocker profile from the list of profiles ("SecureDoc BitLocker Management" in our example).
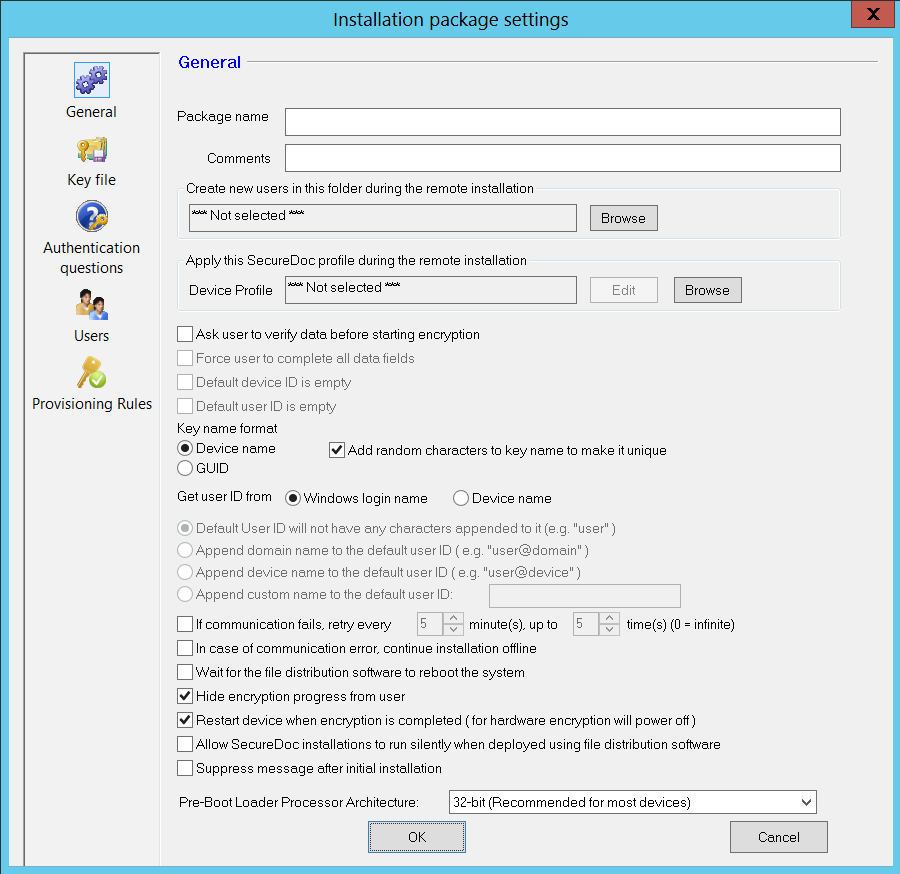
Click on the KeyFile tile on the left pane.
Select default SecureDoc privileges for new users created.
SES Administrator Manual
v9.2 SR1
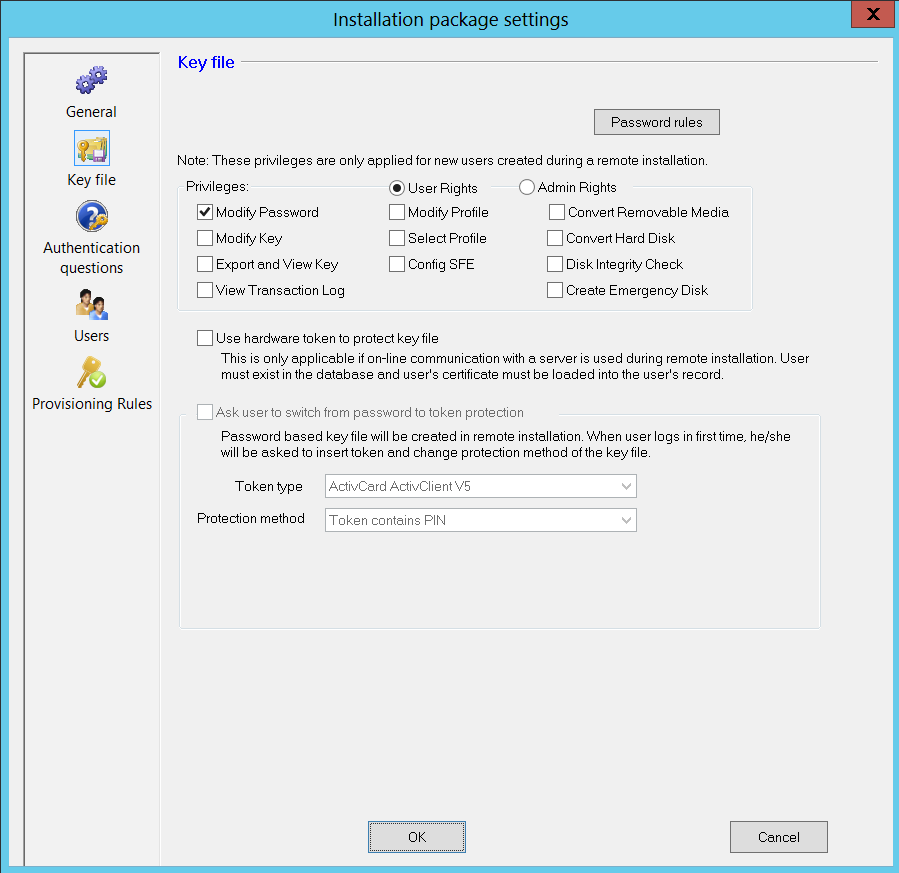
Click on the Authentication questions tile on the left pane.
OPTIONAL: Add Authentication questions if desired.
Click OK to save.
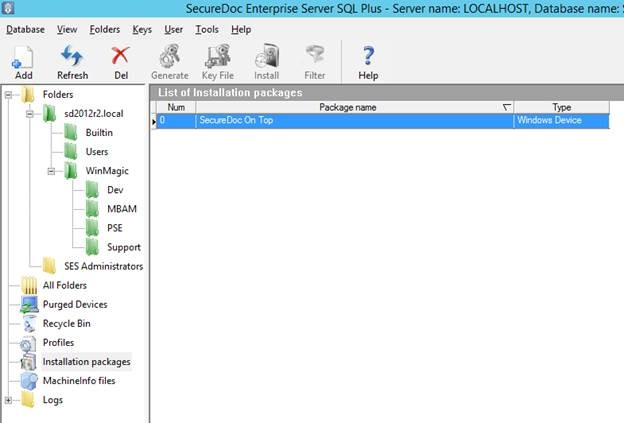
Right-click on the newly created installation file and 'Browse Package Files'
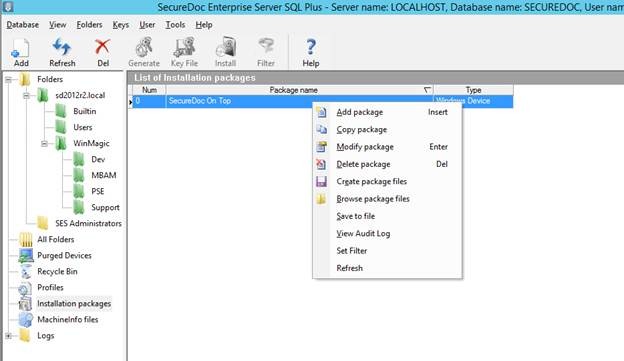
The files necessary for the installation package are created in the RemotePackage folder created by SES installation, in a subfolder given the package name.
Note: Once installation package files have been created, they are automatically updated when any changes are made to the profile or installation package options.
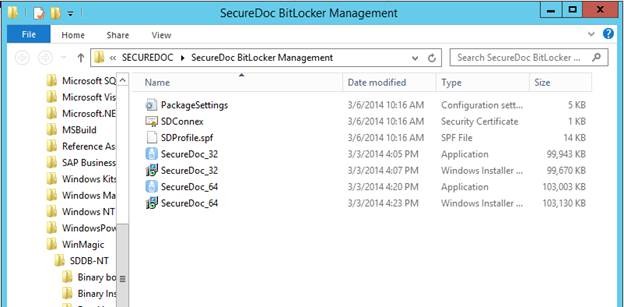
Creating SecureDoc OSA Installation Packages
11
Overview of Steps for Creating SecureDoc OSA Packages
This chapter explains how to create the installation packages you can use to install SecureDoc independently of the host operating system. This feature can be used to protect Linux, Solaris, and Windows machines. Since the install is done at pre-boot, OS updates and upgrades can be run without needing to remove SecureDoc first.
The steps involved in creating a SecureDoc OSA installation package are as follows:
Create a location for the package files (see “Creating SecureDoc OSA Installation Packages” on page 314).
Create a profile (see “Creating SecureDoc OSA Installation Packages” on page 314).
Set installation package options (see “Creating SecureDoc OSA Installation Packages” on page 314).
Create installation package files (see “Creating SecureDoc OSA Installation Packages” on page 314).
Install SecureDoc using a USB or PXE server "Configuring the PXE Server for SecureDoc OSA" on page 330
Note: SecureDoc OSA packages must be deployed only to client machines with an SED and which do not currently have SecureDoc client installed on them.
Creating a Location for the Package Files
On a server accessible to the devices on which SecureDoc will be installed, create a new Windows user account (for example, “smartadmin”). Give the user limited (non-administrator) rights.
This user will only be used to install SecureDoc OSA, and will never be used to log in to any machine.
Create a SMB/CIFS/SAMBA share (for example, “SecureDocOSA”) and give the Windows user created in step 1 read-only access to the share.
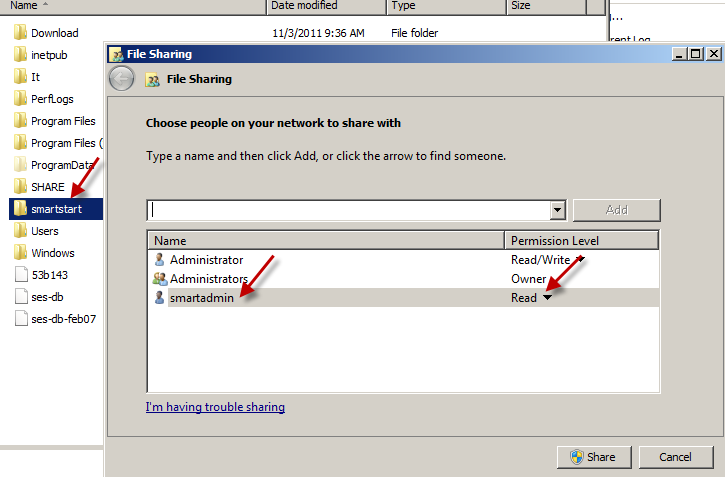
Open the share and create two subfolders: Install and Uninstallfiles. For example:
\SecureDoc_OSA
\SecureDoc\Install
\SecureDoc\Uninstallfiles
On a different computer, use the credentials of the user you created in step 1 and confirm that you can log in to the share and view the folders you created.
Creating a SecureDoc OSA Profile
Click Profiles in the navigation pane.
Right-click on the information pane, and choose Add profile. When prompted for a profile type, choose SecureDoc OSA for SEDs . The SecureDoc profile screen appears.
Creating a SecureDoc OSA Profile
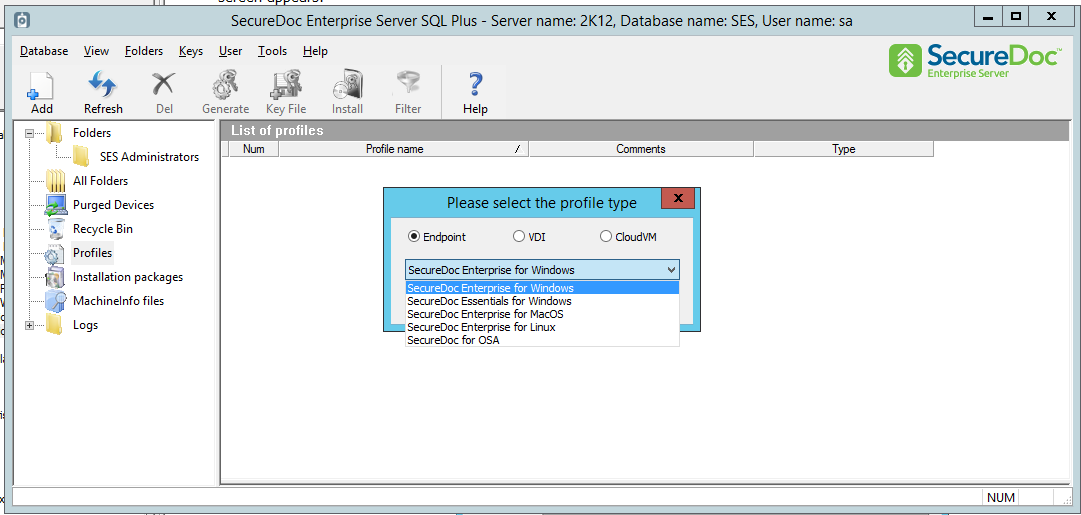
Enter a name and optional comments.
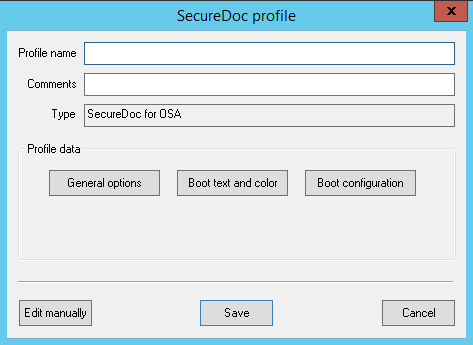
Click General options.
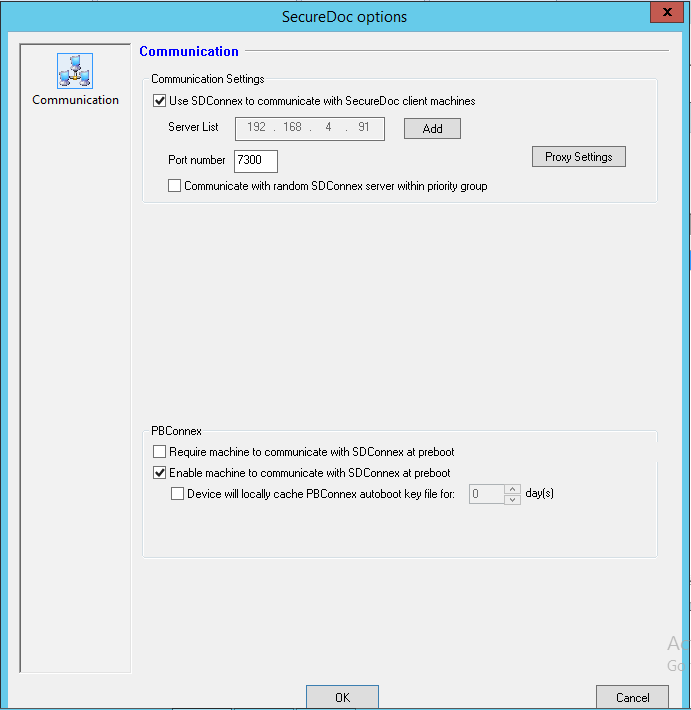
Specify the server’s IP address or network name and port number. User/computer information will be returned via SDConnex communication.
If more than one SDConnex connection has been defined, click Add and enter additional IP addresses or server names. For each server, set the priority it has for devices receiving this installation package. More than one server can have the same priority. The client devices configured with this profile will choose one of these connections, starting with those that have priority 1 (see "SES Components" on page 38).
The client device configured with this profile will choose one of these connections. By default, SDConnex connections are chosen starting with the first one and continuing to the next only if the first connection is not available. To have client devices randomly choose one of the available connections, check Communicate with random SDConnex server from list.
Click OK, then Save.
Boot Text and Color
Boot Text and Color
Boot text and color options control the way Boot Logon appears. These options enable you to customize Boot Logon to reflect your personal preferences.
If you plan to use a customized background, the graphic file needs to meet these requirements:
24 bit bitmap (.bmp) format
1024 x 768pixels
when zipped (SecureDoc zips the file for you), no larger than 0.5MB (you will be warned if your file exceeds thissize)
Only computers with a high resolution monitor (the most common type) will display the customized logo
— other monitors will shown the default Boot Logon display.
In the navigation pane, click Boot Control, then Boot Text and Color.
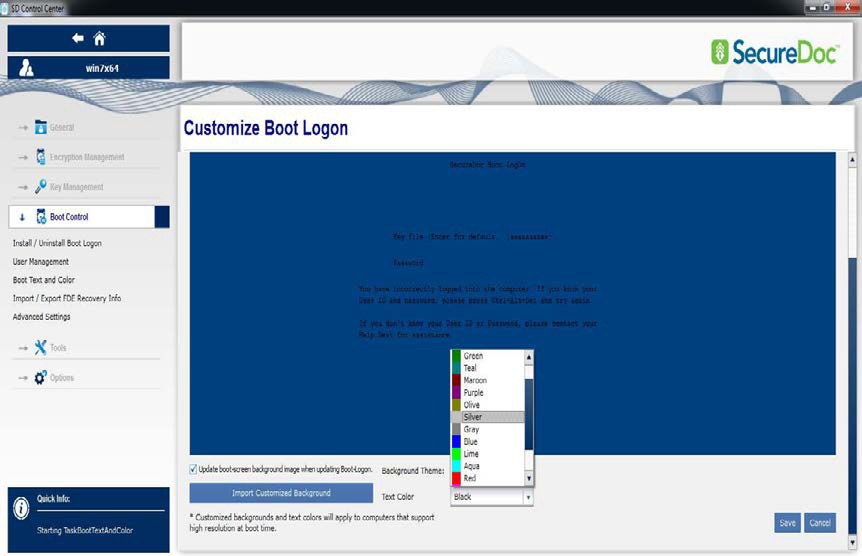
Choose a text color. The results are previewed.
Optionally, click Import Customized Background and browse to the location of a graphic file to use as the background for the Boot Logon screen. (See file requirements above.) Check Update boot-screen background image when updating Boot Logon: the new background will appear at the next BootLogon.
Configuring Installation Package Settings
Once you have created an Installation Package (which is essentially a set of parameters in the SES database), you will use it to create the actual Installation Package files that are distributed to client devices.
Installation packages must be associated with a specific profile. The same profile can be associated with any number of installation packages.
Click Installation packages in the navigation pane.
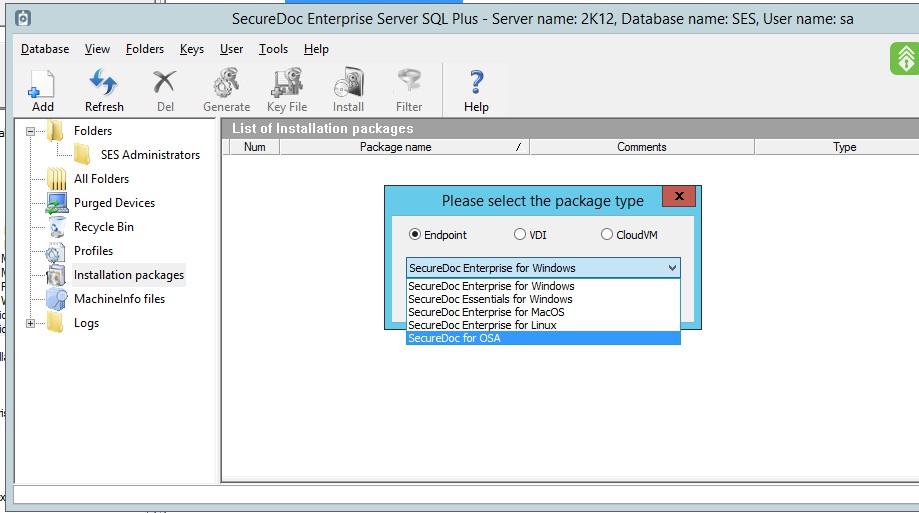 Right-click on the information pane and choose Add Package. When prompted for a package type, choose SecureDoc OSA for SEDs. The Installation Package settings screen appears, showing the available options.
Click General.
Enter a package name and optional comments.
Click Browse and navigate to the location of the SecureDoc OSA profile to be used with this package.
Configuring Installation Package Settings
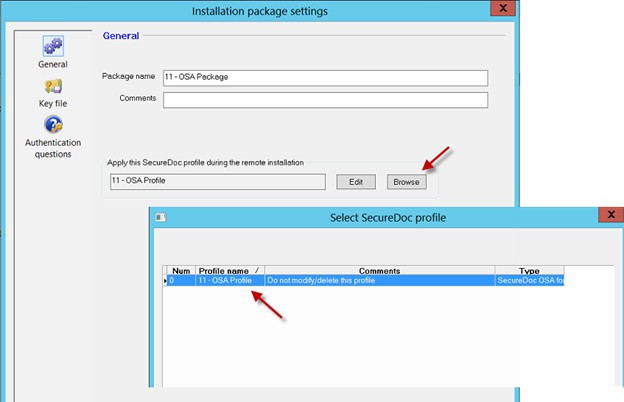
Click Key file.
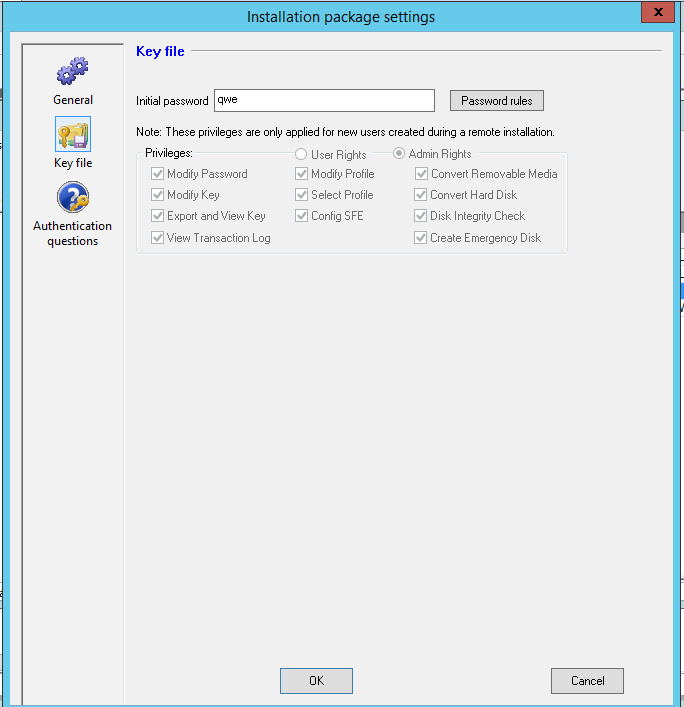
Enter the initial SecureDoc password to be used for all client devices on which this installation package will run. Users are prompted to change this password just before the SecureDoc OSA installation but after registering with SES. This password does not need to conform to Unicode standards but must conform to the global SES password rules (see "General Options" on page 56). If no password is specified, the user receiving this package must already exist in SES, and their password will be required to complete the installation of SecureDoc using this package.
Set the password rules for the password of the key file created for client devices on which this installation package will run. See “Appendix A: Password Rules” on page 474 for details on how to set these rules.
Set the privileges for the user key file created for client devices on which this installation package is run: users using SecureDoc OSA need admin privileges (click Admin Rights).
Browse to and select the default User ID (keyfile) to be available at Boot Logon.
Click OK, then Save.
Creating Installation Package Files
Creating Installation Package Files
Once the installation package settings are configured, the installation package files can be created:
Right-click on the Installation Package in the information pane and choose Create package files.
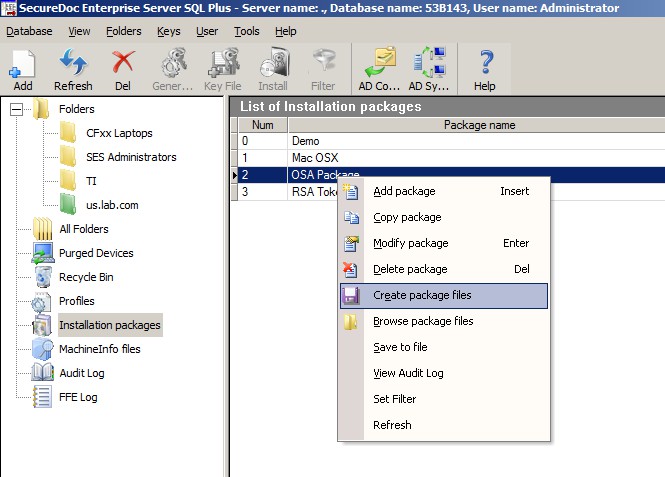
The files necessary for the installation package are created in the RemotePackage folder created by SES installation, in a subfolder given the package name.
Note: Once installation package files have been created, they are automatically updated when any changes are made to the profile or installation package options.
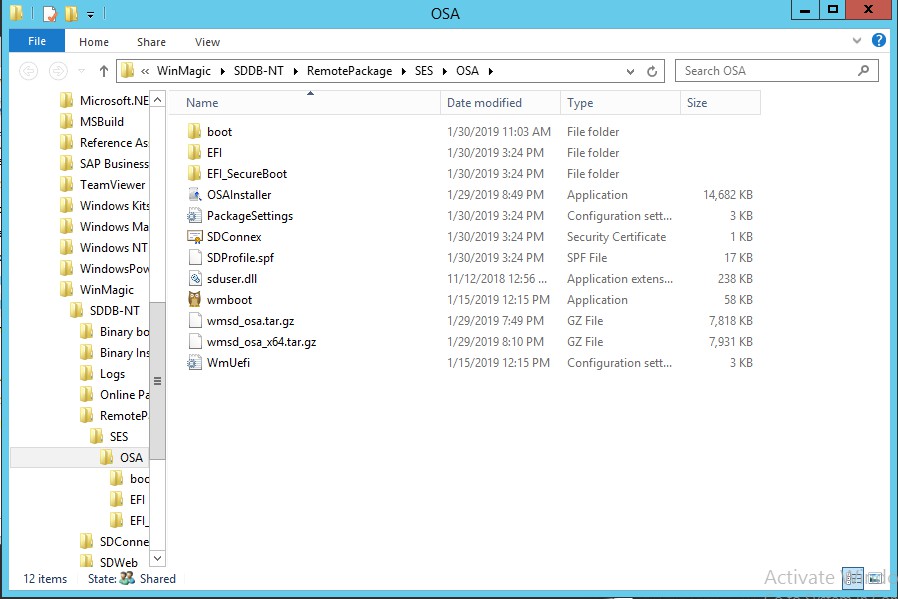
Right-click on the package you just created and copy the three files it contains (PackageSettings.ini, PDProfile.spf, and SDConnex.cer) to the
\securedoc\Install folder of the SMB/CIFS/SAMBA share you created earlier (see
“Creating SecureDoc OSA Installation Packages” on page 314).
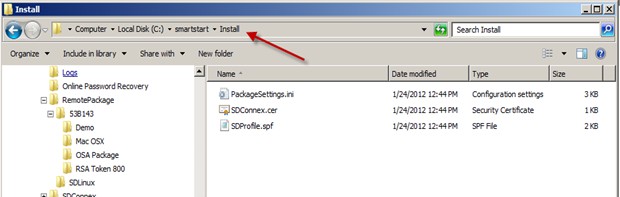
Install SecureDoc OSA from Windows OS using OSA Installer
When creating OSA package files, the OSAInstaller application is created in the RemotePackage folder created by SES installation. This application (OSAInstaller) allows SES Administrators to deploy OSA package from within Windows environment.
SES Administrator Manual
v9.2 SR1
Install SecureDoc OSA from Windows OS using OSA Installer
This feature can be used to protect Linux, Solaris, and Windows machines. Since the install is done at pre-boot, OS updates and upgrades can be run without needing to remove SecureDoc first.
Create a profile (See the Creating SecureDoc OSA Profiles section in this document).
Set Installation Package options for OSA (See the Creating SecureDoc OSA Installation Packages section in this document).
Create Installation Package Files (See the Creating SecureDoc OSA Installation Packages section in this document).
Navigate to C:\Program Files (x86)\WinMagic\SDDB-NT\RemotePackage.
Open the OSA package folder.
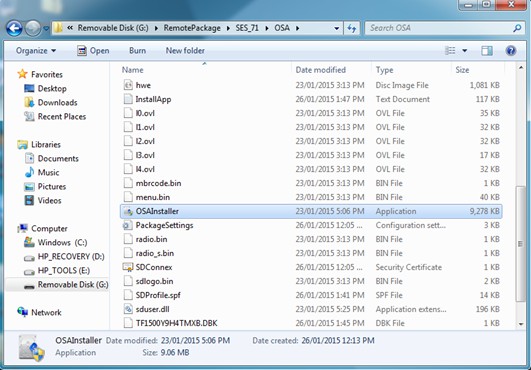
Double-click on the OSAInstraller application. The SecureDoc OSA for SEDs window appears.
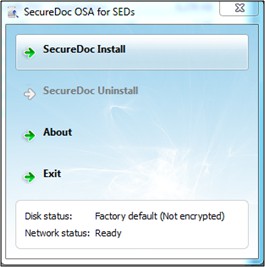
Double-click the SecureDoc Install tab.
After completing the extraction of the boot files, the Change Initial Password window appears.
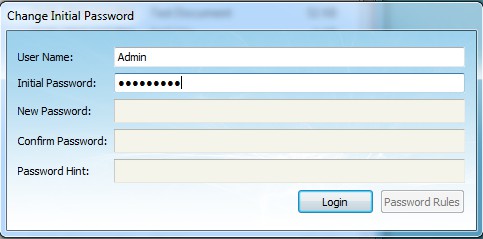
Enter the new password and confirm the same.
Click Login. The installation will start.
After installation is complete a message is displayed advising the user to power off the machine.
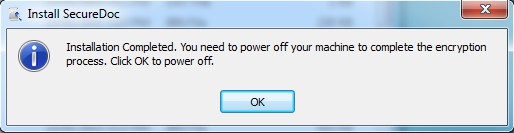
Preparing the USB Key
The USB key must have 2 GB of space available.
The key will be formatted by this process, so backup any data currently on the key.
The USB process is compatible with both Windows XP and Windows 7.
You will need to download the utilities needed to set up the USB for SecureDoc OSA pur- poses: contact WinMagic technical support.
Note: When following this process, have only the USB key intended for SecureDoc OSA purposes inserted to avoid accidental formatting of other drives.
Download the pacakge, which contains a tool to format a USB drive (wmboot.exe) and the latest SecureDoc OSA boot image (in the form of two files, under a “boot” folder).
Remove all USB devices from the computer.
Find and execute the wmboot.exe tool.
Plug in the USB key (the key will be formatted and all its data lost).
The key will be detected by wmboot.exe and its name will be shown in the tool’s window. For example:
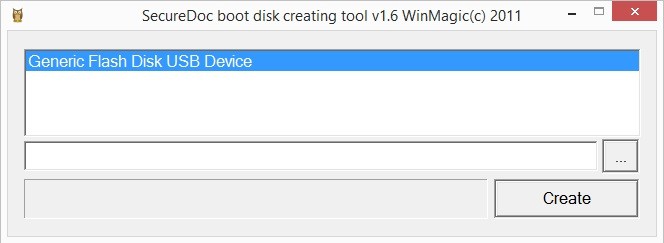
Select the key name and click Create. The formatting process will take a few minutes. There is no confirmation prompt when formatting is complete.
Close the "wmboot.exe" application upon completion.
Copy the boot and EFIfolders on the root of the newlyformatted USB.
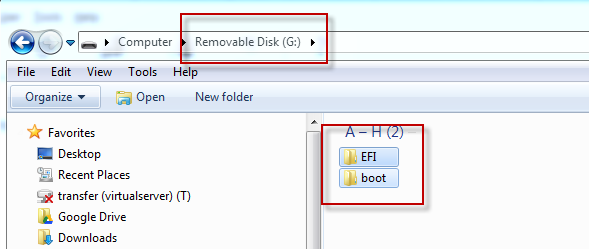
Open the USB for browsing, navigate to the file \boot\grub\menu.lst and open it in Notepad or Wordpad.
Modify the file with user-defined parameters that will copy the configuration files from the SMB/CIFS/SAMBA share to a local folder for installation.
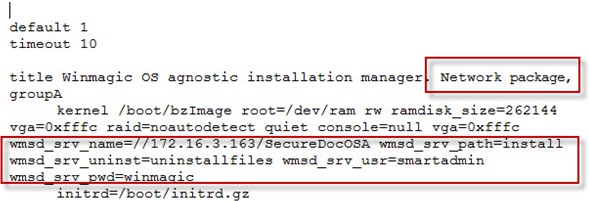 The menu.lst file is as follows. Items in the red boxes may need to be replaced.
Setting | Description |
timeout | Number of seconds to wait before showing PBA. The default forces display without a lengthy wait. |
default | Menu item to pick, by default. There are five menu items presented to the user: install, uninstall, hardware encryp- ted device status, Linux command line, and shutdown. |
Title | Name of the bootable image that the user will choose when booting from a USB key. |
Kernel | Path of bzImage (Linux kernel). |
wmsd_srv_name | Network path to the SMB/CIFS/SAMBA share created in step of “Creating SecureDoc OSA Installation Packages” on page 314. |
wmsd_srv_user | User name of Windows user created for Smart Start in step of “Creating SecureDoc OSA Installation Packages” on page 314. |
wmsd_srv_pwd | Password of Windows user created for Smart Start in step of “Creating SecureDoc OSA Installation Packages” on page 314. |
wmsd_srv_path | Name of the folder in the SMB/CIFS/SAMBA share hold- ing the install files created in step of “Creating SecureDoc OSA Installation Packages” on page 314. |
wmsd_srv_uninst | Name of the folder in the SMB/CIFS/SAMBA share hold- ing the uninstall files created in step of “Creating SecureDoc OSA Installation Packages” on page 314. |
Setting | Description |
initrd | Path to the supplied boot image (initrd.gz). |
Configuring the PXE Server for SecureDoc OSA
Configuring the PXE Server for SecureDoc OSA
Download and unzip the provided zip file, containing the latest SecureDoc OSA boot image.
Open your PXE server and create a folder (for example, SecureDoc OSA).
Copy the provided SecureDoc OSA boot image into the folder you just created.
Open the USB for browsing, navigate to the folder menu.lstand open the file in Notepad or Wordpad.
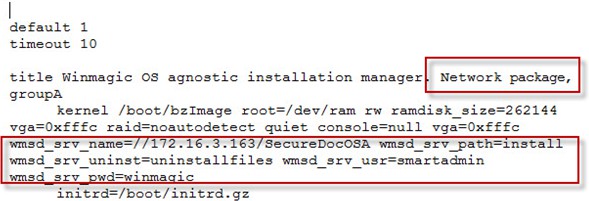 The defaultfile is as follows. Bold italicized items are those that may need to be replaced.
Setting | Description |
timeout | Number of seconds to wait before showing PBA. The default forces display without a lengthy wait. |
default | Menu item to pick, by default. There are five menu items presented to the user: install, uninstall, hardware encrypted device status, Linux command line, and shut- down. |
Title | Name of this PXE bootable image that the user will choose when booting from a PXE server. Note that any given PXE server implementation may have numerous bootable images, so ensure that the name given here is clear and meaningful. |
Kernel | Path of bzImage (Linux kernel). |
wmsd_srv_name | Network path to the SMB/CIFS/SAMBA share created in step of “Creating SecureDoc OSA Installation Packages” on page 314. |
wmsd_srv_user | User name of Windows user created for Smart Start in step of “Creating SecureDoc OSA Installation Packages” on page 314. |
Setting | Description |
wmsd_srv_pwd | Password of Windows user created for Smart Start in step of “Creating SecureDoc OSA Installation Packages” on page 314. |
wmsd_srv_path | Name of the folder in the SMB/CIFS/SAMBA share hold- ing the install files created in step of “Creating SecureDoc OSA Installation Packages” on page 314. |
wmsd_srv_uninst | Name of the folder in the SMB/CIFS/SAMBA share hold- ing the uninstall files created in step of “Creating SecureDoc OSA Installation Packages” on page 314. |
initrd | Path to the supplied boot image (initrd.gz). |
Note: Every PXE installation is unique. Please consult your IT department if you have any PXE related questions
Using SES to Uninstall SecureDoc OSA
The following steps are required when uninstalling a primary drive. After these steps it will continue from step 3 in the below procedure:
In the SES Console Click on the Drives tab.
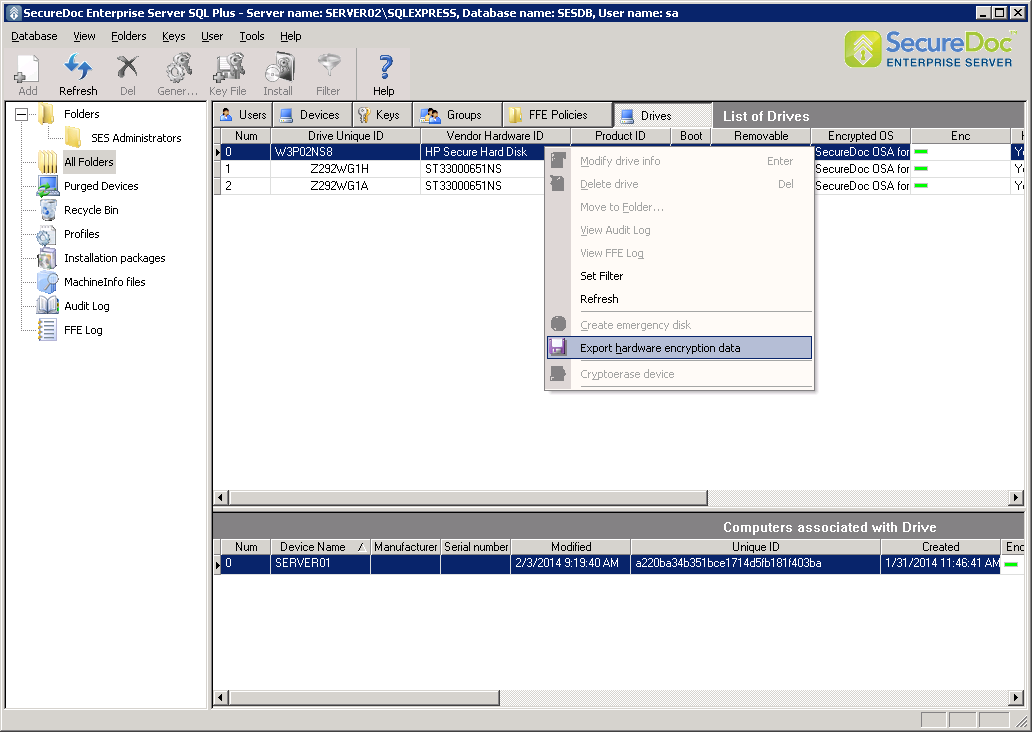
Using SES to Uninstall SecureDoc OSA
Right Click on the primary drive and select Export hardware encryption data
For secondary drives the steps 1 and 2 will slightly differ, but the following will complete the pro- cedure to uninstall.
In the SES console, click on the Devices tab.
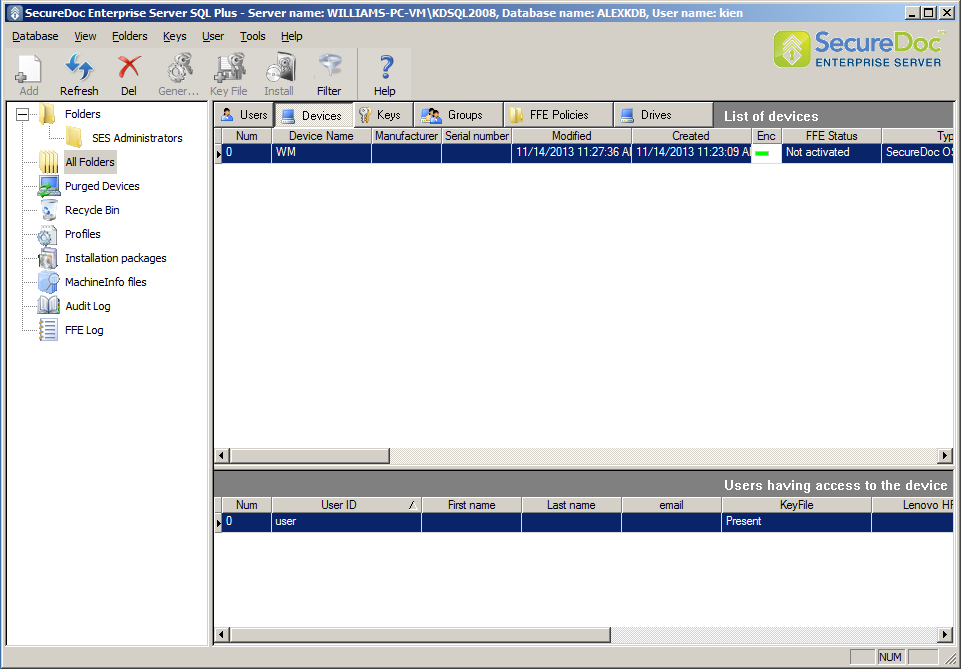
Double click on the SecureDoc OSA client computer from which you want to uninstall SecureDoc. The "Edit Device Information" page will appear:
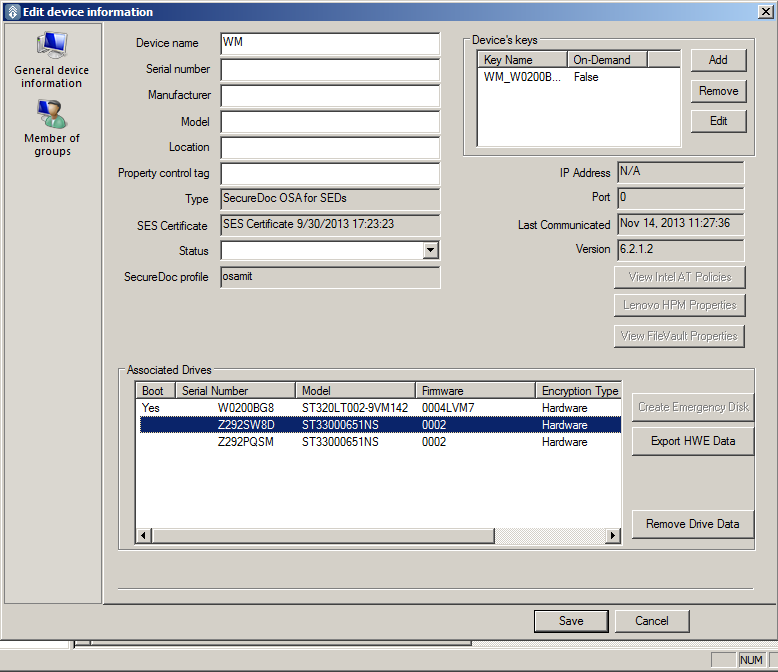
Select the hard drive from which SecureDoc is to be uninstalled from and click on
Export HWE Data Fill out the necessary information in the fields.
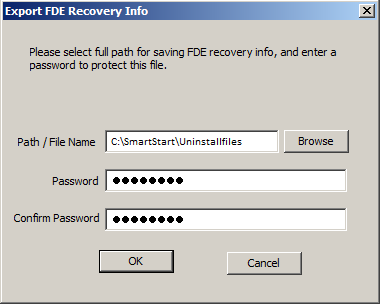
Click Browse and browse to the Uninstall folder in the SMB/CIFS/SAMBA share that you created (for example \\securedoc\Uninstallfiles). Provide a name for the file (.dbk), a password, and click OK (it is recommended to use the device ID, the unin- stall will show a prompt requiring the keyfiles based on the device ID).
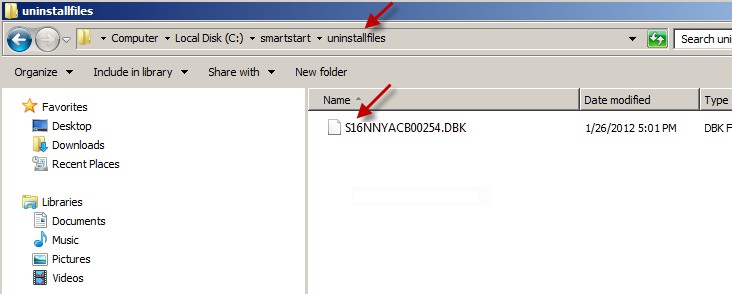
Once the file has been saved, restart the client computer and boot to the USB or PXE server.
In the SecureDoc Install/Uninstall menu click Uninstall. SecureDoc will scan the unin-
stall folder (for example, \\securedoc\Uninstallfiles) and display the exported dbk files. The network should be ready.
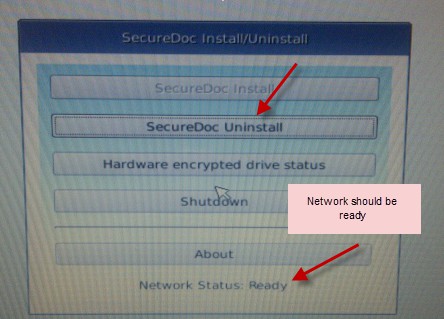
Select the dbk file for your machine and click Open.
Enter the password that you used in step 2 and click OK. You should see a new screen showing the uninstall progress.
When the uninstall is complete, you will be prompted to turn off the computer: click
OK.
Remove the USB or network cable from the computer.
Start the computer. It will no longer display the SecureDoc preboot authentication win- dow, and will boot directly into your OS.
OSA Installation
Boot the SED device from USB or from the PXE server. The SecureDoc Install/Uninstall screen opens, showing the available menu of options.
Note: SmartStart for SEDs supports English only.
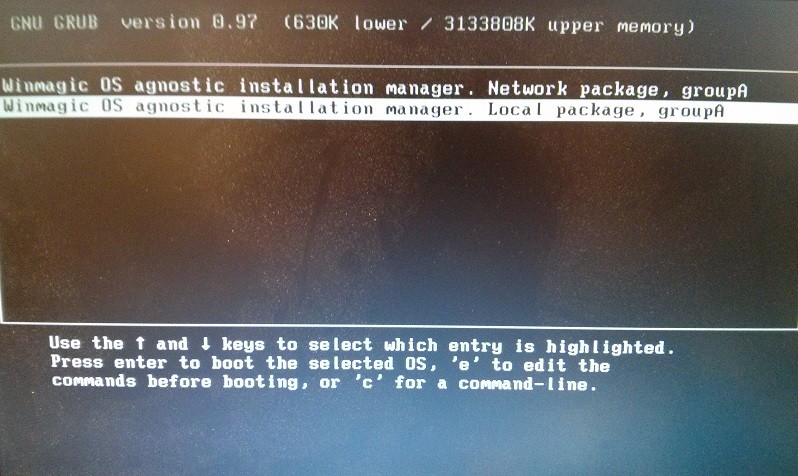
Wait for the Network Status (at the bottom of the screen) to read “Ready”.
Click SecureDoc Install. SmartStart will attempt to copy the configuration files locally.
If copying fails, you can try this process several times: if it continues to fail, there may be a problem access to the network share where the Install files are located.
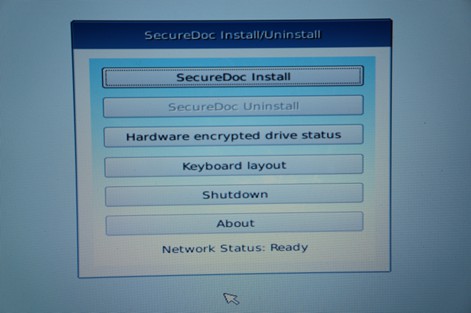
If copying is successful, a Registration Computer Form screen opens.
Enter the user name provided by your administrator.
Note to SES admin: the userid must exist in SES database
Modify other field as needed and click 'OK' to submit the data.
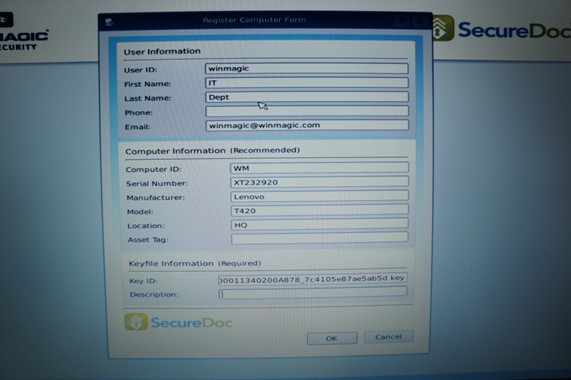
Encryption will start. A SecureDoc installation in Progress screen will be visible until the installation is completed (approximately 5 minutes).
Changing Your Password
At PBA, check the Change password option, then enter your username and password and press Enter.
You will be prompted to enter a new password (and to confirm it).
Click Save. A confirmation message appears.
Click OK.
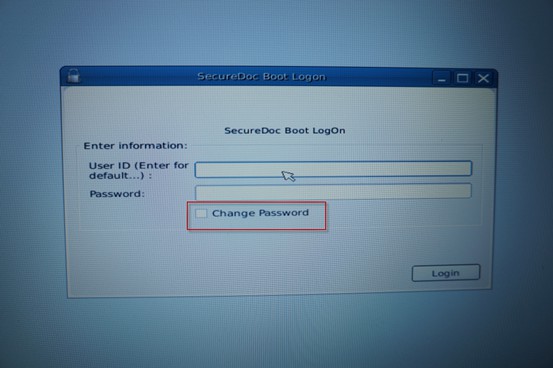
Deploying SecureDoc Using Installation Packa
Preparing to Deploy SecureDoc
12
Once you have created installation packages, you need to deploy them to client devices so SecureDoc can be installed.
ges
Before deploying the packages, communicate with users so they know what is happening and what to expect when they log in after SecureDoc has been deployed. In particular, they will need to know if Boot Logon will appear, whether the device will auto-boot during initial deployment stage, or auto-boot when on the network or if the device will require the user to log on at SecureDoc's pre-boot at all times. They will also need to know about any removable media-related settings and shared access to encrypted disks or media.
Unless you are using a default key file for installation packages, automated installation is based on the user account of the person who last logged in, so make sure users are working on their typical devices on the day prior to deployment. Administrator rights are needed to perform the SecureDoc installation: see the SecureDoc Enterprise Edition Client document’s installation instructions for details.
Overview of Deployment Process: Client Computers (Silent Deployment Option)
Note: This process applies only if the “Provisioning Autoboot and automatically identify the device owner with(out) any prompt” options are set in a device’s installation package (see "Depending on which Device Category you chose, the available Device Profile Types available will be one Installation Packages for Windows" on page 126) — available for Windows devices only, The diagrams below illustrate an environment with a single SDConnex. Where more than one SDConnex exists, available connections are chosen based on the priorities established in the profile deployed to the device.
From the SES server machine, ping the machine where SDConnex is installed, to ensure the two machines can communicate.
Start each SDConnex connection.
Distribute the installation package files to each client computer (for example, push the packages to your SMS).
SMS sends installation package files to individual client computers based on the contents of its computer directory.
SMS logs in to each client computer with a service account and runs SecureDoc_32.msi or SecureDoc_64.msi. A provisioning with temporary auto-boot request is sent to SES, along with the name of the primary user and any additional users.
The SES Management Console creates keys and key files for each user of each client computer, associating user, device, and key information, and stores the information in the SES database. SES then sends the key files to SDConnex, which sends to the client computers:
confirmation of silent deployment
the keyfile for the primary user (protected by a known random string)
the silent deployment keyfile (used for silent deployment only)
keyfiles for additional users (protected by either a known random string or, if the users are in the SES database, the password assigned to them in the database).
Note: If communication to SES is not possible at any stage in this process, a MachineInfo file is created and installation needs to proceed in normal (not silent deployment) mode.
The Credential Manager (used to ensure that the primary user has valid credentials) is set up.
The computer reboots, and installation of SecureDoc continues.
Additional keyfiles are added to Boot Logon and the computer reboots.
On the client computer:
Boot Logon is installed, using the primary keyfile for that computer.
The client computer reboots and installation continues, using the silent installation keyfile.
Windows is loaded and, depending on configuration, conversion (initial full disk encryption) begins.
The client computer reboots again.
The user see a Windows login and logs on as usual (with their AD username/password). This login must be done by the primary user.
Credential Manager validates that existence of a keyfile for the user (requesting one if it is not present), changes the keyfile password to the user’s Windows password, and deactivates silent deployment.
When the user next reboots, they see Boot Logon and log on using their Windows password. Depending on how the package for the device was set up, they are prompted for password recovery information.
From this point on, the parameters defined in the device’s package used: for example, the user might not see Boot Logon again, their Windows and Boot Logon passwords might remain synchronized, etc.
Note: Soon after encryption begins, recovery information (used to restore Boot Logon on a client computer if something happens to the computer’s MBR and Boot Logon is missing) is recorded and sent to SDConnex, and from there to SES. This information can be used to create recovery media for users.
Overview of Deployment Process: Client Computers (Without Silent Deployment Option)
Note: The diagrams below illustrate an environment with a single SDConnex. Where more than one SDConnex exists, available connections are chosen based on the priorities established in the profile deployed to the device.
From the SES server machine, ping the machine where SDConnex is installed, to ensure the two machines can communicate.
Start each SDConnex connection.
Distribute the installation package files to client computers (for example, push the package files to your SMS).
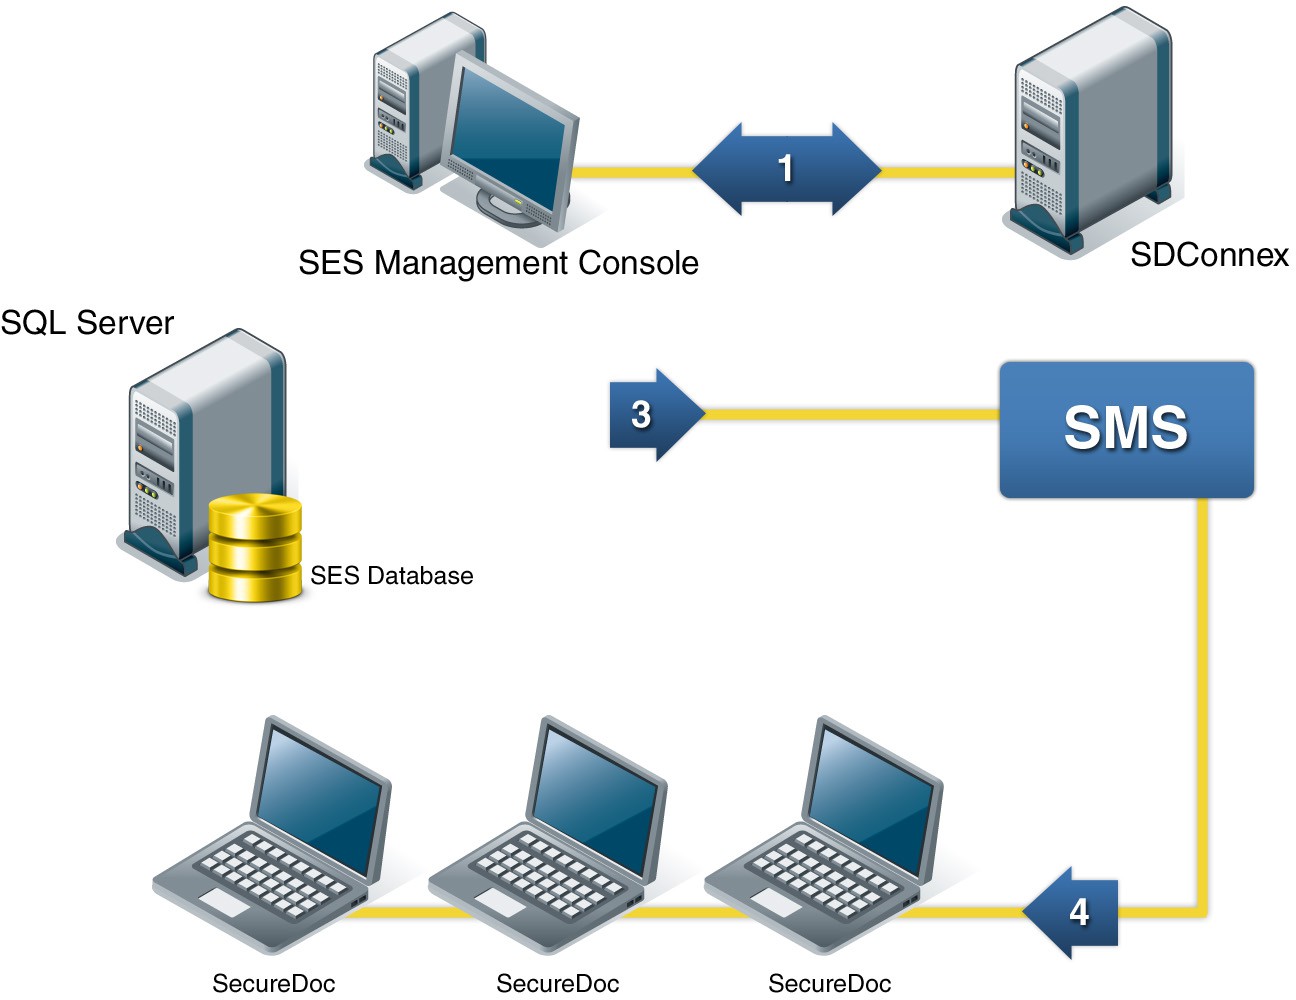
SMS sends installation package files to individual client computers based on the contents of its computer directory.
SMS SMS logs in to client computers with a service account and runs SecureDoc_32.msi or SecureDoc_64.msi on each computer. This process uses the user account of the person who last logged on to the client computer and the initial password in the installation package. (Alternatively, the executable may be used by a logged-in user.)
SecureDoc is installed on the client computers.
User and computer information is retrieved from the client computers and sent back to SES via SDConnex. Information is retrieved and sent for any user who has logged on to the client computer in the past.If a connection cannot be made, an error message appears or, depending on configuration, a MachineInfo file is created. If you set up the installation package to be independent of the contents of the SES database, the steps below occur. If you set up the installation package to affect only users in the SES database, the retrieved information is compared to the contents of the database and the following steps occur only for matching users.
The SES Management Console creates keys and key files for each client computer, associating user, device, and key information, and stores them in the SES database. SES then sends the key files to SDConnex, which sends to the client computers:
the keyfile for the primary user
keyfiles for additional users (protected by either a known random string or, if the users are in the SES database, the password assigned to them there).
On the client computer:
Boot Logon is installed with the primary keyfile. The installation process uses the primary key file(for the most recent user) to continue installation.
The client computer reboots and Windows is loaded.
Keyfiles for other users are added to Boot Logon.
Windows is loaded and, depending on configuration, encryption begins.
The client computer reboots again.
If full disk encryption was deployed, the client computers are encrypted. Users see Boot Logon and must login using their login credentials configured for their package.
Depending on the profile settings (see “Profile General Options ” on page 92), users may be prompted for password recovery answers. If removable media encryption only was deployed, users log on to Win- dows. To encrypt removable media, they must enter their login and password in the SecureDoc Control Center at least once. After that, any time they insert a USB storage device they will be prompted to encrypt it.
Note: Soon after encryption begins, recovery information (used to restore Boot Logon on a client computer if something happens to the computer’s MBR and Boot Logon is missing) is recorded and sent to SDConnex, and from there to SES. This information can be used to create recovery media for users.
Overview of Deployment Process: SED Computers
Note: The diagrams below illustrate an environment with a single SDConnex. Where more than one SDConnex exists, available connections are chosen randomly.
From the SES server machine, ping the machine where SDConnex is installed, to ensure the two machines can communicate.
Start each SDConnex connection.
Distribute the installation package files to client computers by pushing them to SMS.
SMS sends installation package files to individual client computers based on the contents of its computer directory.
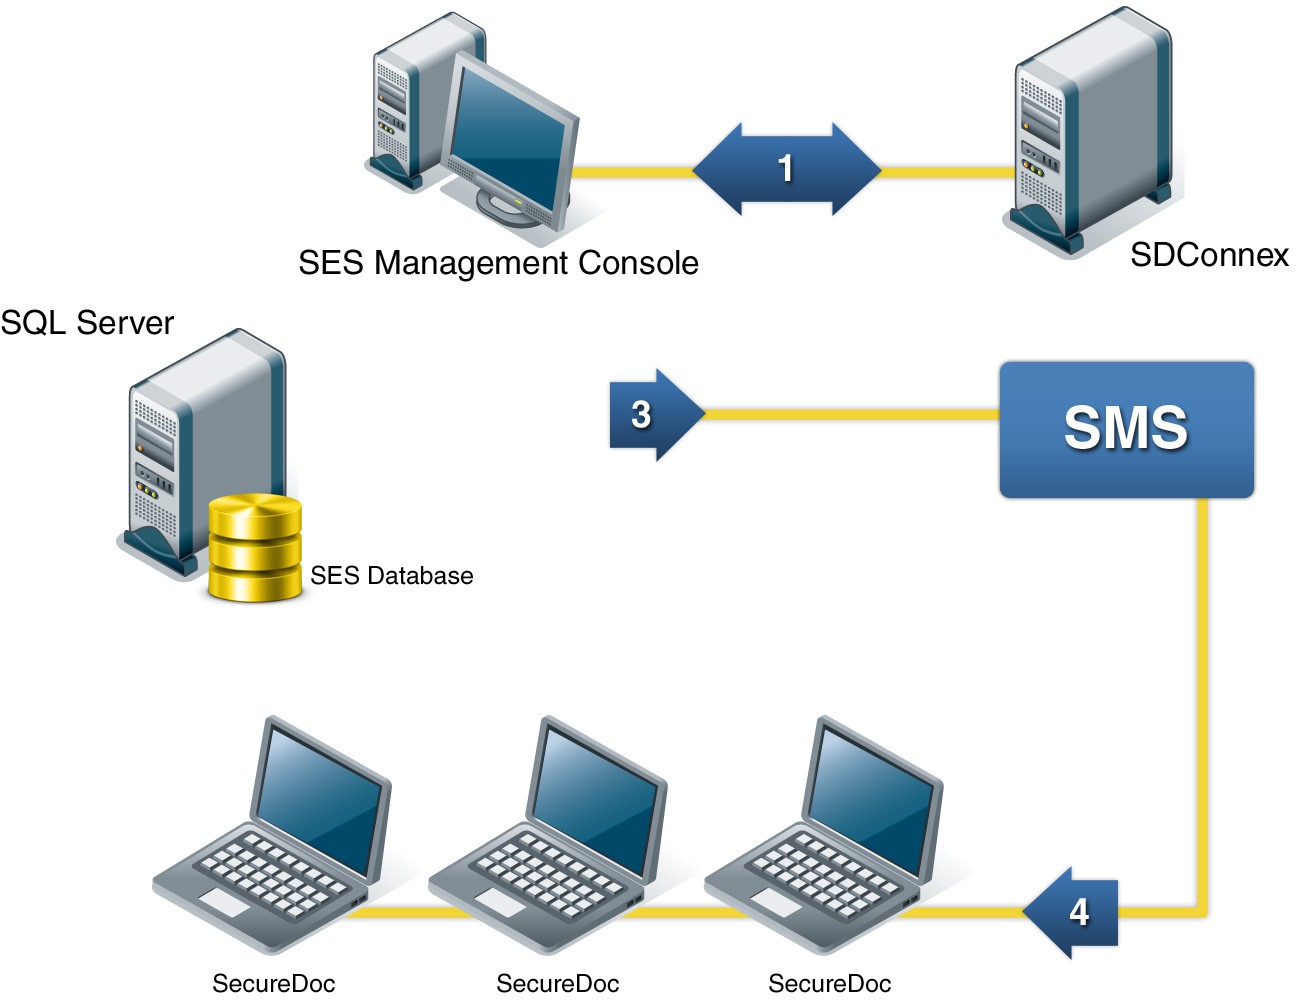
SMS logs in to client computers with a service account and runs SecureDoc_64.exe or SecureDoc_32.exe on each computer. This process uses the user account of the person who last logged on to the client computer.
SecureDoc is installed on the client computers: It will detect that there is an Opal SED and will proceed to "manage" that drive so that it locks all extents and swaps in the Shadow MBR when power is cut to the drive. Next it will provide it a large randomly-generated new unlock code which it will store in a Key File. It will then install Boot Logon.
The key file is sent back to SES and stored in the SES database.
Client computers reboot and the SecureDoc Configuration Wizard is run.
Recovery information (used to restore Boot Logon on a client computer if something happens to the computer’s MBR and Boot Logon is missing) is recorded and sent to SDConnex, and from there to SES. This information can be used to create recovery media for users.
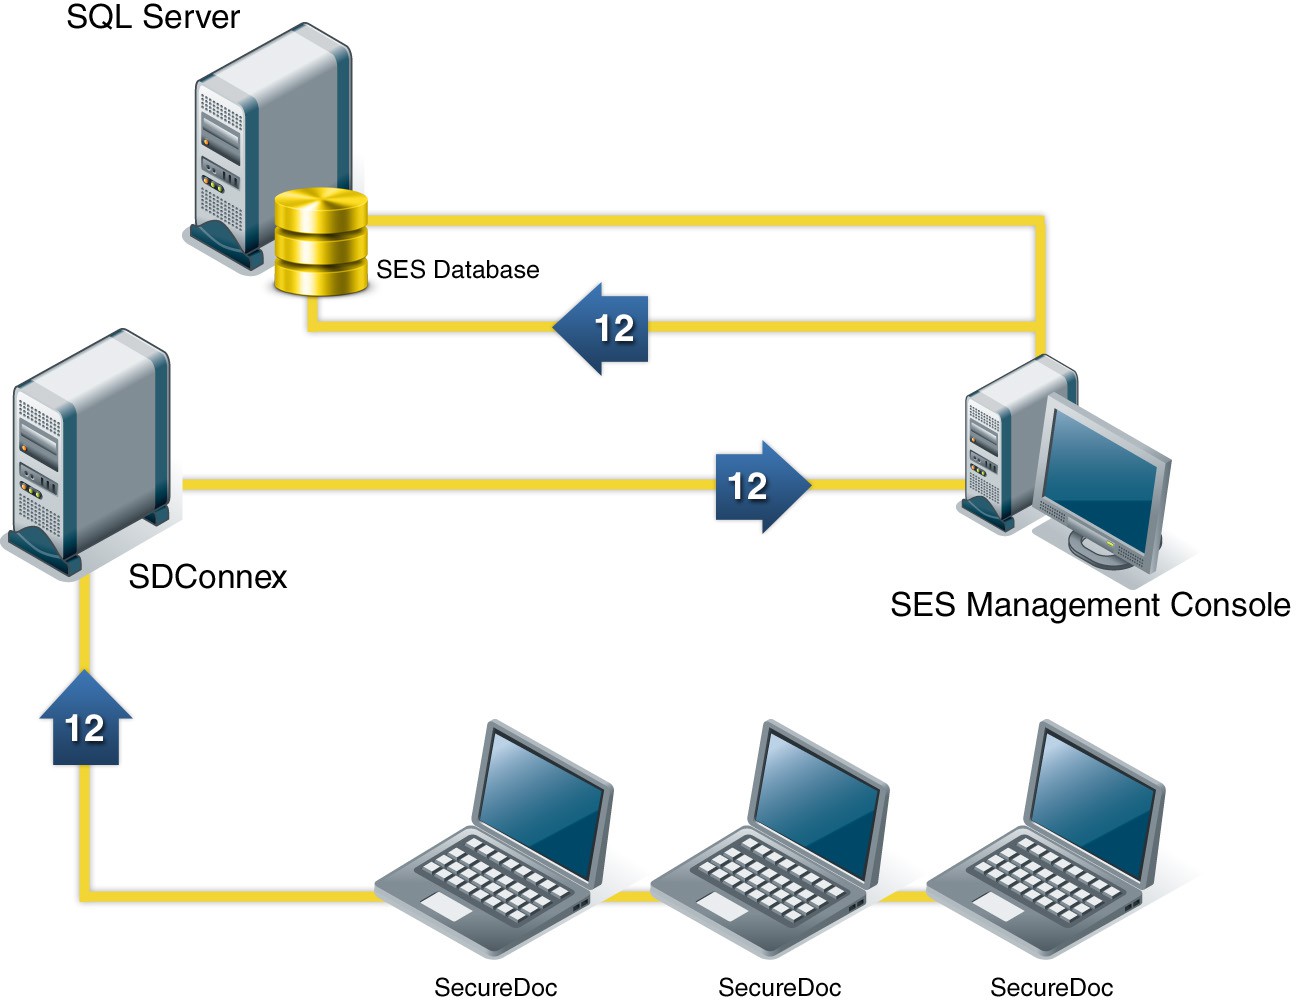
Overview of Deployment Process: Using Default Key File (Client Com- puters)
Distribute installation package files to client computers and run (manually or automatically)
SecureDoc_64.exe or SecureDoc_32.exe on each computer.
SecureDoc is installed on the client computer and it is encrypted using the default key file associated with the installation package.
When the user logs on to Boot Logon, SecureDoc changes the default key file to a key file for that user (for example, based on the user’s Windows user ID) and sends it to SES for storage in the database.
About SDConnex
SDConnex is installed with the SES installation, and handles communication in LAN/WAN environments.
SDConnex collects the SDForm (record) data entered by users as part of the SecureDoc installation process, or (when not using the SDForm installation methodology) the data automatically gathered by the Client device about itself. That data is passed to the SES
database from the Client through SDConnex. SES then creates a unique encryption key and key file for each user, which is copied to the client device.
SDConnex must be running to receive information from client devices. It also needs to be running to allow remote control functions. It is a service, meaning it starts automatically and runs by default in the background until you stop it. If the system running SDConnex is restarted, SDConnex starts automatically, without requiring an administrator to log on.
Before you run SDConnex, be sure you know the location and password information for your SES database.
SES Administrator Manual
v9.2 SR1
Registering and Configuring SDConnex Service
Choose Start >> SecureDoc Enterprise Server >> SecureDoc Services Configuration. The SDConnex Configuration screen appears.
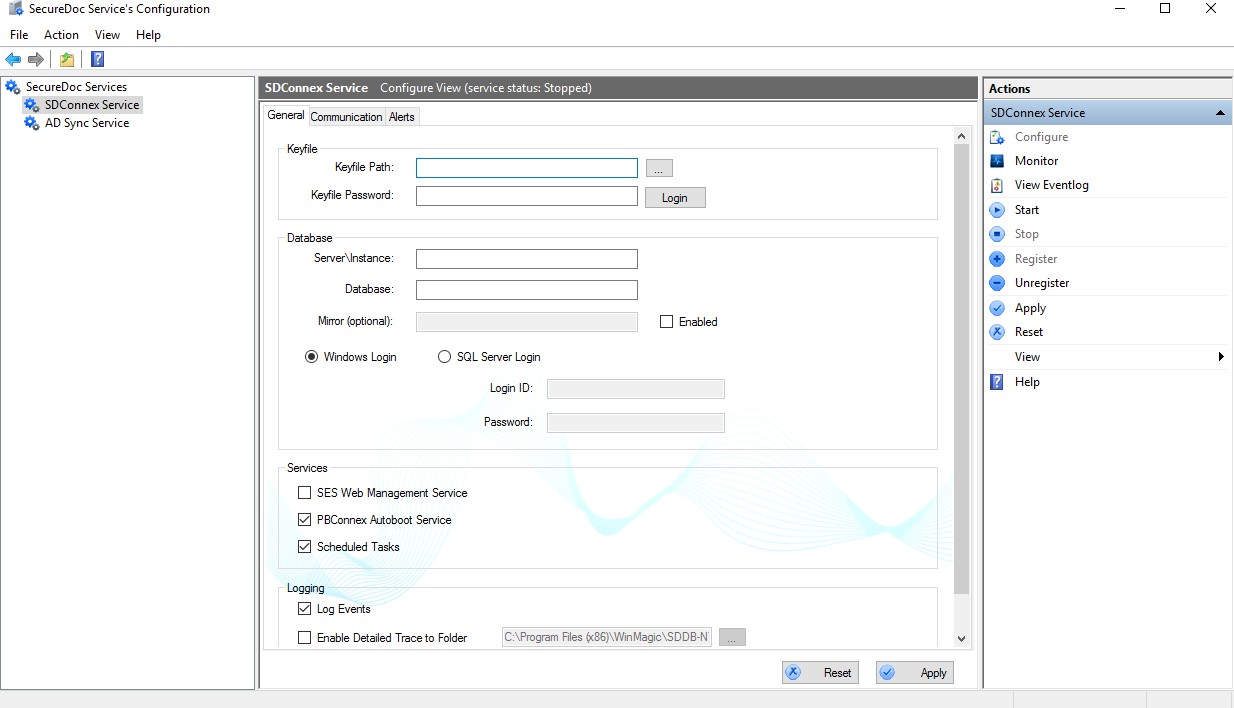
Click SDConnex Service (in the left pane). The SDConnex Service Register View screen appears.
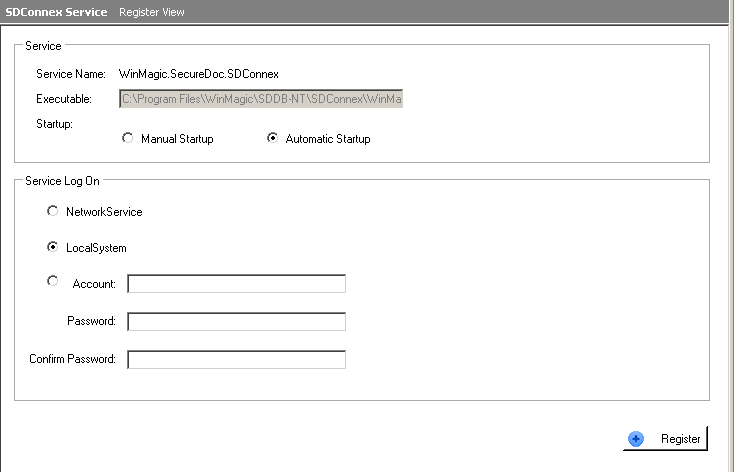
Choose whether you want the service started automatically (when the server starts) or manually. Automatic Startup is recommended.
Choose whether you want the service to log on to your network service or local system. Consult your Microsoft documentation to determine the appropriate setting for your environment.
Note: It is recommended that the SDConnex service be given the least powerful set of privileges in your network.
Enter an account name and password that has access to the local service or network service.
Click Register. The SDConnex Service screen changes to show three configuration tabs named General, Communication and Alerts.
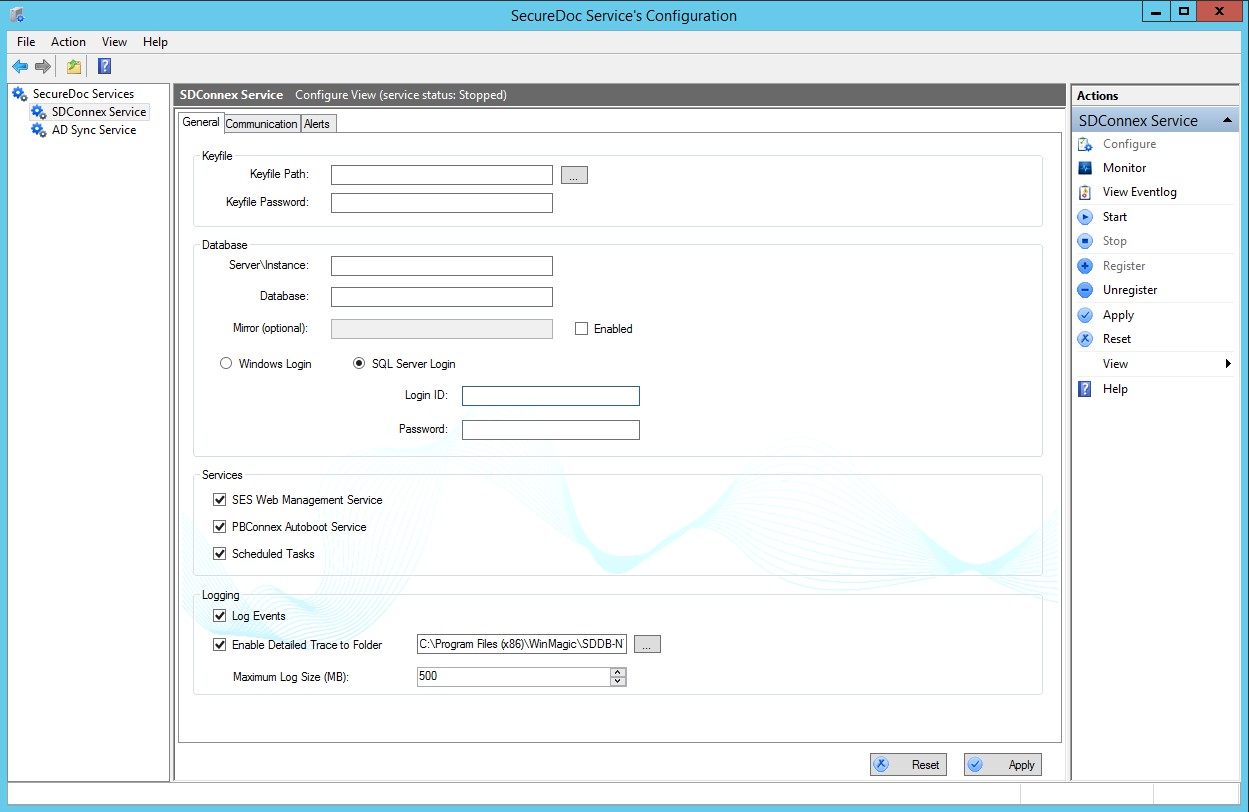
Note: This section explains only the General tab: the other tabs offer optional features and are explained in “ Configuring SDConnex” on page 399.
In the Keyfile area, enter the information needed to locate and log in to the key file protecting your SES data.
In the Database area, enter the name of the SES SQL server/instance and database name.
To mirror the database to another location, click Enabled and enter the name and path to the mirrored database.
Choose whether you want to use Windows Login or SQL Server Login authentication for access to SES. If you choose SQL Server, enter an appropriate login and password.
Note: If SDConnex and SES are installed on different machines and you choose Windows authentication, you will need to change the service log on information using the Windows Service Control Manager to give the specified user SD_admin, SD_user, db_owner and public rights to the SES database.
In the Services area, check the services you want to use:
SES Web Management Service (check to use the SES for Web console)
PBConnex Autoboot Server (check to have this SDConnex server allow AutoBoot for PBConnex connections from devices configured to allow AutoBoot. Clear the option to
prevent use of AutoBoot for PBConnex connections from devices, regardless of whether or not they are configured to allow AutoBoot)
Schedule Task (Check to have the SDConnex server schedule a task to remove SDConnex Performance Statistic information that is older than 1 month. Uncheck this option if it is desirable to allow statistical information re: SDConnex Performance to aggregate for longer than a month, then re-enable it later to return the Performance Statistics information be a month of data).
In the Logging area, choose whether or not to log events. Optionally, you can enable a more detailed trace log and choose the location where trace logs should be stored.
Click Apply and close the SDConnex Management Console.
If you chose manual start, select the service and click Start.
Configuring SDConnex to validate users against OKTA Server
In V9.0, SES introduces options to permit users to be authenticated with PBConnex Network-Brokered Authentication against an OKTA server, instead of Active Directory.
To achieve this, the Administrator needs to modify the following SQL statements to match your OKTA server environment, then run the SQL Insert statement needs to be run against the SES Database.
1 - Modify the following SQL statement values to match your OKTA environment, replacing the contents of the angle brackets <> with your environment's values.
SQL Statements:
SQL> INSERT INTO dbo.Settings (Name, ValNum, ValStr)
Values ('IDNLW_OKTA_AUTH_API_URL', NULL, 'https://<enter url of your OKTA Authentication API>'), (''IDNLW_OKTA_AUTH_API_TOKEN', NULL, '<copy/paste your OKTA Token value here>'), (''IDNLW_AD_ AUTH_TYPE', NULL, '4') ;
SQL> COMMIT ;
Once the above statement has successfully been completed, you should see the data in the SES Data- base:
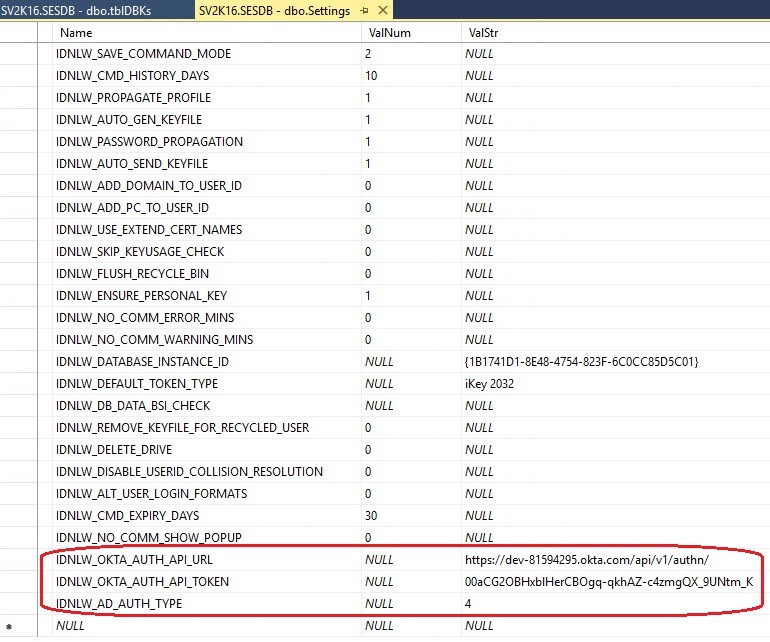
Registering and Configuring Analytics Services
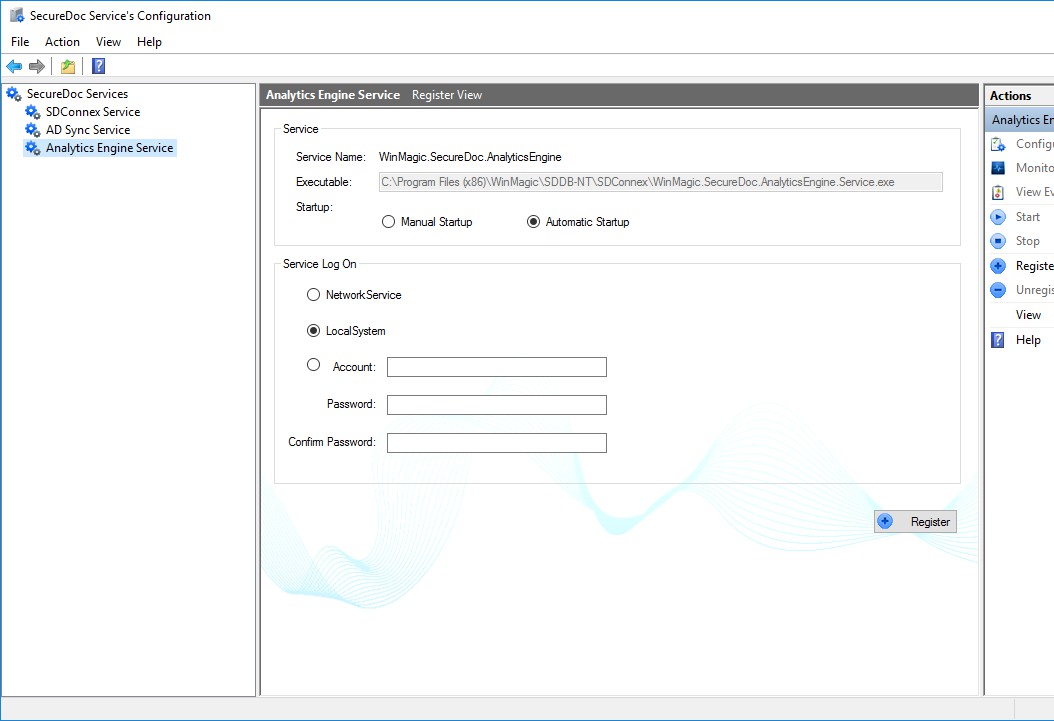 Choose Start >> SecureDoc Enterprise Server >> SecureDoc Services Configuration. The Analytics Services Configuration screen appears.
Click Analytics Services (in the left pane). The Analytics Services Service Register View screen appears.
Choose whether you want the service started automatically (when the server starts) or manually. Automatic Startup is recommended.
Choose whether you want the service to log on to your network service or local system. Consult your Microsoft documentation to determine the appropriate setting for your environment.
Enter an account name and password that has access to the local service or network service.
Click Register. The Analytics Services screen changes to show one configuration tab named General.
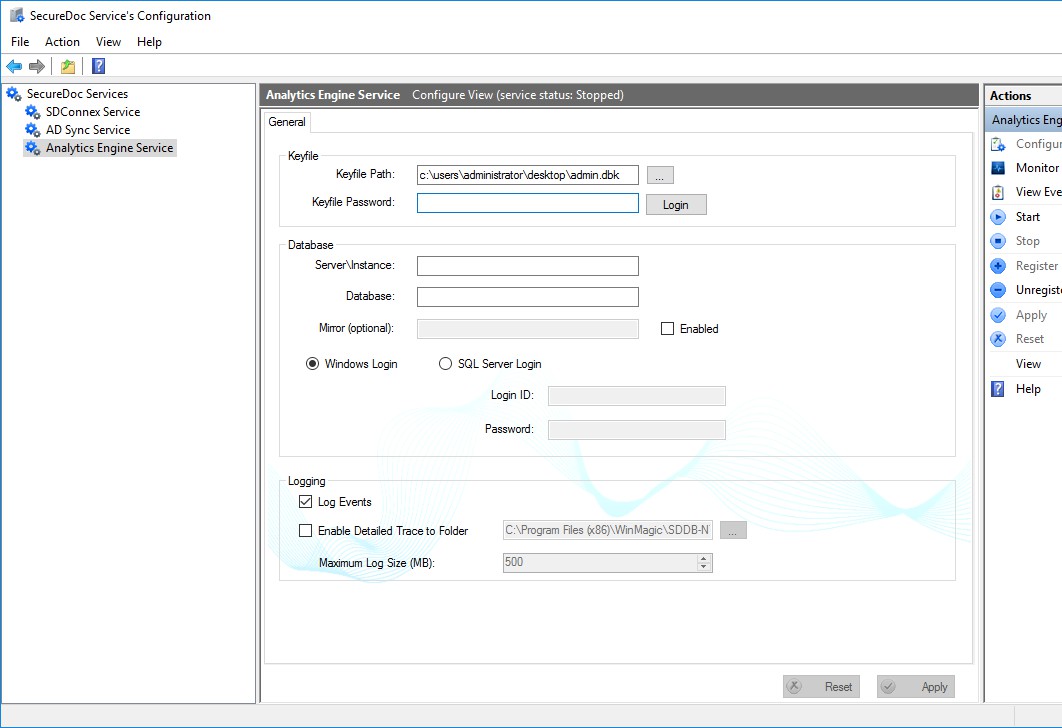
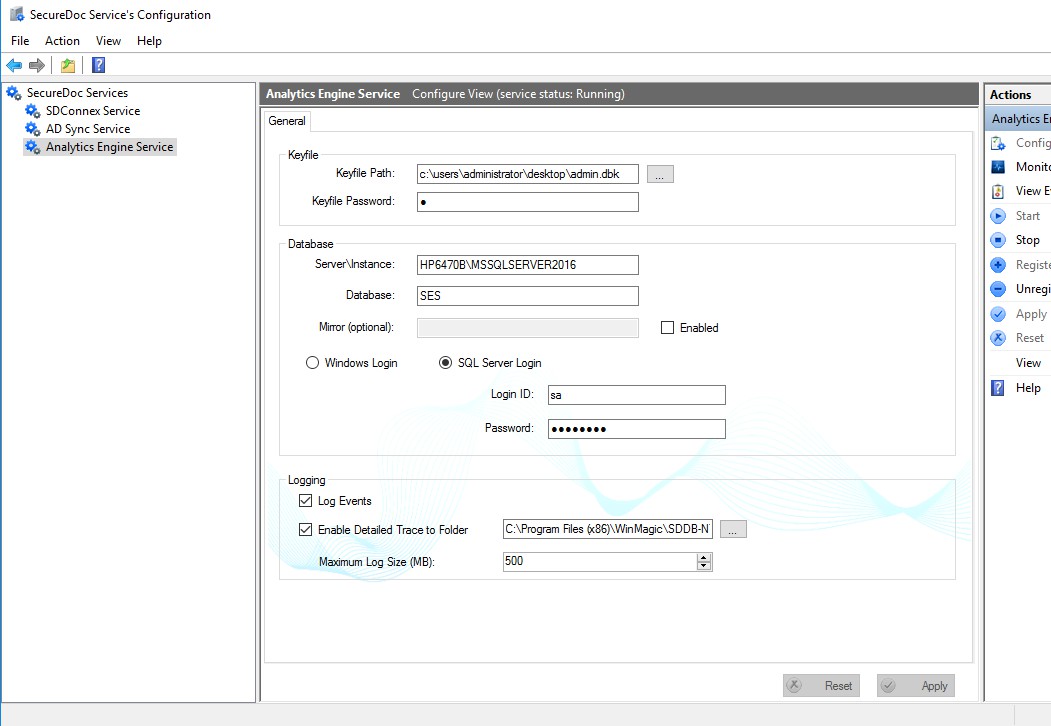 In the Keyfile area, enter the information needed to locate and log in to the key file protecting your SES data.
In the Database area, enter the name of the SES SQL server/instance and database name.
To mirror the database to another location, click Enabled and enter the name and path to the mirrored database.
Choose whether you want to use Windows Login or SQL Server Login authentication for access to SES. If you choose SQL Server, enter an appropriate login and password.
In the Logging area, choose whether or not to log events. Optionally, you can enable a more detailed trace log and choose the location where trace logs should be stored.
Click Apply and close the Analytics Service Management Console.
If you chose manual start, select the service and click Start.
The SecureDoc Gateway Service
Many WinMagic customers that have mobile/off-LAN workforces want to ensure that those users' devices can continue to be actively managed, even though the devices rarely (if ever) connect directly to the corporate LAN.
For many years, WinMagic has offered the option of installing a full SDConnex server inside a Network DMZ (Demilitarized Zone). This requires opening a port for inbound client communications on the Inter- net-to-DMZ firewall, and then opening several ports on the DMZ-to-LAN firewall so that the SDConnex server in the DMZ can communicate with the SQL Server and (optionally) the Domain Controller for AD services. For some customers, the option of having a server outside the Corporate LAN accessing the Domain Controller does not fit within their security model.
In Version 8.5, SecureDoc Enterprise Server introduced the SecureDoc Gateway Service, which can sim- plify the above, while strengthening security.
The SecureDoc Gateway Service provides an option for customers to install a Gateway server to front- end a dedicated SDConnex server (located inside the infrastructure LAN), which requires fewer ports to be accessed and simply validates and forwards acceptable traffic to this dedicated SDConnex server.
Vetting consists of validating that inbound communications from endpoint devices can be trusted (ie. they are from the SES Server's sphere of control).
The use of a dedicated SDConnex server inside the infrastructure LAN strengthens communications by ensuring that on-LAN client traffic cannot be mixed with off-LAN/over-the-internet client traffic.
The Gateway server listens for inbound traffic on the same default port number as the majority of the SDConnex servers do (e.g. port 7300, the default).
However, the Gateway Server (or servers, there can be several if needed) use a different port number to pass its requests on to dedicated SDConnex Server(s).
In this way it ensures that, in the event of any kind of attack or if the Gateway Server were to be shut down, thanks to the validation and port translation functions performed by the Gateway Server, no over-the-internet traffic can reach the dedicated SDConnex servers directly.
NOTE: If intending to use a SecureDoc Gateway server in your DMZ, remember to also set up a separate SDConnex Server to handle its in-bound client traffc, and to set a different Port Number on that SDCon- nex server
Registering and Configuring the SecureDoc Gateway Service
Choose Start >> SecureDoc Enterprise Server >> SecureDoc Gateway Service
The SecureDoc Gateway Configuration screen appears.
Click SecureDoc Gateway Service (in the left pane). The Gateway Service Register View screen appears.
Register the Service. The service registration process is exactly the same as for SDConnex, so if in doubt, revisit "Registering and Configuring SDConnex Service", above.
Once registered, the SecureDoc Service's Configuration screen appears, as in the image below.
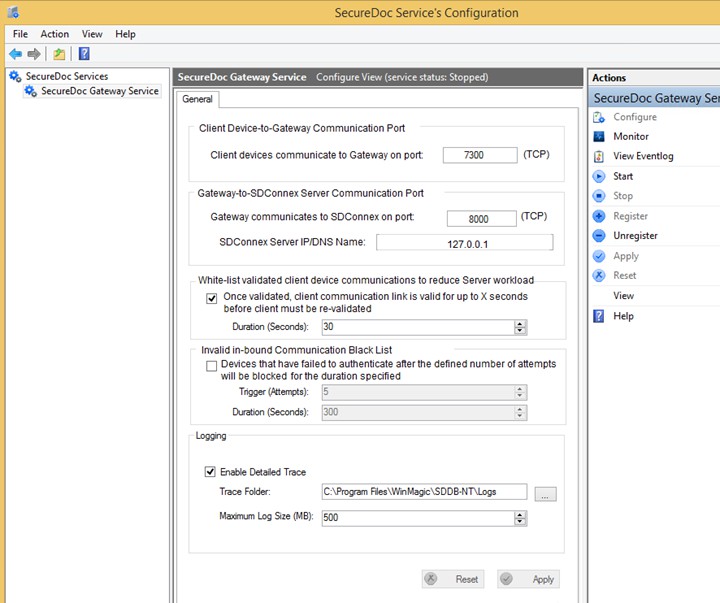
The options in this pane are as follows:
Client Device-to-Gateway Communications Port section:
Client devices communicate to Gateway on port: [ port number ]
Enter the same port number as you use for all SDConnex communication traffic. If you are using the default, enter 7300 here.
Gateway-to-SDConnex Server Communications Port section:
Gateway communicates to SDConnex on port: [ port number ]
Enter the Port number of the dedicated SDConnex Server you'll use to handle over-the- internet client traffic.
In the example shown, inbound traffic over the internet will be port-translated to port 8000, so the SDConnex server dedicated to over-the-internet client traffic will be set to listen on port 8000.
NOTE: It is NOT recommended to use either the same port number as other SDConnex serv- ers (thereby avoiding port translation), nor to combine LAN and over-the-internet client traffic to be handled the same SDConnex server(s). LAN traffic should be handled by cer- tain SDConnex servers, and over-the internet traffic should be handled by others, using a dedicated port number).
White-list validated client communications to reduce Server workload section:
Check box: Once validated, client communication link is valid for up to X seconds before client must be re-validated:
Check this check box, then select the number of seconds using the spinner control below. Together these define that once a client device has been validated by the Gateway Ser- vice, the service will not need to re-validate the client device again until after the entered number of seconds has elapsed.
This option aids scalability, since validation of client devices is a fairly expensive and cycle-consuming process. Already validated client devices continue to communicate
through the Gateway for a period of time, instead of triggering the processor-intensive val- idation process every time they communicate.
Invalid in-bound Communication Black-list section:
Check box: Devices that have failed to authenticate after the defined number of attempts will be blocked for the duration specified.:
Check this check box, then in the Trigger (Attempts) field, select the number of failed authentication/validation attempts that you consider being unacceptable using the spin- ner control. Together these define that you wish to black-list devices if they exceed the number of failed authentication attempts.
In the Duration (Seconds) field, use the spinner to choose the number of seconds that the Gateway Service will ignore/not attempt to validate or process inbound requests from a given black-listed device.
This option also aids scalability, again since validation of client devices is a fairly expens- ive and cycle-consuming process. Devices that have failed to be validated/authenticated a number of times in a row have already consumed too much of the Gateway Service's pro- cessing horsepower, so it will ignore further authentication requests from failed devices for the defined number of seconds.
Logging section:
Choose whether or not to log events. Optionally, you can enable a more detailed trace log and choose the location where trace logs should be stored.
Step Two: Distributing Installation Package Files
To Client Computers
To distribute installation package files to client computers, do one of the following:
map a connection from the client computers to the RemotePackage folder, using file distribution software
push the RemotePackage folder to the client computers using file distribution software such as SCCM (or Microsoft's older SMS product), LANDesk, Tivoli, GPO or other software distribution tool.
copy the RemotePackage folder to a CD or other media, or upload it to a web site
Step Three: Handling Returned User and Device Information (no com- munication)
About MachineInfo Files
Client and device information is returned automatically to SES via SDConnex, where a LAN or WAN connection is available. For client machines not connected via a LAN or WAN, a MachineInfo file is created with information gathered about the user and device, including answers to authentication questions. This file can be sent to a shared folder, sent via email or saved locally for manual communication back to SES via a USB drive. You then need to import the file into SES.
Note: It is recommended that only one administrative user perform this function for all client devices.
Loading MachineInfo Files into SES
Click MachineInfo files in the navigation pane.
Right-click on the information pane, and choose Import MachineInfo Files. The Import SecureDoc MachineInfo Files screen appears.
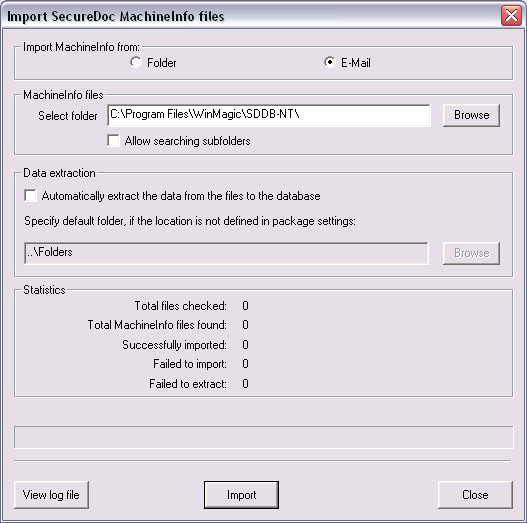
Check the option indicating the location of the MachineInfo files that you want to import — a shared folder (Folder) or an email message (E-mail). The folder name or email address to which the MachineInfo file was sent were identified in the profile distributed to this client device.
If you checked the Folder option, browse to the folder where the files reside. Optionally, check the Search in subfolders option.
If you want the MachineInfo content extracted to a specific folder, check the Automatically extract... option, and browse to the appropriate folder.
Click Import. If you are importing from a folder, the system checks all the files in the specified folder and reports the results. If you are importing from email, the system checks that account for MachineInfo files and reports the results.
Note: If the user and machine information stored in the MachineInfo file already exist in the SES database, you will have two sets of answers to challenge questions: one stored originally in the database and the other coming from the MachineInfo file. Both are retained. If password recovery is needed, the correct set of answers will be identified by using both the user and device name.
To see more details about the import process, click View log file.
The MachineInfo files found appear in the MachineInfo area of SES.
If you did not choose automatic extraction when you loaded the files into SES, follow these steps to do the extraction:
Right-click on the MachineInfo file, and choose Extract the data to the database.
User and device information in the MachineInfo file appears in the designated folders. Users have the privileges associated with the installation package with which they installed SecureDoc.
Files successfully extracted are marked as such. You can right-click on a file, and set it to “extracted” or “not extracted” for tracking purposes.
Note: Depending on your SES options, extracted files may disappear from the interface.
Step Four: After Installation
Normal Results
SecureDoc has minimal effect on users: once it has been deployed and drives have been encrypted, users simply continue to work as before. Under normal circumstances, their only ongoing interaction with SecureDoc is when they turn on their device and SecureDoc’s Boot Logon program requires them to validate their access.
You need to explain to users how to use Boot Logon to log on to their encrypted devices, either giving them a password (if their key file is protected by a password) or reminding them to use their token (if their key file is protected by a token). You also need to make them aware of how encryption for removable media has been configured—they may be prompted to encrypt media when it is inserted in the device, for example.
Users need to be aware that simply logging off at the end of the day is not enough to protect their data. They need to turn their devices off or set their device to hibernation mode. Turning the device on, restarting, or exiting hibernation mode will invoke Boot Logon.
If Installation Fails
If installation fails, SDForm appears on the client device.
To re-try the remote installation, enter information and click Submit. To terminate the remote installation, click Terminate. The SDForm will not re-appear after the client device reboots. To re-run the remote installation, do one of the following:
log on as an administrator and run the command myservice -i and reboot the device — if SecureDoc is installed, the remote installation will continue
Dealing with Client Device Installation Problems
A number of difficulties can arise when installing on the client device. These include:
using a tablet computer’s on-screen keyboard
recognizing a token
locating a PCMCIA reader in a desktop or laptop
using a foreign or atypical keyboard
To solve these problems, you can do one of the following:
change the boot configuration options of the profile
create a new profile and associate it with the existing package (SES will automatically update all client devices using that profile).
Viewing Encryption Status of Client Device
The encryption status of client devices is shown on the SES interface.
Creating SecureDoc OSA Installation Packages
13
Overview of Steps for Creating SecureDoc OSA Packages
This chapter explains how to create the installation packages you can use to install SecureDoc inde- pendently of the host operating system. This feature can be used to protect Linux, Solaris, and Windows machines. Since the install is done at pre-boot, OS updates and upgrades can be run without needing to remove SecureDoc first.
The steps involved in creating a SecureDoc OSA installation package are as follows:
Create a location for the package files (see “Creating SecureDoc OSA Installation Pack- ages” on page 198).
Create a profile (see “Creating SecureDoc OSA Installation Packages” on page 198).
Set installation package options (see “Creating SecureDoc OSA Installation Packages” on page 198).
Create installation package files (see “Creating SecureDoc OSA Installation Packages”
on page 198).
Install SecureDoc OSA from within Windows, or
Install SecureDoc OSA using a USB (page 212) or PXE Server (See: "Configuring the PXE Server for SecureDoc OSA" on page 235).
Note: SecureDoc OSA packages must be deployed only to client machines with an SED and which do not currently have SecureDoc client installed on them.
Creating a Location for the Package Files
On a server accessible to the devices on which SecureDoc will be installed, create a new Windows user account (for example, “smartadmin”). Give the user limited (non-admin- istrator) rights.
This user will only be used to install SecureDoc OSA, and will never be used to log
in to any machine.
Create a SMB/CIFS/SAMBA share (for example, “SecureDoc OSA”) and give the Win- dows user created in step 1 read-only access to the share.
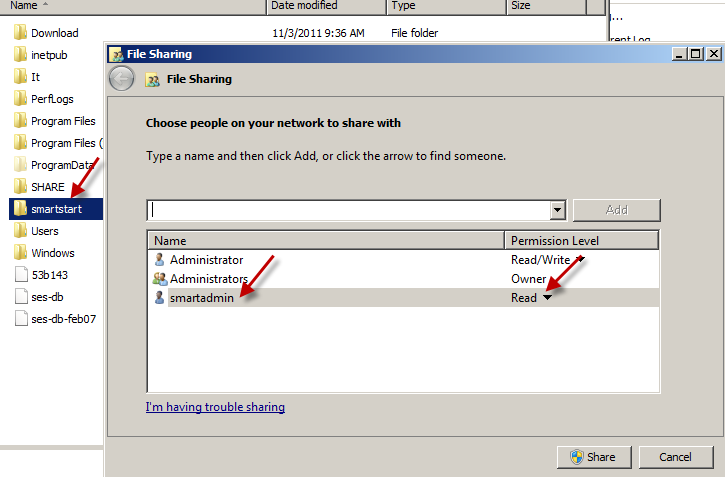
Open the share folder and create two subfolders: 'Install' and 'Uninstallfiles'
Example of network share:
\smartstart
\smartstart\Install
\smartstart\Uninstallfiles
On a different computer, use the credentials of the user created above and confirm that you can log in to the share and view the folders created.
Creating a SecureDoc OSA Profile
Click Profiles in the navigation pane.
In the pop-up menu that will appear, choose "Add Profile". In the panel that will appear, select the "Endpoint" radio button; then choose SecureDoc for OSA.
NOTE: Aside from the desired functionality that you will define differing depending on whether your cli- ent Linux runs inside a physical or Virtual machine (in which case use the "Endpoint" radio button), or inside a Cloud-hosted environment (in which case use the "CloudVM" radio button), the instructions that follow will apply to any type of Linux client.
Creating a SecureDoc OSA Profile
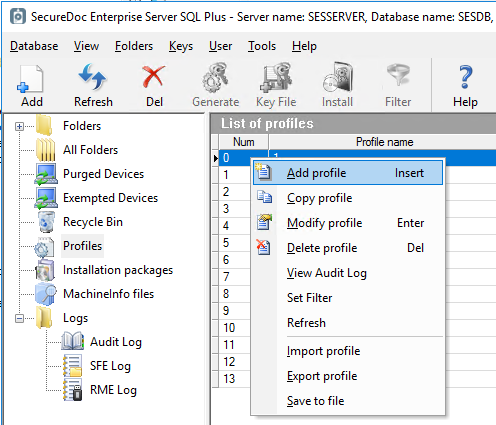
Enter a name and optional comments.
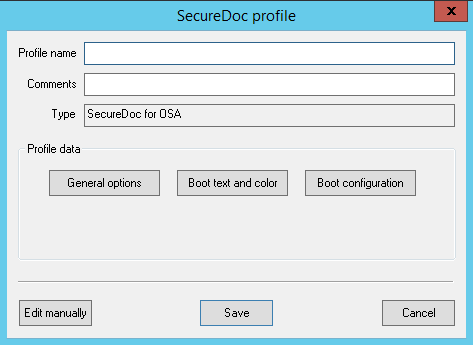
Click General options.
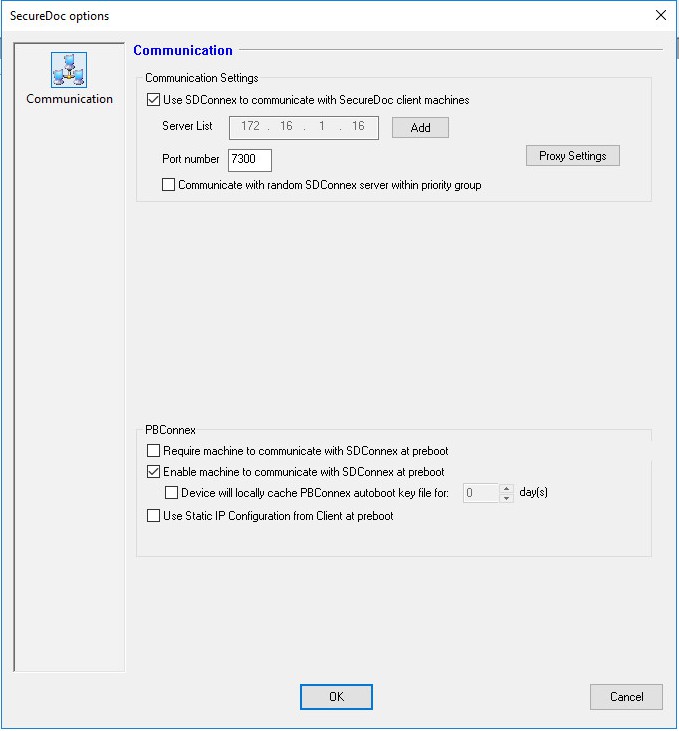
Specify the server’s IP address or network name and port number. User/computer information will be returned via SDConnex communication.
If more than one SDConnex connection has been defined, click Add and enter additional IP addresses or server names. For each server, set the priority it has for devices receiving this installation package. More than one server can have the same priority. The client devices configured with this profile will choose one of these connections, starting with those that have priority 1 (see "SES Components" on page 27).
The client device configured with this profile will choose one of these connections. By default, SDConnex connections are chosen starting with the first one and continuing to the next only if the first connection is not available. To have client devices randomly choose one of the available connections, check Communicate with random SDConnex server from list.
Click OK, which will return you to the primary menu.
Boot Text and Color
Boot Text and Color
Boot text and color options control the way Boot Logon appears. These options enable you to customize Boot Logon to reflect your personal preferences.
If you plan to use a customized background, the graphic file needs to meet these requirements:
24 bit bitmap (.bmp) format
1024 x 768pixels
when zipped (SecureDoc zips the file for you), no larger than 0.5MB (you will be warned if your file exceeds thissize)
Only computers with a high resolution monitor (the most common type) will display the customized logo
— other monitors will shown the default Boot Logon display.
In the navigation pane, click Boot Control, then Boot Text and Color.
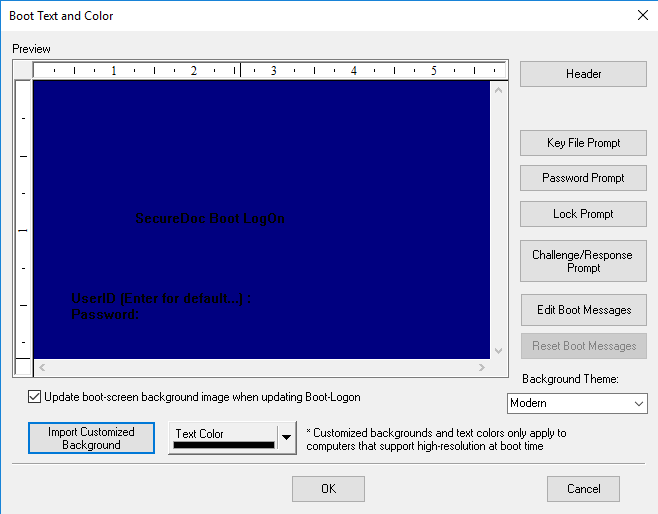
Choose a text color. The results are previewed.
Optionally, click Import Customized Background and browse to the location of a graphic file to use as the background for the Boot Logon screen. (See file requirements above.) Check Update boot-screen background image when updating Boot Logon: the new background will appear at the next BootLogon.
Configuring Installation Package Settings
Once you have created an Installation Package (which is essentially a set of parameters in the SES data- base), you will use it to create the actual Installation Package files that are distributed to client devices.
Installation packages must be associated with a specific profile. The same profile can be associated with any number of installation packages.
Click Installation packages in the navigation pane.
Right-click on the information pane and choose Add Package. When prompted for a package type, click the Endpoint radio button, then choose SecureDoc for OSA/Linux in the drop-down list. The Installation Package settings screen appears, showing the avail- able options.
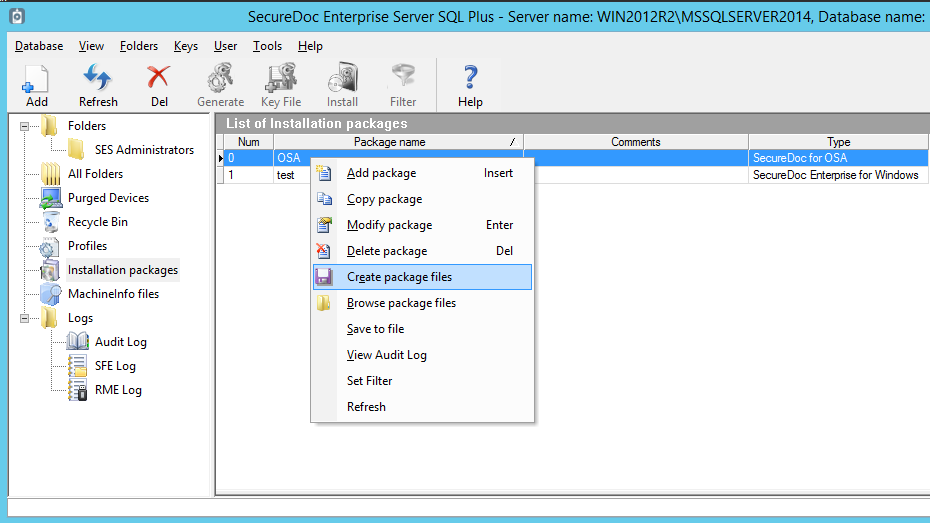
Click General.
Enter a package name and optional comments.
Create new users in this folder during the remote installation: This option (if selected) will force the placement of new User accounts that are set up during device installation into the specified folder. This functionality is the same as applies for Windows devices.
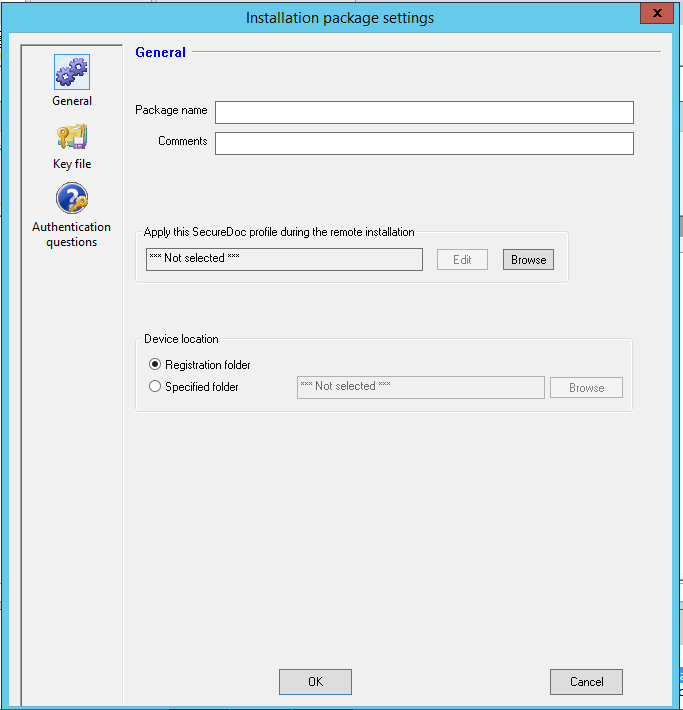
Click Browse and navigate to the location of the SecureDoc OSA profile to be used with this package.
If using Self-Help recovery, click on Authentication Questions. The Authentication Panel will appear (as in the image below). In that panel, choose the required number of questions (up to 7)
from among the available list of questions.
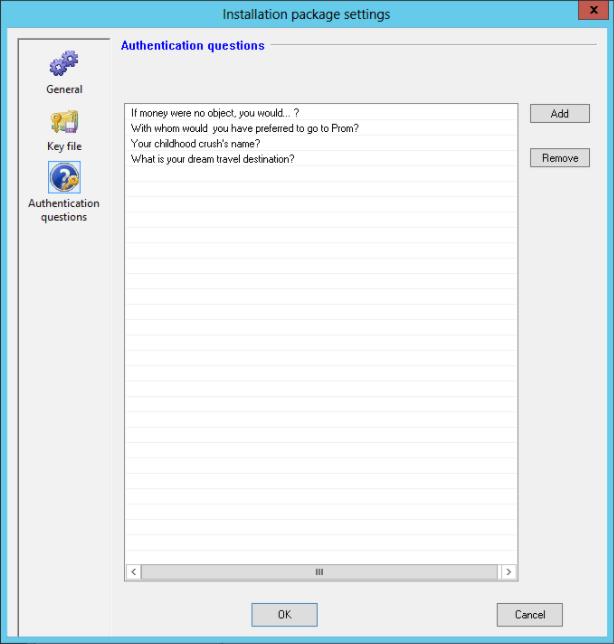
Creating Installation Package Files
Once the installation package settings are configured, the installation package files can be created:
Right-click on the Installation Package in the information pane and choose Create pack- age files.
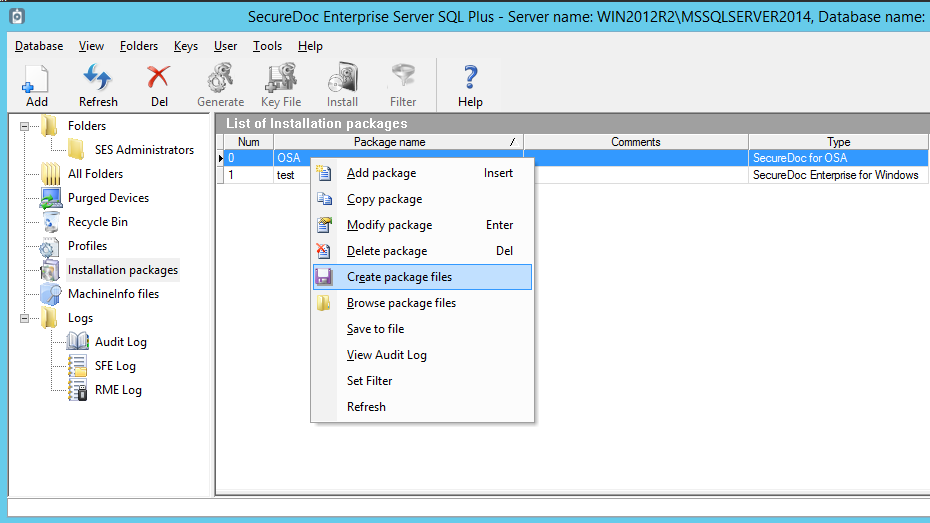
The files necessary for the installation package are created in the Remote Package folder created by SES installation, in a subfolder given the package name.
Note: Starting Once installation package files have been created, they are automatically updated when any changes are made to the profile or installation package options.
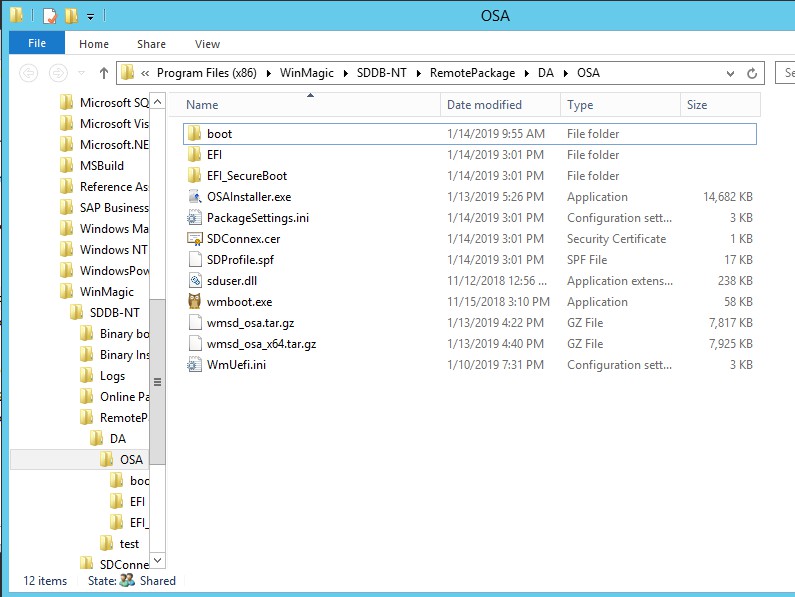
Right-click on the package you just created and copy the three files it contains (Pack- ageSettings.ini, SDProfile.spf, and SDConnex.cer) to the\securedoc\Install folder of the SMB/CIFS/SAMBA share you created earlier (see “Creating SecureDoc OSA Installation Packages” on page 198).
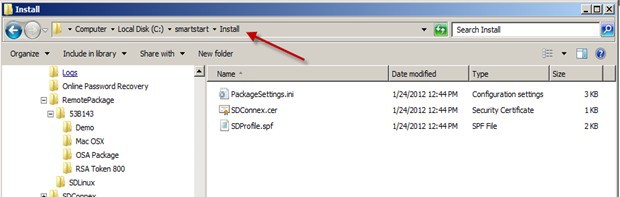
Install SecureDoc OSA from Windows OS using OSA Installer
When creating OSA package files, the OSAInstaller application is created in the RemotePackage folder created by SES installation. This application (OSAInstaller) allows SES Administrators to deploy OSA pack- age from within Windows environment.
This feature can be used to protect Linux, Solaris, and Windows machines. Since the install is done at pre-boot, OS updates and upgrades can be run without needing to remove SecureDoc first.
Create a profile (See the Creating SecureDoc OSA Profiles section in this document).
Set Installation Package options for OSA (See the Creating SecureDoc OSA Installation Packages sec- tion in this document).
Create Installation Package Files (See the Creating SecureDoc OSA Installation Packages section in this document).
Navigate to C:\Program Files (x86)\WinMagic\SDDB-NT\RemotePackage.
Open the OSA package folder.
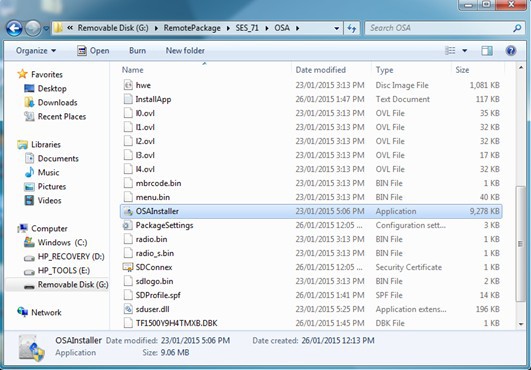
Double-click on the OSA Installer application. The SecureDoc OSA for SEDs window appears.
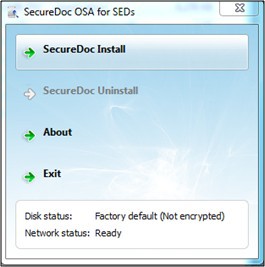
Double-click the SecureDoc Install tab.
After completing the extraction of the boot files, the Change Initial Password window appears.
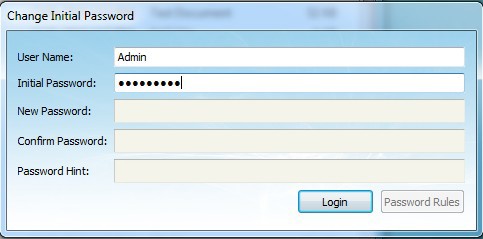
Enter the new password and confirm the same.
Click Login. The installation will start.
After installation is complete a message is displayed advising the user to power off the machine.
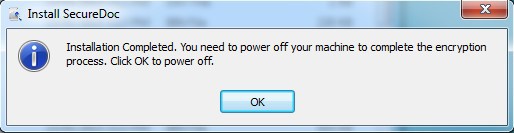
Install SecureDoc OSA using Linux command line interface
In SES V8.3, the SecureDoc OSA Installation process has been substantially improved, for greater ease- of-deployment compared to earlier versions.
In Versions 8.3 and onward, a option to run a command-line interface (CLI) installer application can be run from within the Linux OS in the device on which SecureDoc OSA is to be installed.
The benefits of using this Linux command line interface installer are:
Previous-version OSA installation was done via USB or PXE boot, neither of which could be automated or run completed silently. The Administrator or delegate needed to phys- ically access the device before installing/encrypting it. Of these methods, USB was the easiest method, but PXE boot was complex to setup.
Another issue had been pre-boot compatibility: OSA included its own static pre-boot
that did not utilize the currently-installed Linux version. This could cause OSA to not work with certain devices, and frequently required WinMagic to rebuild OSA if cus- tomers were running on newer systems. This issue became more critical relating to sup- port for networks (e.g. wired, wireless, 802.x etc), as, in order for OSA to run it needs to communicate with SES as a first step, and some customers found issues in deploy- ment where OSA did not support their network cards, or due to other issues.
This new version also addresses complexities relating to capture of User/device inform-
ation: OSA runs post-boot (post OS) so administrators are often required to fill user-
/device information manually when SDform appears, in order to continue the deployment. This again required manual action & often became an onerous task, adding complexity if customers were planning to deploy a large number of devices.
Lastly, this new version improves staging users for offline usage: Previous versions did
not implement Key File deployment for users to be staged during & right after install- ation. OSA would often require the user to login to pre-boot in order for them to have staged a user Key File to the device, or the administrator would need to assign the user to the device using the SES Console.
Prepare the device
3. Open grub file on an editor by running the command below:
nano /etc/default/grub
4 - Add libata.allow_tpm=1 to GRUB_CMDLINE_LINUX_DEFAULT to enable security ATA commands. For example:
GRUB_CMDLINE_LINUX_DEFAULT="quiet splash libata.allow_tpm=1"
Install SecureDoc OSA using Linux command line interface
Save the changes you have made, by entering: <Ctrl>+<X> and then <Y> to save the above changes
Update grub by executing the following command:
update-grub
Reboot the client machine Installing OSA on a Linux machine
In Versions 8.3 and onward, a option to run a command-line interface (CLI) installer application can be run from within the Linux OS in the device on which SecureDoc OSA is to be installed.
The InstallApp has been extended to support a command line invocation.
The new OSA package contains two archives:
wmsd_osa_x64.tar.gz (for 64-bit-only machines)
wmsd_osa.tar.gz (for machines capable of running a 32-bit pre-boot operating environment)
- Copy one of the above PLUS "boot" directory (only initrd.gz is required) PLUS PackageSettings.ini
SDProfile.spf SDConnex.cer
into a directory (e.g. /usr/local/osa) on the the target Linux system.
- Untar the archive in that directory.
– Change directory to the above directory, for example: cd /usr/local/osa
tar -xvf wmsd_osa_x64.tar.gz or
tar -xvf wmsd_osa.tar.gz if the system only supports 32-bit Operating Systems.
– Run: sudo -s to change privilege to root.
– Run: chmod 777 * to set permission for the files in this folder.
– Run: export LD_LIBRARY_PATH=. /sbin/ldconfig -v
Once the tarball been expanded, the InstallApp command will become available. 7 - Run the following command to begin installation:
./InstallApp install userid=yourid firstname=yourname lastname=yourname phone=yourphone [email protected]'
… substituting your information wherever you see a variable that starts with “your…” above. The Command Line Interface (CLI) and usage of InstallApp are as follows:
The InstallApp has been extended to support commands. The new installation method for OSA will help SecureDoc administrator to use the InstallApp from Linux OS and automate their OSA installation method by passing different variables.
InstallApp Command Line Interface syntax and option format:
InstallApp [<command>] [<variables>][<options>]
If no valid command is specified, InstallApp operates in a GUI mode.
Supported CLI commands are Command: install
Used to install OSA client, the following variables are supported when using the install command.
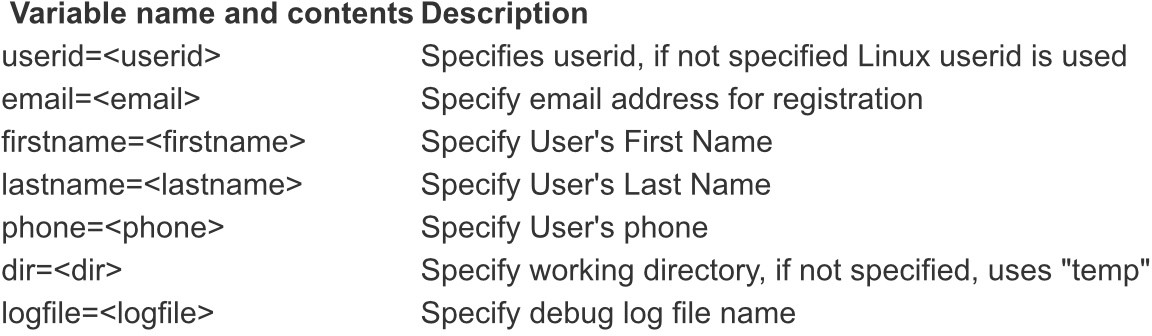
e.g. sudo env LD_LIBRARY_PATH=. ./InstallApp install userid=joed phone="+1 977 102 833"
Command: uninstall
Used to uninstall OSA client, the following variables are supported

Currently all the files are expected to have same password
e.g. sudo env LD_LIBRARY_PATH=. ./InstallApp uninstall password=MyPassword
Command: status
Used to display current status of hard drives
e.g. sudo env LD_LIBRARY_PATH=. ./InstallApp status
Preparing USB Key
The USB key must have 2 GB of space available.
The key will be formatted by this process, so back up any data currently on the key.
The USB process is compatible with both Windows 7, 8, 8.1, 10.
You will need to download the utilities needed to set up the USB for SecureDoc OSA pur- poses: contact WinMagic technical support.
Note: When following this process, have only the USB key intended for SecureDoc OSA purposes inserted to avoid accidental formatting of other drives.
Download the package, which contains a tool to format a USB drive (wmboot.exe)and the latest SecureDoc OSA boot image (in the form of two files, under a “boot”folder).
Remove all USB devices from the computer.
Find and execute the wmboot.exe tool.
Plug in the USB key(the stick will be formatted and all its data lost).
The USB key will be detected by wmboot.exe and its name will be shown in the tool’s window. For example:
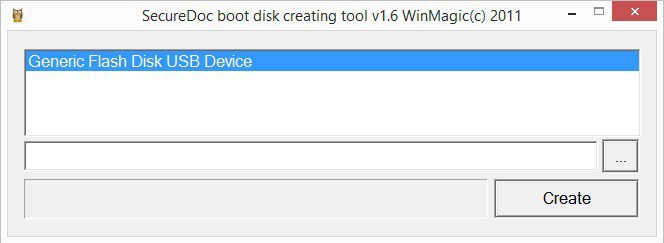
Select the key name and click Create. The formatting process will take a few minutes. There is no confirmation prompt when formatting is complete.
Close the "wmboot.exe" application upon completion.
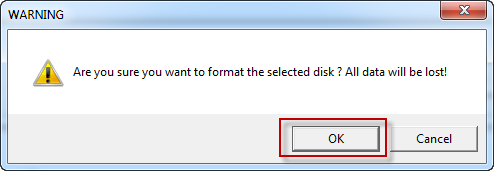
Copy the boot and EFIfolders on the root of the newly formatted USB Memory Stick.
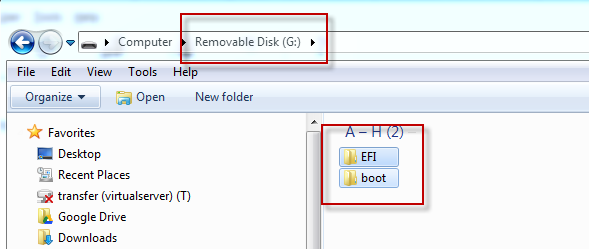
Open the USB for browsing, navigate to the file \boot\grub\menu.lst and open it in Notepad or Word pad.
Modify the file with user-defined parameters that will copy the configuration files from the SMB/CIFS/SAMBA share to a local folder for installation.
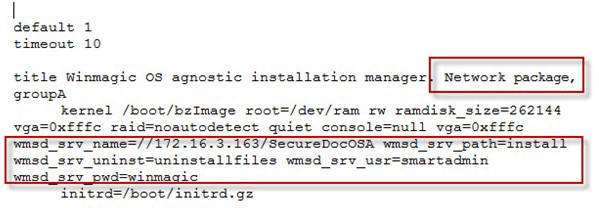
Settings | Description |
timeout | Number of seconds to wait before showing PBA. The default forces display without alengthy wait. |
default | Menu item to pick, by default. There are five menu items presented to the user: install, uninstall, hardware encryp- ted device status, Linux command line, and shutdown. |
Title | Name of the bootable image that the user will choose when booting from a USBMemory Stick |
Kernel | Path of bzImage(Linux kernel). |
wmsd_srv_ name | User name of Windows user created for Smart Start in step of “Creating SecureDoc OSA Installation Packages” on page 198. |
wmsd_srv_pwd | Password of Windows user created for Smart Start in step of “Creating SecureDoc OSA Installation Packages” on page 198. |
wmsd_srv_ path | Name of the folder in the SMB/CIFS/SAMBA share hold- ing the install files created in step of “Creating SecureDoc OSA Installation Packages” on page 198. |
wmsd_srv_ uninst | Name of the folder in the SMB/CIFS/SAMBA share hold- ing the uninstall files created in step of “Creating SecureDoc OSA Installation Packages” on page 198. |
Path to the supplied boot image (initrd.gz). |
Configuring the PXE Server for SecureDoc OSA
Download and unzip the provided zip file, containing the latest SecureDoc OSA boot image.
Open your PXE server and create a folder (for example, SecureDoc OSA).
Copy the provided SecureDoc OSA boot image into the folder you just created.
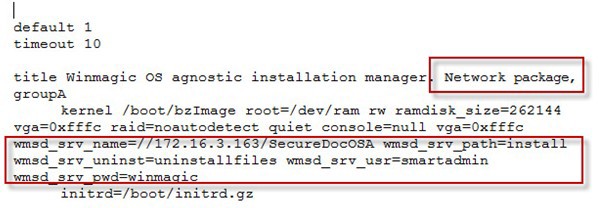 Open the USB for browsing, navigate to the folder men then open the file in Notepad or Wordpad. The default file is as follows. Bold italicized items are those that may need to be replaced.
Setting | Description |
timeout | Number of seconds to wait before showing PBA. The default forces display without alengthy wait. |
default | Menu item to pick, by default. There are five menu items presented to the user: install, uninstall, hardware encryp- ted device status, Linux command line, and shut- down. |
Title | Name of this PXE bootable image that the user will choose when booting from a PXE server. Note that any given PXE server implementation may have numerous bootable images, so ensure that the name given here is clear andmeaningful. |
Kernel | Path of bzImage(Linux kernel). |
wmsd_srv_ name | Network path to the SMB/CIFS/SAMBA share created in step of “Creating SecureDoc OSA Installation Packages” on page 198. |
wmsd_srv_ user | User name of Windows user created for Smart Start in step of “Creating SecureDoc OSA Installation Packages” on page 198. |
wmsd_srv_pwd | Password of Windows user created for Smart Start in step of “Creating SecureDoc OSA Installation Packages” on page 198. |
wmsd_srv_ path | Name of the folder in the SMB/CIFS/SAMBA share holding the install files created in step of “Creating SecureDoc OSA Installation Packages” on page 198. |
wmsd_srv_ | Name of the folder in the SMB/CIFS/SAMBA share holding |
Setting | Description |
uninst | the uninstall files created in step of “Creating SecureDoc OSA Installation Packages” on page 198. |
initrd | Path to the supplied boot image (initrd.gz). |
Note: Every PXE installation is unique. Please consult your IT department if you have any PXE related questions.
Install OSA using a Bootable USB stick or PXE Server
Boot the SED device from USB or from the PXE server. The SecureDoc Install/Uninstallscreen opens, showing the available menu of options.
l Note: SmartStart for SEDs supports English only.
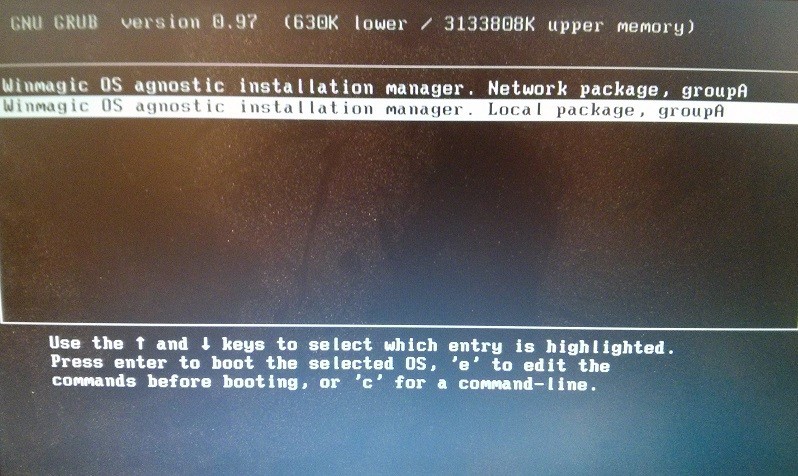
Wait for the Network Status (at the bottom of the screen) to read “Ready”.
Click SecureDoc Install. Smart Start will attempt to copy the configuration files locally.
l If copying fails, you can try this process several times: if it continues to fail, there may be a problem access to the network share where the Install files are located.
Install OSA using a Bootable USB stick or PXE Server
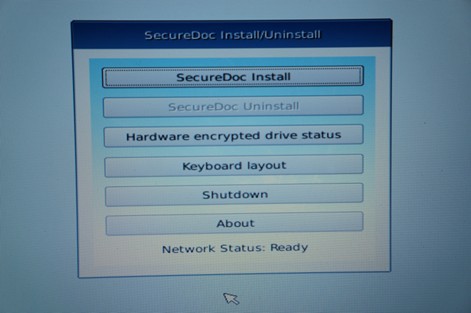
If copying is successful, a Registration Computer Form screen opens.
Enter the user name provided by your administrator.
Note to SES admin: the user id must exist in SES database
Modify other field as needed and click 'OK' to submit the data.
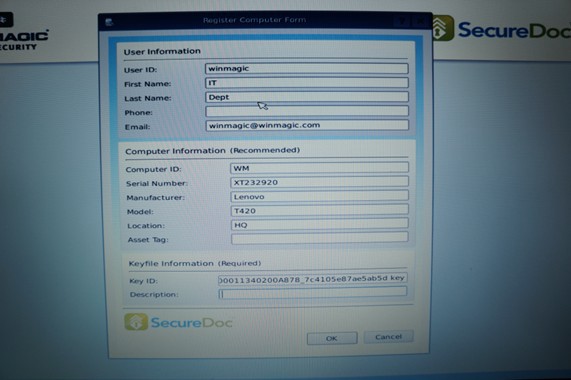
Encryption will start. A SecureDoc installation in Progress screen will be visible until the installation is completed (approximately 5 minutes).
Changing Your Password
At PBA, check the Change password option, then enter your user name and password and press Enter.
You will be prompted to enter a new password (and to confirm it).
Click Save. A confirmation message appears.
Click OK.
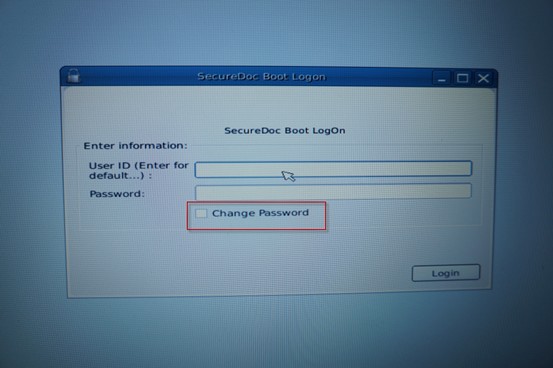
Server Configuration for OSA
Create Network Share Folder
On a server accessible to the devices on which SecureDoc will be installed, create a new Windows user account (for example, “smartadmin”). Give the user limited (non-administrator) rights.
a. Note: This user will only be used to install SmartStart, and will never be used to
log in to any machine.
Create a SMB/CIFS/SAMBA share (for example, “SmartStart”) and give the Windows user created above read-only access to the share.
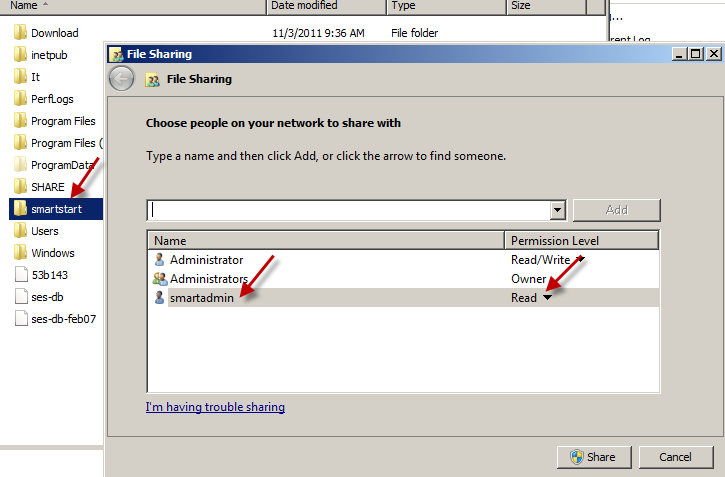
Open the share folder and create two subfolders: 'Install' and 'Uninstallfiles' Example of network share:
\smartstart
\smartstart\Install
\smartstart\Uninstallfiles
On a different computer, use the credentials of the user created above and confirm that you can log in to the share and view the folders created.
Creating OSA Profile
Click "Profiles" in SES. Right-click on the information pane, and choose Add profile.When prompted for a profile type, choose 'SecureDoc OSA for SEDs'.
Enter a name and optional comments.
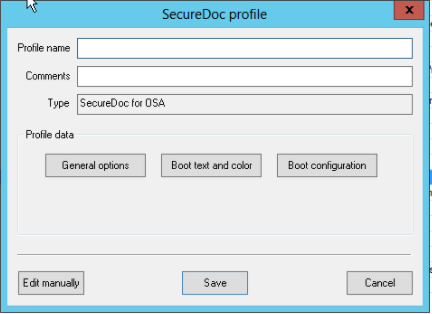
Confirm the IP Address(es) of the SDConnex server(s) in the list. If you have more thanone SDConnex server running, add it to the list. Save the profile.
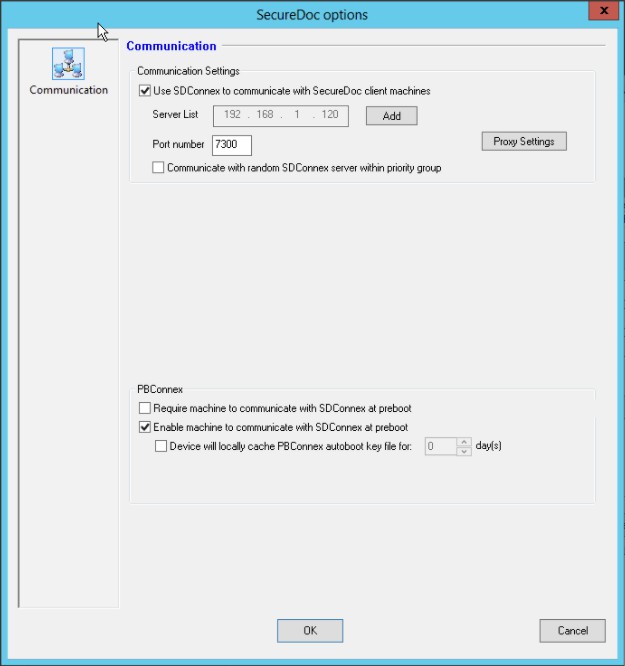
Boot Text and Color options are the same as for other device types, described earlier.
Boot Configuration contains a subset of familiar options also used in other device types, also described earlier.
Create OSA Installation Package
Right-click on the Installation package pane and choose Add Package.
"Endpoint" radio button, then in the drop down list in the lower part of the panel, choose "SecureDoc for OSA/Linux".
Label the installation package and pick the OSA Profile from the list.
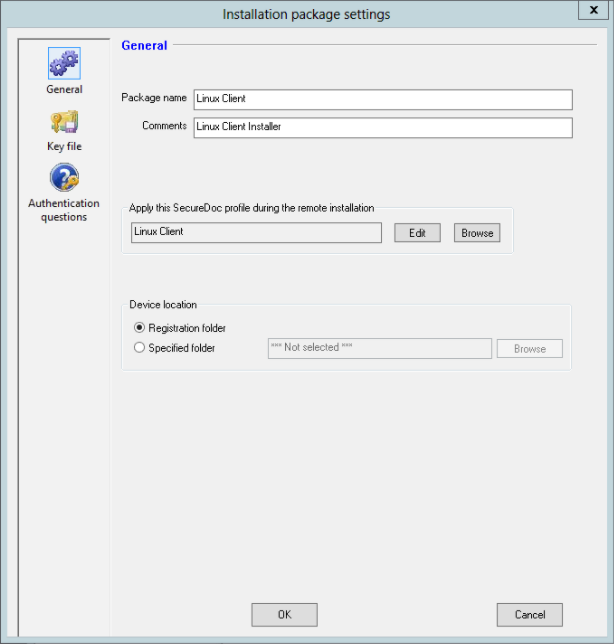
Choose the Device location. The options are "Registration folder" which means the device will be stored in the folder in which it was registered, or "Specified folder", which if selected will prompt you to choose the specific folder where the device record is to be stored.
SES Administrator Manual
v9.2 SR1
Specify an initial password in the package and Save the package file.
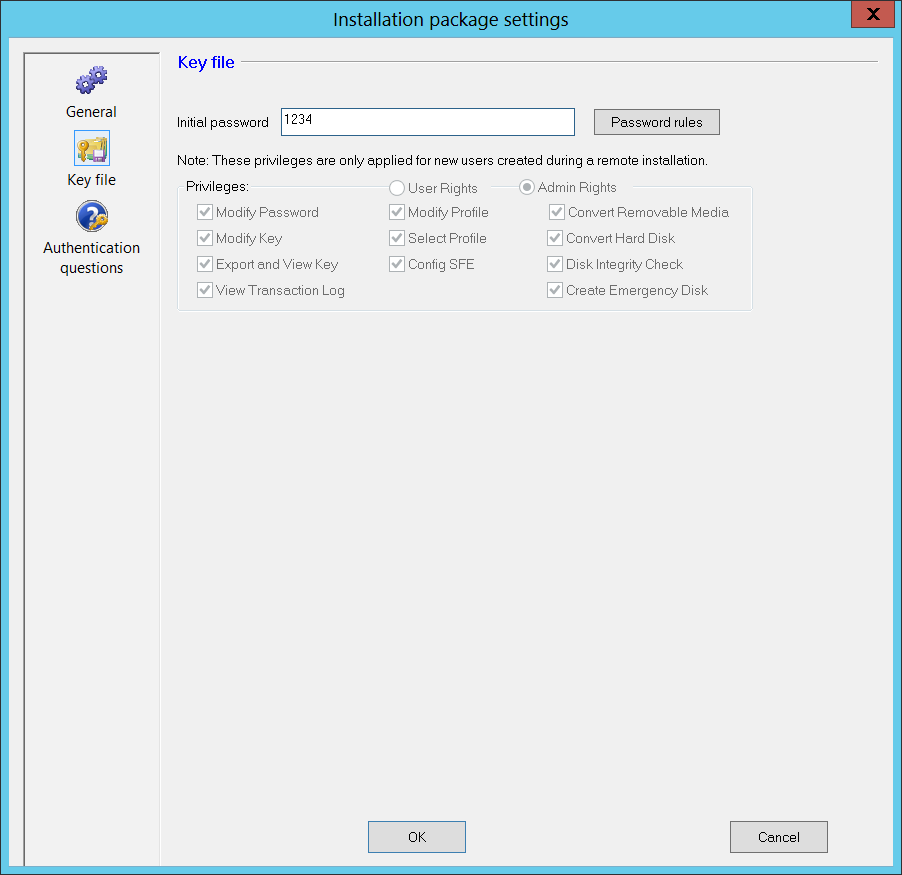
Click on the Authentication Questions navigation at left, and in that panel select the desired Authentication Questions from the master list of Self-Help Authentication Questions.
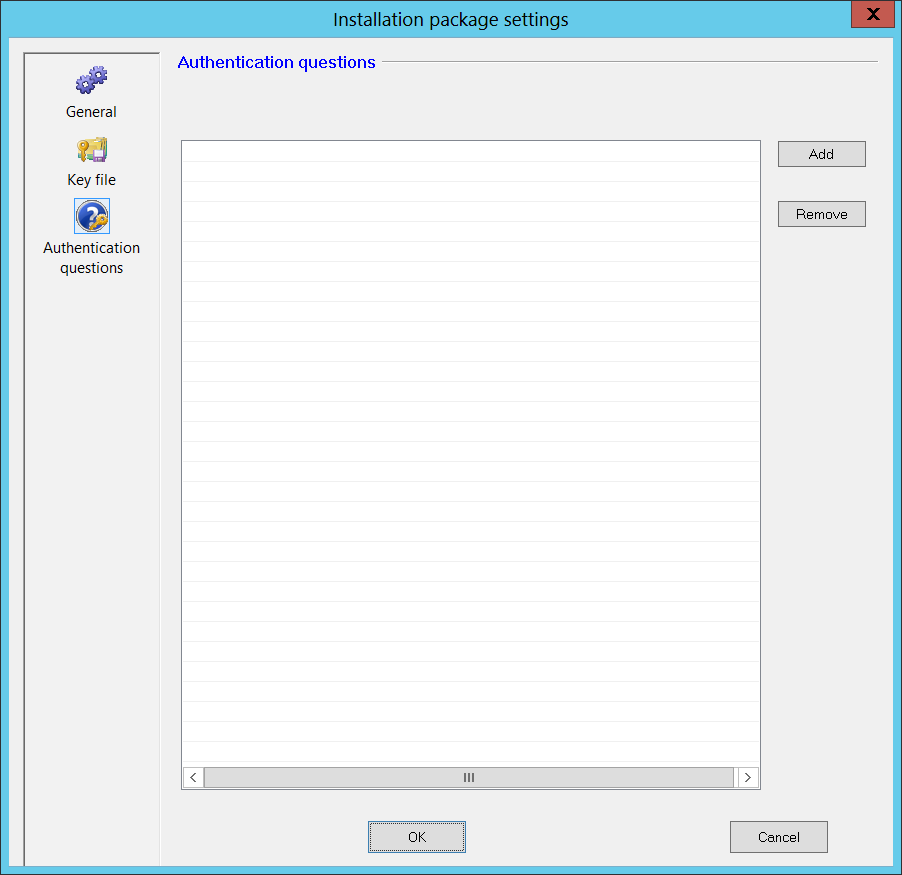
Right-click on the newly created installation file and 'Browse Package Files'.
The files necessary for the installation package are created in the RemotePackage folder created by SES installation, in a subfolder given the package name.
Note: Once installation package files have been created, they are automatically updated when any changes are made to the profile or installation package options.
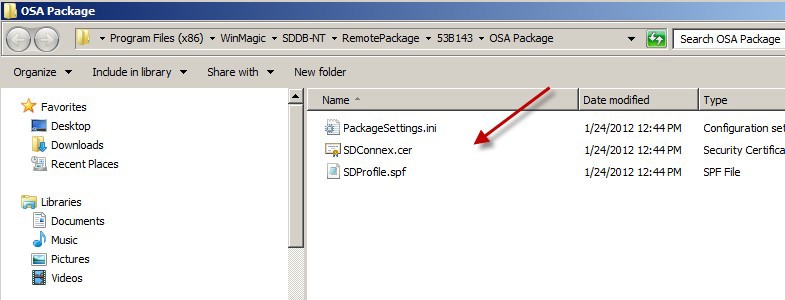
Copy the three (PackageSettings.ini, SDProfile.spf, and SDConnex.cer) to the networkshare folder, eg \smartstart\Install folder
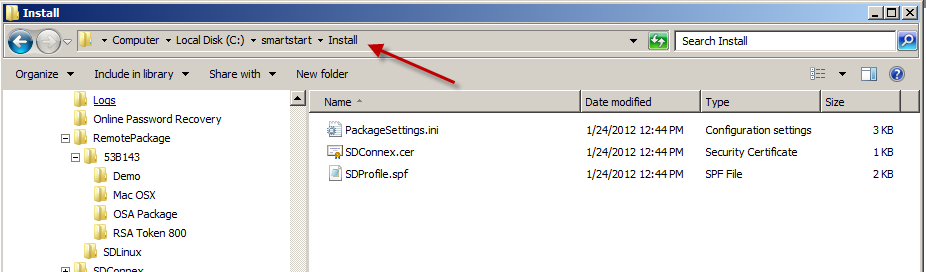
Using SES to Uninstall SecureDoc OSA
The following steps are required when uninstalling a primary drive. After these steps it will continue from step 3 in the below procedure:
In the SES Console Click on the Drives tab.
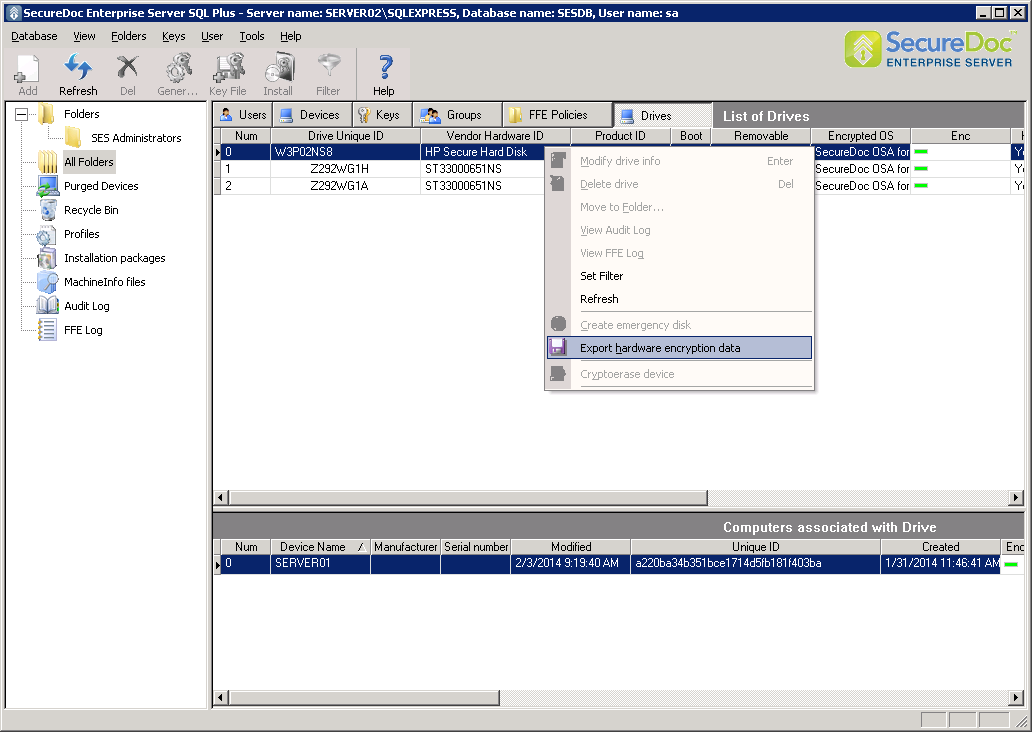
Right Click on the primary drive and select Export hardware encryption data
For secondary drives the steps 1 and 2 will slightly differ, but the following will complete the pro- cedure to uninstall.
In the SES console, click on the Devices tab.
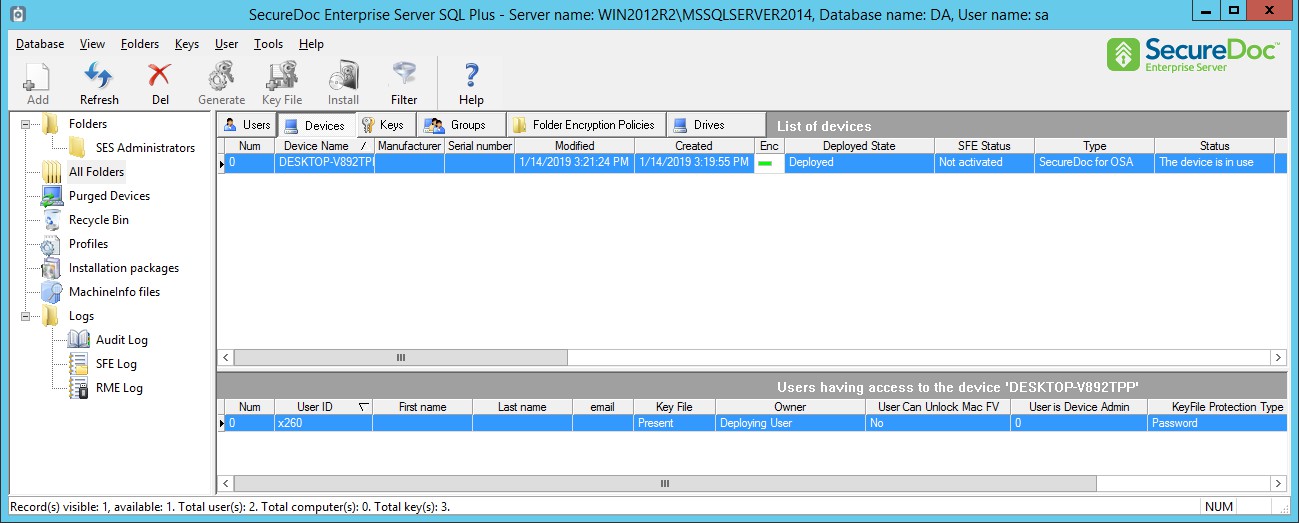
Double click on the SecureDoc OSA client computer from which you want to uninstall SecureDoc. The "Edit Device Information" page will appear:
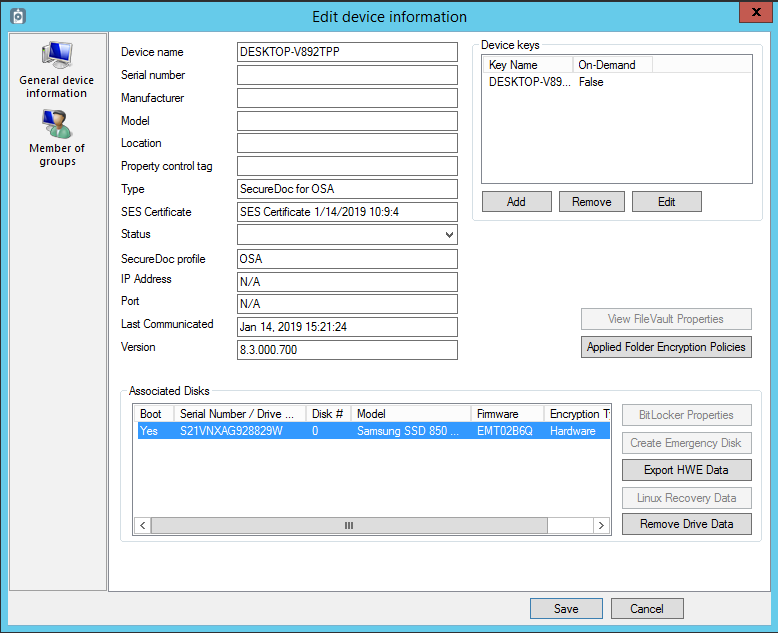
Select the hard drive from which SecureDoc is to be uninstalled and click on
Export HWE Data The Path/File Name will be pre-filled with a .dbk file name derived from the Serial Number of the drive whose recovery information is being exported.
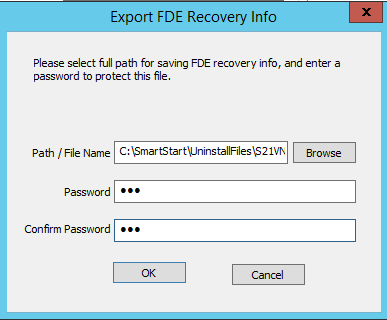
Change the highlighted line to be:
Click Browse and browse to the Uninstall folder in the SMB/CIFS/SAMBA share that you created (for example \\securedoc\Uninstallfiles).
The Path/File Name will be pre-filled with a .dbk file name derived from the Serial Number of the drive whose recovery information is being exported. You may wish to use another name for this file, for example one based on the device name (since most devices will have a single SED drive).
a) Optionally make whatever change you wish to the file name, then b) enter and confirm the pass- word, and c)click OK to save the file.
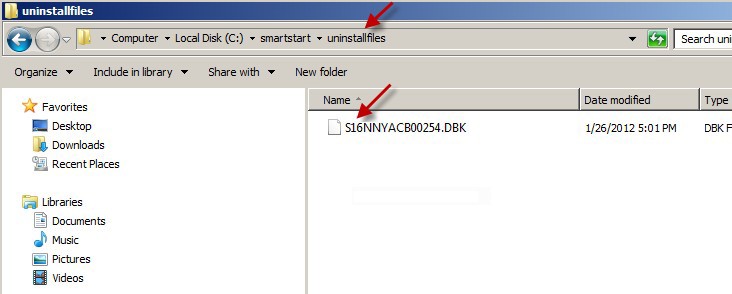
Once the file has been saved, restart the client computer and boot to the USB or PXE server.
In the SecureDoc Install/Uninstall menu click Uninstall. SecureDoc will scan the uninstall folder (for example, \\securedoc\Uninstallfiles) and display the exported dbk files. The network should be ready.
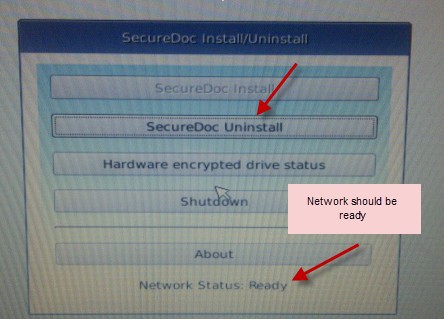
Select the dbk file for your machine and click Open.
Enter the password that you used in step 2 and click OK. You should see a new screen showing the uninstall progress.
When the uninstall is complete, you will be prompted to turn off the computer: click OK.
Remove the USB or network cable from the computer.
Start the computer. It will no longer display the SecureDoc preboot authentication window, and will boot directly into your OS.
Prepare the USB Flash Drive
Formatting USB with 'wmboot' utility
Copy the 'wmboot' zip file to your Desktop. Extract the wmboot.exe and the latest OSA boot image (under a “boot” folder).
Remove all USB devices from the computer.
Run the wmboot.exe tool.
Plug in the USB Memory Stick (the key will be formatted and all its data lost). The wmboot.exe will automatically detect the USB as shown.
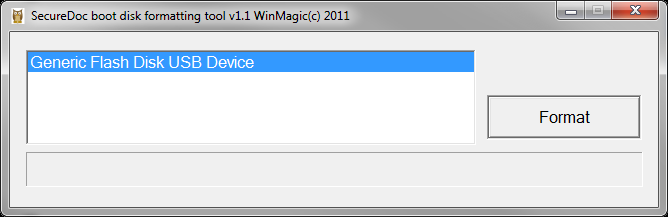
Select the USB Memory Stick name and click Format. The formatting process may take a few minutes. (As per wmboot.exe tool v 1.1, there is no confirmation prompt when formatting is com- plete). Close the 'wmboot.exe' upon completion.
Create a folder 'boot' on your USB
Copy the extracted files into the boot folder on USB. The contents of the boot folder should be as fol- lows.
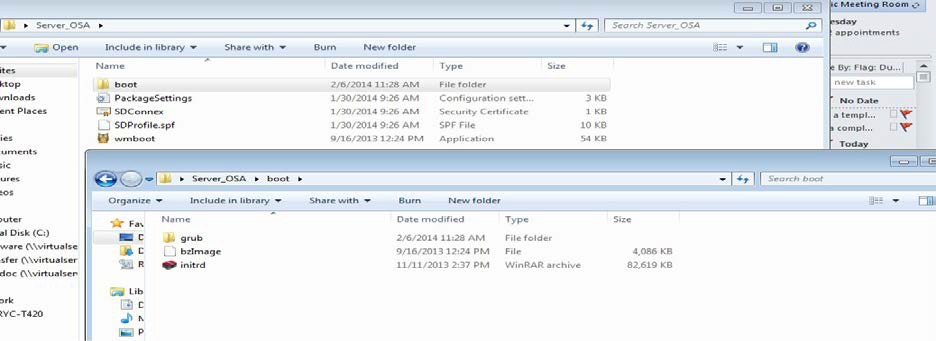
Navigate to the file \boot\grub\menu.lst on the USB and open the file in Notepad or Wordpad.
Modify the file with user-defined parameters that will copy the configuration files from the SMB/CIFS/SAMBA share to a local folder for installation.
Client Installation
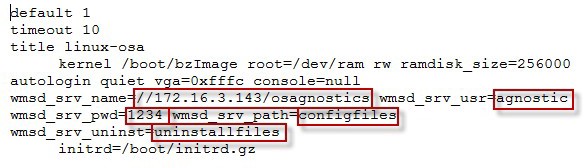
Client Installation
OSA Installation
Boot the SED device from USB or from the PXE server. The SecureDoc Install/Uninstall screen opens, showing the available menu of options.
Note: Smart Start for SEDs supports English only.
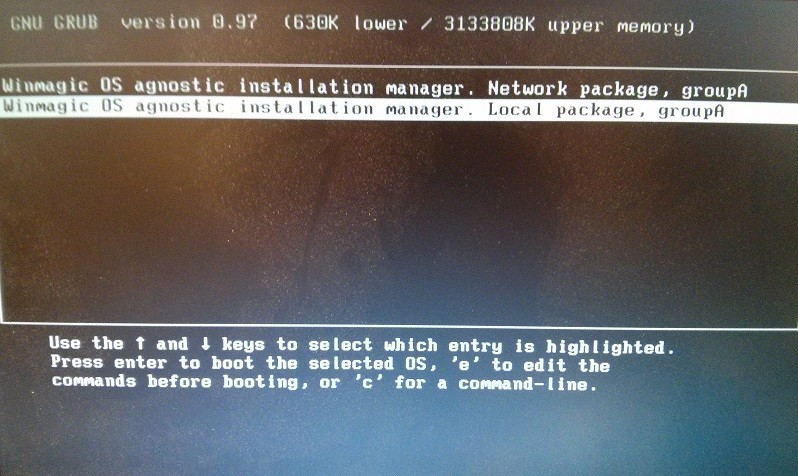
Wait for the Network Status (at the bottom of the screen) to read “Ready”. In some cases this may take 30 seconds or more, depending on the speed of your network's DHCP server in servicing IP address requests.
Click SecureDoc Install. SmartStart will attempt to copy the configuration files locally.
If copying fails, you can try this process several times: if it continues to fail, there may be a problem access to the network share where the Install files are located.
If copying is successful, a Register Computer Form screen opens.
Enter the user name provided by your administrator.
NotetoSESadmin:theuseridmustexistinSESdatabase
Modify other fields (Key File Description (if not already displayed), Computer ID, Serial Number, Man- ufacturer, Model, Location) as needed and click 'OK' to submit the data. The Key ID value will be provided based on the Drive identifier and ideally should not be altered in order to maintain continuity of identification back to the disk drive itself.
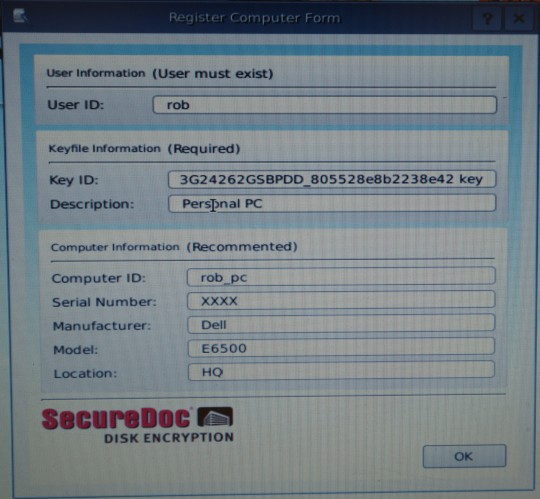
Encryption will start. A SecureDoc installation in Progress screen will be visible until the installation is completed (approximately 5 minutes).
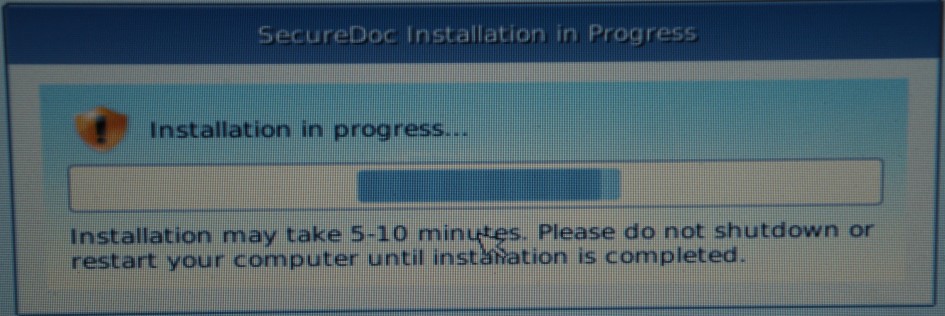
Changing Your Password
At PBA, check the Change password option, then enter your user name and password and press Enter.
You will be prompted to enter a new password (and to confirm it).
Click Save. A confirmation message appears.
Click OK to exit the confirmation message. Your password change is complete.
Uninstall using OSA
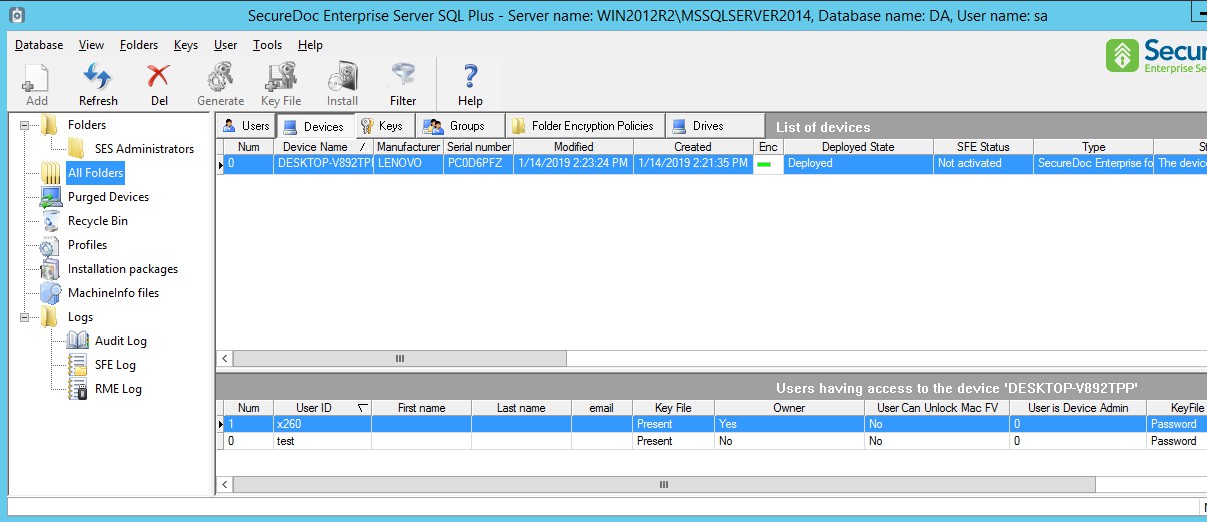 In the SES console, click on the Devices tab.
Double click on the SecureDoc OSA client computer from which you want to uninstall SecureDoc.
From the Device details panel, select the hard drive from which SecureDoc is to be uninstalled and then click on the button entitled: Export HWE Data. In the panel that will appear, fill out the necessary information in the fields (as in the image below).
In the panel that will appear, fill out the necessary information in the fields (as in the image below).
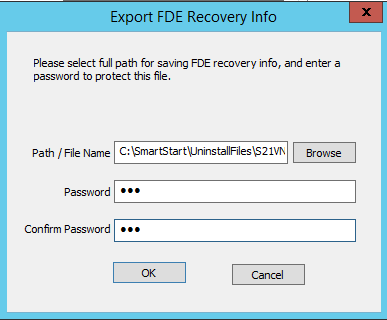
Click Browse to select the Uninstall folder in the SMB/CIFS/SAMBA share that you created (for example \\smartstart\Uninstallfiles). The default file name will be derived from the Serial Number of the drive itself, but if you wish to use a different file name then a) optionally make that change, then
b) enter and confirm the desired Password, and c) click OK to create the file.
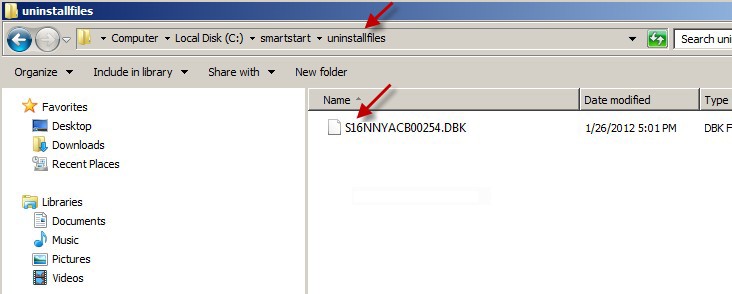
Once the file has been saved, restart the client computer and boot to the USB (or PXE server).
In the SecureDoc Install/Uninstall menu click Uninstall. SecureDoc will scan the uninstall folder (for example, \\smartstart\Uninstallfiles) and display the exported .dbk files.
Note: The device should be connected to the network and have an IP address lease (the panel will show"Ready" at the bottom, as in the image below.
Note: You may need to wait 30 seconds or more, depending on how fast your network's DHCP server can service requests for IP Addresses.
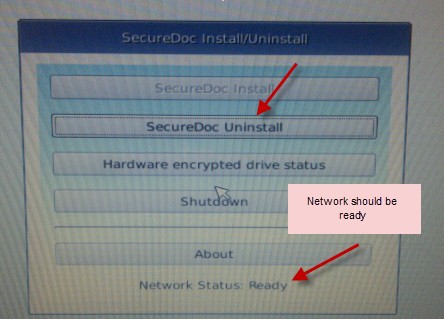
Select the dbk file for your machine and click Open.
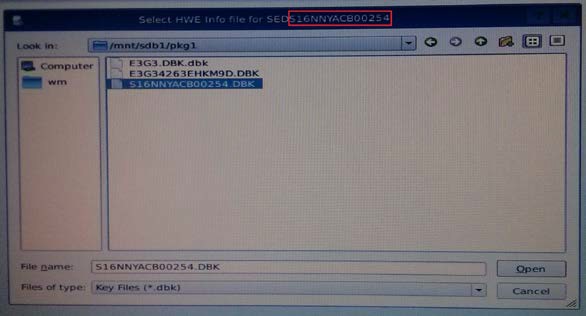
Enter the password previously entered and click OK.
A new screen showing the uninstall progress will appear.
When the uninstall is complete, you will be prompted to turn off the computer: Click OK.
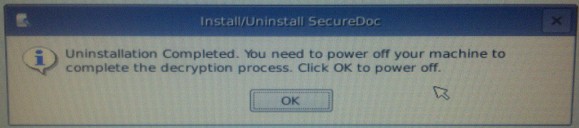
Remove the USB or network cable from the computer.
Boot up the client computer. It will no longer display the SecureDoc preboot authentication win- dow, and will boot directly into your Operating System's desktop environment or Operating System selection tool (e.g. grub, lilo). The Self-Encrypting Drive(SED) in this device has been reverted to an "un-managed" state, and is no longer protected by SecureDoc OSA.
Configuring SDConnex
14
SDConnex must be running in order to receive information from client devices to which you have sent installation packages, and to allow remote control functions. If you are using multiple SDConnex connections, at least one of the connections associated with a client device needs to be running.
SDConnex is a service, starting automatically on system reboot and runs by default in the background until you stop it. If the system running SDConnex is restarted, SDConnex may or may not start automatically, depending on your choice for SDConnex configuration.
Note: You performed basic configuration of SDConnex before you deployed installation packages, as described in “Step One: Starting SDConnex” on page 343. This chapter explains other configuration options available to you.
To access the SDConnex Management Console, choose Start >> SecureDoc Enterprise Server >> SecureDoc Services Configuration. The SDConnex Configuration screen appears.
Configuring Communication Details
Click the Communication tab.
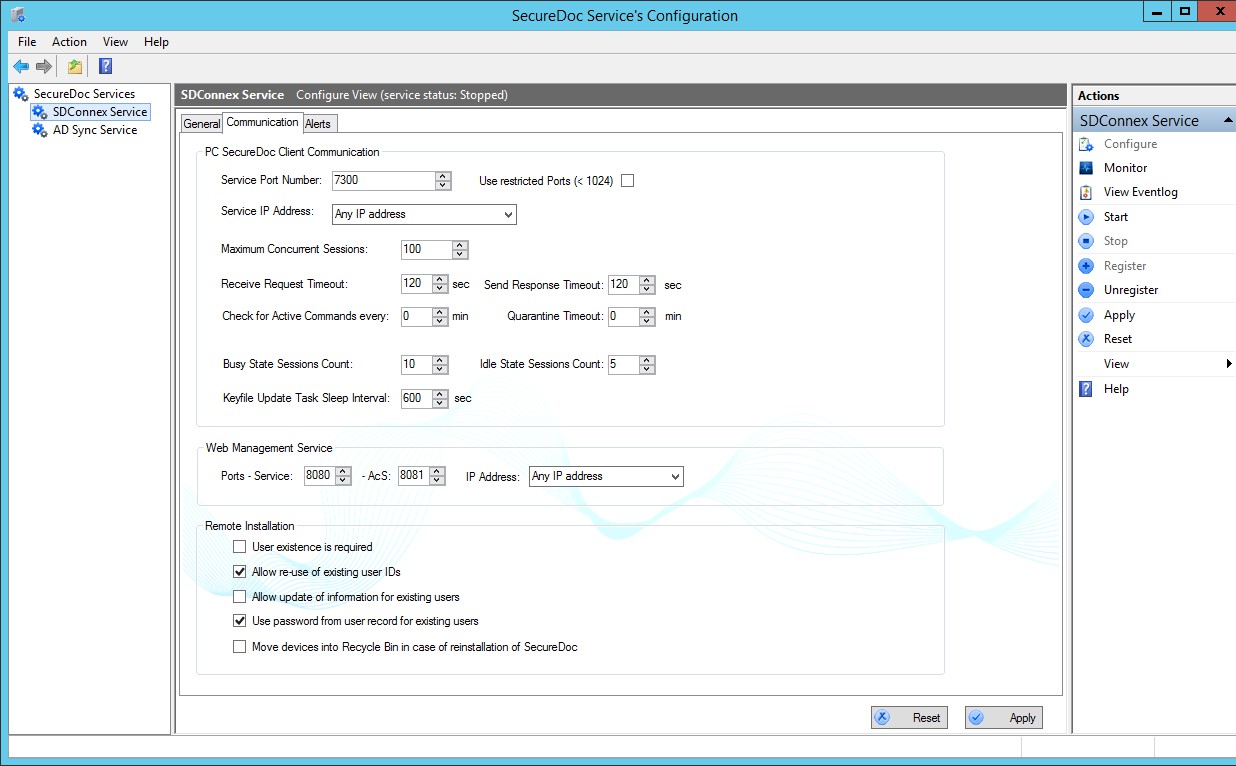 Enter the amount of time SDConnex should wait to send a response to a client device, or receive a request from a client device, before timing out and disconnecting the session.
Enter the maximum number of Maximum Concurrent Sessions available for SDConnex.
Note: For a large-scale deployment (over 20,000 client devices), a minimum of 50 and a maximum of 100 is recommended. For a smaller-scale deployment, a minimum of 10 and a maximum of 50 is recommended.
Enter the frequency with which SDConnex will Check for Active Commands . At the interval specified, SDConnex will wake up the SecureDoc agent on any client device for which a command (for example, an updated profile or new key file) is waiting, so the command can take effect.
Enter the amount of time a suspect device will be placed in Quarantine Timeout. Suspect devices are those whose keys or device information are not in the database but that make repeated attempts to connect to SDConnex. While suspect devices are in quarantine, attempted connections from them will be ignored.
Check the appropriate Remote Installation options:
if you want SecureDoc installed only for users in the database, check User existence is required (if the user receiving the package does not exist in the database, installation will stall).
Note: For the "User existence is required" feature to work in the Hosted Solution, the folder of where the installing user exists and destined for must be specified in the installation package. If the folder is not specified, SDConnex will not be able to find the user and fail the installation.
if you want installation to proceed when an installation package is sent to a user who already exists in the SES database, check Allow re-use of existing user IDs
if you want new information gathered as part of the installation package process to be written back to the user’s record in the database, check Allow update of information for existing users
if you want to use, as the initial key file password, the password recorded for the user in the database, check Use password from user record for existing users
if you want to create a new device name and encryption key if SecureDoc is reinstalled on a client device, check Move devices into Recycle Bin in case of reinstallation of SecureDoc — this prevents device duplication in the database when re-imaging with the same device name
Configuring Alerts
SDConnex’s alert system sends an informative email to a designated individual whenever certain conditions occur.
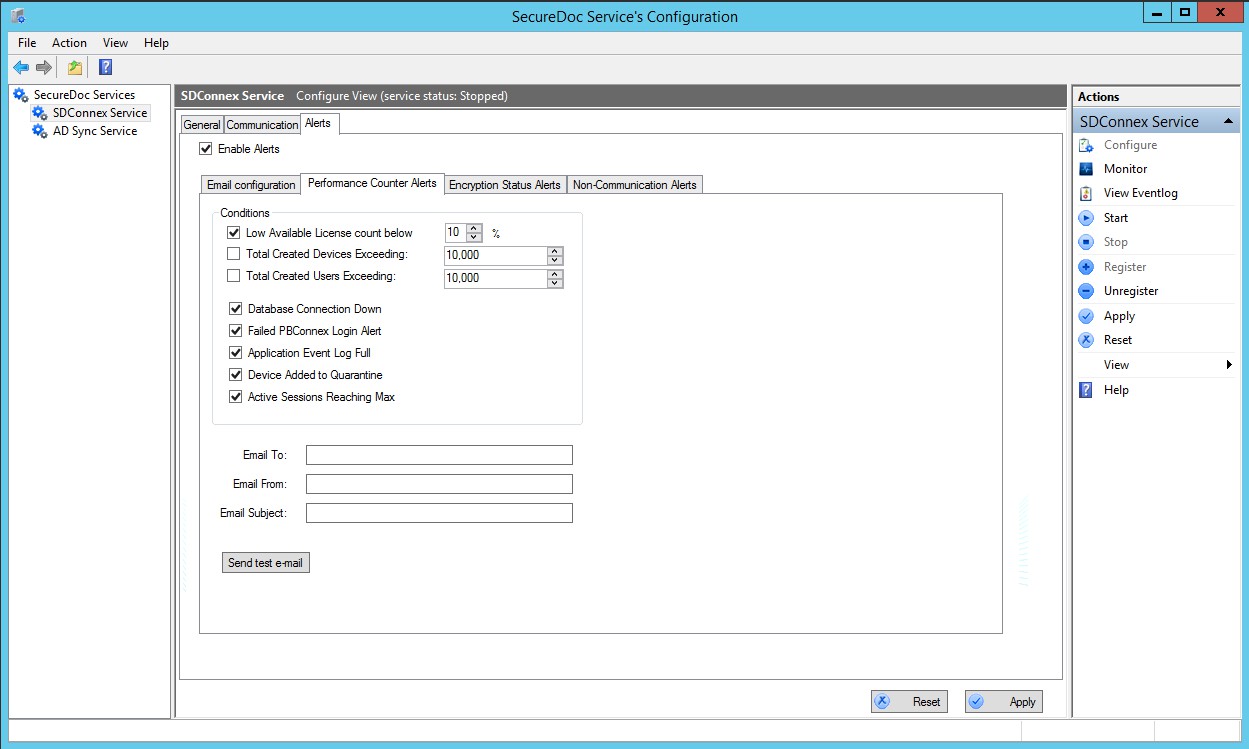
Click the Alerts tab and check Enable Alerts.
Check all the conditions that should trigger an alert.
Enter the SMTP Server and Port Number to be used for email communication. (Optionally, send a test email to confirm your settings.)
Enter the From and Subject for the email.
Alerts use the default email account set up on this machine to send email. If you are logged in to SES from a domain account, you may need to provide domain credentials: check User’s domain authentication and enter the username and password of a user authorized to access the SMTP server.
Managing the Service
Once you have configured all the settings, you can start the SDConnex service. At any time, you can stop the service, although the only time this is necessary is when updating SES.
Select the SecureDoc service.
In the right pane, click the action you want to perform: stop, start, register, or unregister.
Note: When upgrading SES to a new version, both the ADSync and the SDConnex services will also be upgraded, meaning that the new versions of these services will be unregistered, and therefore must be registered anew. For this reason, WinMagic recommends that you always document how your SES ser- vices were configured (e.g. by taking and storing screenshots of the configured panels) so that the re- registration and reconfiguration of the updated versions of these services can be performed rapidly and in a consistent manner from one version to the next.
Monitoring the Service
To verify that the SDConnex service is listening on the default port (7300), type the following command into a command prompt window:
netstat –an –p tcp
To monitor the service:
Select the SDConnex service.
In the right pane, click Monitor.
- or -
Choose Action >> Monitor.
A new screen appears.
The top of the tab shows tracking statistics for important processes, as well as a Refresh Rate control through which you can define how frequently the counters are to be reset in order to begin re-counting (5 seconds is the default refresh rate).
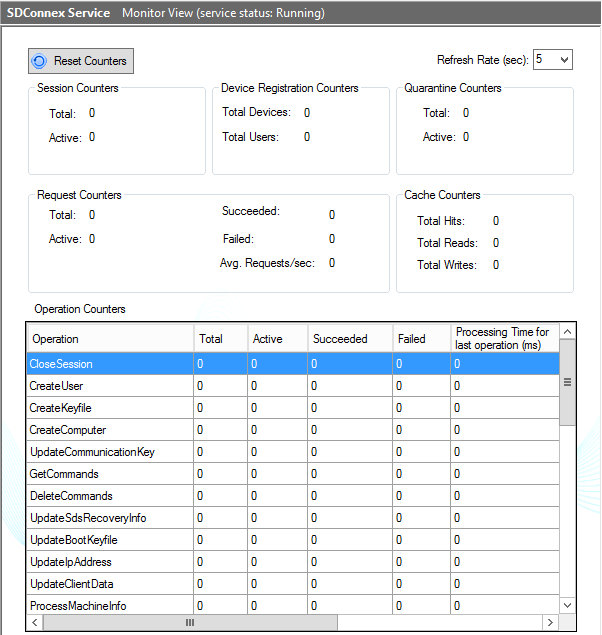
Counter | Description |
Session | number of client device connections since the ser- vice started (Total) and number currently operating (Active) |
Device Regis- tration | total number of client devices in the database total number of users in the database |
Quarantine | number of IP addresses quarantined since the ser- |
Counter | Description |
vice started (Total) and currently number being quar- antined (Active) | |
Requests | number of requests received from client devices since service started (Total) and current requests from client devices total number of requests that succeeded, total num- ber that failed, and average number of requests received per second |
Cache counters | total number of hits, reads, and writes on cache Note: This information is will only be displayed when the "Enable Data Cache Layer" option is checked in the Gen- eral tab. |
Operation | The operation counters are granular, function-specific counters that track SDConnex communication activities, counting the number of such activities during the refresh period. The leftmost column of this scrollable list provides a clear description of each monitored type of activity or function, such as creating key files, creating users, closing sessions, etc. |
You can reset these counters if you wish: click Reset Counters.
Viewing the Event Log
Select the SecureDoc service.
In the right pane, click View EventLog.
- or -
Choose Action >> View EventLog.
In the EventLog view you can:
page through the log (use the controls at the top of the screen)
sort the log (click on column headings)
or navigate through its pages
clear the log (click the Clear Log action)
refresh the log (click the Refresh Log action)
Using Remote Control
Overview
15
SES enables you to remotely control any client device in the SES database. You can add users, activate auto-boot, reboot client devices, lock client devices, etc. Remote Control is typically used with client devices connected to SES via SDConnex, although it is possible to use these functions without such a connection. Remote Control commands can be stored in a shared folder, from which they will be retrieved when a networked device connects, or can be distributed through some other mechanism.
Remote Control commands rely on the device’s unique ID recorded in SES, so these functions are available only for devices that received an installation package.
Working with Commands
Remote Control is handled through commands, which are invoked by choices made in the SES interface. Commands can apply to a single device or several at once:
to affect a single device, right-click on its record, and choose the appropriate command
to affect several devices, select them and right-click, then choose the appropriate command
to affect all the devices in a folder, right-click on the name of the folder holding those devices, and choose the appropriate command.
The interval at which Remote Control commands are sent to client devices is set in SDConnex
To view commands that have not yet been executed for all machines:
Right-click on a machine’s record in the Devices tab, and choose Show Commands from the menu. The Commands screen appears, displaying information on each command waiting to be sent, as well as each command sent in the past (the length of time commands remain in this list is configured as part of the SES General Options, as explained in “General Options” on page 56).
Note: If you have multi-selected several devices, the Show Commands option will be disabled/greyed-out.
Note: This list shows only manually-issued commands, not automatic operations of SES. To keep track of automatic operations, see the audit log.
To delete a command, select it, and click Delete. To modify a command, select it, and click
Modify. See each individual command’s description for details on its syntax.
To cancel all commands that have not yet been executed:
To cancel all waiting commands for any device in the database, right-click on the word Folders
in the navigation pane.
To cancel all waiting commands for a selected set of devices, multi-select the devices, then right click on one of the devices in the selection list.
To cancel all waiting commands for all devices in a folder, right-click on that folder in the navigation pane.
To cancel all waiting commands for an individual device, right-click on that device in the Devices tab.
Choose Cancel all active commands from the menu. You are prompted to confirm the cancellation.
SES Administrator Manual
v9.2 SR1
Crypto-erasing a Client Device
To Crypto-erase a client device, rendering it unusable (for example, in the case of theft):
Right-click on one or more devices (this command cannot be performed on a folder), and choose
Cryptoerase Device from the menu.
You are prompted to confirm the action. Depending on configuration, you may be able to cancel the Crypto-erase before it is complete.
Note: This is only possible if the appropriate option has been set in the SES Options (see “General Options” on page 56) and in the installation package (see “Boot Configuration Options ” on page 231 for Windows, “Boot Configuration Options” on page 1 for Mac).
The syntax for this command is SDUTIL /X
Rotating Key Encryption Keys on Endpoint Devices
SecureDoc's SDUtil command now includes the capability of forcing the rotation of a device's Key Encryption Key (KEK). The option, syntax and required elements are shown in the table below:
This command can rotate the Key Encryption Keys for Software Encryption (Full Disk Encryption and Full Volume Encryption), Self-Encrypting Drives and where SecureDoc Pre-Boot provides pre-boot autentication to BitLocker-encrypted disks.
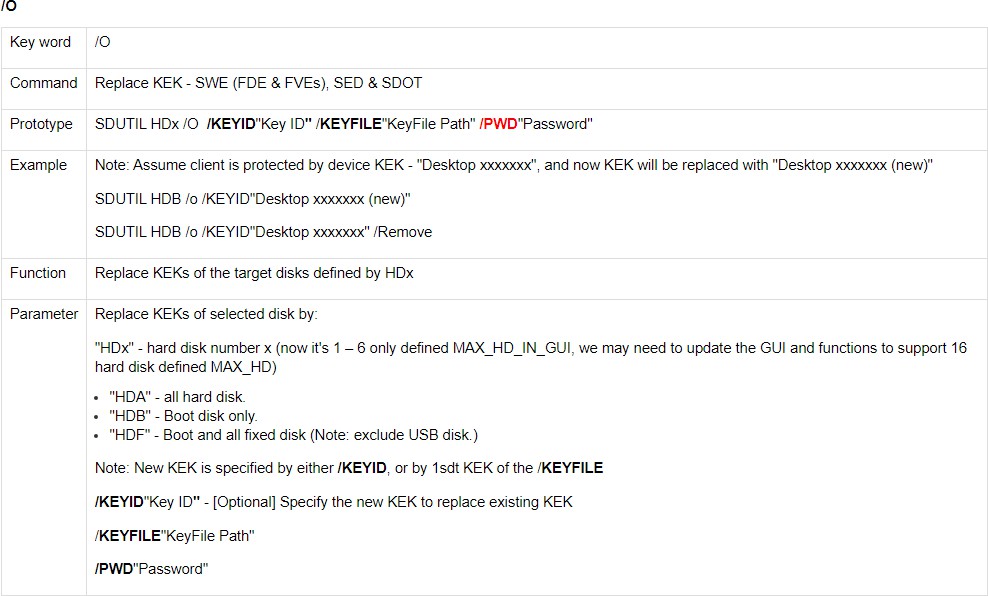
Process for using SDUTIL /O to rotate Key Encryption Keys (KEKs):
Please follow all steps diligently:
In the SES Console, create a new KEK (e.g. "21H2NewKey") for a given Device, then add it to the device whose KEK is to be rotated.
Force the client device to communicate to the SES server a couple of times to ensure that the updated key files have been send to the device (all User key files on the device will be affected since Device-level Keys are provided to all of the device users by attribution), and confirmed. Check the device's commands to see that the new key file has been sent down and confirmed.
Reboot the client device. Using SecureDoc Control Center, check the primary user's Key File, check- ing in the "Additional key file" section to ensure that the new Key is present in the user's Key File.
Prepare a script (with SDUTIL HDA /O /KEYID"21H2NewKey") to run with SDBat on the endpoint device. Once this has been run successfully, the device DEK is protected with the extra KEK - "21H2NewKey" now.
Reboot the device, making sure that Pre-Boot Authentication works. Make sure also that PBConnex Network-brokered authentication works (e.g. add the device to a Network-Brokered AutoBoot group and determine if it boots up to Windows). Also ensure that local login is working.
Prepare a script (with SDUTIL HDA /O /KEYID"21H2-ENTER-PC key" /Remove) to run with SDBat on the endpoint device. This will remove the original KEK from the on-device key file. Once this has been run successfully, the device DEK is protected by the new KEK only, the original one is removed.
Reboot, make sure Pre-Boot Authentication, Network-brokered Authentication and local logins are working.
Check PBA user's KF in "Additional key file" now (you expect to see both KEKs are still available to this user in the user's Key File on the device)
In the SES Console, remove the original KEK from the Device's list of Keys. You can expect that SES will "push" updated key files to the device for all users, and these will contain only the NEW Key (plus of course any other Keys the user is entitled to for other purposes than the KEK to access this device).
At the device, again force the device to communicate with the server a couple of times to ensure that it has downloaded the new keys.
Reboot the device yet again, and again make sure Pre-Boot Authentication works, PBConnex Net- work-Brokered Authentication works and any local logins
12 Using SecureDoc Control Center, check the PBA user's Key File's "Additional key file" section - you should only see the new KEK.
Activating Auto-Boot for Client Devices
Auto-Boot is used to temporarily by-pass the Boot Logon authorization so that, for example, software updates can be made on a client device. This is possible because SES contains all the information needed to log on to client device. This function can only be used if the Auto-Boot option was set in the SecureDoc options in the profile used on this client device (see "Boot Configuration General Options" on page 232).
Note: Use auto-boot with caution, since it temporarily disables security restrictions.
Right-click on one or more devices or a folder, and choose Activate auto-boot from the menu. A new screen appears.
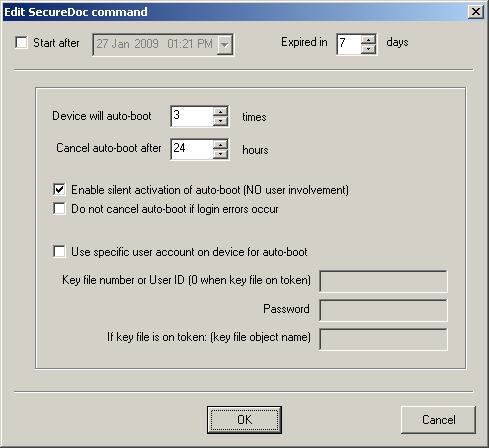
To specify a starting date for this function to take effect, check the Start after option, and choose a date from the calendar.
If necessary, modify the default expiry of 7 days.
In the Device will auto-boot field, specify how many times the device automatically reboots before the normal Boot Logon authorization takes effect again.
In the Cancel auto-boot after field, specify how long the device accepts auto-boot commands before the normal Boot Logon authorization takes effect again.
Note: You must set both a number and a time period. They work in conjunction with each other. For example, if a computer is set to reboot 5 times and cancel after 2 hours, whichever condition is met first ends the auto-boot process. That is, if the 2 hours has elapsed but the computer was rebooted fewer than 5 times, the auto-boot stops. If the computer has rebooted five times but the 2 hour time period has not elapsed, the Auto-Boot stops.
For SEDs, Auto-Boot will be cancelled based on the time period, not the number of reboots.
If you want Auto-Boot to be active even if the client device’s user has not run Boot Logon yet, check the Enable silent activation of auto-boot... option. Auto-Boot will use the userID and password of the currently logged in user. If this option cleared, the user has to be authorized by Boot Logon before auto-boot runs.
If you want Auto-Boot to continue even if login errors occur, check the Do not cancel auto- boot... option.
To use a specific (administrator) account to log on for Auto-Boot purposes, check the Use specific user account on device... option, and enter the key file information necessary to log on to that key file (remember to use a 0 if the key file is on a token). If not used, defaults to the last user who logged on.
Click OK.
The syntax of this command is:
SDUTIL /U [PARAMETERS]
where the possible parameters are:
C”N” indicates number of reboots enabled
T”N” indicates number of hours during which reboot is enabled
/SILENT indicates silent activation (SecureDoc saves and use current account information (user ID and password) for up to (number) reboots within next (number) hours
/NOCANCELERROR indicates to not cancel if login errors occur
/KEYFILE"UserID" indicates the specific user account to use for auto-boot, with
/PWD"password" indicating the password and /OBJLABEL" object name" indicating the object name (if key file is on a token)
- /Minutes - to specify, that timeout value is a number of minutes rather than hours
- /ENC - The password value passed in the /Pwd Parameters will be encrypted if /ENC is present (This option was introduced in SES V8.2)
- /PERMANENT - ???
- /KEEP (Whether to delete or keep instance of keyFile from"UserData" folder)
- /FORCE - enforces use of "dummy" Key File for setting-up Auto-boot
Rebooting Computers
To re-boot a client device:
Right-click on one or more devices or a folder, and choose Reboot device from the menu.
You are prompted to confirm the action. Once the computer has rebooted, only users with the appropriate keys can access it.
The syntax of this command is: SDUTIL /Z
Locking Computers
To lock client devices, logging users out of Windows automatically (and, if SecureDoc Screen Lock is enabled for those users, requiring them to enter their SecureDoc password before continuing):
Right-click on one or more devices or a folder, and choose Lock devices from the menu.
Associating Profiles with a Folder or Device
To assign a new profile to a client device or to a folder full of client devices (which must be of the same type):
Right-click on one or more devices or a folder, and choose Assign profile to devices from the menu.
A list of existing profiles (of the relevant type) appears. Select the appropriate one and click
OK.
The syntax of this command is: SDUTIL /I
Creating and Assigning SFE Policies
All devices receiving SFE policies must be part of a group. For convenience, we recommend creating an “SFE Devices” group and adding all appropriate devices to that group.
To create an SFE policy to protect local device paths:
Select a folder and click the Folder Encryption Policies tab.
Right-click on the tab and choose Create Folder Encryption Policy.
From the Folder location field, choose the appropriate environment variable by clicking the browse button or enter it in the field. Environment variables are explained in more detail below, and vary based on operating system.
From the Properties groupbox, select the encryption key by clicking the browse button or enter it in the field.
Click Save to complete the policy.
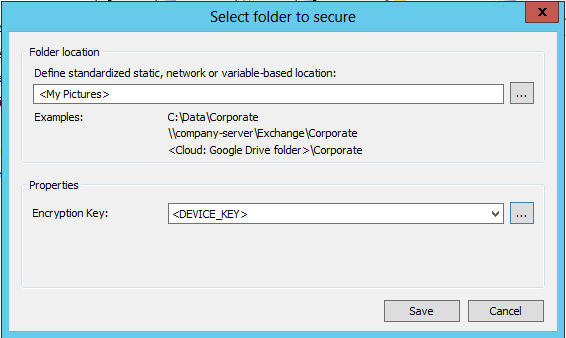
Environment variables are user-specific. For example, if a Windows device has a user "Jane" and a user- "Tom", the LOCALAPPDATA environment variable for Jane is C:\Users\Jane\AppData\Local and, for the user Tom is C:\Users\Tom\AppData\Local. Other common environment variables are:
APPDATA = C:\Users\username\AppData\Roaming
TEMP=C:\Users\username\AppData\Local\Temp
USERPROFILE=C:\Users\Admin\username
ALLUSERSPROFILE=C:\ProgramData
Assigning SecureDoc Client (SFE) policy to groups
Once the SecureDoc Client policy has been saved, it appears in the SES Console:
Please note the policy has not yet been assigned to devices. The SES Administrator is still required to push the policy down to the groups.
Note: Once the policy is crated, it cannot be changed or modified. If any changes must be made, a new policy will have to be crated.
Select the Groups tab from SES.
Select the group to which you want the policy to be assigned.
Double-click on the selected group. The Group Properties window appears.
From the left navigation menu, select Folder Encryption Policies. The Folder Encryption Policies screen is displayed.
Click ADD button. The Add SFE Policy window appears.
Select the select an existing folder policies radio button.
Click OK.
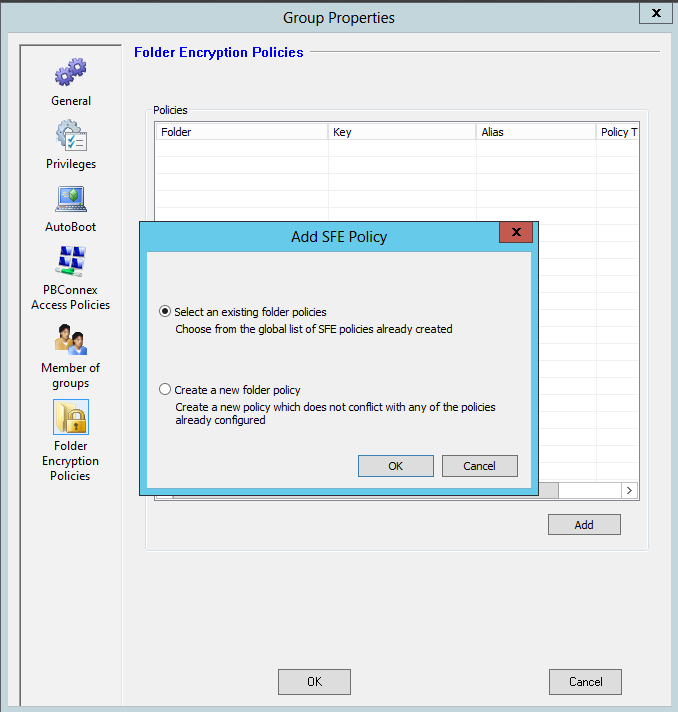
The Select an SFE policy window appears.
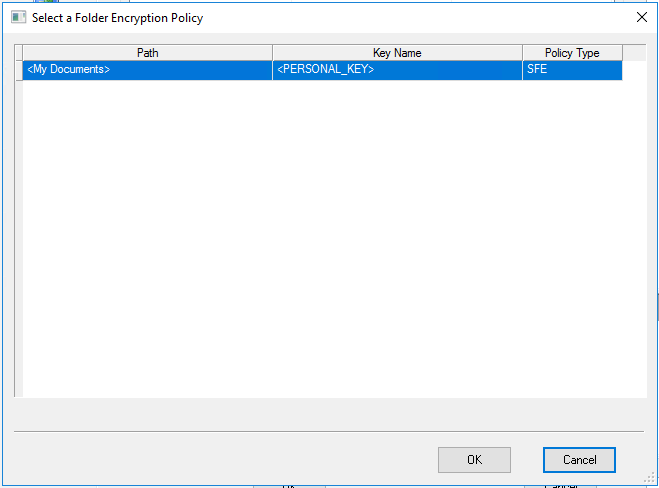
Select the desired policy to be deployed.
Click OK. A confirmation prompt, This policy is applied to all devices in this group. Do you wish to continue?, is displayed.
Assigning SecureDoc Client (SFE) policy to client devices
Locate the device in the group to which you want the policy sent, right-click on the selected device and choose Assign folder policy to device. The Select Folder
Policy window appears.
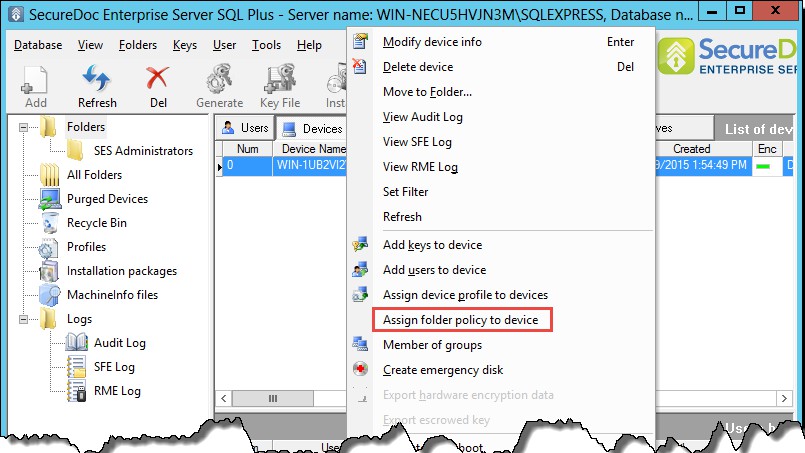
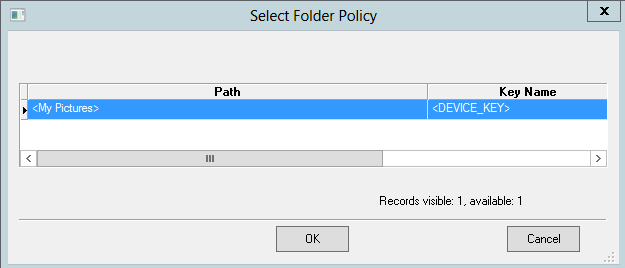
Select the desired path / key and click OK.
Note: The SFE Policies tab shows the encryption progress of folders affected by SFE: for details, use the SFE log ("Using the SFE Log" on page 459).
Mac FileVault2-Specific Commands
Adding User Account
To add a user account to the FV2 device, or modify an existing account, adding the user to the Unlock List:
On the Devices tab, right-click on a Mac FV2 device and choose Add users to device.
Navigate to and select the user.
Optionally, check the "Do not add to UnlockList" option: this removes the user from the Unlock List or, if the user account does not exist, prohibits it from being added to that list in the future.
Changing User's Password
To change the user's password:
Edit the user's record and change their password.
On the Devices tab right-click on the user's record and choose Push Users Passwords.
Removing User Account
To remove a user account from being able to access the device (this removes the account from the Unlock List and deletes the keyfile associated with the user), On the Devices tab, right-click on the user and choose Remove user from device
Note: If the user is currently logged on, they will be logged out immediately. This command cannot be used to remove the last remaining account on the device.
Locking User Out
To lock a user out of the FV-encrypted drive, right-click on the user record in the Devices tab and choose FileVault, then Lock Users On Device.
Adding an Existing User to the Unlock List
To add an existing user account to the Unlock List (if the user was excluded from that list: by default, users are added to the Unlock List when their accounts are added to the device), right-click on the user record in the Devices tab and choose FileVault, then Add Users to Unlock List.
Removing a User from the Unlock List
To remove a user from the Unlock list, retaining their record in the database and retaining their key- file, right-click on the user record in the Devices tab and choose FileVault, then Remove Users from Unlock List.
Using SDRecovery
This chapter explains how to use SDRecoveryCmd.
SDRecoveryCmd
16
This section explains the usage of a new command-line tool that became available in V6.5 of SecureDoc Enterprise Server. SDRecoveryCmd permits the display, unlocking or crypto-erasure of both regular disk drives and Self-Encrypting Drives. In either case, these can be spinning platter type (traditional) drives or Solid State Drives (SSDs).
The SDRecoveryCmd command executable can be located at C:\Program Files\WinMagic\SDDB-NT\Bin- ary boot files\Win. <version#.build#>
Command Syntax
The SDRecoveryCmd command can accept one of several “modifier verbs”, followed by a number of input parameters which are in the form of brief “clauses”, such as –d, -k, -p, etc, which provide the command with an understanding of what the value that follows the clause means to the operation of the command.
Running the SDRecoveryCmd command without a modifier verb or input parameters, will show the user the fully-articulated list of option combinations, as shown below:
SDRecoveryCmd -info [-d <diskNo>]
Display information about all disks, or a specific disk (using -d clause).
SDRecoveryCmd -unlock <-d diskNo> -k <keyfile> [-p <password> | -e
<encfile>]
SDRecoveryCmd -unlock <-d diskNo> [-h <diskNo>] -u <username> -p <pass- word>
Unlock a specific disk using various authentication methods.
SDRecoveryCmd -erase <-d diskNo> -k <keyfile> [-p <password> | -e <enc- file>]
SDRecoveryCmd -erase <-d diskNo> [-h <diskNo>] -u <username> -p <pass- word>
SDRecoveryCmd -erase <-d diskNo> <-s PSID>
Crypto-erase a specific disk using various authentication methods. SDRecoveryCmd -erase <-d diskNo>
Crypto-erase a plaintext SED, no authentication required.
SDRecoveryCmd "Modifier Verbs"
Options:
-d: Disk Number against which the command operates.
-k: Key File name to be used to log in.
-p: Password that protects Key File specified in -k clause.
-e: Enc File name (full location) can be specified instead of using -k and -p clauses
-h: Disk Number on which user's key file is located
-s: PSID
-u: User Name.
The above shows the available options and, briefly, how they can be used.
SDRecoveryCmd "Modifier Verbs"
The operational “modifier verbs” available are:
How to interpret clauses (argument names) and options available
Types of Clauses: Dependent, Optional, Alternatives
Dependent
[ ] Some clauses are dependent upon the use of a given structure, and these are generally surrounded by square brackets [ ].
For example:
SDRecoveryCmd -unlock <-d diskNo> -k <keyfile> [-p <password> | -e
<encfile>]
Where the –unlock modifier verb is used, then either –p followed by password, or –e followed by the loc- ation and name of the .enc file must be supplied (and not both).
Optional
< > The use of the left and right angle brackets indicate that, IF USED, all the contents of the clause and value set must be defined. For example –d must be followed by a disk number, but in certain cir- cumstances the entire –d clause structure is optional.
Alternatives
Using SDRecovery
Clause sets
The use of the vertical spacer indicates that what follows is an alternative to what precedes the spacer bar.
For example:
SDRecoveryCmd -unlock <-d diskNo> -k <keyfile> [-p <password> | -e
<encfile>]
This command option has two possible ways to authenticate to a Key File – either using the –p clause, followed by a Passwordakes , or using the –e clause, followed by the location and name of the .enc file for that device.
Clause sets
Some clauses are mandatory where a given clause type is defined. For example, one cannot use the –d clause without also applying the disk drive number to be queried.
The clauses (which behave like very abbreviated argument names) and their possible argument values are briefly described at the end of the command syntax display, above, and are explained in more detail below.
Clauses and their meanings
The following table form shows these clause options, the use of which will be explained below:
Clause option | Description |
-d | This clause indicates that the value that will follow it is the Disk Number against which the command operates. |
-k | This clause indicates that the value that will follow it is the Key File name to be used to log in |
-p | This clause indicates that the value that will follow it is the Pass- word that protects Key File (which is in turn specified in the -k clause). |
-e | This clause indicates that the value that will follow it is the Enc File name (full location) can be specified instead of using -k and -p clauses |
-h | This clause indicates that the value that will follow it is the Disk Number on which the user's key file is located. |
-s | This clause indicates that the value that will follow is the PSID. Note: The acronym PSID stands for Physical Security Identification Number, and refers to the PSID value usually printed on the label affixed to Self-Encrypting Drives (SEDs). |
Clause sets
-u | This clause indicates that the value that will follow it is the User Name. |
Using the Command Line Interface
Introduction
17
The command line interface utility allows you to perform common functions on client devices.
Updating User Passwords
Update password for a specific user. Updated passwords will be verified against the overall SES password rules.
SESCmd UpdatePassword <Username> <UserPassword>
where Username is the UserID the user is assigned in the SES database and UserPassword
is the new password to be assigned to that user.
Assigning Administrators to Devices
Assign users administrative rights to selected devices.
SESCmd AssignAdmin <Username> <DeviceName>
where Username is the UserID the user is assigned in the SES database and DeviceName is the client device to which the user should have admin access.
Assigning or Removing Access Rights to Devices
Assign users specific access rights to selected devices.
SESCmd AssignUser <Username> <DeviceName> <UserAccessRights] [/E | /D
]
where:
Username is the UserID the user is assigned in the SES database
DeviceName is the client device to which the user should have access rights
UserAccessRights is one or more of the following:
[W|w] — Modify Password
[K|k} — Modify Key
[V|v] — Export and View Key
[L|l] — View Transaction Log
[M|m] — Modify Profile
[S|s] — Select Profile
[R|r] — Convert Removable Media
[H|h] — Convert Hard Drive
[I|i] — Disk Integrity Check
[E|e] — Create Emergency Disk
/E enables the specified right
/D disables the specified right
For example, to provide full administrative rights, we would add all of the options together:
SESCmd AssignUser userx device123 WKVLMSRHIE /E
For example, to provide just user rights:
SESCmd AssignUser usery device345 W /E
For example, to remove removable media rights:
SESCmd AssignUser userz device556 R /D
Removing Users from Devices
Remove users from having access to selected devices.
SESCmd RemoveUser <Username> <DeviceName>
where Username is the UserID the user is assigned in the SES database and DeviceName is the client device to which the user should no longer have access.
Change Protection Type
Change users' protection type (password or token).
SESCmd SetProtectionType <Username> [ /T | /P ]
where Username is the UserID the user is assigned in the SES database
/P specifies password protection
Disrupting / degrading normal service to enforce licensing compliance on endpoint devices
SecureDoc Enterprise Server offers a new account-in-good-standing compliance feature for those cus- tomers offering SecureDoc management as a hosted service. When activated, this permits the SecureDoc client itself to present reminder messages and a countdown before the device can be accessed to users whose service payments are delinquent, prompting them to pay and make their accounts current.
Executing pre-boot reminder / warning messages using SES command tool (SEScmd)
SES administrators can run SES Command tool (SEScmd) by providing the boot-message, device name, and timer value. Once the command is executed on non-compliant end-point devices, users will receive a pre-boot warning message and see a delay timer. (Windows experience is not affected).
On the system where SES is installed, run SESCmd from the following location C:\Program Files (x86)\WinMagic\SDDB-NT\SDConnex\SESCmd.exe in command prompt.
To warn the users execute the following command through SESCmd SetBootMessage VM_WM8 10 "Test Message!" winmagic SetBootMessage <Device Name> <Delay> <Message> <SES password>
Device Name | Device name as recorded on the SES Database. |
Delay | Positive integer will activate the delay. For example, if the |
Using the Command Line Interface Disrupting / degrading normal service to enforce licensing compliance on endpoint devices
delay timer is set to 10, the customized message will appear for 10 seconds. NOTE: Any message, once defined, will continue to appear on the affected /targeted device(s) perpetually, until it has been canceled by sending another command with a Neg- ative integer value (see below). Negative integer will de-activate the delay. For example the delay time is set to -1, the customized message will not appear anymore. | |
Message | SES administrator customized message displayed to the end user |
/? | Displays help |
Example of execution command to set a boot message:

Note: SESCmd.exe can be automated to receive input from CSV file that contains a list of devices that are out of compliance.
In SES console, you will notice the following remote command executed on the device .
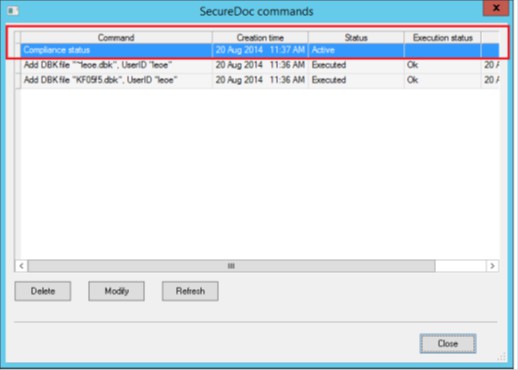
On the endpoint, the following prompt at pre-boot that will disrupt the end users from authenticating:
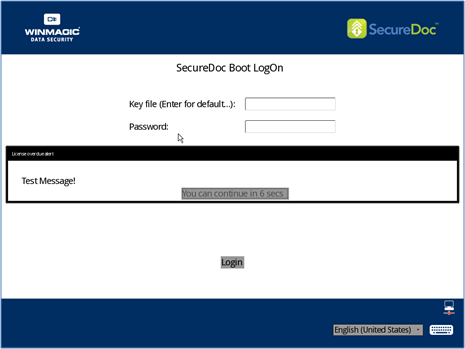
Using Hardware Security Module (HSM)
Introduction
18
The Hardware Security Module (HSM) option can be (optionally) used to protect the SecureDoc Key File used to provide Administrator Access to the SES Database through the Console. When HSM is used, the SES database protection key file is securely stored inside a tamper-resistant HSM device, instead of on the local disks.
Setting up Environment
Install and Register the Luna Client
For installation instructions, refer to the Luna HSM user guide supplied by the SafeNet Technologies.
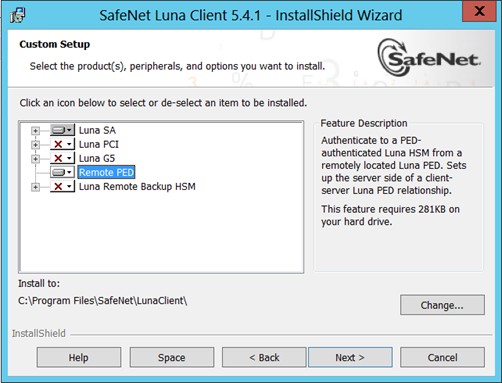
Install Luna Patch
For installation instructions, refer to the user guide supplied by the SafeNet Technologies.
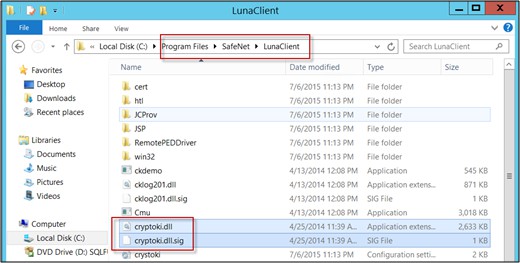
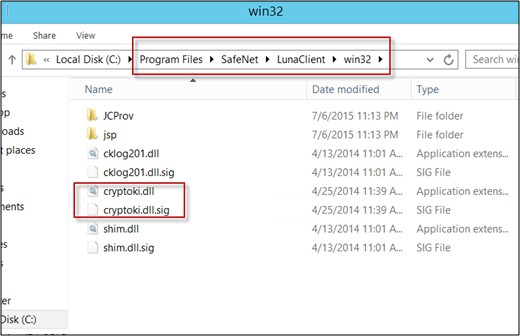
Configure Luna client on Server and Client Devices Client Configuration
From a Command Line prompt using elevated/Admin rights, navigate to the location where Luna client is saved (e.g. c:\Program Files\SafeNet\LunaClient).
Create a self-signed certificate, using the following commands:
Vtl createCert -n <Device IPAddress>
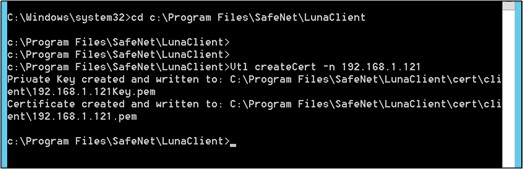
Copy the public key to the Server by running the following command:
Pscp cert\client\<ipAddress>.pem< HSM Server account @ hsmhostname-or-IP >: . (Note there is ":" and ".")
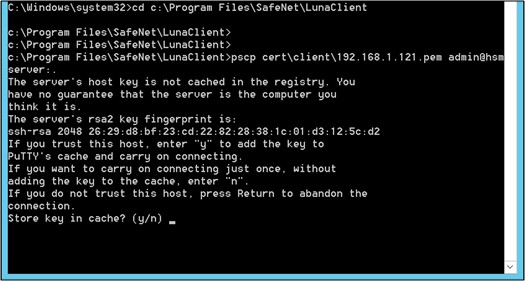
 Type y at where it asks to confirm if trusted the host. Type in the account password and press Enter.
Copy the server public key locally:
Pscp < HSM_Server_account@ hsmhostname-or-IP >.pem . (Note that there is a space at the end then the ".").

Type in the account password and press Enter.
Add the server to list:
Vtl addserver -n <hsmhostname-or-IPaddress> -c server.pem
Server Configuration
Delete the original client if needed: (Note: Delete the client using the same IP, otherwise, it won't work since only one client is registered per IP). The client list will provide all the list of client names.
Note: The clientName can be any name. Just make sure that the name easy to remember in case you need to delete it.
From an SSL application (i.e. putty) connect using the address "hsmhost- name_or_ipaddress"
Client delete -client <clientName>.
Create client:
Client register -client <clientName> -IP <IPAddress> or
Client register-client<clientName> -hostname<MyClient>
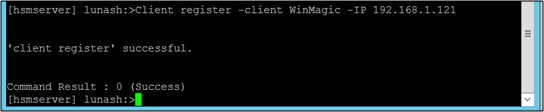
Assign the client to partition.
Client assignPartition -c <clientName> -p <partitionName>
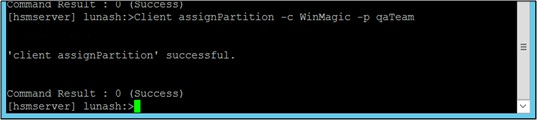
Verify Connection
On the client device, from a Command Line prompt using elevated/Admin rights: Vtl verify
Register HSM as a Custom Token Type
Copy 32 bit version of cryptoki.dll from: c:\Program Files\SafeNet\LunaClient\win32\cryptoki.dll to c:\windows\SysWow64
Make the following registry changes:
Open regedit, under HKLM\SOFTWARE\Wow6432Node\WinMagic:
Create string value: Name: SmartCardDll Value: cryptoki.dll
Create string value: Name: SmartCardType Value: <Empty>
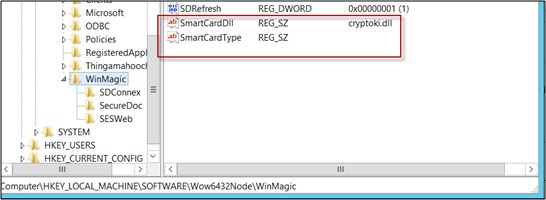
Create Custom Key File Using Token Protection
Preparation:
Before proceeding, temporarily disable the SES global option that forces users to change initial passwords.
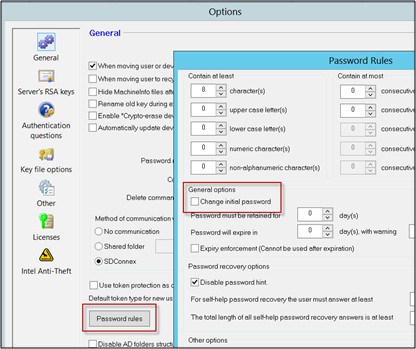
This option will not be needed for the Key File about to be created, since it will rely upon the Hardware Security Module (HSM) to provide the actual credentials that will unlock the key file that is about to be created.
As well, since HSM provides these credentials, it is not meaningful or possible to require that they be changed immediately upon first use.
Note: Once the process of creating the HSM-protected Key File, if the Change Initial Passwords global option is normally in effect, it should be re-enabled.
Log into the SES Console application as a master Administrator.
Select the SES Administrators folder.
Click on the Users tab within this folder.
Right-click on the SES Master Administrator User ID, and select the Create Key File option. Upon choosing the option to create a key file, the Create Key File window appears.
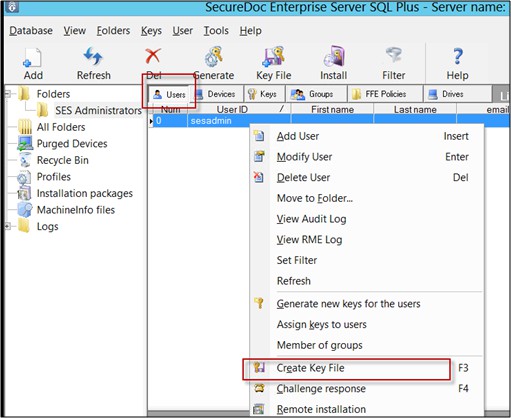
Disable the Change Initial Password option.
Choose a location and name for the new HSM-protected key file that will be created.
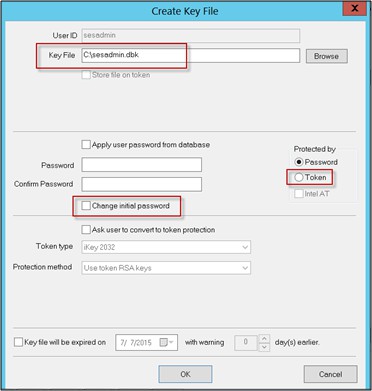
Under the Protected by section, select Token by clicking on its radio button. A new window Hardware Token Information opens. In this new window, note that the selected User ID (e.g. admin) continues to be shown in the first field.
SES Administrator Manual
v9.2 SR1
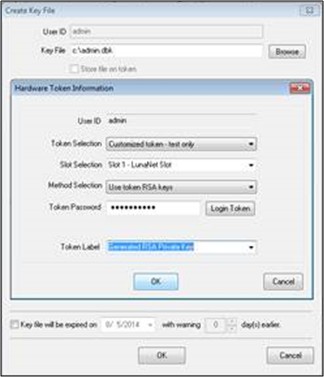
Choose Customized Token from the Token Selection drop-down menu.
Choose the option Slot 1 – LunaNet Slot from the Slot Selection drop-down menu.
Choose Use token RSA keys from the Method Selection drop-down menu.
Enter the HSM Password in the Token Password field. (This is the Partition password).
Select Generated RSA Private Key from the Token Label drop-down menu.
Click the OK button. The panel is saved and closed.
Click OK on the underlying window (Create Key File) to complete the creation of the new Key File of the defined name, in the desired location. The key file is created and saved.
Using Key File Protected by HSM
Close the SES Console.
Log into the SES Console.
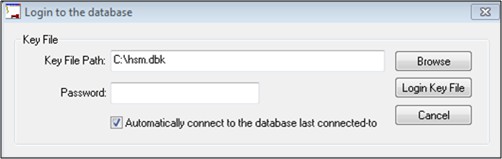
Browse to the newly created HSM key file. This time (and hereafter), the Administrator will log in using the new HSM-protected Key File, by authenticating using the HSM password (This is the Partition password).
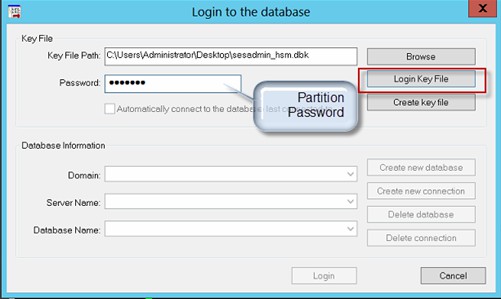
Confirm the Database Information and click the Login button.
Configure SecureDoc Services.
Start AD Sync
Register AD Sync.
If the keyfile path is not point to the HSM key file then browse to it.
Enter the HSM password (This is the Partition password).
Click Login.
Click Apply.
Click on Sync Config.
Right click and add the Domain.
SES Administrator Manual
v9.2 SR1
Enter all the information and click Save Sync. All the users/ groups/ OUs are imported to SES DB. For those users in AD that has certificate, the certificate also imported to the SES DB
Start SDConnex
Click on SDConnex Service.
Register the Service.
If the keyfile path does not point to the HSM key file (created above) then browse to it.
Enter the HSM password (This is the Partition password).
Click Apply.
Start the Service. The SDConnex Service is registered and runs properly.
Validate with netstat command and check for port TCP 7300 is present, which means service is connected to DB.
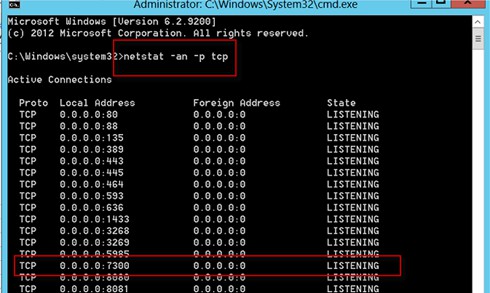
Working with SES Management Console
Working with Users
User Information
19
Users in the selected folder of the SES database are listed on the Users tab (the bottom panel of the tab shows which devices are associated with the selected user). Information about users shown on this tab can include their user id, name, email address, and whether or not their certificate is recorded in SES.
Folders and groups imported from Active Directory are shown in green.
Users associated with devices appear in the lower portion of the Devices tab, with information including their keyfile and whether or not Boot Logon is available.
Users who have keys appear in the lower portion of the Keys tab, with the same information as on the Users tab.
About User Privileges
Privileges determine what a user is authorized to do (for example, change their password, modify security profiles, or encrypt/decrypt a hard disk). They are stored as part of the key file.
In SES, privileges appear in a user’s record when any of the following is true:
an installation has been performed (via installation package) for this user on a new device
a user is assigned to a device in SES
a key file is generated for the user in SES (by right-clicking on the Users grid and choosing
Create Key File)
Although privileges in the user’s record can be modified (right-click on the user record in the Users or Devices grid and choose Modify User), those modifications do not affect the key file for that user on any device the user is assigned to.
To have changes apply to the user on a device, modify the user’s device-specific record. Modified privileges apply only to the device in question. Right-click on the user in the Devices grid and choose Access Rights.
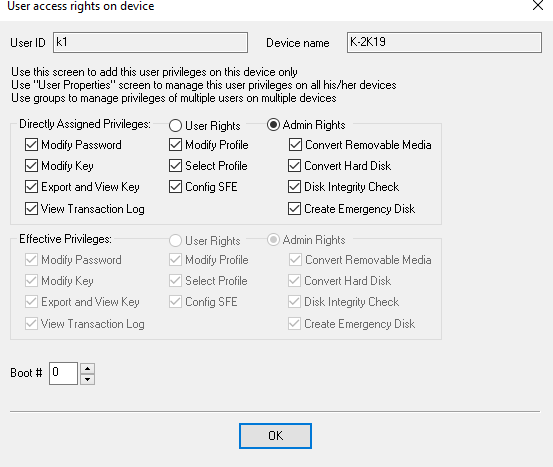
The modified privileges are stored in the replacement key file sent for that user to a device. This occurs when one of the following happens:
key file is automatically generated because the user’s properties have changed
a new key file is created for the user on the device (by right-clicking on the user in the device grid and choosing Create Key File)
For more about privileges, see “Appendix E: Privileges” on page 491.
Adding, Modifying, and Deleting Users
To add a user:
Right-click on the Users tab and choose Add User.
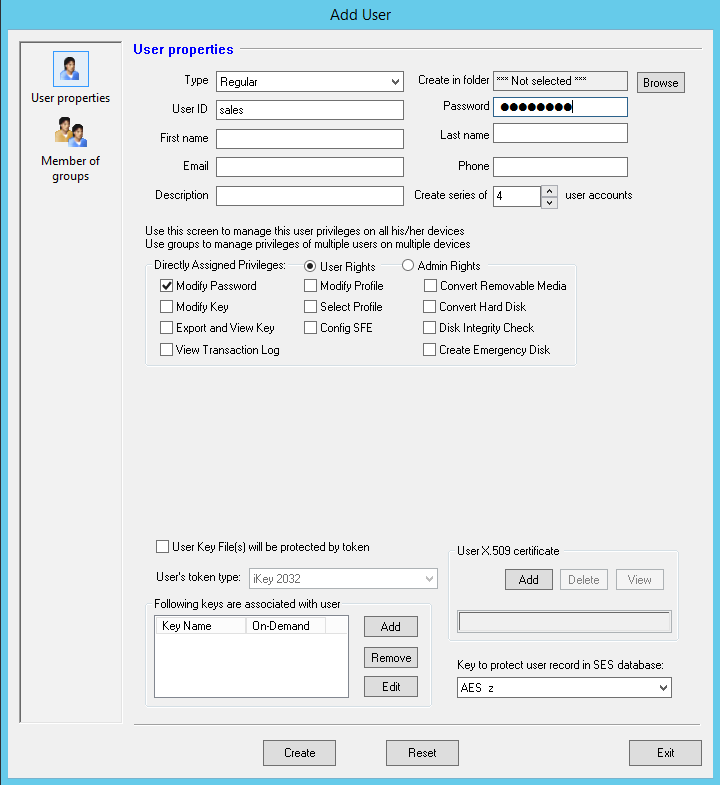
The Type drop-list permits defining what type of user. Aside from regular users (the default), a user can be defined as an Auto-Boot user, or one or more Temporary users can be created. Temporary Users can be used in the Provisioning aspect of the Installation Package settings, for example to permit shipping encrypted but as-yet undeployed endpoint devices to another office. Using a Temporary User account and password (which the recipient at the destination office will know), a device can be protected more strongly while in transit against a would-be thief being able to log in to the device (as might be possible if the device auto-boots to the Windows logon).
To use this account for permanent Auto Boot (see “Boot Configuration General Options” on page 232), check the Use account to enforce... option no longer exists in this form. Change the phrasing to: 'ensure that the user Type field has been set to "Auto Boot".
Note: The ability to define the User Type remains available only until the user record is saved: A user cannot be changed from one type to another once the user record has been saved to the database.
Set the user’s privileges (see “About User Privileges” on page 436). Below the user's Directly Assigned Privileges" area is a Combined Privileges area, which shows any privileges that apply to this user through the combination of Direct privileges assigned above, and any group-based privileges derived from any groups the user belongs to. Combined privileges cannot be changed except by changing the Direct privileges and/or Group privileges.
If the user will use a token for authentication, check Use token protection and choose a token type.
If the user will use a certificate for authentication, select it.
If appropriate, add an existing key from the SES database to the user.
To make the user a member of a group, on the Member of tab, click Add to Group and choose the appropriate group. For more information on groups, see “Working with Folders ” on page 453.
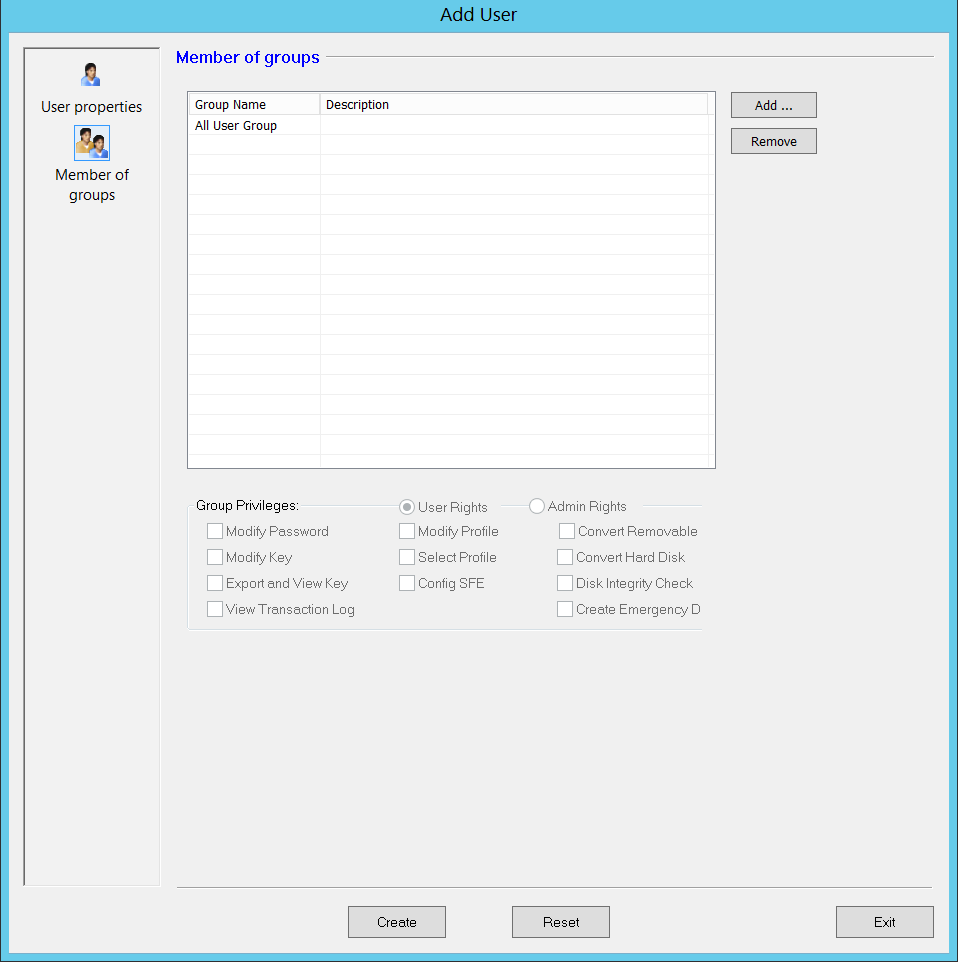
Click Save.
The user appears on the User and Keys tabs.
To edit a user’s record, right-click on the user’s name on any tab and choose Modify User or double-click on it on the Users tab.
To delete a user from the SES database:
If the user is associated with devices, remove that association. In the Users or Devices tab, right-click on the device and choose Remove user from device.
Right-click on the user in the Users tab and choose Delete user. The user information is moved to the Recycle Bin.
Note: For OSA - Adding or Modifying users on SES (sending ADDUser remote command) will not result in storing correspondent key files locally.
Adding Key Files to a User
To add key files to a user, adding that key file to any devices the user is associated with:
In the Users or Devices tab, right-click on the user and choose Create Key File.
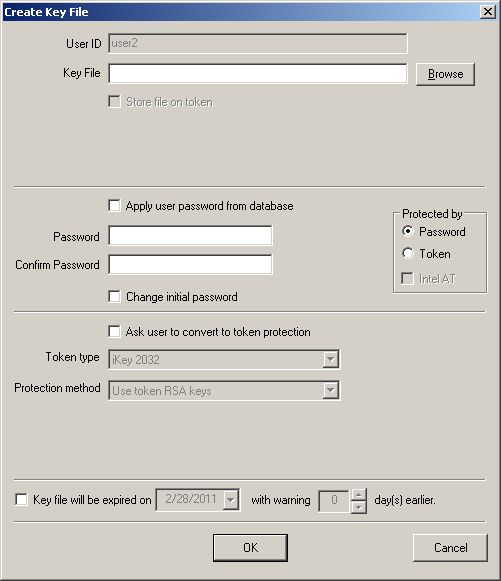
Enter a File name. The assigned path and name appear in the field, where you can change it if desired.
To place the key file in a specific folder, click Browse and navigate to the folder.
If the key file is to be protected by a password, you can choose either to use the password stored for this user (check Apply user password from database) or enter a new one.
To force the user to change their password when they first log on to their encrypted computer, check the Change initial password option.
To prompt users to convert their password-protected key file to a token-protected key file instead, check Ask user to convert to token protection option and identify the token and password method. Be sure the appropriate token is stored in the user’s record.
To have the key file expire by a certain date, check the Key file will be expired option and choose the expiry date and number of days warning.
Click OK.
Note: Once the key file has expired, it is unusable.
Protecting a Key File with a Token
When you check the Token option, the Hardware Token Information screen appears.To expand support for additional Smart Cards and Tokens that can be used for protection SecureDoc Key Files, WinMagic has added new options “Generic Cards”, “PIV Cards” and “OpenSC Cards” as new types. The “Generic Cards” and “PIV Cards” will permit the Administrator or User to select any smart card supported by Microsoft CSP (Cryptographic Service Providers) and to configure the keyfile with the desired certificate protection schema: Protection schemas include “certification-on-token”, “certificate-in-file” or “certificate-in- windows-store”. The “OpenSC Cards” option will use OpenSC PKCS11 middleware, which can be downloaded from https://www.opensc-project.org/ . This token type will support all token methods (PIN-on-token, Cert-on-token, RSA-on-token, but the card itself may not.
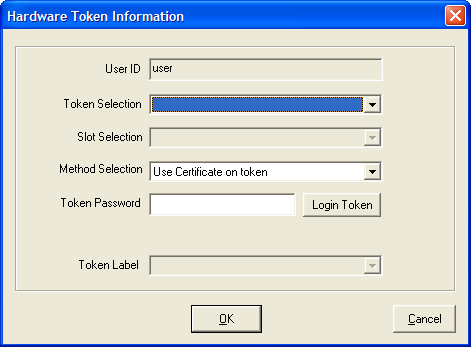
From the Token Selection list, choose the token type (defaults to token chosen in SES options, as described on “General Options” on page 56).
From the Slot Selection list, choose the hardware slot where the token is inserted.
From the Method Selection list, choose a protection method to be used to encrypt the key file. For a description of each method, see “Creating Package” on page 478.
Enter the token password and click Login Token.
In the Token Label field, enter or choose label (name) for the key file to have on the token.
Note: Depending on the method selected, you may be prompted for a token label.
Changing from password protection to token protection at Windows and Pre-boot
SES Administrators can automate the mass-transition from password protection to the use of smart card or token-protection at Windows and pre-boot. This feature is particularly useful for large enterprises who wish to perform mass transition to token protection.
To change from password protection to token protection:
Open SecureDoc Configuration Services window.
Stop ADSync Service.
Open SES console.
In the SES Global options General page (Tools -> Options), choose the desired token type from the Default token type for new users drop-down.
In the Key File options page, enable the Automatically update key file on device when user/device/group keys are modified option.
Add the clause ApplySmartCardLogonFromUserAccountControl = “true” in the AddSettings section in the WinMagic.SecureDoc.ADSync.Service.exe. XML configuration file located in Program Files\WinMagic\SDDB-NT\SDConnex.
In Active Directory, add the certificate and select the “Smartcard is required for interactive logon” option.
Other User Functions
To add a key to a user, see “Creating Encryption Keys” on page 449.
To associate an existing key to a user, right-click on the user (on the User’s tab) and choose
Assign keys to users, then choose from the available keys in the folders.
To associate a user with a folder and/or group, see “Working with Folders ” on page 453.
To display audit information for a specific user, right-click on the user and choose View Audit Log. For more on this log, see “Using the Audit Log” on page 456.
To perform challenge-response password recovery for a user, see “Using Password Recovery” on page 471.
To perform remote installation for a user, see “Appendix B: Creating Remote Installation Packages” on page 477.
To view the user’s access rights on a device, double-click on the user record on the Devices tab.
To remove a user from a device, right-click on the user in the Devices tab and choose
Remove user from device.
Working with Devices
Device Information
Note: For Android devices, the Bluetooth device name and the Android ID are displayed. For example, if the Bluetooth device name for Samsung Galaxy Note 4 is "Joe" and its Android ID is "9688587f04e1f223", then it will be shown as "Joe- 9688587f04e1f223"
The Devices tab lists the client devices (all types) in the selected folder of the SES database. Information shown includes:
the date/time the device record was created and last modified
the date/time the device last communicated with SES
the type of profile sent to the device (e.g. “computer”)—the name of the profile is shown in the device record itself
if the device’s profile has been modified, whether or not those changes have been applied to the device
the SES certificate associated with the device
the IP address and port of the device
whether or not hardware encryption is being used on the device
how many pending remote control commands (discussed later in this module) are pending for the device
the number of days since the client device last communicated with the server
the operating system and SecureDoc version on the device.
Device information is also shown on the Users tab (for the devices associated with the selected user) and the Keys tab (for the devices associated with the selected key).
Information about the user associated with the selected device is shown in the bottom panel.
Modifying or Deleting Devices
To modify a device’s properties, right-click on the device (in the Devices or Users tab), and choose Modify device info, or double-click on it (in the Devices tab).
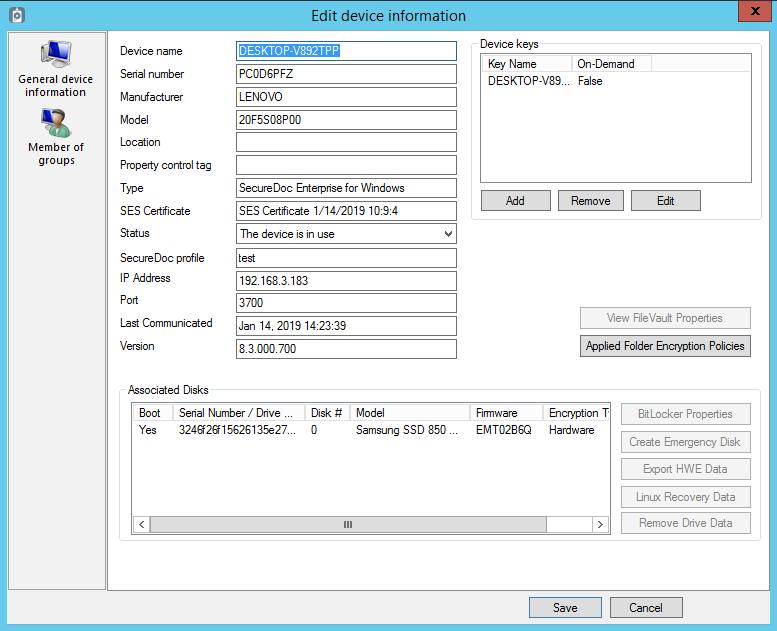
The modifiable properties for devices are:
its name, serial number, manufacturer, model, location and property control tag
its status
its keys.
Note: The properties screen also shows status information about the device’s communication with SES.
Drives (SED or other) associated with the device are listed in the Associated Drives area. with their encryption status shown. External drives are indicated.
the Client Policy tab lists the timers and policies established for this device (see “Depending on which Device Category you chose, the available Device Profile Types available will be one Installation Packages for Windows” on page 126) and includes a field you can use to enter the phone number of the device (for SMS purposes) and a Randomize passphrase button that, when clicked, will generate a new randomized passphrase for the device to use at the next rendezvous initiated by the device
the Profile Policy tab lists additional parameters for the device.
Device FileVault Properties
The Device FileVault Properties tab displays the account recovery password details for the FileVault2-protected device. If the user of the device forgets the password, the SES Administrators can give the Recovery Account Password to that user for logging into that device for once.
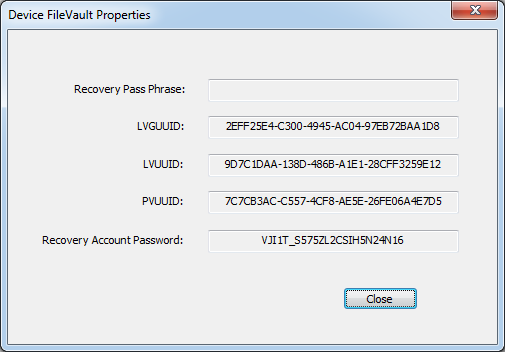
Note: The Recovery Account Password field is visible only when the WinMagic Recovery Account is enabled in Profiles.
Applied SFE Policies
The Applied SFE Policies lets you view the list of applied SFE policies, their encryption status, key- names or meta-names of the keys that protect the SFE paths, any linked folder aliases (if defining Cloud encryption policies) and policy types.
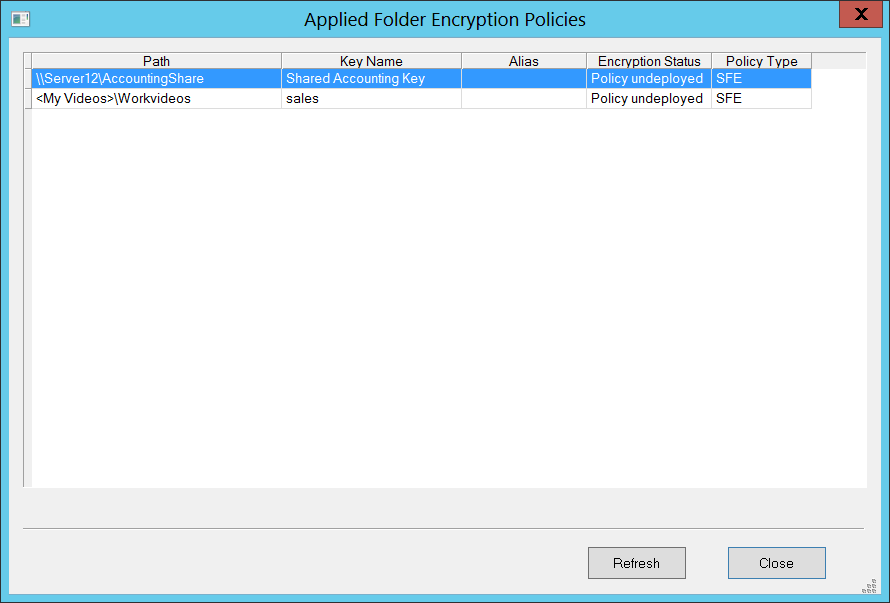
Other Device Functions
To associate a device with a folder, see “Working with Folders ” on page 453.
To display audit information for a specific device, right-click on the device and choose View Audit Log. For more on this log, see “Using the Audit Log” on page 456.
To associate an existing key to a device, right-click on the device (on the Device tab) and choose Add keys to device, then choose from the available keys in the folders.
To add users to a device, right-click on the device (on the Devices tab) and choose Add users to device, then choose from the available users.To use the certificate from the user’s record for key file protection, check the Use the certificate from... option.
To create recovery media for a device, see “Creating Recovery Media for a User” on page 463.
Working with Keys
Key Information
The Keys tab lists the keys in the selected folder of the SES database. Information shown includes name, description, type, and whether or not it is an on-demand key. Information about the users with the selected key is shown in the bottom panel.
Adding, Modifying, and Deleting Keys
To add a key, follow the instructions in “Creating Encryption Keys” on page 449. To modify a key, double-click on it or right-click and choose Modify Key. To delete a key, right-click on it and choose Delete Key.
Note: Use caution when deleting keys. Be certain that nothing that still exists that has been protected by that key, since deletion can prevent future recovery of information protected by that key (e.g. a USB stick or DVD).
Other Key Functions
To associate a key with a folder (which deploys it to the users within the folder structure), see
“Working with Folders ” on page 453.
To display audit information for a specific key, right-click on it and choose View Audit Log. For more on this log, see “Using the Audit Log” on page 456.
To remove the assignment of a key from its users, right-click on it and choose Deassign Key from Users.
To add keys (through importing), see “Creating Encryption Keys” on page 449.
To view key information in csv format, right-click on the key and choose Save to File, identifying the location for the file.
Filtering Data in the Information Pane
About Filtering
You can choose from two different methods of filtering the records shown to display only those records you are interested in:
the Filter button in the toolbar lets you set filtering criteria for users, devices, and keys, lets you set multiple criteria, and keeps the filter in effect until you choose to clear it
the filter item available from the context menu lets you set filtering criteria for any item (user, package, profile, etc.), lets you set single criteria, and clears the filter if you move to a different list in SES
Note: Although you can restrict the number of records shown in SES table views (see General Options — see “General Options” on page 56), filtering affects the entire data set, not just what is currently shown. For example, if you have set to show only 10 records at a time, filtering will apply to more than just those 10 records, and a filter that matches 15 records will cause all 15 to be displayed.
Using the Filter Button
Click the Users, Devices, or Keys tab (these appear when you click Folders in the navigation pane).
Click the Filter button. You are prompted to specify filter criteria, including the target number of records to return. The criteria vary depending on the tab. For example, for users you can filter for user name, last name, first name, or date. Criteria specified are always interpreted as “the selected information begins with” the value entered in the Filter field.
If more records are found than indicated in the Allow retrieve maximum value, you are
prompted to choose whether to display all the records found, or to refine the search so it returns fewer records.
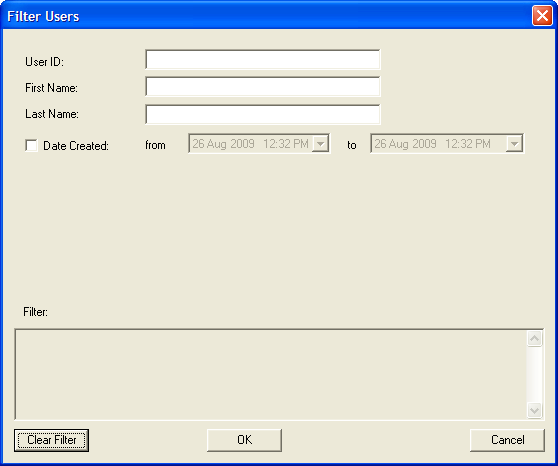
Click OK. The filter takes effect and remains in place until you click the Filter button again (the filter query is displayed in the Filter area of the screen when you re-open it) and click Clear Filter.
Note: The interface shows the message Filter applied when a filter is active.
Using the Context Menu
Right-click on any list (user, package, profile, etc.) and choose Set Filter.
The Filter screen that appears varies depending on the item selected. For example, for users you can filter to show only those with a user ID beginning with specific characters, or an email address containing specific characters, or a last name “bigger than” (in alphabetical order) a specific value.
Once you’ve set a filter, it takes effect immediately, showing only the items that match that filter. To clear a filter, right-click on the list of items and choose Clear Filter.
Creating Encryption Keys
If you need additional keys created for users, you can create them and then distribute them using a remote installation package.
You can either choose to create encryption keys for specific users, or create keys independent of specific users and then assign them to users or computers.
On the Users tab, select those users (or just a single user) for whom you want to create a key, right-click and choose Generate New Keys for the Users from the menu.
or
On the Keys tab, right-click in the information pane and choose Add New Key from the menu.
The New Key screen appears.
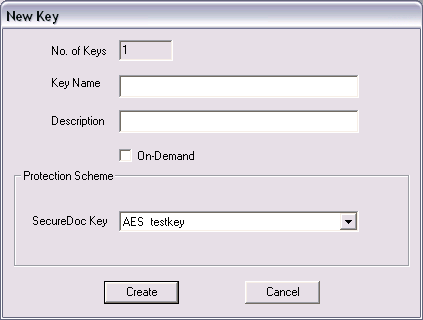
If you selected more than one user, the total number of users (and therefore, keys to be created) appears in the No of Keys field.
If you are creating this key for an individual user, the default key name (the user’s name plus the word “key”) appears in the Key Name field. Modify if necessary.
If you are creating keys for multiple users, the Key Name field is grayed out. Each key is given a unique name based on the user’s name plus the word “key”.
If you are creating keys independent of users, the Key Name field is blank. Add a new as necessary.
Optionally, enter a description of the key.
From the SecureDoc Key list, choose the key to be assigned to this key.
Click OK. The new keys appear in the Keys tab.
Note: You can also import keys from an existing key file to which you have admin account access, by right-clicking in the Keys tab and choosing Import Keys from the menu.
If you created keys independently of users, assign the key to users by right-clicking on them and choosing Assign keys to users or Add keys to computers.
Acquiring SecureDoc Licenses
As customers grow and device counts expand, these additional devices need to be SecureDoc pro- tected, requiring the purchase of additional licenses. When customers purchase additional licenses, upon being provided with the customer's License key (see top of image below), WinMagic will provide them with a new License File that contains their new total licensed device counts.
The current number of licenses purchased appears in the the Devices area (for device-type licensing) and in the Features area for application features that are licensed separately. As you deploy SecureDoc to client devices, the "Used" column will show the current number of licenses of that type that are currently active. As you deploy SecureDoc to client devices, the Available area shows current numbers.
Note: Upon initial installation of SecureDoc Enterprise Server it will default to be in what we refer to as "Evaluation" mode. This provides you with the ability to deploy to 10 of each of the license types, plus 3 Server-grade licenses during your Evaluation or Proof of Concept phase.
Note: Purged devices and devices that have been deleted (any devices in the Recycle Bin) are not included in the "Used" count for that device type, or where a feature had been deployed to a purged or deleted device: see “Purging and Restoring Devices” on page 452.
Choose Tools >> Options and click License.
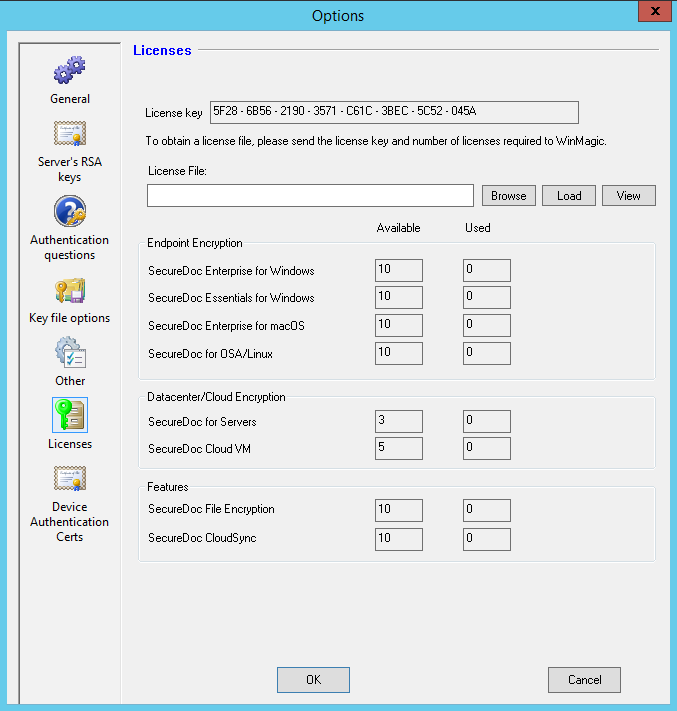
When you receive the license file with new licenses, Browse to its location and select it. The number of licenses within the file will be displayed below the license file name you chose.
Take this opportunity before proceeding to ensure that the license file contains the correct number of licenses you purchased. If the license file does not contain the expected license count(s), please forward the file to your WinMagic account representative and explain the issue.
Click Load to apply the contents of the new license file to your SES implementation.
Once the license count has been accepted, your Available count(s) will be altered to reflect the new license count totals.
Note: It is recommended that you move or rename the license file to something distinctive, to reduce the risk of re-importing an older license file (which could have the result of reducing your license count to a point prior to your current license count).
Note: OSA Clients will consume a Windows Server license count when one or more TCG Enterprise-class SEDs are detected on the client device.
Purging and Restoring Devices
Overview
This function allows you to identify potentially lost, stolen, or reformatted devices. It moves such devices, which are flagged if they have not communicated with SES for a configurable period of time, to the Purged Devices folder in the management console. Devices in that folder are assumed to no longer be using a SecureDoc license, freeing up those licenses for other devices.
This works first by defining how frequently this is to run (e.g. every 90 days) and how far back in time the last communication from a given device has to have been for that device to be considered for pur- ging (e.g. 365 days). With the above example, every 90 days, upon exiting the SES console, the purge will be able to run. In this example, it will automatically move any devices that have not com- municated to the server in the past 365 days to the Purged folder, freeing up their license counts.
Note: Users/keys for the purged device will not be purged. All existing links between purged devices and users/keys will be retained.
Setting up Purged Device Function
Choose Tools >> Purge Devices. The Purge Devices screen appears.
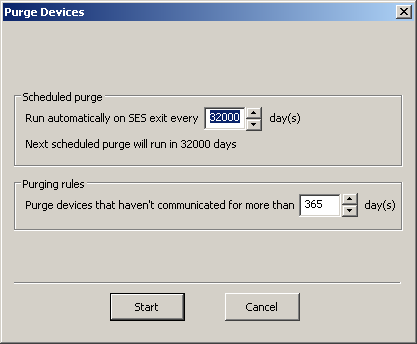
Specify the number of days to wait between checks for potential purged devices.
Specify how a device qualifies as potentially purged: enter the number of consecutive days that a device must not have communicated with SES.
Click Start.
Exit SES. You will be prompted to continue or cancel the purge process.
Note: This prompt will re-appear any time a check needs to be performed again.
Restoring Purged Devices
If a device was identified as a purged device but is not in fact to be purged, you can restore it.
Open the Purged Devices folder.
Right-click on the device(s) and choose Restore selected device(s).
Restored devices begin using a license again.
Permanently Purging Devices
Use caution when removing a device from the Purged Devices folder. The device is permanently removed from the SES database: it does not move to the Recycle Bin.
Working with Folders
Adding a Default Key to All Folders and Groups
This function is useful to establish a baseline for additional keys (beyond the personal ones created through the deployment process) for each folder and group and for each user within those folders and groups. Users inherit the default key from the hierarchical levels above them, so some users may be assigned multiple default keys.
To add default keys to all folders and groups:
Click Folders (the top of the hierarchy) in the navigation pane.
Choose Folders >> Assign default keys to Folders and Groups.
An indication of the number of keys created appears.
Note: If you are doing this for the first time, the number of keys will equal the number of folders and groups in your system that do not already have keys. If you repeat this after adding more folders and groups, only the new ones will be assigned a default key.
A system-named key is added to each folder and group in the SES database. This key is not an on-demand key, that is, it must be in a user’s key file to be used. As user key files are updated
or replaced, the folder-level keys will be added to the users' replacement key files. If the Global option Automatically update key file on device when user/device/group keys are modified is enabled (see “General Options” on page 56), adding a key within the folder structure will generate and deploy new key files for all affected users.
Use of that feature should be planned with care in large organizations as it can trigger a lot of network traffic, and the ideal is to define folder level keys early in the deployment cycle if possible, so there is little to no additional traffic during implementation.
Manually Creating Folders
Although typically folders are created through importing from Active Directory, they can be created manually. For more on folders, see “Using Folders to Organize User Information and Share Keys” on page 44.
To add a folder:
Right-click on the folder (root or other) under which you want the folder created and choose
Add Folder.
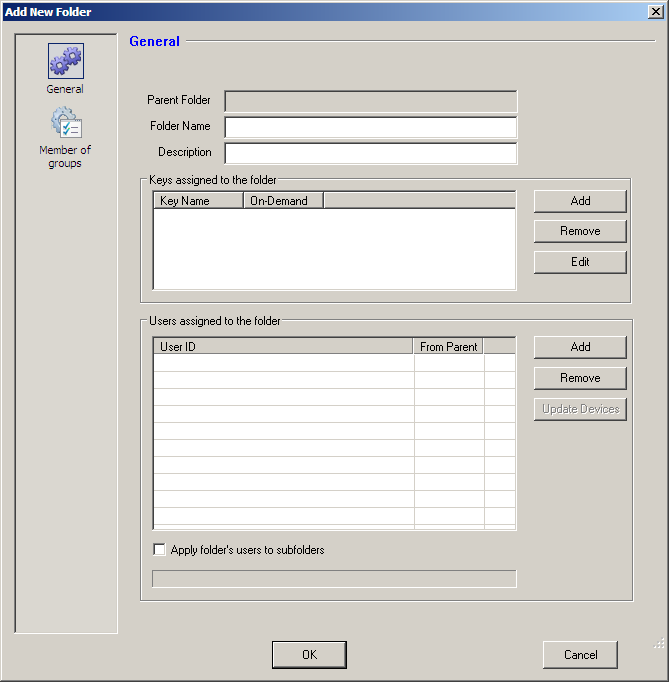
Enter a name and description for the folder.
To add keys to the folder (automatically assigning them to the users/devices in the folder and its sub-folders), beside the Keys assigned to the folder panel, click Add and select the
desired key. You can also remove keys and edit some of their properties. To have the created keys cascade down to subordinate folders, check Apply folder's users to subfolders.
Add users to the folder and, optionally, click Update Devices to add the devices associated with those users to the folder.
Note: Adding users and devices to a folder does not affect PBConnex: “Using Pre-Boot Connex (PBConnex)” on page 119 for more about this feature.
Optionally, add the users (but not devices) in the folder to any sub-folders that are created or already exist.
Optionally, assign the folder (and, therefore, its devices) to a group. This is useful if PBConnex is being used (see “Using Pre-Boot Connex (PBConnex)” on page 119).
Click Save.
To edit a key:
From the group, folder, or user properties screen, double-click a key.
Optionally, edit the description.
Note: Changing a key’s On-Demand status changes all occurrences of this key. For example, if the key was used for 100 users and was not an On-Demand key, then it was included in the 100 key files for those users. If you change this key to be On-Demand, a new key file, without the key whose status was changed, will be sent to each of the100 users. On-Demand keys are not stored within the key files, so changing a key from a key file-based key type to an On-Demand key type will require that it be removed from any key files in which it currently resides.
Moving or Adding Users, Devices, or Keys to Folders
To move a user, device, or key to a specific folder:
Right-click on the item and choose Move to Folder.
A list of the available folders appears.
Choose the appropriate folder and click OK.
Note: When users are moved from one folder to another, any keys in their Key File that are derived from their relationship to the previous folder are removed and replaced with the keys derived from the new folder.
Modifying Folder Properties
To modify a folder’s properties, right-click on it and choose Folder Properties. Follow instructions as for “Manually Creating Folders” on page 454.
Deleting Folders
Deleting a folder will delete the users, device, and groups in the folder and its sub-folders. To delete a folder, right-click on it and choose Delete Folder.
Searching the SES Database
You can search the SES database for user, device, or key information. This search looks in all folders in the database.
Choose Tools >> Search. The Search screen appears.
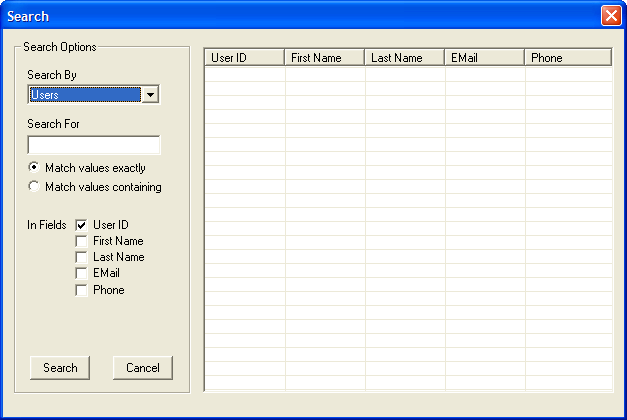
Choose the type of information to search for from the Search By list.
Specify the search criteria.
Click Search. The results appear in the right side of the screen.
Using the Audit Log
About the Audit Log
The audit log records all actions done in SES, including creating users, deleting folders, assigning keys to users, and so on. It also records important events performed on the client device, including when a user logs into Boot Logon and/or the SecureDoc GUI, when password recovery was used, when key files are added or removed from the Boot Control table, when a MachineInfo file was imported or deleted, and the date and time disk encryption/decryption ended. All communication actions related to database access, key or user creation, and so on are logged by SDConnex. Actions already logged through the event viewer aren’t added to the audit log.
Note: All contents of the audit log are also saved in the Windows Event Log.
The audit log has two components: the active log and the history log. Each audit log event has an expiry date/time assigned to it, based on its importance. Once that expiry date/time is reached, the event moves to the history log but is still available for viewing. You toggle between the two views by right-clicking on the Audit Log item in the navigation pane of the console.
Viewing the Audit Log: All Entries
To view the audit transactions of SES, click on Audit Log in the navigation pane.
Note: Audit log transactions can be deleted after a certain number of days using the SES options — see “General Options” on page 56.
The audit log shows the most recent entries at the top of the list.
To view the audit log entries for a particular device / user / key, right-click on the item and choose Audit Log. The screen that appears shows only the relevant log entries, and lets you further filter those entries.
 To see the details for any item in the audit log, double-click on the item. The details appear. To filter the audit log so it shows only specific items (for example, only uses of password recovery):
Click in the toolbar.
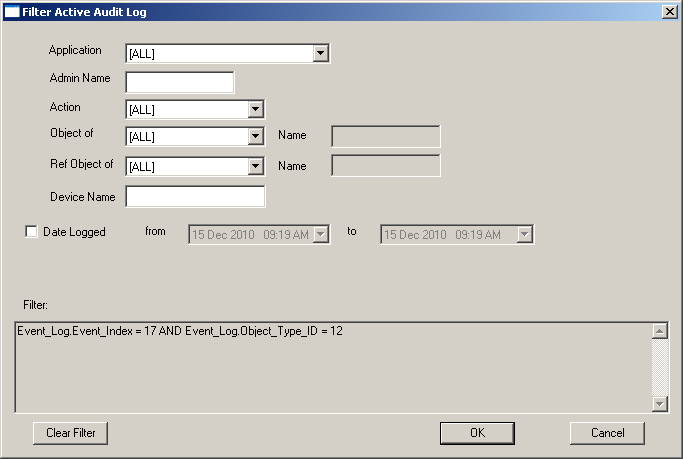
Enter filtering information in the filter screen and click OK.
The display changes to show only items that match the filter.
For example, consider the situation where a laptop is stolen and you want to determine when the device was actually encrypted. You would open the Devices tab and click the filter button, enter the name of the device and leave Encryption at its default setting of “All”.
Note: Filters use the standard Windows “%” wildcard.
To save filtered audit log results:
Right-click anywhere on the Audit Log grid and choose Save to file.
When prompted, choose a location and file name. The file is created as an Excel file.
Note: Use a descriptive name that includes the date, for easy recognition.
To clear the filter, re-open this screen and click Clear Filter.
Viewing the Audit Log: Folder-Specific Entries
Right-click on a folder and choose View Audit Log.
You see just those entries related to the selected folder. You can use checkboxes to show or hide:
Importing the Online Password Recovery Log File into the Audit Log
The Online Password Recovery function creates a log file to record every creation of a response password. This log file can be imported into SES for reporting and other purposes. For security reasons, this needs to be a manual process.
Import can happen once the Online Password Recovery log file is moved to the Data subfolder:
C:\Inetpub\wwwroot\SecureDocES\Log\Data
This occurs when the EventLog.log file reaches a configured size. The log file that appears in the Data subfolder has a name based on the date and time the file was created.
Open the audit log and choose Tools >> Import From >> Import from Online Password Recovery log file.
A new screen appears. Click Add and browse to the location of the log files, then open one or more of them.
Note: The default location for these log files is:
Drive:\Inetpub\wwwroot\OnlinePasswordRecoveryWebS
ervice\Log\Data\
although it can be any other shared folder.
The selected files appear in the screen.
You can remove log files (select file and click Remove) or view their contents (select file and click Preview) from this screen.
When the list of log files is complete, click Import. The imported log files are added to the Audit Log display, with the application indicated as “OnlinePasswordRecovery”.
Saving the Audit Log as a File
To save the entire audit log to a file:
Right-click anywhere on the Audit Log grid and choose Create Audit Log File.
When prompted, choose a location and file name. The resulting file can be opened in Notepad or a similar application but is not updated with new transactions.
Note: Use a descriptive name that includes the date, for easy recognition.
Using the SFE Log
This log shows FFE status related to server-side FFE policies assigned to devices. It is viewable from the navigation pane or by right-clicking on a user or device record and choosing View Audit Log. The log can be filtered and/or saved to a file. Log entries related to client-side FFE will appear in the local (cli- ent) log.
Note: All contents of the FFE log are also saved in the Windows Event Log.
Using the Removable Media Log
The log shows operations related to removable media. It shows the user who performed the operation, the operation type (create/delete/write/rename), and other useful information.
Working with Database Files
Moving Database Files
If you move the SES database files to a different database server, you need to follow the same procedures as for original installation (see “Installing SES” on page 47). After moving the database files, make sure to update the connections from the SES software. Failure to do so may lead to inconsistent data, as some administrators may still be making changes to the old database location.
Note: The database server must be located on the same network as the device the SES software resides on. Multiple database files should not be in use at the same time.
Backing up Database Files
In case anything happens to the hard disk where the SES files are located, it is important to back them up elsewhere. Use your regular data backup measures.
Moving or Updating Software
Moving the SES Software
Since the SES database files can be accessed by more than one user at the same time, the SES software can be installed on more than one computer. To do so, install the SES software on the additional computer, and make the appropriate connection to the database files (see “Installing SES” on page 47). You need to have a key file containing the encryption key used to protect the database files to make a connection.
Note: The database server must be located on the same network as the computer where the SES software resides. It is not recommended to have multiple database files in use at the same time.
Updating the SES Software
When a new version of SES becomes available, updating existing versions is as simple as installing the new software directly over the existing version (see “Installing SES” on page
47). No uninstalling is required.
Note: If you have more than one SES installation, make sure to update each version to keep your environment consistent.
The SES database is automatically migrated. The tool used to do this is also accessible directly in SES, by choosing Tools >> Import data from MS-Access database or Import data from MS-SQL Server database. It can also be used to merge multiple databases into a single database.
When you log on to SES you are prompted to choose whether or not to back up your database files before they are converted to the newer version. If you choose to back them up, the login process ends. Copy the .MDB, .DAT and .DBK files to a backup location and login again, choosing to convert your database files.
Note: SecureDoc client software on client devices will also need to be updated.
Working with the SES Key File
To change the password for the SES key file (containing the key used to encrypt the SES database), choose Database >> Change key file password. In the Change Password screen, enter the old password, the new one, and confirm the new one. To see the password rules stored in the SES key file, click Password Rules. For help, see “Appendix A: Password Rules” on page 474.
To see the privileges stored in the SES key file, choose Database >> Key file info. For information on privileges, see “Appendix E: Privileges” on page 491.
Adding Administrative Users
You must have one administrator user for each SES database, but can also establish other administrator users who can have all or just some capabilities. For example, you can set up an administrator who can simply perform password recovery but not any other functions on the database.
To give users administrative rights to the database:
Open the SES Management Console.
Create the user as an administrator, and assign the user the key for the database created during installation.
Create a key file for that user (see “Creating Encryption Keys” on page 449, for instructions).
Choose Database >> Access Rights. The access rights screen appears.
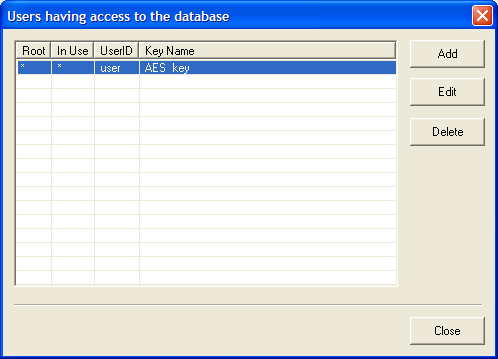
Click Add, browse to the key file of the administrative user you want to have access to the database, select it and click Open. The access rights screen appears.
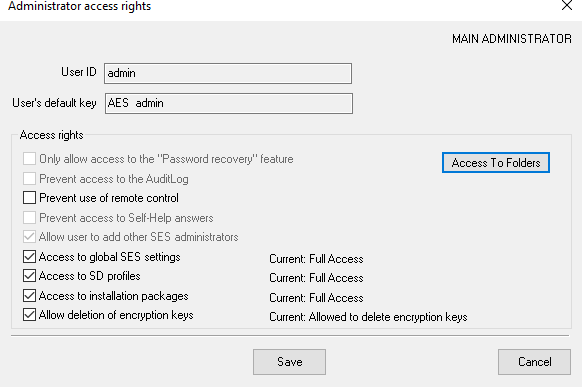
Enter the key file’s password in the Key file password field, and click Login.
Choose from the User’s default key list. The key selected must be contained in the key file used to create the database.
If this administrative user should only be able to do password recovery, check the Only have access to the “Password Recovery” feature option. Users with access to just Password Recovery see an interface where they choose a user and view challenge questions and answers only.
To prevent this user from seeing the audit log, check the Cannot see the Audit log option.
To prevent this user from being able to use remote control, check the Cannot use remote control option.
To allow this user to add other SES Administrators, check the Can add another SES administrator option.
To restrict this user’s access to global SES settings, profiles, or installation packages, click the appropriate checkboxes to toggle through three possible access rights: full, read only, or no access.
Note: You cannot assign access permissions yourself that your own account does not allow. That is, you cannot give other users access to functions you cannot perform.
Optionally, choose which folders this administrator user has access to by clicking Access To Folders. The Access to Folders screen appears, showing all available folders.
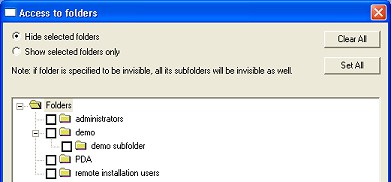
You can choose to either select the folders to be hidden (not available to this user) or those to be shown (available to this user). Select the appropriate option, then select the folders. Select All selects all folders, Clear All clears all selected folders.
Note: You cannot grant access to folders that your own account does not have access to.
Select Allow deletion of encryption keys checkbox to allow only specific SES Administrators to have the capability to delete Encryption Keys from the SES Database.
Note: The rules implicit in this functionality apply both to the SES client-server console, as well as to the SESWeb web-based console. For all administrators that lack the Delete Encryption Key right, the Delete menu option will be disabled in all Key-related context menus, and use of the Del (Delete) keyboard key will not result in the deletion of an Encryption Key if selected and the Del key is pressed
Uninstalling SES
To uninstall SES, use the Windows Control Panel’s add/remove programs feature as normal. Next, delete the databases from within SQL Server. Doing so also deletes the physical database files.
Note: If new files were added to the directory where SES is installed, the folders are not required. You may need to delete these folders manually.
Dealing with User Issues
This chapter explains how to deal with these common issues, once SecureDoc has bee installed on client devices.
n
Creating Recovery Media for a User
20
The SES database contains all the information necessary to create recovery media that users can use if, for some reason, Boot Logon is missing, keys are lost, or other issues are encountered with their encrypted boot disk or any internal or external drives associated with the device
Note: These instructions apply to Windows and Mac FV2 devices only. For Mac (non- FV) instructions, see “Creating Recovery Media” on page 1. For previous uses of SES, to use this feature you need to remove SEDs from SES control, then add them again.
To create recovery media (emergency disk) for a non-SED Windows device:
Create a DOS-bootable USB.
Right-click on the device’s record in the Devices tab, and choose Create Emergency Disk.
When prompted, insert the DOS-bootable media. Recovery files are copied to the media.
When the copy is complete, give the removable media to the user to boot from. Instructions on using recovery media are in the SecureDoc Enterprise Client documentation.
To create recovery media (emergency disk) for a Mac FV2 device running a version of macOS prior to High Sierra 10.13.x device:
Right-click on the device’s record in the Devices tab, and choose Create Emergency Disk.
Choose a folder in which to store the recovery data.
A prompt appears, giving you the master password that will be required to use the media. Take note of this password.
Copy the folder to removable media and give it to the user. Instructions on using recovery media are in the SecureDoc FV2 Client documentation.
To create recovery media (emergency disk) for a Mac FV2 client running macOS High Sierra (10.13.x) or later.
Save the keychain file in a USB stick, and then boot the device from its Recovery Par- tition
Open a Terminal and type in the following commands:
Security unlock-keychain /Volumes/USBkeyname/Keychainname.keychain
Note: you will need to enter the password it provided when creating emergency disk
diskutil ap list
Note: This will list all disks. Find the Volume number/UUID where Encrypted status is "Yes"
diskutil ap unlockVolume Volume number/UUID -recoveryKeychain /Volumes/USBkey- name/Keychainname.keychain
Note: This step will unlock Volume
diskutil ap decryptVolume Volume number/UUID
Note: Background decryption is ongoing; You can use the "diskutil ap list" command to view the pro- gress of the decryption process
WARNING: DO NOT REBOOT THE MACHINE at this moment; you need to wait until decryption com- pletes 100%, after which the device can be rebooted. This requirement applies because during decryp- tion, FileVault is considered to be still active and would require the user to enter a password in order to regain access to the device (unlock FV2 pre-boot).
To create recovery media for SEDs:
Double-click to open the Device record of the device containing the SED (in the Devices tab).
In the Associated Disks table within the device record, click to select the drive for which the recovery media applies, then click the Export HWE Data button to the right of the drives table.
NOTE: Alternatively, if you know exactly the disk for which you wish to export hardware encryption data, using the Drives tab, right-click on the disk to both select the disk and display the context-sens- itive menu, then select Export hardware encryption data from the menu.
You will be prompted for the location in which to save a password protected .dbk. A Hardware Manager executable will be saved in the same location.
Boot the client machine using a DOS-based bootable USB.
Transfer the two files (.dbk and executable) to the client Windows machine (by USB, shared network folder, etc.), and use the Hardware Manager executable to unlock the device.
Note: Due to the nature of this function, the .dbk file that is exported actually contains complete access to the SED, meaning the person who uses the Hardware Manager with the correct .dbk file and password can lock, unlock, encrypt, decrypt and cryptoerase the drive. For this reason, you may want to restrict use of this function.
Dealing with a Lost or Damaged Token
Dealing with a Lost or Damaged Token
There are several ways to help a user recover from a lost or damaged token:
issue a new token (see "Issuing a New Smart Token" on page 465)
provide the user with a one-time password-protected key file to use until a new smart card can be issued
provide the user with a one-time login using password recovery
Issuing a New Smart Token
If a user loses or damages their token, you can issue a new one.
Initialize the new token, following the instructions from the token manufacturer.
Add the appropriate user’s certificate to the token from the CA.
Note: For a user to successfully log in to their computer at pre- boot, they must log into their token. The token must contain the same certificate that was originally used to protect the key file.
Send the token to the user, along with the token password.
Dealing with Operating System Crashes
Introduction
Recovering from an operating system crash requires two computers — the one that crashes, and another, decrypted one. For the purposes of this procedure, we call the crashed computer “C” and the decrypted one computer “D”.
Recovery involves the following steps:
decrypting the crashed computer (see "Decrypting the Crashed Computer" on page 465)
uninstalling Boot Logon (see "Uninstalling Boot Logon" on page 466)
Decrypting the Crashed Computer
Before running any diagnostic tools, you probably have to decrypt Computer C, since Windows utilities cannot recognize the encrypted hard disk. In addition, Windows is likely to replace the MBR first, meaning that the computer will not run the SecureDoc boot loader, so will not be able to be decrypted.
To decrypt computer C, do the following:
Using SES, add the encryption key that is encrypting the (crashed) hard disk to your administration account. Create a key file containing this key, and save the key file to a USB drive.
Locate a bootable, decrypted computer (computer “D”). This can be any computer available to you: you are not going to encrypt this computer. Install SecureDoc and then, after the installation is complete, turn off the computer.
With computer D turned off, attach the encrypted (crashed) hard disk of computer C as a slave to the bootable computer. For laptops, you may require a specific adapter to attach the hard disk. Once the hard disk has been attached, power on computer D.
On computer D, log into the SecureDoc Control Center.
Insert the USB drive the key file was saved to in step 1, and logon to the key file using the appropriate password.
Using the Control Center, install Boot Logon on the bootable hard disk (hard disk 1) on computer
D. A series of prompt messages appears: when prompted to create recovery media, click No, since you will not encrypt the first hard disk.
Upon restarting, the computer remains at the Boot Logon prompt. Beside the Default Key File, press the <Enter> key. Enter the password you assigned in Step 1, and press the <Enter> key.
Upon successfully authenticating to Boot Logon, the computer begins booting into Windows.
Log back into the SecureDoc Control Center, and decrypt hard disk 2 (HD2).
Uninstalling Boot Logon
Using the SecureDoc Control Center, uninstall Boot Logon from all hard drives. Once Boot Logon has been uninstalled, Windows diagnostic programs can be used to troubleshoot the (crashed) OS.
Once the hard disk is corrected, you need to re-encrypt with the users’ encryption key, before sending the computer back to the end-user.
Accessing a User’s Encrypted Device
Should a user leave the company with their smart card, you can gain access to the user’s encrypted device. To access the encrypted device:
Log into SES, and open your (administrator) user account.
Add the encryption key that is protecting the user's device to your own account.
Create a key file to use when logging into Boot Logon on the user's encrypted device.
Turn on the user's encrypted device, and follow one of the following paths, depending on where the key file is stored.
If the key file is on a floppy disk:
At the Boot Logon prompt, beside the Key File prompt, enter the full path to the key file on the floppy disk, e.g. A:\Demo.dbk, and press the <Enter> key.
Note: The DOS naming convention is used. If the key file name is longer than 8 characters, you need to take that into account (A:\longfi~1.dbk).
Enter the password to the key file at the Password prompt. If the key file contains the correct encryption key, and the password was entered successfully, the computer starts up Windows.
If the key file is on a token:
Insert the token/smart card. At the Key File prompt, enter the number 0, and press the
<Enter> key.
SecureDoc searches for the token and prompts for the password. At the Password prompt, enter the token password, and press the <Enter> key. If the key file contains the correct encryption key, and the password was entered successfully, the computer starts up Windows.
Removing SecureDoc Disk Encryption
Removing SecureDoc Disk Encryption
To remove SecureDoc Disk Encryption from a computer:
Decrypt the computer (see page 412).
Uninstall Boot Logon (see "Uninstalling Boot Logon" on page 413). Note that once Boot Logon has been uninstalled, the device must be rebooted so that it can boot up without the Boot Logon element in the boot order.
Remove SecureDoc software files using the Control Panel.
Note: IMPORTANT: All steps above must be completed. If the device is rebooted before Boot Logon has been uninstalled, the device will automatically re-encrypt the drive(s) as soon as the user has logged into Windows.
Adding a Key File to an Encrypted Client Device
To add a key file to an encrypted computer:
Create a user by right-clicking on the User folder.
Ensure that the When key file is created for the computer, automatically send it to the machine option is set in the main SES options.
If you used an installation package to install SecureDoc on the client device, follow these steps:
Highlight, on the Devices folder, the computers that are to get the new key file.
Right click and add users to computers, selecting the new user you created earlier.
Select a computer.
Right click the new user and choose Access Rights. Set the Boot number to indicate the number in the boot order this user gets. If this number is left at 0, the next available slot will be used. For example, if you have only one user per computer, this account will be in slot 2. Click OK.
Right click the new user and choose Create Key File. If you want a copy of the key file saved on the SES machine, enter a file name. Otherwise, leave it blank and the key file will be created in a temporary location until it is sent to the client device.
Select the other options you want.
Set and confirm the password for the new user, and click OK. The key file is automatically enabled for sending to the client’s computer.
Note: The key file will not be sent if the SES option When key file is created for the computer, automatically send it to the machine is not set.
If you didn’t use an installation package to install SecureDoc to the client, then you have to install SecureDoc manually as follows:
Create a new account for each computer that has its own encryption key. These key files can be saved on a network share or USB drive or floppy etc.
Log in to the client devices using the admin account for the computer (a:\admin.dbk).
Log in to the SecureDoc Control Center.
From the Boot Control tab, select a Boot number to add the admin key file.
Click Add/Update key file.
Select the key file from the location to which it was saved. The key file is added to the boot order and this number can be used at the next logon.
Deleting Users from an Encrypted Device
To delete users from an encrypted device:
Create an admin key file containing the key used to encrypt the device.
Log in to the SecureDoc Control Center.
On the Boot Control tab, highlight the userid, and click Delete.
Updating a User’s Key File
If you update user information in the SES database, you may need to update the user’s key file on their computer. This is necessary if:
password rules have changed
key file expiry dates have been added
new encryption keys have been assigned to the user
the user’s token has been lost so a new key file must be created To update a user’s key file:
Using bkimport.exe to alter the Pre-Boot Background image
A tool has been created that permits scripted or direct update of the image used as the background image within SecureDoc Pre-Boot. This tool applies to devices running the Windows operating system only, at present.
The tool is called Bkimport.exe and is installed as a standard element in all SecureDoc client install- ations starting with SES V8.2, onward.
To use this, either perform the following steps or create a script that will accomplish the following so that the changes could be applied to any number of endpoint devices.
Copy the 32 or 64 bit version of Bkimport.exe from the client’s SecureDoc program folder structure to a working folder (e.g. C:\Background)
Copy the desired new image (e.g. Image.BMP) to the same folder (C:\Background)
NOTE: The .BMP file must meet SecureDoc’s requirements for a pre-boot background image, namely:
24 BMP format
1024 x 768 pixels
It must be less than .5 mb in size, when zipped
Open a CMD line as an administrator and navigate to the working folder (e.g. C:\Background)
Recovering from MBR Overwrite
Recovering from MBR Overwrite
If something happens to the MBR on the user’s computer, you need to restore it using recovery media before the user can gain access to the computer. See "Creating Recovery Media for a User" on page 463 for instructions on creating recovery media.
Handling Backups
Client devices encrypted by SecureDoc can be backed up as normal. However, the user needs to authenticate through Boot Logon before the backup can be run. If backup utilities are run in MS-DOS, you are required to authenticate at Boot Logon prior to starting the bootable disk.
Note: Information being backed up remains in plain text on the storage media. For this reason, it is advisable that you encrypt the target media or protect it in some way.
Handling Disk Imaging
Imaging a disk requires the user to authenticate to Boot Logon first. Upon authenticating, the user changes the Boot Logon Configuration Menu to start the computer with a floppy disk. The imaging software can then be run in MS-DOS. For more information on the Boot Logon Configuration Menu, see the SecureDoc Enterprise Client documentation.
Supported imaging software consists of: PowerQuest's Drive Image and Symmantec's Ghost.
Note: Important: The information being written to the image remains in plain text. The image must be protected accordingly.
Modifying the Hardware Settings in the Boot Logon Configuration Menu
For troubleshooting purposes, you may be required to modify hardware settings at the Boot Logon Configuration Menu. Such occasions may be:
tokens not being recognized at Boot Logon
smartcard readers not being detected at Boot Logon
problems installing Boot Logon; error with BIOS
error using SCSI or IDE Controllers
For information on using Boot Logon Configuration, see the SecureDoc Enterprise Client documentation.
Viewing Users’ KeyFile Protection Method
In the SES console, under the Devices / Users tab a new column has been added, entitled “KeyFile Pro- tection Type. This column displays the specific protection method (Password, Password + TPM, Token, Token + TPM, Finger Print Reader, Finger Print Reader + Password, Finger Print Reader or Password.) that has been used to protect each users’ keyfiles on the indicated device(s).
Whenever a keyfile protection type is changed, the SecureDoc client device will update SES and an entry will be logged in Audit Log as soon as the client establishes communication with SES. The SES Administrators can also track the protection type change events in the Audit Log.
To view KeyFile Protection Type:
Log into SES Console.
Click the Devices tab.
Select the device for which you want to view the password protection type. In the KeyFile Protection Type column, you can view what protection method has been used, as highlighted in the bottom right of the image below.
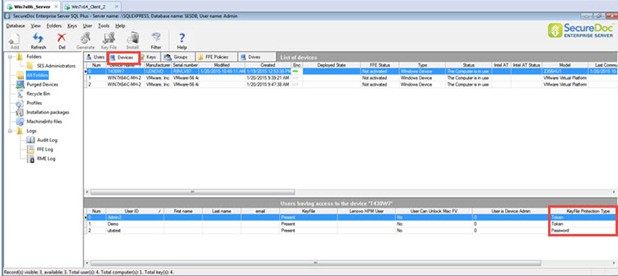
Using Password Recovery
About Password Recovery
Overview of Password Recovery Options
Password recovery enables you to maintain security in the common situation of a user
21
forgetting a password. Password recovery can be performed in any of the following ways:
users can perform their own self-help password recovery (see the SecureDoc Enterprise Client documentation for instructions)
users can contact an administrator who uses SES to perform challenge response password recovery (see "Using SES-Based (Challenge Response) Password Recovery" on page 472)
Note: Challenge/response password recovery requires that authentication questions and answers for individual users be recorded in SES, so applies only to client devices encrypted using an installation package.
Challenge Questions and Answers
At SecureDoc installation time, users are asked certain questions (for example, “Who was your first grade teacher?”) and the answers are recorded. When users need to recover a password, they are asked the questions again and their responses are compared to what was originally recorded. A match between question and answer means the user is valid and can be issued a new (temporary) password.
Special Considerations for Key Files Stored on Tokens
For key files stored on tokens, the password cannot be recovered through password recovery processes, since you need to authenticate to the token first. Instead, password recovery creates a new password-protected key file that can be used to log into the computer until a new token can be issued or a new password be created for the token-based key file. The user needs to add this new key file to Boot Control using the SecureDoc GUI.
For token users, this feature only works if, in the SES password rules (see “Appendix A: Password Rules” on page 474), the option After a token-based key file’s password has been recovered... was set when the installation package for this user’s computer was created and distributed. This option determines how many days the password-based key file created through password recovery can be used to log into the computer and locks the key file after that number of days has been passed.
The process for restoring the key file stored on a token varies depending on what method was used to create the initial key file.
Method | Impact on |
Method 1: Use Token RSA | You can change the token’s password using third-party card management or PKI software; SecureDoc does not have to |
Method | Impact on |
Keys | know that the password has been changed. As long as the entered password can login to the correct token with the cor- rect RSA private key, you can log in to SecureDoc. If the card has been lost, and the card management software can create another card and place the same encryption RSA keys on it, you can use the new token to login to the SecureDoc key file. |
Method 2: Token contains PIN | The key file cannot be recreated. You need to initialize a new token and create a new key file including the encryp- tion key used to encrypt the user’s computer. |
Method 3: Use Certificate on token | You only need to initialize a new token, make sure the private key from the MS CA is created on the card, and give the user the new card. The user can then restore their old token-based key file because the token you gave them con- tains the private key that can decrypt their original key file. |
Method 4: Use Certificate on file | You only need to initialize a new token, make sure the private key from the MS CA is created on the card, and give the user the new card. The user can then restore their old token-based key file because the token you gave them con- tains the private key that can decrypt their original key file. |
Method 5: Use Symmetric Keys | You only need to initialize a new token, make sure the private key from the MS CA is created on the card, and give the user the new card. The user can then restore their old token-based key file because the token you gave them con- tains the private key that can decrypt their original key file. |
Using SES-Based (Challenge Response) Password Recovery
When a user calls to report a lost password, run SES, right-click on their user record (in any tab), and choose Challenge Response. The Challenge and Response screen appears, showing the user’s recorded answers to the self-help password recovery questions.
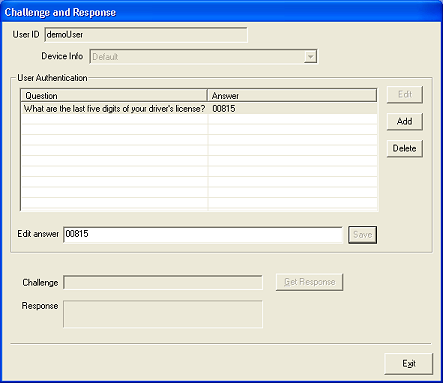
Using Password Recovery Using SES-Based (Challenge Response) Password Recovery
Note: If the user has already recovered their password on another computer, you will be presented with two computer IDs to choose from. Ask the user to identify which computer (shown when they press <F8> from the Boot Logon screen) they are trying to gain access to.
Read the user the questions from the screen, and check the answers they give you verbally against the ones entered here.
Note: If the “show answers” options was not checked (see “Profile Advanced Options” on page 188) for the profile associated with the user’s device, the answers appear as asterisks, for security purposes.
Once you have received enough correct answers to satisfy you of the user’s identity, ask the user to reboot their computer and remain at their Boot Logon screen. Have them press the
<Enter> key beside the Key File prompt, then click Forgot Password? The user should see a new screen.
Ask the user to read you the Challenge Text they see. Type this number in the Challenge textbox in SES, and click Get Response. If the challenge number is incorrect, an error appears. If it is correct, a response number appears.
Read this response number to the user.
Ask the user to enter the response number in the Response field on the screen they see. If the response number is entered correctly, their computer begins to boot.
Once the operating system loads, the user is prompted to change the password as usually done and uses that password from then on.
Viewing Event Log
Each time click a password is recovered, the event log information is appended to the end of event log XML fragment file EventLog.log located under the folder C:\Inetpub\wwwroot\SecureDocES\Log\. To view this log, click the View Log tab. To view this information in the SES Management Console, run SES and select event log files
(*.log under the Data folder) to process.
View Event Log Report (Enhanced)
Click the View Report tab to view the Event Log Report. This report can be printed or exported.
Appendix A: Password Rules
Overview
To ensure that users use strong passwords, you specify the rules they must use when changing their password. (Users change passwords using the Control Center.) These rules are stored in the key file.
To set these rules, run SES from the Start menu and choose Tools >> Options >> General; then click Password Rules from the General options. When you are finished changing password rules, click OK. You are returned to the General options screen.
Password Security Policy
The goal of a policy enforced when passwords are created or changed is to prevent certain types of attack on protected devices. Here are some common attacks:
Guess Attack — may be successful if personal information like phone number, license plate number, pet’s name, etc. is used as a password. Such a password may be easily guessed by anyone who has access to this information.
Brute Force Attack — may be successful if the password is too short, allowing an attacker to try all possible combinations in a feasible time.
Dictionary Attack — may be successful if the password is a word of a real language, geographical name, name of a person, etc. Modern information technologies provide capability to find equivalents of such passwords for known authentication mechanisms.
The following rules allow administrator to prevent attacks described above:
Password must be at least 8 characters long (protects against Brute Force Attack). The maximum password length supported is 64 characters.
Password must contain at least one character that is a lower-case letter, upper-case letter, digit, or special character (protects against Brute Force and Dictionary Attacks).
Password hint feature must be disabled (protects against Guess Attack).
Self-Help Password Recovery feature must be disabled (protects against Guess Attack). Configure your password rules and key file options so they enforce this policy.
Password Rules Screen
Note: When the SES administrators make changes to the global password rules, then the existing package(s) password rules will not change. However, when a key file is created and sent down from SES during online installations, the changed global password rules will be applied, not the old password rules of the existing package(s).In case of offline installations, the old installation package rules will apply.
Appendix A: Password Rules
Password Rules Screen
In a scenario where two different Windows SecureDoc installation packages are created, each one with different password rules, then the latest Password rules, (the rules applied to the second or the later installation package in this example) will overwrite the older password rules (first installation package). The new changed Password rules apply to all the new users as well as the existing users when a new key- file is created and sent down from SES.
Password Composition
In the Contain at least area, specify the minimum number of characters and type of characters to be used in a password. Click the arrows or type the appropriate values. Note that:
numeric characters are the numbers 0 - 9
non-alphanumeric characters are any character except A - Z, a - z, and 0- 9. Non- alphanumeric characters include #, ?, !, @, and so on.
In the Contain at most area:
Specify the maximum number of repeated characters allowed in a password. A value of 0 means any number of consecutive characters is allowed—for example, “passssssword” would be allowed. A value of 1 means no consecutive characters are allowed—for example, “password” would not be allowed. A value of 2 means no more than two consecutive letters are allowed—for example, the password “passsword” would not be allowed. However, “PASSsword” would be allowed, because the third “s” is a different case.
Specify the maximum number of consecutive characters allowed in common between the old password and a new one. For example, if you specify a maximum of 2 consecutive characters, and the old password was “PASSWORD”, a new password of “WORLDMAP” would not be allowed, because there are three consecutive characters (“WOR”) in the old and new password. However, “WoRLDMAP” would be allowed, because the “o” is a different case.
General Options
Use these options to set up password expiry. Causing passwords to expire after a period of time increases security since it requires users to change their passwords at regular intervals (users tend to choose from a limited set of possible passwords that may be easily guessed by someone familiar with that user’s patterns, or may write down or share their password).
Requiring users to change their passwords regularly diminishes these risks.
NOTE: In V9.0, the option that defines the number of days after which the password expires now also applies to the BitLocker PIN/Passphrase. In V9.0 functionality was added to force users to rotate/change their BitLocker PIN/Passphrase on a regular basis (defined here). Note that this ONLY applies if the Device Profile does NOT define PIN/Passphrase synchronization with the user's Windows Password. Where the user's BitLocker PIN/Passphrase is synchronized with his/her Windows credentials, Windows settings will define how long the Password (and therefore the synchronized PIN/Passphrase) will remain in effect.
Note: Password expiry time must be equal to or greater than the amount of time the password must be kept.
Note: You cannot change the password timing after the Key File has been created. If it is necessary to change the password timing, make the change in these global settings, then remove and re-add affected users from devices, to force the creation of new key files for those users. The new key files will be created with the revised timing defined in the global settings.
Appendix A: Password Rules Password Rules Screen
Note: The Change initial password option is not available in the new SES v7.1. When the SES is upgraded from the older version (e.g. version 6.5 or lower), the change initial password option will be ignored.
To set a minimum number of days for which a password must be kept, enter a value in the
Password must be retained for at least field.
Use the Expiry enforcement option to determine what happens when the password expires. Check this option to have key files permanently expire when their password expires. Clear this option to have users, when the password expires, still be able to log on to their devices (they are then prompted to enter a new password).
Password Recovery Options
To prevent users from defining or using password hints, check the Disable Password Hint
option.
Set the minimum total (aggregate) number of characters used in answering the self-help authentication questions in the For self-help password recovery... field. Clarification: The number entered here applies as the combined character count of all the answers provided, so for example a setting of (say) 20 characters means that the user must have entered a minimum of 20 characters (in total) when answering all the questions - not 20 characters per individual answer.
Set the minimum number of questions a user must answer for self-help password recovery in the For self-help password recovery... field. NOTE: Due to space constraints on the Self- Help Recovery screen at Pre-Boot, the maximum number of questions that can be posed or displayed is 7. WinMagic recommends 3-5 questions as offering a good degree of security, while not overly taxing the user to remember a large set of personal answers over a long period of time.
Other Options
Set the maximum number of passwords to be saved in the key file’s password history. New passwords are checked against the key history file to prevent any duplicates from being created. For example, if you set the history to 5, any new password cannot have been used in the past 5 times the password was changed.
If you are using token-based key files, enter a value in the After a token-based key file’s password... field. When doing password recovery on a token-based key file, a password-based key file is created and used in place of the token-based key file. This option determines how long the user can use this password-based key file before having to run password recovery again or switch to using a token.
Note: The password for the actual token can only be changed after the token is authenticated and only if the token vendor supports this functionality. Password rule settings apply to all key files created after the settings have been modified.
Appendix B: Creating Remote Installation Pack- ages
Overview
When to Use Remote Installation Packages
Generally speaking, you will use installation packages (described in “Depending on which Device Category you chose, the available Device Profile Types available will be one Installation Packages for Windows” on page 126) to install SecureDoc on your client devices. You should only consider using remote installation packages to install SecureDoc if:
you want to encrypt only some disks of the client device
you want to encrypt only some partitions of the client device
you want to use standard encryption mode (not recommended)
Computers set up using remote installation packages do not send information back to SES. As a result, they do not support the remote control or password recovery functions. Remote installation packages can be created only for users already in the SES database.
Remote Installation Package Steps
Optionally, create a profile to use as part of the installation package (see “About Device Profiles” on page 128).
If necessary, create encryption keys for specific users and computers (see “Creating Encryption Keys” on page 449).
Set up remote installation packages for specific users, including creating a key file and specifying encryption parameters.
Optionally, create additional key files and include them in the remote installation package.
Copy the resulting files to the local computer—this can be done manually or using your file distribution software. No return communication is expected.
Organizing Records for Easier Access
You create remote installation packages for specific users/computers. SES lets you organize those users/computers into folders and then perform functions on all the items in the folder at once. You can also add keys to a folder, making it easy to assign a group of keys to a user.
Creating Remote Installation Package
Overview
This process creates a set of files, including a key file, for the selected users. Different options are available depending on whether a password or token is used to protect the key file, and whether or not you are including an administrator key file. For more information on the significance of these different choices, see “Deploying SecureDoc ” on page 41 and “Keys and Key Files” on page 33.
SES Administrator Manual
v9.2 SR1
Appendix B: Creating Remote Installation Packages
Creating Remote Installation Package
The key files created have the user privileges set in the record of the user’s record — you can edit the record and change those privileges if you like, by double-clicking on the UserID in the Users tab.
Once a remote installation package has been created, you can add another key file to it before creating the files that make up the package.
Creating Package
Overall Steps
On the Users tab, select the users who you want to make individual remote installation files for, right-click, and choose Remote Installation. The Remote Installation Create Key File screen appears.
To create a subfolder to hold the remote installation files folder and key file under the default folder, enter a name in the File Name and press Enter. The assigned path and name appear in the field, where you can change it if desired.
To create the remote installation files subfolder and key file within a specific folder, click Browse and browse to the location. The specified path and a default key file name (based on the user file’s name) appears in the field. You can change path and name if necessary.
To automatically add all the keys in the folder where this user is located to the key file, check
Add folder’s keys to the key file.
Note: By default, the Create subfolder for this user option is checked when a subfolder is named, so a subfolder with the user’s name is created in the specific location. You can clear this option.
To add an existing administrator account key file to the package, giving the administrator access to the client device, check the Add admin key file to the package option. This administrator account is used in case of emergency, when the user cannot reach an administrator and needs to act with administrative rights to, for example, decrypt the computer.
Click Select Admin and choose the administrator account to be used. The key file associated with that administrator appears in the File Name field.
In the Boot # field, enter the administrator’s key file number in Boot Logon.
Specify how the administrator’s file is to be protected by, in the Protected by area, choosing either Password or Token. If protecting with a password, see “Appendix B: Creating Remote Installation Packages” on page 477. If protecting with a token, see “Appendix B: Creating Remote Installation Packages” on page 477.
Click OK.
To use the password assigned to the user in SES, check Apply user’s password from the database option.
Choose how to proceed:
To protect the key file with a password, in the Protected by area, check Password
and follow the instructions in “Appendix B: Creating Remote Installation Packages” on page 477.
To protect the key file with a token, in the Protected by area, check Token and follow the instructions in “Appendix B: Creating Remote Installation Packages” on page 477.
Click OK. The Remote Installation Options screen appears: see “Setting up Encryption Options for Package” on page 479.
Note: Once the key file has expired, it is unusable.
Appendix B: Creating Remote Installation Packages Creating Remote Installation Package
Note: Depending on the method selected, you may be prompted for a token label.
Setting up Encryption Options for Package
When you save your basic remote installation package settings, the Remote Installation Options screen appears.
From the Drives List, choose whether you want to encrypt all hard disks, or choose the specific hard disk or partition to be encrypted. Choose items you know exist on the client device
(s) to which you are sending this remote installation package.
From the Keys List, choose the key to be used to encrypt the selected drive or partition.
In the Modes List, choose either Standard or Thorough. For details on these modes, see
“Conversion Modes (FDE)” on page 37.
Once you have chosen a drive/partition, a key, and a mode, click Set to have this setup appear in the list. To delete a setup, select it and click Delete. You can add as many setups as you want.
To have the client device reboot once encryption is complete, check the Re-start after finish option.
To associate a profile with this remote installation, click Browse and navigate to the profile you want to use.
Distributing Package Files
The appropriate files are created in the folder (and subfolder, if used) specified during the package creation process. To install SecureDoc:
Copy the SecureDoc_32.exe file from the Remote Package folder located in C:\Program Files\WinMagic\SDDB-NT\RemotePackage to the folder that contains your Remote Installation setup files.
Copy all files in the installation folder to the root of the C: drive of the client device where you are going to install SecureDoc.(files can not be in a folder).
Double click on the SecureDoc_32.exe file to start the SecureDoc installation.
Appendix C: Protection Methods
If an installation package is set to prompt users to switch from password to token protection, you need to choose one of the following protection methods. These are used to determine what certificate to use when encrypting the key file.
Method | Description |
Method 1: Use Token RSA Keys | SecureDoc uses the RSA keys on the token to protect the key files. During login, SecureDoc uses the entered pass- word to log in to the token. SecureDoc uses the on-token RSA private key to decrypt and encrypt data. Note that you can change the token’s password using third- party card management or PKI software; SecureDoc does not have to know that the password has been changed. As long as the entered password can login to the correct token with the correct RSA private key, you can log in to SecureDoc. If the card has been lost and the card man- agement software can create another card and place the same encryption RSA keys on it, you can use the new token to login to the SecureDoc key file. |
Method 2: Token contains PIN | If the token does not have encryption capability, use this method. The token is used to store a “strong” PIN of 256 bits, generated randomly at the time of creation. The PIN is used to access the key file. During login, SecureDoc uses the entered password to log in to the token and obtain the PIN stored in the token to access SecureDoc key files. This method changes the tokens, thus is not recommended if the enterprise relies on other third-party card man- agement or PKI systems to manage tokens. For password recovery, the key file cannot be recreated. You need to initialize a new token and create a new key file including the encryption key used to encrypt the user’s com- puter. |
Method 3: Use Certificate on token | During login, SecureDoc uses the RSA private key on the token as in method 1. Unlike in method 1, SecureDoc uses the certificate stored on the token to perform the RSA public key encryption. The token must contain the certificate but it doesn't have to have the public key. For password recovery, you only need to initialize a new token, make sure the private key from the MS CA is created on the card, and give the user the new card. The user can |
Appendix C: Protection Methods
Method | Description |
then restore their old token-based key file because the token you gave them contains the private key that can decrypt their original key file. | |
Method 4: Use Certificate on file | During login, SecureDoc uses the RSA private key on the token as in method 1. Unlike in method 1 and 3, SecureDoc uses the certificate from a file. This token-based key file does not need the token to be present. This is the preferred method for creating key files for an enterprise with PKI systems. A SecureDoc administrator can create key files for thousands of users without having to have the tokens or the password to the tokens. If you use this method, the interface changes to enable you to browse to the certificate file. |
Method 5: Use Symmetric Keys | Some tokens can use secret keys instead of RSA keys. You can use these secret keys to protect the key file as well. SecureDoc needs the token inserted when creating the key file. During login, SecureDoc uses the entered password to log in to the token and uses the on-token secret key to access the SecureDoc key file. |
Method 6: Use certificate from Window Store | Windows may store certificates in a particular folder. If you use this method, users are prompted to chose from the list of certificates stored on their Windows computer. |
Appendix D: Encryption Details
Introduction
This appendix discusses the issues of data security and encryption in general, and introduces how WinMagic’s SecureDoc disk encryption (for which SES provides centralized control) addresses those issues.
In SecureDoc terms, “data security” means much more than user IDs and passwords. SecureDoc performs full disk encryption of hard drives and removable media and protects data from potentially malicious attacks. It also allows encryption of individual partitions, files or folders.
For an overview of all the available encryption options offered through SecureDoc, see “” on page 28.
Disk Encryption as Your Last Line of Defense
Generally, people think that if they create a document of a sensitive nature, encrypting it provides an acceptable degree of security. In reality, a knowledgeable thief may be able to access the sensitive information on the disk, ignoring the encrypted file altogether.
Information may be stored on disks in several ways, leaving the information vulnerable. Additionally, the operating system often replicates information for its internal use, without your knowledge. All Windows programs use a swap file to emulate additional RAM memory. The swap file contains data from programs that are currently running. This data may include personal files as well as passwords.
Modern devices have to take data security into consideration. The device’s last line of defense is data encryption. Most data encryption products on the market do not thoroughly address security. They usually secure the obvious sources of sensitive information, leaving the less obvious sources open to attack. Hackers strive to stay one step ahead of the state-of-the-art technology in data security. They have always found a way to get at unprotected information. SecureDoc solves this security vulnerability.
Data Locations That Need to be Protected
Introduction
Sensitive data resides in many locations on a device. Some of the main locations that need protection, and that SecureDoc’s full disk encryption fully protects, are described in this section.
Temporary Files
Temporary files are duplicates of your document files. Most commercial software packages create them to track temporary changes you make as you work. While you are editing a document, the file size expands and decreases depending on the application's dynamic storage requirements.
Temporary files are a necessity, helping you work faster and make it possible for you to undo changes and correct errors. Microsoft’s TEMP folder is used universally by all Microsoft
Windows-compliant programs to store temporary files, but some applications store their temporary files elsewhere.
Paging and Swap Files
Paging is a technique operating systems use to expand the amount of available system memory. A portion of the hard disk is used as if it were RAM. Whenever memory resources run low, the operating system writes data to the paging file. In a multitasking operating environment, processes are brought into the foreground as needed. Data belonging to each process is copied from the paging file into system memory. Similarly, the content of system memory is copied to the paging disk whenever a process is moved to the background.
The operating system writes all kinds of information to the paging file, including information you might have assumed was securely protected by encryption. The common belief is that paging files are difficult to interpret and that the chance of extracting useful information from them is small. The truth is that in typical working environments, multiple copies of the same data can be found in paging files quickly and easily.
Note that the most sensitive data of a security system, data such as the private key used for VPN, e-mail, and digital signature, can also be found in the paging file.
File Slack
Created when a file is saved to disk, a file slack is the data storage space from the end of the file to the end of the last cluster assigned to the file. A file’s content determines its length.
Windows file systems store files in fixed length blocks of data called clusters, which are made up of one or more (up to 64) sectors. A file might only be a few bytes long; nevertheless, it could occupy a whole cluster. Alternatively, a file might be long but it could occupy only a few bytes in the last cluster of several thousand bytes. File sizes rarely match the size of one or more clusters exactly.
As a result, the last sector of a file can contain very sensitive data collected from RAM at the time the file is saved, data such as passwords, private keys, and email messages and word processing documents that were previously stored in the remaining sectors left in the cluster.
The Windows Registry
Microsoft Windows and most application software store various data in the Windows registry. A Web browser might save the domain name of the sites you visited in the Windows registry. Even word processing software might save the name of the file you last edited to the registry. Windows itself needs the registry to know the configuration of how to start up, so encryption methods other than SecureDoc’s, which begin after Windows, do not encrypt these files.
File Systems with Access Control
It is often assumed a file system with built-in access control is secure. Since users must enter a password to access their personal files, many people have the mistaken impression that their files and data are protected. However, even a file system with built-in Access Control List (ACL) security provides no protection against an attacker with either physical access to the disk, or administrator privileges on the local machine (a very common configuration). Both of these avenues are available (a thief would have both), and an attacker can simply read the raw data from the disk and then freely use available and inexpensive disk editors to locate and read the plain text of any document.
Hibernation and Sleep Mode
Sleep mode for software FDE should only be used when the PC is in an approved physical security zone, since the disk encryption keys are resident in memory and therefore vulnerable to discovery by attacks that can scan the memory.
Sleep mode for SEDs should be used only when the PC is in an approved physical security zone, since the credentials required to automatically unlock the hard drive when resuming from sleep are cached in memory and vulnerable to discovery by attacks that can scan the memory. Also, operating system controls, such as a screen lock, should not be solely relied on to prevent access to the unlocked drive. Once the SED has been authenticated to, unlike software FDE, these controls may be able to be bypassed by booting to alternate media and accessing the data on the unlocked drive.
Hibernate is a secure alternative for both software and hardware encrypted drives.
Hidden Partitions
A hidden partition is a portion of the hard disk that an operating system, such as Windows, does not recognize or display a file system for. Software applications sometimes use these hidden partitions to save data. For example, some hibernation mode software continually saves data on a hidden partition instead of in a file on a visible partition. This quiet action can create blocks of information in plain text for which there is no security at all.
Free Space and Space Between Partitions
Sectors at the end of the disk that do not belong to any partitions may be displayed as free space. Other unused sectors are found between partitions and extended partition tables. Unfortunately, some applications and virus software use this free space to store programs and data. Even when a disk is formatted, this free space remains unaffected, and the information can be recovered.
About Encryption
When information is encrypted, it is scrambled up in a careful, mathematically precise way. Some ways are more secure than others, depending on the mathematical formula used.
Think of the formula as a mechanism for transforming information from an intelligible form into an unintelligible form. A meat grinder is a good analogy. You stick a steak in the top, turn the crank, and out comes hamburger. Now imagine that you could turn the crank in the opposite direction and turn hamburger back into steak.
To make this transformation of information possible, a mathematical formula is needed. In cryptography, these formulas are quite sophisticated. It is more common to refer to them as algorithms because they are coded as computer software. An algorithm is a procedure for solving a mathematical problem in a finite number of steps that frequently involves repetition of an operation. SecureDoc supports AES, as well as RSA for tokens.
Like a physical lock used to protect the contents of a cabinet, an encryption algorithm requires a combination to lock (encrypt) and unlock (decrypt) information. Although this combination is just a number, it is enormous. Enormous numbers make good combinations because they are difficult to guess. You do not have to enter an enormous number for SecureDoc to use as a combination, however; SecureDoc generates the number automatically. Although you can choose from several different algorithms, you can only use one type for a given computer.
SecureDoc's encryption is based on Public-Key Cryptography Standards (PKCS) #11 standards. These define a technology-independent programming interface, called Cryptoki, for cryptographic devices such as smart cards and PCMCIA cards.
SecureDoc utilizes the Rijndael AES encryption algorithm approved by National Institute of Standards and Technology (NIST). The NIST picked the Rijndael algorithm as an encryption standard to protect sensitive information.
In 1997, NIST initiated an effort to develop the Advanced Encryption Standard (AES) and requested encryption formulas from experts around the world. Researchers from 12 different
countries submitted encryption algorithms. Fifteen candidate formulas chosen by NIST were “attacked” for vulnerabilities and intensely evaluated by the worldwide cryptographic community to ensure that they met the AES criteria. Five finalists were selected in 1999 for more intensified attacks and were evaluated for factors, such as security, speed, and versatility. The winning algorithm for the AES was selected in October 2000 and incorporates the Rijndael encryption formula that was developed by two Belgian cryptographers who have agreed that it may be used without royalty fees. The final standard was published in December 2001.
The AES algorithm has been designed to protect sensitive government information well into the 21st century and will replace the aging DES. It is used widely in the private sector to protect sensitive computerized information and transactions, benefiting millions of consumers and businesses that rely on cryptography for financial services, e-commerce, and e- government transactions.
Note: Although hardware tokens offer the higher level of security and integration with Public Key Infrastructure (PKI) that is an essential feature of state-of-the-art encryption products, most products today do not perform authentication to tokens or PKI at pre-boot. Without this pre-boot authentication (which SecureDoc offers) the token may be interacted with only after Windows starts, thereby still carrying the weakness of protecting disks by password only. For higher security, users should make sure that token authentication is done, as with SecureDoc, pre-boot and no later.
SecureDoc disk encryption provides the flexibility of choosing password only, or a combination of password, hardware tokens, and biometrics.
The SecureDoc Cryptographic Engine implements the following cryptographic algorithms certified under the NIST Cryptographic Module Validation Program (CMVP):
Algorithm | Cryptographic Function | Modes/Mechanism | Certificate # |
AES | Encipherment | ECB, CBC | 359 |
SHA | Hashing | SHA-2, 256, 384, 512 | 434 |
HMAC | message authentication | SHA-2, 256, 384, 512 | 158 |
PRNG | Random number gen- eration | ANSI X9.31 AES | 172 |
To encrypt the entire hard disk, including Windows boot and system files, SecureDoc has to run before Windows and has to work directly with the BIOS.
To make sure that SecureDoc can work with your PC’s BIOS:
SecureDoc is installed and the computer reboots.
SecureDoc installs Boot Logon on all hard drives.
SecureDoc reboots without encrypting any portion of the disk. At this time no data has been encrypted; Boot Logon only prevents access to the hard disk. If the SecureDoc Boot Logon is not successful, the first time you attempt to log on, you are prompted to uninstall it.
If Boot Logon was successful, SecureDoc begins encryption.
Note: SecureDoc errors can be viewed in the Windows Event Viewer.
Disk Encryption as Your Last Line of Defense
Overview
Although modern cryptographic techniques make recovering information from an encrypted disk extremely difficult, even for highly qualified scientists, a number of different ways to handle disk encryption exist. Each solution has a different set of weaknesses that can be exploited by someone trying to recover protected information.
Though it is impossible to make the claim that any product can secure your information absolutely, some products are certainly capable of providing a higher degree of protection than others. The differences lie mostly in the thoroughness with which they cover all the access points to the information contained on your hard disk. This requires extensive consideration of the inner workings of the operating system. Fortunately, SecureDoc disk encryption covers all access points.
Plugging Security Leaks
WinMagic’s SecureDoc disk encryption plugs every security leak that could render disk information vulnerable to attack while the device is off. Whereas mainstream data encryption solutions only encrypt source files, SecureDoc goes the extra mile and secures data found in backup files, temporary files, paging files, and even the Recycle Bin.
Enabling Access without Master Password
You may have heard of a “master password” that enables the master administrator to access all devices of the enterprise. Some products offer “master” passwords that enables the master administrator to access all devices in the enterprise. The convenience this provides brings a high risk: if the master password is compromised, all devices in the enterprise are compromised. Some products even provide a maximum limit of just 6 characters for the master password.
SecureDoc users can create individualized passwords, with the knowledge that they can perform “self-help” password recovery if that password is forgotten. SES allows several secure methods of password recovery that provide the power of master passwords without the accompanying security risks.
Protection from Password Attack
To “attack” a password means to try to guess it. Common methods include:
trying to guess commonly used passwords (names of pets, significant dates, favorite sports teams)
using lists of common passwords found on the Internet
using software that tries every possible combination (“brute force” method)
SecureDoc disk encryption uses password rules to develop strong passwords that are relatively safe from password attack.
SecureDoc Disk Encryption Features
SecureDoc disk encryption protects your data from unauthorized access by encrypting the disks on which your sensitive data is stored. You can encrypt any hard or logical disk (both bootable and non-bootable); a floppy disk (A:); or removable devices, including USB (flash) disks, zip disks, etc. The table that follows lists and explains these features:
SecureDoc Disk Encryption Feature | Description |
Design and Archi- tecture | Designed to conform to PKCS #11 standards, the most widely- used cryptographic API in the world, so it can easily facilitate integration with other products, such as: Smart Cards for use in electronic commerce PCMCIA cards, biometric devices, and other hardware tokens Hardware accelerators Other applications such as email software, browsers, and Public Key Infrastructure applications. Designed to authenticate only once to open all resources, whether Windows log-on, network log-on, log-on to access encrypted disks and files, database log-on, or log-on to other applications. Supported in the Open Card Framework proposed by Sun, IBM, Netscape and Oracle, Entrust, and other security vendors. Used also in the Intel CDSA standard, adopted by the Open Group. |
Encryption Algorithms Used | Uses AES (256 bit) and the SHA-2 and RIPEMD 160 hashing algorithms. The NIST Cryptographic Module Validation Program (CMVP) for WinMagic supports the following certifications: AES Cert # 1 SHA-2 Cert # 76 |
Dual and triple factor user authen- tication at pre- boot | Provides ultimate security and flexibility for passwords, tokens, and biometrics. Integrates with popular tokens and PKI at pre-boot time. Works seamlessly with virtually all PKI suppliers, including Bal- timore, CA, Digital Signature Trust, Entrust, Identrus, Microsoft, RSA, Verisign, and others. Requires only one token to work with all applications.· Integ- rates tokens from Rainbow/SafeNet, Datakey, ActivCard, Alad- din, Spyrus, Eutron, CRYPTOCard, G&D, Schlumberger, and many other leading suppliers of tokens. Supports a wide range of hardware tokens and readers. |
Entire and Trans- parent Disk Encryption Pro- tection | Encrypts every byte of data on the PC's hard-drive(s). Secures residual data, temporary files, paging/swap files, hid- den partitions, and crash dump files left unprotected by other |
SecureDoc Disk Encryption Feature | Description |
encryption methods. You can continue to work on the PC while the conversion takes place in the background. Tolerates interruption, such as a power outage, without any data loss during the initial conversion to encrypt all sectors of the disk. After an initial conversion, which encrypts existing data, your data on disks is encrypted AT ALL TIMES, even if the power goes out while you are working. You can work as usual once you enter your password and/or your smart card or USB token at Boot Logon. | |
Fast Conversion | Converts 28 Gigabytes per hour on a 1.8 G Pentium desktop. There’s no noticeable performance loss for encrypted disks. All recovery features are governed and controlled by YOUR organ- ization. Ensures no back door exists with source code validation by third parties and by several government organizations around the world. |
Windows Com- patibility | Designed for Windows 7, 8, 8.1 and 10. Completely Win32 and Win64-compliant and is not hindered by backward compatibility issues in regard to legacy MS-DOS based technology. |
Flexible Key Label- ing | Enables easy, yet secure, sharing of encrypted files, disks, and removable media. Enables role- and identity-based key labeling to let you assign names or labels to keys used for encryption. Enables the convenience of shared access to encrypted objects by different keys that are available to different users. For example, John Smith could have a key file containing the role- based keys “Sales Department,” “Sales Department Group 3” and an identity-based key, “John Smith”. |
No “Master Pass- word” vul- nerability | Provides unique centralized key management without the risk associated with the “Master Password” concept. |
Integrated Disk Locking | Used to disable read/write access to individual disks including removable media such as USB sticks. Decryption (conversion back to plain text) is possible; this privilege is reserved for administrators only. Prevents unauthorized copying of data to floppy disk or other removable drives. Configures to enable access to only encrypted removable media. This feature helps you: |
SecureDoc Disk Encryption Feature | Description |
SecureDoc Certifications and Evaluations
Introduction
To determine whether a security product does as its vendor claims, a purchaser has three options: trust the vendor, test the product, and/or rely on an impartial third party with the experience and knowledge to evaluate the product. WinMagic believes in peer review as well as formal validation by third parties and has made SecureDoc disk encryption source code available to several credible third party validation bodies. For more information on third-party evaluation, validation, and certification of SecureDoc, refer to our Web site: www.winmagic.com.
Source Code Validation
Source code validation is the only way to verify that a product does not have (vendor) back doors. Bruce Schneier, world-renowned crypto-analyst and creator of the BlowFish and TwoFish algorithms (a final AES candidate), author of “Applied Cryptography”, and president of Counterpane Systems, has reviewed and crypto-analyzed SecureDoc source code. Bruce has verified the strength of SecureDoc's construction, and testified that there are no security holes. He has said:
SecureDoc's sector based encryption is smart. It sits at the lowest level and intercepts all requests to read and write to the disk, so the entire disk is encrypted and no sectors are missed. With strong, trusted encryption algorithms, SecureDoc has a clean design.
Claims Common Criteria
SecureDoc disk encryption has undergone strict tests required by the Common Criteria Evaluation and Certification Scheme for security software. These standards are recognized and endorsed by 13 countries, including the United States, U.K., Germany, and Canada. All testing takes place in high-quality, controlled facilities accredited to ISO/IEC Guide 25 specifications (guidelines for the testing IT security products and systems).
Level 2 FIPS Validation
The SecureDoc cryptographic engine has achieved FIPS 140-2 level 1 & 2 validation from NIST/CSE (August 2006). The United States Congress requires the entire Federal government, including federal contractors, to use FIPS 140-2 certified cryptographic devices when they exist. SecureDoc, with an even higher level 2 validation, satisfies this requirement for a broad class of government security implementations.
While most software products have only achieved a level 1 validation, WinMagic's SecureDoc disk encryption has achieved a level 2 validation, underscoring the fact that SecureDoc is a trusted platform not only for the government but also for any enterprise that wishes to protect its sensitive data on laptop and desktop PCs.
The FORTEZZA version of SecureDoc is the only disk encryption product certified by the NSA for secret data for US Government agencies.
SecureDoc disk encryption is now a pre-qualified IT security product for Canadian Government agencies, too. The Communications Security Establishment (CSE) of Canada has tested SecureDoc as part of its IT security for the Telework project. The report's conclusion was that only disk encryption (such as SecureDoc) provides effective protection for data on a hard disk. Other encryption methods fell short when considered for this function, and were recommended for use only as supplements to disk encryption.
The Future
At WinMagic, we invest in the future through a strong emphasis in research and development. This is to protect your investment in SecureDoc disk encryption as we keep up with evolving technology. We look forward to continuing our leadership role by constantly improving, innovating, and pushing the frontier in the security field forward.
Appendix E: Privileges
Privilege | Description |
Modify Password | User can change their password. User key files have only this privilege. |
Modify Key | User can generate, delete, and import keys and to make key file backups. Automatically enables the Export and View Key privilege. |
Export and View Key | User can work with encryption keys, for example, export- ing and emailing a key file to remote users, exporting keys to other key files. Users can also create new users and administrators and give other administrators the rights to import key files into their key database. |
View Transaction Log | User can view the SecureDoc audit log. |
Modify Profile | User can set up disk access profiles which control or mon- itor read/write access to both encrypted and non-encryp- ted disks. Automatically enables the Select Profile privilege. |
Select Profile | User can apply a disk access profile. Automatically enables the Modify Profile privilege. |
Config SFE | User can define client-side SecureDoc File Encryption of selected folders. |
Convert Remov- able Media | User can decrypt/encrypt removable media. Users must also be granted “administrative” rights in Windows. |
Convert Hard Disk | User can decrypt/encrypt hard disks. Users must also be granted “administrative” rights in Windows. Auto- matically enables the Disk Integrity Check and Create Emergency Disks privileges. |
Disk Integrity Check | User can continue working even if the disk integrity check fails, inspecting the device and re-creating a new signature for the disk integrity. |
Create Emer- gency Disk | User can create recovery media to restore their Master Boot Record. |
SES Administrator Manual
v9.2 SR1
Appendix F: Testing Candidate Devices for Com- patibility with SecureDoc Pre-Boot
In V8.3, WinMagic has introduced a new "SecureDoc Pre-Boot Compatibility Test" tool option, which will temporarily install SecureDoc's Pre-Boot, interrogate the technology and other aspects of the computer and determine whether the device should be compatible with SecureDoc's Pre-Boot Authentication.
This section details how to install and run this tool, gather its results, and uninstall it.
Objectives:
The overall operation of the SecureDoc Pre-boot compatibility test mode is to simulate a SecureDoc deployment installation by installing the essential client and pre-boot components. The actual encryp- tion of the disk(s) and/or enforcement of client-side security policies is omitted when this mode is enabled. Note that this can (ideally) be based on the Profile/Package settings you intend to deploy to endpoint devices, or upon a "nominal" Profile and Package that primarily uses the default settings.
The tool will not enforce ANY disk encryption and security features (e.g. password-synchronization, token authentication, etc), so the tool reduces the complexity and potential interference of the com- patibility tests while further reducing troubleshooting/remedies in the event of a pre-boot failure.
This also reduces the time required to deploy the test installation and to un-install it after completion. Lastly, the device will also not register itself with SES during compatibility testing.
Compatibility Testing
[Profile] -> [General Options] button -> [Advanced Options] panel
[SecureDoc Boot Logon Auto-Adapt] - this section appears at the bottom of this panel:
Do: Check/Enable the option entitled: "Installer will auto-adapt to device specifics/technologies" From the drop-down menu below it:
Do: Select the following option: "Stop after Pre-Boot compatibility test and report results only"
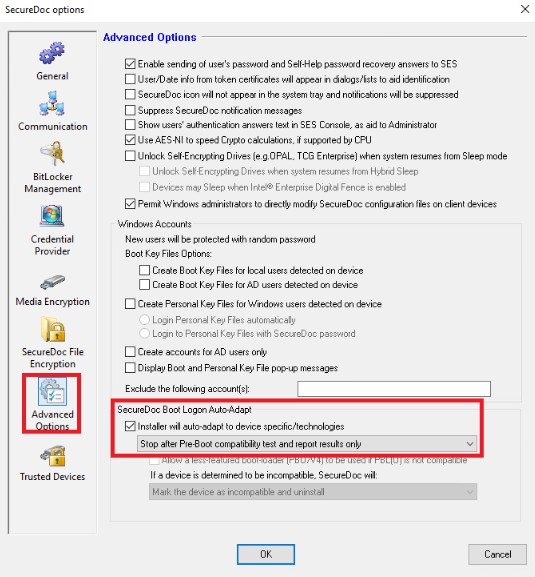
Now that Compatibility Test mode has been enabled, the following settings must be set as defined below, in order to avoid problems during the test.
Profile:
From the main profile navigation panel, click the General Options button.
Navigate to the General panel. In the lower half of the panel are the SecureDoc Encryption settings.
- Ensure: "Use hardware encryption if available option" is un-checked (even if testing compatibility on devices that may contain Self-Encrypting Drives).
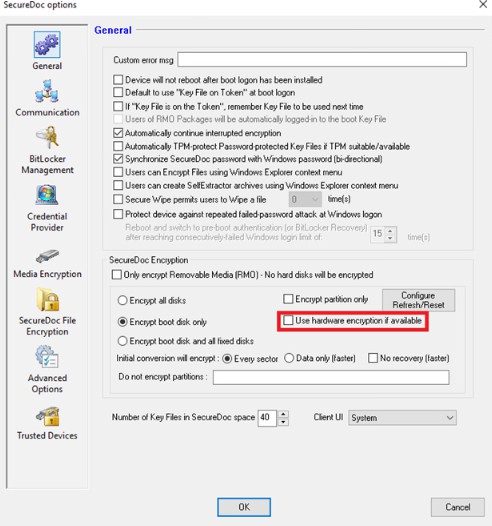
Installation Package:
- Ensure the following Device Provisioning Rules are DISABLED in the installation package.
- Disable/Un-check "Enable a provisioning state so as to allow access"
By disabling the above option, the option entitled "Device(s) will auto-boot to Windows logon" will be grayed-out/inaccessible.
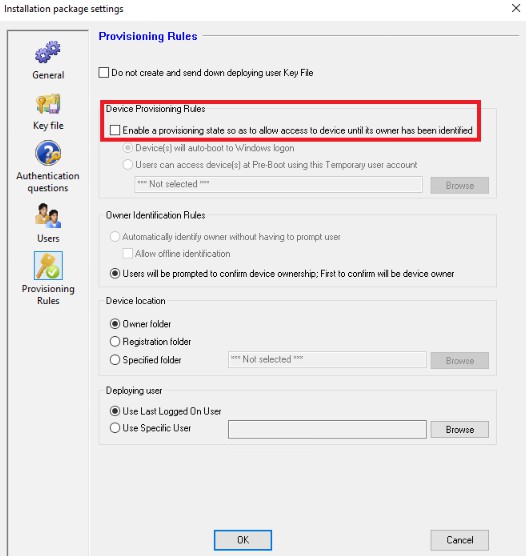
- Ensure that the Installation Package you will be using for the Compatibility Test does NOT include a KnownConfigs.XML file. Delete this file if present.
NOTE: The KnownConfigs.XML file will be re-added to the Package whenever the Package is edited, so you may be best served by completing the above changes, then copying the contents of your Package to another folder (minus the KnownConfigs.XML file), then using that folder's contents for your com- patibility testing.
- Deploy your Compatibility Tool test installation package from the contents of the separate folder cre- ated in step 4 above.
NOTE: The location of the compatibility result file is in the userdata folder. For example: C:\Program Files\WinMagic\SecureDoc-NT\UserData
Using the Pre-Boot Compatibility Tool, Uninstalling:
To run the Pre-Boot Compatibility tool, install the package containing the “normal” SecureDoc install- ation helper files (the certificate, ini file, profile file) excluding the KnownConfigs.XML file on the device.
This will install the Compatibility tool’s pre-boot layer, and then it reboots the device.
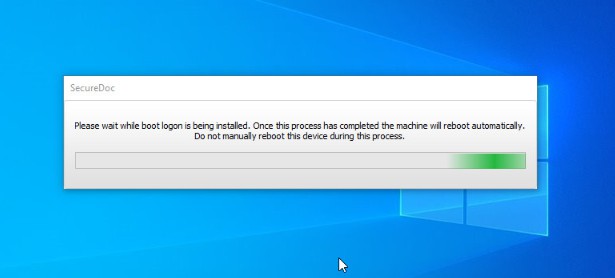
During this pre-boot, the device will go through its compatibility pre-boot test, during which it will gather information about the device and exercise various aspects of SecureDoc to determine how best to handle the specifics of the device’s hardware and firmware.
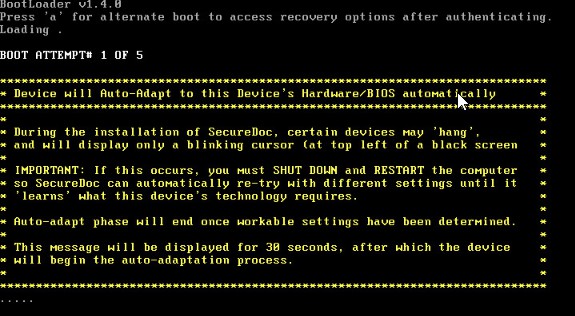
When the device gets to Windows, it shows the following message, indicating that Pre-Boot can be un- installed, and the device must be rebooted.
If the user responds in the positive to uninstall the test tool’s Pre-Boot, the tool will be removed, and the device rebooted.
If the user responds in the negative or cancels the prompt, the tool will run each time the device is rebooted until the tool has been removed.
After having un-install the compatibility test tool’s Pre-Boot, the device should be rebooted. After the device has rebooted the following message appears.
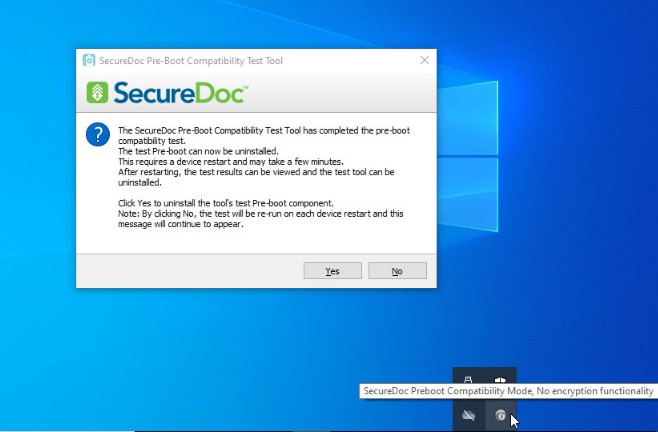
This message mentioned that the report can be seen, and looks like this:
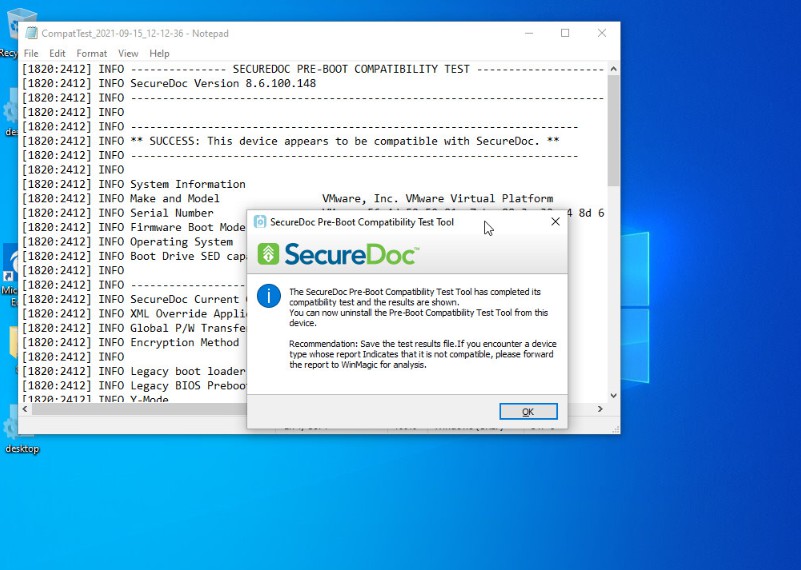
The report will be saved as a plain-text file in the UserData folder of the install within CompatTest_ YYYY-MM-DD_HH-MM-SS.log format for its filename.
Note: The UserData folder is a hidden folder. Enable show Hidden folder to view the folder or type in the folder name in the directory to access it C:\Program Files\WinMagic\SecureDoc-NT\UserData
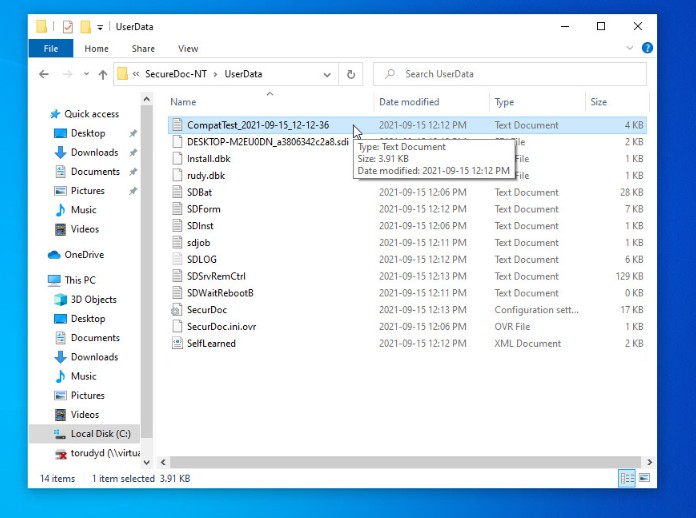
Using the Pre-Boot Compatibility Tool, Uninstalling:
To run the Pre-Boot Compatibility tool, install the amended package on the client device including all "normal" SecureDoc installation helper files (the certificate, ini file, profile file, KnownConfigs.xml) and run the executable that suits the device's hardware (32-bit or 64-bit).
This will install the Compatibility tool's pre-boot layer, and then it reboots the device.
During this pre-boot, the device will go through its compatibility pre-boot test, during which it will gather information about the device and exercise various aspects of SecureDoc to determine how best to handle the specifics of the device's hardware/firmware.
When the device gets to Windows, it show the following message, indicating that Pre-Boot can be un- installed, and the device must be rebooted.
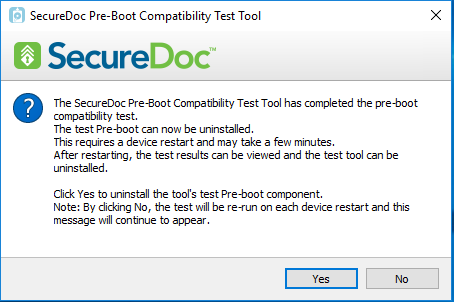
If the user responds in the positive to un-install the Test tool's Pre-Boot, the tool will be removed and the device rebooted.
If the user responds in the negative or cancels the prompt, the tool will run each time the device is rebooted until the tool has been removed.
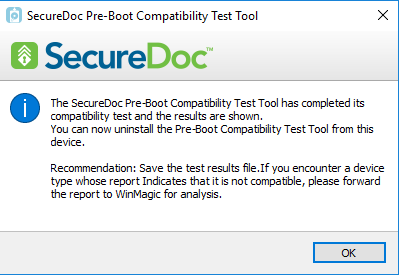 After having un-installed the compatibility test tool's Pre-Boot, the device should be rebooted. After the device has rebooted the following message appears.
This message mentions that the report can be seen, and it looks like:
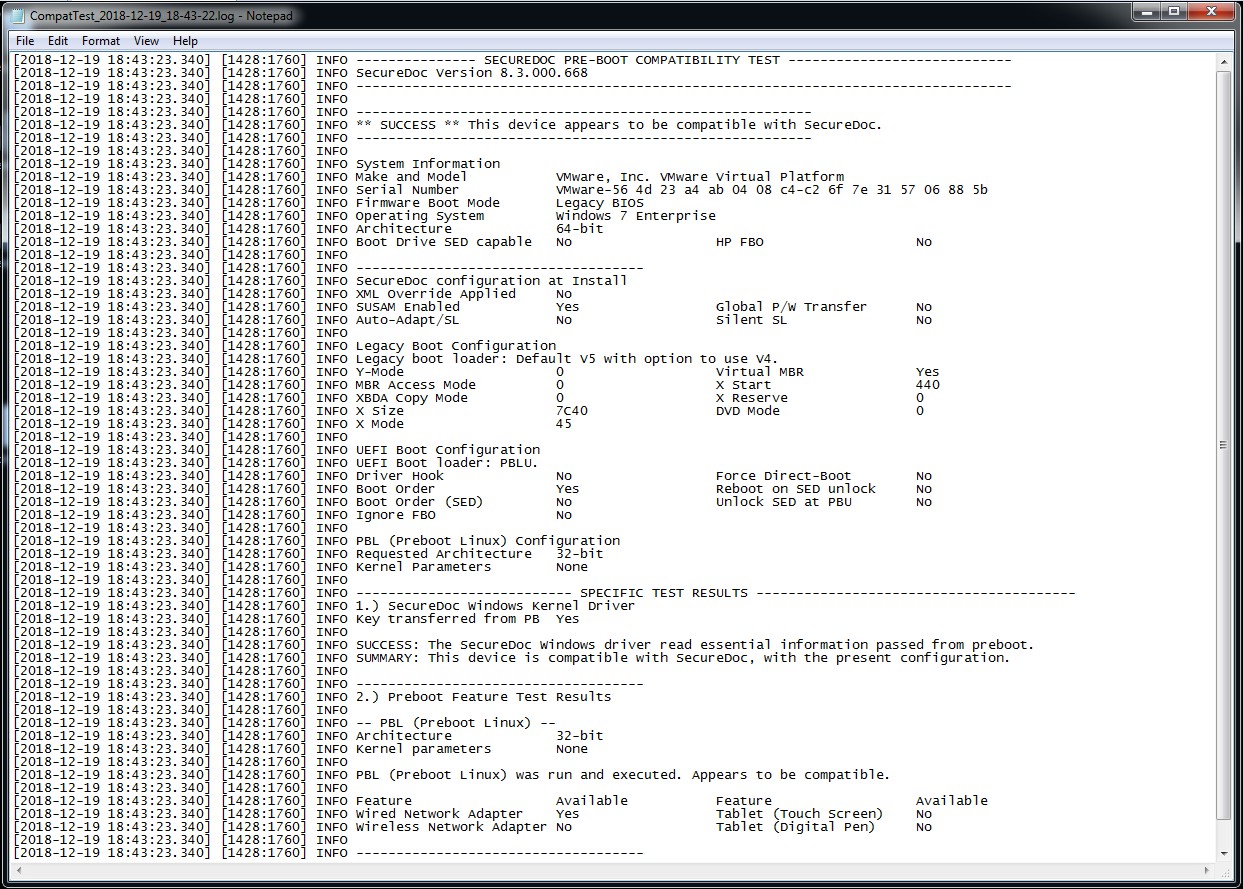
NOTE: When in Compatibility Test mode, all message boxes and dialogs indicate that you are working with the Compatibility Test (not a regular SecureDoc installer).
IMPORTANT: If for any reason the KnownConfigs.xml file has been excluded from the list of files in the Installation Package, the Compatibility Test will automatically be placed in "Learning" mode. In this mode, if the device is unable to transition to Windows, you might encounter one or more blank screens with a blinking cursor (or a Blue-Screen halt), indicating that SecureDoc has not yet figured out what settings this device type needs to transition from Pre-Boot to the Windows loader. If you encounter this scenario, simply reboot the device each time it occurs, and SecureDoc's learning mode will auto- matically change to the next set of settings to retry with a new combination. This can be repeated until SecureDoc has figured out the details of this device. As can be seen from how "hands-on" this process needs to be, clearly the ideal scenario is to ensure that the KnownConfigs.xml file is included in the Installation package set of files.
Test Result Details:
The test results will include:
SecureDoc version and build
Success or Failure serving as a summary message to indicate if preboot was execute and the transfer data occured
System information
Make and Model Serial Number
Firmware Boot Mode (Legacy or UEFI)
OS information and architecture (32-bit/64-bit)
Boot drive is SED capable (and if so it's make/model) Firmware support for HP FBO
SecureDoc Configuration (What the active profile configuration on the client side) XML override applied
SUSAM enabled
Global Password Transfer
Auto-Adapt (Self-Learning) and silent Auto-Adapt Legacy Specific
Boot-loaders (v5, v4, v5 failover to )
Y-Mode
Virtual MBR and MBR Access Mode XStart, X Reserve, X Size, X Mode XBDA Copy Mode and DVD Mode
UEFI Specific
Boot-loaders (PBU, PBLU, PBLU + PBU) Driver Hook
Force Direct Boot
Boot-Order and Boot-Order for SED Ignore FBO
Reboot on SED Unlock and Unlock SED and PBU If PBL or PBLU is configured
Requested architecture (Setting PrebootArch64Bit in the PackageSettings.ini
Kernel Parameters
(PBLU only) DTK in Storage Kernel Transfer Results
On Success indicate such On Failure
Checks if Preboot is installed and was run
Indicate Settings changes may need to be made (We don't have this as a Oct 2018)
Checks if Preboot is not installed but was
Indicate Hardware may not be compatible with SecureDoc
Check if Preboot is installed but was not run
Indicate either preboot is incompatible with the system or retry Preboot features Results
PBL/PBLU is always shown first if tested Actual architecture (32/64-bit) Actual kernel parameters
Wired/Wireless networking hardware detected Tablet (Touch/Pen) hardware detected
PBU
Architecture
Filter Driver Executed - Yes/No
Networking (TCP/DHCP) protocols detected
The report will be saved as a plain-text file in the UserData Folder of the install with in CompatTest_ YYYY-MM-DD_HH-MM-SS.log format for it's filename.
Appendix G: New support tool added that clears all NVRAM-maintained SecureDoc Boot settings to ensure there are no vestiges of a previous SecureDoc installation remaining on the device following a "bare metal" re-imaging of the device.
With V8.5, WinMagic's SecureDoc now offers a new command-line tool that can be used to reset any NVRAM-based settings that could be carried over from one instance of SecureDoc to another on an oth- erwise wiped device.
The new tool is called SDClean.
To execute it, first please download it from WiinMagic's website.
Then, from a Command Line (run as Administrator), execute the following command, applying the necessary arguments as follows:
SDClean - Cleans SecureDoc UEFI related data from the firmware. Copyright (C) 2019 WinMagic Inc.
Usage: sdclean.exe [all] [clearfbo] [clearbord] [cleardord]
all - Attempt to clear all instances of SecureDoc from the firmware. clearfbo - Clears the HP FBO (FilterBootOrder) entry.
clearbord - Clears SecureDoc entries from the BootOrder list. cleardord - Clears SecureDoc entries from the DriverOrder list.
SES Administrator Manual
v9.2 SR1
Term | Definition |
admin key file | A key file with full privileges for an encrypted device, includ- ing the ability to create additional key files. |
Algorithm | A detailed sequence of actions to perform some task (named after a Persian mathematician, Al-Khawarizmi). Technically, an algorithm must reach a result after a finite number of steps, thus ruling out brute force search methods for certain problems. The term is also used loosely for any sequence of actions which may or may not terminate. |
auto-boot | SecureDoc Client function that skips the boot logon screen and goes directly to Windows Login. |
Auto Login | SecureDoc Client function that requires users to log on to Boot Logon, after which SecureDoc Client automatically logs on to the SecureDoc Client Screen Lock and the Windows Login. |
Boot # | Each key file enabled on an individual device is assigned a number in Boot Control. This number can be used to select the key file to be used at Boot Logon. |
Boot Logon | SecureDoc Client application that authenticates users to key files before giving them access to an encrypted device. Also known as “pre-boot authentication prompt”. |
challenge question | An optional function that lets you define a series of “chal- lenge” questions to help validate a user’s identity. The user’s correct answers must be stored in the SecureDoc Enterprise Server database. For example, a challenge question might be “what is your favorite color?” and user A’s correct answer might be “red”. If user A is asked that question and responds “blue”, the administrator may choose to judge that the per- son’s identity is in question. |
challenge/response password recovery | Method for recovering a lost password that requires inter- action with the SecureDoc Enterprise Server Administrator. |
client computer | PC within your network, either standalone or connected via LAN/WAN. |
client device | PC within your network, either standalone or connected via LAN/WAN. |
Control Center | SecureDoc Client application used on client devices to per- form SecureDoc Client management functions, such as chan- ging a password. |
Term | Definition |
conversion | Synonym for process of encrypting a full disk. |
Crypto-erase | Remove the encryption key from an encrypted device, ren- dering it inaccessible. Aka “zeroize”. |
disk | Includes local or network disk, RAIDs and magneto optical drives. |
disk access control | Settings to control or monitor read/write access to both encrypted and non-encrypted disks. |
disk integrity | The process that checks the computer’s boot files to make sure they have not been tampered with, or corrupted, on boot-up. Depending on the user’s privileges, the user may or may not be able to proceed if disk integrity is in doubt. |
emergency disk | Used to restore Boot Logon on a client device. This would be necessary if something happens to the computer’s MBR and Boot Logon is missing, leaving the computer inaccessible. The files for this disk are returned from the client device on receipt of installation package.The “disk” can be any remov- able media except a diskette: USB stick, CD, etc. |
encryption key | The mechanism used to encrypt/decrypt a user’s disks or removable media. Can act on a set of disks, a single partition, a single disk, etc. Can be assigned to different users in dif- ferent forms (e.g. to user A in a key file, to user B in a smart card, to user C in a USB device, and to user D in a key file pro- tected by user D’s Entrust profile). Must be stored in a key file. |
FDE | Full Disk Encryption. |
folder | Used to organize user information in the SES Management Console. A user can belong to only one folder. |
fixed disk | See “disk”. |
installation package | Contains profile and SecureDoc Client software for automatic installation via SES on a client device. Returns user/device information which is used to automatically create encryption keys and key files. Must be used in order for client devices to be available for remote control. |
group | A division of a folder, used to organize user information in SES. A user can belong to many groups. Keys can be assigned to a group, allowing shared access to encrypted resources. |
key file | Contains the encryption keys, user privileges, password rules, and other information for a specific user. Can be stored on a token. Encrypted itself and protected using a password |
Term | Definition |
or token. | |
MBR | Master Boot Record of a computer. |
MachineInfo file | Contains data about the user and device to be put in the data- base. |
on-demand keyfile provisioning | SES function (Enterprise editions only) that allows keys to remain on the server and be accessed when needed by users. Such keys are referred to as “on-demand” keys. |
Password hint | A hint to help the user recall their password. Should not con- tain the password itself, and should not contain enough information that someone other than the authorized user could guess. (For example, “name of your first pet”.) For security reasons, this option is disabled by default, as many customers had difficulties ensuring that users were not enter- ing easily-guessed versions of their passwords in the Pass- word Hint field. |
Password Recovery | Process of enabling users with a lost or forgotten password to regain access to their PC. Once user is validated through answers to challenge questions, they can continue to boot and log on to Windows, but are immediately prompted to spe- cify a new password. |
PBA | Preboot Authentication (Boot Logon). |
Pre-Boot Connex (PBConnex) | The ability to authenticate users against SES (rather than based on a locally stored key) before the operating system loads: see “Using Pre-Boot Connex (PBConnex)” on page 119. |
profile | In SES, included as part of installation package. Sets the para- meters for SecureDoc Client installation on the client device. In SecureDoc Client, an external file containing customization and other settings that can be imported by other SecureDoc Client users. See also profile. |
Protection Key | Key that identifies which administrators have administrative access to which encryption keys. |
remote installation package | Alternative to installation packages (SES). |
remote control | Used to remotely control client devices (for example, locking them) from SES. Available only for client devices where SecureDoc Client was installed via a installation package. |
removable media | Refers to USB/firewall drives, CD/DVDs, flash and SD cards. |
RMO | Removable Media Only (no hard disk encryption). |
Term | Definition |
Screen Lock | SecureDoc Client function that uses a screen saver for added security. The screen saver requires users to log on to their key file or, for token-based key files, to insert their token, to continue working with the computer. |
SDConnex | Communication method used after SecureDoc Client install- ation is complete on client devices, to send SecureDoc Client information between SES and client devices. |
SED | Self-encrypting hard disk with embedded hardware encryp- tion functionality. See WinMagic web site for details on which of these drives are supported. |
SecureDoc Client Control Center | See Control Center |
SecureDoc Client Logon | SecureDoc Client function that offers an alternative to using the Windows logon. The user logs on to Windows once after initializing this setting, but is subsequently required to log on to the SecureDoc Client Screen Lock with the key file inform- ation they entered at Boot Logon. Once the user has logged on, SecureDoc Client decrypts the file containing the WIn- dows information and automatically log on to the Windows prompt with it. If the Windows information is correct, Win- dows starts to load. |
self-help password recovery | Function that enables users to recover, without administrator help, from a lost password or token. |
SFE | SecureDoc File Encryption. |
strong password | A password that is difficult for a person or program to guess. Passwords are made strong by being long (no shorter than eight characters) and including a mixture of alphabetic and numeric characters, mixing cases as desired. It is important to not have a password that corresponds to a recognizable word or phrase, particularly a user’s name or login ID. The password also should be able to be remembered by the user, to avoid writing passwords down. |
token | In security terms, a physical device, such as a “smart card”. |
zeroize | Remove the encryption key from an encrypted device, ren- dering it inaccessible. Aka “Crypto-erase”. |