Issue/Question:
How can a SecureDoc device profile be assigned to one or more devices from the SecureDoc Enterprise Server console?
Product Version Affected:
All SecureDoc Enterprise Server versions.
All SecureDoc client versions
Use Case:
Assigning a new or updated device profile to a single endpoint after a configuration change.
Applying the same device profile to multiple devices during deployment or policy standardization.
Moving devices to a different SecureDoc policy group or operational profile.
Reapplying a profile when a device requires updated SecureDoc settings from the server.
Method 1: Assign Profile from the SES Console
1. Open the Devices Tab
In the SecureDoc Enterprise Server console, select the Devices tab.
2. Select the Target Devices
Locate and select the device or devices that require the device profile assignment.
Note: To select multiple devices, hold down the Shift key while selecting the required devices. If devices are managed in Folders/OUs, you can also use the folder structure to push profile updates to devices in groups.
3. Assign the Device Profile
Right‑click the selected device(s), then select Assign device profile to devices.
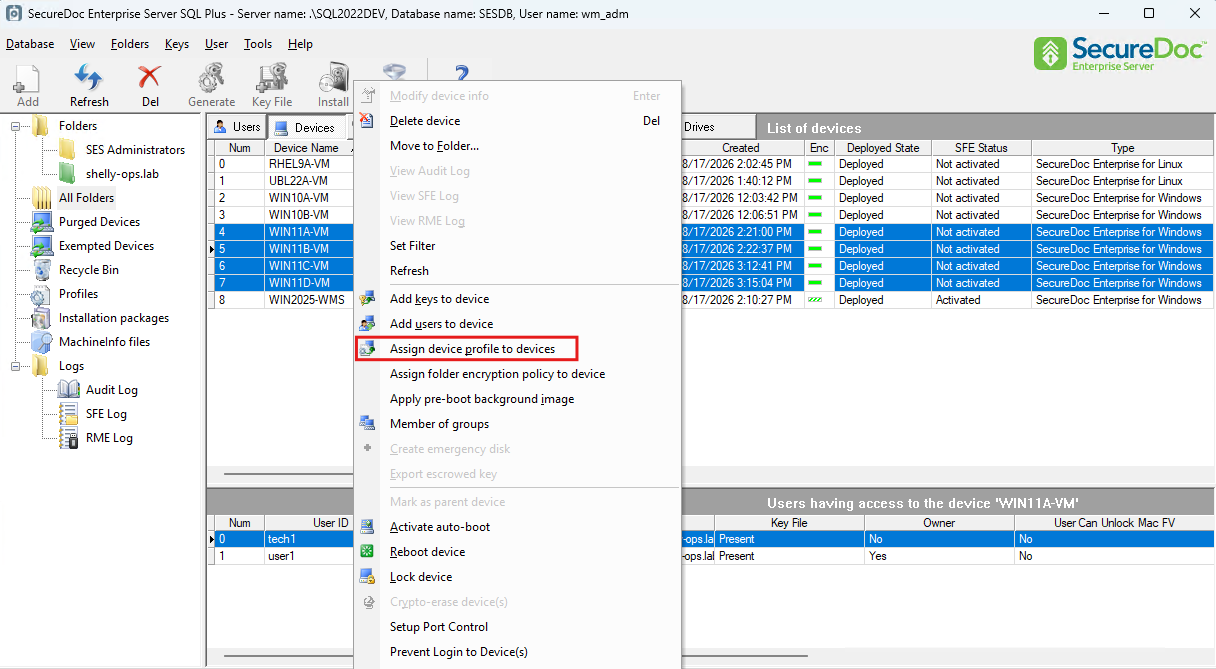
4. Choose the SecureDoc Profile
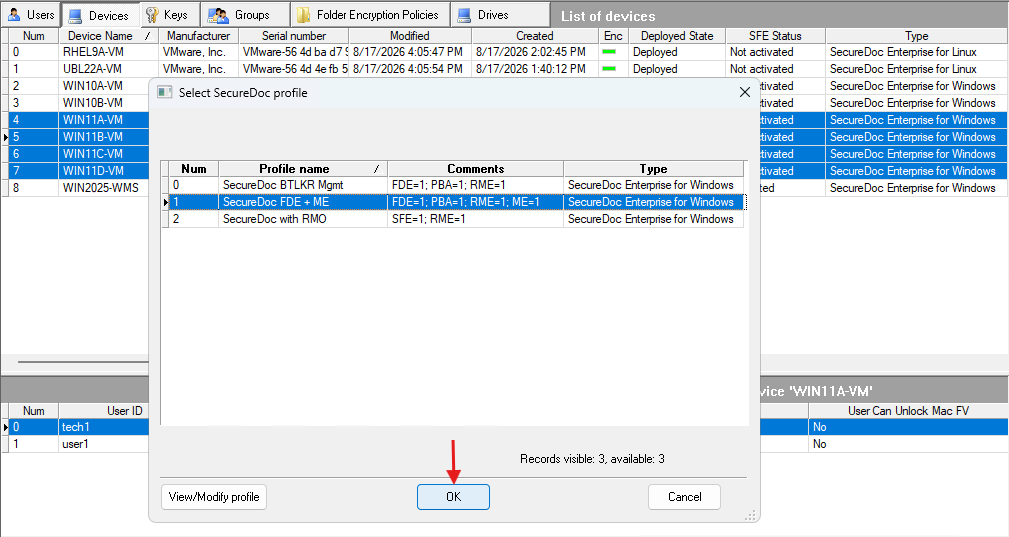
In the Select SecureDoc Profile window, select the required device profile and click OK.
Expected Result:
For confirmation, right-click on the same device, and go to Show Commands to verify that SecureDoc Enterprise Server created the command for the selected device(s). The command is queued to be delivered the next time the endpoint communicates with the server.
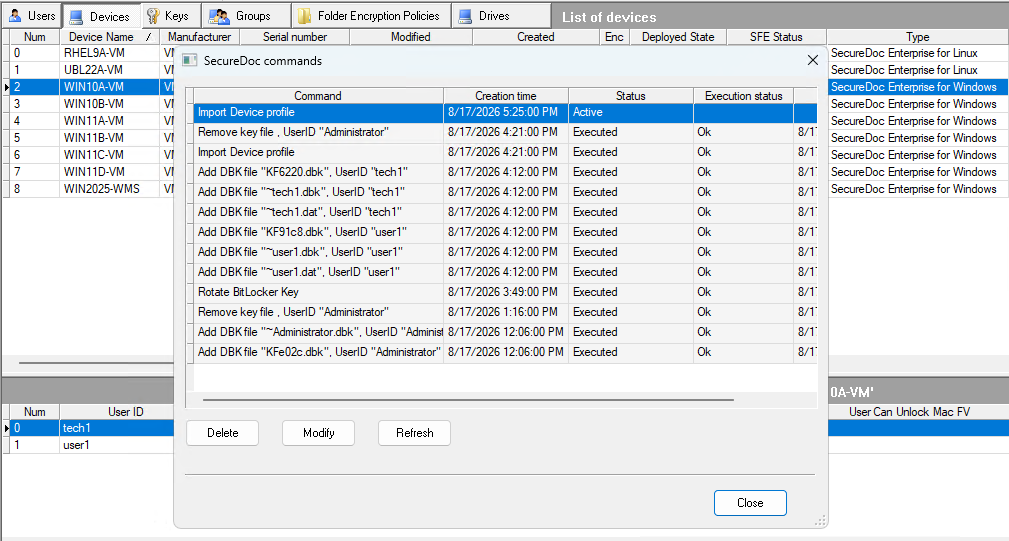
If the profile was sent in error, and not yet Executed, you can delete the command before the endpoint checks in with the SES.
Method 2: Assign Profile from the SES Web/SES SaaS
1. Log into the SaaS SES Console
The user doing this must have adequate permission in SES to assign profiles.
2. Open the Devices Tab and Select the Target Devices
In the Devices tab, locate and check the box/boxes beside the device/devices that require the profile assignment.
Note: To select multiple devices, check the box beside the selected devices. If devices are managed in Folders/OUs, you can also use the folder structure to push profile updates to devices in groups.
3. Assign the Device Profile
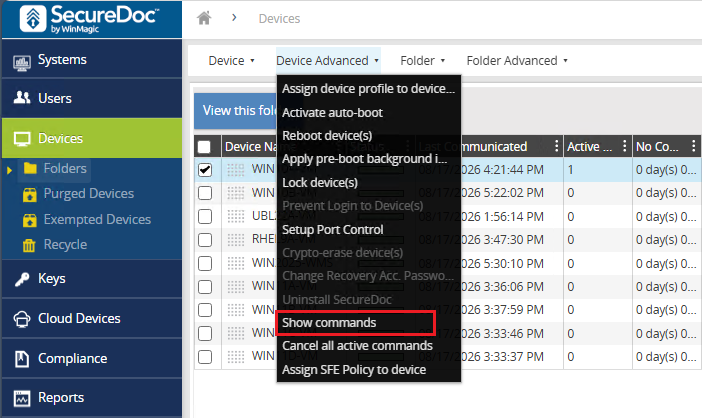
With the devices selected, click on Device Advanced and select Assign device profile to device...
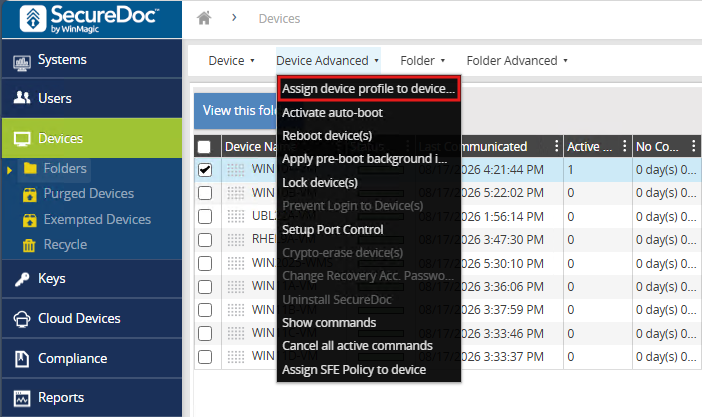
4. Choose the SecureDoc Profile
In the Select Profile window, select the required device profile and click Save.
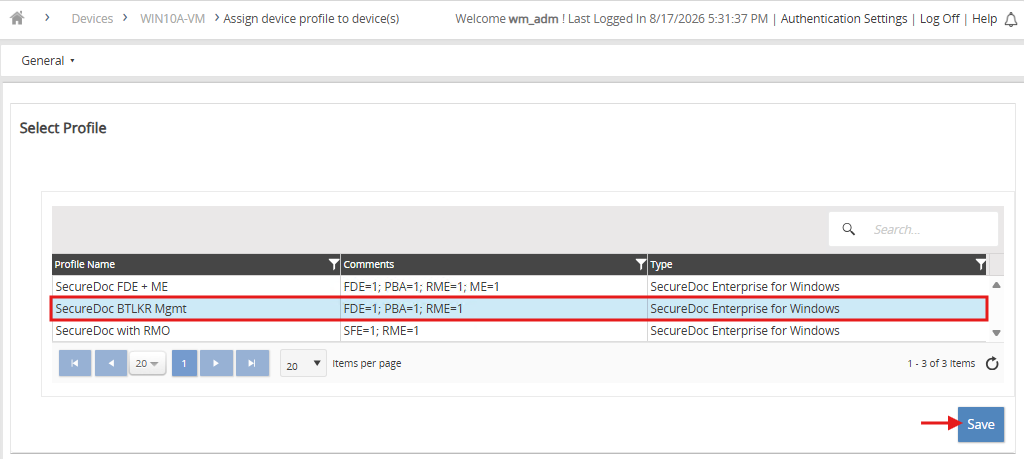
SecureDoc Enterprise Server creates a command for the selected device(s). The command is queued to be delivered the next time the endpoint communicates with the server.

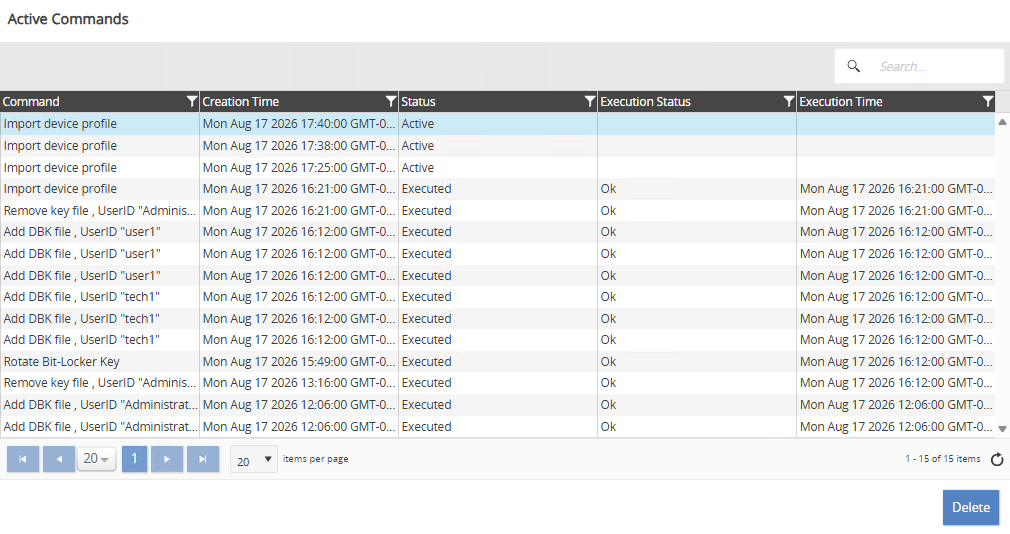
The command queue can be seen by selecting the device and Show Commands.
If the profile was sent in error, and not yet Executed, you can delete the command before the endpoint checks in with the SES.
Additional Information
To force communication from the endpoint, right‑click the SecureDoc icon in the system tray and select Communicate with Server.
If the SecureDoc icon is hidden at the endpoint, refer to KB1513 for instructions on displaying or accessing the SecureDoc system tray icon.
KB Owner: Sheldon Chin