SecureDoc Enterprise Server v9.2 SR1
Enterprise Quick Deployment Guide

©Copyright 1997 - 2026 by WinMagic Corp. All rights reserved. Printed in Canada
Many products, software and technologies are subject to export control for both Canada and the United States of America. WinMagic advises all customers that they are responsible for familiarizing themselves with these regulations. Exports and re-exports of WinMagic Inc. products are subject to Canadian and US export controls administered by the Canadian Border Services Agency (CBSA) and the Commerce Department’s Bureau of Industry and Security (BIS). For more information, visit WinMagic’s web site or the web site of the appropriate agency.
WinMagic, SecureDoc, SecureDoc Enterprise Server, Compartmental SecureDoc, SecureDoc PDA, SecureDoc Personal Edition, SecureDoc RME, SecureDoc Removable Media Encryption, SecureDoc Media Viewer, SecureDoc Express, SecureDoc for Mac, MySecureDoc, MySecureDoc Personal Edition Plus, MySecureDoc Media, PBConnex, SecureDoc Central Database, and SecureDoc Cloud Lite are trademarks and registered trademarks of WinMagic Inc., registered in the US and other countries. All other registered and unregistered trademarks herein are the sole property of their respective owners. © 2026 WinMagic Corp. All rights reserved.
Acknowledgements
This product includes cryptographic software written by Antoon Bosselaers, Hans Dobbertin, Bart Preneel, Eric Young ([email protected]) and Joan Daemen and Vincent Rijmen, creators of the Rijndael AES algorithm.
This product includes software developed by the OpenSSL Project for use in the OpenSSL Toolkit (http://www.OpenSSL.org/).
WinMagic would like to thank these developers for their software contributions.
Contacting WinMagic
WinMagic 11-80 Galaxy Blvd. Toronto, ON M9W 4Y8, Canada Toll free: 1-888-879-5879 Phone: (905) 502-7000 Fax: (905) 502-7001 | Sales: Marketing: Human Resources: Technical Support: For information: For billing inquiries: | [email protected] [email protected] [email protected] [email protected] |

Introduction
This guide will walk you through the basic steps for installing and configuring SecureDoc Enterprise Server and creating a basic installation package for SecureDoc.
The intent of this guide is not to explain every aspect of SecureDoc, but rather to enable you to get going as quickly as possible. Note: Some screenshots shown in this guide and the videos may be from a previous version of SES; The differences between the version shown and your version are not relevant for the purposes of Quick Deployment and product evaluation, so the older materials will suffice. For additional details on configuration options not covered in this guide, it is recommended that you review the User Manual for SecureDoc Enterprise Server as well as the client User Manual for the respective client installers.
Certain segments of this guide are available in Video form, providing you with a narrated view of
key aspects of the configuration and deployment process.
Look for hyperlinks in this document in this form:
About Quick Deployment
SecureDoc Enterprise Server (SES) is a powerful and flexible administrative tool with many features.
This document guides you through the basic steps for setting up your SecureDoc Enterprise Server, and creating SecureDoc Profiles and Installation Packages for encrypting endpoint clients:
Pre-requisites for the SecureDoc installation
Database Setup (Refer to Appendix A)
Installing SecureDoc Enterprise Server
Creating the initial credentials and database
Configuring the SecureDoc Services
Configuring the SecureDoc Web Console
Creating your first Profile and Installation Package
Installing your first Installation Package on a device
This guide is focused on Full Disk Encryption, therefore:
Only the basic functionality is enabled, including full disk encryption of just the hard disk of the client device. Removable media encryption and other encryption functionality are not enabled, although these and other functions can be enabled later and the profile updated on the devices.
Additional features such as SecureDoc File Encryption and Disk Access Control are not enabled.
Note: Images in this document may not align exactly with the SES version you are installing, but they are adequate to illustrate the processes and actions you must take.
Recommendation:
This document should be considered a “workbook”. It contains empty blocks scattered throughout the document that prompt you to record vital details relating to your SES implementation.
WinMagic strongly recommends printing a copy of this document, into which you can manually record the details of your SES implementation using the blocks provided, then keep your marked-up printed copy in a safe place (e.g. where you store your SES Master Key File backup).
What SecureDoc Enterprise Server Does
SecureDoc Enterprise Server (SES for short) is a robust, enterprise managed, encryption solution designed to protect company-wide devices with minimal administrative effort, enabling centralized security and protection for enterprise data. All security-related information, such as keys, key files, user information, and device information, is centrally stored and managed. SES also lets you remotely control your client devices and helps you support users if they encounter encryption-related problems, such as a forgotten password.
The SES solution is made of multiple components, which are described in the next section.
SES Components
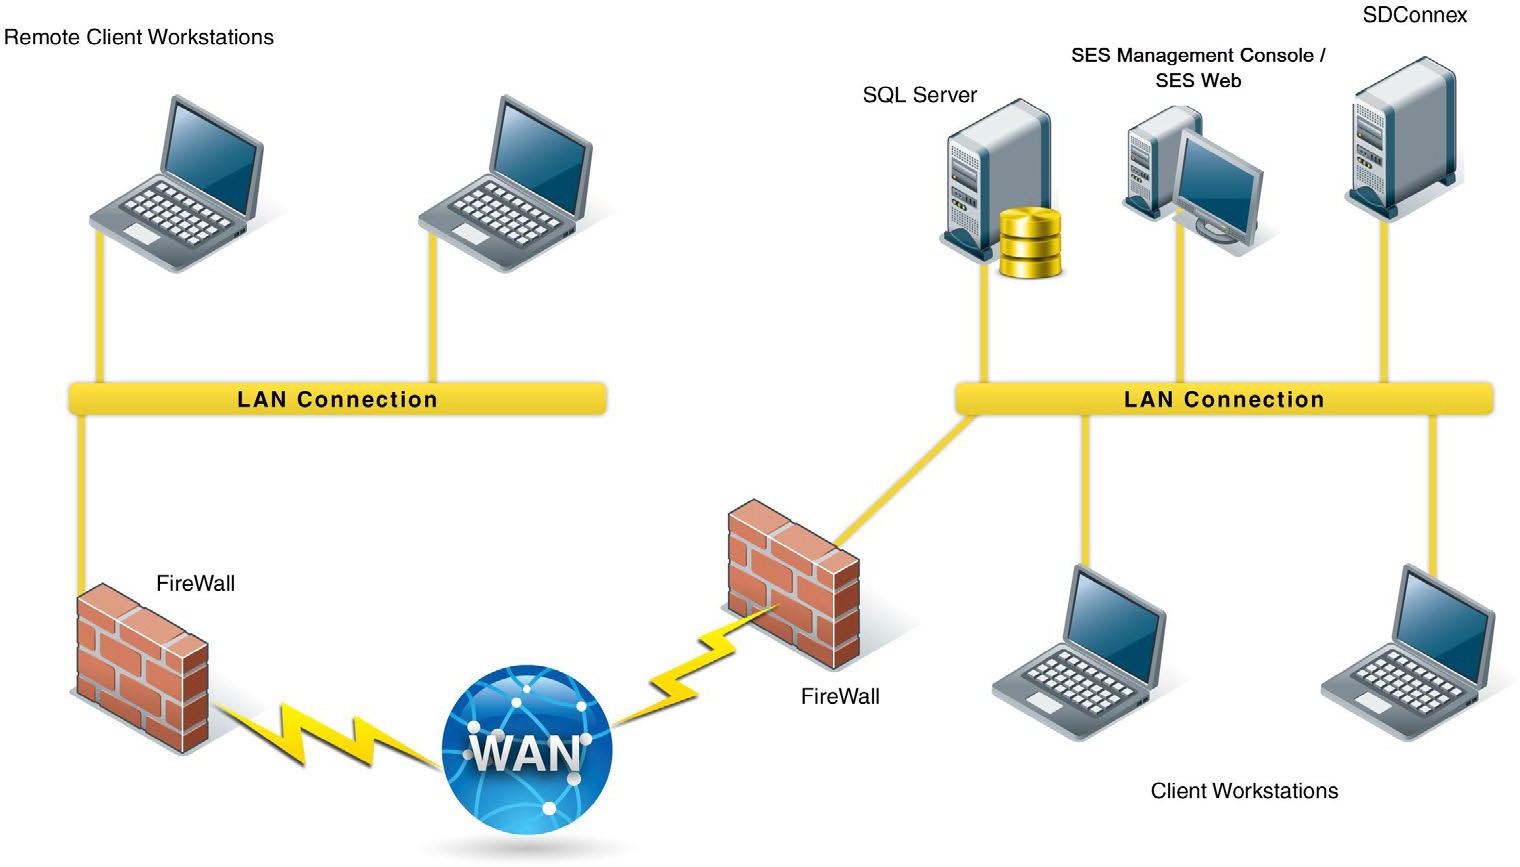
Database (SQL Server)
The SES database is a SQL Server database that contains information about users, devices, and encryption keys as well as other SES-related information. All sensitive information contained in the database is encrypted. SES does require a SQL Server in order to function.
SES Server/SES Management Console
The SES Management Console provides a secure and powerful means to define how SecureDoc is to be deployed, to remotely control client devices, to help users recover lost passwords, to manage user and device information, and to perform all other SecureDoc related functions.
SDConnex
SDConnex is the communication engine for SES: it must be running for information to be sent to and received from connected client devices. SDConnex runs as a Windows service.
To provide capacity for additional endpoints as well as load balancing, multiple SDConnex Services (Servers) can be associated with a single SES database. Client devices can be configured to use multiple server addresses, or all servers can be load balanced with third party equipment.
ADSync
ADSync is used to configure and monitor the synchronization of Active Directory information (users, folders, and groups) with the SES database. This allows for faster population of users and groups into the SecureDoc database.
Analytics Engine Service
The Analytics Engine Service was added in SES V8.5. Its function is to prepare the analytic values shown in the SESWeb analytics pages. This Quick Deployment Guide only addresses configuring this service and starting it. It is covered in greater detail in the SES Administrator’s Guide.
NOTE: There are no video elements relating to the registration or configuration of the Analytics Engine Service, but it is very straightforward and once registered/configured it will run automatically.
SES Web
The SES web console provides a web-based interface for SecureDoc Enterprise Server. The SecureDoc Enterprise Web console supports many of the features provided by the SecureDoc Enterprise Server, including User Management, Device Management and Recovery, Pre-Boot Networking, Password Recovery, and Challenge / Response recovery.
In addition, it provides reporting across a variety of aspects of the environment.
It also includes a simplified recovery ability, which is ideal for level 1 help desk support, as it limits the available functionality to only Challenge / Response recovery.
Important Basic Concepts
In order to understand the purpose behind some of the future procedures, it is important to have a basic understanding of SecureDoc Keys and Key files and how this impacts user credentials.
Keys
At the heart of any encryption product are keys – Think of these keys as a digital version of the keys on your keyring. Keys:
Are generated by SecureDoc
Are assigned to users, groups, and devices
Are stored in the SES database
Are used to encrypt or decrypt files and internal or removable disks
Are securely stored in a Key File
Key Files
A key file is simply a container in which to securely store keys – Think of this as the keyring that keeps all your keys together. Key Files:
Are generated by SecureDoc and contain keys
Can be stored as a .DBK file on a hard drive (ex: user.dbk)
Protected with 256-bit AES Encryption
Require a password to access
Are used to protect the keys that are used to encrypt or decrypt files and internal or removable disks
Key Concepts
The key / key file concept is the basic building block of SecureDoc. When a user is assigned to a device, the way that device receives the user’s credential is via the transmission of the encrypted key file that contains the relevant keys to access that device. As you will see in the SES installation section, a key file and a key that is contained inside it is required to access the SecureDoc database.
As part of this guide, a “Master Key File” will be created, which is the most important and critical file to protect, aside from the Database itself. Think of key files as self-contained credentials, that cannot be changed or acted upon by anything other than SecureDoc.
Preparing the SES Server
SES Server Recommendations
SecureDoc Enterprise Server is highly scalable for management of all sizes of environments. For server infrastructure recommendations and capacities, please contact your WinMagic sales representative for guidance. They can provide a guide with baseline suggestions. For the purposes of this document, all components (including SQL if necessary) will be installed on a single server.
WinMagic recommends One SDConnex server per approximately 3000 devices.
SES Server Prerequisites
SecureDoc Enterprise Server requires a Windows Server 2016 or later platform to operate.
IMPORTANT: In addition, SQL Server 2016 or higher is also required. If a full SQL Server is not available, SQL Express 2016 or higher can be used. It is important to note that SQL Express does not support the use of maintenance plans, and DB size is limited to 10 GB.
In order to prepare your server for the SES installation, please review the following and prepare the server accordingly:
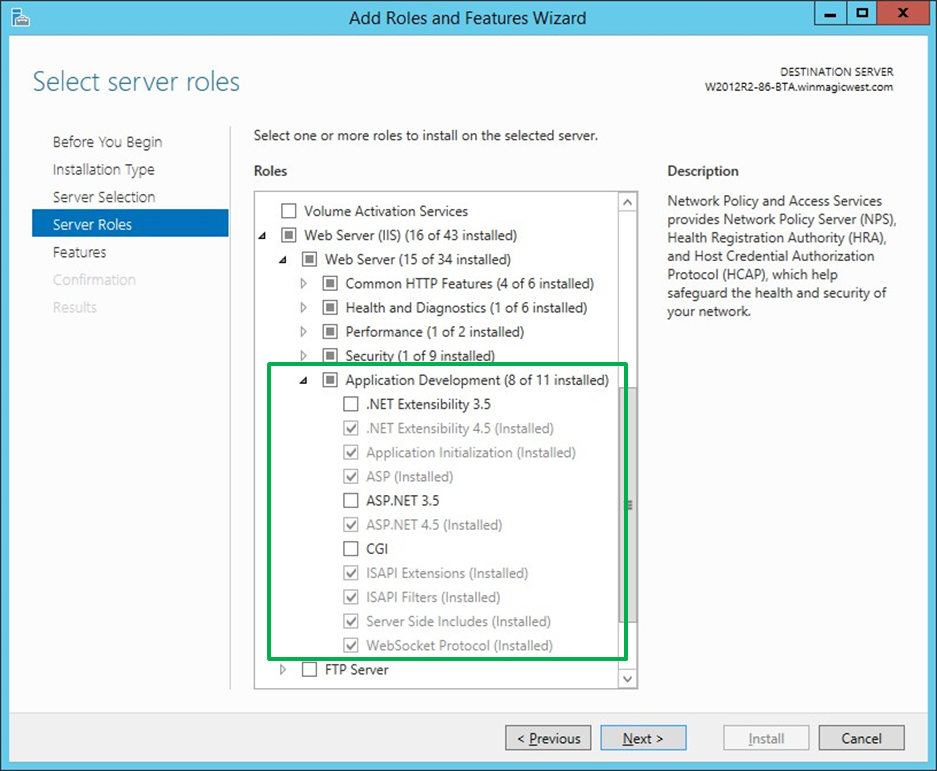
The SES Web Console requires the IIS Role be installed.
When configuring the IIS role, check the options under “Application Development” as seen in the following screenshot:
Microsoft .NET Framework 4.7 or later must be installed
Download it here:
Minimum Server Hardware Requirements:
2 Core, 2Ghz CPU or more
8GB Ram
120GB Hard Drive
If installing SQL Server Express 2016 (or higher), please refer to Appendix A
SES Account Credentials
In order to properly authenticate across all aspects of the SecureDoc ecosystem, a single Active Directory service account is highly recommended. This account can be limited in group access across the domain, however it must be granted local administrator access on the SES Server as it will be used to start the SecureDoc services. This account:
Should have a difficult, fixed password. Avoid the following special characters when creating the service account password: ‘ “ \ % _
The reason is because these characters can be used in SQL injection attacks
Should have access to read the AD tombstone (Deleted Objects)
Refer to the following Microsoft article:
Should be used to log into the server (If Possible) in order to simplify setup of SES.
Must be granted access to the SQL server in order to access the SecureDoc Database.
Is used to authenticate and provide ability for SecureDoc to sync with Active Directory.
Is used to start the SecureDoc Services and Web Console application pool.
Before continuing, please create this account and provide it with “sysadmin” rights to your SQL server. We can reduce the rights after the database has been created by SecureDoc.
For details on the SQL rights required for the AD Service Account, please refer to Appendix B.
.png)
SES SQL Database
Note: For production implementations of SecureDoc Enterprise Server, WinMagic recommends that the Full Text Indexing feature be enabled in the database engine prior to the installation of SecureDoc Enterprise Server. Database Full Text Indexing is used to provide increased search capabilities in the SES Web console.
Installing SES
Video: https://youtu.be/T2J75QZTMQw Run-time: 2m24s
Copying and Executing the SES Installer
Before you install SES, make sure you have reviewed the prerequisites in the previous section and have a service account prepared. It is recommended to login to the Server with the Service Account, however it is not required.
Download the most current SES installation executable and copy it to your server, and then run it as Administrator:
.png)
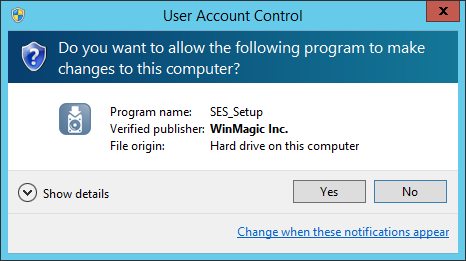 Click Yes:
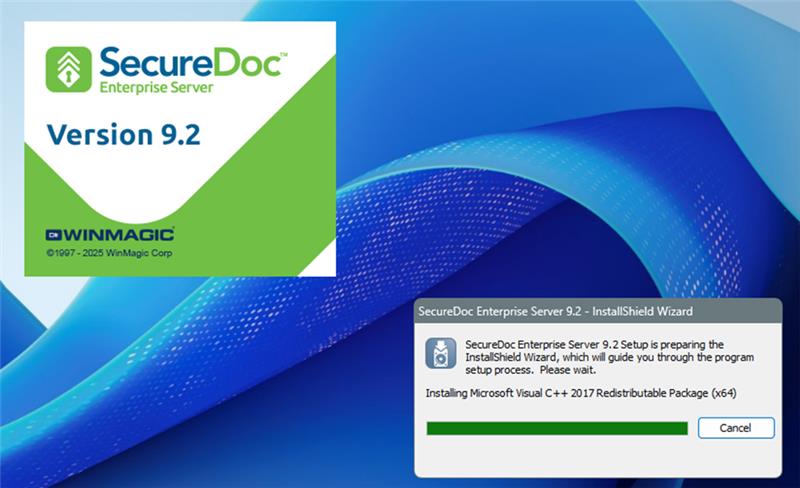
The Installation will start:
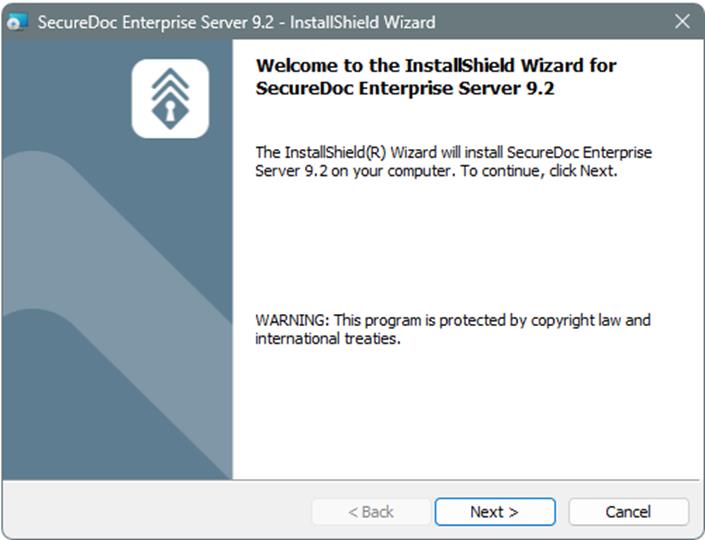
Click Next:
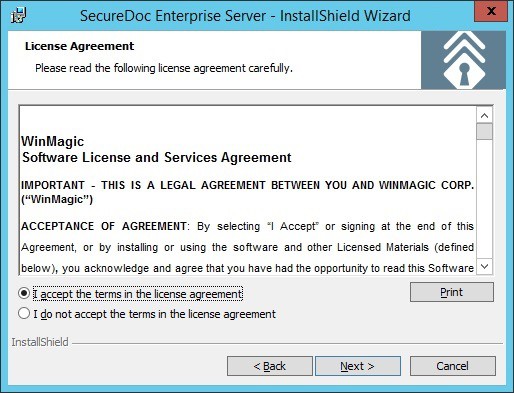 Read and Accept the End User License Agreement (EULA), and click Next:
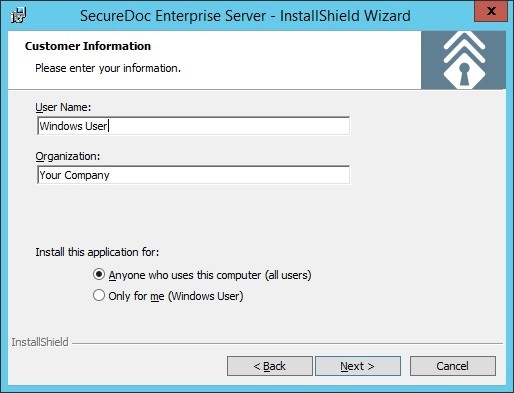 Enter the User Info if Applicable (It is recommended to install for “Anyone”), and click Next:
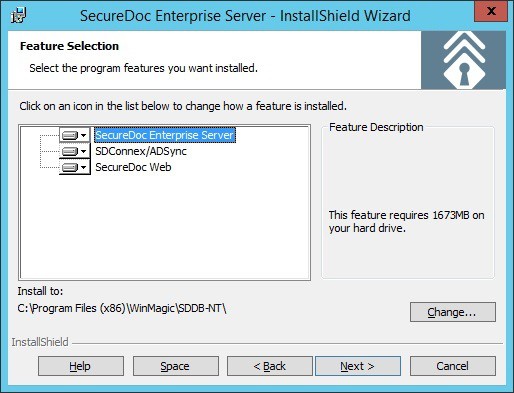 Confirm the Location to install the software to, and click Next:
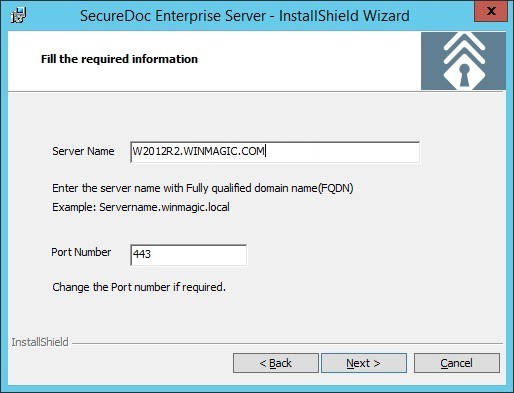 Enter the Fully Qualified Domain Name of your server, leave the port at 443, and click Next:
Record your Server name and port numbers here, if desired: Server Name:
Web Port:
Web API Port:
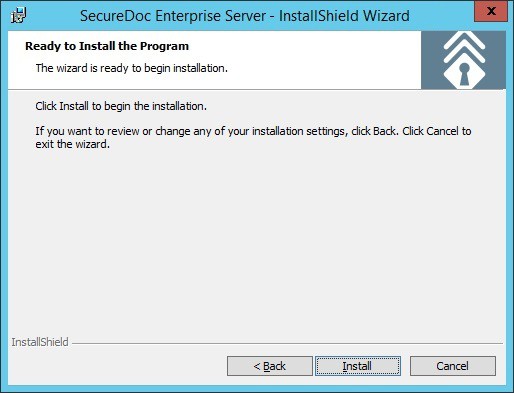 Click Install:
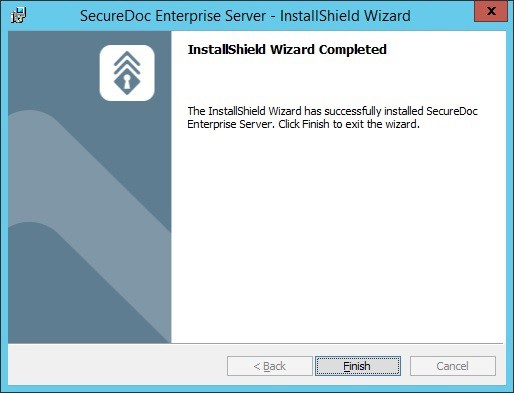 The installation will proceed… Click Finish when complete:
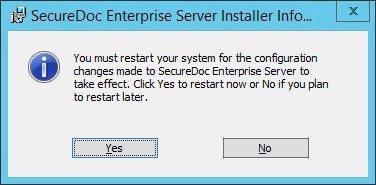 Click OK to accept that a reboot will be required after Setup is completed:
The installation of SecureDoc Enterprise Server is complete. After the Server restarts, please login again with the AD Service Account to continue with the configuration process.
Setting Up the SES Database and Master Key File
Video: https://youtu.be/BNpG9QdecaA Run-time: 5m50s
As previously mentioned, SES information is stored in an encrypted database that is protected by a master key, which is encrypted inside a master key file. The key file is protected using a strong password.
IMPORTANT! This key and key file is the only way to access the encrypted database information. Loss of the password used to unlock this key file is unrecoverable and will prevent complete access to the database! It is STRONGLY recommended to save a backup of this key file and password in a secure location.
Run SES from the Start menu (Start >> Programs >> Secure Doc Enterprise Server >> SecureDoc Enterprise Server):
.png)
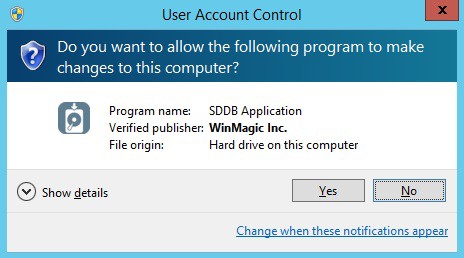
If UAC is enabled, accept the User Account Control (UAC) Prompt by clicking Yes:
The SES Login Screen is displayed. Click “Create Key File”:
.png)
The Create key file screen appears. Click “Browse” to select the location to save the key file:
.png)
Navigate to the location where you want to store the key file, and type a name for the key file: (We suggest creating a folder called KeyFiles, under the Program Files (x86)\WinMagic Folder)
.png)
Select a name for the keyfile:
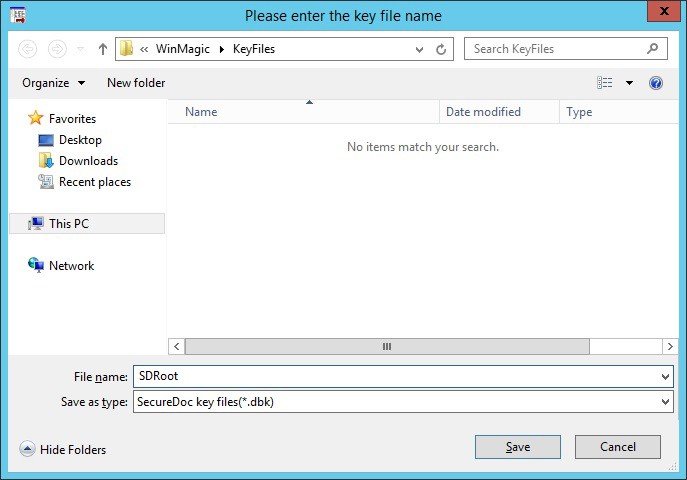
Click Save.
The name appears in the Key File field of the Create Key file screen.
In the Password field, enter a strong password for the key file and then confirm the password.
In the User ID field, enter a unique user ID for the key file – This should be unique from any AD user account. We recommend SDRoot, SDDB, Database, etc.
In the Key name field, enter the name you want assigned to the key used to encrypt the SES database. We recommend using your company name.
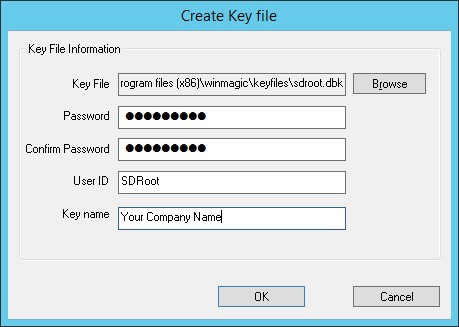
Record where you will store a physical copy of your master Key File (if desired): Key File password (or where password is stored):
.png)
Click OK. The Login to the database screen re-appears after a message that the key file has been successfully created. Click OK to confirm.
At the Login screen, enter the password that you just set for the key file, and click “Login Key File”:
.png)
The buttons in the bottom section are now activated. Click Create new database:
.png)
The Create new database screen appears, as in the image below:
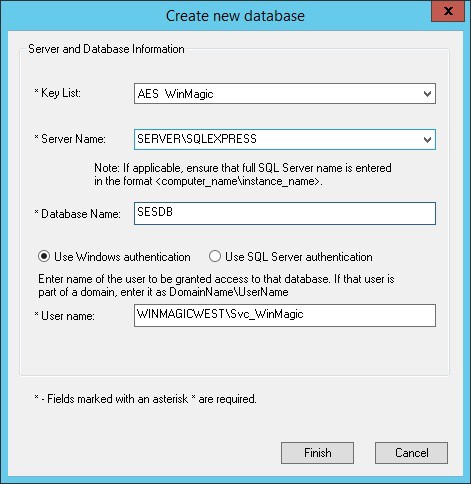
Enter the Server Name of the SQL server. In the screenshot above, SQL Express is installed on the same server, and by default SQL Express uses a named instance, specified by a backslash.
Enter a name for the Database. Recommended are SESDB, SecureDoc, SDDB, SDDatabase, Etc. Leave the default set to use the service account previously configured and click Finish.
.png)
Note: If you receive an error creating the Database, Refer to Appendix C - Troubleshooting
When the Administrator Access Rights screen appears, click the option to “Allow user to add other SES administrators” and click Save.
Recommendation: As a security precaution, the right to add further Administrators should be limited to one (or a very restricted set of Administrators) to ensure that the number of users with full Administrative rights can be both limited and securely managed.
.png)
The database will now be created, and once complete you will be presented with the SES Console:
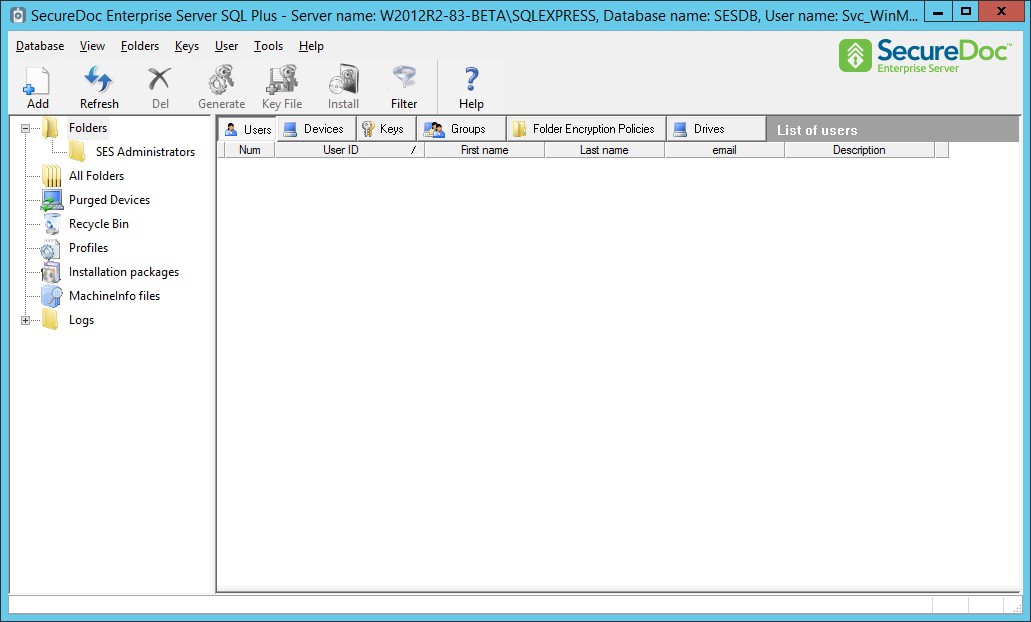
For now, minimize this window as we move to the next configuration section.
Configuring the SecureDoc Services
Video: https://youtu.be/VDVt-SQxJdM Run-time: 6m12s
For endpoint devices to communicate with the SES Server (which they will normally do during initial installation and thereafter) the SDConnex service must be installed and configured.
Register the SDConnex, AD Sync and Analytics Engine Services
Choose Start >> SecureDoc Enterprise Server >> SecureDoc Services Configuration. If UAC is enabled, click Yes at the prompt:
The Service Configuration Screen appears. Click on “SDConnex Service” in the left pane. Select the radio button next to Account and enter the AD Service Account Credentials in the form of domain\user. Enter and confirm the password and click Register:
.png)
Repeat the same procedure for the AD Sync Service and the Analytics Engine Service
Configure the SDConnex Service
Click on the SDConnex Service on the left. The SDConnex Service screen changes to show three configuration tabs. We will start with the General tab as shown below. The Keyfile path will already be populated with the location of the master key file. Type in the Key file password and click Login:
.png)
You will see the Server\Instance and the Database fields populate with their previously configured values. In addition, check both boxes under Services and click Apply:
.png)
If any errors are encountered, confirm that the connection information for the SQL server and database are correct, and that the account with which you are currently logged on (The AD Service Account) has sufficient SQL server rights to access the database.
Next, click on the Communication tab. We will leave all settings at their defaults, except for under Remote Installation. Select the middle and bottom check boxes, so that your screen matches the screenshot below, and click Apply:
.png)
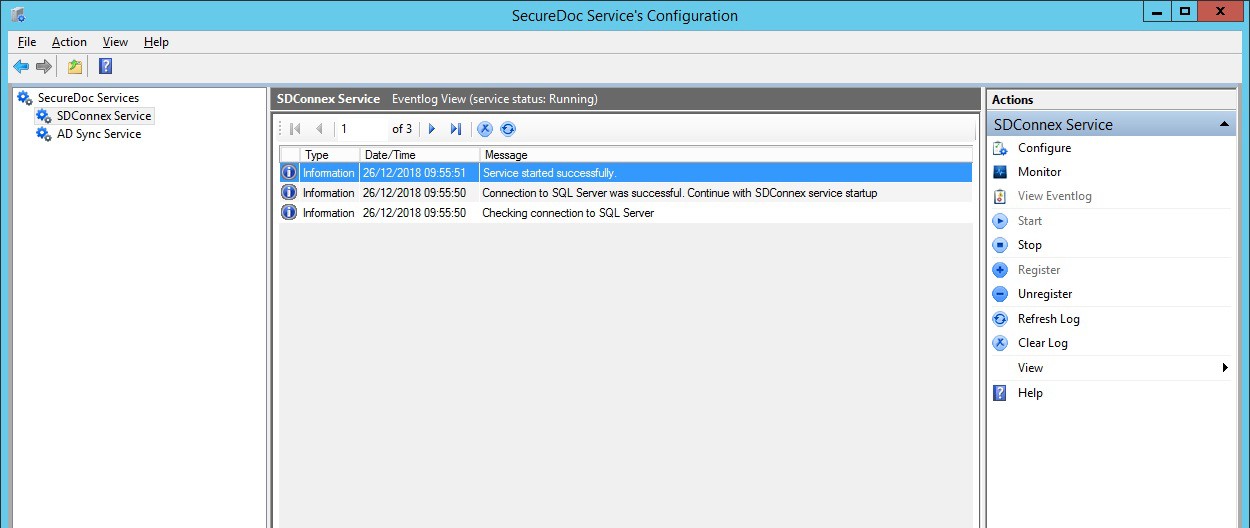
The configuration is complete. Click on Start to start the service, and then click on View Eventlog to check the event messages. You should see a message that the service successfully connected to the database:
Configure the ADSync Service
Click on the ADSync Service on the left. The ADSync Service screen changes to show two configuration tabs. We will start with the General tab as shown below. The Keyfile path will already be populated with the location of the master key file. Type in the Key file password and click Login:
.png)
The information will populate as shown. Confirm the information by clicking Apply. Next, we will setup the sync with your Active Directory Domain. Click on the Sync Config tab, and right click on the Root of Tree View. Select Add Domain:
.png)
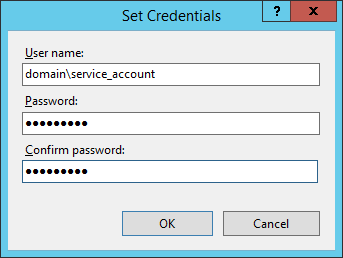
The Add Domain window will appear. Enter the domain name or domain controller server name, the NetBiosName\User Name and Password for the AD Service account and click Browse Forest:
.png)
Select the domain and click OK:
.png)
You will now see the Root Naming Context populated in the bottom of the window. Click OK:
.png)
Click OK at the message that appears, confirming the information has been saved:
Back at the Sync Config tab, click on the Plus Sign next to the domain – Do Not Click the Check Box. You do not want to sync the entire domain as there is a lot of information that is unnecessary for SecureDoc. What you want to focus on are any OUs that contain Users and Groups as shown below. Check the box next to the specific OUs which contain the users and groups you wish to sync, and click Save Sync. Then, click Start to start the service:
.png)
You can click View Eventlog to confirm the synchronization has started. Depending on the size of the AD and the number of users in AD, the first sync can take up to 30 minutes. Once the event log shows that the sync is completed, you will see users and groups populated in the SES Console. In addition, you can click on Monitor on the right column to see statistics on the number of users and groups that have been synchronized. Services Configuration is now complete, and you can close this screen.
Note: It is very important to grant access for the AD Service Account to read the deleted items. Otherwise, deleted items will not be removed from the SES Database. Please refer to the Microsoft article linked in the prerequisites section of this document.
Configure the Analytics Engine Service
By this point the Analytics Engine Service has been registered. Its configuration steps are nearly identical to those for the General tab of ADSync:
Browse to the location of the master keyfile and enter the Key File Password
Click Login which will populate the Server\Instance fields
Accept all other defaults and click Apply
Start the service.
.png)
Configuring the SES Web Console
The SESWeb (also called SDWeb) Console is a convenient way to perform day to day tasks such as Challenge/Response recovery for users who have forgotten their password, adding or removing users to devices, as well as accessing a variety of pre-configured reports and statistics. In V8.6, new functionality permits defining and updating both Device Profiles and Installation Packages.
In order to configure the Web Console, there is some minimal setup required.
Configure IIS to serve the SES Web Console
Video: https://youtu.be/LDNimDHPCrA Run-time: 2m57s
Choose Start >> Internet Information Services (IIS Manager)
.png)
Once IIS is open, expand the server tree on the left column and click on Application Pools
From here, right click on the SecureDoc AppPool and select Advanced Settings… as shown:
.png)
Once in Advanced Settings, look down the list for Identity (You may need to scroll down) Select it and click on the small button to the right with the three dots […]:
.png)
Select the radio button for Custom account: and click the Set… button:
.png)
Enter the credentials for your service account (same account used to run SDConnex) and click OK:
Proceed to Click Ok until you are back at the IIS screen. You should see the new account settings reflected in the AppPool:
.png)
Next, we will check the bindings for the HTTPS certificate. Click on SDWeb and from the following screen, click on Bindings… in the right-hand column:
.png)
We must bind a certificate to the website. For this guide, we will bind a self-signed certificate. Click on Edit…:
.png)
The Edit Site Binding screen appears. There should already be a certificate created as part of the SES installation. Select it from the SSL Certificate: drop down menu, and click OK:
.png)
Close out of the edit binding screen and return back to the IIS screen. Click on the server name in the left column and restart the Web server by either right clicking or clicking in the right column:
.png)
Define how SESWeb authenticates to the SES Database
Once the above steps have been completed, the last step is to instruct the SES Web Server:
How to authenticate to the Key File that protects the SES Database, and
Define and know where the Database is, and what it is called.
To do this, it is necessary to open a browser directly on the Server running SES Web. The site below is not accessible from other devices.
NOTE: Microsoft Edge, Chrome, Firefox will work, but Microsoft Internet Explorer is deprecated, and may encounter issues with registration. It is recommended to use a modern browser for this process.
1 - In the browser URL, enter https://localhost.
The browser will automatically determine this configuration process has not been performed before, and will redirect to https://localhost/Install, as shown in the screen below.
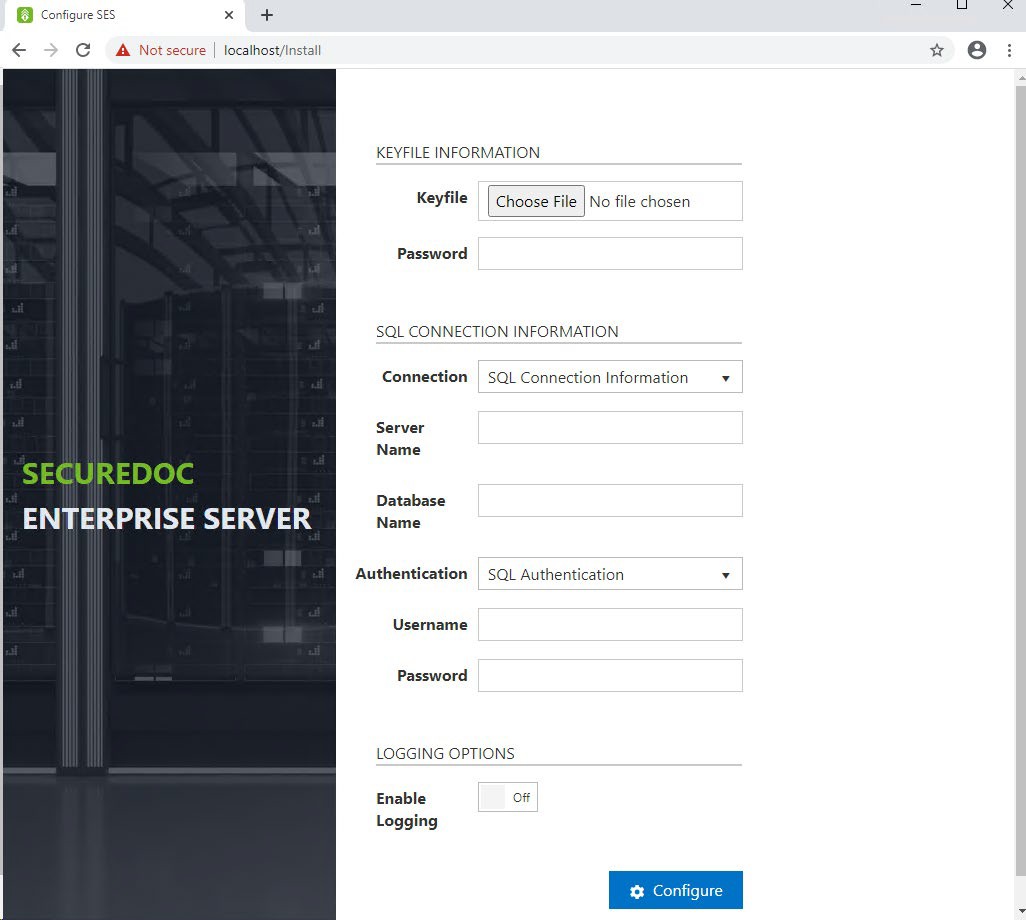
- Select the Master Key File location – This is the master key file created on page 18 of this guide
- Enter the Password that protects the master key file.
– Enter the name of the Server which is running SQL Server
– Enter the name of your SES Database
– In the Authentication dropdown, select whether you’ll be using SQL Authentication (the ‘sa’ account) or windows credentials. Windows credentials are derived from the SecureDoc AppPool as configured in the previous section.
– If using SQL authentication, enter the User Name of the account you’ll be using
– If using SQL authentication, enter the Password for the account you’ll be using
– If desired, enable logging (Typically only at the recommendation of WinMagic Support)
– Click the Configure button.
NOTE: Once the configuration details have been saved, the server will not continue to redirect from localhost to localhost/Install. Once the above settings have been defined, the SES Web console will know that the configuration settings have been applied and will not display the prompts screen above, even if you enter “localhost” as the URL.
However, if you ever need to return to this screen (e.g. to make any changes), you can log into it again by opening a browser on the Server and entering https://localhost/Install”
Lastly, verify that you can access the SecureDoc Web Console:
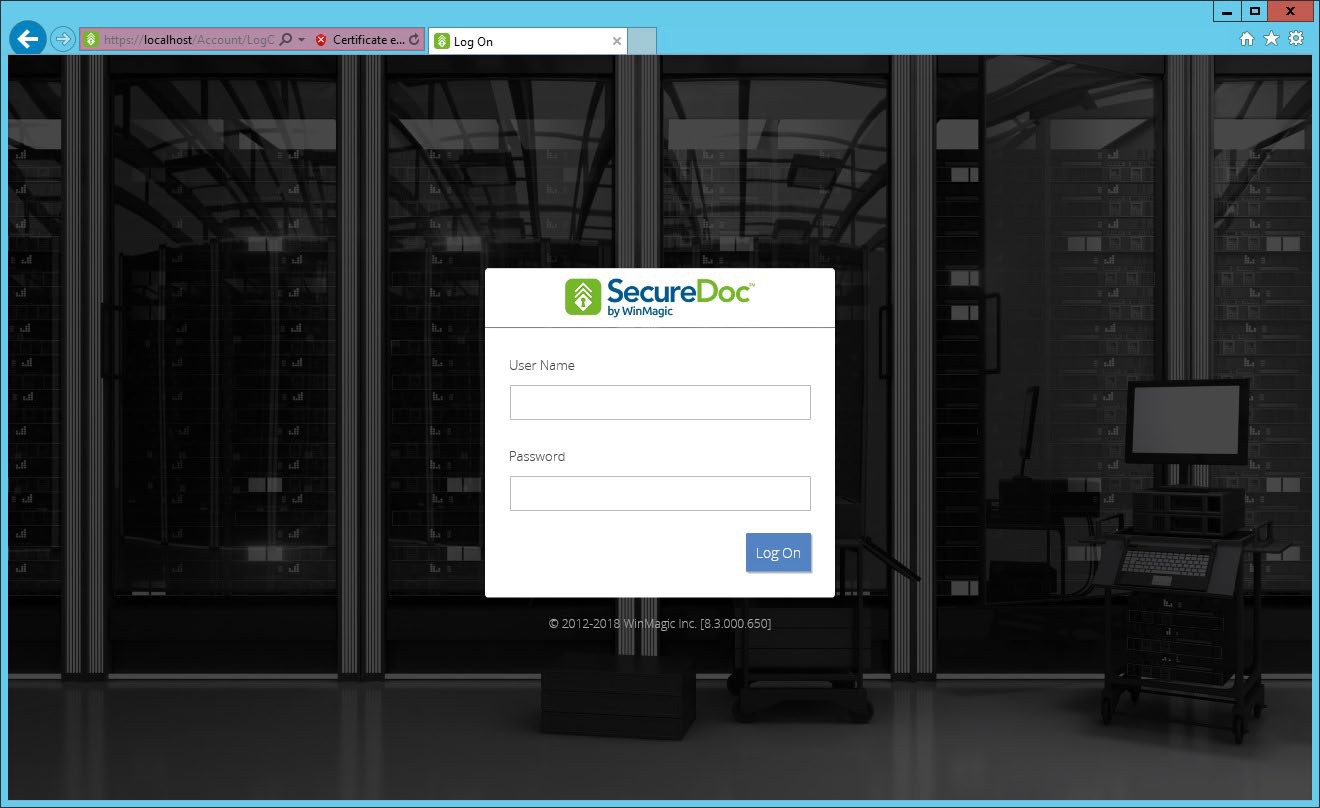
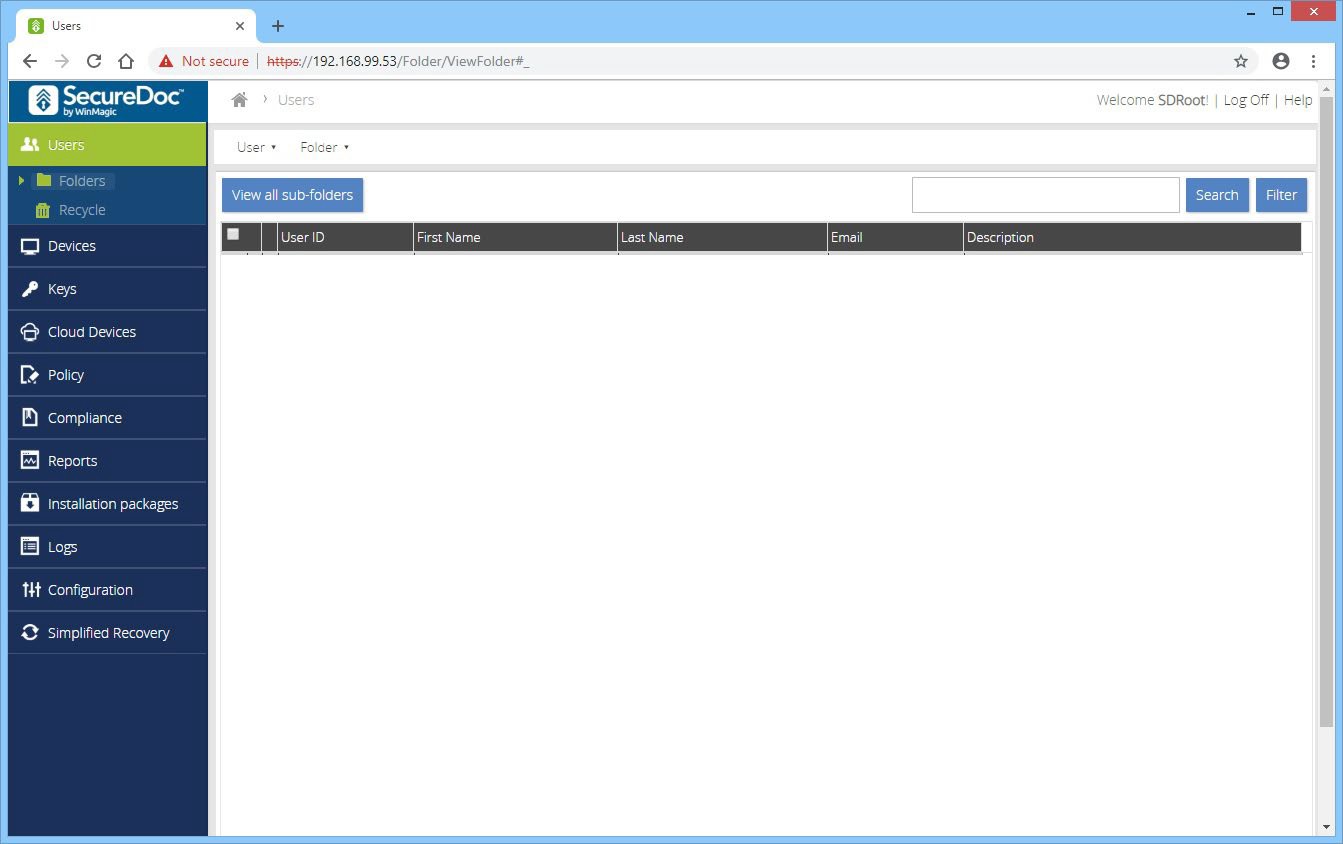
Login using the Root User that you created when you created the Master Key File:
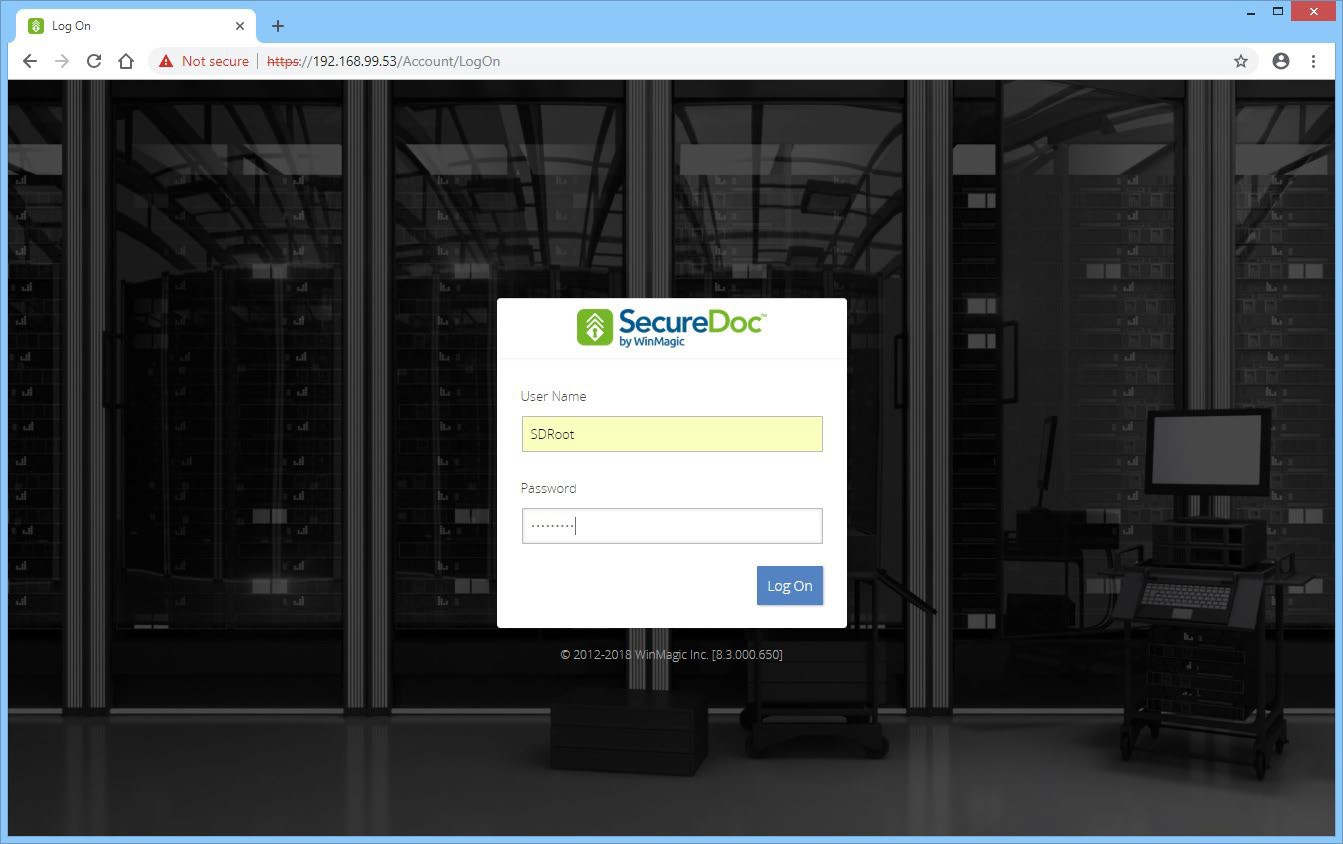
You will be presented with the main screen, and the Users section:
Add Group Access to the SES Web Console
Video: https://youtu.be/MvxasOvNFFI Run-time: 2m13s
Next, we will add an administrator group for access to the console. Click on Configuration to open that section, and then click on Administrator Management. Next, click on the Administrator Groups tab:
.png)
Click on the Administrators menu, and select Add administrator group:
.png)
Select the group that you wish to add, and select the Administrator role from the bottom section and click Save. If your group is not shown, click the box Display all groups. If your group is still not shown, confirm that you have synced in the group from AD, or create a new group in the SES console before continuing:
.png)
You will receive confirmation that the settings have been saved successfully:
.png)
Log Off of the Root User and login using a member of the newly added group:
.png)
.png)
Creating a Windows Client Install
In this section, we will walk through configuration of a standard Windows SecureDoc profile, and link it to an installation package, which can then be installed on a windows device. This guide is intended as a first step and covers only basic options. For more advanced descriptions of all available options, please refer to the SES User Manual.
Create a SecureDoc Enterprise for Windows Profile
Video: https://youtu.be/sYtuch5eqQw Run-time: 6m17s
Profiles set the parameters for the functions SecureDoc will perform on the client device. Changes to the profile can be easily sent to client devices that are assigned to use the profile.
To create a profile, click Profiles in the left side of the SES screen, and then right-click on the right side of the screen and choose Add profile:
.png)
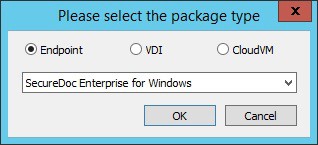
You will be asked what kind of profile you would like to create. Select Endpoint and
SecureDoc Enterprise for Windows, and click OK:

The main SecureDoc profile configuration screen is shown. Type a name for the profile and add any comments if desired, and then click General options:
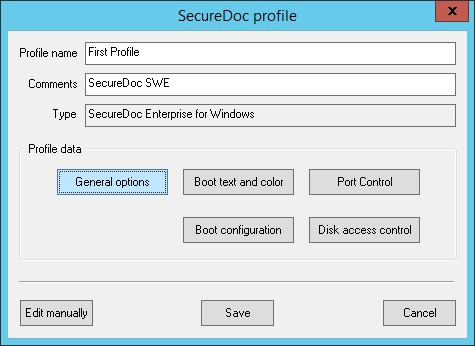
The sections are arranged by icon and description in the left column. Configure the General options to match the screenshot below. We will enable password sync for users, only encrypt the boot disk, disable hardware encryption detection, and encrypt data only.
This is designed to get you going with SecureDoc Software Encryption as quickly as possible:
.png)
Next, click on Communication to proceed to the next section. Confirm that the IP address shown in the server list is correct. In addition, we will add the DNS name of the server. Click on Add:
.png)
From the screen that appears, select Server Name and type in the FQDN. Click Add, and OK:
.png)
Next, click on Credential Provider to open that section. Check the box to Automatically log in to Windows with Credentials entered at Boot Logon. Uncheck the box below so that your screen matches the screenshot. This enables “Single Sign On” meaning that the user credentials used at Pre Boot Authentication will be used to automatically sign on to Windows:
.png)
Finally, click on Advanced Options to open that section. Check the boxes to Create Boot Key Files and Personal Key Files as shown. In addition, we will check the box to create accounts for AD users only. This means that only AD accounts found on the device will be allowed at Pre Boot, and not local user accounts. If you prefer that all accounts (local and AD) can access Pre Boot, then do not check this box. After configuring this screen, click OK:
.png)
You are back at the main configuration screen. Click on Boot text and color:
.png)
Click on the Key File Prompt and change the prompt to read Username: Click on the dropdown for Background Theme and select Classic. This screen allows you to change the main text that is displayed at Pre Boot. In addition you can set a custom background image.
If you would like to do so, please make sure the image is a 1024x768 pixel 24bit BMP file. When compressed it should be no more than 512kb. You can test this by compressing it using the built in windows zip utility (right click, send to zip file). When finished, click OK:
.png)
You are back at the main configuration screen. Click on Boot Configuration:
.png)
Confirm that all the options match the screen shown below. No changes should be required. Click on Advanced Options:
.png)
You can see from the above screen that SecureDoc employs four Pre-Boot Authentication methods. These methods are described in more detail in the SES User Manual.
We will be using the Pre-Boot Linux or PBL for legacy devices, and Pre-Boot UEFI or PBU for UEFI devices. After you experiment with the native UEFI Pre-Boot, you can create a copy of this profile and change this setting to Pre-Boot Linux for UEFI or PBLU. PBLU is a more advanced pre boot environment that includes additional functionality but may not be compatible with all devices. It is important to test this setting on each device type prior to deployment into a production environment.
Confirm that all the options match the screen shown below. Click on OK:
.png)
You are back at the main configuration screen. Click on Save to save the profile:
.png)
Create a SecureDoc Enterprise for Windows Installation Package
Video: https://youtu.be/8t1AB3B4A1o Run-time: 4m07s
Installation Packages set the options that apply during the initial installation of the SecureDoc client. These settings are used only during the initial installation and device registration stage of the client install. Each installation package is associated with a single profile, however multiple installation packages can reference the same profile.
To create an installation package, click Installation Packages in the left side of the SES screen, and then right-click on the right side of the screen and choose Add package:
.png)
You will be asked what kind of profile you would like to create. Select Endpoint and
SecureDoc Enterprise for Windows, and click OK:
The main SecureDoc profile configuration screen is shown. Type a name for the installation package and add any comments if desired, and then click the second Browse button as indicated below. This will open the profile selection screen:
.png)
Select the profile from the list of available profiles, and click OK:
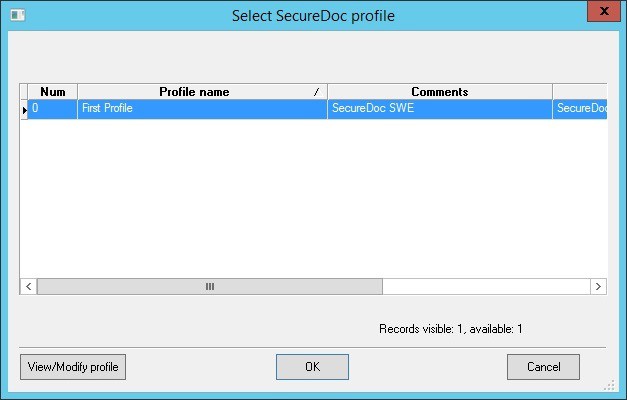
You will now see the profile indicated in the Device Profile box. Check the bottom three checkboxes as shown in the screenshot below. These settings will show a large window with the encryption progress so that you can see the encryption status. In addition it will restart the computer twice during the installation. The “Allow SecureDoc installations to run silently…” will allow the encryption process to start without waiting for a user to logon to Windows, and the last checkbox will prevent a popup that appears once installation is complete. For more details surrounding these options, please review the SES User Manual. For now, set these options and click Provisioning Rules:
.png)
Provisioning rules determine the behavior of the Pre Boot Authentication during the initial installation phase of SecureDoc. By Default, a provisioning state is enabled which means that Pre Boot Authentication will be hidden until a point in time where a user has been positively identified and confirmed as being cached on the device. The reason for this is to prevent a scenario where Pre Boot Authentication could be shown without any cached user credentials. This scenario would prevent any user from accessing the device. Therefore, provisioning will automatically determine the first user to logon and assign that user to the device. Once this is complete, Pre Boot Authentication will be displayed on the next boot.
In addition, you can also choose to specifically route the device location to a specified folder in your folder view. This can simplify device management by placing all devices in a single folder.
For this guide, confirm that all options are set as shown, and click OK:
.png)
The package will now be created, it may take a minute for it to be displayed in the SES console window.
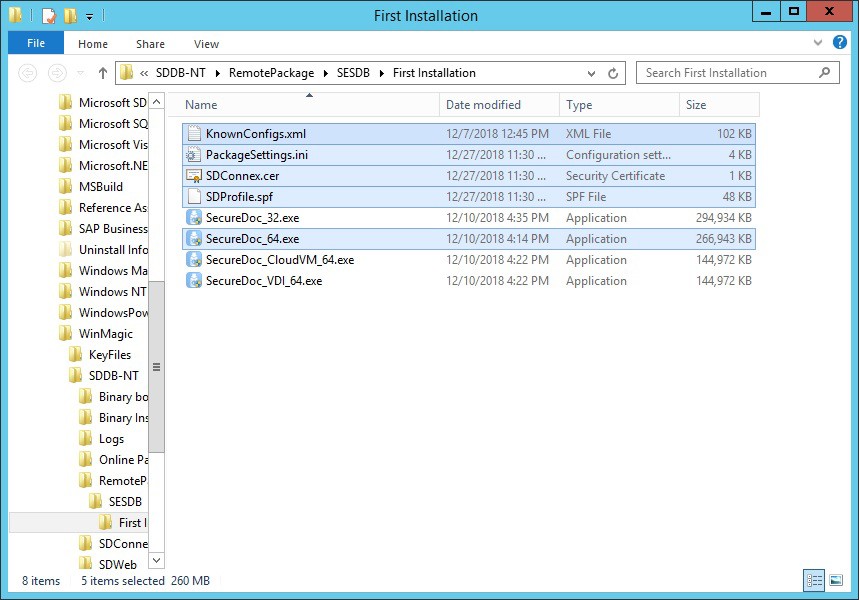
In order to locate the installation package files, right click on the installation package and select Browse Package Files. A new File Explorer window will open with the location:
.png)
For your first installation, copy all the files highlighted below to a USB or network location:
Install SecureDoc on an Endpoint Client
Video: https://youtu.be/sHfz4UwEDvM Run-time: 5m26s
In order to install the client on your first device, make sure to copy all of the following files to a temporary folder on the client, and then execute SecureDoc_64.exe as an administrator:
Knownconfigs.xml – This contains preconfigured installation parameters for specific devices, for compatibility purposes.
PackageSettings.ini – This contains the installation package settings that were previously configured.
SDConnex.cer – This is a certificate that is used to protect the proprietary AES 256 encryption used for communication from the client to the server and vice versa.
SDProfile.spf – This is the profile settings that were previously configured.
SecureDoc_64.exe – This is the base installation, which settings are determined by the files listed above.
The executable is a silent installer. You will see a splash screen and then you may see some pre-requisites being installed. SecureDoc requires Microsoft Visual C++ 2017 Runtime.
Viewing the device status in the SES Console
A column called Deployed State in the Devices tab in the SES console indicates the SecureDoc deployment status of a device, i.e. Deployed, Temp User, Temp Autoboot, Unknown, and No Provisioning.

Each device can have one of the following deployed states:
Status | Description |
Deployed | The owner of the device has been identified, and unless Autoboot is enabled, Pre-Boot Authentication is shown on boot. |
Temp User | The owner of the device has not been identified yet. The Pre boot logon screen appears, and authentication can be performed with a Temporary User account that has been configured and cached on the device. Once the owner is identified, status will change to deployed and the Temporary User account will be removed. |
Temp Autoboot | The owner of the device has not been identified yet. Since there are no cached credentials on the device, the Pre boot logon screen is not shown. The system is set to Autoboot, or automatically authenticate to Pre boot. |
Unknown | For Mac devices only and previous-version SecureDoc clients |
Device Owner Status
In the “Users having access to the device” table under Devices tab, you will see a column called Owner. This column provides the details regarding the device’s ownership – whether or not the user is the owner. Currently the “Owner” cannot be changed once established.
However, there is no advantage to changing the Owner. This is simply to indicate that this is the first user cached to the device.

After installation
How Users are Affected
The end user experience of having SecureDoc on their computers is minimal:
Once SecureDoc has been deployed and drives have been encrypted, users simply continue to work as before. Under normal circumstances, their only ongoing interaction with SecureDoc is when they turn on their device and the Pre Boot Logon program requires them to enter credentials to authenticate.
Managing Encrypted Devices
The encryption status of client devices is shown on the SES interface. For example, one computer in the display below is encrypted:

Once client devices are encrypted, you can use remote control functions to work with them, or modify the profile and re-send it to all or some of the client devices. This could be done, for example, to change to token-based encryption or to enable removable media encryption.
Please see the SecureDoc Enterprise Server Manual for more information on remote control, removable media, multi-factor authentication and other features.
Appendix A
How to install SQL Express
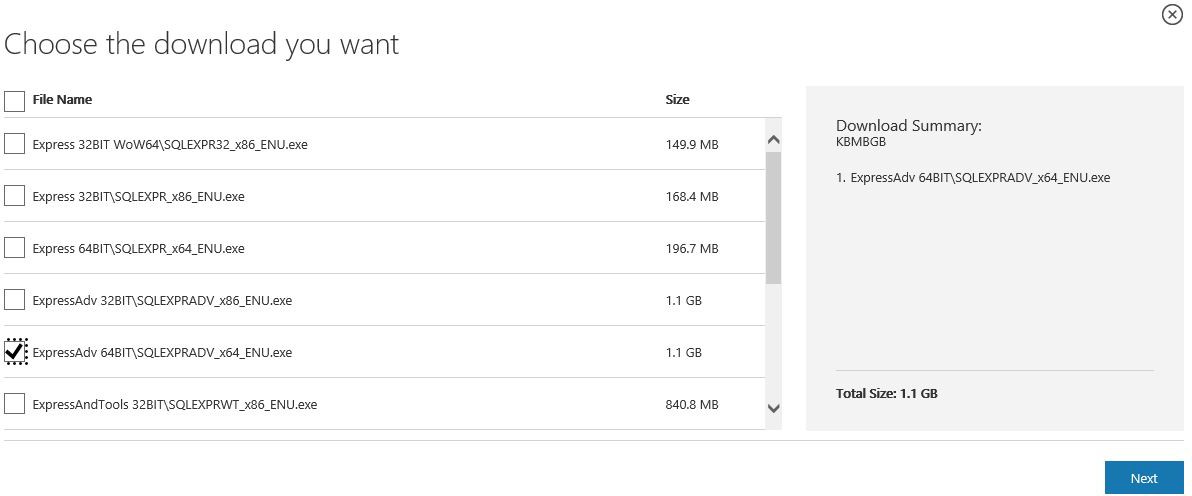
This appendix provides step by step instructions for installing SQL Express. A link to the download is below. WinMagic recommends installing the advanced version with Full Text Search, however it is not required. You will need SQL management studio, either provided as part of the SQL Express download, or downloaded and installed separately. While the concepts covered in this appendix are universal to all SQL versions, this appendix will focus on SQL 2019 or later.
Installation of SQL Express
Once you have downloaded the installer to a temporary location, right click on it and run it as administrator. You will see the following screen asking you to choose a directory for the extracted files. Confirm the directory is correct and click Ok:
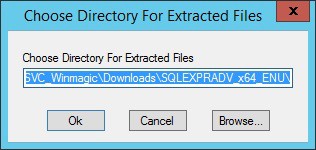
You will now see the files extract:

Once the files have extracted, the main configuration screen will appear. Click on New SQL Server stand-alone installation or add features to an existing installation:
.png)
The following License Agreement screen will appear. Accept the license and click Next:
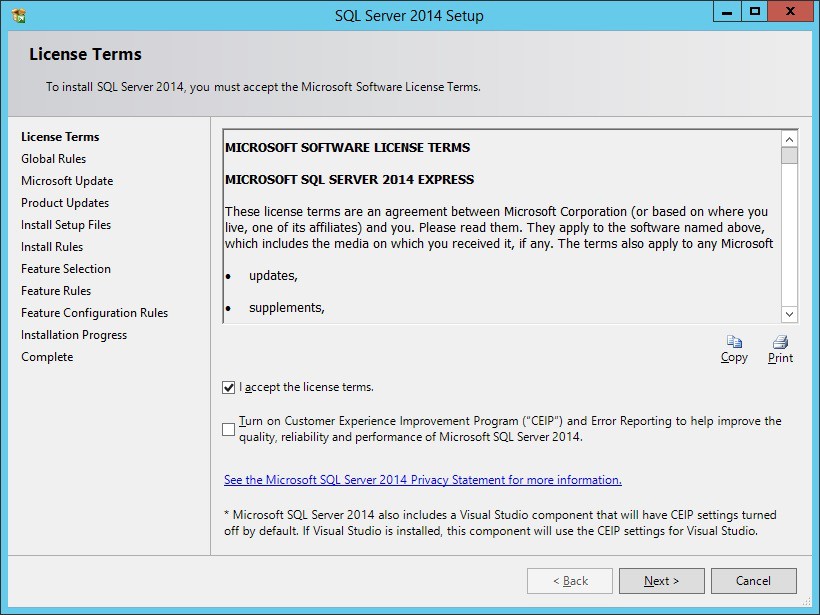
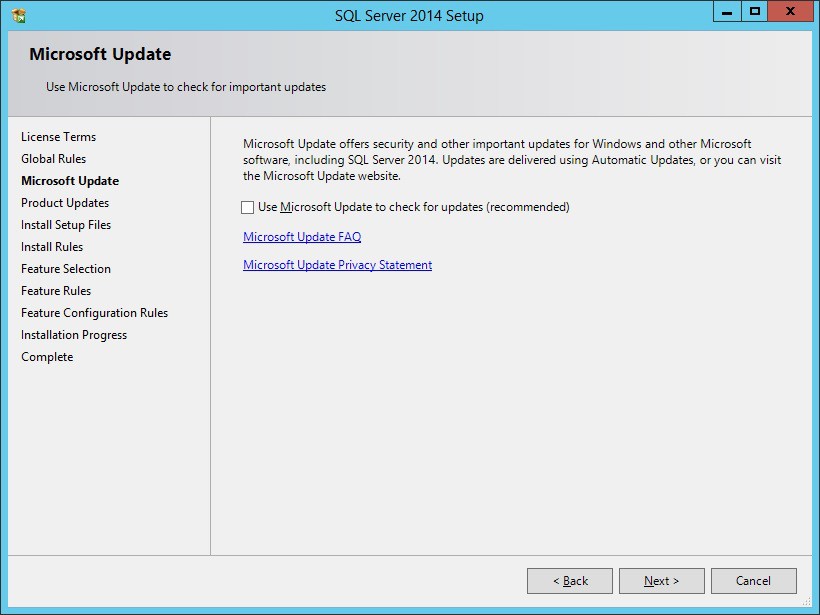
If you would like to use Microsoft Update, check the box. Click Next:
Here is where we will select the features to install. Match the settings below and click Next:
.png)
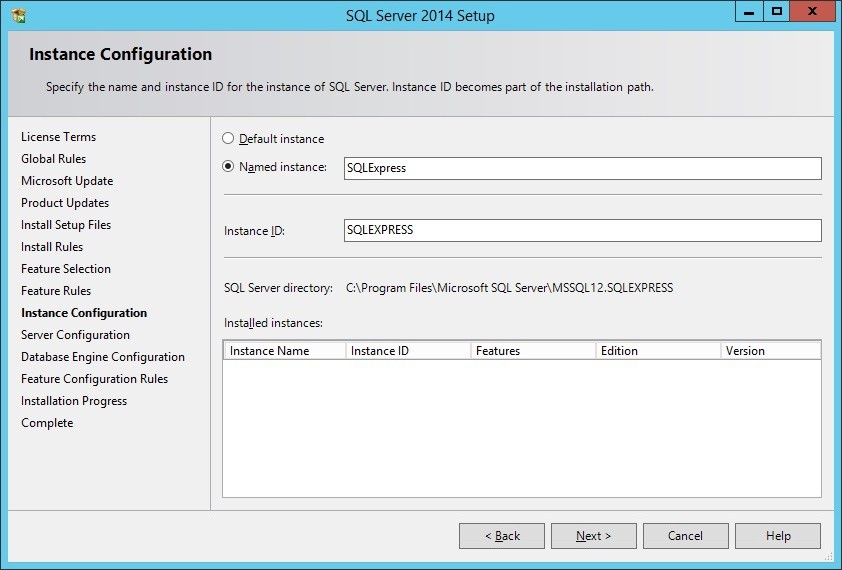
You can choose either the Default Instance or a named instance. Default is a named instance called SQLExpress. This simply means to access the SQL server, you need to use YourServerName\SQLExpress to identify it. To continue, click Next:
Leave all settings at the defaults as shown, and click Next:

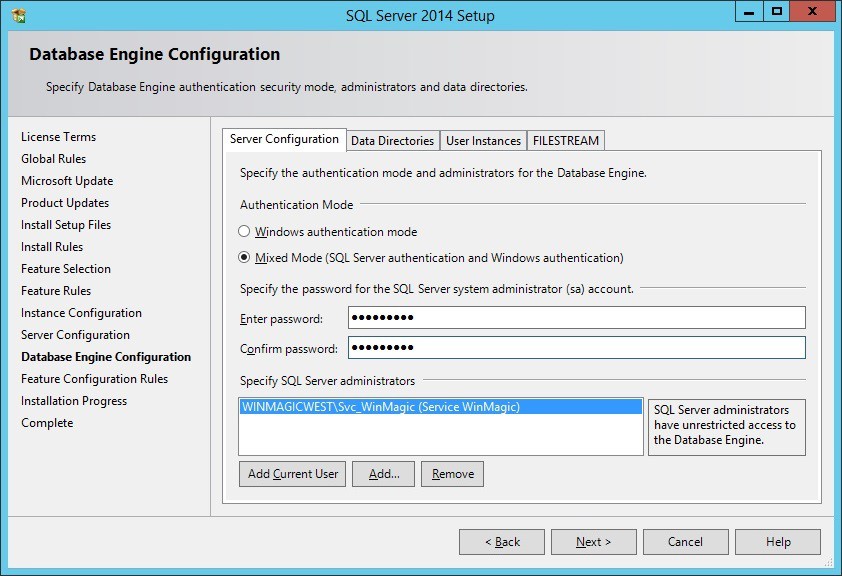
Here, we will enable Mixed Mode authentication. This is not required, but we will do this so that you have a way to access the SQL server using non-windows credentials. This gives flexibility for authentication later, should you have issues authenticating with windows credentials. Make sure to set a strong password and make a note of it! Then, click Next:
Now the installation will start. This can take several minutes.
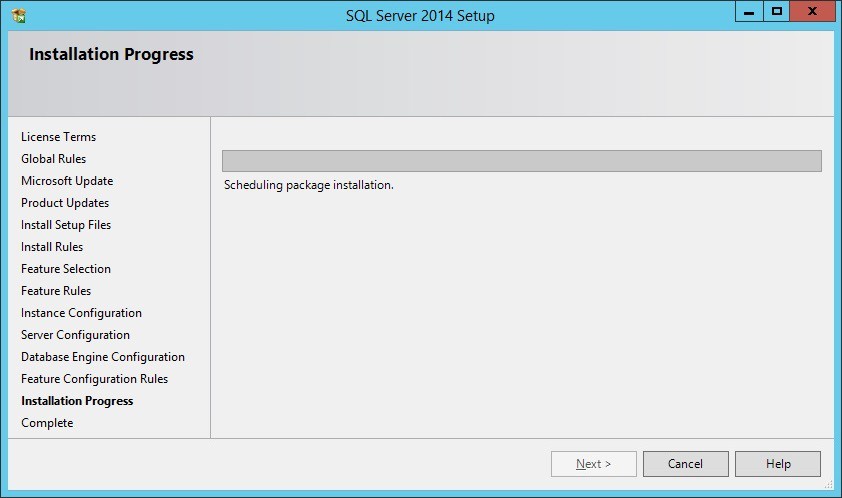
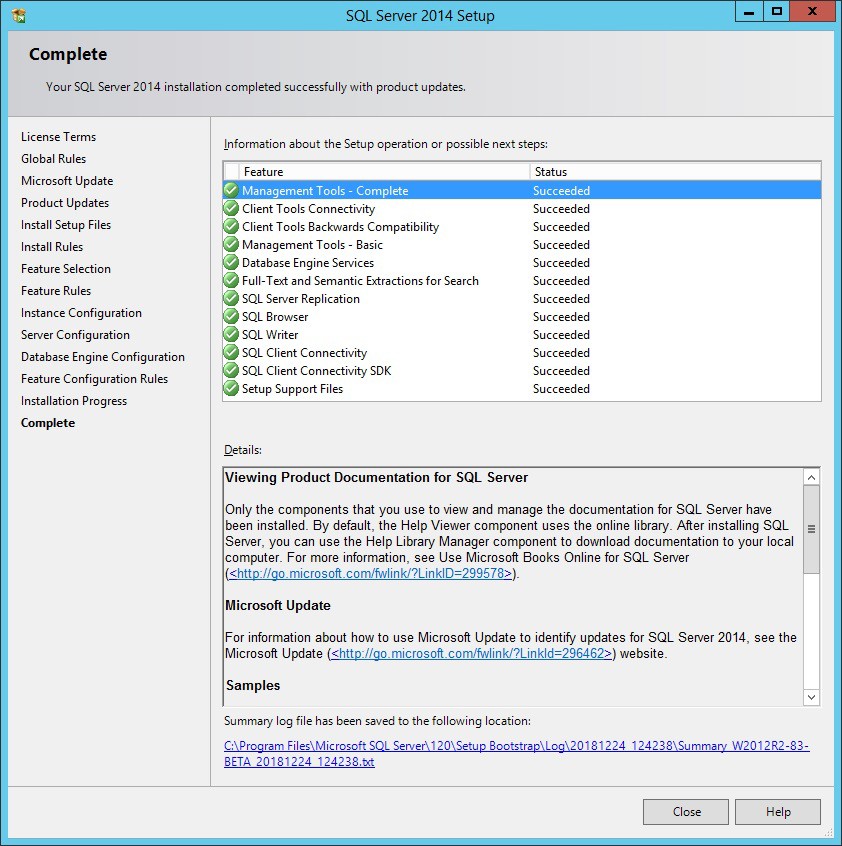
When installation is complete you will see the following summary screen. Click Close:
How to Login and add a SQL Server Admin Group
Now that you have successfully installed SQL Server Express, you can login using SQL Management Studio and perform administrative tasks on the Server and Databases. The first recommended task to perform is to add an Admin Group for access to the server. This is typically an AD group. Adding this group will make it much easier to provide SQL server access to user accounts who may need to use the traditional SES console.
First, launch SQL Server Management Studio from the start menu:
.png)
The Management Studio console will launch, and you will be presented with a login screen:
.png)
The currently logged on user will automatically be entered in the login screen. This should be the same user that was used to install SQL Express. Click Connect to login to the server.
Once logged on, you will see the server in the left hand column, with a tree of folders underneath. Expand Security, right click on Logins, and select New Login…:
.png)
Under Login Name, search for your AD Group. Once found, click on Server Roles on the left:
.png)
Here, select the access level for this group. Since there are no other databases being hosted on this server, and this is intended to be an admin group, check the box for sysadmin and click OK:
.png)
Congratulations, SQL Server is now setup and ready to use. To grant new users access to the SQL server, simply add them to your group. Repeat the process to add new groups if lower access levels are required.
How to enable External connections on SQL Express
By default, SQL express only allows connections from the same server that it is installed on. However, if you have more than one server which needs to connect to the database (DMZ server for example) then you will need to enable external connections and configure the appropriate port for SQL to listen on. By default, this port is 1433 on non SQL Express installations. In order to configure SQL express for TCP/IP connections, launch the configuration MMC snapin:
.png)
Depending on your UAC settings, you may be prompted to launch, click Yes:
.png)
You will be presented with the snapin. Open the SQL Server Network Configuration and click on Protocols for SQLEXPRESS. Then Double Click on TCP/IP:
.png)
We need to enable TCP/IP so that other servers can connect to this SQL Server. Click the drop down box and select yes under the enabled option, and then click on the IP Addresses tab:
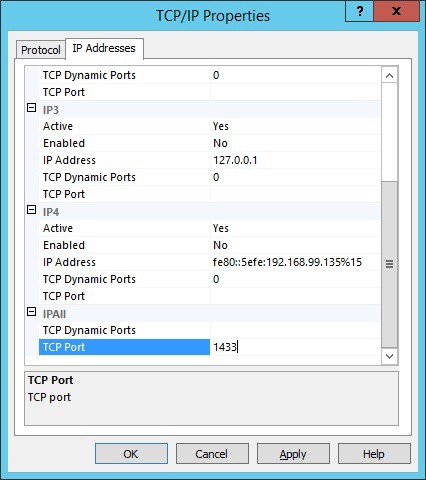
.png)
On the IP Addresses tab, scroll all the way to the bottom of the section. We will define a global, static port. Under IPAll, select TCP Port and enter 1433 or a custom number if 1433 is not available to you, and click Apply:
You will receive a message confirming that the change requires a restart of the SQL Server:
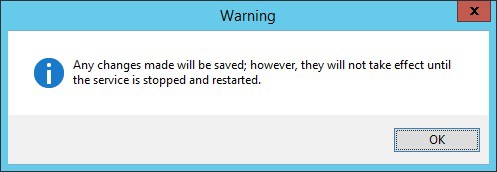
Click OK to close the window, and close the MMC snapin. Restart the SQL server and then you can use a Universal Data Link “tester” to check that the SQL server is now accessible from other servers on your network.
See Appendix C for details on creating and using the UDL tester.
Appendix B
SQL Server Access Requirements
This appendix provides additional details on the minimum access levels required for User or Groups who need to access the SecureDoc database. Two access levels are described below.
For day to day use, the following minimum access level is required:
(user role) db_datareader
(user role) db_datawriter
(user role) SD_admin
(user role) SD_user
(server role) public
(user role) db_ddladmin
Review the screenshots below for additional details. The User roles are set for each database under each user account:
.png)
.png)
For the service account, or any account that is performing a SES installation / upgrade:
(user role) db_owner
(user role) SD_admin
(user role) SD_user
(server role) dbcreator
(server role) public
(user role) db_ddladmin
Review the screenshots below for additional details. Server roles are set under the user or group / Server Roles pane, and User roles are set for each database as previously described:
NOTE: If using these instructions to upgrade an existing SES implementation.
.png)
.png)
Appendix C
SQL Server Access Troubleshooting
This appendix provides basic troubleshooting steps for verifying that your SES Installation can communicate with your SQL Server. Common issues include:
Incorrect spelling of the server name
Incorrect spelling of the database name
Failure to include instance name if configured
Failure to indicate custom SQL port if configured
Failure to enable TCPIP connections for SQL Express hosted on a different server
Insufficient privileges granted in SQL for the windows account being used
Troubleshooting Basic Connection Errors
The most common issues occur when configuring the initial connection for the SQL server, in order to create a new database or connect a new windows user to an existing database. If the database or SQL server is not accessible, you will receive errors similar to the following:
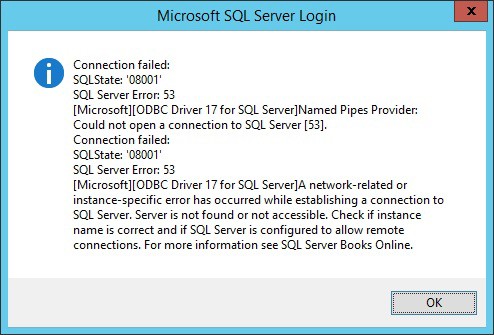
This error indicates that the server was not found – A common reason for this is because the name was misspelled, or it was configured to use a custom port. In the case of SQL Express, it may have not been configured to allow remote connections.
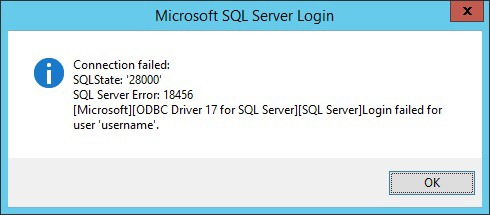
This error indicates that the server information was correct, but the login failed for the user account that was specified. The solution here is to confirm the user has access.
In either case, you will see the following dialog box pop up:
.png)
Make sure to click Cancel on this dialog as this is not where we want to make changes. You will receive the following message:
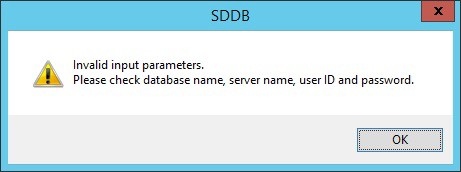
Click OK, and double check all the information entered. If all appear to be correct, the next step is to independently confirm that your SQL server and database are accessible.
Using a Data Link Connection utility to verify SQL Server Access
A simple way to verify that you can access your SQL server and database is to use a data link connector. This can be easily made on any Microsoft Windows operating system without requiring any external software or components:
First, right click on the desktop and create a new text document:
.png)
When the document is created, change the name to Tester.UDL – the name is not important, the file extension is the critical component. A UDL extension specifies a Universal Data Link document.
You will be prompted to confirm the file name extension change, click Yes:
.png)
You will see the icon has now changed to a new image. Double click on Tester.udl and you will be presented with the following dialog:
.png)
To test your connection and credentials, enter your server name into #1, and to test the credentials of the currently logged on windows user, select Use Windows NT Integrated security at #2. Then click Test Connection. If the connection is successful, you will receive a corresponding message. If the connection failed, you can use the error message to continue troubleshooting. If you are unable to connect using the server name, try next by using the direct IP of the SQL server. If you are still unable to connect, try using PING [IP] or TRACERT [IP] to make sure that the server is accessible and responding.
Confirm that the SQL server is running, and that it is listening on the correct ports.
Refer to Appendix A for guidance on checking and confirming that the user account being used has access to the SQL server, either individually or as part of a group membership.
NOTE: If using a custom SQL TCP/IP port, make sure to use a single comma, no spaces, to indicate the port. For example: Servername,1499
Appendix D
Windows Enterprise for BitLocker Client
This appendix provides steps for creating a Bitlocker client to manage Bitlocker encryption.
Creating a Bitlocker Profile
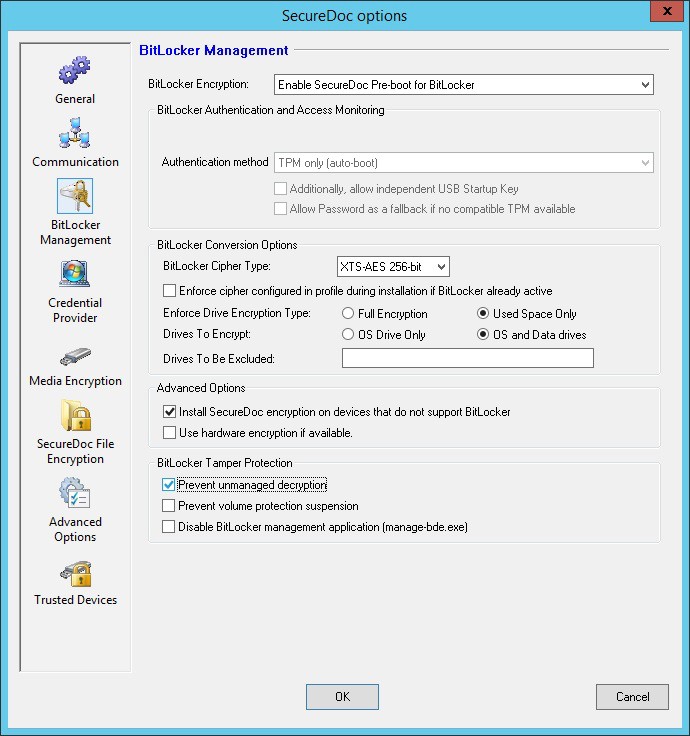
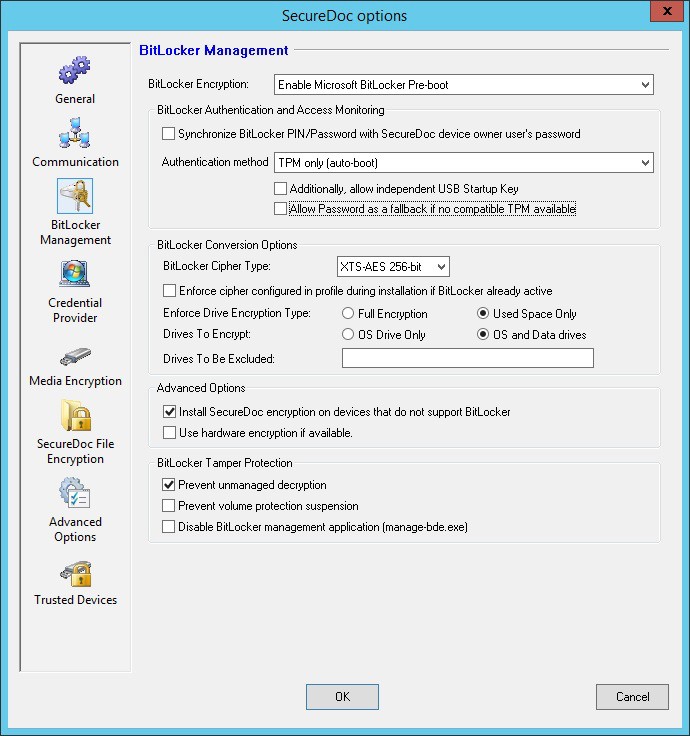
To create a Bitlocker Profile, first follow the steps in the section Creating A Windows Client Install. Once complete, open the profile you created and click on General Options, then click on the Bitlocker Management page. Here you have multiple options for management:
Option 1 – SecureDoc Pre-Boot for BitLocker
This option allows you to take advantage of the powerful SecureDoc Pre-Boot authentication while using Bitlocker as the underlying encryption engine for windows. This gives you a feature rich Pre-Boot while still allowing you to leverage the Bitlocker technology. This option is enabled by default when you click Enable Bitlocker Encryption:
For more details on the rest of the above options, please refer to the SES user manual. For now, match the options to the below screenshot and click OK:
Save the profile and you are now configured to utilize Bitlocker as the encryption engine.
Option 2 – Straight BitLocker Management
This option allows you to take advantage of the powerful SecureDoc Pre-Boot authentication while using Bitlocker as the underlying encryption engine for windows. This gives you a feature rich Pre-Boot while still allowing you to leverage the Bitlocker technology. This option is enabled by default when you click Enable Bitlocker Encryption:
For more details on the rest of the above options, please refer to the SES user manual. For now, match the options to the below screenshot and click OK:
Save the profile and you are now configured to utilize Bitlocker as the encryption engine.
Appendix E
SecureDoc Client for MacOS FileVault2
This appendix provides steps for creating a MacOS client to manage FileVault2 encryption.
Creating a MacOS FileVault2 Profile
To create a Mac FV2 profile, click Profiles in the left side of the SES screen, and then right-click on the right side of the screen and choose Add profile:
.png)
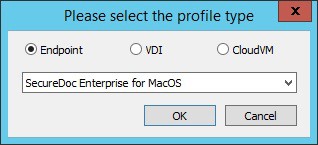
You will be asked what kind of profile you would like to create. Select Endpoint and
SecureDoc Enterprise for MacOS, and click OK:
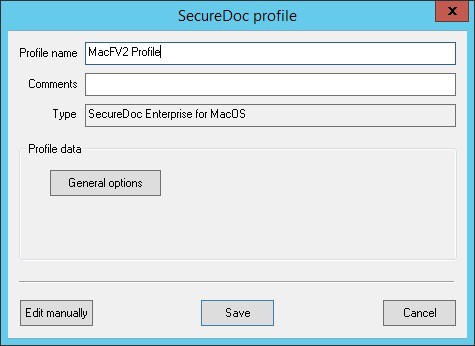
The main SecureDoc profile configuration screen is shown. Type a name for the profile and add any comments if desired, and then click General options:

The sections are arranged by icon and description in the left column. Configure the General options to match the screenshot below. We will enable FileVault2 Encryption, Synchronize/store Mac User Accounts and Credentials in SES, and Authenticate Mac User Account against Active Directory:
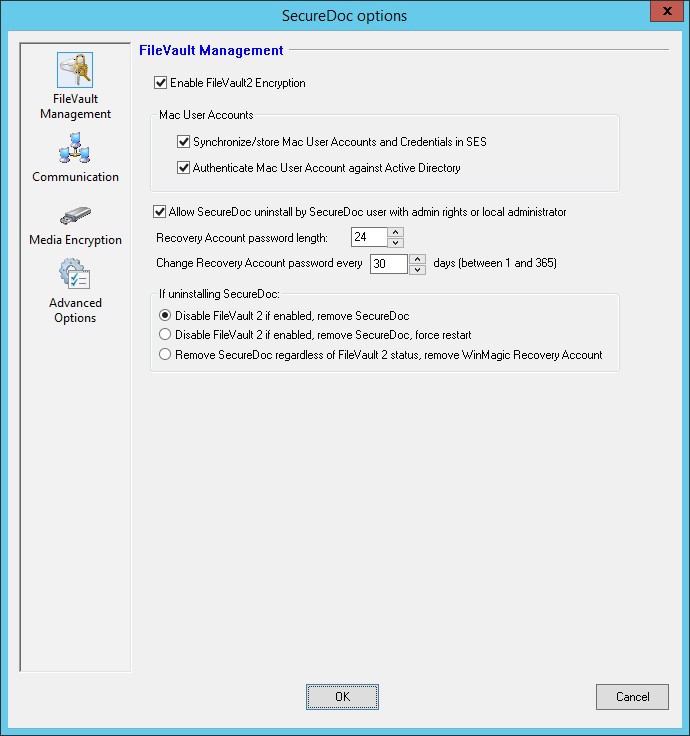
Under Communication, setup the server addresses using the same method as with the Windows profile. When complete, click OK:

Back at the profile screen, click Save to save the profile:
Next, you must create an installation package.
Creating a MacOS FileVault2 Installation Package
To create an installation package, click Installation Packages in the left side of the SES screen, and then right-click on the right side of the screen and choose Add package:
.png)
You will be asked what kind of profile you would like to create. Select Endpoint and
SecureDoc Enterprise for MacOS, and click OK:

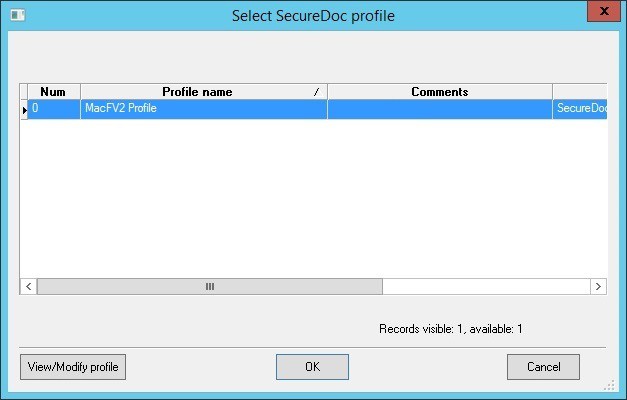
The main SecureDoc profile configuration screen is shown. Type a name for the installation package and add any comments if desired, and then click the second Browse button as indicated below. This will open the profile selection screen:
.png)
Select the profile from the list of available profiles, and click OK:
You will now see the profile indicated in the Device Profile box. Leave all options unchecked unless you wish to hide the encryption progress bar, in which case you can check Hide encryption progress from user. In addition, if you have a specific folder that you would like to store all the installations of this package, you can specify it below. Otherwise, select the Registration folder option, which will place the device in the folder where the user is located. Click OK when complete and the installation package will be generated:
.png)
In order to locate the installation package files, right click on the installation package and select Browse Package Files. A new File Explorer window will open with the location:
.png)
For your first installation, copy all the files highlighted below to a USB or network location:

On the Mac device, mount the DMG file and double click to open the contents:
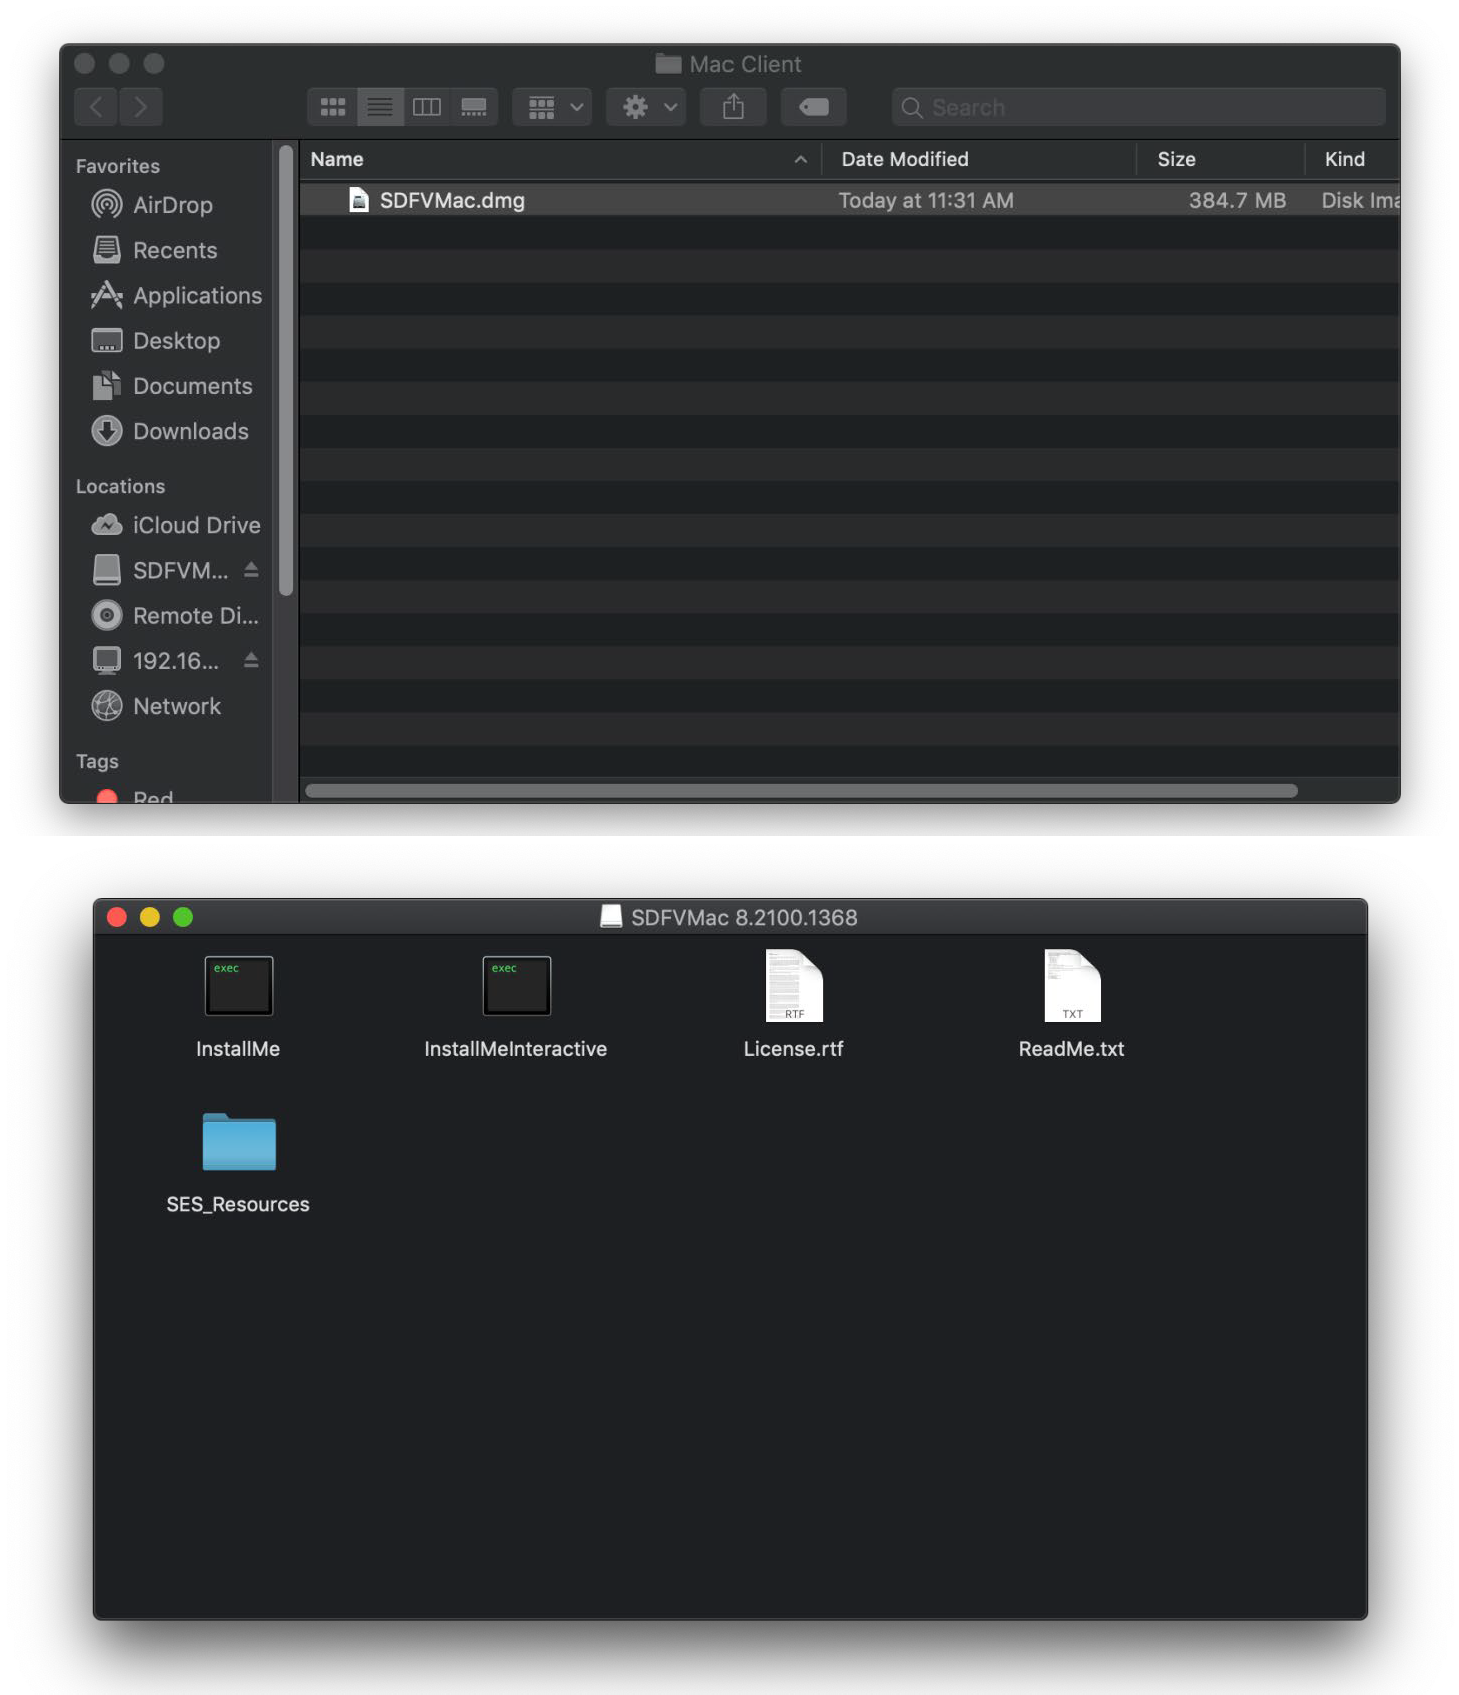
Double click on the InstallMe or InstallMeInteractive to install the client. The InstallMe is a silent installation script, whereas the Interactive will prompt through the install in typical fashion. You must be logged on as an administrative user to perform the install. For more details, please refer to the WinMagic User Guide for the Macintosh Client.

5770 Hurontario Street, Suite 501, Mississauga, ON | L5R 3G5 | Canada Tel: (905) 502-7000 | Fax: (905) 502-7001
Web: www.winmagic.com | Email: [email protected]
WinMagic provides the world’s most secure, manageable and easy-to–use data encryption solutions. Compatible with all editions of Microsoft Windows Vista, 7, and 10 as well as Mac and Linux platforms, WinMagic’s SecureDoc protects sensitive data stored on portable media such as laptops and removable media including USB thumb drives and CD/DVDs. Thousands of the most security conscious enterprises and government organizations around the world depend on SecureDoc to minimize business risks, meet privacy and regulatory compliance requirements, and protect valuable information assets against unauthorized access. With a full complement of professional and customer services, WinMagic supports over three million SecureDoc users in approximately 43 countries. For more information, please visit www.winmagic.com, call 1-888-879-5879 or e-mail us at [email protected].
SecureDoc, SecureDoc Enterprise Server, Compartmental SecureDoc, SecureDoc PDA, SecureDoc Personal Edition, SecureDoc RME, SecureDoc Removable Media Encryption, MySecureDoc, MySecureDoc Personal Edition Plus, MySecureDoc Media, and SecureDoc Central Database are trademarks of WinMagic Inc. Other products mentioned here in may be trademarks and / or registered trademarks of their respective owner.
Copyright 2025 WinMagic Inc. All rights reserved. This document is for informational purpose only. WinMagic Inc. makes NO WARRANTIES, expressed or implied, in this document. All specification stated herein are subject to change without notice.