Topic: This How-To article provides steps to migrating SD device(s) from one SES server to another SES server. This may become necessary if one SecureDoc-protected firm purchases another SecureDoc-protected firm and wishes to amalgamate all devices into a single SES server.
There are four steps to moving these devices successfully to the new productions server.
Step 1: Export the SES certificate from the SES production server to the original server.
Step 2: Add the original server protection key to the master key file of the production server.
This master key file will contain two protection keys belonging to the original and production server.
Step 3: Log into the SES server and SDConnex with the new key file.
Step 4: Pushing down the profile to these devices containing the new IP address and protection keys
Product version affected: All SES and SD versions
System Requirements: http://www.winmagic.com/support/technical-specifications
Environment: All devices and Windows OS
Additional Reference Material:
KB 1401 How to Migrate SES server to new server
KB 1021 Upgrade path for migrating from older versions of SecureDoc Enterprise Server
Steps to follow:
Step 1: Export the SES certificate from the SES production server
Click on Tools > Options > Server’s RSA keys > select Export button.
Browse to a location to save the file and it will save the file as xxx.p12. Enter a password.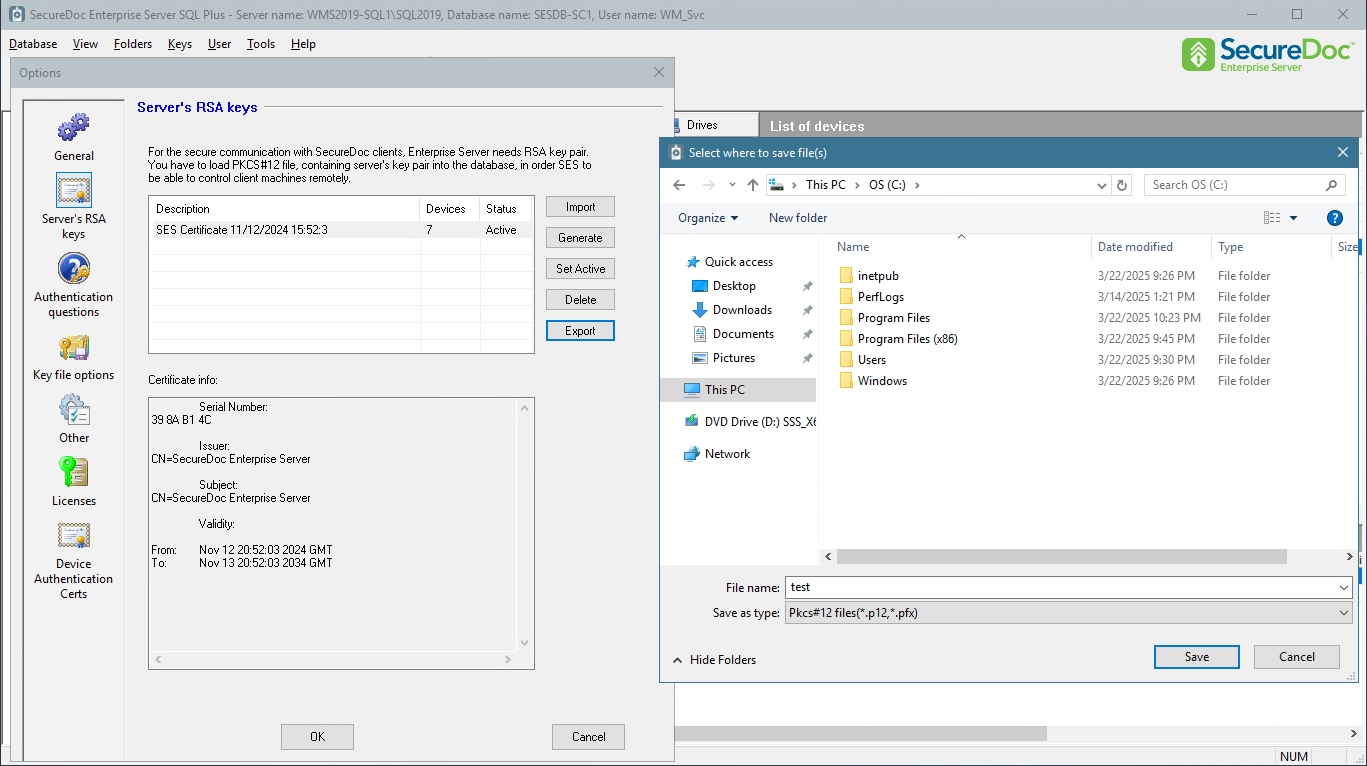
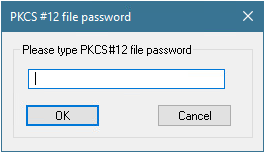
Import this xxx.p12 file to the original SES server. Mark the certificate as “Set Active” 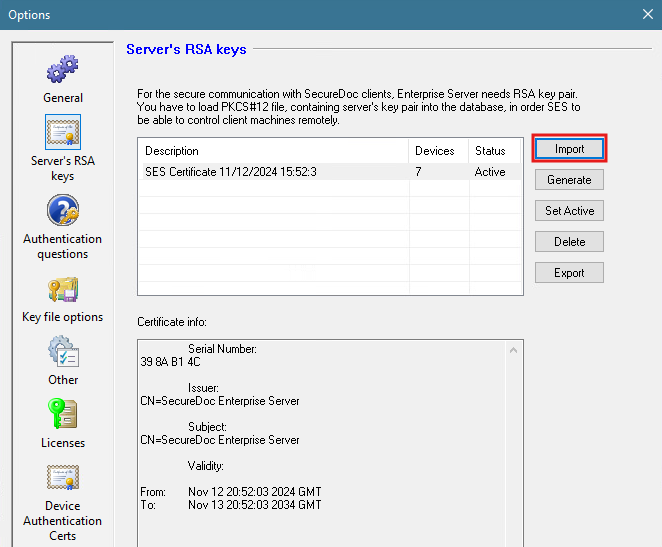
Step 2:
Determine what is the protection key of the master key file from the original SES server.
This is the keyfile that administrator needs to log into the SES and SDConnex Services. In this example, it is the SESadmin and the protection key is AES SESkey.
The following three screen shots are used to determine the master key file and the protection key.
Log into the SES console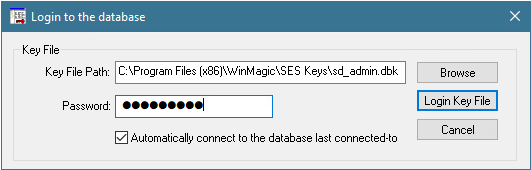
Database > Access Rights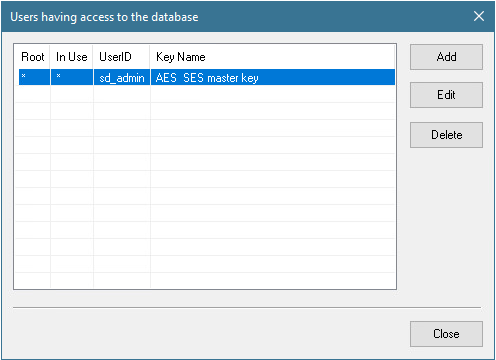
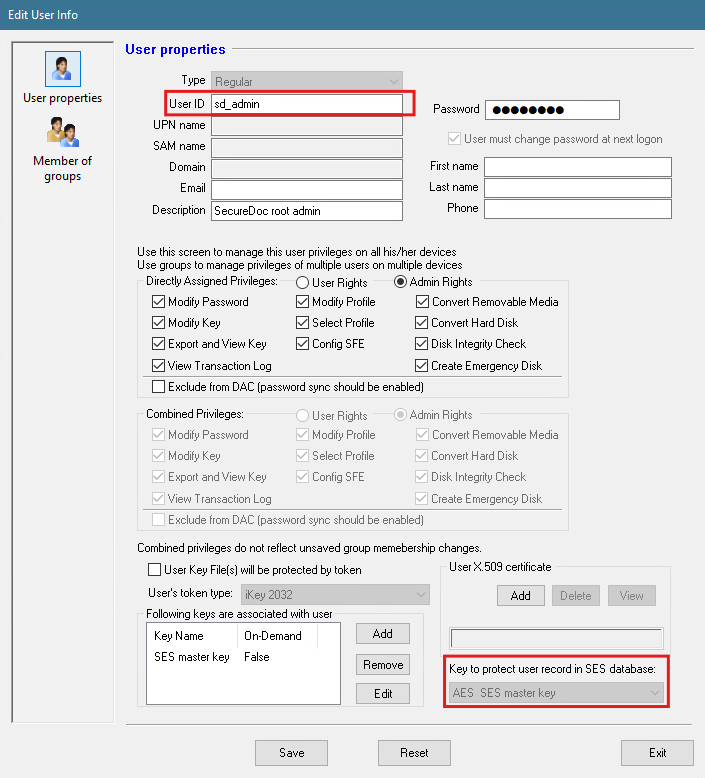
Right click on the master keyfile i.e SESadmin > create key file
Click on Browse to put the physical key file to the desktop and give it a password > select OK. 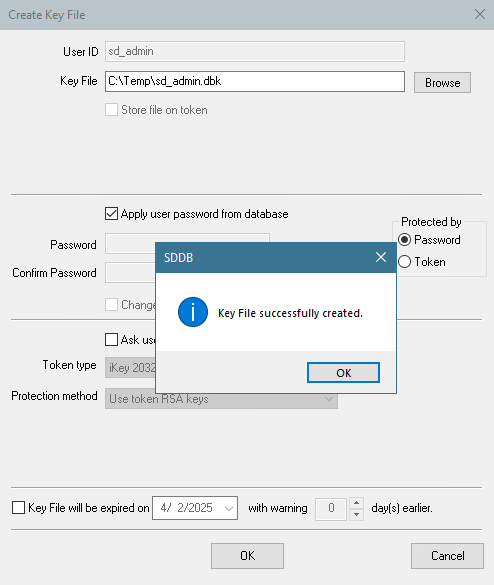
Take this key file and place it on the production server desktop. On the production server, select the SES administrator folder or select the folder that holds main protection keys.
Click on the Keys tab and right click to select “Import keys”.
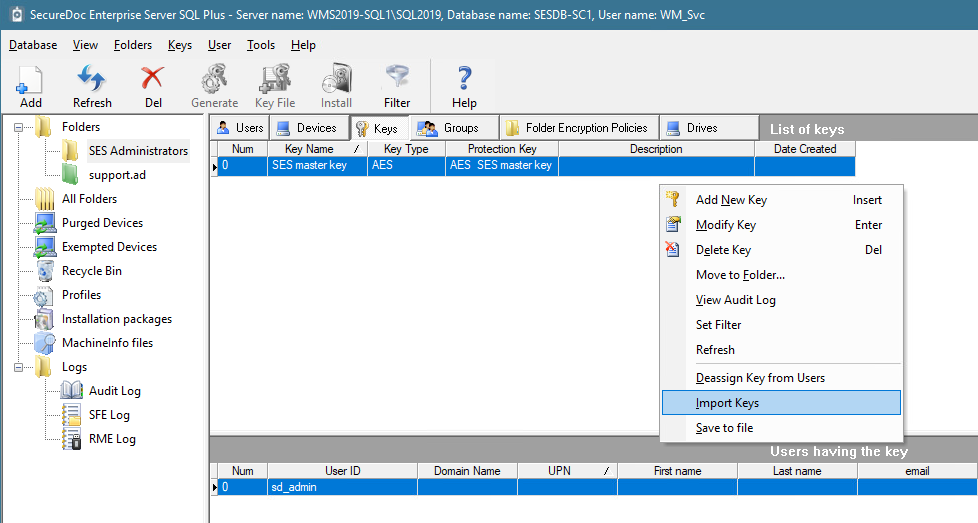
Browse to the key file > Login Key File > Import Keys.
From the production server, right click on the master key file i.e SES admin > modify key file > click on “Add” button to add the encryption key. Select the protection key > OK
Right click on the user to create a physical key file.
The new key file should now have the current SES production protection key and the production key from the original SES server.
Step 3:
With this new physical key file on the production server, you will need to use this key file to log into the SES console and to the SDConnex Configuration.
A. Open the SES server > select “Browse” and look for the new key file. Enter the password and click on Login.
B. From the SDConnex Service > click on configure > General tab
Click on “Stop” to stop the service
Click on the Browse button to locate the new key file and log in with the new password.
Then click on “Start” to start the service.
Step 4:
From the original SES server, please push down a profile that contains the new IP address of the SES production server. This will allow the devices to communicate with the production server.
Right click on the profile, select General Options > select Communications button > select Add > in put the IP address of the SES production server > and then click on add > Set the priority on this IP address to be 1 and the old IP address as 2 > click Ok > OK
Once the profile have been save, push the profile to these devices.
Right click on the device and select “Assign device profile to devices” (see screenshot)
On the device side, communicate with the server and then restart the pc.
Another test would be to push a new key file down to the device to see if it works or not.
1548 - Migrating Devices From One Server to Another
- Updated on Feb 6, 2026
- 3 minute(s) read
- VN
Was this article helpful?