Topic: This How-To article addresses the following tools within WinPE to do SecureDoc Recovery:
1.Obtaining and Creating Emergency Disk
2.Export SDSpace
3.Repair MBR/SDSpace/UEFI
4.Analyze and Recover
5.MBR SDSpace Recovery
6.UEFI Recovery
7.Restore Original MBR
8.DAC Unblock all devices
Product version affected: SecureDoc 6.4 and newer, SDRecovery v3.0 and WinPE 6.5 supporting up to Windows 10
Environment:
All Windows OS versions
All devices
All SATA and Self-Encrypting OPAL 2 hard drives
WinPE tool Download:
Download the latest WinPE iso file https://fileshare.winmagic.com/link/tKkd6zB34mgkalBz4u8T42
If customers have difficulty downloading the iso file, please contact technical support for assistance. Please refer to KB 1540 – How to create a Bootable WinPE USB tool
Steps to follow:
1. Obtaining and Creating Emergency Disk
The SES database contains all the information necessary to create recovery media that Users can use if, for some reason, Boot Logon is missing, keys are lost, or other issues are encountered with their encrypted boot disk or any internal or external drives associated with the device.
Note1: You must use the same password for SDSpace Recovery at boot logon that was created while creating the emergency disk. Thus, it is strongly recommended to remember this password.
Note2: If a device profile is deleted, emergency disk cannot be created.
Additional Reference Material:
KB 1039 - How to Create Emergency Disk from a SD Standalone Device
KB 1543 - How to Create Emergency Disk From SES Console
KB 1544 - How to Create Emergency Disk from SESWeb Console
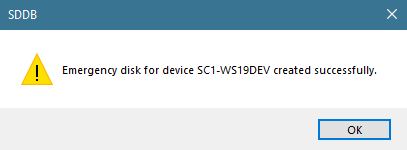
Step 1: Generate Emergency Disk for Target device, Save to the root of an external media (E.g. USB Disk)
Note: Emergency Disk is unique for each device.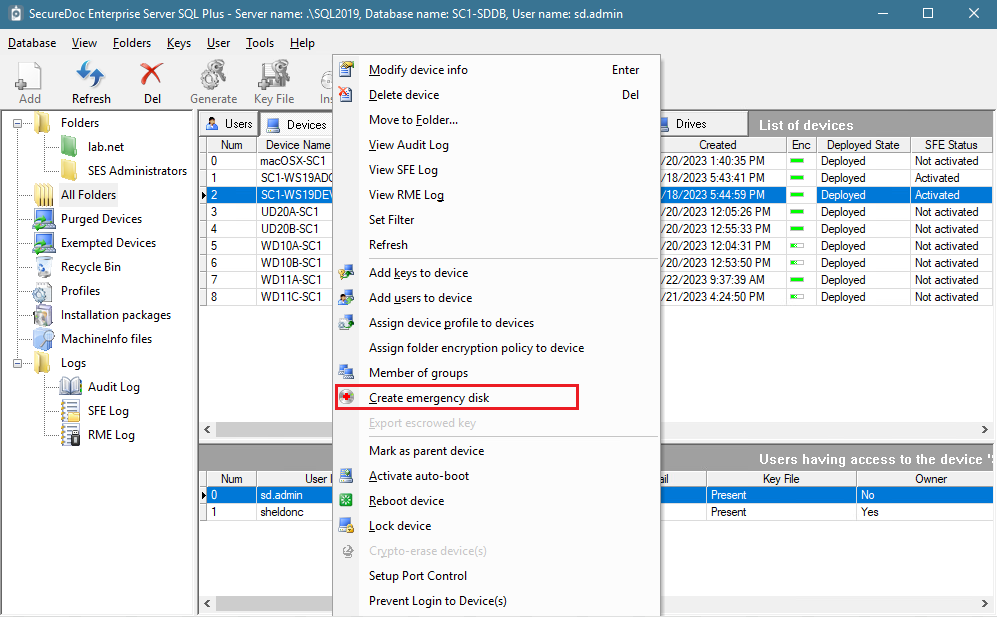
Once generated, the contents of external media should look similar as the screenshot shown.
Note: It may differ depending on the SecureDoc version.
Step 1: Boot to WinPE.
Step 2: Insert an external media (e.g. USB device).
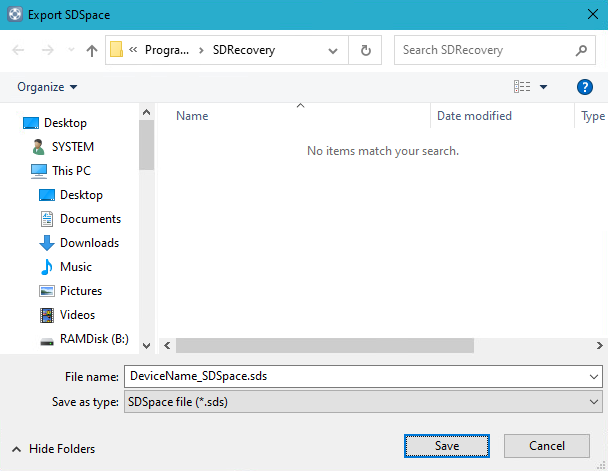
Step 3: Open SDRecovery from the Emergency Disk folder that was created from SES or SD Client and Click on Export SDSpace.
Note: There is no need to Unlock the Drive prior to selecting Export SDSpace.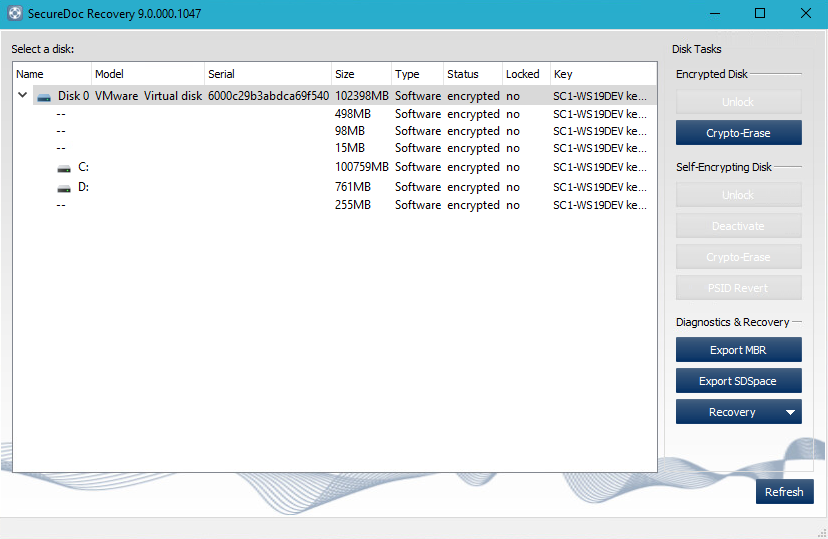
Step 4: Type in a filename and Save on external media.
As from SDRecovery 3.0, new options are available to scan and repair MBR, UEFI and SDSpace depending on the option selected.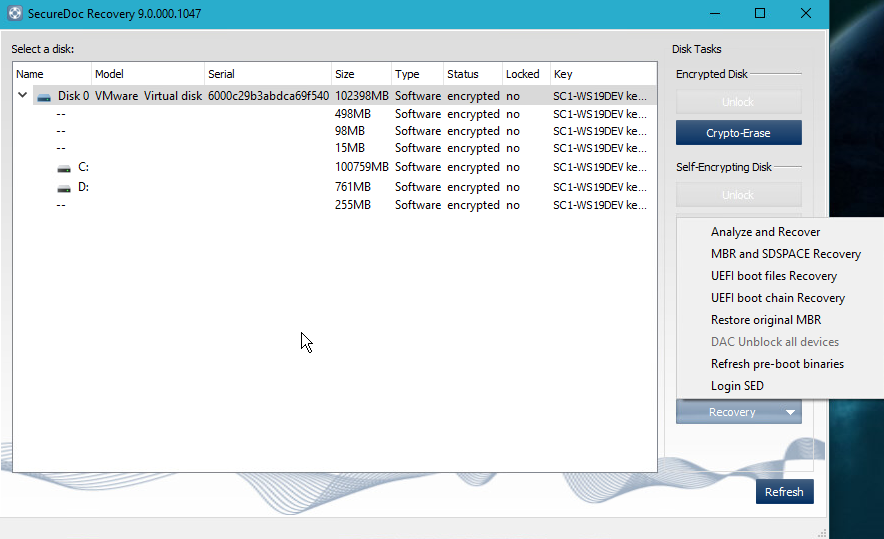
NOTE: The following recovery/restore options will NOT work on Self-Encrypting Drives.
SSDRecovery Option | Aim | Pre-Requisite |
Analyze and Recover | To scan and fix EFI and MBR Corruptions |
|
MBR and SDSpace Recovery | To restore MBR and SDSpace from Emergency Backup from SES |
|
UEFI Recovery | To fix UEFI boot order |
|
Restore original MBR | Restores original MBR |
|
The Analyze and Recover option detects the system problems and repairs it.
- Click on the Recover tab.
- Click on the Analyzer and Recover option from the dropdown menu. The Emergency disk path window opens.
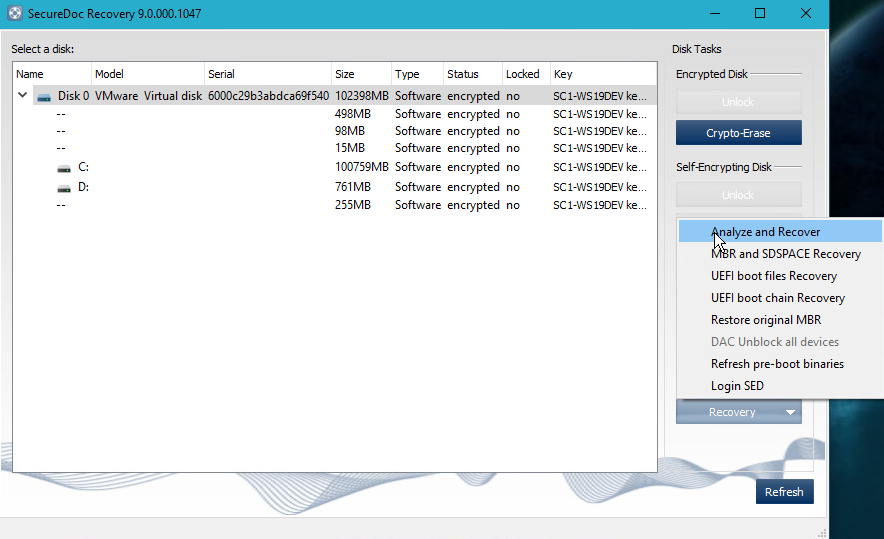
3. Navigate to the Emergency Disk folder that you have created from SES or SD Client.
4. Click Choose. A message “Analyzing Disk 0 Completed successfully”, is displayed. 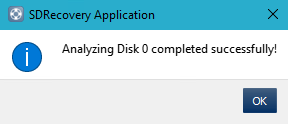
5. Click OK.
5.MBR SDSpace Recovery
WARNING: Use this option only when MBR or SDSpace is corrupted.
- Click on the Recovery tab.
- Select MBR SDSpace and Recovery.

A prompt, “SecureDoc MBR is not valid. Do you want to recover MBR on Disk 0?” is displayed.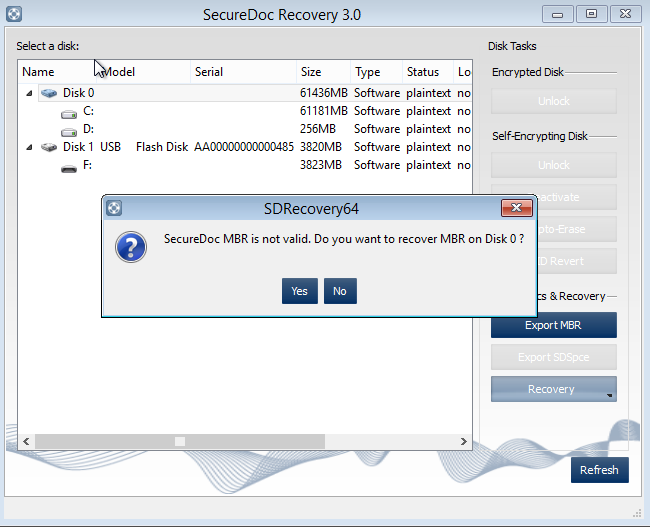
3. Click Yes if you want to recover MBR; otherwise, Click No if you want to recover only SDSpace and then go to step 5.

4. Click Choose. A confirmation message, “MBR on Disk 0 has been overwritten successfully” is displayed.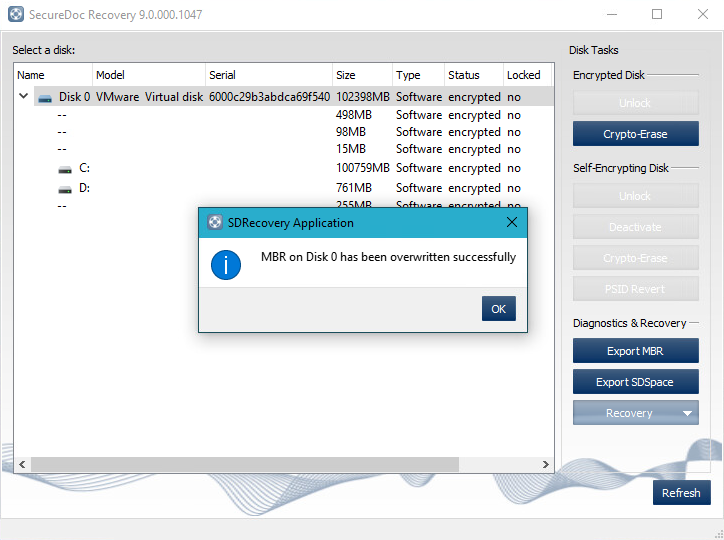
5. When clicked No to recover the SDSpace only, a prompt “Do you want to recover SDSPACE on Disk 0?” appears.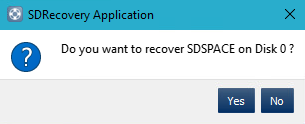
6. Click Yes. A message “SDSPACE on Disk 0 has been overwritten successfully” is displayed.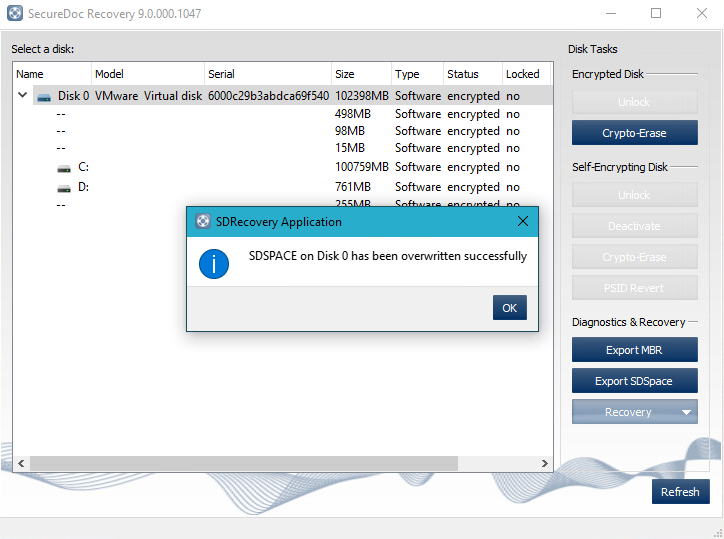
7. Click OK.
Note: This option is enabled for UEFI devices only. Use UEFI-based WinPE bootable disk.
- Click on the Recovery tab.
- Select UEFI Recovery.
A prompt, “Do you want to recover UEFI boot files?” is displayed.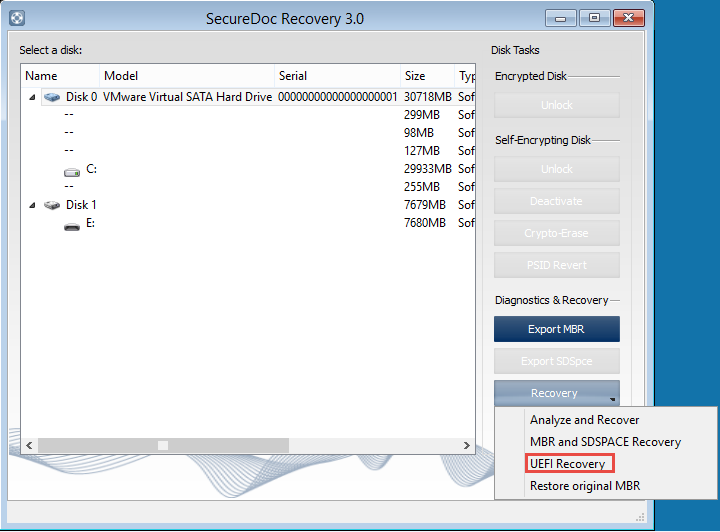
3. Click No. A prompt, “Do you want to recover UEFI Boot Order variable?” is displayed.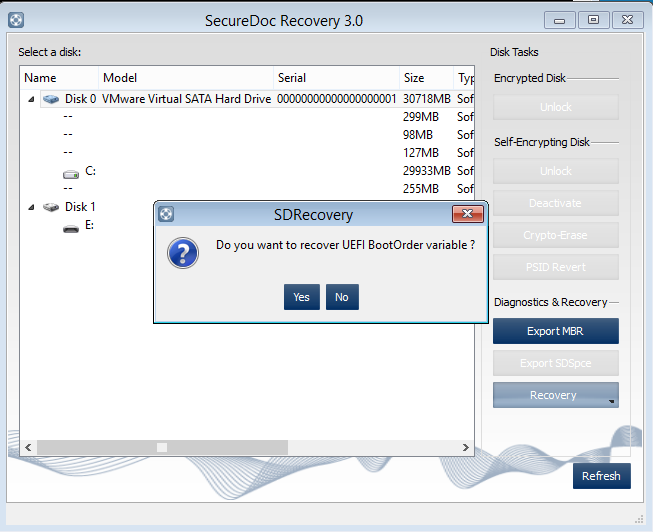
3. Click Yes. A confirmation message, “UEFI Boor Order variable has been recovered successfully” is displayed.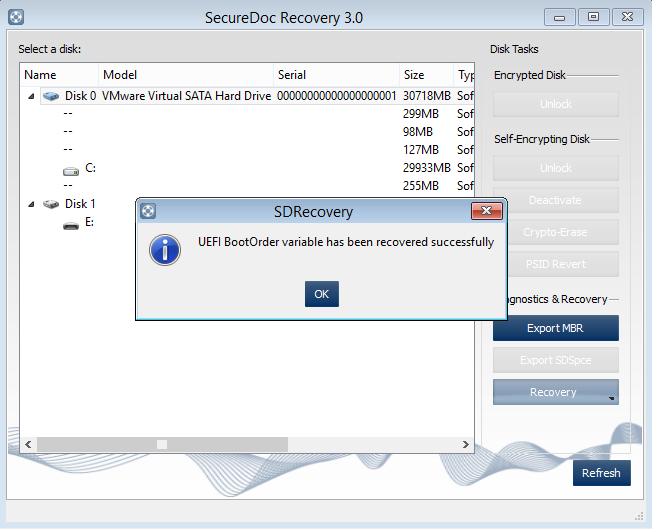
5. Click OK. Note: If the device fails to boot, then proceed to perform the next steps.
6. Repeat the steps 1 through 2. A confirmation message, “UEFI Boot Files have been recovered successfully” is displayed.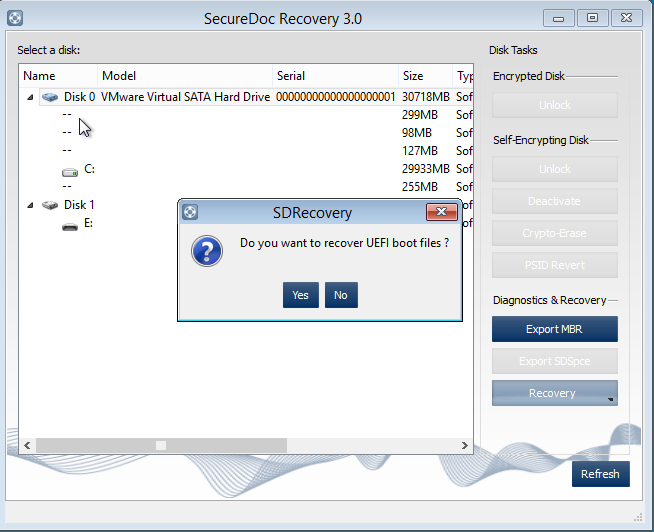
7. Click Yes. A confirmation message, “UEFI Boot Files have been recovered successfully”, is displayed.
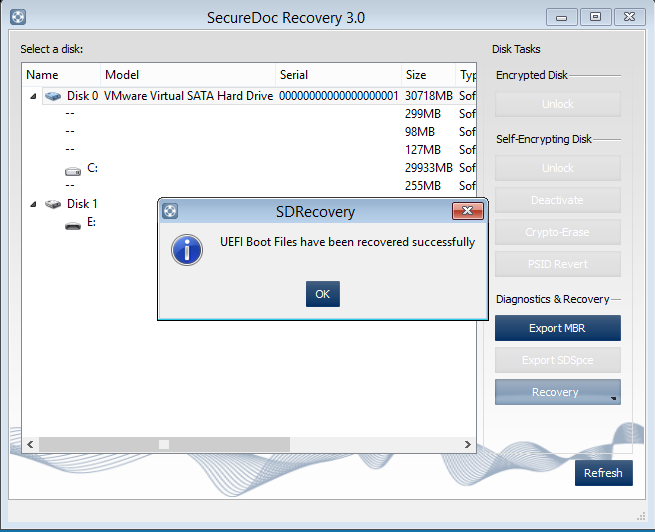
8. Click OK.
WARNING: Use this option only when the drive is NOT encrypted.
1. Click on the Recovery tab.
2. Select Restore original MBR.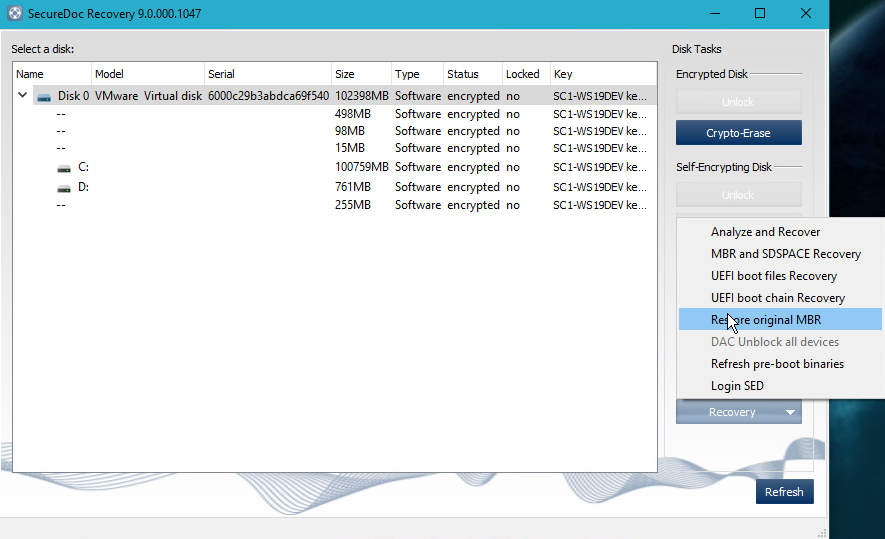
3. A prompt, “Do you want to restore original MBR on Disk 0?” is displayed.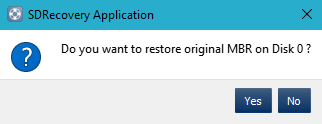
3. Click Yes.
4. Navigate to the emergency disk folder.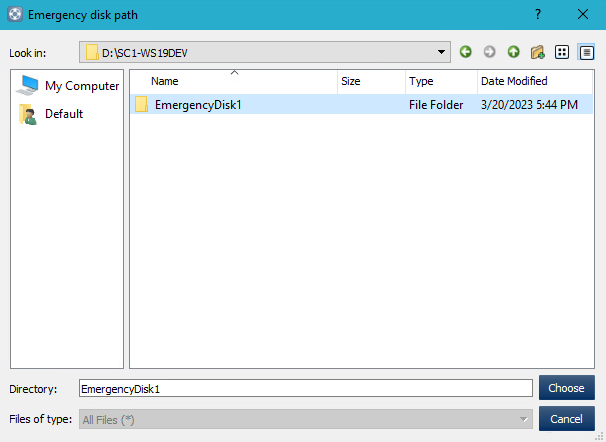
5. Click Choose. A message, “Original MBR on Disk 0 has been restored successfully”, is displayed.
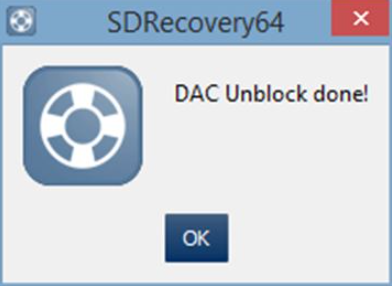
8.DISABLE DISK ACCESS CONTROL (DAC)
Disk Access Control may be enabled in the profile on the client device. By default, the administrator, when booting to WinPE, will not have write access to any external media plugged in to the WinPE environment.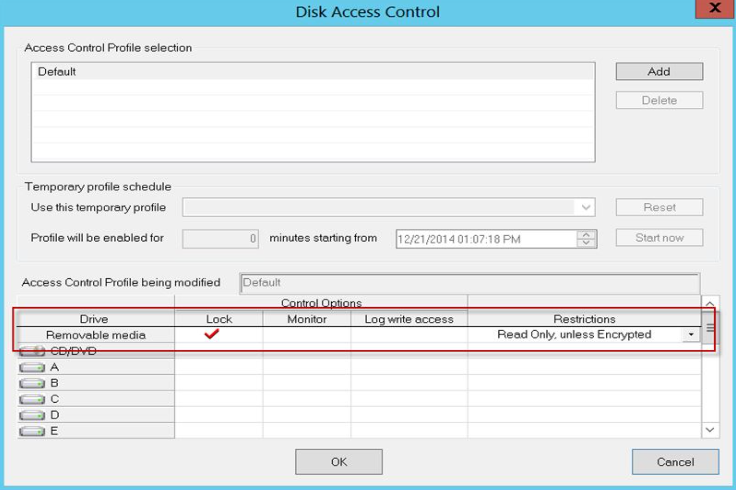
- First Unlock the Encrypted drive with SDRecovery.
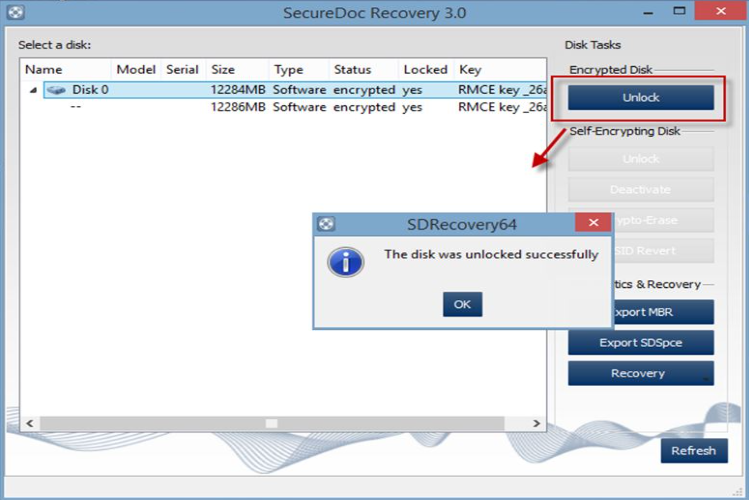
- The menu option ‘DAC Unblock’ is no longer greyed-out and is now available.
Note: Only unlocking with an admin key file will allow the ‘DAC Unblock’ option to be available.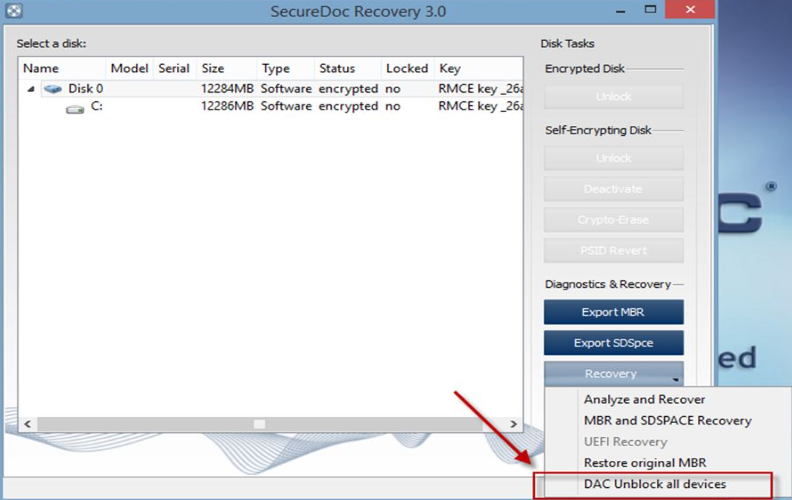
- Click on the menu to unblock external media. You can now save data from the WinPE environment to any external media (e.g USB drive) plugged in.