Issue:
This How-To-Article will guide user to manually install SD on a stand-alone device using the advance wizard.
Product version affected:
All SD version
Environment (OS/hardware/software):
All Windows OS
Devices
Procedures:
Step 1:
After Installation has been completed > Click on "Getting Started"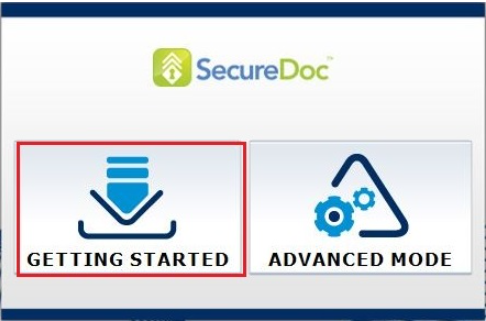
Step 2:
Click on Advanced Wizard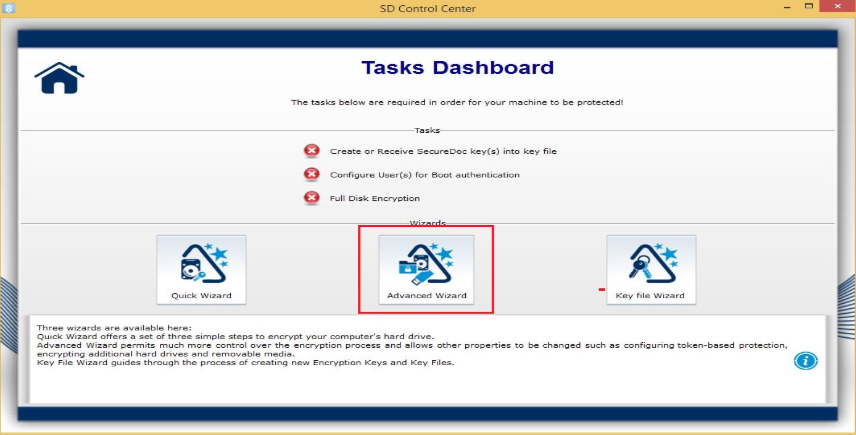
Step 3:
Click Next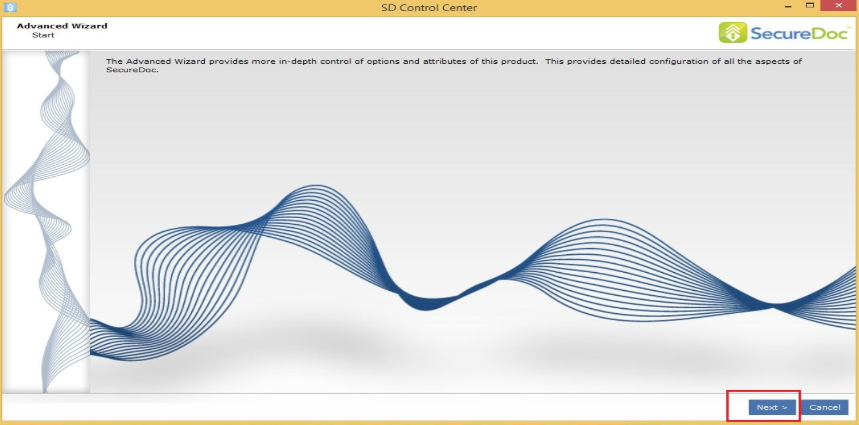
Step 4:
Select "Create new key file"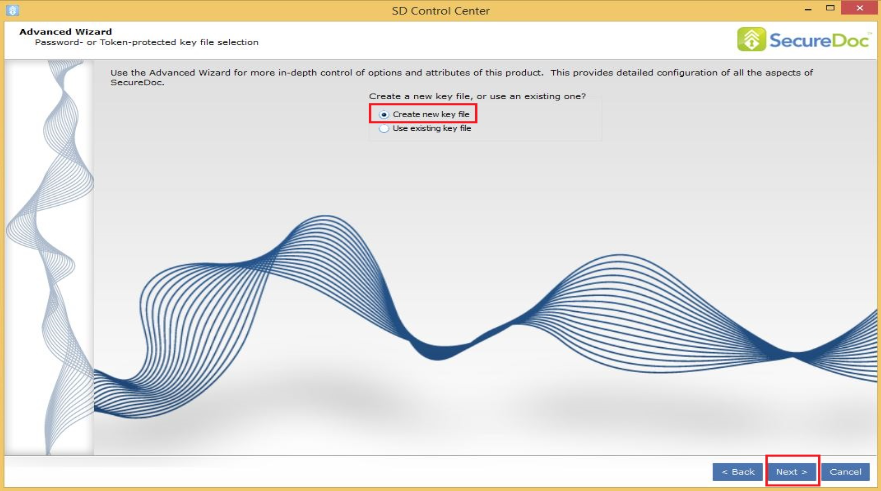
Step 5:
Leave the default setting to NO for hardware Token Configuration
Click Next
Step 6:
Enter a name for the keyfile and a password. Remember the location of where the keyfile is created. By default it will create the keyfile in C:\program files\winmagic\securedoc-nt\userdata folder.
Click Next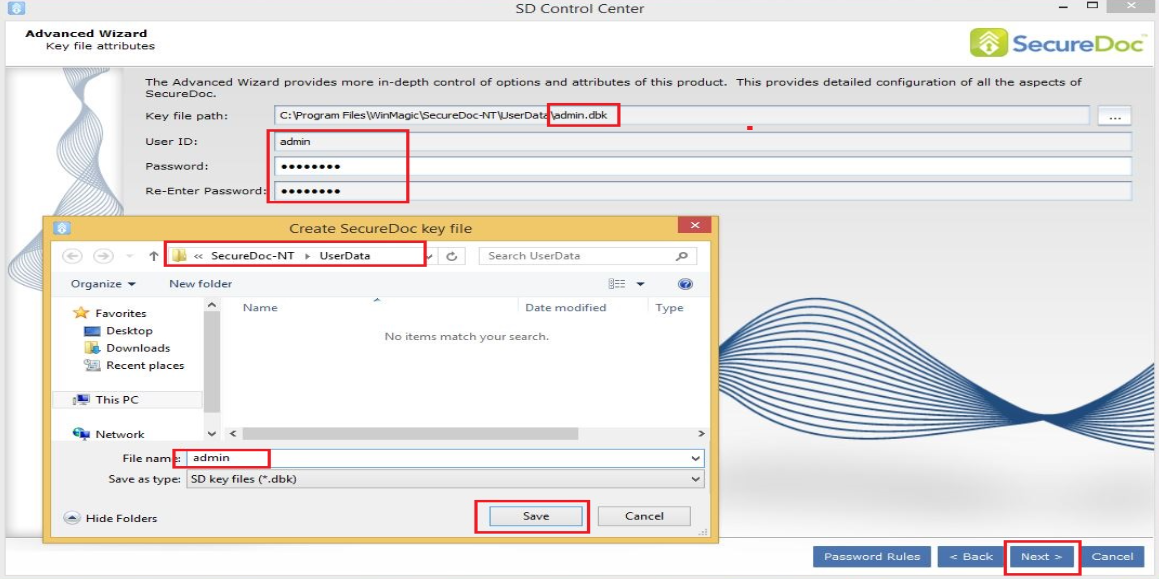
Step 8:
Create a SecureDoc Key i.e Admin
Click Next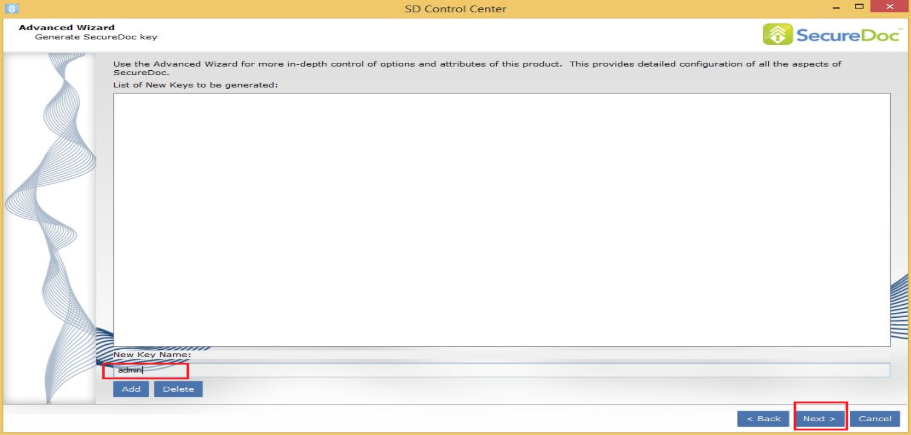
Step 9:
Highlight the key and click Next to generate the SecureDoc key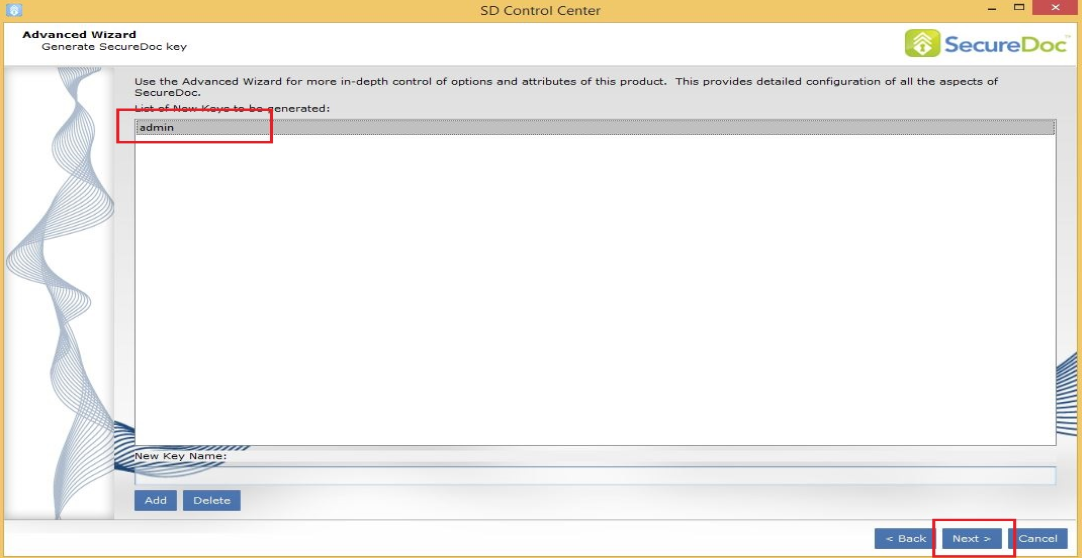
Step 10:
Select the appropriate conversion mode either Standard or Thorough with the proper encryption key.
Click Next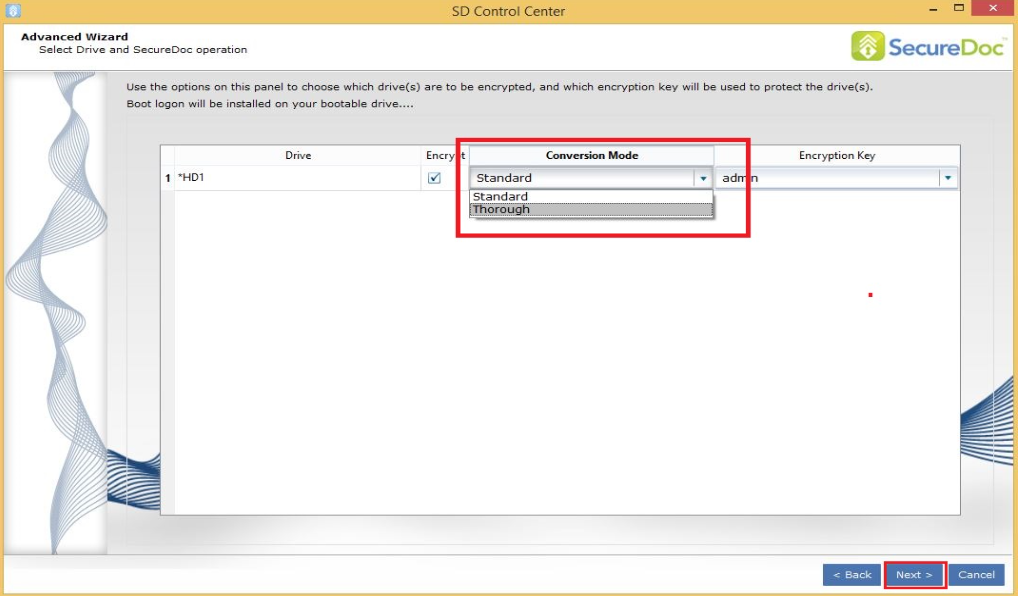
Step 11:
Click Next to accept the Default location of where the Recovery Media will be created.
A warning message will be display. Click Yes.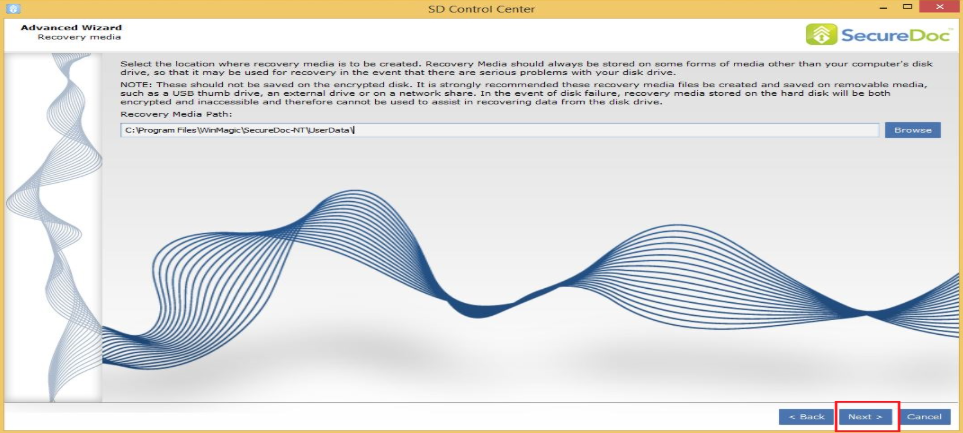
Step 12:
Click Finish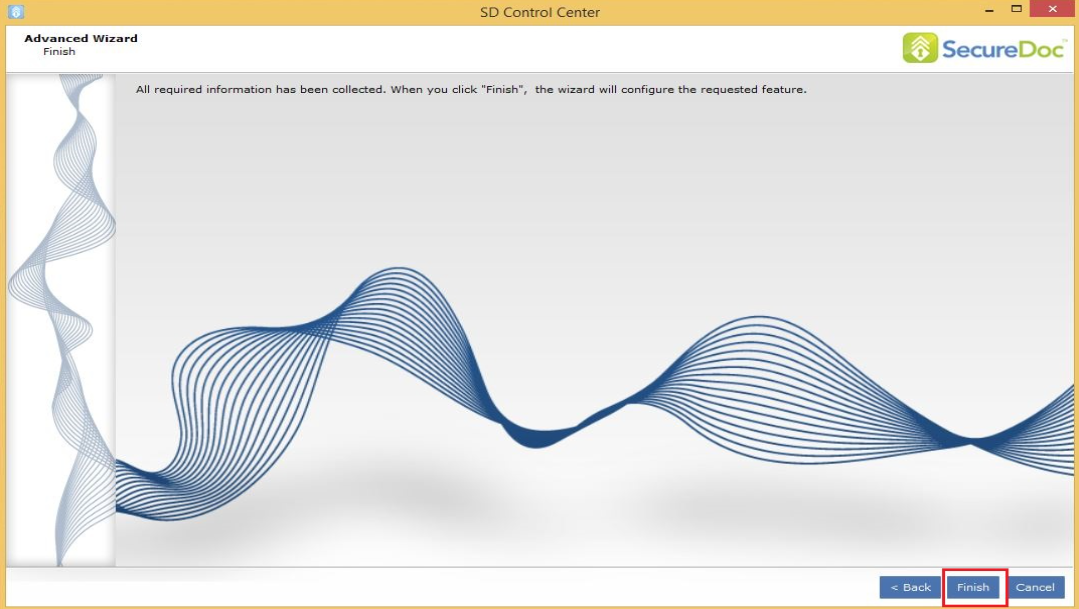
Step 13:
SD will begin to install the boot logon > It will then prompt to restart the device.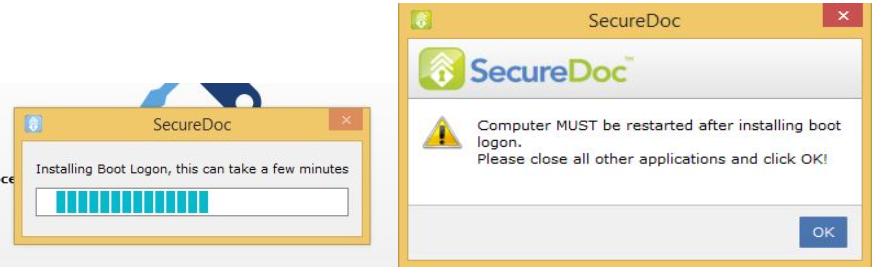
Step 14:
Once you sign in at preboot and log into Windows > Right click on the SecureDoc icon in the system tray and select SecureDoc Control Center
Select Yes or No for Quick Mode Conversion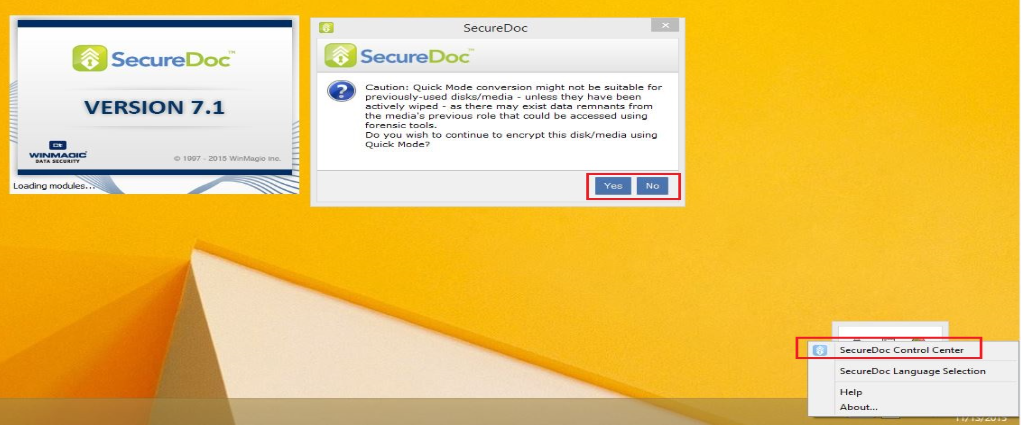
Step 15:
Allow SD Conversion to finish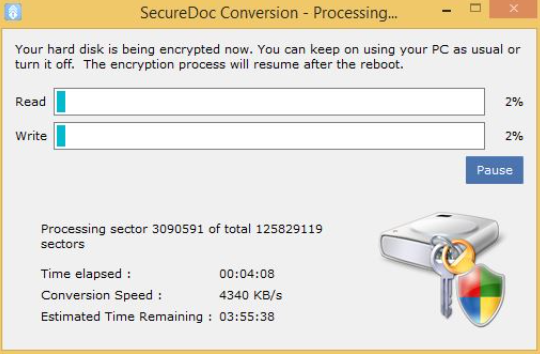
1489 How To Manually Install SD On a Standalone Device Using the Advance Wizard.
- Updated on Feb 11, 2026
- 1 minute(s) read
- VN
Was this article helpful?