SUMMARY:
This article provides instructions to perform in-place upgrade of OS in following environments:
1. Upgrade Windows 7 SP1/8/8.1 to Windows 10 build 10240 only with SecureDoc 6.5 SR3.
2. Upgrade Windows 10 build 10240 to build 1511 TH2 only with SecureDoc 7.1
3. Upgrade Windows 10 build 10240 or build 1511 TH2 to build 1607 RS1 only with SecureDoc 7.1 SR4. Note: Windows 10 TH2(build 1511) is ONLY supported in SecureDoc 7.1 and later. Windows 10 RS1(build 1607) is ONLY supported in SecureDoc 7.1 SR4.
ENVIRONMENT: Windows 7 SP1, Windows 8, Windows 8.1 to Windows 10 (build 10240, 1511 or 1607) SecureDoc 6.5 SR3, 7.1, 7.1 SR4
Encryption option | Support | SecureDoc software encryption | Supported in 6.5SR3 and later | SecureDoc OPAL management | Supported in 6.5SR3 and later | SecureDoc BitLocker Management (SDBM) | Supported in 6.5SR3 and later | SecureDoc BitLocker Management (SDOT) | Supported in 7.1 |
NOTE: Support for Windows 10 devices (build 10240) encrypted with SecureDoc and upgrading to Windows 10 TH2 or RS1 will be limited to specific scenarios as listed below.
Encryption Type | Windows OS Upgrade Method | Supported/Unsupported | Hardware encryption (SED/OPAL drives managed by SecureDoc) | 1. System Update via Windows Control Panel
2. By running the installation DVD within Windows OS | Both methods are supported | Software encryption with SecureDoc | Methods:
1. System Update via Windows Control Panel
2. By running Windows 10 custom ISO DVD (injected SD 7.1 Kernel Filter Drivers) within Windows OS - Please see instructions below | Method 1: Not Supported
Method 2: Supported |
Product version affected:
- SD 6.5SR3 version; upgrading from Windows 7/8/8.1 to Windows 10 build 10240.
- SD 7.1/SR1/SR2(A) versions; upgrading from Windows 10 (build 10240) to build 1511 Threshold 2.
- SD 7.1 SR4 version; upgrading from Windows 10 (build 10240) or Windows 10 TH2 (build 1511) to Windows 10 RS1 (build 1607). Environment (OS/hardware/software):
Windows 7, 8, 8.1
Windows 10 & TH2 update
Limitations:
1) Upgrading to Windows 10 with FFE enabled is not supported.
2) RMCE (Removable Media Container )may fail to unmounts under Windows 10 environment.
3) Using SDCredential Provider with Windows 10 can occasionally present SecureDoc logon screen.
4) Windows 10 may fail to come out of Hibernation on BIOS Legacy mode. IMPORTANT: Prior to upgrade, SecureDoc must be upgraded to SD 6.5 SR3 or newer because older versions do not support Windows 10. Please follow the procedure to inject the SecureDoc drivers into the Windows 10 installation media prior to upgrading to Windows 10/TH2/RS1. The OS upgrade will fail if the drivers are not injected.
DISCLAIMER: WinMagic provides the following instructions as samples. The instructions should be tested and reviewed prior to use in production environments. Customers are responsible in ensuring the instructions are appropriate for use in their operating environments.
Windows 10 kit will need to be installed
Here is the link for the tool as it will be needed in Step 4
http://go.microsoft.com/fwlink/p/?LinkId=526740
This link was found at the bottom of this page.
https://msdn.microsoft.com/en-us/windows/hardware/dn913721.aspx
Previous versions for Windows 8, 8.1 and 7 will not work. All use the same file name for the installer (adksetup.exe) which makes it difficult to find. Upgrade procedure 1. Prior to upgrading to Windows, please ensure SecureDoc client is upgraded to SD 6.5 SR3 or newer. Failing to do this will lead to compatibility issues. 2. Create a custom installation media with SD kernel drivers injected to prepare for OS upgrade with the procedure below. Upon OS upgrade, there are 3 options: a. Keep personal files, apps and Windows settings (Recommended) - If this option is selected, once the OS upgrade is complete, SecureDoc will be able to function and communicate back to SES server (if managed version is used) without addition steps. b. Keep personal files only
- SecureDoc will need to be reinstalled after OS upgrade. c. Nothing
- SecureDoc will need to be reinstalled after OS upgrade. Procedure on injecting the SD kernel drivers into the Windows 10 installation media 1. Download and install Visual Studio 2015 products:
https://www.visualstudio.com/products/vs-2015-product-editions
2. Download Windows Kits and Tools for Windows 10
https://msdn.microsoft.com/en-us/windows/hardware/dn913721.aspx
3. SDPE Tool can be download from the following link:
SD 6.5SR3: (SDPETool_65.zip) https://fileshare.winmagic.com/link/ooUQ9OZBL6qv9RdrEaumL8
SD 7.1 & 7.1 SR1: (SDPETool_71.zip) https://fileshare.winmagic.com/link/6V0IuvZh9fvdSdgChlvpmt
Note: Please make sure to download the correct SD Kernel drivers. Failure to use the correct drivers will results in unsuccessful upgrade.
4. Download the OSCDIMG tool to be use in step 12
http://www.deploymywindows.com/2014/11/create-bootable-iso-using-oscdimg-tool.html
5. Create the following 3 folders:
C:\temp\Mount
C:\temp\mountpe
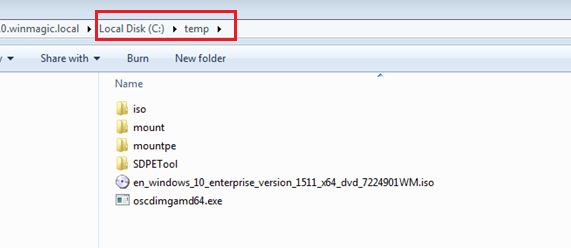
C:\temp\iso (this is the folder where the ISO will be extracted to)
6. Extract the Windows 10 ISO file into the C:\temp\iso\W10x64)
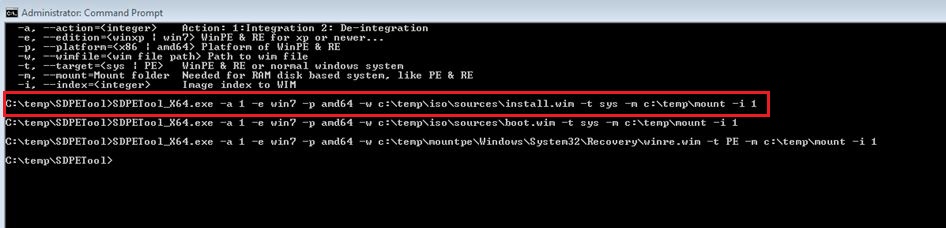
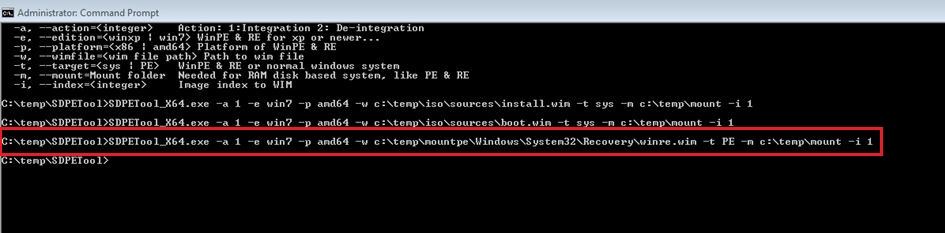
7. Using SDPETool to inject SD kernel drivers into install.wim with the following commands: (~4 min) C:\temp\SDPETool>SDPETool_X64.exe -a 1 -e win7 -p amd64 –w c:\temp\iso\sources\install.wim -t sys -m c:\temp\mount -i 1
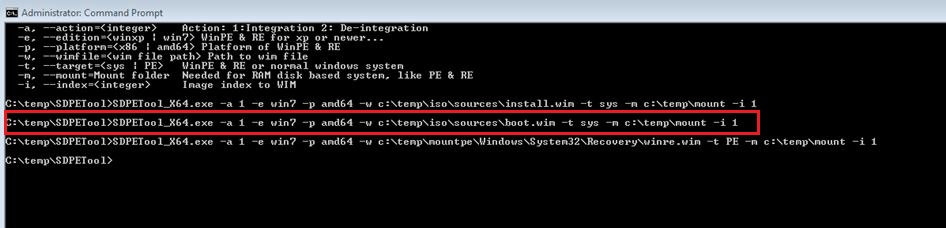
8. Using SDPETool to inject SD kernel drivers into boot.wim (~2-3 min) C:\temp\SDPETool>SDPETool_X64.exe -a 1 -e win7 -p amd64 -w C:\temp\iso\sources\boot.wim -t sys -m c:\temp\mount -i 1
 9. Using imagex to mount the install.wim file to a temporary folder C:\Program Files (x86)\Windows Kits\10\Tools\bin\i386>imagex.exe /mountrw C:\temp\iso\sources\install.wim 1 c:\temp\mountpe
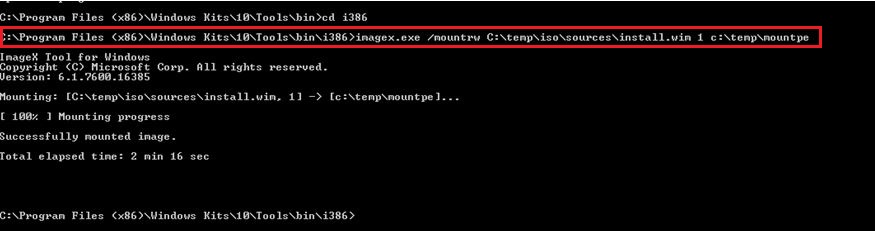 Expected output of ImageX tool for Windows below:
ImageX Tool for Windows
Copyright (C) Microsoft Corp. All rights reserved.
Version: 10.0.10011.0 Mounting: [c:\CustomISO\W10x64\sources\install.wim, 1] -> [c:\temp\mountpe]...
[ 100% ] Mounting progress
Successfully mounted image.
Total elapsed time: 1 min 37 sec
10. Using SDPETool to inject SD kernel drivers into winre.wim C:\temp\SDPETool>SDPETool_X64.exe -a 1 -e win7 -p amd64 -w c:\temp\mountpe\Windows\System32\Recovery\winre.wim -t PE -m c:\temp\mount -i 1
 11. Unmount winre.wim image and commit the change C:\Program Files (x86)\Windows Kits\10\Tools\bin\i386>imagex.exe /unmount /commit c:\temp\mountpe
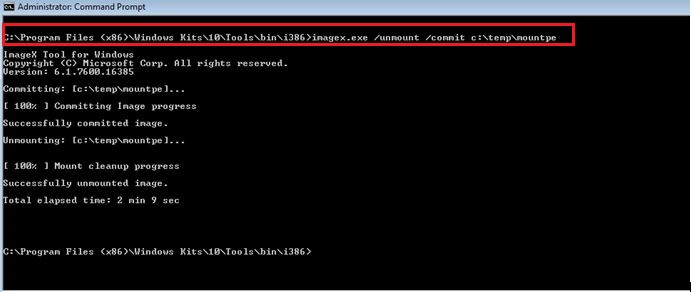
Expected output for ImageX tool for Windows below: ImageX Tool for Windows
Copyright (C) Microsoft Corp. All rights reserved.
Version: 10.0.10011.0
Committing: [c:\temp\mountpe]...
[ 100% ] Committing Image progress
Successfully committed image.
Unmounting: [c:\temp\mountpe]...
[ 100% ] Mount cleanup progress
Successfully unmounted image. Total elapsed time: 1 min 47 sec 12. Using oscdimg.exe tool to create an ISO image of modified OS C:\temp>oscdimgamd64.exe -n -m -bc:\temp\iso\boot\etfsboot.com c:\temp\iso c:\temp\en_windows_10_enterprise_version_1511_x64_dvd_7224901.iso
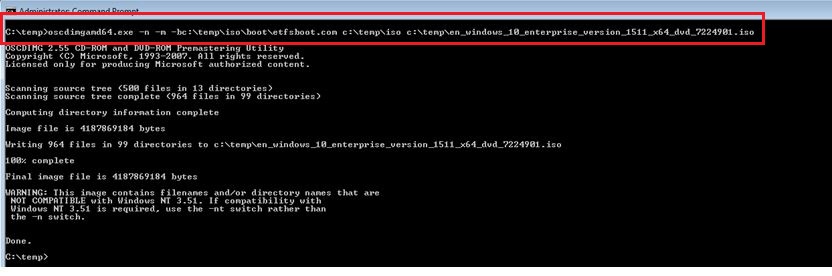 Expected output from OSCDIMG tool for Windows below:
OSCDIMG 2.56 CD-ROM and DVD-ROM Premastering Utility
Copyright (C) Microsoft, 1993-2012. All rights reserved.
Licensed only for producing Microsoft authorized content.
Scanning source tree (500 files in 13 directories)
Scanning source tree complete (959 files in 101 directories)
Computing directory information complete
Image file is 4293281792 bytes
Writing 959 files in 101 directories to c:\Windows10x64_Build10240_SDIntegrated_v7.1.iso
100% complete
Final image file is 4293281792 bytes 13. Done.
If there are any questions or concerns, please contact our Technical Support team. Email: [email protected]
Phone: 1-888-879-5879 x 1
Internal Reference:
KB 1589 "How to Inject SD Kernel Modules Into Windows 10 | 