This How-To-Guide will assist client in installing and setting up the SES server console on an administrator workstation device.
Issue:
Depending on each customer's security design, access to the SES Console may be:
- Limited to directly logging on to the server
- Remote Desktop access to the Server, or
- Administrators may wish to have the SES Console application installed on their own Workstation devices.
Product version affected:
All SES versions
Environment (OS/hardware/software):
Windows 7, 8(.1), Windows 10
Windows Server 2008, and 2012
http://www.winmagic.com/support/technical-specifications
Steps to follow:
Step1: Run the SES server installation file specific to the company's current server version. Customer can also request for the installation by contacting WinMagic customer support.
Step 2: Right click on the file and run as administrator.
Step 3: Select only "SecureDoc Enterprise Server" feature to be install.
Deselect "SDConnex/ADSync" and "SecureDoc Web" features before clicking on the "Next" button.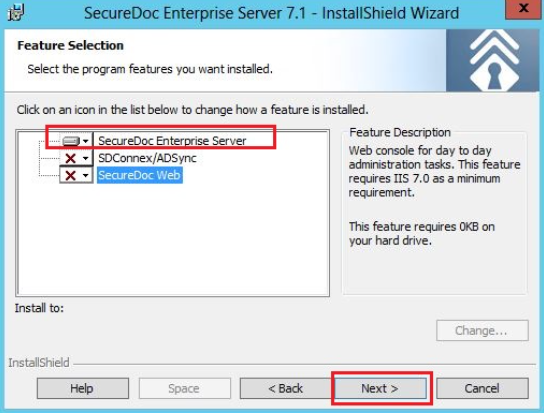
Step 4: Obtain the original SES admin keyfile to log into the SES server console from your own device.
Or please refer to KB 1473: How to setup a second SES admin account article.
Step 5: After the installation is completed, right click and run as administrator to launch the SecureDoc Enterprise Server application.
Please refer to the tips below to obtain the current server settings when configuring the new console.
- Deselect "Automatically connect to the database last connected to"
- Browse to the Keyfile and enter the password before clicking on "Login Key File".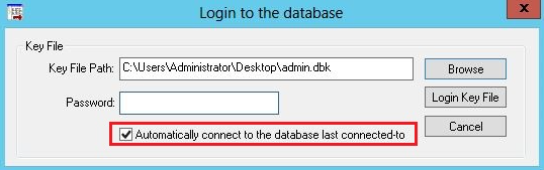
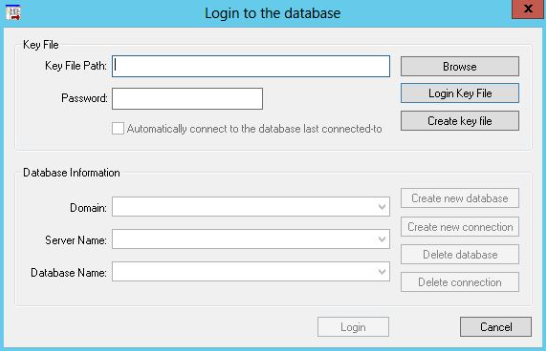
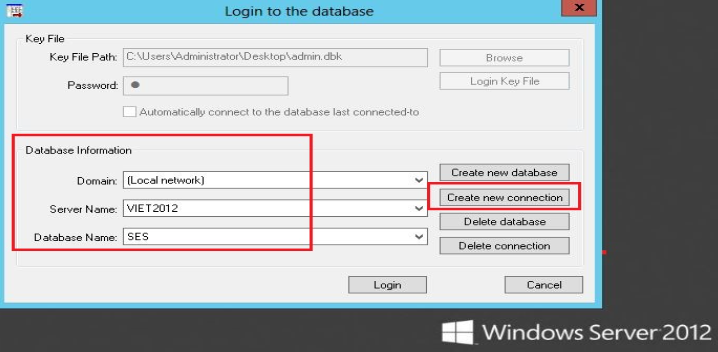
- Click on "Create new connection" > Enter the "Server Name" and "Database Name"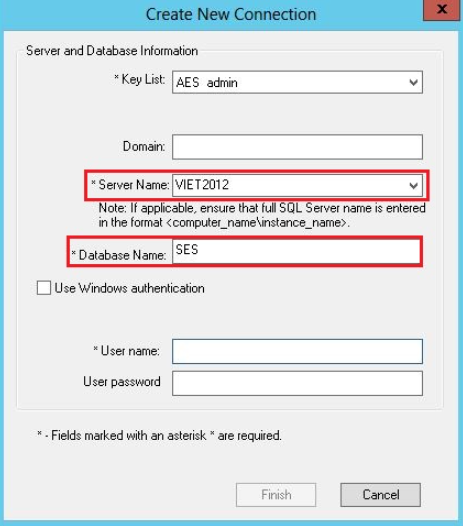
- Please select the appropriate account to use to run the SES application before clicking on the "Finish" button.
Optional Step 6: For ease of administrative work, please download and run the latest SQL management studio on device.
Things to look from the production server settings when configuring new SES console on a workstation:
1. The location of the keyfile to log into the SES console. Please uncheck the "Automatically connect to the database last connected to" option to obtain more information.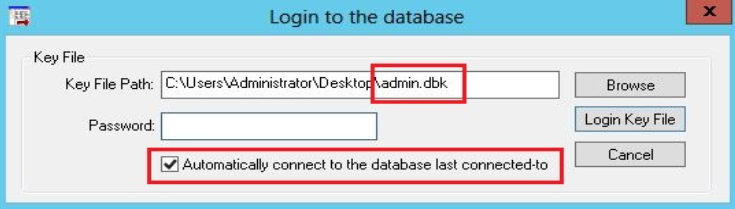
2. Database Information: