Maximum Number of Failed Logins
Topic:
This article addresses the issue of users encountering 'Maximum Number of Failed Login'.
In order to prevent a device from being hacked by guessing the password, "Maximum Number of Failed Login” serves as a security prevention at preboot. This feature applies on V4, PBU and PBL.
When logging into preboot, it will count the number of failed login attempts on each user. A maximum number of failed login attempts are set by the SES Administrator in SES or SD Control Center. Once the set amount of failed logins has been reached, that account will be locked at preboot and cannot be used for authentication anymore.
Setting up Maximum Number of Failed Login
Setting up the Maximum Number of Failed Login can be done either through SES or the SD Control Center.
The following instructions are used to set Maximum Number of Failed Login in SES by an SES Administrator:
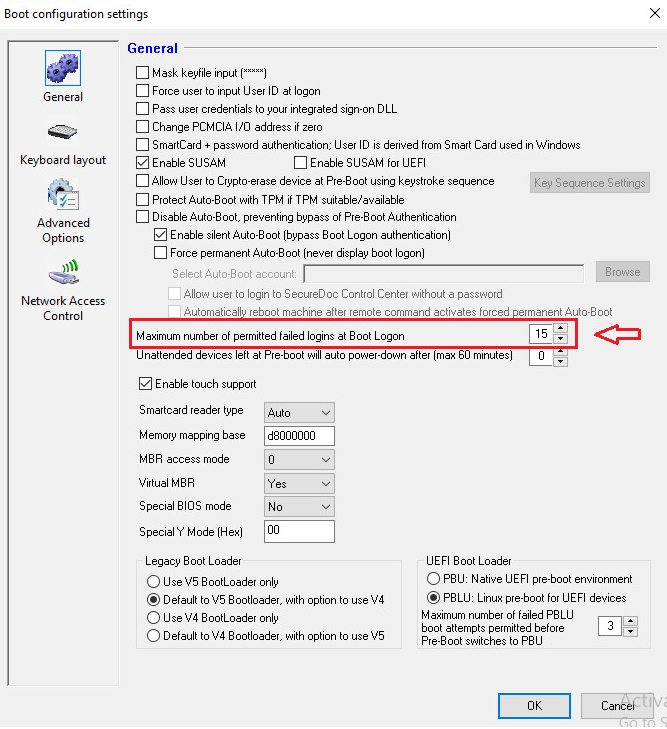
1. Open SES, and click on Boot Configuration Settings
2. Under General, there is an option "Maximum number of failed logins”
3. Input, or use the up/down arrow keys to set the Maximum number of failed logins
The following instructions are used to set Maximum Number of Failed Login in the SD Control Center, by SecureDoc Administrators:
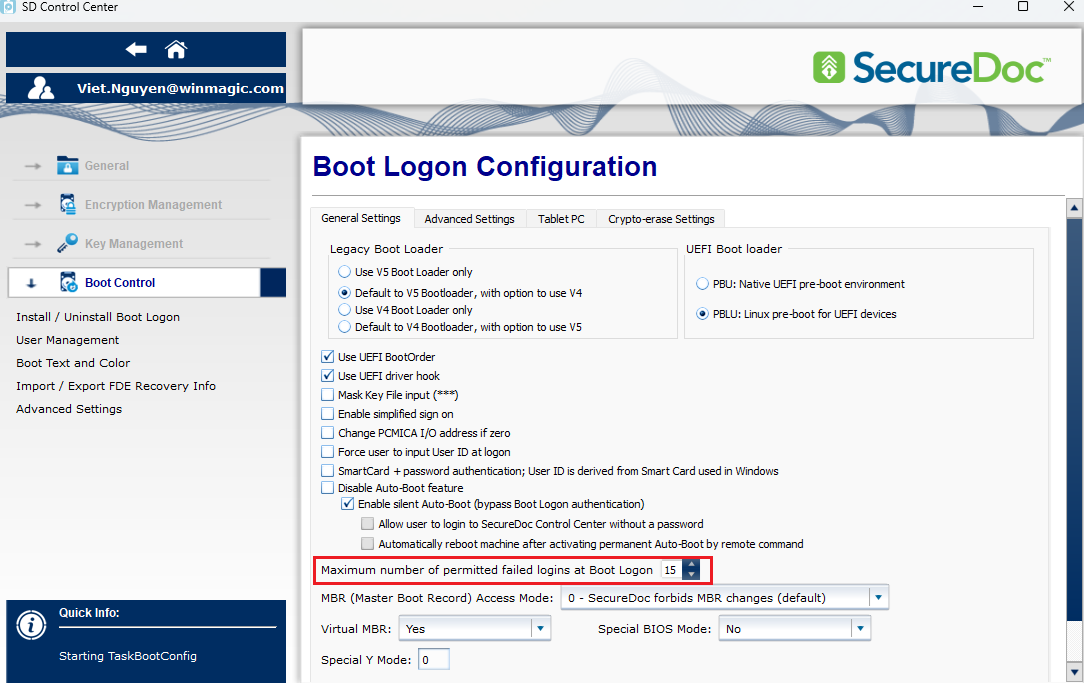
- Open the SD Control Center, and click on Boot Control
- A Boot Logon Configuration screen will appear, there is an option "Maximum number of failed logins”
- Input, or use the up/down arrow keys to set the Maximum number of failed logins
When the Maximum Number of Failed Logins is reached, the account will be locked. There will be three different methods that can be used to unlock an account.
External Key File (Applied to versions 6.4 and lower, Starting 6.5 Challenge Response needs to be used)
An External Key File can be used to unlock a device. If the file has admin rights, it will unlock all locked accounts. If the file has no admin rights, it doesn’t unlock anything, it will just pass pre-boot.
- Insert the USB into a device with SES running
- In SES, right click on the locked user
- Click Create Key File
- Click on "Browse”
- Select the inserted USB and click "OK”
- At Create Key File Screen, enter a new password
- Click on "OK”
- A message will appear indicating that the Key File has been created successfully
- Plug the USB into the locked user device
- At (BL) enter the locked User, and the new password that was created
- User can login to BL successfully
Challenge/Response
Note: Please refer to KB 1554 - How to do Challenge Response
A Challenge/Response will unlock all the locked accounts.
- An SES administrator will be needed to help complete the Challenge/Response.
- When on the Boot Logon Screen, press the <Enter> key beside the Key File prompt, then click Forgot Password?
- There will be a field with the Challenge Text, this must be given to the SES Administrator.
- A Response Number will be provided by the SES Administrator and this number must be inputted in the Response field.
- The computer will begin to boot, and the user is prompted to change the password.
A PBConnex Key File will unlock all locked accounts.
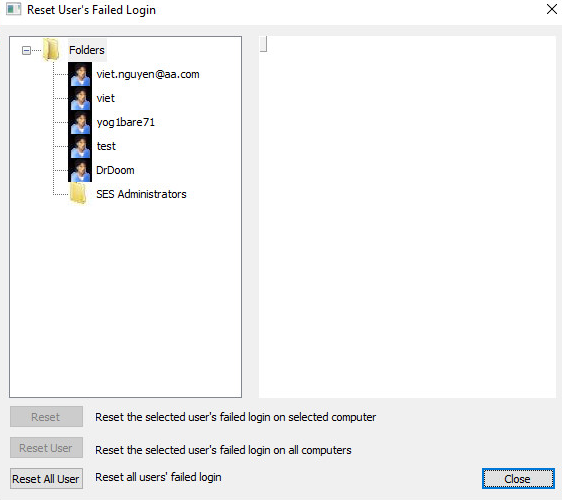
Reseting User's Failed Login:
Step 1:
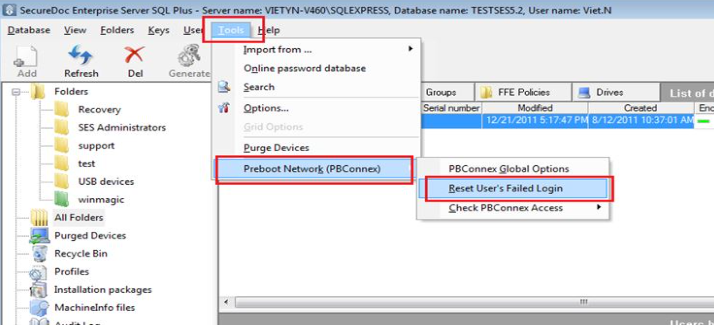
From the SES console > select Tools > Preboot Network (PBConnex) > Reset User's Failed Login
Step 2:
Locate the user that has been locked out of signing into the device > Highlight the user and click "Reset User".