SecureDoc for Linux Endpoint
Deployment Guide v9.2SR1
©Copyright 1997 - 2026 by WinMagic Inc. All rights reserved.
Printed in Canada
Many products, software and technologies are subject to export control for both Canada and the United States of America. WinMagic advises all customers that they are responsible for familiarizing themselves with these regulations. Exports and re-exports of WinMagic Inc. products are subject to Canadian and US export controls administered by the Canadian Border Services Agency (CBSA) and the Commerce Department’s Bureau of Industry and Security (BIS). For more information, visit WinMagic’s web site or the web site of the appropriate agency.
WinMagic, SecureDoc, SecureDoc Enterprise Server, Compartmental SecureDoc, SecureDoc PDA, SecureDoc Personal Edition, SecureDoc RME, SecureDoc Removable Media Encryption, SecureDoc Media Viewer, SecureDoc Express, SecureDoc for Mac, MySecureDoc, MySecureDoc Personal Edition Plus, MySecureDoc Media, PBConnex, SecureDoc Central Database, and SecureDoc Cloud Lite are trademarks and registered trademarks of WinMagic Inc., registered in the US and other countries. All other registered and unregistered trademarks herein are the sole property of their respective owners. © 2026 WinMagic Inc. All rights reserved.
Acknowledgements
This product includes cryptographic software written by Antoon Bosselaers, Hans Dobbertin, Bart Preneel, Eric Young ([email protected]) and Joan Daemen and Vincent Rijmen, creators of the Rijndael AES algorithm.
This product includes software developed by the OpenSSL Project for use in the OpenSSL Toolkit (http://www.OpenSSL.org/).
WinMagic would like to thank these developers for their software contributions.
Contacting WinMagic
WinMagic Corp. 11-80 Galaxy Blvd. Mississauga, Ontario, M9W 4Y8 Toll free: 1-888-879-5879 Phone: (905) 502-7000 Fax: (905) 502-7001 | Sales: Marketing: Human Resources: Technical Support: For information: For billing inquiries: |
This document guides you through the basic steps for configuring and deploying SecureDoc for Linux Installation Packages for Endpoint devices. This does not represent the full feature set available through SES, but is intended as a way to quickly deploy SecureDoc for Linux Endpoint.
WinMagic has done extensive work to improve, streamline and augment the security surrounding the initial deployment of Key Files during the process of installing the SecureDoc Linux software, bearing in mind that many customers have widely divergent requirements relating to how devices are used during and after initial installation. Some customers install SecureDoc while the primary device user is on or will be on the machine, while others may need to protect new devices before the end-users of those devices have been defined, as well as other scenarios.
Note: For deployments on Virtualized or Cloud-hosted devices such as Amazon AWS EC2, Microsoft Azure, VMware vSphere, Microsoft System Center (Hyper-V) and Citrix (Xen) – See SecureDoc for Linux CloudVM Deployment Guide
About SecureDoc for Linux (SDLinux) Endpoint
SDLinux Endpoint is a full disk encryption solution for Linux-based devices. Using this product, SES administrators can deploy SDLinux packages that contains a set of scripts and/or executables on target Linux devices. When an SDLinux package is deployed, SDLinux pre-boot will be installed on these target devices, their root / data volumes will be encrypted, and the devices will be registered to the SecureDoc Enterprise Server. The profile settings, installation package settings and SES communication-protection certificate will come along with the installation package.
SDLinux uses Dm-crypt as its encryption engine. While native Dm-crypt is built-in to Linux systems it does not however provide the ability to perform online conversions unlike SDLinux. With SDLinux online conversion, this allows customers the ability to encrypt a live Linux system without taking taking it offline.
| IMPORTANT: The pre-boot authentication component along with SecureDoc space (SD space with encryption configuration, management files) plays an essential role in unlocking the full encrypted system to boot. It is important to note that on SDLinux encrypted systems, the space on the disk where pre-boot authentication (application) and SDspace reside are the only areas of the disk that is left in clear text. They are left in clear text so that an encrypted system can launch pre-boot with it is configuration files to perform authentication to unlock the system to boot. |

Key Features
SDLinux supports full disk encryption on most of the popular Linux Distributions (See Supported Operating Systems).
Provides Full disk encryption (using aes-cbc-essiv with sha256) which includes encryption on the root volume, data volumes and swap partitions.
Deploy and encrypt on pre-installed Linux systems without having to wipe/erase the disk or re-install the Linux OS with encryption enabled.
Supports Live Conversion allowing the Linux system to be in use while the encryption runs in the background, minimizing system downtime.
Protects powered off systems (Data-At-Rest encryption)
Supports encryption on XFS and EXT4 file systems. Other filesystems (i.e. btrfs) are supported as well but only through sector by sector encryption.
Supports deployment and management of LUKS encrypted Linux clients (See Appendix I)
Supports deployment on Linux clients with FIPS mode enabled (See Installing SDLinux on FIPS validated Systems)
Centralized password and key management of encrypted Linux systems
About Quick Deployment
This document guides you through the basic steps of setting up Device Policies on SESWeb and creating SDLinux Installation Packages for encrypting Linux clients:
Creating and Linking Policies
Pre-requisites for the SDLinux installation
Allocate free space on an existing Linux system (Refer to Appendix A)
Installing SDLinux
Managing Encrypted devices
Updates and Upgrades after deployment
Uninstalling SDLinux
This guide is focused on Full Disk Encryption, therefore:
Only the basic functionality is enabled, including full disk encryption of just the hard disk of the client device.
About This Version
Support for RHEL 9.6 OS version
Support for RHEL 9.7 OS version
Support for Ubuntu 24.04 LTS FIPS deployments
Support for adding admin user list during deployment
Support profile pushes from SES to the Linux client specifically
Changing client profile to enable permanent autoboot
Changing client profile to disable permanent autoboot
Support for setting and updating new device owner from SES
New feature to support Single Sign-On (SSO) for RHEL 8 and 9 OS versions
New feature to support Manager Approvals at preboot
SDLinux Components
There are four main components to the SDLinux product:
Pre-boot
SecureDoc space (SDspace)
Conversion driver
SecureDoc service (SDservice)
Boot Logon
Boot Logon is the SecureDoc mechanism that performs Pre-Boot Authentication. At Boot Logon, users can provide password authentication (or if PBConnex is enabled, connect to SES to authenticate) to unlock the encrypted Linux system.
The pre-boot is built during install time on the running system using files from the target OS to ensure that pre-boot application is native to the target OS and provide full compatibility.
If the target system has a separate boot partition, then SDLinux will create pre-boot application in this boot partition and leave the boot partition in clear text.
Important: In some Linux systems, root and boot partitions exist on the same partition. In these cases, SDLinux needs to create a new separate boot partition for the live system and install/create pre-boot authentication on it. By doing this, the boot partition is left in clear text for the system to launch pre-boot to unlock the disk.
SecureDoc Space (SDspace)
SDspace is a smaller area/partition also created during install time (~ 6 MB). It contains information on:
How keys are used to encrypt the disk.
Key manager server info
and Other client related settings for pre-boot.
Conversion Driver
The conversion driver is the component used by SDservice to run the online conversion operation. The driver is also responsible for:
Handling operations when an interruption during conversion occurs (records the point where the conversion stopped)
Handling operations when resuming from an interruption (recalls where the previous conversion stopped and resumes conversion from that point)
SecureDoc Service (SDservice)
SDservice uses the conversion driver and drives the actual inline conversion. It is also responsible for performing the following tasks during and after conversion:
Handles checking and reporting of the system health to SES
Handles key file and recovery management
Supported Operating Systems
Note: If the OS and specific version is not listed below or you are looking for support of older versions you can find the complete list in the SecureDoc For Linux section of our website’s System Requirements page
https://winmagic.com/en/data-security-support/system-requirements/
Ubuntu
Linux Release date | SecureDoc Version | |
Ubuntu 24.04.4 LTS* | February 12, 2026 | 9.2 and newer |
Ubuntu 24.04.3 LTS* | August 7, 2025 | 9.2 and newer |
Ubuntu 24.04.2 LTS* | February 20, 2025 | 9.2 and newer |
Ubuntu 24.04.1 LTS* | August 29, 2024 | 9.1SR1 HF3 and newer |
Ubuntu 24.04 LTS* | April 25, 2024 | 9.1SR1 HF3 and newer |
Ubuntu 22.04.5 LTS* | September 12, 2024 | 9.1SR1 HF3 and newer |
Ubuntu 22.04.4 LTS* | February 22, 2024 | 9.0SR4 HF1 and newer |
Ubuntu 22.04.3 LTS* | August 10, 2023 | 9.0SR3 and newer |
Ubuntu 22.04.2 LTS* | February 23, 2023 | 9.0SR3 and newer |
Ubuntu 22.04.1 LTS* | August 11, 2022 | 9.0SR3 and newer |
Ubuntu 22.04 LTS* | April 21, 2022 | 9.0SR3 and newer |
Ubuntu 20.04.6 LTS* | March 23, 2023 | 8.6SR1 and newer |
Ubuntu 20.04.5 LTS* | September 1, 2022 | 8.6SR1 and newer |
Ubuntu 20.04.4 LTS* | February 24, 2022 | 8.6SR1 and newer |
Ubuntu 20.04.3 LTS* | August 26, 2021 | 8.6SR1 and newer |
Ubuntu 20.04.2 LTS | February 4, 2021 | 8.6 and newer |
Ubuntu 20.04.1 LTS | August 6, 2020 | 8.6 and newer |
Ubuntu 20.04 LTS | August 23, 2020 | 8.6 and newer |
Ubuntu 18.04.6 LTS* | September 17, 2021 | 8.6 SR1 and newer |
Ubuntu 18.04.5 LTS | 8.5 and newer | |
Ubuntu 18.04.4 LTS | 8.5 and newer | |
Ubuntu 18.04.3 LTS | 8.3SR1 and newer | |
Ubuntu 18.04.2 LTS | 8.3SR1 and newer | |
Ubuntu 18.04.1 LTS | 8.3SR1 and newer |
* Deployment on FIPS mode supported:
FIPS mode on Ubuntu 18.04 and 20.04 will require SecureDoc version 9.0SR2 and above.
FIPS mode on Ubuntu 22.04 will require SecureDoc version 9.2 and above.
FIPS mode on Ubuntu 24.04 will require SecureDoc version 9.2SR1 and above
RedHat
RedHat Enterprise Linux Server
Version | Release date | SecureDoc Version |
9.7* | 2025-11-11 | 9.2 HF1 and newer |
9.6* | 2025-05-02 | 9.2 HF1 and newer |
9.5* | 2024-11-12 | 9.2 and newer |
9.4* | 2024-04-30 | 9.1SR1 and newer |
9.3* | 2023-11-07 | 9.1SR1 and newer |
9.2* | 2023-05-10 | 9.1 and newer |
9.1* | 2022-11-15 | 9.1 and newer |
9.0* | 2022-05-17 | 9.1 and newer |
8.10* | 2024-05-22 | 9.1SR1 and newer |
8.9* | 2023-11-14 | 9.1SR1 and newer |
8.8* | 2023-05-16 | 9.0 and newer |
8.7* | 2022-11-09 | 9.0 and newer |
8.6* | 2021-11-09 | 9.0 and newer |
7.9* | 2020-09-29 | 8.6SR1 and newer |
* Deployment on FIPS mode supported:
FIPS mode on RHEL 8.x will require SecureDoc version 9.0SR2 and above
FIPS mode on RHEL 9.x will require SecureDoc version 9.1 and above
Supported Platforms
Public Cloud |
|
Private Cloud |
|
Kernel driver requirements
SDLinux requires the appropriate kernel drivers matching the operating systems kernel version in order to install successfully. The SDLinux package comes with a select default kernel drivers (kernel drivers that come included with the package) that it can use for installation. Also during the installation process, when the kernel driver is not available locally, it is capable of downloading drivers dynamically online (via internet connection) when the kernel drivers are not available within the package.
Default Kernel Versions
The following kernel versions are included by default in SDLinux packages:
rhel8.wmsd.tar.gz | rhel9.wmsd.tar.gz | ub20.wmsd.tar.gz | ub22.wmsd.tar.gz | |
Kernel Versions | ||||
3.10.0-327 | 4.18.0-80 | 5.14.0-162.6 | 4.15.0-1039-fips | 4.15.0-1039-fips |
3.10.0-514 | 4.18.0-147 | 5.14.0-162.12 | 5.15.0-56-generic | 5.15.0-47-generic |
3.10.0-693 | 4.18.0-193 | 5.14.0-162.23 | 5.15.0-48-generic | |
3.10.0-862 | 4.18.0-240 | 5.14.0-284.18 | 5.15.0-56-generic | |
3.10.0-957 | 4.18.0-305 | 5.19.0-38-generic | ||
3.10.0-1062 | 4.18.0-348 | 6.2.0-25-generic | ||
3.10.0-1101 | 4.18.0-425 | 6.2.0-26-generic | ||
3.10.0-1127 | 4.18.0-477 | |||
3.10.0-1160 | ||||
3.19.0-75-generic | ||||
4.4.0-200-generic | ||||
4.8.0-59-generic | ||||
4.10.0-42-generic | ||||
4.11.0-14-generic | ||||
4.15.0-45-generic | ||||
4.18.0-25-generic | ||||
5.3.0-26-generic | ||||
5.8.0-36-generic | ||||
5.11.0-38-generic | ||||
Note: Majority of ub20.wmsd.tar.gz and ub24.wmsd.tar.gz kernel drivers are downloaded from our AWS S3 storage. See Kernel Versions in Amazon S3 – page 11 for more info.
Kernel Versions in Amazon S3
While SDLinux packages only come with a select number of kernel drivers it is able to support most of the kernel versions for different Linux flavors. This is done through the installation process by downloading the kernel drivers from WinMagic’s Amazon S3 bucket (Click here to see the current list of kernel versions available). The following is performed during installation process:
The installer will first search for the matching kernel driver locally within the package.
If no kernel drivers are found locally, it will connect to WinMagic’s Amazon S3 bucket to find the matching drivers.
Once a matching kernel driver is found, we check the authenticity of the driver.
Once authenticity is confirmed it will download the Kernel driver to the system while checking for its integrity.
Note: If the authenticity and integrity check fails, the installer will reject the driver.
Once the download is completed and the integrity checks out it will be converted to an SDLinux kernel driver and used to proceed with the installation.
Note: If your company’s security policy does not allow your production servers to have an active internet connection and your Linux systems kernel version is not included by default in the Default Kernel Versions list, you can import the kernel drivers into your installation package prior to deployment.
To import all the kernel drivers into your package for Ubuntu systems please refer to the Appendix H. For other OS versions please contact a WinMagic representative for more info.
Space requirements
The challenge often comes when we have a Linux system where the root and boot exist as the same partition. To encrypt such a system, we often have to first create a separate boot partition on a live running system by copying files from the existing boot partition etc.
Creating a separate boot partition from a live system is not trivial task, so for us to successfully do this, our SDLinux installer looks for one of the following options.
Approx. 600MB ~ 1GB of unallocated free space (space that hasn’t been formatted). If possible we recommend setting aside 1GB of unallocated space to future proof the boot partition size.
SWAP partitions (for LVM systems SWAP needs to be on its own physical volume group to be useable). When free space is not available during the installation, it can make use of your SWAP partition to complete the installation process.
Checking space requirements automatically via the installer
The SDLinux installer will automatically analyze the current system and determine if it is able to obtain the required free space for installation. The installer performs the following analysis:
Search for available free space to be able to create the new boot partition in case boot files are in the same partition as root.
If no free space is available, then part of the physical swap space can be used to carve out enough space and recreate the swap space again (with a smaller size)
If no physical swap partition is available (having enough space), LVM swap volumes will be checked next.
Note: LVM swaps can only be an exclusive volume on their volume group (otherwise data has to be moved around) to be used. In case the swap is within the LVM group the installer will attempt to resize the LVM to make useable space but a manual confirmation is required to perform this (this will stop for a prompt even for silent install “-s” option).
If there is an existing standalone boot partition but no free space or swap volumes that can also be used; then the configuration management can be stored in the boot partition (at least 6 MB of file space will be needed); This mode, however, is slower.
If none of the above is possible then installation will fail and more space needs to be available. Prior to running the installation you may also determine beforehand if your system meets the space requirements. Below are the instructions on how to do this and how to prepare your system if no free space is available.
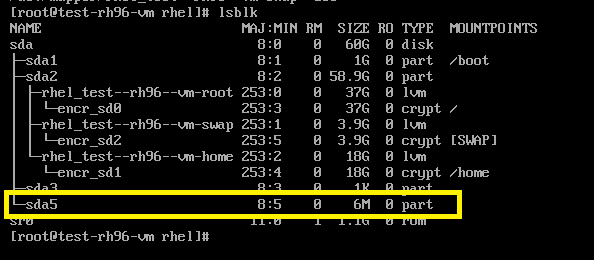
Manually checking for the space requirements
To find out if your system meets these requirements run the following command.

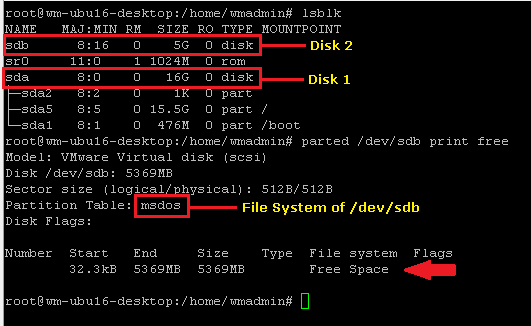
Note: “/dev/sda” is the disk where your operating system resides and where you are installing SDLinux.
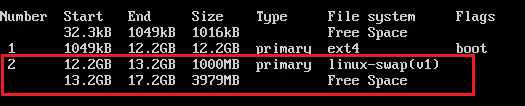
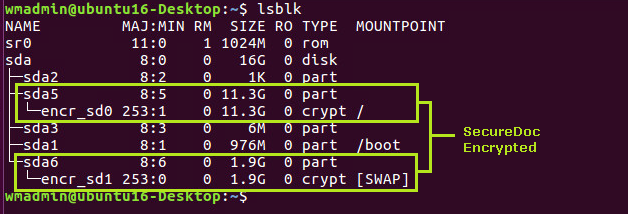
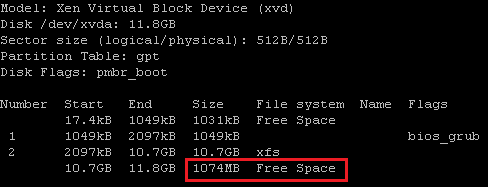
Below is an example of a system that has both unallocated free space and swap partition.
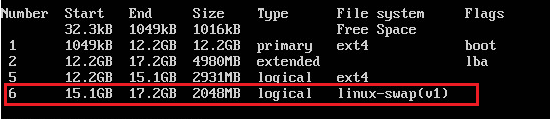
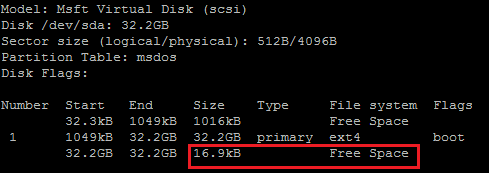
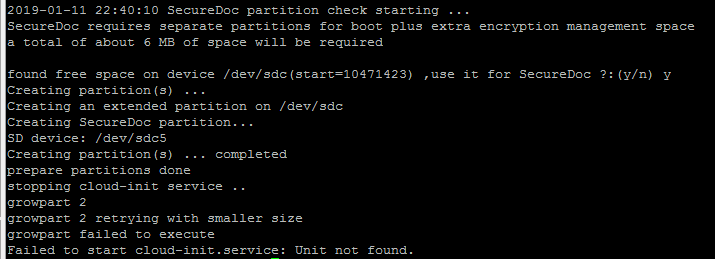
Below is an example of a system that has a swap partition but no free space.
Note: To learn more on how to allocate free space for Azure and AWS environments - See Appendix A1 and Appendix A2 respectively.
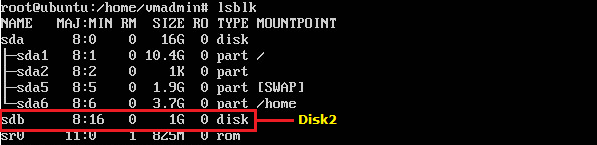
SDLinux can also utilize empty space or SWAP space made available on a secondary drive. If a new Drive is added for this purpose, please ensure that the drive contains a file system.
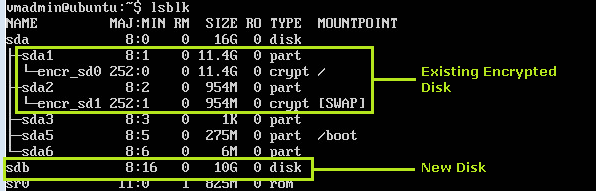
Below is an example of a system that has a second attached disk with a file system created and a useable free space.
Note: To learn more on how to attach a new disk on a Linux system and how to set it up to be used as free space - See Appendix B.
Permission requirements
Users
SDLinux installation requires access to a Linux root account that can install software and make changes to the operating system.
Files, Directories and Services
For security hardened systems, our installer will require access to certain files and folder in order to complete the installation and for our software to run. The following files and folders will be added/modified during the installation process:
Files and Directories | Description |
/usr/local/WinMagic | Main SDLinunx installation folder |
/etc/fstab | |
Grub boot config files:
| Config files vary depending on the distro |
/lib/system/system/winmagic.service | New systemd file for the winmagic service |
/etc/profile.d/housekeeping.sh | WinMagic housekeeping script |
/etc/udev/rules.d/92-dm-secdoc.rules | WinMagic udev security rule |
/etc/dbus-1/system.d/org.winmagic.secdoc.conf | sdservice dbus profile |
/usr/sbin | For WinMagic secdoc-cli |
/usr/bin | For sdpasswd (tool to update user keyfile password) |
/lib/dracut/modules.d/99wmagic | Initrd generation scripts |
<current_kernel>/kernel/drivers/SDLinuxDrv.ko | Conversion driver for disk encryption |
/etc/secdoc/io_load | Used for encryption control feature (may have read/write permission for root and read for group) |
Other security hardening tools and modules:
SELinux(Security-Enhanced Linux) – If your system uses SELinux to define access control for applications, processes and files you will need to set this to permissive mode in order to install SDLinux.
fapolicyd (for RHEL 8+) – If your system uses fapolicyd to control execution of applications you will need to run the secpolicy_prep.sh script (found in the winmagic installation folder) prior to the installation. If you do not see this file in your installation folder please contact WinMagic Support for more information.
Network Connection requirements
Linux client must be able to communicate with the SecureDoc Enterprise Server over the network.
To automatically download during installation the required SDLinux kernel driver as well as any missing pre-requisite libraries on your system, the client machine will need Internet Access. SDLinux will also automatically install the downloaded kernel drivers and pre-requisites.
Note: If your company’s security policy does not allow internet access to your Linux clients (especially for Linux servers), please see the Software package requirement section to pre-install the required modules beforehand.
Software/Library requirements
The softwares and libraries listed below are required by SDLinux to install successfully. If your Linux distribution did not come pre-installed with these then SDLinux will download the required packages for your operating system via the internet and automatically install them on the client machine.
If your company’s security policy does not allow internet access to your Linux clients you will need to manually install each of the software prerequisites below prior to installing SDLinux.
Name of the package or module to download and install for the specific Linux flavor that contains the required executable/libraries | |||||
RHEL7+ | RHEL6 | Ubuntu14 | Ubuntu 16+ | SUSE 15+ | |
parted | parted | parted | parted | parted | parted |
cryptsetup | cryptsetup | cryptsetup | cryptsetup | cryptsetup | cryptsetup |
libpwquality | libpwquality | libpwquality | libpwquality-tools | libpwquality-tools | libpwquality-tools |
or | or | or | |||
libpwquality-dev | libpwquality-dev | libpwquality-dev | |||
dmidecode | dmidecode | dmidecode | dmidecode | dmidecode | dmidecode |
bc | bc | bc | bc | bc | bc |
curl | curl | curl | curl | curl | curl |
iw | iw | iw | iw | iw | iw |
openssl | openssl | openssl | openssl | openssl | openssl |
wpa_supplicant | wpa_supplicant | wpa_supplicant | wpasupplicant | wpasupplicant | wpasupplicant |
xterm | xterm | xterm | xterm | xterm | xterm |
monit |
| monit | monit |
|
|
dracut-network | dracut-network | dracut-network |
|
| dracut-network |
python | python | python | python | python | python |
python-dbus | python-dbus | python-dbus | python-dbus | python-dbus or python3-dbus | python-dbus |
python-argparse | python-argparse | python-argparse | python-argparse | python-argparse | python-argparse |
newt |
|
|
|
| Newt |
dhclient | dhclient | ||||
Example
To obtain the libpwquality.so.1 library on an Ubuntu 16+ system, based on the table above, you would run the following.
apt install libpwquality-tools
If the package or module libpwquality-tools is not available to install then you would run the following instead.
apt install libpwquality-dev
Setting up SESWeb for SDLinux
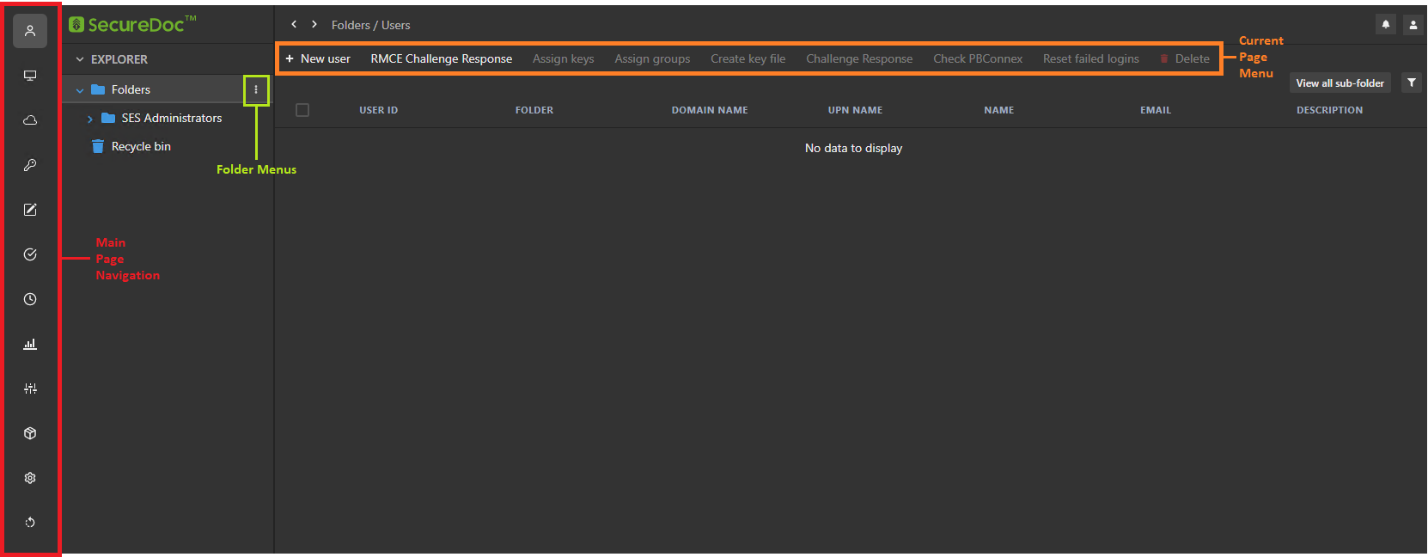
About the SES Web Console
The SES web console provides a web-based interface for SecureDoc Enterprise Server, WinMagic's solution for managing encrypted devices in an enterprise environment. The SES web console supports many of the features provided by the SecureDoc Enterprise Server, including User Management, Device Management and Recovery, Pre-Boot Networking, Password Recovery, Report management, and new Compliance Report Management Tool (CRMT). Being a three-tier Web application, SESWeb relies upon the availability of an SDConnex server to provide its middle-tier calculation and data-management functionality, while Microsoft IIS provides the top presentation layer and the SES Database provides the bottom data-repository layer.
Logging in to the SESWeb Console
To log-in to the SESWeb console, open a web browser and access the log-in page through either of the following links:
https://localhost/ (only if access SESWeb directly from the server)
https://<Server_IP> or https://<Server_Name>
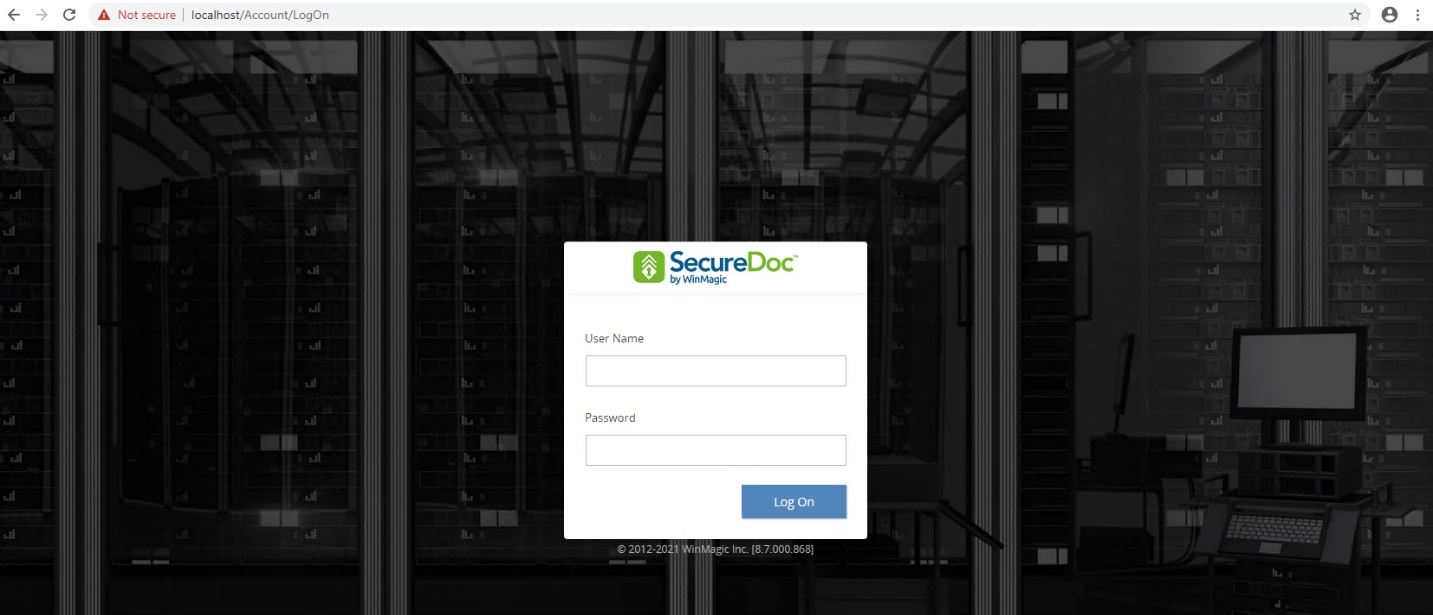
Enter your SES administrator credentials and click Log on.
When you first sign in you will be brought directly to the web management console. The SES Web console allows you to easily navigate through all the different SES features.
Installing SDLinux
In this section, you will find the basic guidelines on deploying SDLinux on your client machine. This section covers:
Creating SDLinux Endpoint profiles
Creating SDLinux Endpoint packages
The SDLinux installation procedure and process
If you are preparing a brand new environment make sure to review the Supported Operating Systems section.
There are two ways to create an SDLinux Endpoint package:
Creating profiles and packages through SES Web
Creating profiles and packages through SES Console.
Creating Profiles and Packages in SESWeb
Creating a Linux Profile
The steps below will guide you on creating a quick SDLinux Endpoint profile on SESWeb for deployment.
To create the profile:
On the Navigation Pane, click on the Profiles tab.
On the Profiles menu, click on Add profile.
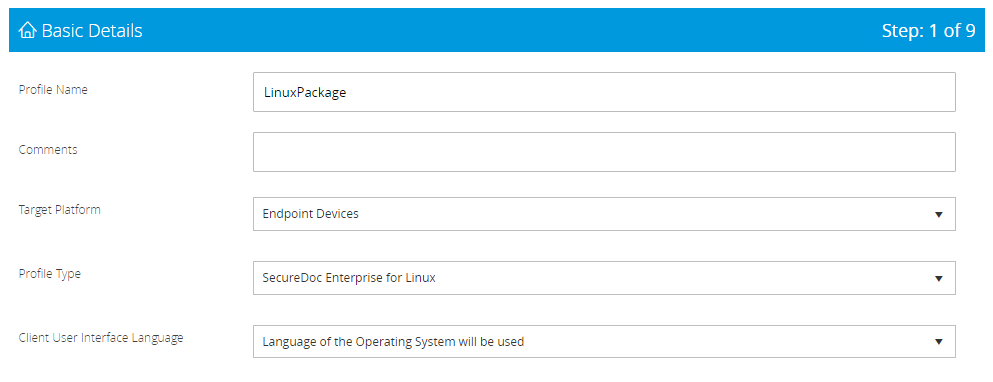
On the Basic Details page, select “CloudVM-IaaS Servers in the Cloud” for the Target Platform.
Select “SecureDoc Enterprise for Linux” for the Profile Type
Enter the name for the profile under the Profile Name field and click Next
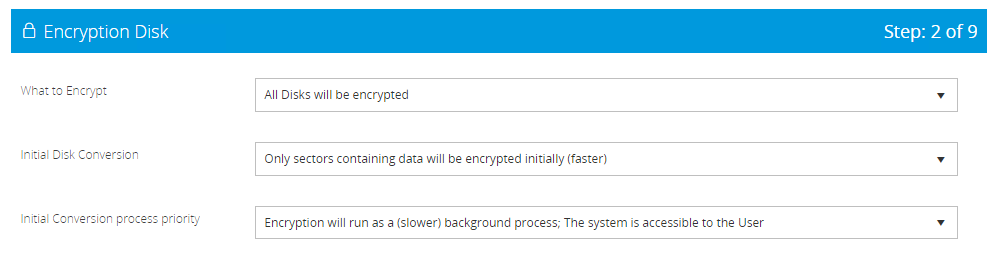
On the Encryption Disk page, select the encryption settings you want to run for your deployment or just click Next to use the default settings selected and proceed to the next page.
Click Next until you reach the Client Agent Settings page
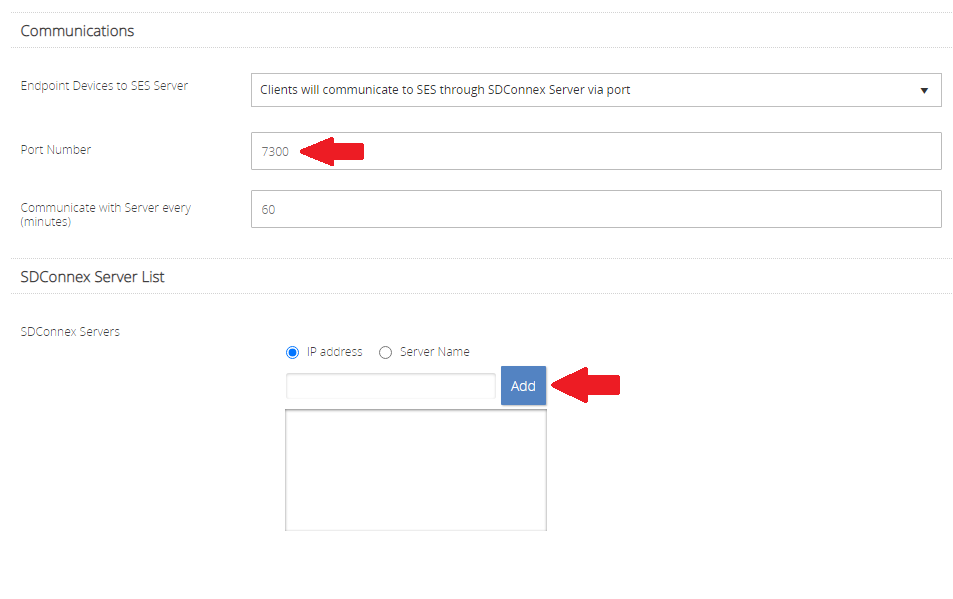
Change the Port Number if you have set a different port for SDConnex and add the IP Address or Server Name for your SES.
Once completed click Submit
Click Ok once the prompt appears that profile was created successfully
Profile created should now appear in the Profiles list page
Creating a Linux Install Package
Once the policies have been created and linked to the appropriate folder where the Linux devices will be registered and a Linux profile has been created, you are now ready to create Linux installation packages.
To create the package:
On the Navigation Pane, click on the Installation Package tab.
On the Package menu, select Create Package from Profile.

On the Installation Package Basics tab, select “CloudVM-IaaS Servers in the Cloud” for the Target Platform.
Select “SecureDoc Enterprise for Linux” for the Package Type
Select the profile under Profile to be deployed.
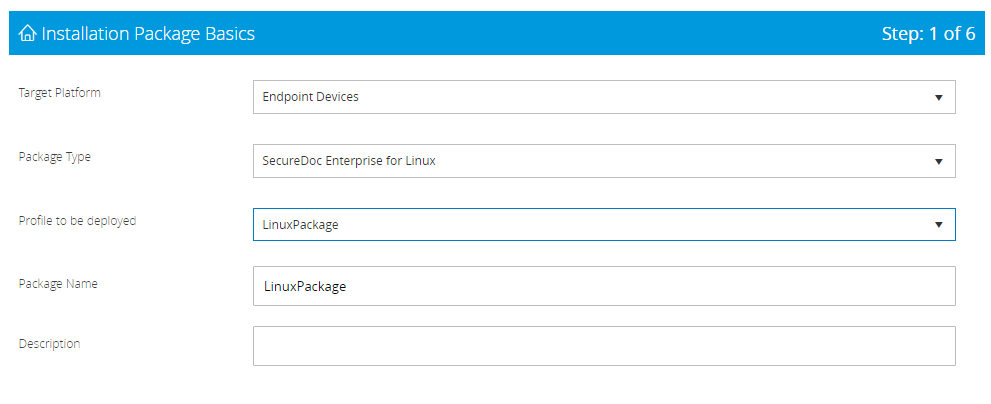
Once profile is selected the Package Name will be auto filled with the same name as the profile. You can change the Package Name if needed.
Click Next until you reach the Device Provisioning and Access Settings page.
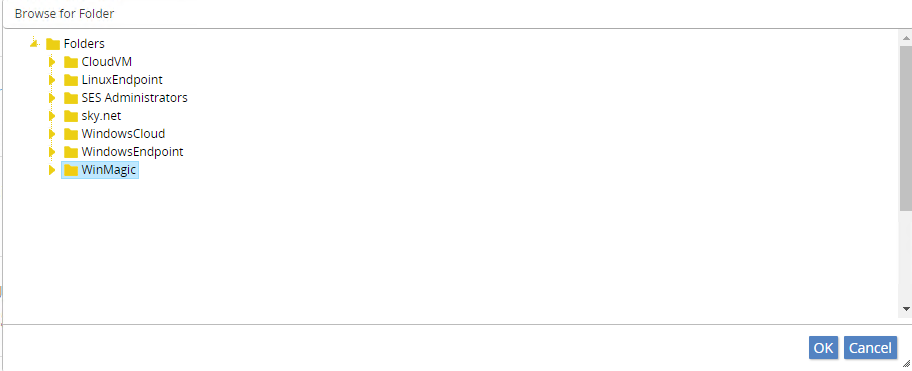
Select “New devices will be added to a specific folder (define below)”, under New Device Organization.
Click Browse and select the folder where the device will register to and then click OK
Click Submit to create the package and then click Ok on the confirmation screen. Your package should now be displayed in the Installation packages list.
On the package you created under the Action column, click on Prepare Full Package for Download

You will be informed that the server is now in the process of preparing the installation package.
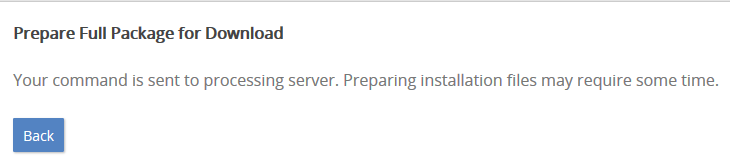
Click on BACK to be brought back to the Installation package list
Under the Action column of the package you created, click on Download to download the package you created. This will download your package as a zip file.

Navigate to your downloads folder and unzip the file (if your Linux client supports the unzip function you can do this later on the client machine).
Copy the Linux installation package created to the target Linux system.
Creating Profiles and Packages in SES Console
Creating a Linux Profile
You can create an SDLinux Endpoint profile from the SES package the first step is to create and define the profile settings that will be used.
To create the profile:
Log-in to the SES Console.
Navigate to Profiles and click Add.
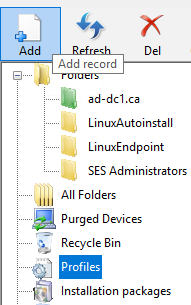
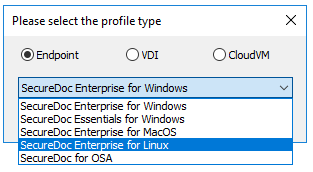
Select Endpoint on the radio button and select SecureDoc Enterprise for Linux on the dropdown menu and Click OK.
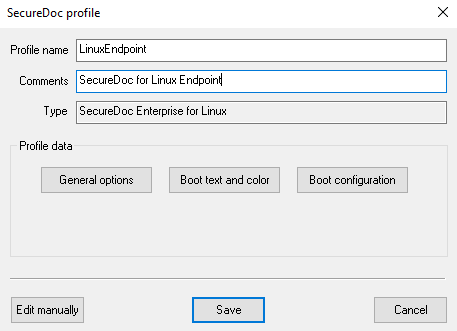
Enter a descriptive Profile Name and add Comments to document the intention and settings of the profile clearly, then click on General Options.
Under General Options, the default settings selected are the recommended settings for deploying on Linux Endpoint devices. You can modify the settings depending on your Company’s requirements.
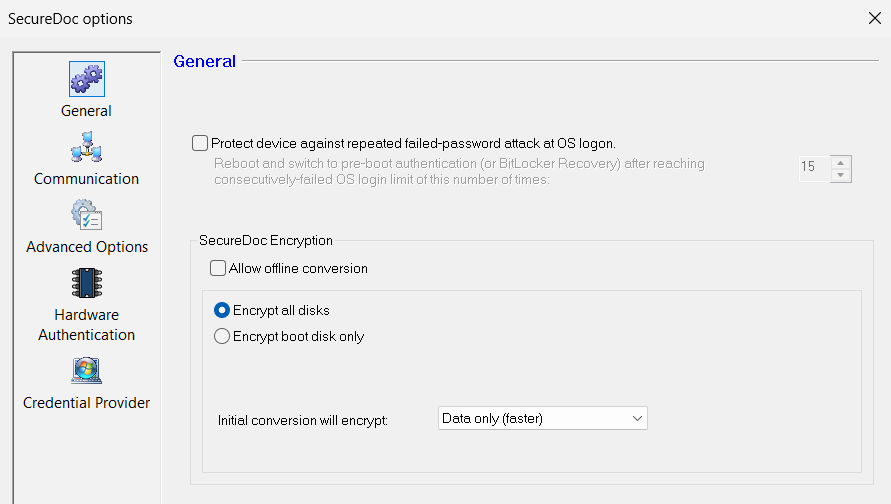
The options, and their functions are as follows:
Option | Description |
Protect device against repeated failed-password attach at OS logon | This option, if enabled, will check for the number of failed login attempts at OS logon. When failed OS login attempts exceeds the set limit, the client machine will reboot and bring you back to preboot login screen. Important: This feature only works in tandem with “Force permanent Auto-Boot” in the Boot configuration settings. If Force permanent Auto-Boot is not enabled, then this option (even when enabled/checked) will not be functional. |
Allow Offline Conversion | This option, if enabled, will block the launching of other applications or services during the initial disc conversion (encryption) process. In effect, this means that the device will run in a mode that is dedicated to initial conversion, to ensure that a) conversion runs as quickly as possible, and b) so that there can be no negative effects possible if other applications/services were permitted to run concurrently with it. (This option will be renamed in a future version to be more self-explanatory). |
Encrypt All Disks | All physical disks will be encrypted |
Encrypt Boot Disk Only | Only the physical disk containing the boot partitition will be encrypted. |
Initial Conversion will encrypt: | Every Sector: This radio button option indicates that every sector of the disk will be encrypted, including blank or unused space which the Operating System detects is not currently in use. Only Sectors containing data: This radio button option indicates that only those sectors that the Operating System detects as being currently in use/containing data. |
Click on the Communication icon to view the options. Similar to the General options the default settings are recommended for deploying on Linux Endpoint but these can be modified depending on your requirements.
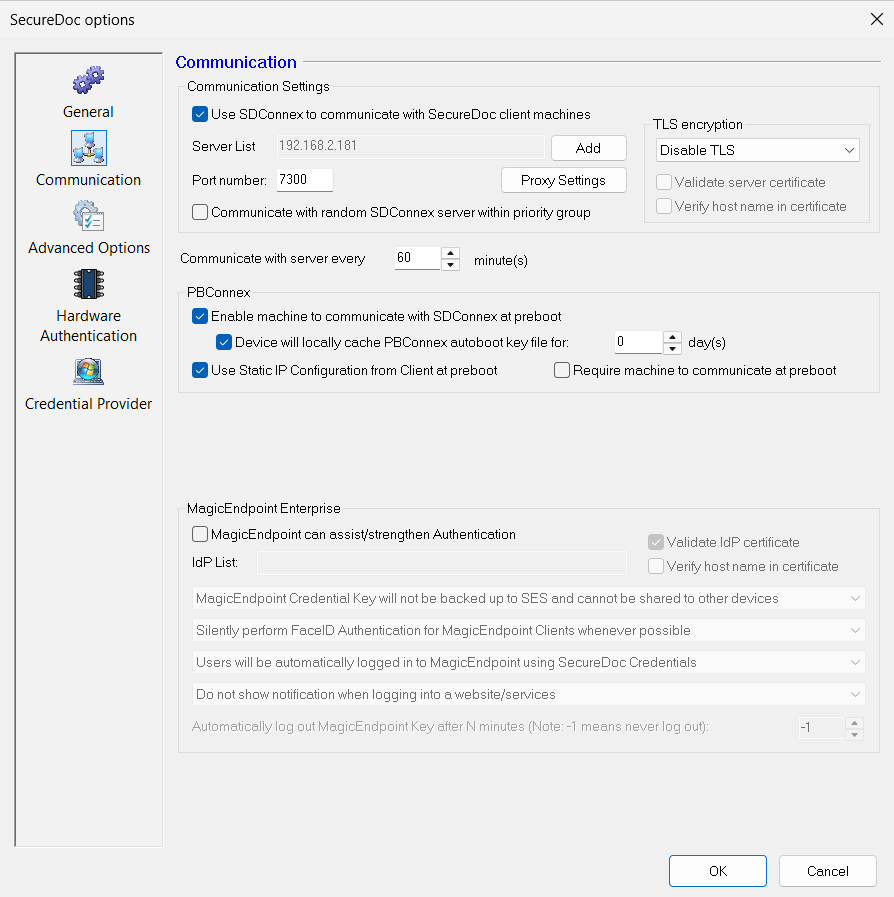
The options, and their functions are as follows:
Option | Description |
Use SDConnex to communicate with SecureDoc client machines | Use if client devices communicate with the SES server via a LAN or WAN. Specify the server’s IP address or network name and port number. Proxy Settings: Use this option to let the client devices connect to SDConnex (and thereby the SES server) through network data communication proxy server. You can either manually configure the proxy settings or use Internet properties. During initial SecureDoc installation, User/computer information will be returned to the SES Server via SDConnex communication on (one of) the SDConnex server(s) defined in this setting. If more than one SDConnex server exists in the SES configuration, click Add. The SDConnex Address list panel shown below permits the SES Administrator to define a list of up to 16 SDConnex servers through which client devices installed with this profile can communicate. To add a server (to the maximum of 16), enter its IP address or server name in the top (depending on which option is selected).
For each server, set the priority it has for devices receiving this installation package: servers will be selected in priority order (starting with 1 as the highest priority). More than one server can have the same priority: in that case, servers will be chosen within that priority depending on the order in which they appear in the list. To have client devices randomly choose one of the available connections in the group, check Communicate with random SDConnex server within priority group (on the Communication tab). This provides the benefit of (in a simple way) balancing the load across several SDConnex servers in a group. |
PBConnex | This set of options allows the choice whether or not client devices that receive this profile should be able to use PBConnex at pre-boot (see “Using Pre-Boot Connex (PBConnex)” in the main SES Administrator Guide). The first option: “Require machine to communicate with SDConnex at preboot” enforces whether or not the client MUST communicate to the SDConnex Server at Pre-boot. Use this option if you require the clients’ local key file to be authorized via PBConnex. The second option: "Enable machine to communicate with SDConnex at pre-boot" defines whether or not clients can utilize PBConnex communication at pre-boot. The indented option below it, named "Device will locally cache PBConnex autoboot key file for": defines whether, once sent to a client device, the PBN AutoBoot key file can be securely retained and re-used on the device for a specified number of days before expiring and optionally indicates how long the cached key file should be retained (see "About PBConnex" in the main SES Administrator Guide). PBConnex-brokered user authentication will be available only to the users, and for the devices, for which it has been set up in the group properties. PBConnex-brokered AutoBoot only takes devices into account (since users will not need to identify themselves at pre-boot), so PBConnex Autoboot groups need only have devices in them, though no harm occurs if such groups also have users defined in them, for other purposes. If the client uses a static IP instead of DHCP check "Use Static IP Configuration from client at pre-boot." |
TLS encryption | This feature enables support for alternative Transport Layer Security (TLS) modes in SDConnex and Profile, offering three distinct settings:
|

Click on the Advanced Options icon to view the options.
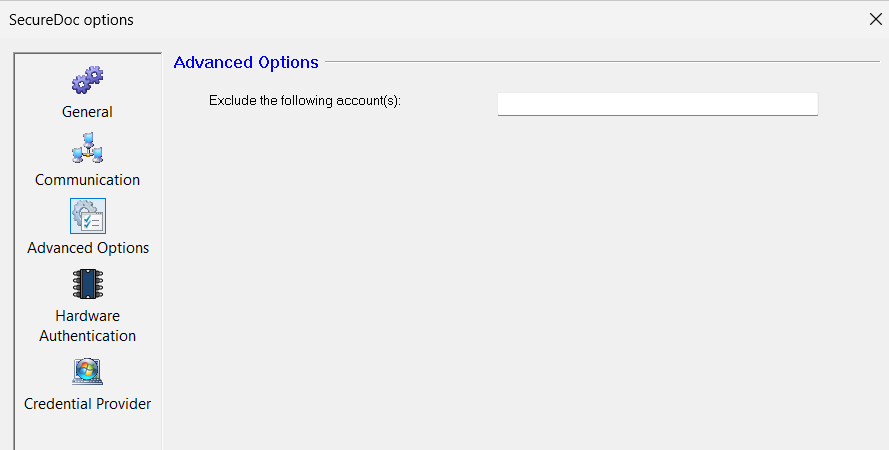
Option | Description |
Exclude the following account(s) | This field allows you to enter comma separated users that will be excluded from being primary owners during device provisioning. If the user is on this list, when they login to the device deployed with SDLinux, that user will not be prompted to be set as a Primary owner of the device. Example: User1,user2,user3 |
Click on Hardware Authentication to view the options.
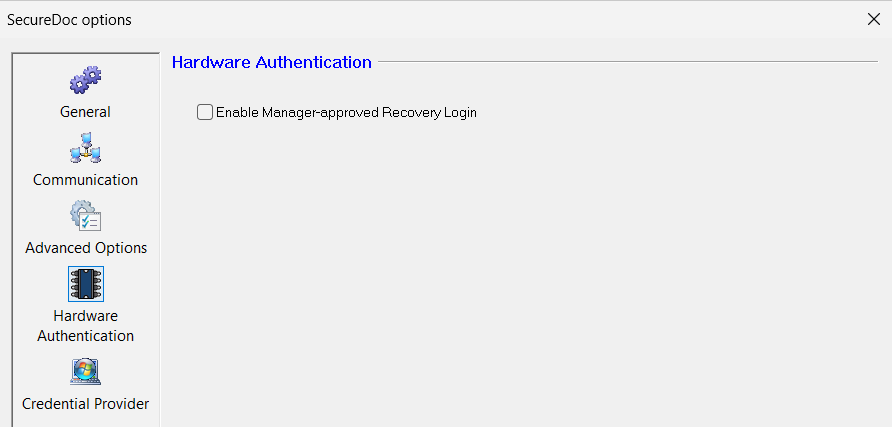
Option | Description |
Enable Manager-approved Recovery Login | This option enables the manager approval feature at preboot that allows users to request login approval from an assigned admin or manager, who will receive a push notification on their mobile device to grant access to the device. |
Click on the Credential Provider icon to view the options.
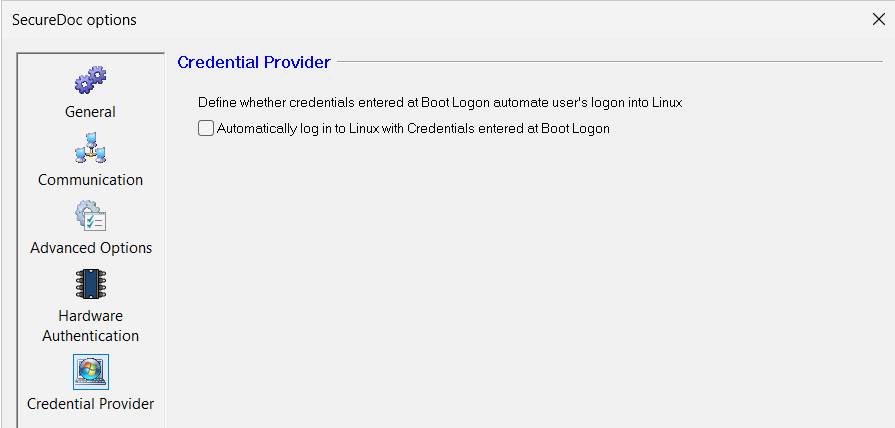
Option | Description |
Automatically log in to Linux with Credentials entered at Boot Logon | This option enables Single Sign-on functionality on the client machine. Enable this option if you want to automatically login at OS using credentials used at Preboot Important: As of 9.2SR1 this feature is only supported on RHEL 8 and 9 OS versions |
Note: For more information on how the SSO feature works on SDLinux see Appendix O
Click OK to close the SecureDoc Options window, which will return you to the Profile main menu.
(Optional) If you need to change the background image or text displayed at preboot (instead of the default SecureDoc preboot) click on Boot text and color button to make your changes. See Appendix J for more info on customizing preboot background and text.
Click on the Boot Configuration button to open the Boot configuration settings.
Under the General options, the following settings are displayed. For this deployment guide we will not be enabling the permanent auto-boot option and will be using the default configuration.
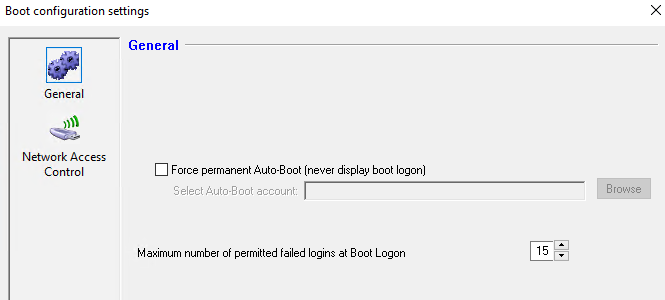
The options, and their functions are as follows:
Option | Description |
Force permanent Auto-Boot (never display boot logon) | Check to have users, of encrypted client devices, not see Boot Logon on start-up and simply log on to their Linux environment as usual. Important: When enabling this feature it is recommended to also enable “Protect device against repeated failed-password attack at OS logon” for additional security |
Select Auto-Boot Account | Click Browse and choose the Auto-boot user’s account. Note that the Auto-Boot account is a special kind of User Account that must have been previously created. |
Maximum number of permitted failed logins at Boot Logon. | For increased security, you can define a maximum number of times that unsuccessful logins can take place at the operating systems log-in screen when Disable auto boot option is enabled. After that maximum number is reached, the client will automatically reboot and halt at the SecureDoc preboot screen. To unlock the device, a user must log-in at preboot with the correct credentials in order to enable permanent autoboot once more or the locked key file user must perform Challenge-Response password recovery. Any time a successful login of another key file takes place, the locked key file will be unlocked and the failed login counter will be reset to zero, to begin a new count of failed logins if needed. |
Click on the Network Access Control to view the options.
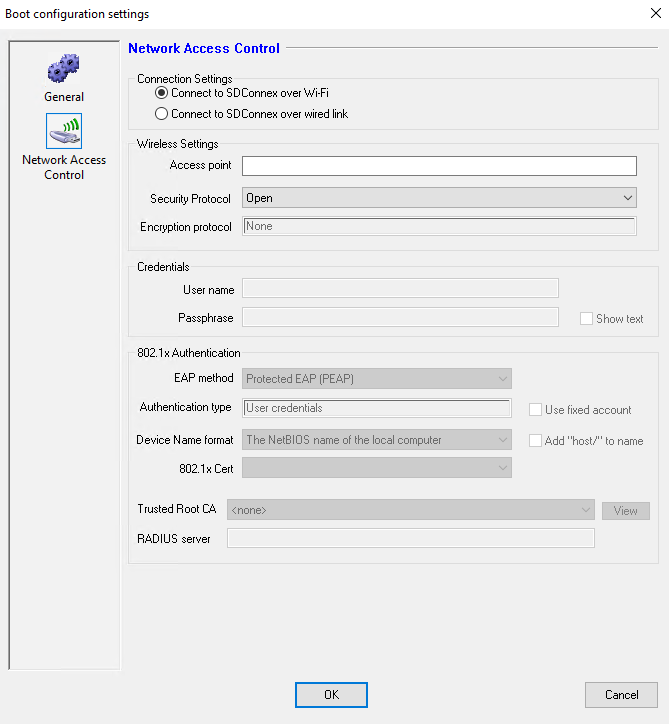
Note: Rather than repeating the extensive coverage of Network settings here, readers are guided to review the section of the Windows Device Boot Configuration Network Access Control settings section of the SES Administrator Guide, since this panel is identical to that used for Windows devices.
The only difference between Network Access Control settings between the SDLinux client and the Windows client is that under SDLinux, it is not possible to access or set the 802.1X Cert certificate (a new feature in 8.3 that is not available in the SDLinux client).
Click OK to close the Boot configuration settings
Click Save to save the new Profile.

Creating a Linux Install Package
The next step is to create an Installation Package and assign the Profile previously created to the package.
To create the package:
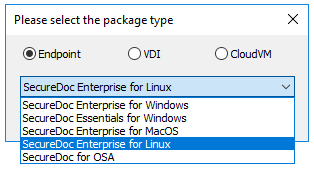
Navigate to Installation Packages and click on Add button to open the Package type menu.
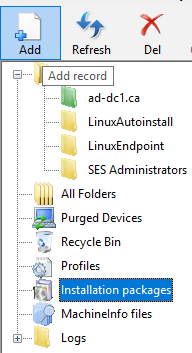
Select Endpoint on the radio button and select SecureDoc Enterprise for Linux on the dropdown menu and Click OK.
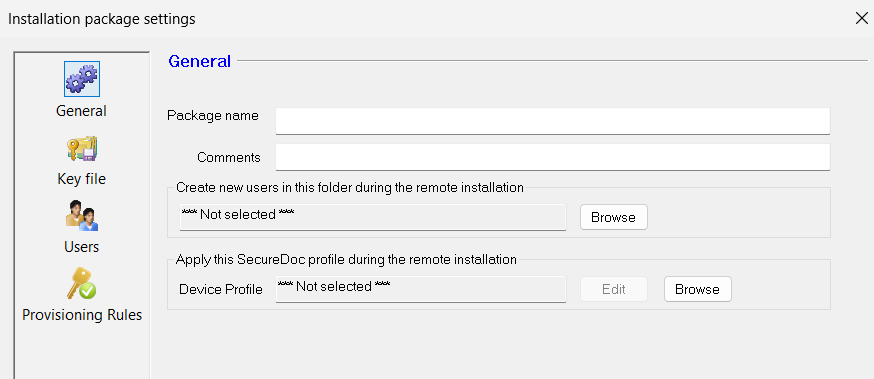
On the General options of the Installation package settings, enter the Package name and select the Device Profile that we previously created.
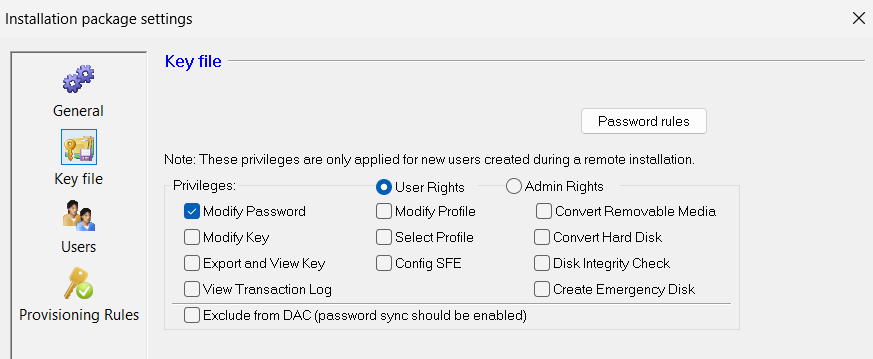
Click on the Key file icon to view and configure the settings.
Note: The Password rules and some of the key file privileges are not fully supported for version 8.3 of SDLinux so these will not be covered here in-depth at this time. You may leave the default settings as is at this time.
If you need to add additional administrator accounts to your deployment, click on the Users icon to add the users to the device.
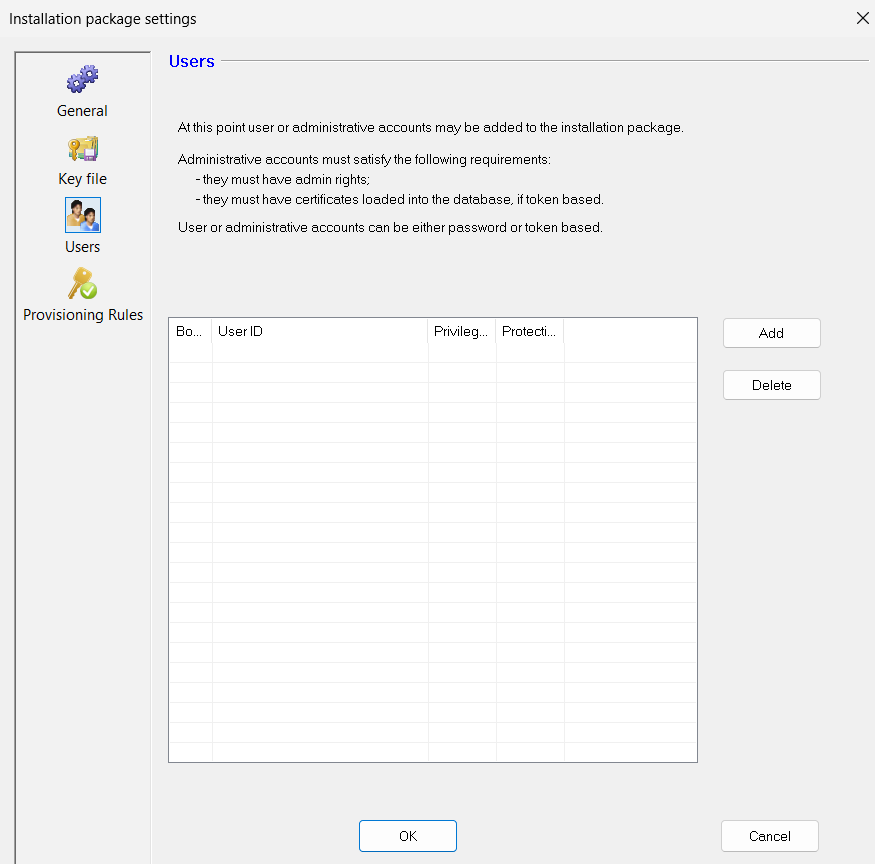
Note: User Key files will be sent down to the client machine for each administrative account added giving them access to the device they are deployed on.
Click on the Provisioning Rules icon to open the Provision Rules panel. There are 2 Provisioning Rules settings that SDLinux Endpoint supports:
(Default Setting) Enable Provisioning state and prompt user to confirm device ownership manually on Linux client machine.
This setting allows administrators to prepare and deploy SDLinux on client machines, prior to the devices getting assigned to its actual owner.
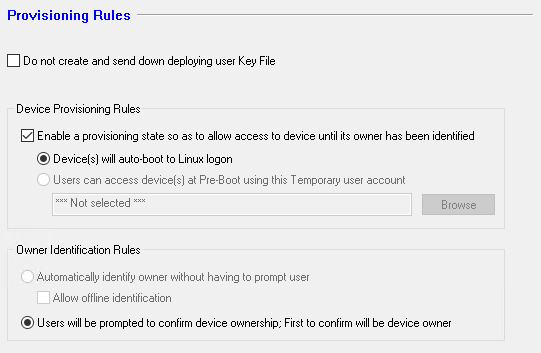
Disable provisioning and prevent key file from being created and sent down to client machine.
This setting relies on your client being able to connect and communicate with your SES server at preboot in order to obtain key files required to log-in and unlock your device’s disk.
Note: Under Owner Identification Rules, the option Users will be prompted to confirm device ownership… is disregarded when provisioning is disabled.
For the purpose of this deployment guide, we will be using the default settings on the Provisioning Rules section and keep the provisioning enabled. Click OK to save the package.
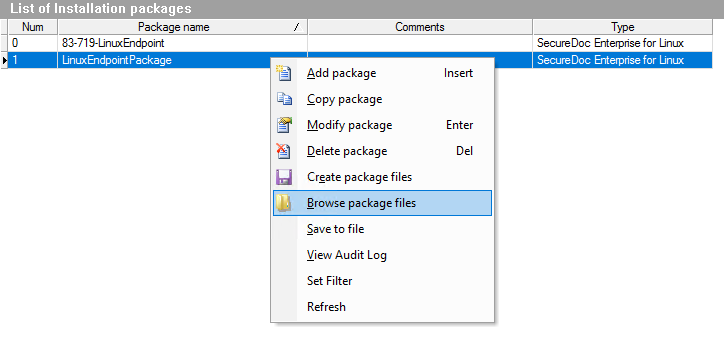
Right click on the saved package and select Browse package files
The next step will be to copy the SDLinux installation package to your client machine and begin installation.
SDLinux Installation Package Files
The Linux installation package will contain the following files as shown below.
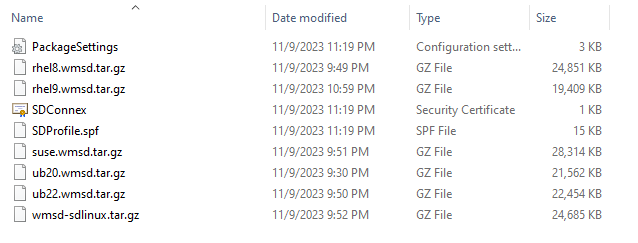
wmsd-sdlinux.tar.gz – Compressed tar file containing the installation files used for deployment on Ubuntu (14.04, 16.04, 18.04), RHEL 7.x and CentOS 7.x operating systems
rhel8.wmsd.tar.gz – Compressed tar file containing the installation files used for deployment on RHEL 8.x operating systems ONLY
rhel9.wmsd.tar.gz – Compressed tar file containing the installation files used for deployment on RHEL 9.x operating systems ONLY
ub20.wmsd.tar.gz – Compressed tar file containing the installation files used for deployment on Ubuntu 20.x operating systems ONLY
ub22.wmsd.tar.gz – Compressed tar file containing the installation files used for deployment on Ubuntu 22.x operating systems ONLY
ub24.wmsd.tar.gz – Compressed tar file containing the installation files used for deployment on Ubuntu 24.x operating systems ONLY
suse.wmsd.tar.gz – Compressed tar file containing the installation files used for deployment on SUSE 15.x operating systems ONLY
SDProfile.spf – file containing profile settings, media encryption, etc…
PackageSettings.ini – Configuration file.
SDConnex.cer – SDConnex certificate.
Backup your instance
It is recommended that you perform a back-up of your client prior to installing SDLinux. Save snapshots of your system if you are deploying on a virtual machine or ask your IT personnel to perform the back up for you.
Deploying the Package
About Deployment
Deploying SecureDoc is a multi-step process: see the SecureDoc Enterprise Server Manual for details.
Step 1: Distributing the Installation Package Files
To distribute installation package files to your Linux client, do one of the following:
Share the folder where your RemotePackages are located and mount the folder to your Linux client. This will require you to install the cifs-utils package in order to mount SMB shares.
Alternatively if your Linux client has Samba (software that provides access to SMB/CIFS protocols used by Windows) installed, you can share a folder on your Linux client and access it from your Windows Server to copy your Remotepackage folder.
Copy the RemotePackage folder to the Linux client using an SFTP solution like Filezilla or WinSCP (See Appendix E for more details).
Copy the RemotePackage to a usb drive or other media, and insert and mount to your Linux client
Step 2: Run Installation on Linux Client
Important: Prior to installation please also ensure that the environment does not have an excess of 16 volumes (including root + SWAP).
For installation of SDLinux on already encrypted (LUKS) devices – See Appendix I: Taking over LUKS-Managed volumes.
To install SDLinux on an un-encrypted system, perform the following:
On your Linux client open terminal
Navigate to the folder location where your RemotePackage was copied.
Use the “ls” command to verify all the files are present on the package.

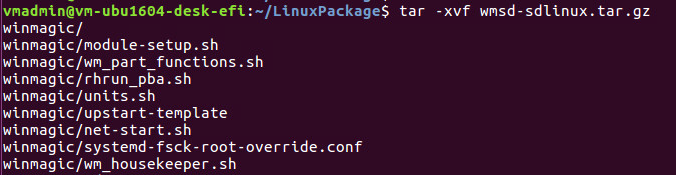
Extract the .tar.gz installer file using the “tar –xvf <file>” command (Click here to see the appropriate installer file to extract).
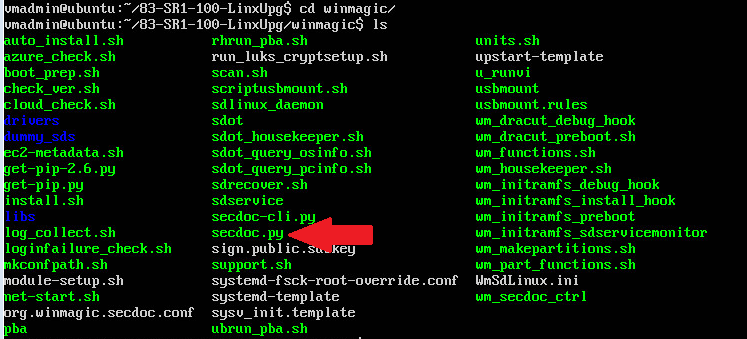
This should extract the contents of the tar.gz file to a folder name called winmagic.

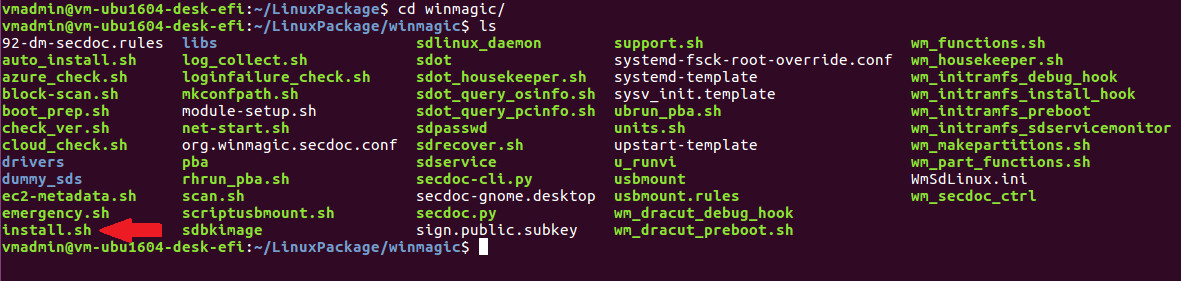
All the scripts required to install SDLinux are in located in the winmagic folder. The install script, as shown below, will be the primary script used for installation.
(For RHEL 8.10) Create the io_load file: Before installing SDLinux, you will need to create and configure the io_load file to mitigate an issue caused by 4.18.0-553 kernel versions and above during encryption.
Create a secdoc folder under /etc
mkdir /etc/secdoc
Create an io_load file and set its value to 256. Or you can run the command below in one line:
echo 256 > /etc/secdoc/io_load
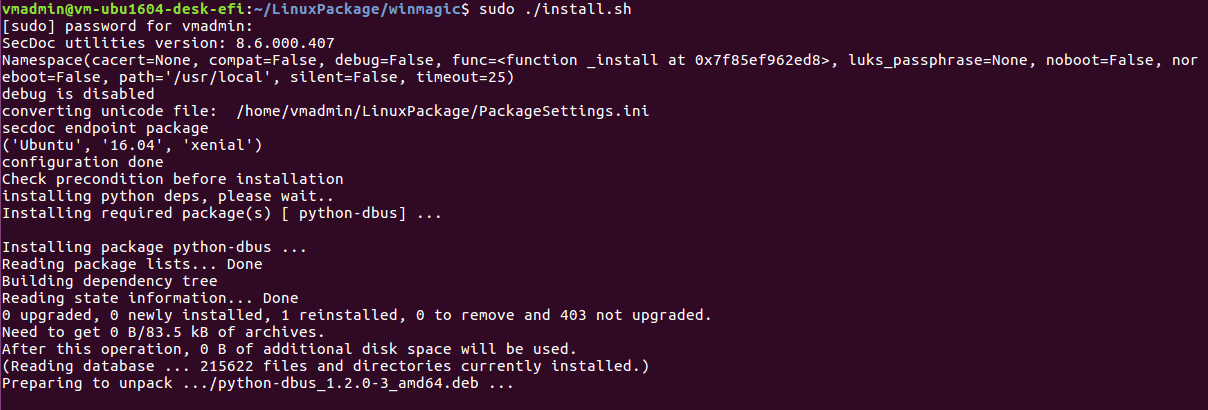
Run the SDLinux install script: Once all the system requirements have been met you can now proceed with installing the SDLinux.
To install SDLinux without user interaction (silent install), run the following command:
sudo ./install.sh -s
Note: The “–s” option assumes that you want to accept the default answers when performing the installation. With this in mind ensure that you have saved and closed all your work on the system as your system will automatically reboot after the installation process when using the silent install method. Run the install command without the “–s” option if you do not wish to use the default answers.
If you are using the silent install method above, you can skip to step# 10 of the install guide.
The install script now runs a compatibility test at the start of its installation process as well and will automatically roll back the install if an issue is found. However if you would simply like to run the compatibility test by itself without actually installing SDLinux see – Running SDLinux compatibility check
To install SDLinux manually and supply your own answers during the installation process, run the following command:
sudo ./install.sh
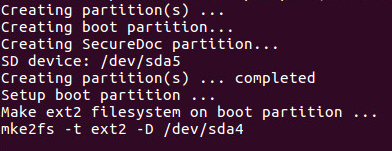
Once the device registers to SES successfully, the installer will then identify if any free space or swap space is available to be used for SecureDoc partition.

Note: If your system contains both free space and swap space, the SDLinux installer will always use free space first prior to using swap space.
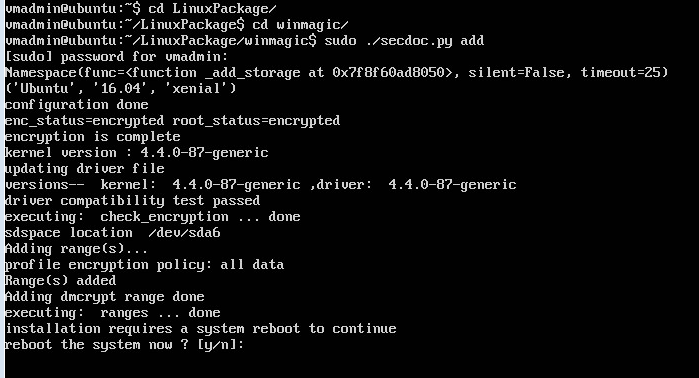
Type “y” and press enter to accept the use of free space. This will then prompt the installer to continue with the creation of the SecureDoc partition as well as import the profile and package settings, drivers and other required configurations.
At the end of the installation process, you will be asked to restart the system in order to complete the installation. Type ‘y’ and press enter to reboot the system.
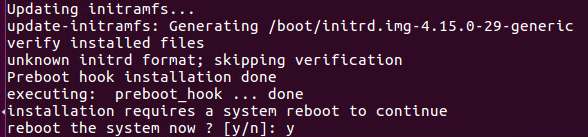
After the system resumes from reboot you should be brought straight back to the OS log-in screen.
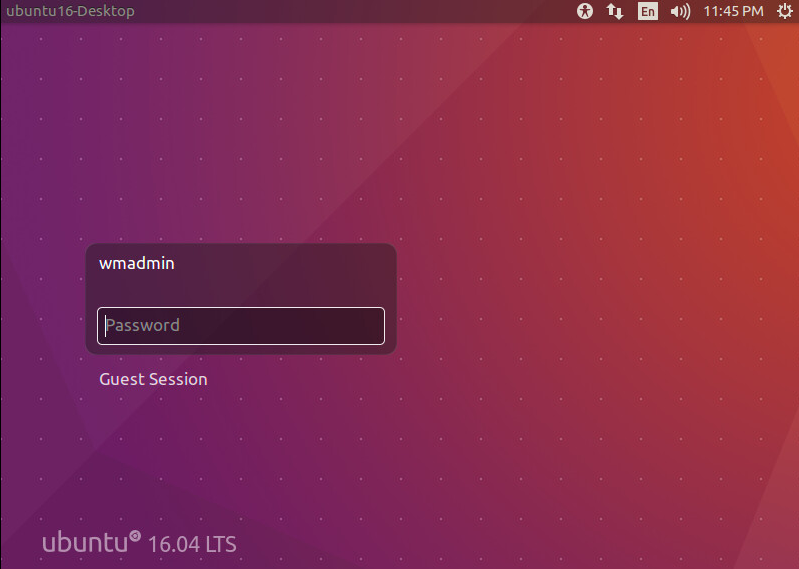
On the SES server, the Deployed State of the registered device is Temp Autoboot. This means, while the device has started encryption, the SecureDoc Preboot won’t be enabled until device ownership has been confirmed.


Step 3: Provisioning and Device Ownership
At this stage the system is now ready to be provisioned to the user.
If you are an organizations Administrator preparing the Linux client for a user you may:
Power off the device at this stage and hand it over to the user.
Log-in to the operating system, skip confirmation of device ownership and continue with device preparation. You may also let the device fully encrypt before handing it over to the user.
If you are the owner of the device (user assigned to the device) you can proceed to log-in to the system and confirm you are the owner of the device.
To confirm device ownership:
Select the user account at the log-in screen and enter credentials to log-in.
You should then see the SecureDoc Primary Account Setup screen upon successful log-in.
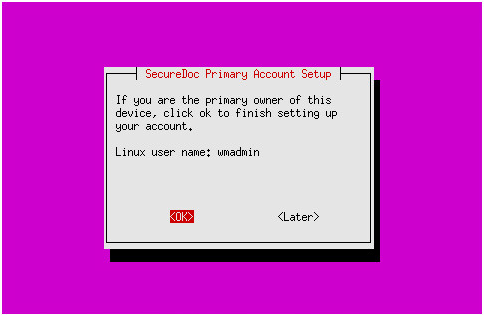
The Linux user name displayed is the account that you used to log-in to the OS.
With the <OK> option highlighted press Enter to proceed to the Password entry screen.
On the Enter password… screen, enter the password for the account. The password entered here will be the password you use to log-in at the SecureDoc preboot screen.
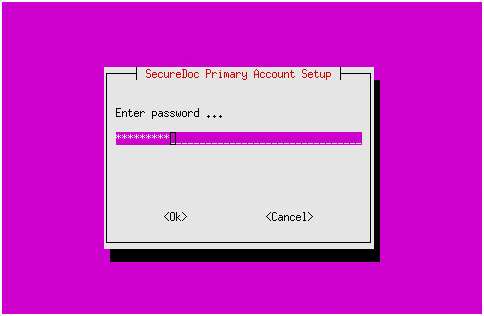
Note: Currently SDLinux does not support password sync, so your password at preboot may be different from your OS account log-in screen.
Press the Tab key on your keyboard to highlight the <OK> option and press Enter.
On the Retype password… screen, enter the same password once again. Press the Tab key to highlight the <OK> option and press Enter.

You should now see a confirmation that the primary account has been successfully set-up. Press Enter to close the screen and you should not be logged in to your system.
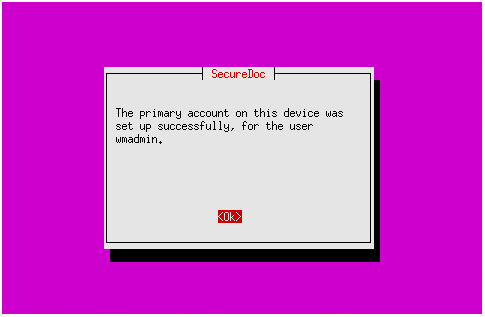
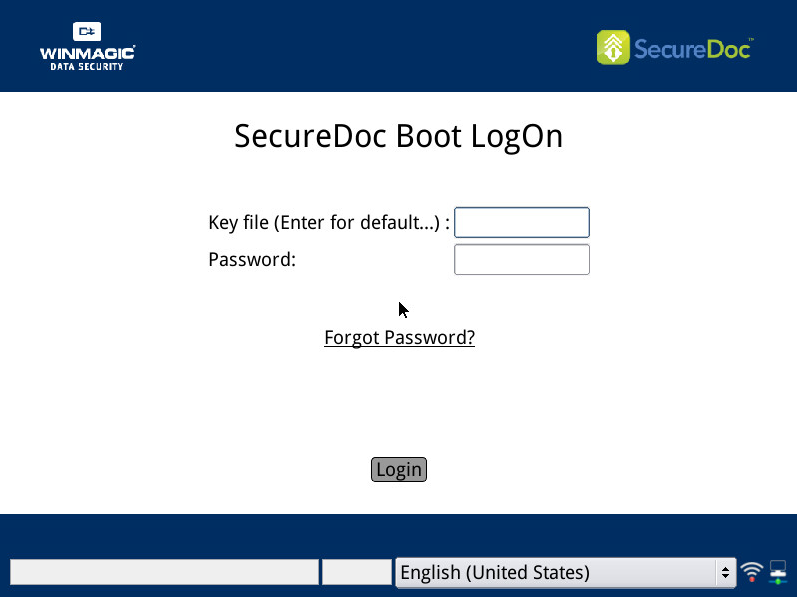
On your next system reboot you should now see the SecureDoc Preboot displayed which will now require you to authenticate prior to logging in to the system.
Step 4: Verify Deployment
To verify if the deployment was successful:
Login to your system and open Terminal.
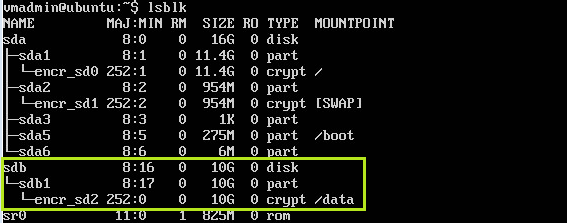
Run the “lsblk” command to view your current partitions. Partitions with an encr_sd0,encr_sd1,encr_sd2…encr_sd(n) indicate encrypted partitions.
To view the encryption progress on your system simply run the python script secdoc-cli.py that is located in the installation path:

When all the partitions indicate 100% encrypted the encryption on your system has completed.
After Installation
How Users are affected
The end–user experience of having SecureDoc on their computers is minimal:
Once it has been deployed and drives have been encrypted, users simply continue to work as before. Under normal circumstances, their only ongoing interaction with SecureDoc is when they turn on their device and SecureDoc’s Boot Logon program requires them to enter credentials to validate their access.
Note: Users need to be made aware that simply logging off at the end of the day is not enough to protect their data. Encryption protects data “at rest”, so, they need to turn their devices off or set their device to hibernation mode. Turning the device on, restarting, or exiting hibernation mode will invoke authentication at Boot Logon, guaranteeing that only authorized users can access the device’s encrypted data. This is the same for devices with PBN autoboot configured policies, since only devices that meet the required policy will be provided the keyfiles needed to authenticate at preboot.
Managing Encrypted Devices
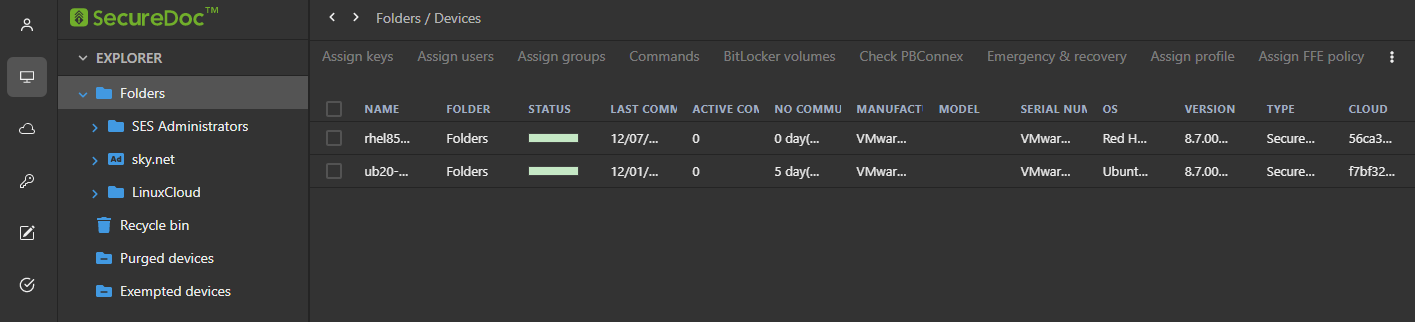
The encryption status of client devices is also shown on the SES Web interface under Devices section of the Navigation panel. Once Linux devices have been encrypted, you can use remote control functions on SES Web to add users to the device or crypto-erase compromised devices.
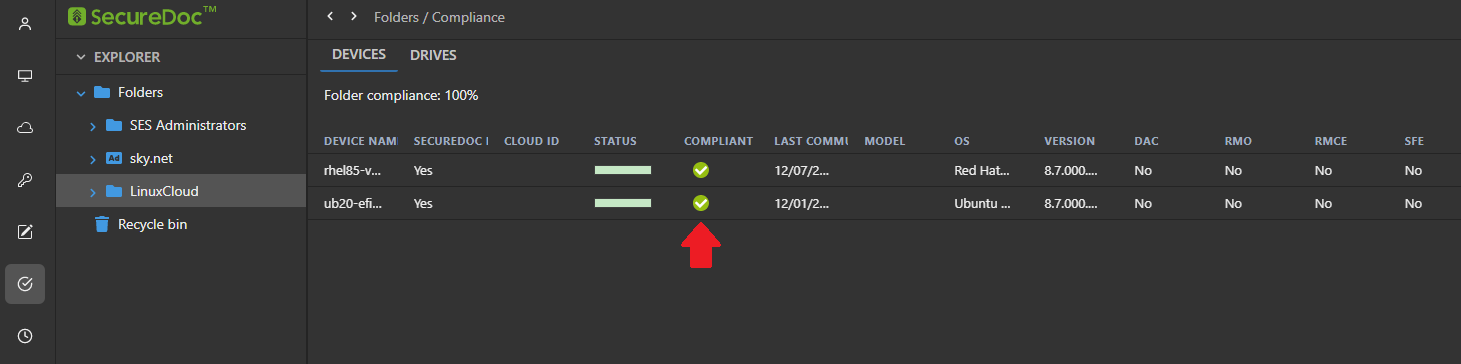
The Compliance section, unlike the Devices section, is only updated periodically (every 12 hours). A device with the  icon under the Compliant column indicates that the device has both SecureDoc installed and all its disks are fully encrypted.
Note: If you are looking to manage devices through the old SES Console – See SES Administrator Manual, “Understanding the SES Console“.
Encrypting Additional Disks
Adding disks to a system after its initial installation is something that happens quite commonly for Administrators. Because of this SecureDoc for Linux also makes it possible to encrypt additional disk attached to a system after its initial deployment. Currently SecureDoc for Linux is unable to encrypt new disks added automatically so the steps below will guide you through how to encrypt newly added disks.
Add the disk to your client machine
Log-in to the client and run the “lsblk” command to verify the disk is visible.
Note: Reboot the client machine if needed if the disk is somehow not visible.
Run the Parted command to create a File System on the second disk to make it usable. Use the command sudo parted -s /dev/sdb mklabel msdos.
Note: “/dev/sdb” is the name of the path of the attached disk and msdos is the file system type

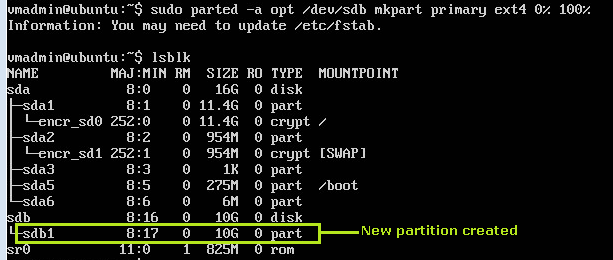
Create a new partition from the added disk. Use the command sudo parted –a opt /dev/sdb mkpart primary ext4 0% 100%
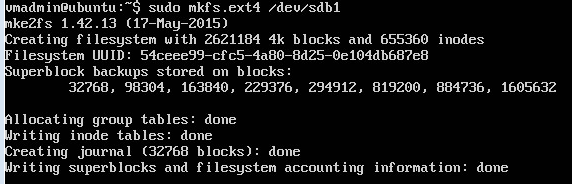
Run command mkfs.ext4 to create a file system on the newly created partition.
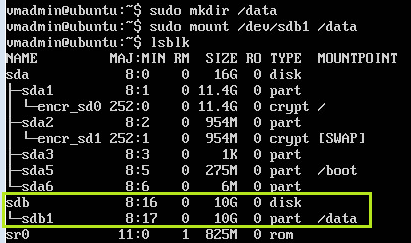
Run the command mkdir /directory_name to create a mount point for the new disk
Temporarily mount the new partition. Use the command mount /dev/sdb1 /directory_name
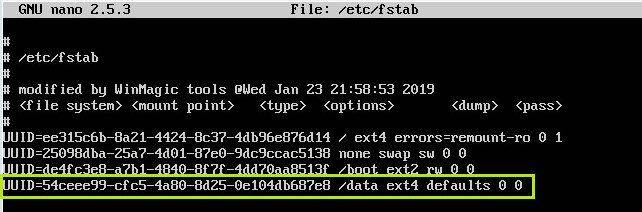
To automatically mount the new partition on every start-up you will need to modify the /etc/fstab file and add the new partition and the associated mount point.
First use the blkid command to determine the new partitions UUID.

Next modify the /etc/fstab using your preferred text editor. In this case we are using the nano text editor by running the following command sudo nano /etc/fstab.
Navigate to the winmagic folder of your installation package and run the command sudo ./secdoc.py add
Once the script completes type ‘y’ to confirm and reboot the system. You can also use the ./secdoc.py add –s command to automatically reboot after the script completes.
On start-up log back in to the system and verify that the encryption the new disk has started by using the lsblk command. You should now see the new disk and the partition created with the encr_sd(n),indicating it is now protected by SecureDoc.
You may also use the secdoc-cli.py script to verify if the encryption of the new disk has completed (See Verifying Deployment on using this command).

Changing the Preboot Background Image
Note: If you are looking to customize the preboot background image prior to installation – See Appendix J.
As of version 8.6, changing the preboot background image on an SDLinux deployed system is now supported. Unlike Windows however, support is limited to changing the preboot background from within the Linux client (changing the preboot background from SES is currently not available in this version).
Before changing the preboot background image make sure:
Linux client is fully encrypted
New image is a .png format
New image is accessible in the Linux client
To change the preboot background:
Navigate to the installation path /usr/local/WinMagic
Run the following command to change the preboot background:
sudo ./sdbkimage -f <sdspace_path> -i <png_image_path>
or (if you don’t know the sdspace path)
sudo ./sdbkimage -i <png_image_path>
Example:

Once the update is successful, you should now see the new preboot background image used on the next reboot.
Updating the SES Server name or IP Address on the client
In a scenario where a change needs to be made to the SES server’s name or to the servers static IP address, the same change needs to be made onto the client machine as well. For this a command line tool is provided to update this on the client by performing the following:
Note: Running the command below will replace the existing SES Server address. As of version 9.0 updating the clients server address is only available using this tool. Pushing a new profile from SES to the client to update the server address is currently not supported on SDLinux.
Open terminal on the client machine.
Run the following command:
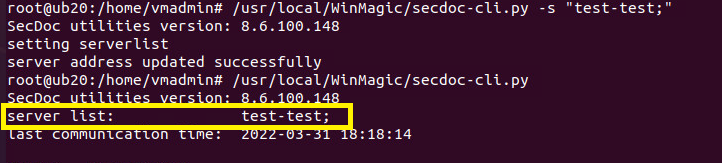
sudo /usr/local/WinMagic/secdoc-cli.py -s “<server_address>”
Example:
Changing the IP address
sudo /usr/local/WinMagic/secdoc-cli.py -s “192.168.2.1;”
Updating the server name
sudo /usr/local/WinMagic/secdoc-cli.py -s “test-server;”
Updating both the IP and server address
sudo /usr/local/WinMagic/secdoc-cli.py -s “192.168.2.1;test-server;206.11.11.11;”
Note: Use the semi-colon ‘;’ to separate multiple entries. For single entries it is still preferred to end the string with a ‘;’ as well.
(optional) To confirm the change was successful you can run the command /usr/local/WinMagic/secdoc-cli.p again (without the ‘-s’ option).
Updates and Upgrades After Deployment
OS Patches and Updates
IMPORTANT: SDLinux, just like any software, may experience incompatibilities after an OS update or patch. However, since SDLinux performs pre-boot authentication an incompatibility can result in the system being unable to boot. Therefore it is especially important to employ best practices when updating the OS when the drive is encrypted.
Testing the patch or update on a non-production system first
Backing up the production system before applying the patch
Also, SDLinux utilizes the following components in Linux (Note: Listed here are system libraries dependencies and not binary tools):
libcryptsetup v1 and whatever dependencies it has ( e.g. libdevmapper )
Glib-2.0
libpwquality
libmagic.so.1
libext2fs.so.2
libhandle.so.1
libblkid.so.1
libuuid.so.1
libmount.so.1
Please take special care to follow the above best practices when patching one of these components.
Note: Avoid performing updates during disk encryption or conversion as this is NOT supported by SDLinux and could cause your system to be in an unusable state.
For an example on how updates are typically performed on an SDLinux encrypted system - See Appendix C.
Client Upgrades
IMPORTANT:
Direct client upgrades are only supported from version 8.3 to 8.3SR1. Any versions earlier than 8.3 are not supported. For info about using an indirect upgrade approach for versions earlier than 8.3 – See the Client Upgrades section of the SecureDoc for Linux CloudVM Deployment Guide v8.3 in the client upgrades
For LVM configured systems, upgrading from 8.3 to 8.3SR1 causes duplicate information to be displayed in the Drives tab of the SESWeb Compliance section. To ensure that info in the Drives tab is not duplicated during the upgrade – See Appendix G
While it is possible to upgrade directly from 8.3 to 8.5 it is highly recommended to upgrade to 8.3SR1 first prior to upgrading to 8.5.
To upgrade your SDLinux client to the latest version:
Note: The steps below assume that SES has been upgraded to the latest version and a new SDLinux package has been created for the upgrade. Also, don’t forget to backup or save a snapshot of your system prior to performing the client upgrade steps.
Log-in to your linux client and run the secdoc-cli.py script as seen below to confirm that the client has been fully encrypted.

Copy the new SDLinux package (with the latest version) to the linux client.
Extract the wmsd-sdlinux.tar.gz file from the new SDLinux package using the “tar –xvf <file>” command. It should extract the contents of the tar file to a folder name called winmagic.
Navigate to the winmagic folder where the secdoc.py script can be found.
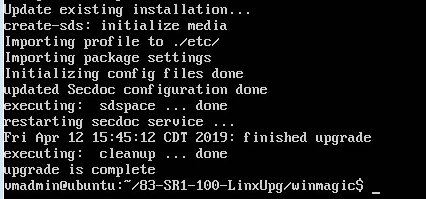
Run the following command “secdoc.py upgrade” to start the client upgrade.
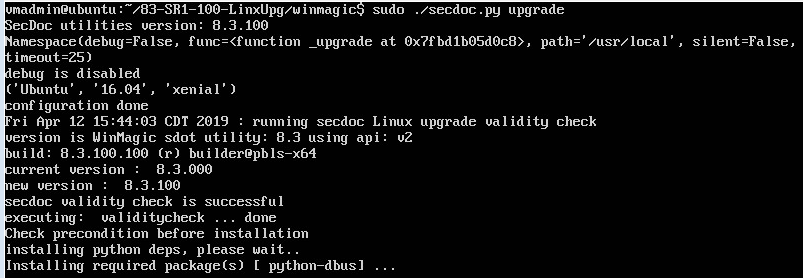
At the end of the upgrade process you should see the text “upgrade is completed” as seen below.
To confirm that the installed SDLinux client has been upgraded you can run the “./sdot version” command from the installation path.

Maintenance and Troubleshooting
Running SDLinux compatibility check
The Compatibility check feature may be used on a Linux system to identify whether or not SDLinux can be successfully deployed and to inform users of any issues if found that will need to be addressed. This feature is especially helpful when testing out new devices or models that have not been previously tested.
To run the install script in compatibility mode:
Run the command: sudo ./install.sh –c -s
The above command will perform the following:
Analyzes the systems disk/partition to check that SDspace can be created – displayed on screen.
Checks if pre-boot GUI can be displayed on the system – displayed as “Framebuffer is available” in the preboot.log
Checks if your system has a valid IP address – displayed as “ip address acquired” in the preboot.log
Installs pre-requisite software packages if internet connection is available (See Software Package Requirement)
After running the command the system should automatically restart the system.
Once the system is restarted, open terminal once more and navigate back to your Linux installation package.
Optional Steps: If you encounter any issues when running the compatibility mode the following steps below will help determine what caused the failure. If there were no issues you can proceed to step #7
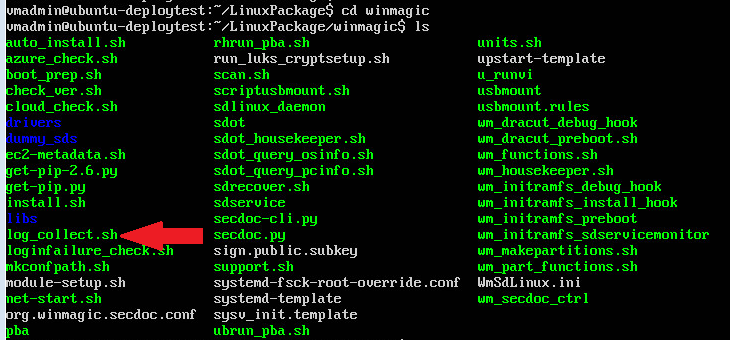
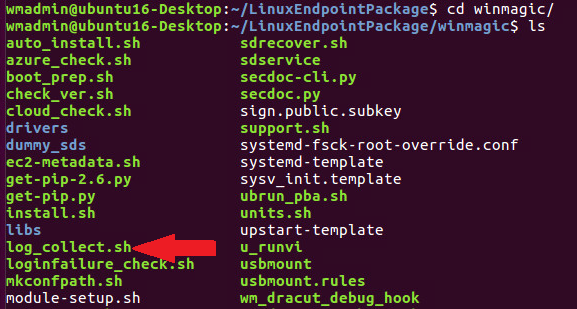
On the wmsd folder run the command: sudo ./log_collect.sh
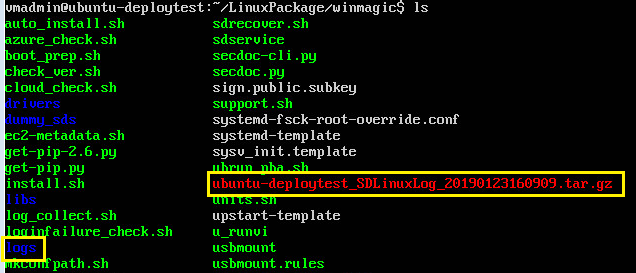
You should get a confirmation that the supportlog file has been created.

You should see the folder (logs) and compressed tar.gz file added to the winmagic folder of your package. The name of the support log file is generated using the following format:
<ComputerName>_SDLinuxlog_<date/time_stamp>.tar.gz
Within the new logs folder open the preboot.log file with the command below:
cat logs/run/initramfs/preboot.log
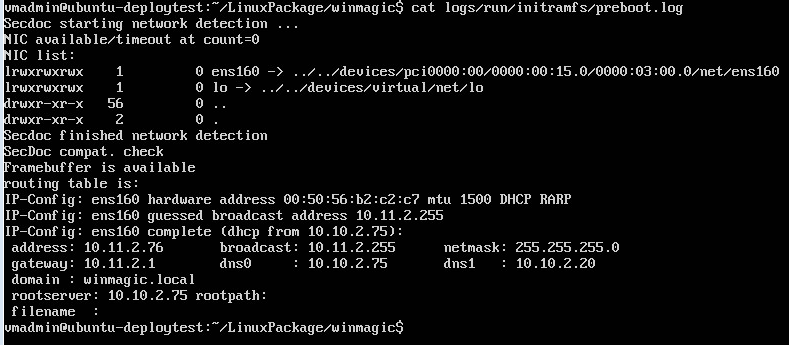
If the Framebuffer check and IP address check failed contact WinMagic support for assistance.
Collecting Support Information and Logs
There may be occasions where, when seeking assistance from WinMagic Technical Support, a support member may request detailed device-level logs to aid in trouble-shooting issues on a given device. SecureDoc offers an easy way to aggregate these logs, after which they can be sent to WinMagic Technical Support.
To collect support information and logs:
Navigate to /usr/local/WinMagic folder.
Run the log_collect.sh script: sudo ./log_collect.sh
You should get a confirmation that the supportlog file has been created.

You should see the folder (logs) and compressed tar.gz file added to the winmagic folder of your package. The name of the support log file is generated using the following format:
<ComputerName>_SDLinuxlog_<date/time_stamp>.tar.gz

You can use these logs to submit support requests to WinMagic support team for issues encountered on your system.
Increasing debug log level
In certain situations the logs collected by the log_collect.sh script may not be sufficient so in this case additional debug logs may need to be enabled on the system.
Additional debug logs can be enabled by doing the following:
During installation:
This is performed when trying to capture additional logs in an event of an installation failure.
After extracting the installation package look for the WmSdLinux.ini file:
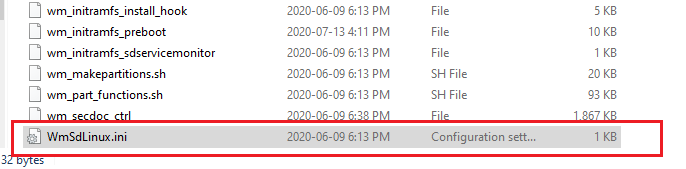
Modify the file with the text editor of your choice.
The debug level can be changed up to level 9 (4 being the default log level) but in most cases or issues level 6 is sufficient.

You can contact the support team if you are unsure what log level you should use
After installation:
This is performed when trying to capture additional logs after installation like encryption issues:
Open terminal and navigate to the SDLinux installation path
cd /usr/local/WinMagic/
Modify the WmSdLinux.ini file with the editor of your choice
vi WmSdLinux.ini
Change the wmsdlinux_log_level value and save your changes
The winmagic service will then need to be restarted in order for sdservice to start logging additional logs.
service winmagic stop
service winmagic start
Updating Keyfile passwords
SDLinux now provides multiple ways for users to update their keyfile passwords. Whether its for situations where a user forgets their password to log-in at preboot or simply performing a regular password update, SDLinux has the tools needed to perform these tasks.
Note: SDLinux does not currently have password sync capabilities, so these tools are only for updating the user keyfile password for preboot log-in and NOT the OS log-in. Please consult with your local IT Administrator if you require updating your OS password.
Challenge-Response Password Recovery
The challenge-response capability is available at the SDLinux preboot for situations where a user forgets their preboot password.
Contact your SES administrator and answer the password recovery questions they ask you.
Reboot, enter your user ID, then click Forgot Password? and Challenge Response.

A new screen opens.
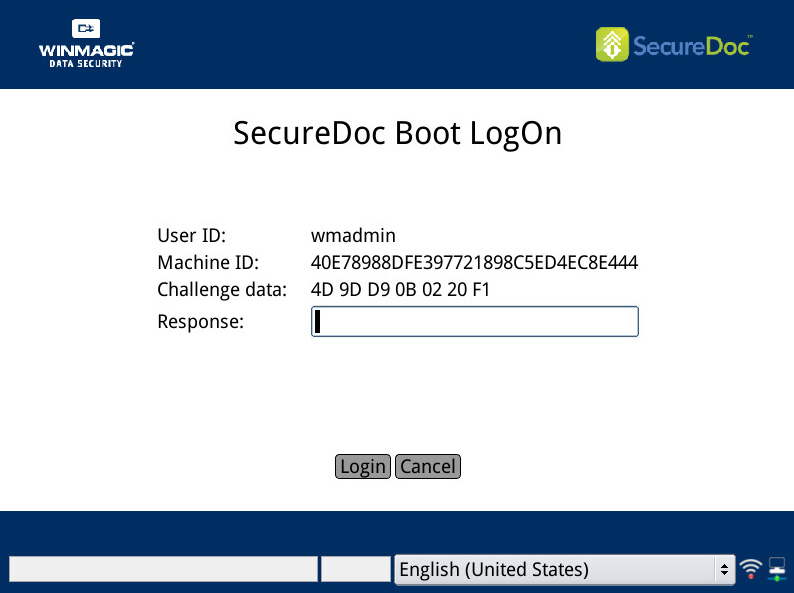
Read your administrator the challenge text you see. The administrator will read you a response number.
Enter the response number in the Response field and click Login. If the response number is entered correctly, your computer continues to boot.
Once the operating system loads, and you log-in with your local user account you are prompted to change your password.
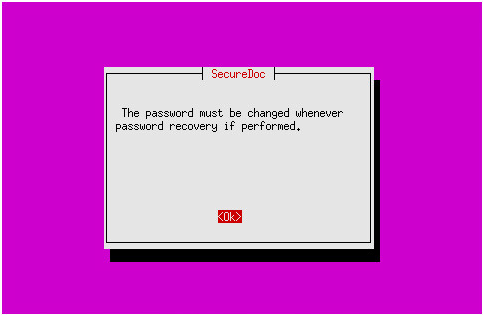
On your keyboard, press Enter to confirm changing the password.
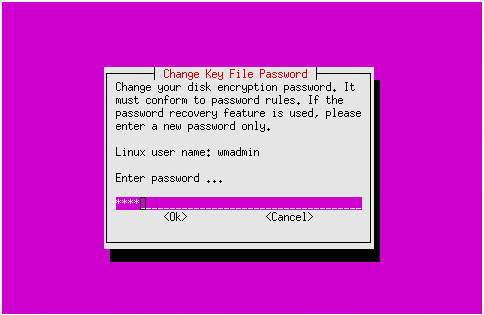
Enter the new password for the account displayed under Linux user name. Press the Tab key to highlight the <OK> option and press Enter to move to the next screen.
Note: The new password you are setting here is the new password for logging it at SecureDoc Preboot. This does not change the password for your local OS account.
Retype the same password to confirm they are matching. Press the Tab key once more to highlight the <OK> option and press Enter. This will now close the Change Key File Password window and log you in to the system.
Changing the Keyfile Password at Preboot
The SDLinux preboot provides the Client Management functionality which allows you to change/update your password at preboot. To change your password:
At preboot, press F3 to display the Client Management button
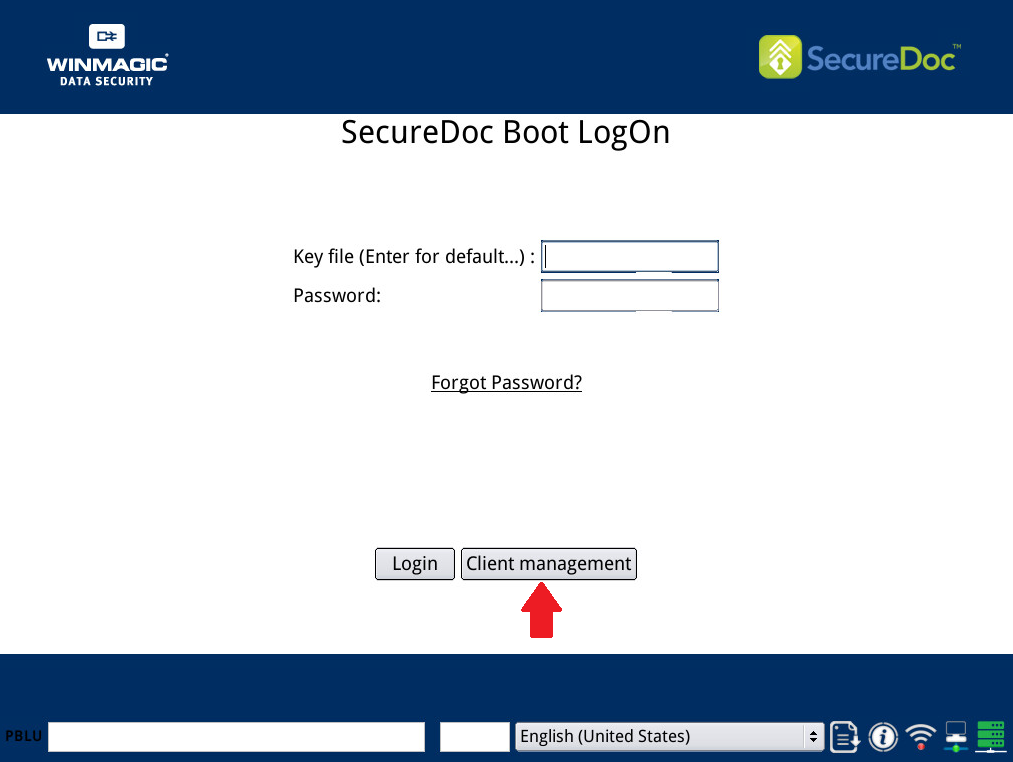
Enter the current keyfile password and then click on Client Management.
Re-enter your current password into the Old Password field and enter the new password that you are changing it into.
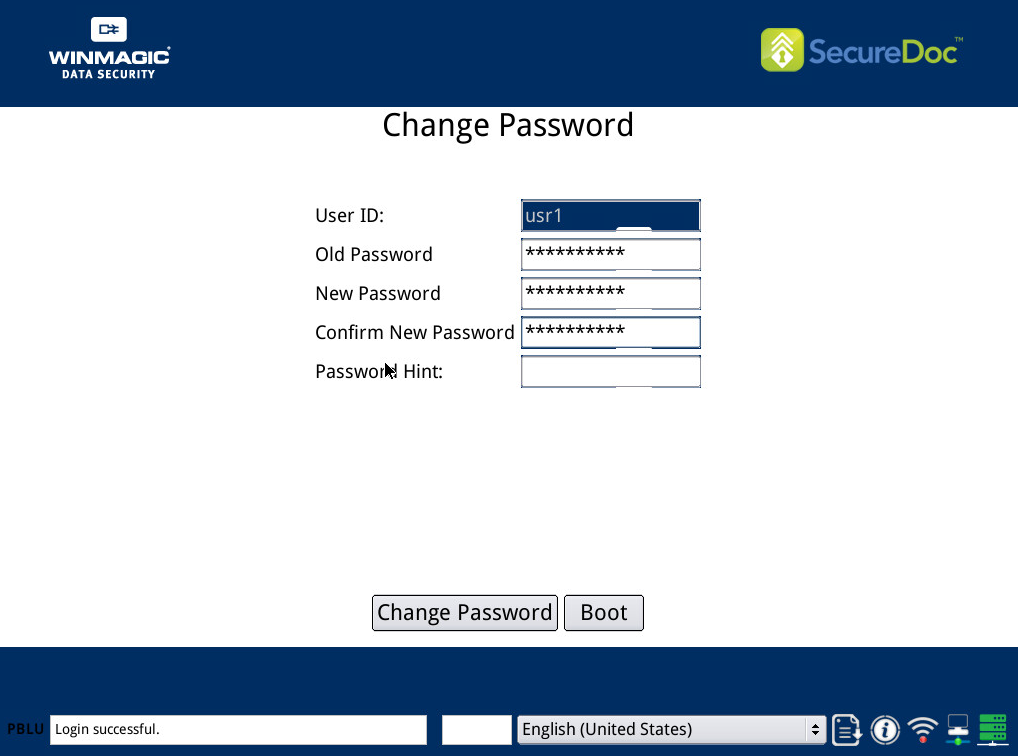
Click Change Password button to update the password
When the password update is successful a confirmation window will pop-up to confirm a successful update.
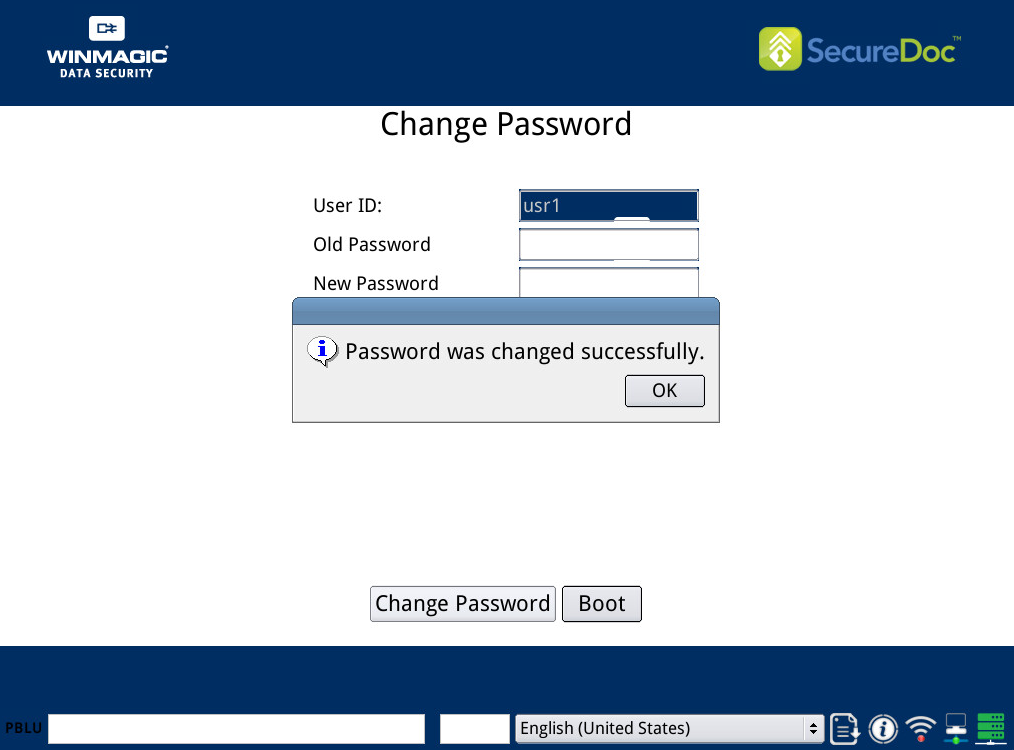
Click OK to close the confirmation window and click on the Boot button to log back in to the system.
On the next reboot, you should now be able to log-in with the new password at preboot.
Changing the Keyfile Password at OS
SDLinux provides a cli tool called sdpasswd that will allow you to update your user keyfile password while logged in to the system. The tool cannot be run as root so before running, make sure that you are just logged with a regular user account. To change your password:
Open a terminal on your desktop
Enter command sdpasswd on terminal and press enter.
You should then be prompted to type your current user password.
Enter your current password and press enter.
Re-enter your password once more to confirm your new password and press enter.
You should then receive a confirmation message that the password update was successful
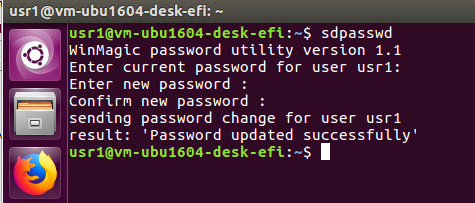
On the next reboot, you should now be able to log-in at preboot with the new password.
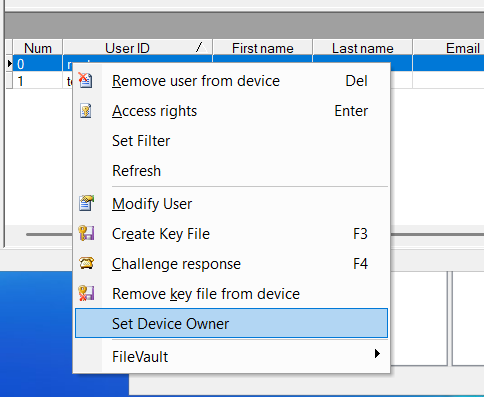
Changing Device Ownership
Device ownership can be changed or updated on SES after primary ownership has been set-up during the initial deployment. To change device ownership:
On SES, navigate to the Devices tab
Select the target device
In the bottom pane for “Users having access to the device…”, select the new user to which to set the new owner to.
Right click on that user and select “Set Device Owner”.
Removing Old Encrypted Drives
Over time, hard drives (especially in server environments) may require being replaced not simply because they break, but because reliability, performance, supportability, and risk tolerance evolve over time. In such cases where an encrypted drive and its partition(s) need to be removed from the system and replaced, the following steps will need to be performed to remove the old encrypted disk record from securedoc space safely:
WARNING: Using this functionality will permanently delete the range data of the encrypted drive and/or its volumes. Once removed the device will no longer be able to unlock these volumes and the removed volumes cannot be added back to the system.
Step 1: Identifying and removing the target drive or volume(s)
Login to your system and open terminal
Modify the file /etc/fstab, and remove entries for the disk/volume targeted for removal. Make sure to take a note of each encrypted volume that you are removing from the disk.
Example:
/dev/mapper/vgb-lv_data1 (for LVM's)
/dev/sdc1 (for standard partitions)
Power off your system and remove the drives to be replaced and replace them with the new drive.
Power on the system and login at preboot
Step 2: Identifying your sdspace location
The sdspace location can normally be found as a 6M partition or loop device when running the lsblk command from terminal. Below are some examples of what sdspace looks like:

You can test if you have properly identified the sdspace location by running the following command:
/usr/local/WinMagic/sdot status -f /dev/loop0 -a
Example:

The command above should output an encryption status if the sdspace path was identified correctly.
Note: Contact your WinMagic support representative if you are still having trouble identifying the sdspace location of your system
Removing the old encrypted volumes record from securedoc space
Once logged in at preboot, login to the OS and open terminal once more
Stop the winmagic service:
service winmagic stop
Navigate to /usr/local/WinMagic and run the sdot delete-range command to remove the old encrypted volume info from securedoc space:
./sdot delete-range -f <sdspace location> <volume1 to remove > <volume2 to remove> <volume3 to remove> …
<sdspace location> - The sdspace location identified in step #2
<volume to remove> - The volume names to be removed from sdspace.
Example:
./sdot delete-range -f /dev/sda5 /dev/mapper/vgb-lv_data1 /dev/sdc1
Once the command is run, it will prompt you to confirm the volumes to be remove.

Review the volumes listed and type ‘Y’ and press enter to continue (Type ‘N’ to cancel the removal)
Once the volumes have been removed start the winmagic service
service winmagic start
You can now start to add the new disk/volumes for encryption (See Encrypting Additional Disks)
Uninstalling SDLinux
If you encounter any issues with your deployment, or decide to remove SDLinux on your system, decryption and uninstall is now supported as of version 8.6. Running the uninstall function performs the following:
Checks the encryption status of the system and performs one of the following:
If system is encrypted, perform decryption on system
If system is not encrypted, proceed with SDLinux uninstall
If system has LUKS encrypted volumes,
Restore LUKS management back to local client (no decryption will occur)
Proceed with SDLinux uninstall
Remove the SecureDoc partition (or sdspace)
Remove the install path (/usr/local/WinMagic)
Update initramfs after removing all other files for cleanup
Running uninstall
Important: If the system you are running uninstall on is fully encrypted, the decryption will be performed as a dedicated process, meaning system will not be accessible until the decryption process has been completed. It is recommended that you plan and schedule for downtime for the affected system.
Uninstall and decryption should only be performed on a system that is fully encrypted. Do not run the uninstall command if the system is still encrypting.
Login to your system and open terminal
Navigate to SDLinux install path in your system /usr/local/WinMagic/.
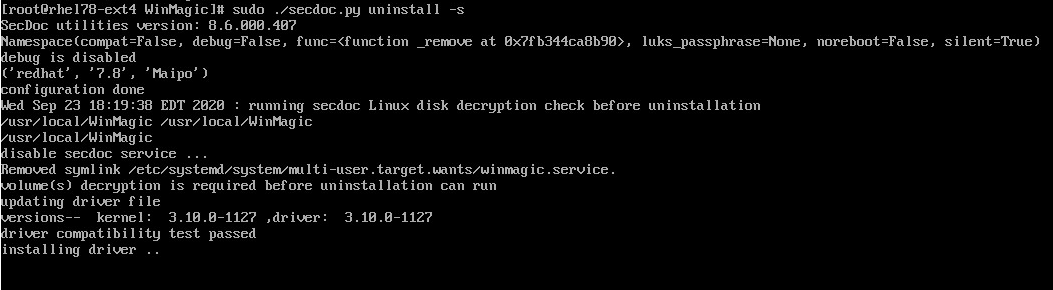
Run the following command to start the uninstall:
./secdoc.py uninstall -s
Once it verifies that decryption is required, system will then automatically reboot to start the decryption process.

Note: For systems with data only encryption, decryption time is dependent on the size of the data encrypted. For systems with sector by sector encryption, decryption time is dependent on the size of the disk encrypted.
Once the decryption is completed log-in to the system once more, open terminal and navigate to the SDLinux install path /usr/local/WinMagic
Run the uninstall command once more to complete removal of SDLinux
./secdoc.py uninstall -s
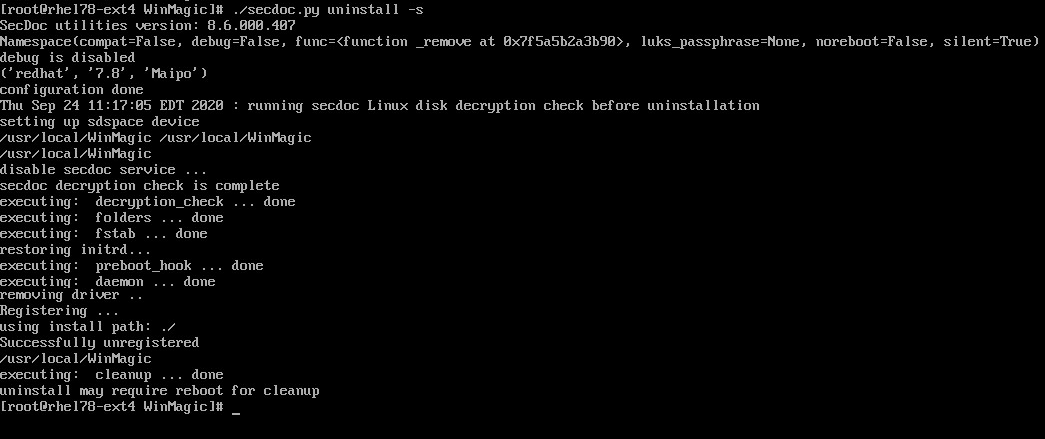
After uninstall completes, reboot the client to complete the uninstall clean up (or you may schedule the reboot at a later time for mission-critical systems).
Note: If you’ve only run the install script with the “-c” option (in compatibility mode and system is not encrypteed) then you will need to run the uninstall command with a “-c” option as well (./secdoc.py uninstall -c -s)
Appendix A
Appendix A1: Azure - Allocating free space on an existing Linux system
Most Linux images on Azure will not have enough free space by default when you use them to create new VM’s.
The steps provided here shows you how to allocate free space on a Linux system on Azure.
Note: For brand new systems, you’ll need to create the VM’s first prior to performing the steps below.
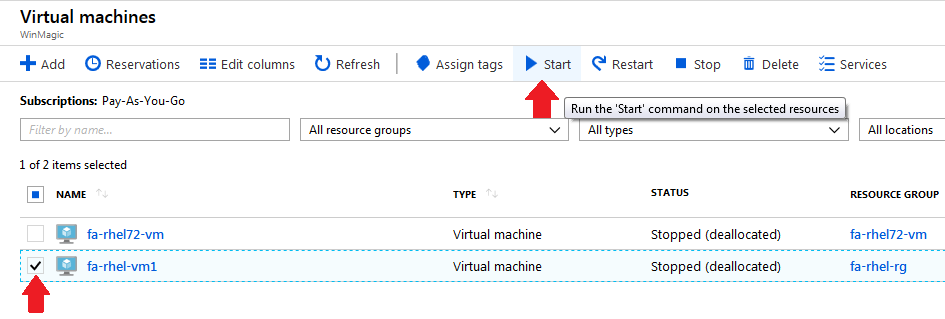
Log-in to your Azure account and navigate to the Virtual machines ribbon
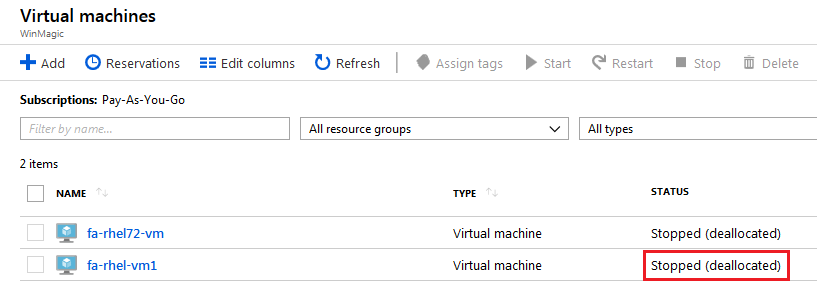
Select the checkbox next to the target VM and click on the Stop button. Click yes to confirm to stop and deallocate the instance.
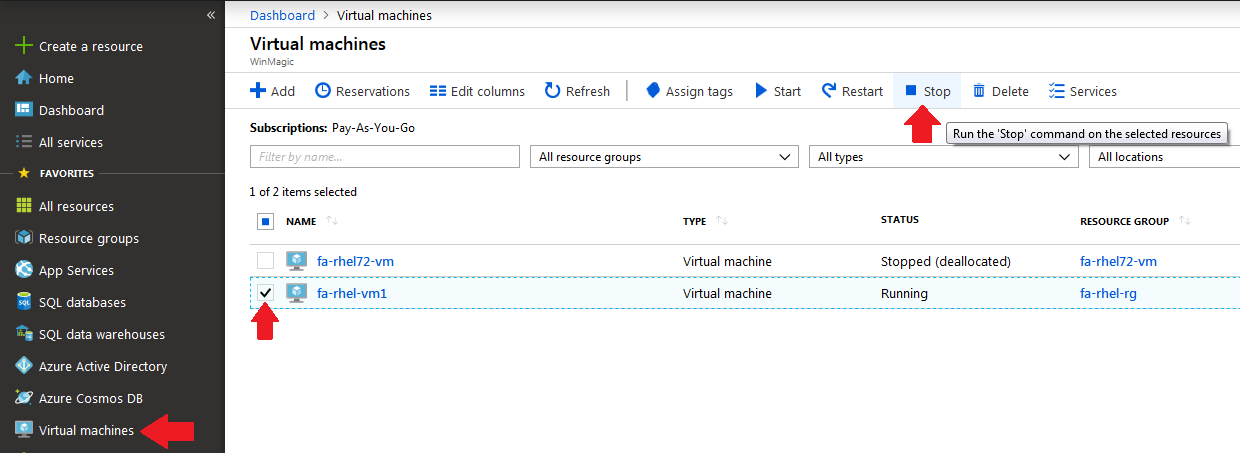
Status of the VM will show as Stopped (deallocated) when its successfully stopped.
Click on the VM name and navigate to Disks under the Settings section of the VM.
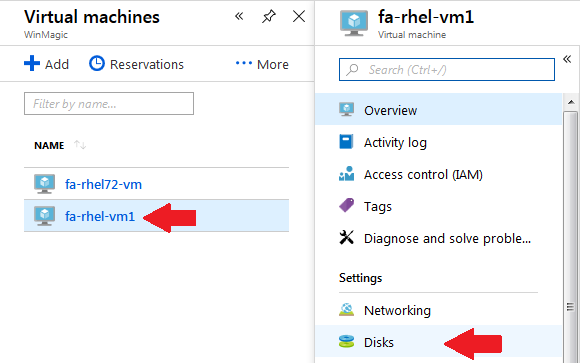
Click on the current OS disk name

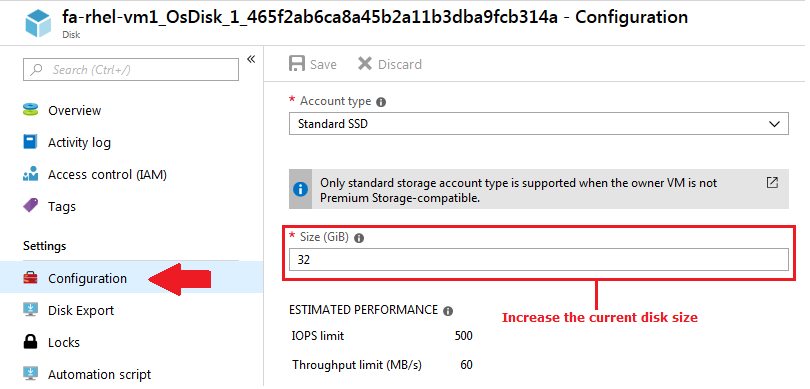
Click on Configuration under the Settings section of the OS disk.
In the Size (GiB) field, increase the size of the disk (i.e. increase from 32GB to 33GB)
Click on Save
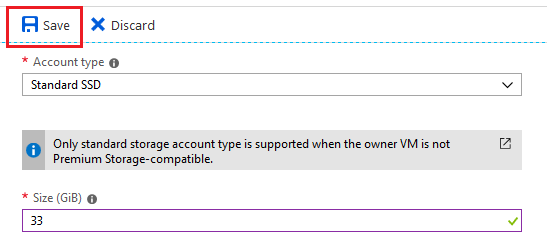
Once the changes have been saved, navigate back to the Virtual Machines page and click on Start.
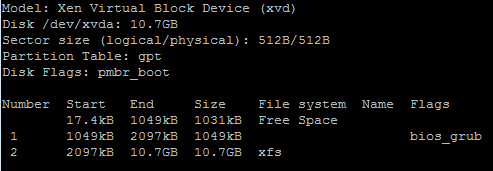
Once the VM has started, log-in to the system and verify that you now have free space available with the command parted /dev/sda print free (Free space should now be changed to the amount you increased it to plus whatever existing freespace there was previously).

Appendix A2: AWS - Allocating free space on an existing Linux system
Most Linux images on AWS will not have any free space by default when you use them to create new VM’s.
The steps provided here shows you how to allocate free space on a Linux system on AWS.
Note: For brand new systems, you will still need to create the VM’s first prior to performing the steps below.
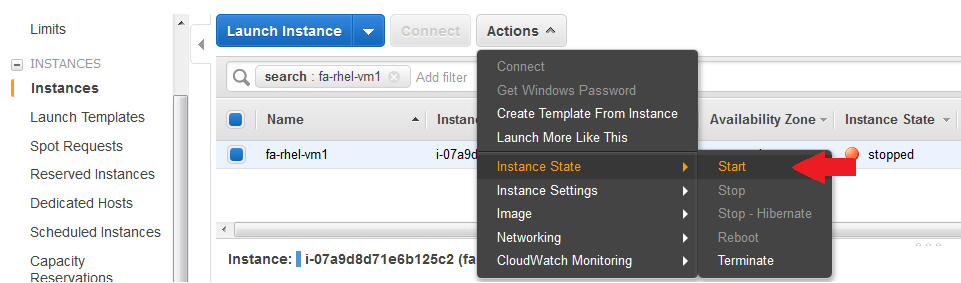
Log-in to your AWS account and navigate to the Instances ribbon on your EC2 Dashboard

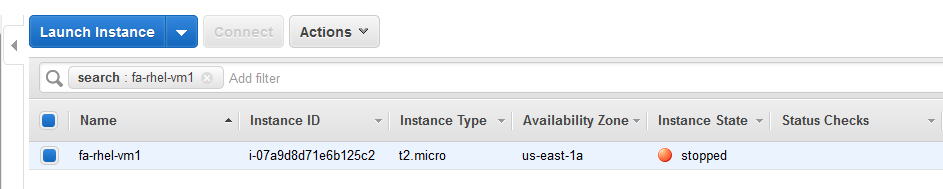
Select the box next to the target VM and go to Actions > Instance State and select the Stop button. Click Yes, Stop button to confirm.
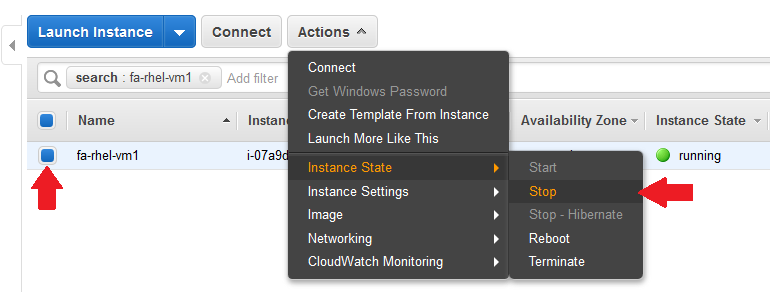
Instance state of the VM will show as stopped when its successfully stopped.
On the VM’s Description click on the Block devices and then click on the EBS ID

This will then navigate you straight to the EBS Volumes section
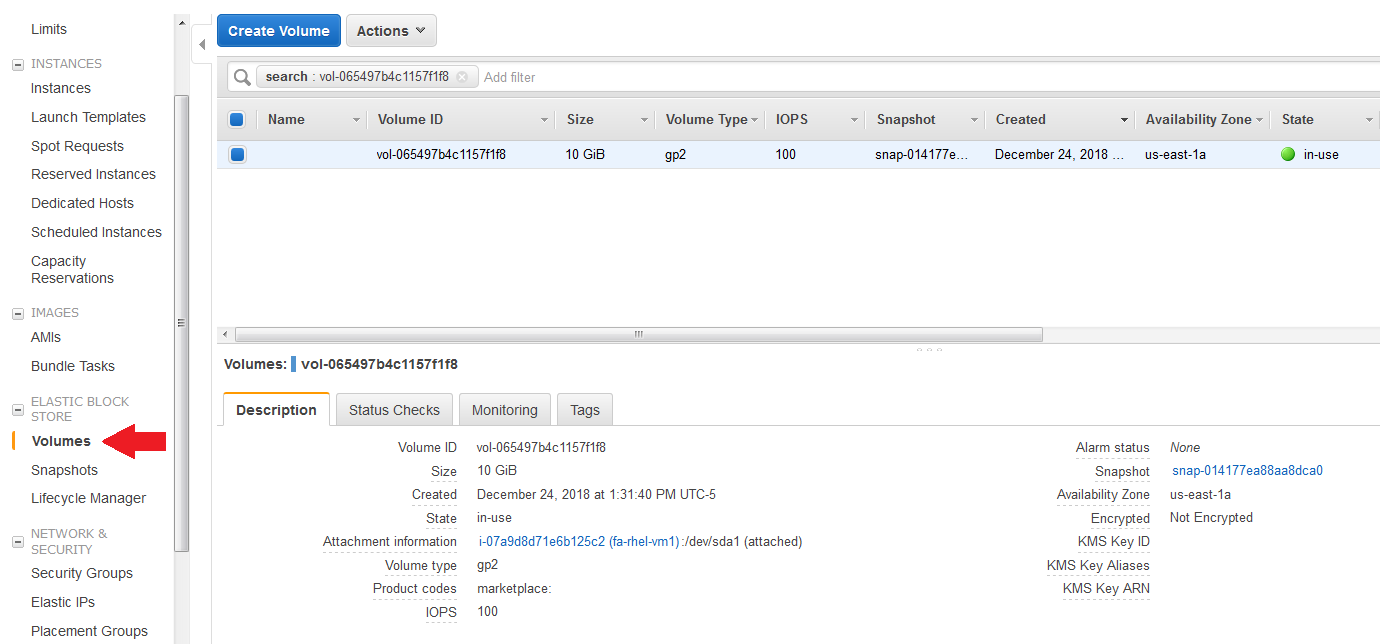
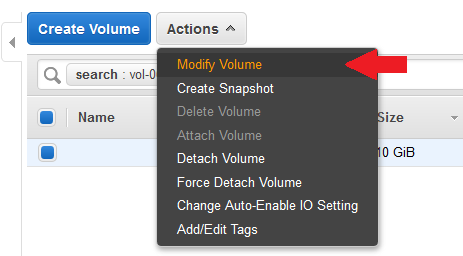
With the volume still selected, go to Actions and click on Modify Volume
In the Size field of the Modify Volume window, increase the size of the disk (i.e. increase from 10GB to 11GB)
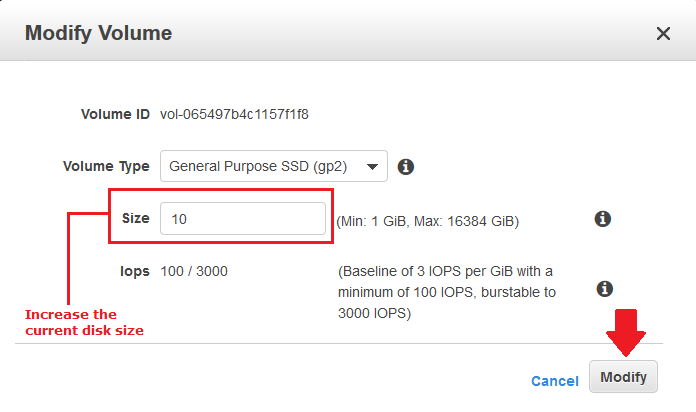
Click on Modify button to save changes.
After increasing the size of the disk we will need to modify the user data settings of the VM so that AWS will not automatically make the free space we’ve made useable.
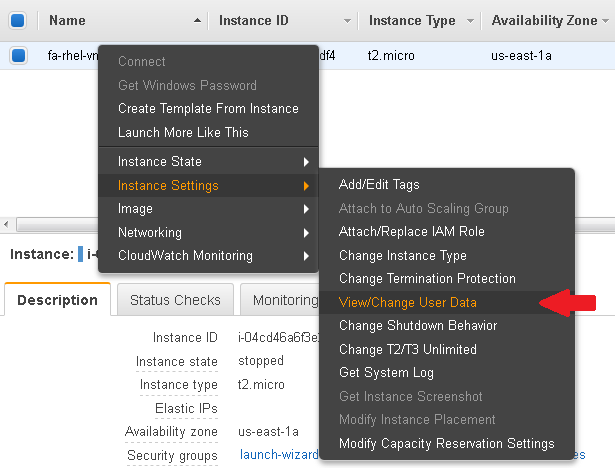
Navigate back to the Instances section and right click on the VM. Navigate to Instance Settings > View/Change User Data
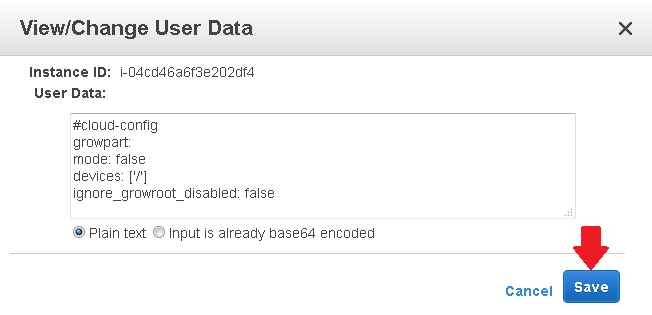
Copy and paste the following text to the User Data section and click the Save button to save your changes.
#cloud-config
growpart:
mode: false
devices: ['/']
ignore_growroot_disabled: false
Start the VM back up by going to Actions > Instance State and then click on Start
Click Yes, Start button to confirm to start the VM.
Once the VM has started, log-in to the system and verify that you now have free space available with the command sudo parted /dev/sda print free.
You may be presented with an error message like the one below. When presented with it type Fix and press enter to move the backup GPT table to the end of the disk.

You will then be presented with a warning message telling you to fix the GPT and use all of the space. Type Fix and press enter.

You should now see the Free space available.
Appendix B
Attaching and preparing a new disk for free space.
For cases where it is not possible to allocate any free space on the existing disk of the Linux client machine, users may attach an additional disk that SDLinux may use as free space for installation.
Info: The steps below apply for both Public and Private cloud platforms
Attach a new disk to your Linux client. Once attached use the lsblk command to verify that that the new disk is visible to your system.
Run the Parted command to create a File System on the second disk to make it usable. Use the command sudo parted -s /dev/sdb mklabel msdos.

Note: “/dev/sdb” is the name of the path of the attached disk and msdos is the file system type
Run the Parted command once more to view the file system created as well as the free space on the second disk

(Only needed for AWS or Azure) Before running the install script on the client machine run the boot_prep.sh script within the installation package to prepare the free space on the second disk:
After running the boot_prep.sh script select yes when prompted with the option below to confirm
Once confirmed you can now run the install.sh script right after.
Appendix C
Example of updating an Ubuntu encrypted system
Note: Make sure to back-up your system prior to performing the client upgrade. See recommended best practices for more info.
Verify that the encryption/conversion is completed on the system. Use the sdot command to verify the encryption status. See the Verify Deployment section on how to use the sdot command.

Verify the current kernel version on your client machine. Use the uname –a command

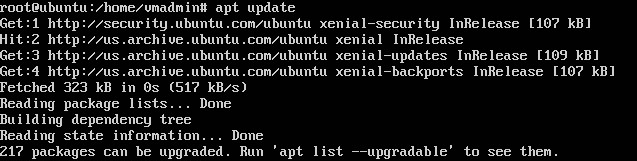
Ensure that your source lists are up to date. Use the apt update command (or apt-get update)
Run the upgrade command to upgrade all installed packages. You can use either the apt-get upgrade or apt-get dist-upgrade
After upgrade has completed, reboot the client machine
Upon log-in you should notice the new kernel version on your system
Ubuntu:
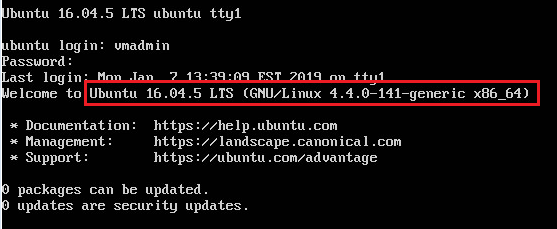
Appendix D
Using Putty as SSH console to connect to Linux environments in Windows
Software Download Link: http://www.chiark.greenend.org.uk/~sgtatham/putty/
PuTTY is a free and open- License Type: Freeware
Description: source terminal emulator, serial console and network file transfer application. It supports several network protocols, including SCP, SSH, Telnet, rlogin, and raw socket connection. It can also connect to a serial port.
Usage: Although PuTTY offers a multitude of option to cover almost all connection and protection methods, for the purpose of this document we will look at the most basic use case. Simply enter the IP address (Web Facing) to the input field named as host name and click on the “Open” button to initiate a connection. During the connection Process you will be asked for the user name and password to finalize the connection.

Appendix E
Using WinSCP to transfer data from Windows to Linux environments
Software Download Link: https://winscp.net/eng/index.php
License Type: Freeware
Description: WinSCP is an open source free SFTP client, FTP client, WebDAV client and SCP client for Windows. Its main function is file transfer between a local and a remote computer. Beyond this, WinSCP offers scripting and basic file manager functionality.
Usage: In depth guides to the usage and abilities offended by WinSCP can be found by navigating to following link: https://winscp.net/eng/docs/guides; however as per the requirements per this document we will focus on the most basic usage method.
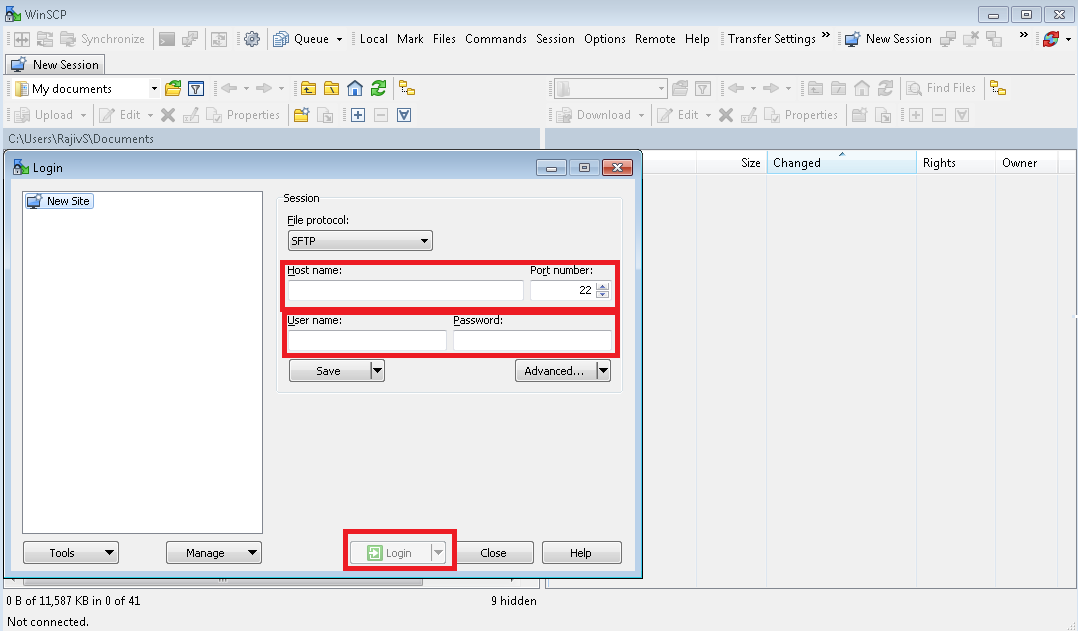
Simply enter the Hostname / IP of the client computer you would like to connect to, followed by the Unser name and password and click on the log in button. Doing so will open the client side file system and Host side file system in a side-by-side pane in WInSCP. Transfer files by simply dragging and dropping them from one computer to the other.
Appendix F
Attaching an encrypted disk from one system to another encrypted system.
For cases when:
Users are migrating to a new system (i.e. Moving to a new system with a new Linux operating system) by detaching their encrypted data disk and attaching it to the new (encrypted) system
The users OS disk becomes inaccessible (i.e. kernel panics, corruption…) but would like to continue using the existing data disk and attach it to a new system.
Users are attempting to recover data on an encrypted system by attaching the encrypted disk to a different system and then unlocking the disk using the recovery keys (steps 1-9 below) and copying the data over to the new system.
Here are the steps on attaching an encrypted disk to another system, unlocking it using the recovery keys and adding/updating the encryption keys on SDspace:
Note: Make sure to back-up your system prior to performing the client upgrade. See recommended best practices for more info.
Review your current instance that has been deployed with an older version of SDLinux.
As seen below, the OS disk (/dev/sda) is configured separately from the Data disk (/dev/sdb) and are both encrypted.
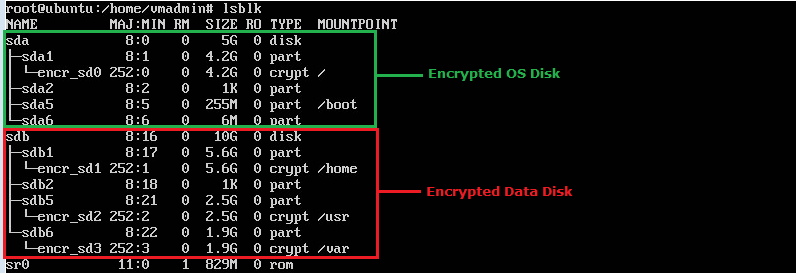
Power off your Linux client and detach the Data disk from it.
Set-up a new Linux system with a single disk containing the operating system and deploy the latest version of SDLinux on it as seen below.
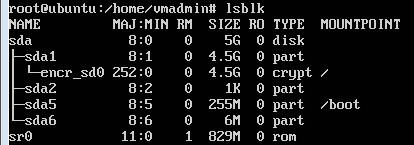
Attach the Data disk drive from the old Linux system to the new Linux system.
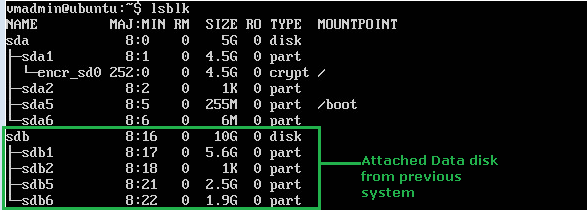
On SES, export the recovery info from both Linux systems. Copy the exported files to the Linux system. Keep in mind the passwords that you have set for each recovery info. See the SDLinux Recovery Guide for more info.
Recovery info extracted from SES:
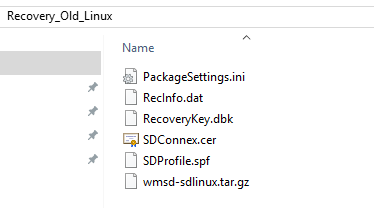
Copy the recovery files (folder) to the winmagic folder of your package.
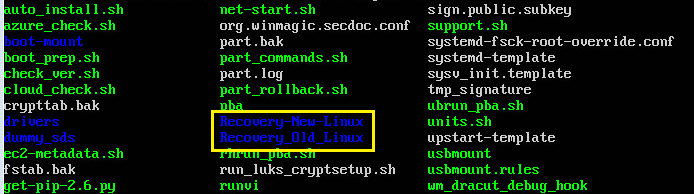
Since our new Linux system does not have the appropriate information on SDspace yet to unlock the encrypted attached drive, we will need to run the sdrecover.sh script to unlock the attached drive using the recovery info from the old linux system. To do that use the following command:
sudo ./sdrecover.sh --keyfile=<recovery_file_path> --recfile=<RecInfo_file_path>
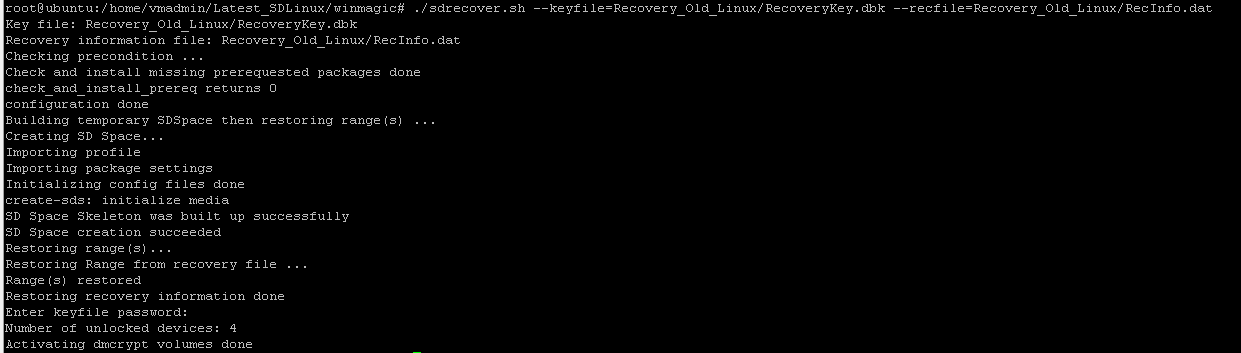
Run the lsblk command to view the unlocked disks:
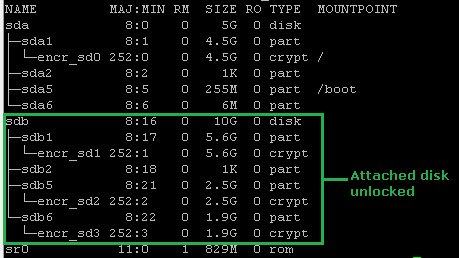
To access the partitions from the attached disk we will need to create new directories on our system which will serve as the new volume mount points for each of the partitions (i.e. encr_sd1, encr_sd2, encr_sd3). Use the mkdir command to create new directories.
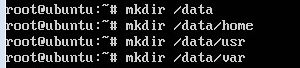
Manually mount the encrypted partitions to the respective directories that you have created by using the “mount /dev/mapper/encr_sd1 /data”. At this point you are now able to access the data from the attached disk.
To fully integrate the attached disk into the new system, we will need the unlocked volumes to be automatically mounted on every system start-up to the new mount points created. To do that we’ll need to add the partitions into /etc/fstab.
First run the lsblk -f command and take note of the UUID for each partition that will be mounted.
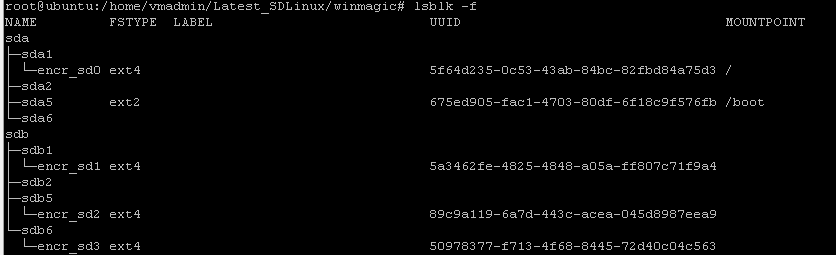
Modify the /etc/fstab file and add the UUID for each partition on the data disk and its associated new mount point.
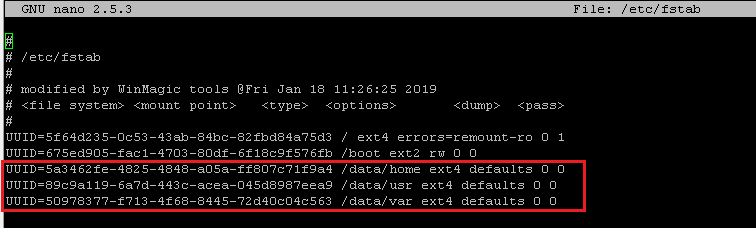
After the /etc/fstab file has been updated its time to recover the SDspace information from the old Linux system for the attached data disk to the new Linux system. To do this we run the following command:
sudo ./sdot recover -f <path_to_sdspace> -r <path_to_recovery_info> -w /etc/fstab –o
Essentially what the sdot recover command does is combine Range objects or in other words they are combining the sdspace information of the old Linux system into the new Linux system.

After running the sdot recover command you will essentially be able to unlock the attached drive automatically on start-up, however at this point your two disk drives are being unlocked by two different keys. The OS disk drive is unlocked by the encryption key generated by the most latest version of SDLinux and the attached data disk drive is unlocked by the old encryption key from the old Linux system. This is where Re-key capability enters.
Re-key essentially enables your system to be managed by the same encryption key. In this case we are running re-key so the attached data disk drive can now be unlocked using the same key as the OS disk drive. To run this use the following command:
sudo ./sdot reKey -o <old_keyfile> -n <new_keyfile> -p <password_of_old_key> -q <password_of_new_key> -f <sds path>

Once re-key has been completed and reboot your system, the disks will now be unlocked by the same key and attached data disk will now be mounted automatically and is accessible.
Appendix G
Removing an existing drive info from the compliance tab for a device prior to upgrading SDLinux client from version 8.3.
The following steps are required to be performed if your Linux system falls into the following conditions:
Have Ubuntu and RedHat/CentOS operating systems configured with LVM partitions
Have installed the 8.3 release version of SDLinux and are planning to upgrade their client.
Note: When modifying your database it is best practice to back-up your DB prior to running the scripts below.
These steps also assume that you have already upgraded your SES from 8.3 to the latest version.
On your SES server, connect to your database and open a new query.
Run the following command
SELECT * FROM Computers WHERE Node_Type_ID=24;
From the result obtain the PC_Index from the specific device you want to perform the upgrade on.
Example:
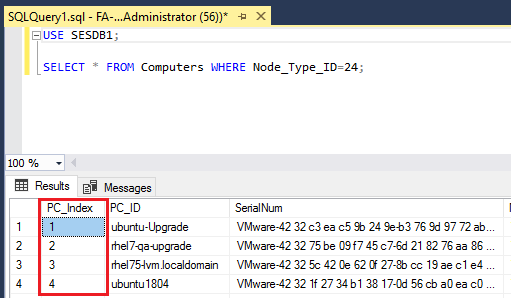
Run the following command replacing the PC_Index that you have obtained from step #3.
DELETE FROM tblAsset_DeviceDisk WHERE PC_Index IN (replace_PC_Index)
Appendix H
Import all Ubuntu kernel drivers to an SDLinux package
If the Ubuntu system you are deploying to does not allow connections to our AWS S3 storage, the instructions below will enable you to download an archive of the latest Ubuntu SDLinux kernel drivers and import the drivers to your local installation package. Once completed your SDLinux installer will now be able to deploy on your Ubuntu system without needing to connect to our AWS S3 storage.
Note: To deploy SDLinux without needing an internet connection, you will also need to install all the pre-requisite software required by SDLinux. To install these software/packages beforehand, see the - Software and Library Requirements.
Download the driver archive using the following link SDLinux Ubuntu Drivers. This should download the file called ubuntu_drivers.tar.gz.
Copy both your SDLinux package and the downloaded ubuntu_drivers.tar.gz to the system you are deploying to.
Untar the ubuntu_drivers.tar.gz file. This should extract the folder drivers.
tar -xvf ubuntu_drivers.tar.gz
Run the following command to copy the files from the drivers folder to the winmagic/drivers folder of the installation package.
sudo cp -avr drivers/* package_name/winmagic/drivers/
Once done, you can now run the SDLinux installation without needing to connect and download kernel drivers on AWS S3
Appendix I
Taking over LUKS-Managed volumes
SDLinux supports deployment on systems that have already been encrypted using LUKS.
Before deploying SDLinux on a system with LUKS-Managed volumes it is important to keep in mind the following:
Non-LUKS volumes are not supported and will be ignored during deployment (i.e. tcrypt, swap random encryption, plain dm-crypt, etc…)
The system deployed on has to either have a separate /boot partition or (unallocated) free space. A system with just a /boot/efi partition and no free space is not supported (see example below).
NAME MAJ:MIN RM SIZE RO TYPE MOUNTPOINT
sda 8:0 0 29.8G 0 disk
├─sda1 8:1 0 8M 0 part
├─sda2 8:2 0 500M 0 part /boot/efi
├─sda3 8:3 0 376M 0 part
├─sda4 8:4 0 17G 0 part
│ └─cr_ata-SXXXXXX_MXXXXXXXXXXX-part4 254:1 0 17G 0 crypt /
├─sda5 8:5 0 8.3G 0 part
│ └─cr_ata-SXXXXXX_MXXXXXXXXXXX-part5 254:2 0 8.3G 0 crypt /home
└─sda6 8:6 0 3.7G 0 part
└─cr_ata-SXXXXXX_MXXXXXXXXXXX-part6 254:0 0 3.7G 0 crypt [SWAP]
LUKS-Managed volumes secured with a master key is also supported
Examples of LUKS managed volumes
Some examples of an encrypted Linux system containing LUKS managed volumes are:

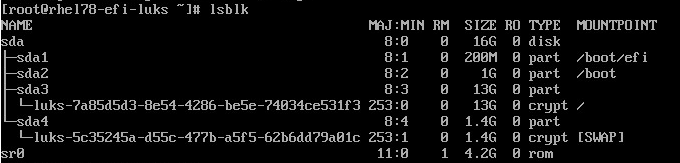
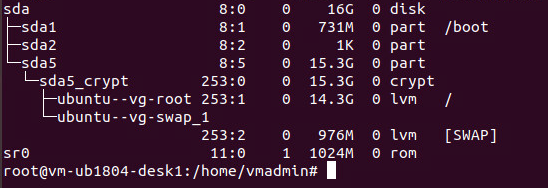
Installing SDLinux on LUKS-managed volumes
To install SDLinux on a system with LUKS-Managed volumes, perform the following:
On your Linux client open terminal (if accessing the client machine remotely see Appendix D on how to set-up putty to connect via SSH console).
Navigate to the folder location where your RemotePackage was copied.

Use the “ls” command to verify all the files are present on the package.

Extract the .tar.gz file using the “tar –xvf <file>” command. It should extract the contents of the tar file to a folder name called winmagic. (Click here to see the appropriate installer file to extract).


All the scripts required to install SDLinux are in located in the winmagic folder.
Run the SDLinux install script: Once all the system requirements have been met you can now proceed with installing the SDLinux.
Run the following command to start the installation:
sudo ./install.sh -s –-skip-driver
Note:
In a regular (unencrypted) linux system, the “–s” option typically performs the installation in silent mode, however this will not be the case with already encrypted systems as the installer will require the user to provide the existing passphrase for the system.
Since LUKS managed volumes are technically already in an encrypted state, we use the “--skip-driver” option during installation since it is not necessary to download and verify kernel driver versions.
If you have a mixed system, meaning you have a combination of LUKS-managed volumes and plain text volumes (volumes/disk that have yet to be encrypted) then run the install command without the “--kip-driver” option.
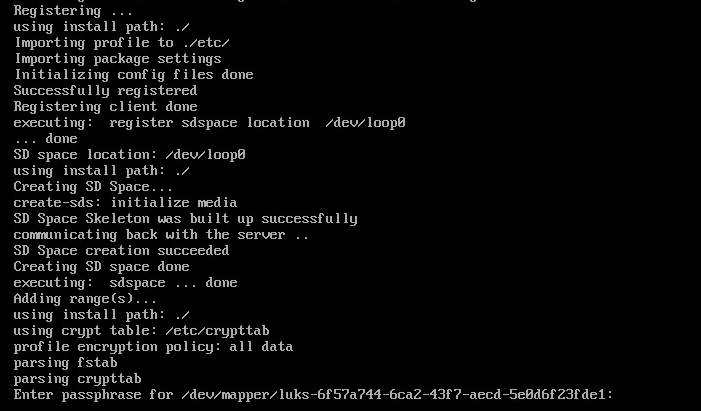
To run the installer without any user interaction on LUKS encrypted systems, you can use the “--luks-passphrase” option to supply the passphrase before hand.
sudo ./install.sh -s --skip-driver --luks-passphrase <passphrase>
On the Enter passphrase prompt, type the existing passphrase for the system. The passphrase referred here is the one used to unlock the encrypted system upon start-up and not your account password to log-in to the OS (unless you have set your account password and passphrase to be the same).
Press enter to proceed with the installation. Once the installation completes, the system will automatically reboot.
On this initial reboot, when your system is starting up, you will notice that you are no longer prompted for the LUKS passphrase and are directly brought to the OS log-in screen.
Note: At this time our SecureDoc preboot is already installed, however you will not see this right away as the initial start-up serves as an additional checking to make sure that preboot can run without any issues on the system.
Once you log-in to your system you an confirm that SDLinux has been successfully installed by running the following command:
sudo /usr/local/WinMagic/secdoc-cli.py
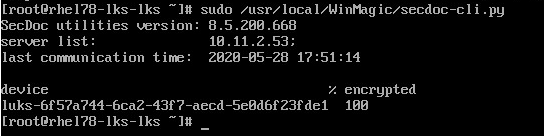
The result above confirms that SDLinux was successfully installed and is now managing the LUKS volumes.
On succeeding reboots, you should now see the SecureDoc preboot displayed. You can reboot your system once more to confirm that:
SecureDoc preboot is indeed being displayed
Is able to establish a connection with SES
Is able to automatically authenticate and login at preboot via the autoboot policy previously set-up (see Adding a New Policy).
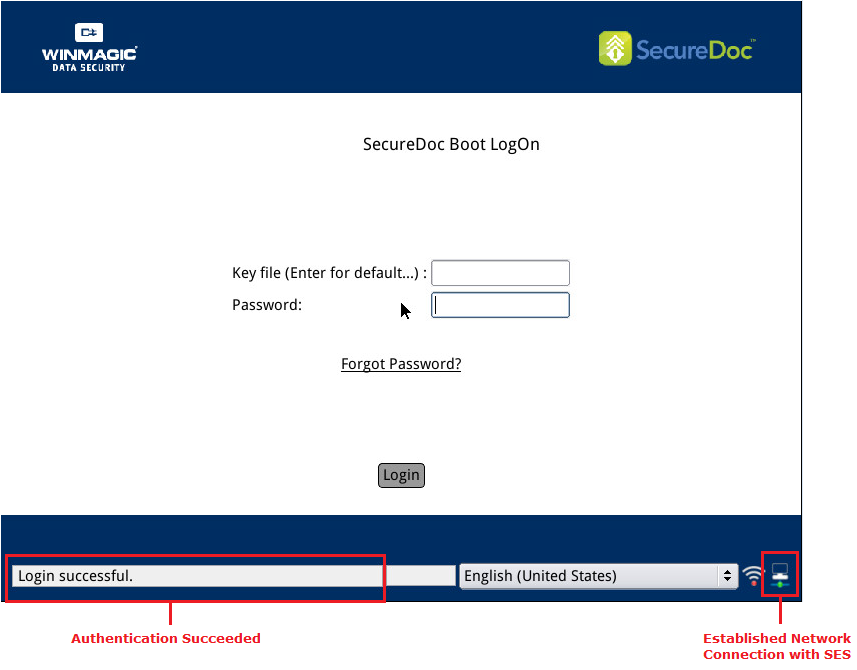
Appendix J
Customizing Preboot Text and Background
For cases where you would like to customize the text and background that appears at preboot for your deployments, customization is now possible through the SDLinux profile on SES.
To import a custom preboot background on your profile:
On SES Console, Navigate to Profiles
Double click on the Profile you wish to customize and click “Boot text and color”
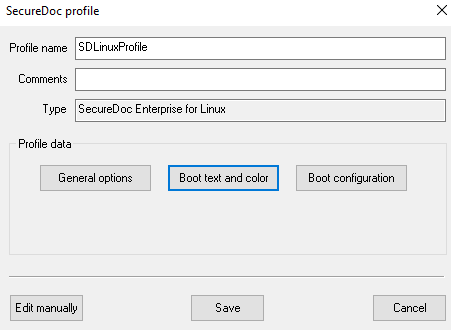
Click on “Import Customized Background button”
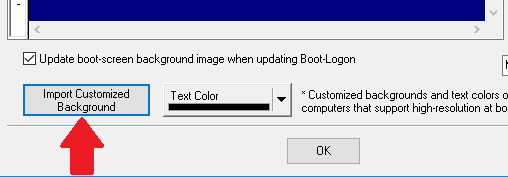
Select the background image that you wish to import and click ‘Open’ (Note: It is recommended to have an image at 1024x768 resolution and 24bit bitmap).
Click ‘OK’ once more to save changes
(Optional) To verify if your changes were saved correctly, open the package files and verify if the file bkgd.bin is present
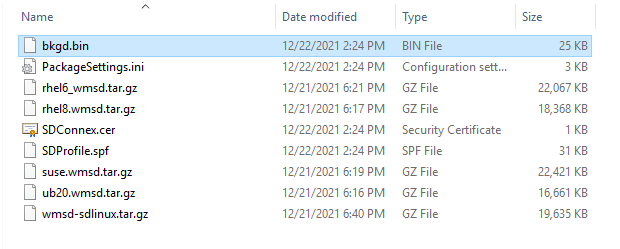
Client machine should now display the imported custom image once package is deployed
To customize the preboot displayed at preboot your profile:
On SES Console, Navigate to Profiles
Double click on the Profile you wish to customize and click “Boot text and color”
Click on “Edit Boot Messages” (Notepad should open with the file boot_msg)
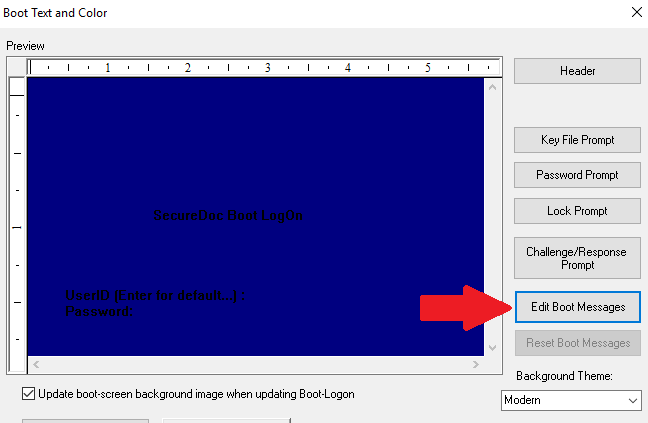
On the file opened, find the following ID’s depending on which text you would like to customize 10121, 10122, 10123
Remove the ‘;’ characters at the beginning to uncomment the parameters. Make sure to also add ‘<’ at the beginning of the ID lines.
Modify the text to be displayed at preboot as needed
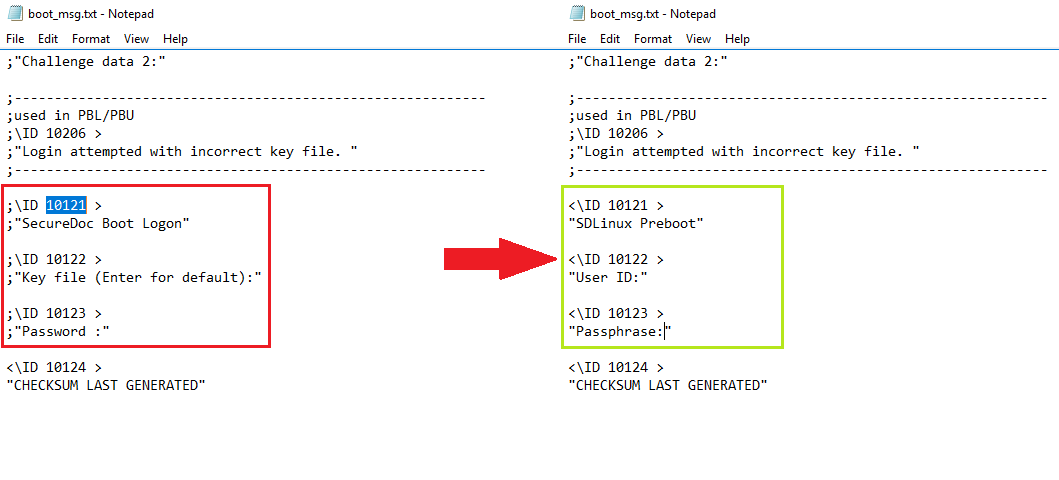
Once modifications are done, save the text file and close Notepad
Click OK to save your changes on the Boot text and Color settings
(Optional) To check if your changes were actually saved, open your package files and open SDProfile.spf file on a notepad. Verify that the new parameter PrebootMsgs is present on the file:
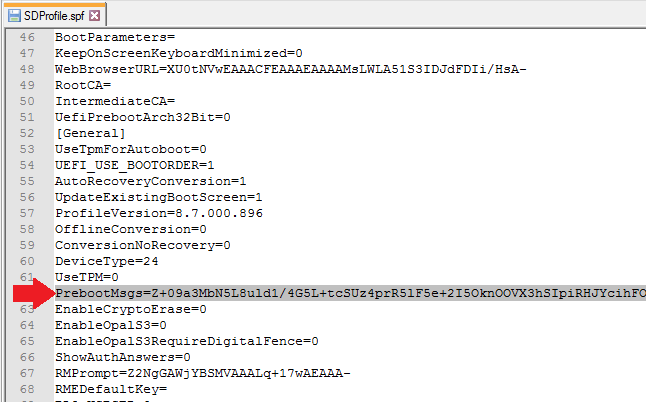
Limitations to Customizing Preboot
As of version 9.0, text customization and importing custom backgrounds are currently the only type of preboot customization supported in SDLinux.
The features highlighted in red on the image below (while they are accessible) should not be used when customizing preboot. Using these features could cause conflicts to customizations done in the Boot Messages settings so its important that only the features highlighted in green are used in this case.
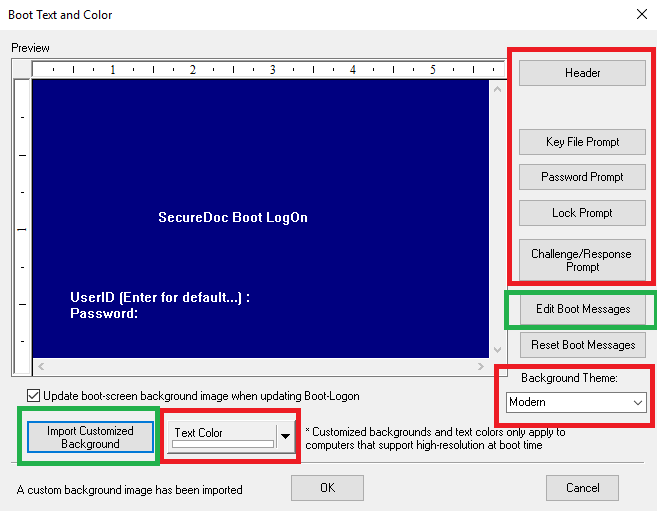
*Green - Supported
*Red – NOT supported
Appendix K
Common Deployment Issues
[ERROR] Unable to find a matching driver to update the system
Issue
During deployment, the installation fails with an error “[Error] Unable to find a matching driver to update the system”
Example:

Cause
Local machine is unable to reach WinMagic’s AWS S3 storage to download the required kernel driver
The kernel version on the Linux system that SDLinux is being deployed is not yet supported
Solution
Check that the kernel driver is available for download on our AWS S3 storage.
Click here to see the current list of kernel versions available
On your browser, search for the kernel version that your Linux system is using.
If you do not see the kernel version on the kernel drivers list submit a request to WinMagic Support team requesting for the new kernel driver. At this point, there is no need to proceed with further troubleshooting.
If you do find the kernel driver on the page but are still unable to deploy SDLinux, continue with the steps below.
On a different client machine with a known internet connection, manually download the required kernel driver using the following link:
https://s3.amazonaws.com/CloudVM/Linux/drivers/v2/SDLinuxDrv-<kernel_version>.ko
Replace “<kernel_version>” with the current kernel version on your system (Run command “uname -a” on terminal to find out your system’s kernel version).
Copy the downloaded kernel driver to the Linux client, rename the downloaded file to simply just SDLinuxDrv.ko
On your client machine, where your SDLinux installation package resides, navigate to the winmagic > drivers folder
Create a folder using the kernel version as its name (i.e. 5.3.0-64-generic)
Move or copy the SDLinuxDrv.ko file to the newly created folder.
Example:
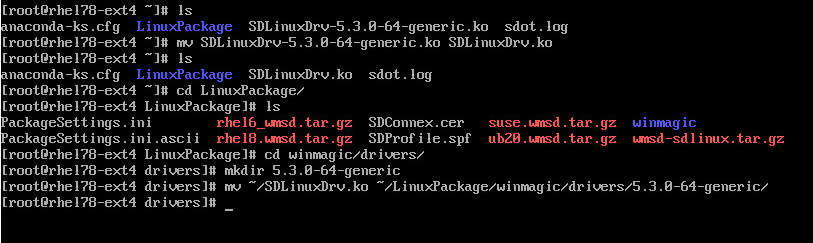
Once done run the installation once more and it should now be able to use
[ERROR] Driver Compatibility Test Failed
Issue
During deployment, the installation fails due to driver compatibility test failing and may display one of the following error messages:
insmod: ERROR: could not insert module ./SDLinuxDrv.ko: Required key not available
insmod: ERROR: could not insert module ./SDLinuxDrv.ko: Operation not permitted
[ERROR] driver compatibility test failed
Example:

Cause
SecureBoot is enabled on the client machines BIOS
Solution
Disable SecureBoot on the client machines BIOS and then try to deploy SDLinux once more. User can re-enable SecureBoot once encryption has completed on the system.
[ERROR] Failed to find SD partition
Issue
Installation fails due to SDLinux being unable to create/find the SecureDoc partition.
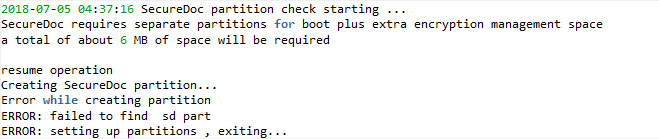
Cause
When re-imaging a physical Linux machine from a bootable usb device, after the re-image is completed and usb is unplugged the machine is not rebooted prior to starting the SDLinux deployment. Reboot is required to ensure that no files on the system are still pointing to the usb device.
Solution
After re-imaging the system, remove the usb drive (containing the image) and manually reboot the system.
After system starts up you can now run the installation once more.
Installation failed, lack of network support when booting up
Issue
During deployment, the installation fails with an error “Installation failed, lack of network support when system booting up”
Example:

Cause
The RedHat/CentOS network interface file “ONBOOT” setting is disabled
Solution
For RHEL 8.x and older versions:
To enable the ONBOOT settings on the systems network interface file
Navigate to the systems network interface file folder:
cd /etc/sysconfig/network-scripts
Open the network interface file with your prefferred edittor (Note: interface file name is different for each system):
vi ifcfg-eth0
Modify the ONBOOT settings to yes and save your changes
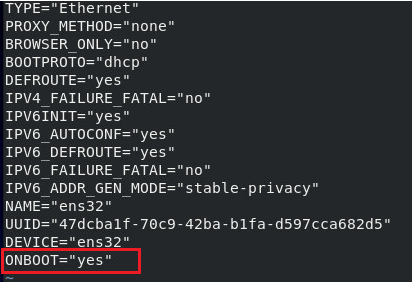
Once changes are saved retry the installation
For RHEL 9.x:
On terminal, run the following command (replace the <adapter_name> with your systems network adapter):
nmcli con show <adapter_name> | awk '/connection.autoconnect:/ { print $2}'
Example:
nmcli con show enp0s31f6 | awk '/connection.autoconnect:/ { print $2}'
If the command above outputs 'no', we will need to update this to output 'yes'. To change this run the following:
sudo nmcli con mod <adapter_name> connection.autoconnect yes
Run the command in step #1 again to confirm the change
Retry the installation once more once change has been confirmed
System boots up in Emergency mode after performing a kernel update
Issue
After performing a kernel update on a RHEL 9 system (that has SDLinux installed), when the system is rebooted, the user is able to login at preboot successfully however it does not boot the user back to the OS but instead boots them in an Emergency Mode shell prompt.
Cause
During the kernel update, the grub parameters may have been overwritten during the update and is now missing the UUID of the root partition that causes the system to not boot correctly. This is also confirmed by running the command: systemctl --failed
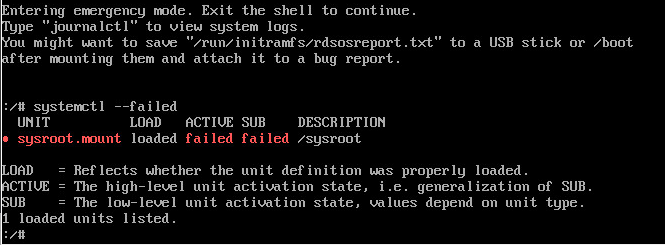
Workaround
There are two ways to by pass the Emergency mode after performing a kernel update to enable you to boot back to the system.
Method 1
Manually mount sysroot at the Emergency mode shell prompt. This method will allow you to get past the Emergency mode error and boot to the OS on the current/latest kernel version.
Run lsblk command to identify the root partition. In the example below it is the encr_sd0
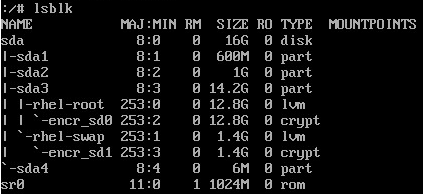
Run the command below to mount sysroot
mount /dev/mapper/encr_sd0 /sysroot
Run the systemctl --failed command once more to confirm there are no more failures
Type ‘exit’ and press enter to continue.
Note: This process may take a few minutes to complete so please patiently wait for it to complete.
You may also start to see some warnings displayed like the one below, these are just white noise and can be ignored.
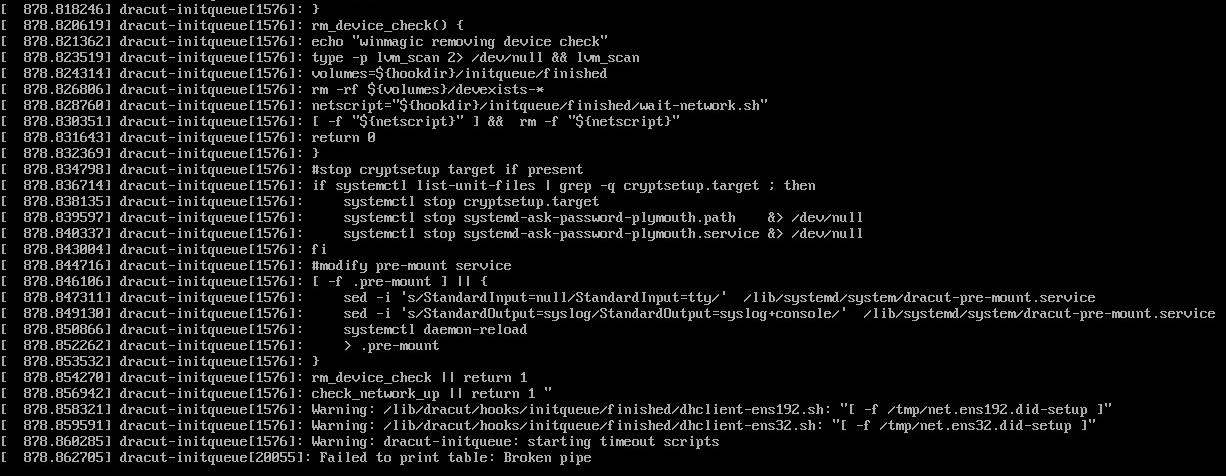
Method 2
Boot back to the previous kernel version prior to the update. When you reboot your system, simply select the previous kernel listed on the Grub menu and this should allow you to login at preboot and boot back to the OS. Booting to the older kernel is only temporary so you have access to the terminal to apply the fix.
Fixing the boot up issue
To permanently fix the issue so the system boots normally to the latest kernel after reboot, we will need to manually add the root partitions UUID into the linux grub menu.
Run lsblk -f command to identify the root partition and its corresponding UUID. In this case it will be the encrypted root partition.
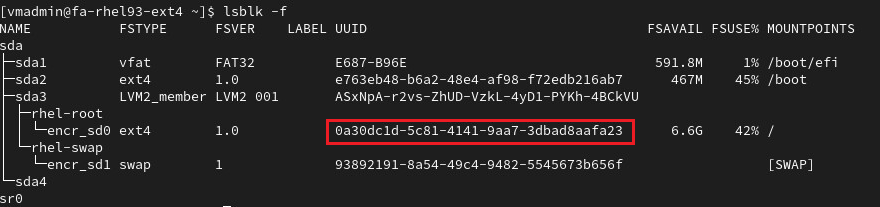
Next use the grubby command to manually add the argument to the kernel on start-up
grubby --args=root=UUID=<UUID_of_partition> --update-kernel /boot/vmlinuz-<current_kernel_version>
Example:
grubby --args=root=UUID=0a30dc1d-5c81-4141-9aa7-3dbad8aafa23 --update-kernel /boot/vmlinuz-5.14.0-427.26.1.el8.x86_64
To verify that the update was successful, run the command below to check that the argument was added to the boot entry properly.
grubby --info /boot/vmlinuz-<current_kernel_version>
Example:
grubby --info /boot/vmlinuz-5.14.0-427.26.1.el8.x86_64
Once you reboot the system, your system should boot normally to the OS now after logging in at preboot.
Appendix L
SDLinux Commands Cheat Sheet
Basic Commands
Command | Description |
./install.sh -s (Run command from SDLinux package) | Installs SDLinux and all other software pre-requisites. Reboots client machine automatically. |
./install.sh -c -s (Run command from SDLinux package) | Runs the SDLinux installer in compatibility mode. Compatibility mode will install pre-requisite software and install path. It also tests sdspace creation and preboot compatibility but registration or encryption will occur. |
./check_ver.sh (in SDLinux package) Or /usr/local/WinMagic/check_ver.sh | Checks the SDLinux installer/client version |
./log_collect.sh (in SDLinux package) Or /usr/local/WinMagic/log_collect.sh | Generate support logs. Creates a tar.gz file that contains all the log files needed for troubleshooting. For install issues, command may be run from the install package. For all other issues, command should be run from the install path (/usr/local/WinMagic) |
/usr/local/WinMagic/sdot status -f <sdspace_path> | Displays a summary of the systems encryption status. Example: /usr/local/WinMagic/sdot status -f /dev/sda5 |
/usr/local/WinMagic/sdot status -f <sdspace_path> -a | Displays a summary of the systems encryption status for each disk volume/partition |
/usr/local/WinMagic/sdbkimage -f <sdspace_device> -i <png_image_path> Or /usr/local/WinMagic/sdbkimage -i <png_image_path> | Replace/Update the preboot background image Example: /usr/local/WinMagic/sdbkimage -i /home/test/Bkgd.png |
./boot_prep.sh (Run command from SDLinux package) | (Use for public cloud environments) Creates securedoc space and separate boot partition. Can be run first on public cloud environments prior to running the SDLinux install script. |
Recovery Commands
Command | Description |
sdpasswd (Command can be run in any path) | Command to update the current logged in users’ user key file for logging in at preboot (does not update the OS password login). |
/usr/local/WinMagic/sdrecover.sh --keyfile=<recovery_file_path> --recfile=<RecInfo_file_path> | Recovery command to unlock an encrypted disk attached on a different system. Note: See - Appendix F of the “SecureDoc for Linux Deployment Guide” for more info on how to use the command |
/usr/local/WinMagic/sdot recover -f <path_to_sdspace> -r <path_to_recovery_info> -w /etc/fstab –o | Recovery command that combines the range objects in sdspace (or combines sdspace information). This command is run when you want the recovery system, where the encrypted disk has been attached to, to be able to automatically unlock the disk on start-up. Note: See - Appendix F of the “SecureDoc for Linux Deployment Guide” for more info on how to use the command |
secdoc-cli.py commands
Command | Description |
/usr/local/WinMagic/secdoc-cli.py | Displays usage information of the secdoc-cli.py command |
/usr/local/WinMagic/secdoc-cli.py | Displays the following information: -Server IP/Name List -Communication time -Encryption status |
/usr/local/WinMagic/secdoc-cli.py -c | Communicate to SES server |
/usr/local/WinMagic/secdoc-cli.py -s “<server_address>” | Updates the server list that the client machine communicates to. Example: /usr/local/WinMagic/secdoc-cli.py -s “192.168.2.1;test-server;” |
/usr/local/WinMagic/secdoc-cli.py -u | (version 8.6SR1+ only) List/Display user key files present on the client machine |
secdoc.py commands
Command | Description |
/usr/local/WinMagic/secdoc.py uninstall | Uninstalls SDLinux. Command will need to be run twice in order to fully uninstall SDLinux. -Issuing the command for the first time will initiate the decryption of the system (does not apply for LUKS encrypted system) -Issuing the command for the second time unregisters the device from SES and removes the SDLinux install path. Note: See the SecureDoc for Linux Deployment guide for more info on how to use this command. |
/usr/local/WinMagic/secdoc.py add -s | Initiates encryption of a newly added (unencrypted) disk. “-s” option will automatically reboot the system and start the encryption. |
./secdoc.py upgrade (Run command from SDLinux package) | Initiates a client upgrade to the latest version of SDLinux |
Other commands
Command | Description |
/etc/profile.d/wm_housekeeper.sh | Manually trigger the “SecureDoc Primary Account Set-up” window (if owner has not been identified on the device). |
service winmagic stop | Stops the local winmagic.service deamon |
Service winmagic start | Starts the local winmagic.service daemon |
Appendix M
List of SES features supported by SDLinux client
Remote Commands | Supported |
Add keys to device | No |
Add users to device | Yes |
Assign device profile to devices | No |
Assign folder encryption policy to device | No |
Member of groups | Yes |
Create emergency disk | Yes |
Export escrowed key | No |
Mark as parent device | Yes |
Activate auto-boot | No |
Reboot device | No |
Lock device | No |
Crypto-erase device(s) | Yes |
Setup Port Control | No |
Prevent Login to Device(s) | No |
Show commands | Yes |
Cancel all active commands | Yes |
Save to file | Yes |
Check PBConnex Access | No |
Profile Settings
SecureDoc Profile | Supported | |
General Options | Yes | |
General | SecureDoc Encryption Settings | Yes |
TPM Protection for Keyfiles | No | |
Communication | Communcation Settings | Yes |
If no communication with server for more than |
| |
E-Mail MachineInfo Option | No | |
PBConnex Settings | Yes | |
MagicEndpoint Enterprise | No | |
Media Encryption |
| No |
SecureDoc File Encryption |
| No |
|
|
|
Boot text and color | Yes | |
| Import Customized Background | Yes |
Text Color | Yes | |
Header | No | |
Key File Prompt | No | |
Password Prompt | No | |
Lock Prompt | No | |
Challenge/Response Prompt | No | |
Edit Boot Messages | Yes | |
Background Theme | Yes | |
Boot configuration | Yes | |
General | Force permanent Auto-Boot | Yes |
|
| |
Network Access Control | Connection Settings | Yes |
Wireless Settings | Yes | |
Credentials | Yes | |
802.1x Authentication | No | |
Note: Use Edit Boot Messages feature for customizing the SDLinux preboot Header, Key File and Password Prompts.
Package Settings
SecureDoc Package | Supported | |
General | Create new user in folder during remote installation | Yes |
|
| |
Key file | Password rules | Yes |
Privileges | Yes | |
Provisioning Rules | Prevent user keyfile creation during deployment | Yes |
Enable provisioning to allow access to device until owner is defined | Yes | |
Allow device autoboot to Linux preboot | Yes | |
Allow access to users with temporary user account | No | |
Automatically identify owner without having to prompt user | No | |
User will be prompted to confirm device ownership | Yes | |
Set device location | Yes | |
Appendix N
Deploying SDLinux for 802.1x Network
Prerequisites
Certificate Authentication server configured to be used by Radius server
Radius server configured to be used to authenticate from WiFi Access Point
WiFi Access Point with authenticated WPA2-Enterprise method using Radius server defined.
Make sure that test client can connect to WiFi using cert configured (e.g in Windows OS level)
SDLinux profile/package configuration
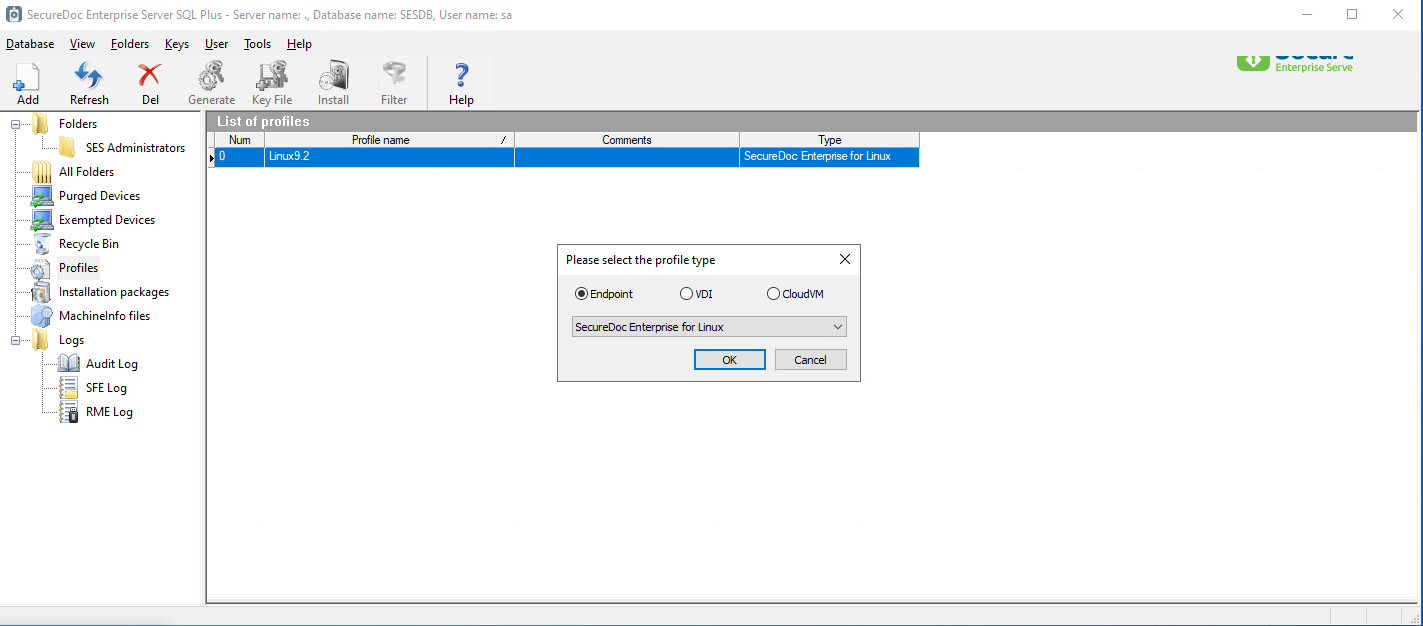
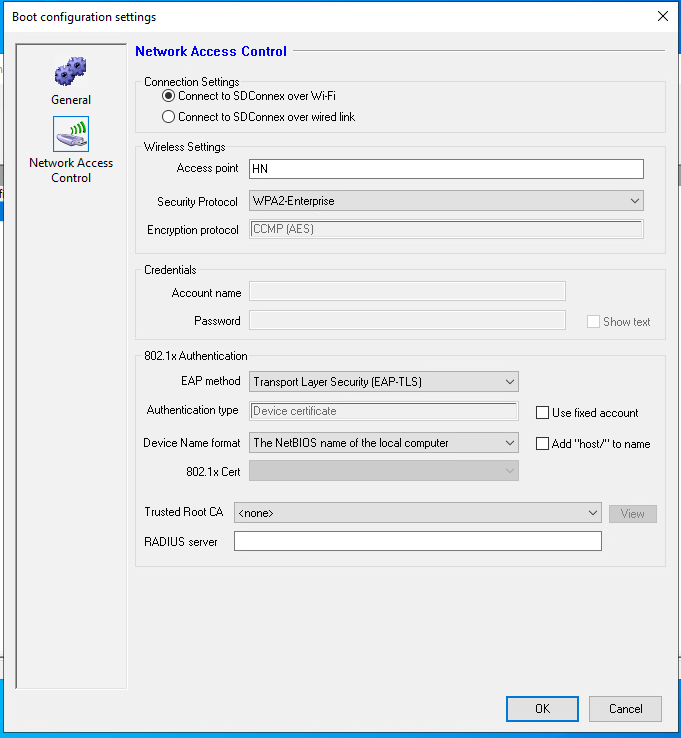
Preparing the cert and config files
Preparing the certificate files
The steps below outlines how to prepare the cert config files (MCERT_FILE, MCERT_KEY, CACERT_FILE), needed for the installation.
Get WiFi authentication certs from CA server (in my case, I used CA and NPS on Windows server for the test so I will have cert.pfx file after certificate configured then We need to convert to cert.crt and cert.key to be able to use at Linux deployment. You should use any public tool to convert https://decoder.link/converter or using openssl at Linux). At this time, We don’t need CAcert configured at Linux
Get CA cert file from CA server
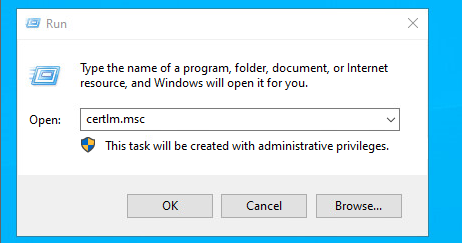
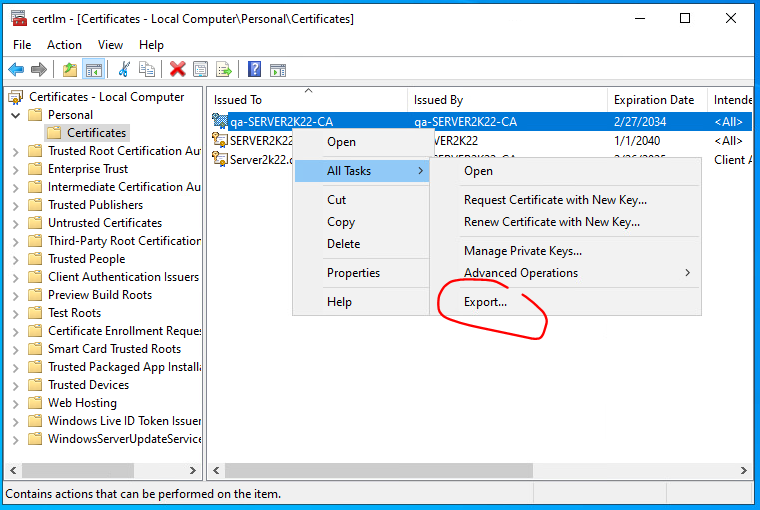
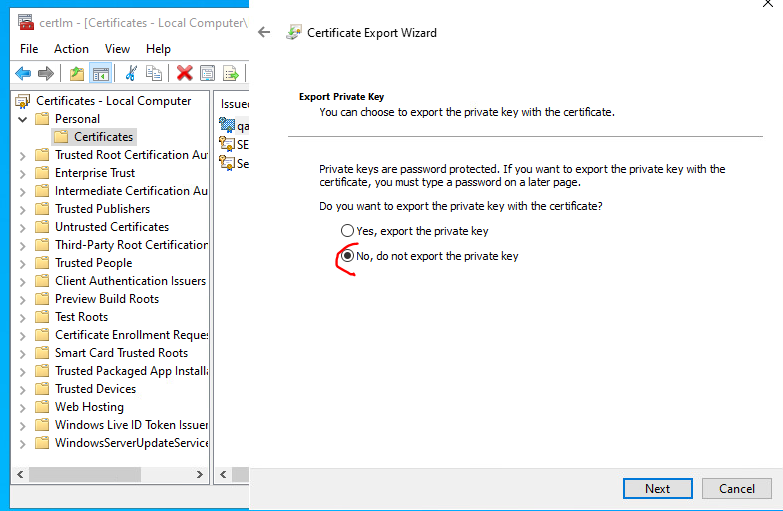
We will get the CA cert with extension .cer then We can change the extension to .crt
Get WiFi cert file from CA server
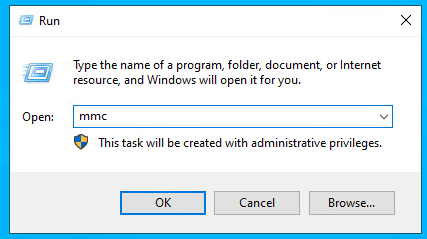
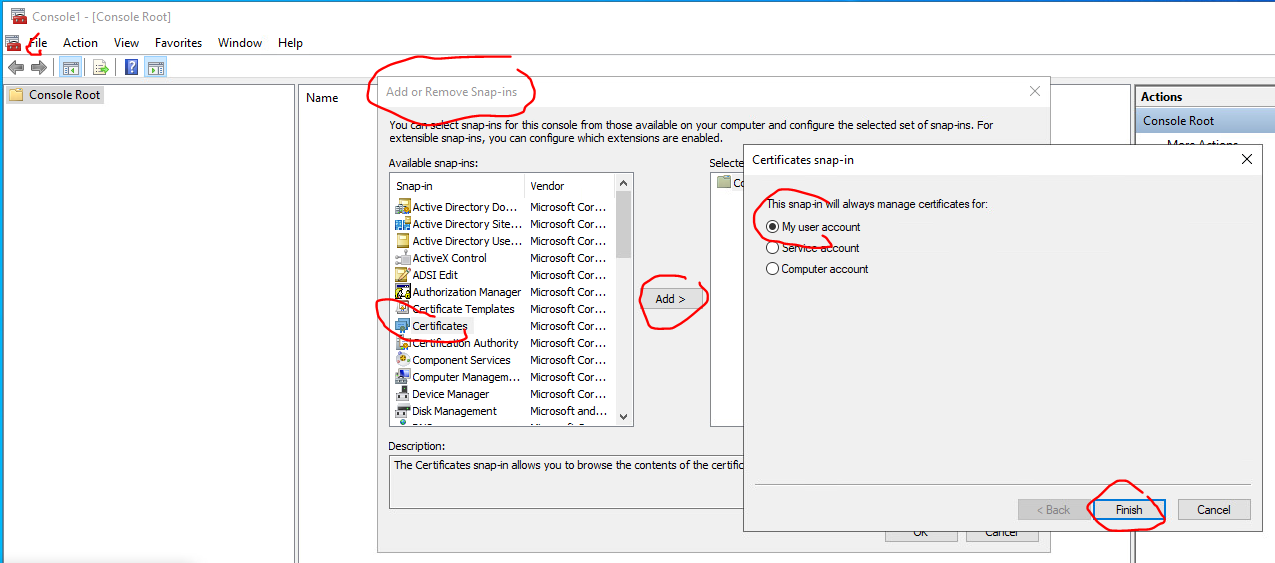
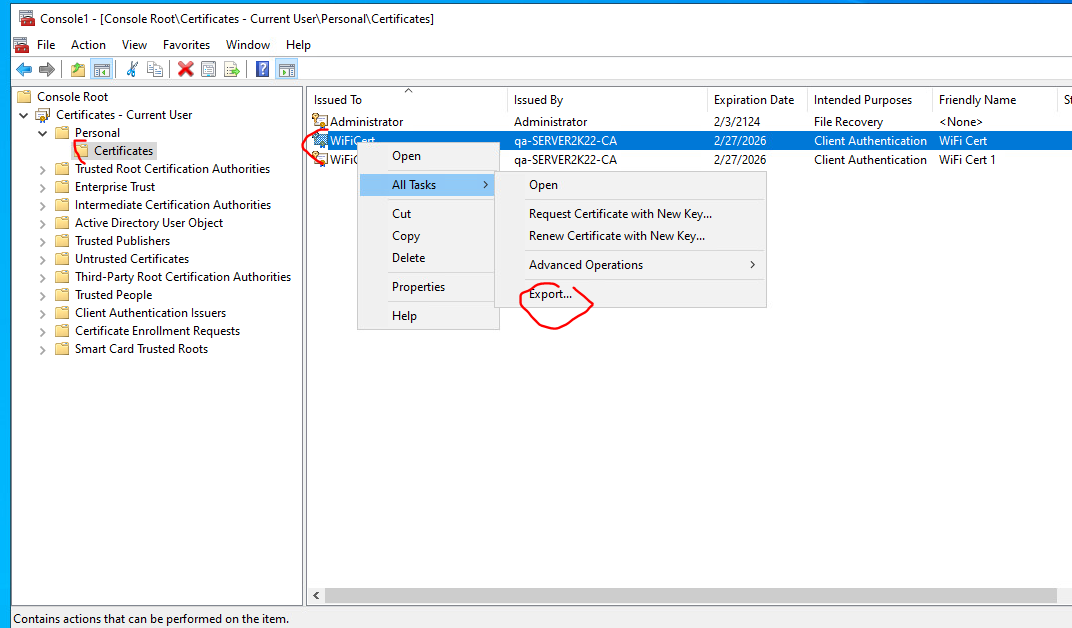
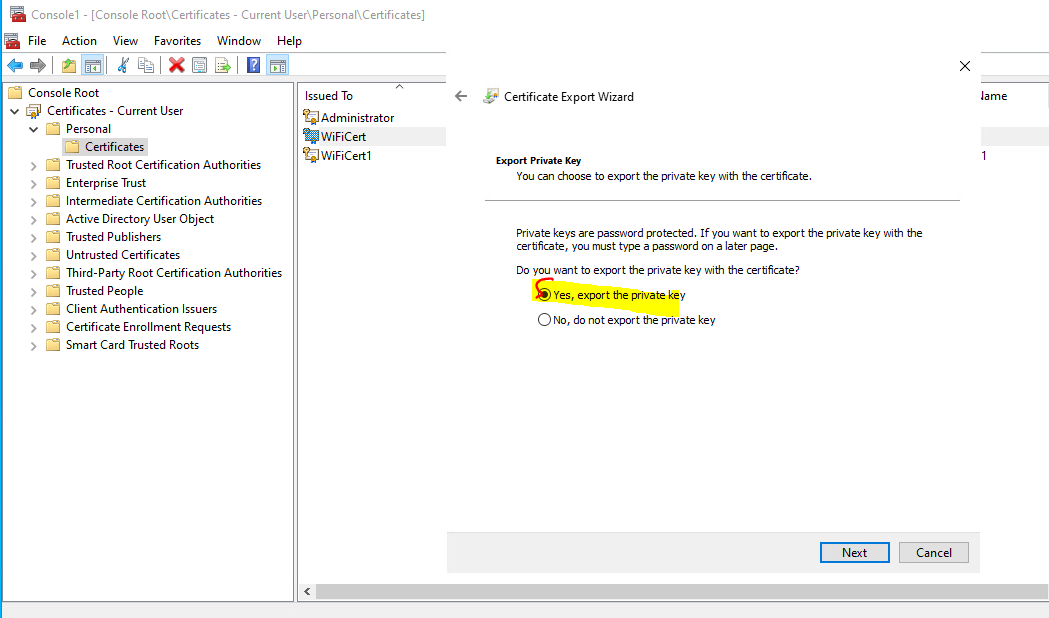
Afte that We will get the WiFi cert file with extension .pfx then We will convert to pem file and We will have .crt and .key files to test
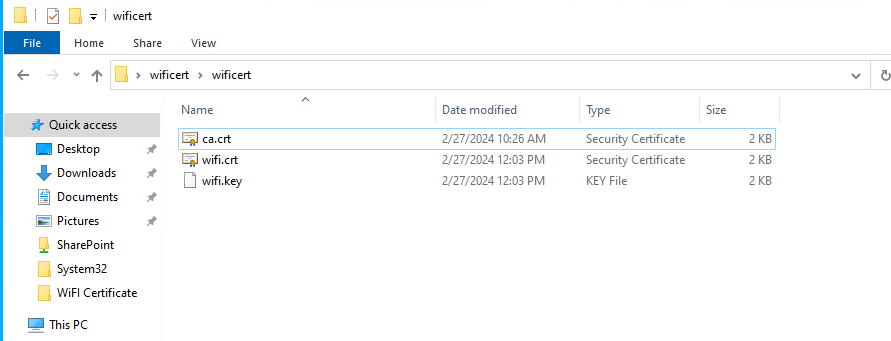
Setting up the installation package with the cert config files
Copy SDLinux installation file and extract to Linux machine then We will have Installation folder named “winmagic”

Copy WiFi certs to Linux machine
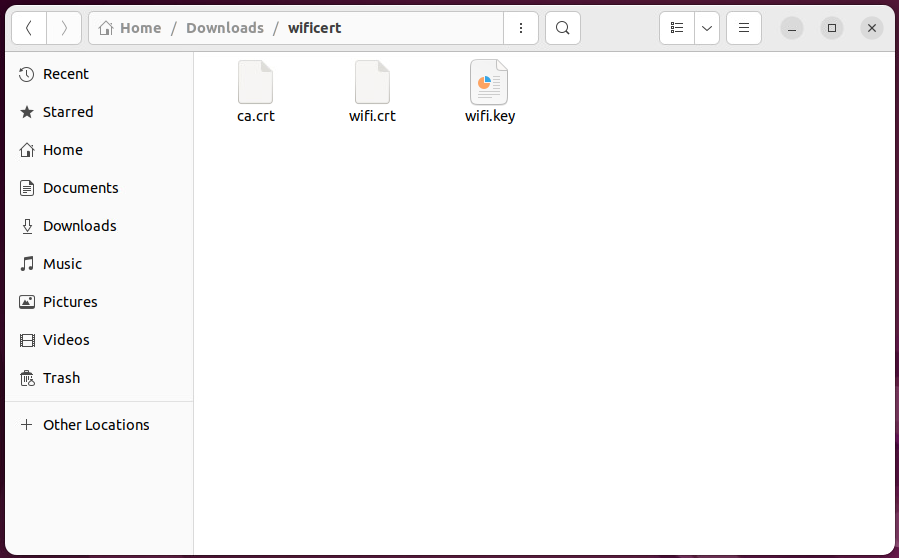
Define the cert files located then go to the SDLinux installation folder “winmagic” and then create a file named “certconfig” and file’s content will have path to cert files and identity as below as an example in my Linux machine. Please note that the CA certificate is optional and the MCert_ID is your identity. And in my example, the identity is “hn”
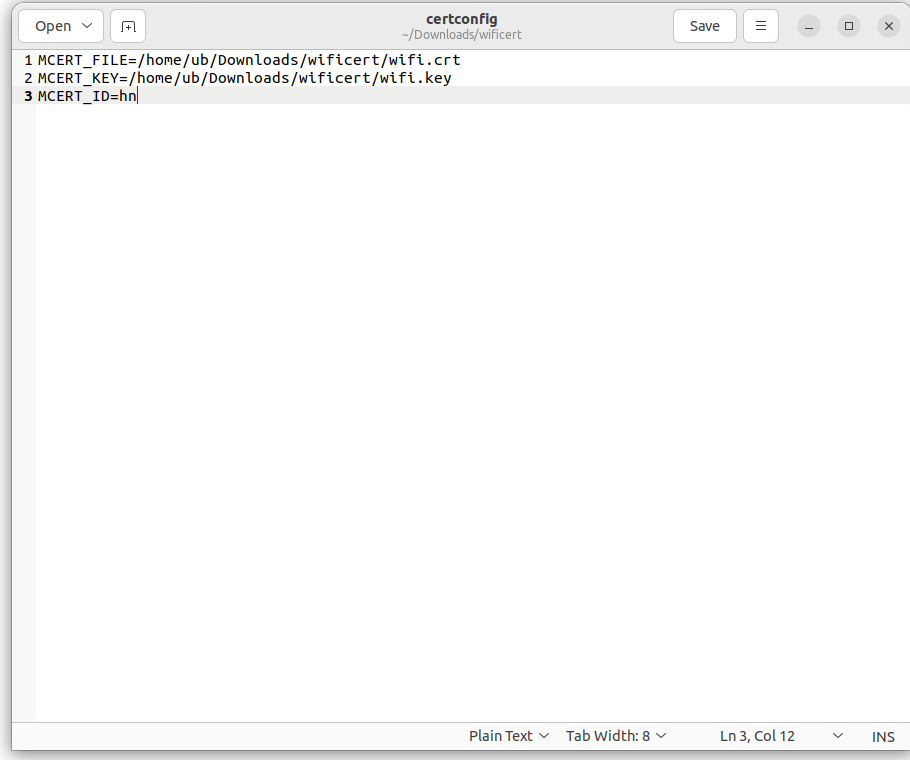
Running the installation with the cert config option
Now install SDLinux package and confirm the WiFi at Preboot using below command -> after the deployment and SM, at SD Preboot, WiFi is auto connected and able to reach to SES server successfully.
sudo ./install.sh -s --certcfg ./certconfig
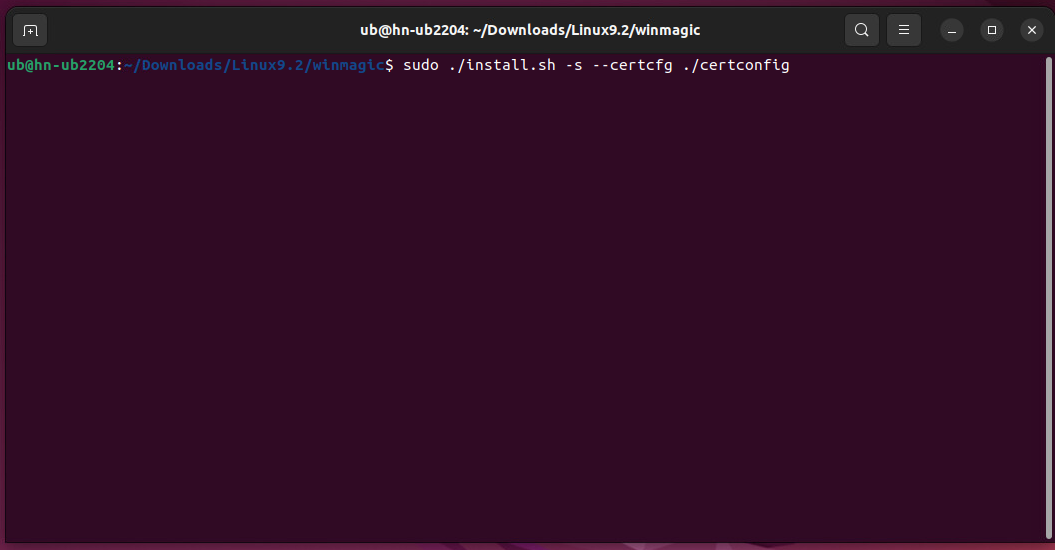
After the deployment (SM and encryption), reboot the Linux machine and checking the WiFi connection at Preboot -> The WiFi will automatically connect to defined AP in SD profile settings.
Running the installation with an encrypted private key
The instructions below show how to configure and deploy SDLinux when your WiFi certificate uses a private key that requires a passphrase to be entered
Copy SDLinux installation file and extract to Linux machine then We will have Installation folder named “winmagic” as seen below.
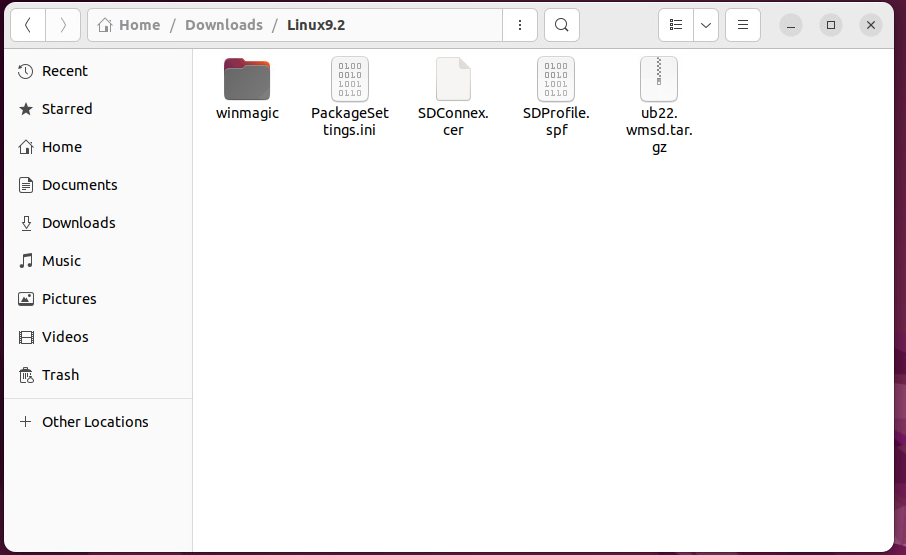
Copy WiFi encrypted certs to Linux machine then create a file with any name in anywhere at Linux machine (In this example, a file was created inside the cert folder with the name “privatekey.pass”)

The file “privatekey.pass” contains the passphrase for the private key file
Define the cert files located then go to the SDLinux installation folder “winmagic” and then create a file named “certconfig” and file’s content will have path to cert files, path to passphrase of private key file and identity as below as an example in my Linux machine.
Please note that the CA certificate is optional and the MCERT_ID is your identity.
Content of file:
MCERT_FILE=[path to the cert file ]
MCERT_KEY=[path to the encrypted private key file]
MCERT_ID=[Your identity used in the WiFi cert]
MCERT_KEYPASS=[path to file contained passphrase of private key file]
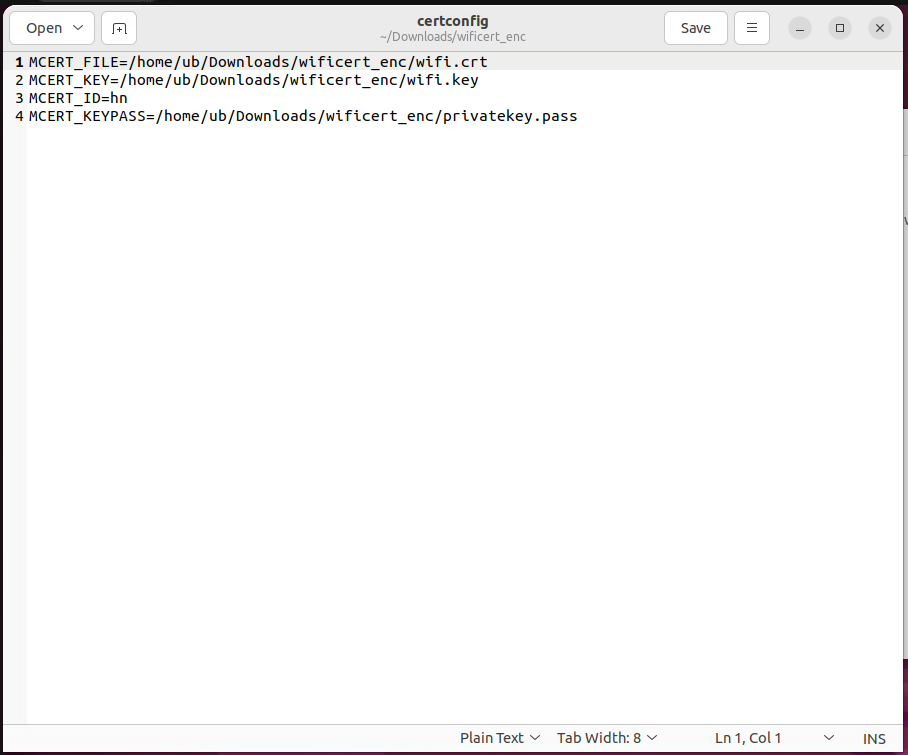
Now install SDLinux package and confirm the WiFi at Preboot using the following command
sudo ./install.sh -s –certcfg ./certconfig
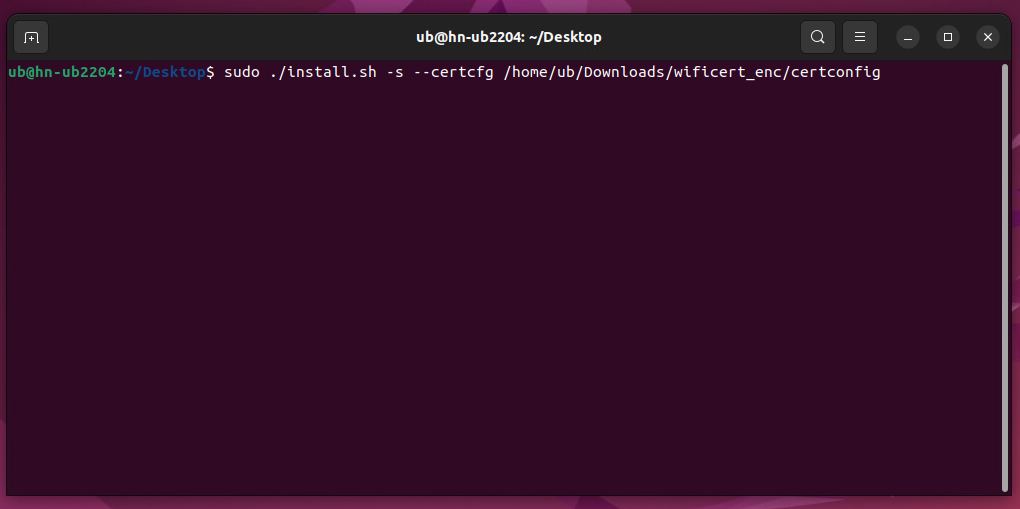
After the deployment complete the primary account set-up and for encryption to complete
Reboot the Linux machine and verify the WiFi automatically connects to the defined access point in SD profile settings and able to connect to SES server successfully.
Updating the certificates on an existing SDLinux installation
In case the certificate on an existing installation is expired or is about to expire, you will need to replace/update the certificate with a new certificate.
To replace or update an existing certificate:
Replacing the certificate with the same identity.
sudo /usr/local/Winmagic/sdot certs -m <machine cert path> -e <private key path>
Example:
sudo /usr/local/Winmagic/sdot certs -m /home/ub/Downloads/wificert/wifi.crt -e /home/ub/Downloads/wificert/wifi.key
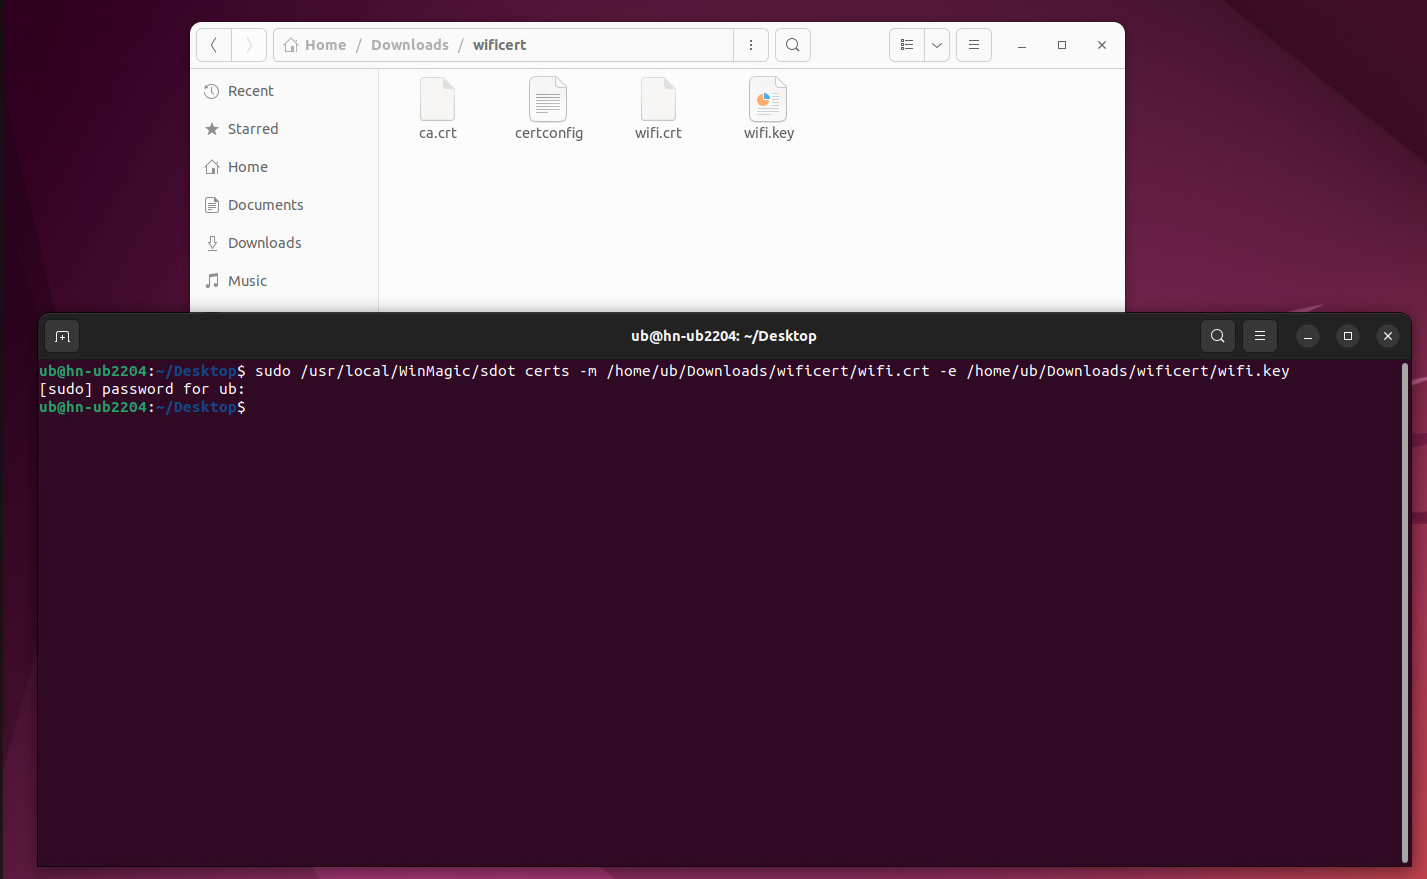
Replace the certificate with a different identity
sudo /usr/local/Winmagic/sdot certs -m <machine cert path> -e <private key path> -i <identity name>
Example:
sudo /usr/local/Winmagic/sdot certs -m /home/ub/Downloads/wificert/wifi.crt -e /home/ub/Downloads/wificert/wifi.key -i wifiuser
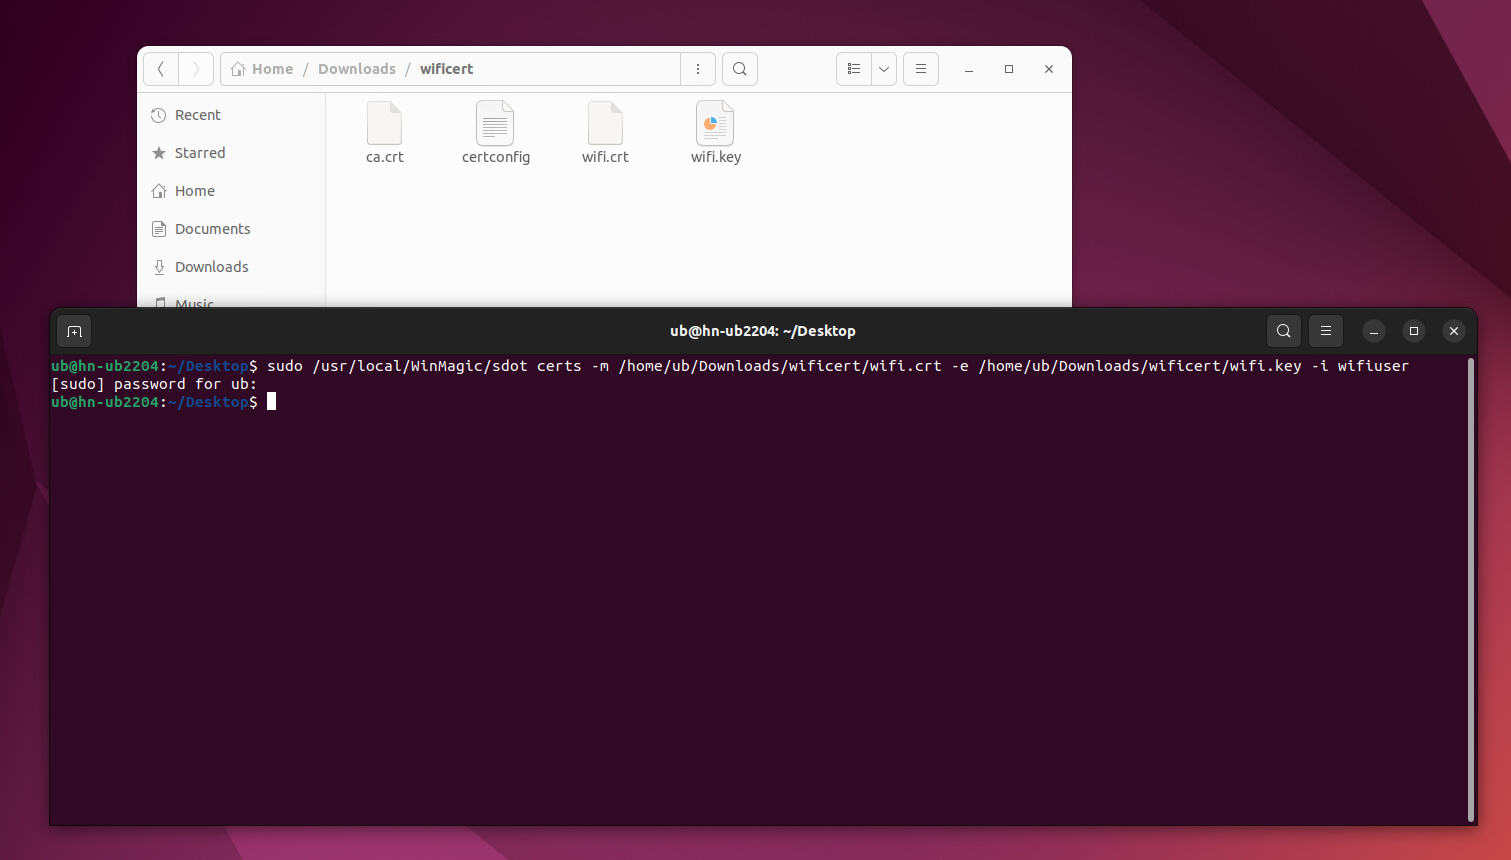
After running the commands, both the certificate and identity will now be updated with the new one and will be used for authentication at Preboot
Updating the certificate when cert and private key are passphrase protected
Replace the certificate with the same identity.
sudo /usr/local/Winmagic/sdot certs -m <machine cert path> -e <private key path> -p <passphrase of private key file>
Example:
sudo /usr/local/Winmagic/sdot certs -m /home/ub/Downloads/wificert/wifi.crt -e /home/ub/Downloads/wificert/wifi.key -p P@ssword123
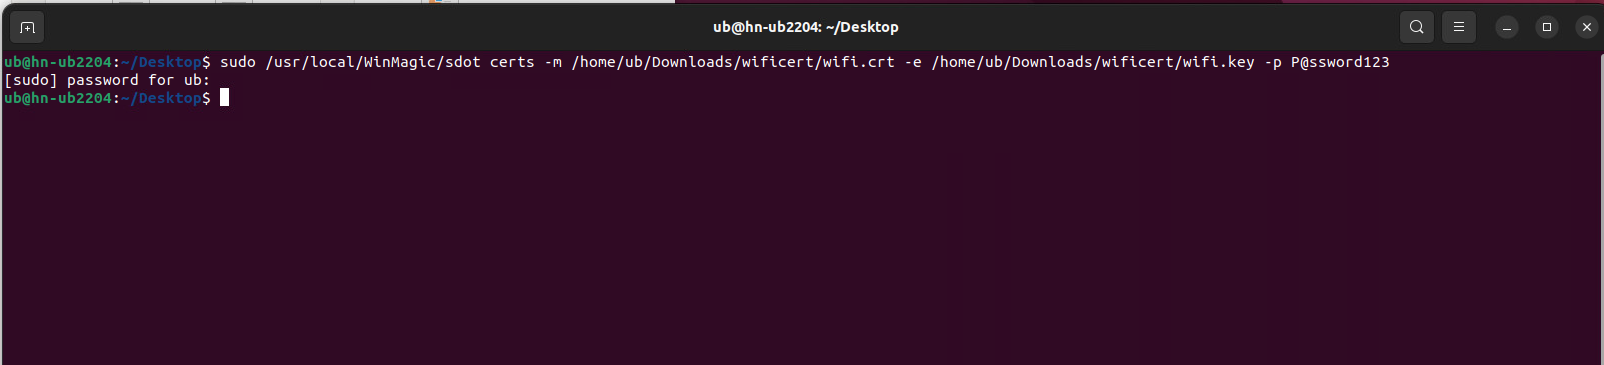
Replace the certificate with the different identity
sudo /usr/local/Winmagic/sdot certs -m <machine cert path> -e <private key path> -p <passphrase of private key file> -i <identity name>
Example:
sudo /usr/local/Winmagic/sdot certs -m /home/ub/Downloads/wificert/wifi.crt -e /home/ub/Downloads/wificert/wifi.key -p P@ssword123 -i wifiuser
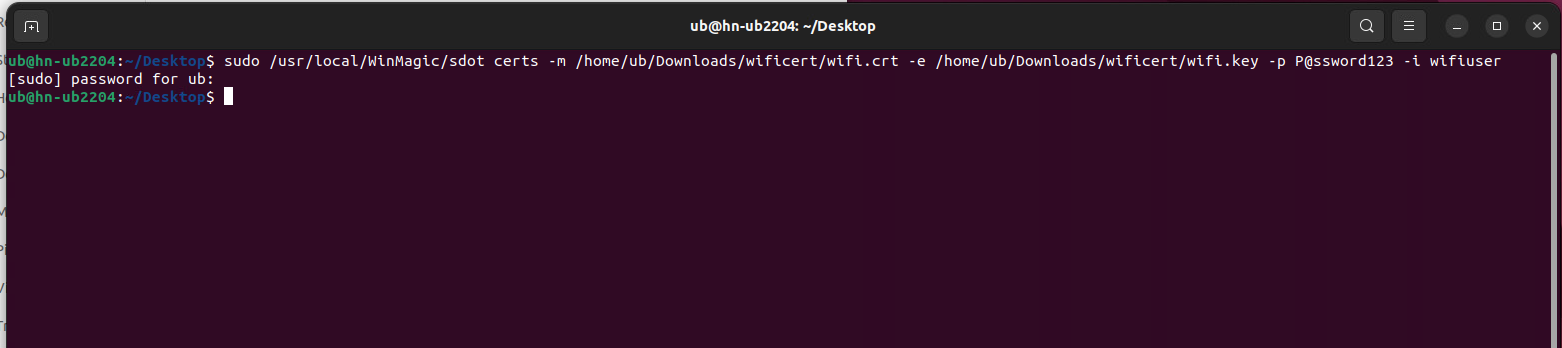
After command run, the new certificate and new identity will be replaced for WiFi authentication at Preboot
Appendix O
Deploying SDLinux with Single Sign-on (SSO)
Note: As of 9.2SR1, SSO is currently only supported on RHEL 8 and 9 OS versions. Ubuntu OS version will be supported at a later release schedule.
Step 1: Enabling SSO from the SDLinux profile
When creating your SDLinux profile click on General Options > Credential Provider
Tick the checkbox for “Automatically log in to Linux with Credentials entered at Boot Logon” to enable SSO functionality
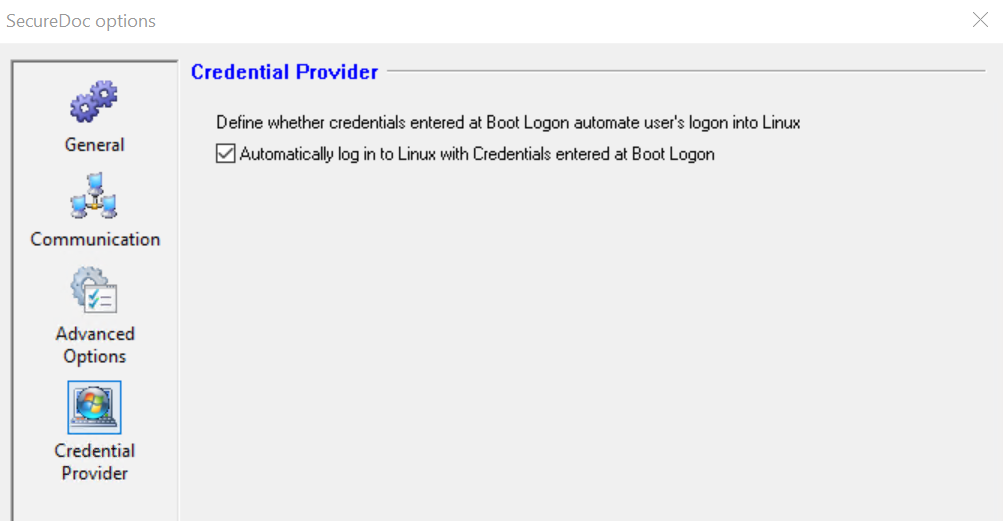
Step 2: Deploying the SDLinux package
Install the SDLinux package (with SSO enabled in the profile from Step 1) to the client machine
After the initial reboot, Login in to the OS
Complete the primary ownership prompt by confirming the owner and setting the password to login at preboot.
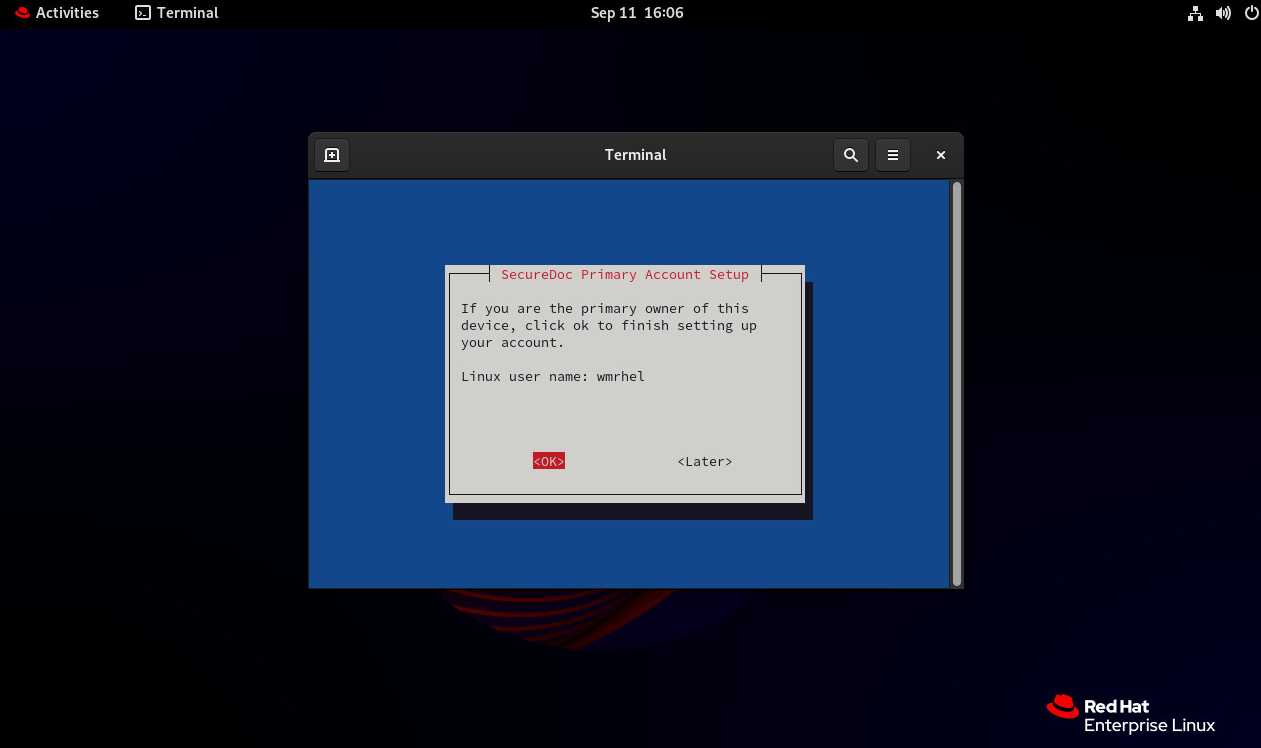
Step 3: Activating SSO on the Linux client after the initial deployment.
The SSO functionality on SDLinux requires the user to initially login in to preboot and then manually login to the OS 1 time to fully activate the feature.
Reboot the client machine
On start-up, login in at preboot with the primary owner’s password
At OS log-in screen manually login to the OS
Note: This initial manual login, serves as the activation for the SSO feature and essentially securely stores the credentials you have entered here to be used for SSO
completed this will now fully activate the SSO functionality on the client machine
Reboot the client machine once more
Login at preboot as normal
At the OS login screen, click on the user account to single sign-on to the OS
User should be automatically signed in to the OS without having to manually enter their password
Note: The single sign-on feature works primarily after a user has just authenticated at pre-boot.
Furthermore, the username logging in at pre-boot must match the user you’ve selected at the OS login screen for the SSO to trigger. If it doesn’t match you will have to login manually.
SSO Frequently Asked Questions
What scenarios are single sign-on NOT supported?
When locking the screen or when the screen locks due to it being idle. Manual login to the OS is required in this instance.
When logging out of the current user account and logging back in. Manual login to the OS is required in this instance
(For RedHat OS’s) When resuming from hibernation but the swap partition on the system was not encrypted (During deployment, the profile was set to ‘encrypt boot disk only’)
Is Single Sign-on supported after resuming from Hibernation?
YES, single sign-on is supported when resuming from hibernation (for Red Hat, only if all partitions are encrypted).
When resuming from hibernation:
System will resume with the SecureDoc login screen displayed
After logging in at pre-boot, clicking on the user will trigger SSO for that user and resume your session
Can you enable SSO on a Linux client for multiple user accounts?
YES, it is possible. As long as the SSO activation steps (See Step 3) have been performed for that user account it will be able to SSO into the system
What if a user changes their local OS password?
When the local user account password is changed, this usually occurs when a user uses ‘passwd’ command to change their local user password. When this is done this causes a mismatch between the current credentials and the credentials stored for SSO login. To update the SSO login credentials:
Reboot the client machine
Login at pre-boot
At the OS login screen, click on the user
The system will attempt to SSO but will fail due to the mismatching credentials
Once it fails to SSO, simply login manually with the new user password
Once logged in successfully to the OS, this will update the SSO login credentials with the new credentials.
On the next reboot and login, the system should be able to SSO successfully
What if the password for logging in at preboot is changed?
If the user KF password used to login at preboot is changed, this will only affect the login at preboot. The SSO login is not affected and will still work after logging in at preboot with the new password.
Can I enable SSO on an existing SDLinux deployed system?
Yes, you can enable SSO on an existing Linux client by updating the profile from the SES server.
To enable SSO on an existing system.
On the SES Server, go to the profiles tab and create an SDLinux profile with SSO enabled (See Step 1)
Navigate to Folders > Devices, and right click on the target device you wish to enable SSO on.
Select ‘Assign device profile to devices’ from the context menu
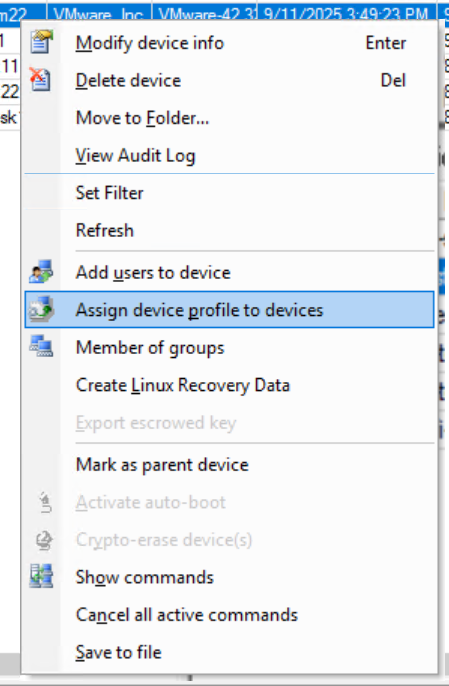
Once assigned, go to your client machine next and force communicate it to your SES server
On the client, open terminal
Run the command: /usr/local/WinMagic/secdoc-cli.py -c
(Optional) Back on SES, if you right click on the device and select the option ‘Show Commands’ it should show an Executed status on the ‘Import profile’ command

Once client has received the profile update from SES, you will need to go through the SSO activation on the client side.
Reboot client machine
Login at preboot
Login at OS with current password (to securely store credentials for SSO login)
Once activation is completed SSO will now work moving forward

11-80 Galaxy Blvd., Mississauga ON M9W 4Y8
Tel: (905) 502-7000 | Fax: (905) 502-7001
Web: www.winmagic.com | Email: [email protected]
WinMagic provides the world’s most secure, manageable and easy-to–use data encryption solutions. Compatible with all editions of Microsoft Windows Vista, 7, and 10 as well as Mac and Linux platforms, WinMagic’s SecureDoc protects sensitive data stored on portable media such as laptops and removable media including USB thumb drives and CD/DVDs. Thousands of the most security conscious enterprises and government organizations around the world depend on SecureDoc to minimize business risks, meet privacy and regulatory compliance requirements, and protect valuable information assets against unauthorized access. With a full complement of professional and customer services, WinMagic supports over three million SecureDoc users in approximately 43 countries. For more information, please visit www.winmagic.com, call 1-888-879-5879 or e-mail us at [email protected].
SecureDoc, SecureDoc Enterprise Server, Compartmental SecureDoc, SecureDoc PDA, SecureDoc Personal Edition, SecureDoc RME, SecureDoc Removable Media Encryption, MySecureDoc, MySecureDoc Personal Edition Plus, MySecureDoc Media, and SecureDoc Central Database are trademarks of WinMagic Inc. Other products mentioned here in may be trademarks and / or registered trademarks of their respective owner.
© Copyright 2026 WinMagic Inc. All rights reserved. This document is for informational purpose only. WinMagic Inc. makes NO WARRANTIES, expressed or implied, in this document. All specification stated herein are subject to change without notice.