Resizing/Shrinking the root partition to allocate free space for SDLinux deployment
Warning: Resizing/Shrinking a root partition in Linux carries significant risks of data loss and could render your system unbootable if not done correctly or if some failure occurs due to unforeseen circumstances. It is highly recommended to back-up your data before starting the process below
I. Scope
The methods described on this document should only be used if:
- The system has no free unallocated. Running the following command to check for free unallocated space:

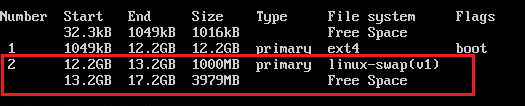
- The system has no physical swap partition available. This does not include swap files, it has to be a separate partition (applies to swap partitions inside an LVM)
- The system has no existing separate boot partition. If the system only has “/boot/efi” or “/” partitions.
Example:

- The system can no longer have any additional disk attached. As an option, an additional disks may be attached to a system in order to satisfy the unallocated free space requirement.
II. Resizing/Shrinking Method
There are two methods you can use to shrink your root partition and allocate free space for your SDLinux deployment.
- Automated method - using custom script
- Manual method – using a Live Ubuntu USB
III. Automatically Resize/Shrink root partition with custom script
- Download and copy the script to the Ubuntu linux client or open terminal and run:
wget https://wmcustomimgs.s3.us-east-1.amazonaws.com/wmresize.tar.gz
- Extract the package:
tar xvf wmresize.tar.gz
- Navigate to the extracted wmresize folder.
- Take note of your existing root partition and current free space (example: parted /dev/sda print free)
- Run the script:
sudo ./wm_resizefs.sh
- After some time the client should automatically reboot
- On Start-up, automatic partitioning should start
- Verify that:
- Automated partitioning is able to complete
- System is able to boot back to the OS after partitioning
- Check root partition size has been shrunk
- Check that there is more free space now available (approx ~1G or more)
- Install SDLinux on client machine and ensure deployment is successful
IV. Manually Resize/Shrink root partition with Live USB
Preparing a Live Ubuntu USB
Requirements
- USB stick: at least 8 GB recommended
- Ubuntu ISO file: https://releases.ubuntu.com/
- Utility/Tool to create bootable USB: Rufus
Creating Bootable USB with Rufus
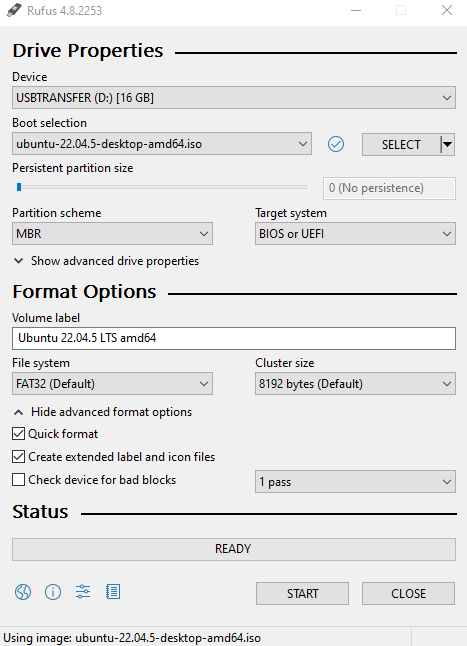
- Insert the target USB and launch Rufus
- Configure Rufus:
- Device: Select the USB stick
- Boot selection: click on “Select” and choose the Ubuntu ISO
- Partition scheme: choose
- MBR for legacy BIOS
- GPT for UEFI (recommended for modern systems)
- File system: Leave default (FAT32)
- Click START, when prompted keep selection at Recommended and click OK
Booting to the Live USB
- Insert the Live USB to your Linux system and reboot
- On start-up enter the Boot Menu: On Dell and Lenovo systems this is done by pressing F12 key repeatedly on start-up (keys may vary depending on the manufacturer and device model)
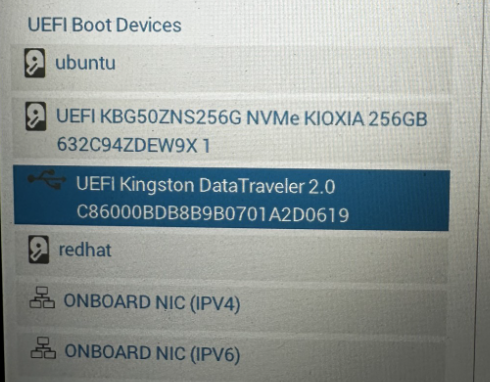
- Select the Live USB from the Boot menu
Example:
- Once booted to the USB, select “Try Ubuntu”
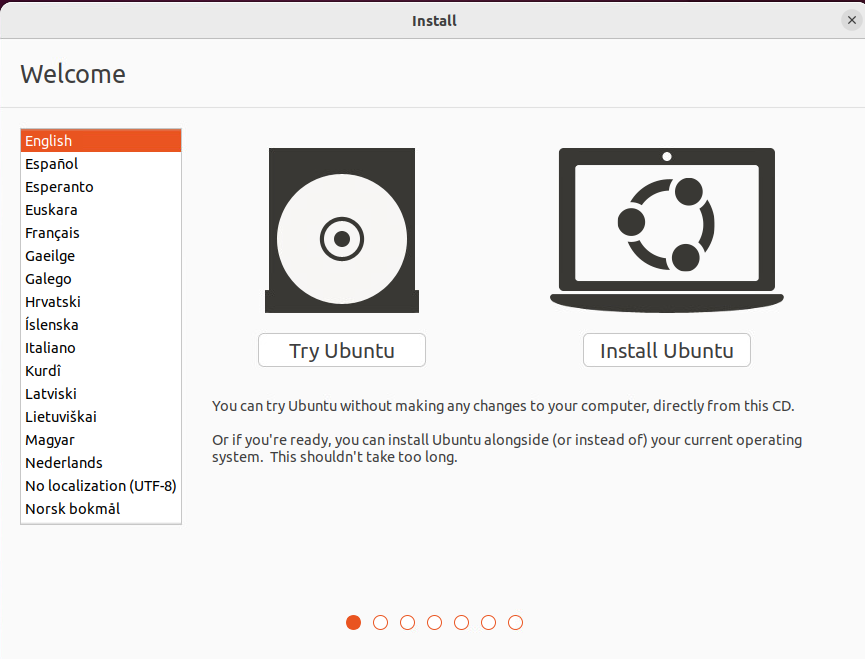
- This should bring you to the Ubuntu live OS
Resizing/Shrinking the root partition
There are two ways you can resize/shrink partitions:
- Resizing with a graphical user interface tool like GParted
- Resizing with command line
Resizing using the GParted Tool
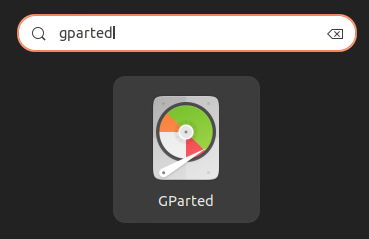
- Launch the GParted tool (You click on ‘Show Applications’ and search for the tool like below as well to find it).
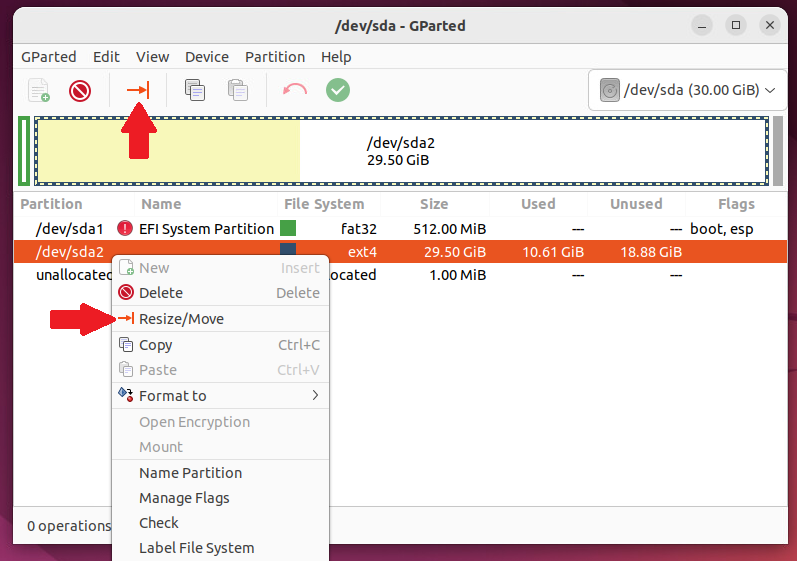
- Select the root partition for the interface and click on the Resize/Move button (Or you can also right click on it and select “Resize/Move” from the context menu)
On the example below, the root partition is /dev/sda2.
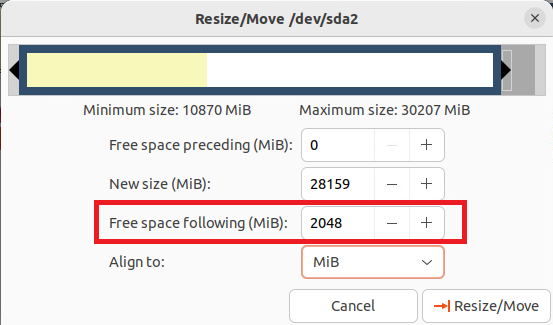
- On the Resize/Move window, under “Free space following (MiB)” enter the amount of free space you would like to set-up at the end of the disk.
On the example below, we are setting 2048 MB (2GB) of free unallocated space at the end of the disk. The minimum size recommended for SDLinux installation is at least 1024MB (1GB)
- Once the size has been set, click on Resize/Move button
- Back to the main screen, you should now see root partition size decreased and the unallocated space at the end of the disk.
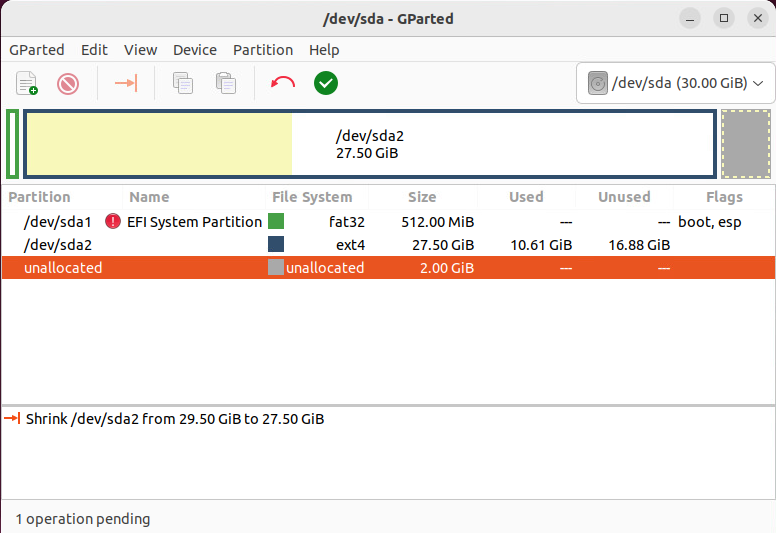
- Once you are satisfied with the changes, click on the check icon/button at the top to confirm and apply the changes. Click Apply when prompted to confirm.
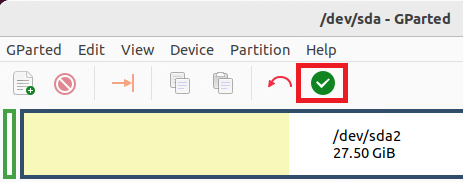
- Click Close, once all operations have completed
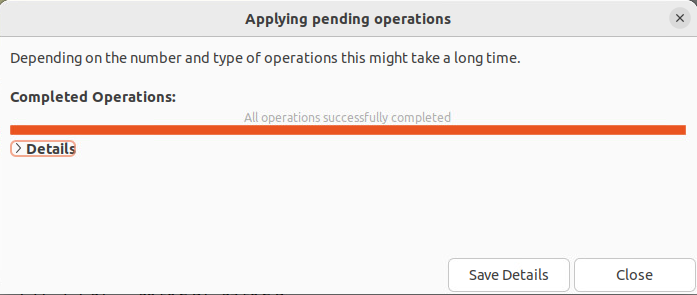
- Reboot the system and make sure to unplug the Live USB on start-up
Resizing with command line
- Open Terminal (You can click on ‘Show Applications’ and search for Terminal to find it).
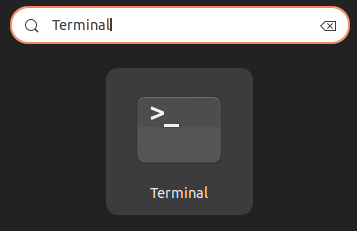
- Run lsblk command to identify the disk name.
On the example below the disk is called sda (On devices with NVMe drives this would be nvme0n1).
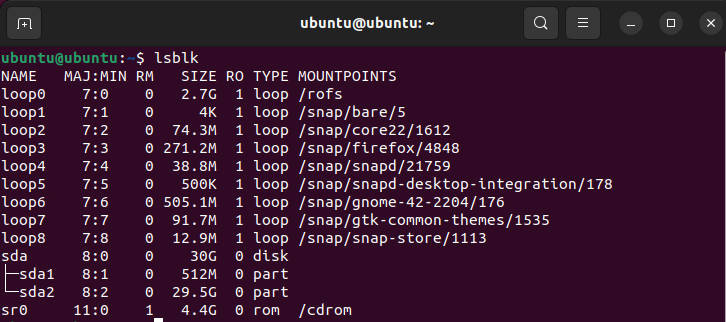
- Run the command below to start the GNU Parted tool
sudo parted /dev/sda
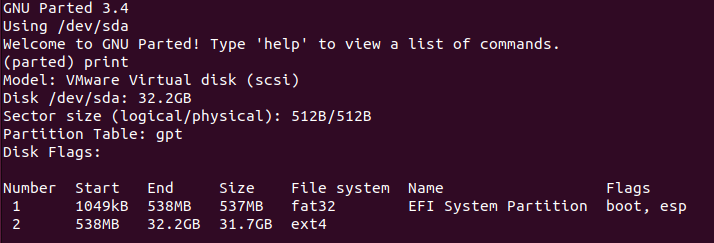
- On the Parted tool type ‘print’ and press enter
- The result should display the partition info on the disk. Take note of the partition number of the root partition to resize
On the example below, the root partition number is ‘2‘
- Run the command below to resize the partition:
resizepart <partition_number> <size>
Example:
resizepart 2 29GB
- When prompted if you are sure to continue, type ‘Yes’ and press enter

- Type ‘quit’ and press enter to exit out of the GNU Parted tool.
- Reboot the system and make sure to unplug the Live USB on start-up