SDLinux - Collecting preboot logs on a VM by using an attached disk
Step 1: Attach a second disk to VM
Add or attach a new virtual hard disk on the VM (the disk can be as small as 1G)
Login to the OS, open terminal and prep/format the disk for use (example):
parted -s /dev/sdb mklabel msdos
parted -a opt /dev/sdb mkpart primary xfs 0% 100%
mkfs.xfs /dev/sdb1
Step2: Mount the disk at pre-mount
Reboot client machine
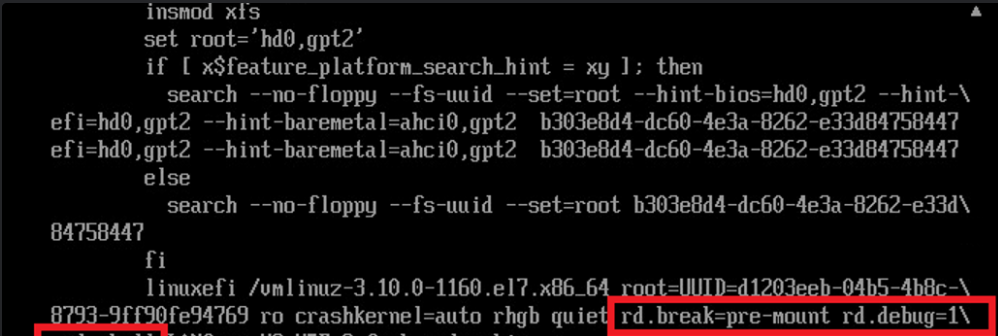
At start-up press 'e' at the grub menu and add the following parameters in the kernel command line: “rd.break=pre-mount rd.debug=1“ (see example below)
Press ctrl-x to continue
Once it drops to pre-mount shell, mount the disk to /mnt
mkdir /mnt
mount /dev/sdb1 /mnt
check and confirm drive is mounted with ‘lsblk’ command

type 'exit' and press enter to exit out of shell and bring you back to preboot
At preboot, press F7 to collect support logs
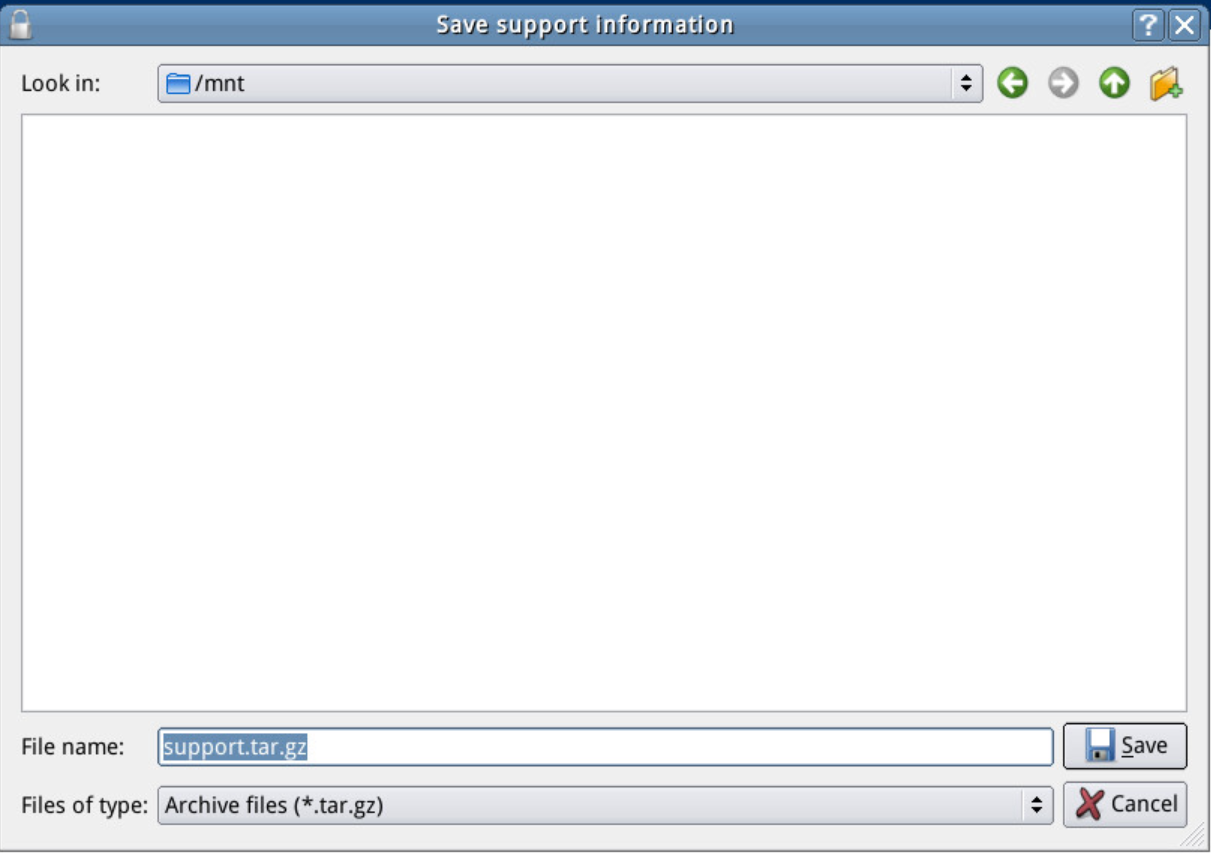
This should allow them to save the support logs at /mnt
Step3: Login to OS and grab the logs
After saving the preboot logs, login at preboot manually
Login to the OS and open terminal
Mount /dev/sdb1 again and grab the preboot logs saved there