SecureDoc 9.2 Guide
Upgrading the SecureDoc Server
All SecureDoc Versions
©Copyright 1997 - 2026 by WinMagic Inc. All rights reserved.
Printed in Canada
Many products, software and technologies are subject to export control for both Canada and the United States of America. WinMagic advises all customers that they are responsible for familiarizing themselves with these regulations. Exports and re-exports of WinMagic Inc. products are subject to Canadian and US export controls administered by the Canadian Border Services Agency (CBSA) and the Commerce Department’s Bureau of Industry and Security (BIS). For more information, visit WinMagic’s web site or the web site of the appropriate agency.
WinMagic, SecureDoc, SecureDoc Enterprise Server, Compartmental SecureDoc, SecureDoc PDA,
SecureDoc Personal Edition, SecureDoc RME, SecureDoc Removable Media Encryption, SecureDoc
Media Viewer, SecureDoc Express, SecureDoc for Mac, MySecureDoc, MySecureDoc Personal Edition Plus, MySecureDoc Media, PBConnex, SecureDoc Central Database, and SecureDoc Cloud Lite are trademarks and registered trademarks of WinMagic Inc., registered in the US and other countries. All other registered and unregistered trademarks herein are the sole property of their respective owners.
© 2026 WinMagic Inc. All rights reserved.
Acknowledgements
This product includes cryptographic software written by Antoon Bosselaers, Hans Dobbertin, Bart Preneel, Eric Young ([email protected]) and Joan Daemen and Vincent Rijmen, creators of the Rijndael AES algorithm.
This product includes software developed by the OpenSSL Project for use in the OpenSSL Toolkit (http://www.OpenSSL.org/).
WinMagic would like to thank these developers for their software contributions.
Contacting WinMagic
WinMagic 11-80 Galaxy Blvd. Toronto, Ontario, M9W 4Y8 Toll free: 1-888-879-5879 Phone: (905) 502-7000 Fax: (905) 502-7001 | Sales: [email protected] Marketing: [email protected] Human Resources: [email protected] Technical Support: [email protected] For information: [email protected] For billing inquiries: [email protected] |
Table of Contents
SecureDoc Enterprise Server (SES) Phased Upgrade and Rollback Plan 4
SES Upgrade Project Checklist 5
Server-Side Upgrade: Phases 1–4 6
Phase 1: Pre-Upgrade Preparation and Testing (The Upgrade and Test Project) 6
Phase 2: Production Readiness and Safety Net 7
Phase 3: Production Upgrade Execution 8
Phase 4: Post-Upgrade Validation, Monitoring, and Rollback 8
Client-Side Upgrade: Phase 5 and Final Validation 9
Phase 5: Phased Endpoint Rollout 9
Post-Client Upgrade Validation (Per Phase) 9
How to Upgrade the SecureDoc Enterprise Server, Step by Step: 10
SecureDoc Enterprise Server (SES) Phased Upgrade and Rollback Plan
A successful SecureDoc Enterprise Server (SES) upgrade requires careful planning and execution. This guide outlines a methodical, phased process to lead your team through the necessary steps. We strongly recommend following this procedure to ensure a safe and successful outcome because testing eliminates uncertainty and verified backups enable quick recovery.
Pre-production testing in a test lab environment is essential for verifying the upgrade's compatibility with client configurations, communication integrity, and existing security policies. This step facilitates procedural refinement and the documentation of a controlled, predictable upgrade path, thereby minimizing operational risk. The subsequent creation of a full, verified backup image serves as the primary assurance mechanism. This image is the critical component of the established rollback procedure, guaranteeing the capability to restore the system to its pre-upgrade state following any catastrophic event.
SecureDoc Release Notes
Before you upgrade, read the release notes for every version between your current version and the version you are upgrading to. They list the fixes, known issues and changes that may affect the upgrade.
8.6: 8.6 · 8.6 HF1 · 8.6 SR1 · 8.6 SR1 HF2 · 8.6 SR1 HF4
9.0: 9.0 · 9.0 SR1 · 9.0 SR2 · 9.0 SR3 · 9.0 SR4 · 9.0 SR4 HF1
9.1: 9.1 · 9.1 HF3 · 9.1 SR1 HF2 · 9.1 SR1 HF3
9.2: 9.2 · 9.2 HF3 · 9.2 SR1 · 9.2 SR1 HF1 · 9.2 SR1 HF2
SES Upgrade Project Checklist
Use the following checklist to track all required activities across the phases of the upgrade process.
Phase | Activity | Target System | Status | Notes |
Phase 1: Pre-Upgrade Testing | Environment Staging: Build a production-mirroring test environment and replicate the SecureDoc database. Isolate the lab and point its profile settings at the lab server’s FQDN/IP so test clients can’t reach production. | Server | ||
Pre-Upgrade Benchmark: Collect all required performance metrics. | Server/Client | |||
Upgrade Dry Run: Execute and document the full upgrade procedure in the lab. | Server | |||
Post-Upgrade Endpoint Testing (Lab): Complete all endpoint tests (Policy/Auth/Encryption) in the lab. | Client | |||
Phase 2: Production Readiness | Communication: Notify all IT stakeholders of the scheduled maintenance window. Include what users and the help desk will see while SDConnex is down. | Server | ||
Prerequisites Verified: Confirm SQL roles (Quick Deployment Guide 9.2, Appendix B), Full-Text Search feature, and local admin rights. | Server | |||
License Validation: For upgrades from SES 6.5 SR3 or earlier, run the License Validation Tool and request a new license file. | Server | |||
Shutdown Services: Stop SDConnex, ADSync and Analytics Engine on all servers, stop the SESWeb site in IIS, and close the Console. | Server | |||
Master Key File Backup: Back up the master key file and store its password securely. | Server | |||
Database Backup: Complete a Full backup of the SecureDoc database using SSMS. | Server | |||
Full System Backup: Take either a VM snapshot or a bare-metal image backup of the SES server. | Server | |||
Phase 3: Server Upgrade Execution | Confirm Services Stopped: Confirm the services and the SESWeb site stopped in Phase 2 are still stopped on all primary and secondary servers. | Server | ||
Run Installer & Upgrade DB: Execute the SES installer, selecting the SESWeb option, then log in to the Console with the master key file to back up and upgrade the database. | Server | |||
Upgrade Remaining Servers: Run the appropriate installers on all SDConnex servers first, then DMZ servers, then any SESWeb servers that run separately or in an HA setup. Start Services: Configure and start services in order: SDConnex, ADSync, then Analytics Engine. | Server | |||
Phase 4: Validation & Monitoring | Server/Targeted Testing: Perform core server checks, pilot client check-ins, and a challenge-response recovery test on a pilot device. | Server/Client | ||
Endpoint Validation (Server Only): Confirm pilot clients communicate successfully and apply policies from the upgraded SES server. | Client | |||
Extended Monitoring: Monitor logs, server resources, and help desk channels for 24-48 hours. | Server | |||
Rollback Readiness: Set a go/no-go point; after it, fix forward. Before any rollback, take a fresh SQL backup of the upgraded database. | Server | |||
Phase 5: Client Upgrade & Final Validation | Phased Endpoint Rollout: Begin deployment of the new client version following the organization's schedule. | Client | ||
Post-Client Upgrade Validation: Confirm client status, successful login, and functionality after the client install. | Client |
Server-Side Upgrade: Phases 1–4
The Server-Side upgrade encompasses all preparation, execution, validation, and recovery steps that focus on the SecureDoc Enterprise Server itself and its associated services.
Phase 1: Pre-Upgrade Preparation and Testing (The Upgrade and Test Project)
The process begins by replicating the production environment in an isolated lab to eliminate risk.
Environment Staging: Build a dedicated test environment that precisely mirrors the production server, including the operating system and resources. Replicate the production SecureDoc database onto a separate SQL instance for testing with realistic data. Because this copy holds production keys, keep the lab isolated from production. Update the server FQDN and/or IP in the lab’s profile settings so test machines can’t communicate with the production server, and destroy the copy when testing is complete.
Pre-Upgrade Benchmark Client and Server: Before proceeding with the upgrade, it's important to document the actively used features and their current performance. This will help you assess post-upgrade results and ensure that all critical functionalities continue to operate as expected. The examples provided below can serve as a guide, though they may vary depending on your organization's profile settings. After the upgrade, compare the documented features with your updated production environment to confirm that everything is functioning as it did prior to the upgrade.
Examples of Actively Used Features to Validate Pre- and Post-Upgrade:
Internal and external client communication workflows (SDConnex communication)
Challenge-response functionality for password recovery
Pre-boot login performance (e.g., time taken for the pre-boot screen to load and authenticate successfully)
Profile deployment updates (e.g., time required to push a new profile to a test client)
User provisioning in Active Directory (e.g., adding new users)
Password management operations (e.g., changing user passwords)
Phase 2: Production Readiness and Safety Net
After successful lab testing, preparation focuses on establishing the critical safety net for the production environment.
Prerequisites: You must verify vital technical requirements:
The account performing the upgrade needs these SQL roles: db_owner, dbcreator (server role), db_ddladmin, SD_admin, SD_user and public. For day-to-day operation the minimum is db_datareader, db_datawriter, db_ddladmin, SD_admin, SD_user and public (Quick Deployment Guide 9.2, Appendix B; KB 1449). Validate these rights before and after the upgrade.
The Full-Text Search SQL feature must be active in SQL Server.
The user performing the upgrade needs local administrator rights to the Windows server and SQL Server administrative rights.
Supported platforms: Windows Server 2025 and SQL Server 2022 are recommended, because earlier versions are out of support or in extended support. Windows Server 2016 or later and SQL Server 2016 or later remain supported (all 64-bit, with the latest critical updates; SQL Server includes the free Express edition). Minimum 4 GB RAM (8 GB or more recommended), 50 GB free disk space and a 2.2 GHz 64-bit processor (WinMagic System Requirements page).
License: If upgrading from SES 6.5 SR3 or earlier, complete the License Validation Check (see the step-by-step section) before the maintenance window. A new license file must be requested, so allow time for it.
Communication: Tell users and the help desk what to expect. During the window, sign-in keeps working with the cached Key File on each device, but anything that needs the server waits until SDConnex is back, including profile updates, password propagation and sync, and remote commands. Freeze provisioning and new client installs from the backup until the go/no-go decision in Phase 4.
System & Database Backup (Critical Path): The most vital safety measure is performing a full system and database backup.
Shut Down Services: Stop the SDConnex, ADSync and SecureDoc Analytics Engine services on all servers, stop the SESWeb site in IIS, and close the Console. The maintenance window starts here.
Master Key File Backup: Back up the master key file and store its password securely.
Database Backup: With all services stopped, use SQL Server Management Studio (SSMS) to execute a Full backup of the SecureDoc database.
Full System Backup: Choose one method: VM Snapshot for virtual machines or a Bare-Metal Image Backup for physical servers. If SQL Server runs on a separate server, the snapshot or image of the SES server doesn’t include the database; the SQL database backup is what you restore.
Phase 3: Production Upgrade Execution
Confirm Services Stopped: Confirm the services and the SESWeb site stopped in Phase 2 are still stopped on all servers.
Run Installer: Log onto the primary server with administrator privileges and run the new version SES installer.
Install Options: Select the option to install SESWeb. After the reboot, log in to the Console with the master key file; it prompts you to back up and upgrade the database.
Upgrade Remaining Servers (If required): Upgrade all remaining servers by running the appropriate installer on the SDConnex servers first, then the DMZ servers, and on any SESWeb servers that run separately or in a high-availability (HA) setup. See Upgrading Additional Servers in the step-by-step section.
Start Services: Configure and start all services in this sequence: the SDConnex servers, then ADSync, and finally the Analytics Engine.
Phase 4: Post-Upgrade Validation, Monitoring, and Rollback
Post-upgrade activities center on immediate system validation and extended monitoring.
Server/Targeted Testing: Confirm all SecureDoc services are running and that the primary administrator can log in to the console. Perform core checks, including users and key lookup and simple report generation. Run a challenge-response recovery on one pilot device from the upgraded help-desk console. The response is calculated from the keys in the SES database, so a successful run confirms they survived the schema upgrade.
Endpoint Validation (Server Only): Perform thorough checks on a small, controlled group of pilot production clients still running the old client version. This verifies the upgraded server is backwards-compatible:
Client Communication: Manually force a check-in from pilot clients and verify their last communication time updates in the console.
Policy Integrity: Review the status of the pilot clients to ensure they show compliance with existing policies pushed from the upgraded server.
Extended Monitoring: Perform extended monitoring for 24–48 hours, observing CPU/RAM, checking help desk reports, and reviewing logs for emerging issues.
Go/No-Go: Set a go/no-go point at the end of extended monitoring. After it, fix forward rather than roll back. Once Phase 5 starts, rolling the server back is no longer a simple option.
Rollback Plan: If validation tests fail or widespread communication issues last more than 30 minutes, activate the rollback:
Before any rollback: Take a fresh SQL backup of the upgraded database. Keys, audit entries, new devices and password changes written since the pre-upgrade backup are lost when you restore; this backup keeps them for recovery.
Virtual Machine: Shut down the VM and revert to the pre-upgrade snapshot. If SQL Server runs on a separate server, also restore the pre-upgrade SQL backup.
Physical Server Recovery Options: Either (a) boot from recovery media, restore the bare-metal image, and restore the pre-upgrade SQL backup; or (b) uninstall SecureDoc and its supporting services, reinstall the previous version, and restore the pre-upgrade SQL backup. The previous version can’t use the upgraded database schema, so every rollback path includes the SQL restore.
Client-Side Upgrade: Phase 5 and Final Validation
This phase begins only after the server upgrade has been fully validated and monitored (Phase 4 is complete).
Phase 5: Phased Endpoint Rollout
The client upgrade is implemented using a phased approach over a period of time, following your organization's recommended procedure. This allows for controlled testing and monitoring before broad deployment.
Post-Client Upgrade Validation (Per Phase)
To ensure a smooth and successful upgrade of client devices, it's essential to follow a structured rollout strategy combined with thorough validation at each phase. The following steps outline a recommended approach to deploying the upgraded SecureDoc client across your organization:
Pilot Group Deployment
Deploy the new client version to a small, diverse pilot group (e.g., 50–100 machines) that represents a range of hardware and operating system configurations. This initial phase helps identify any potential issues before broader deployment.
Staggered Rollout Expansion
Once the pilot group demonstrates stability, gradually expand the deployment to larger segments—starting with 10%, then 25%, followed by 50% of total endpoints. This phased approach should be aligned with your organization's change control schedule and can be spread over several days or weeks. Continue until all remaining endpoints have been successfully upgraded.
Upgrading Endpoints
Begin by running the installer from the upgraded SES server directly on client devices. The upgrade is performed in-place, meaning devices do not require decryption prior to installation. Existing client installation packages are upgraded automatically during and after the SQL schema update; no manual rebuild is needed.
Validation Testing After Each Phase
After completing each rollout phase, conduct validation tests to ensure the upgraded clients are functioning as expected. Key validation steps include:
Post-Upgrade Status: Verify that each client successfully registers with the upgraded SES server and reports the correct client version along with an Encrypted status.
Authentication and Access: Confirm that end-users can authenticate at pre-boot and access the operating system without issues.
Functionality Testing: Validation should be based on your organization's specific policies and operational needs. The items mentioned, such as adding a new user to a device or changing an existing user's password, are provided as examples. Your testing should focus on the core client features that are actively used in your environment to ensure they continue to function properly after the upgrade.
How to Upgrade the SecureDoc Enterprise Server, Step by Step:
This guide will walk through the step-by-step procedure to upgrade the SecureDoc Enterprise Server and all related components. The first section will address upgrading the primary server, and the latter section will address updating additional servers such as dedicated SDConnex and DMZ-Located servers.
Preparation for Upgrade:
In order to prepare for the server upgrade, it is recommended to update all documentation with the SDConnex and ADSync Service settings as well as make any backups necessary of the previous client installation files (as they will be overwritten during the upgrade) Also record the location of the master key file, the SQL connection details, and the account used for database access.
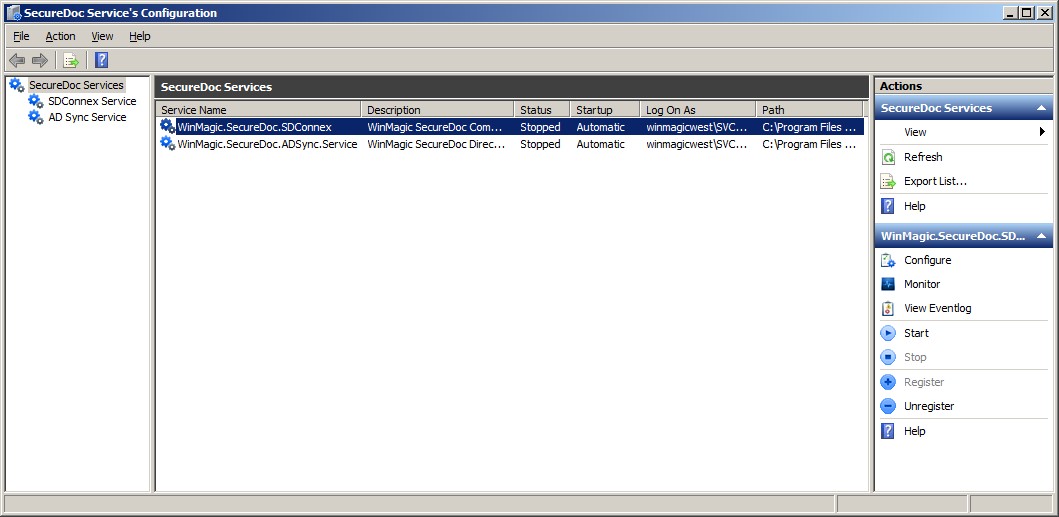
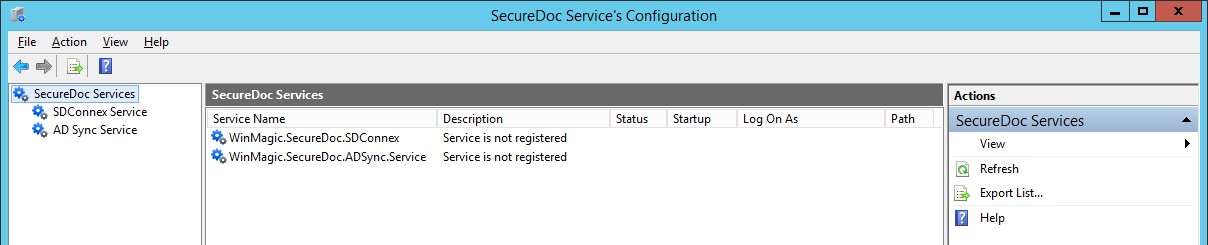
Take Screenshots of the existing SDConnex Settings as shown below:
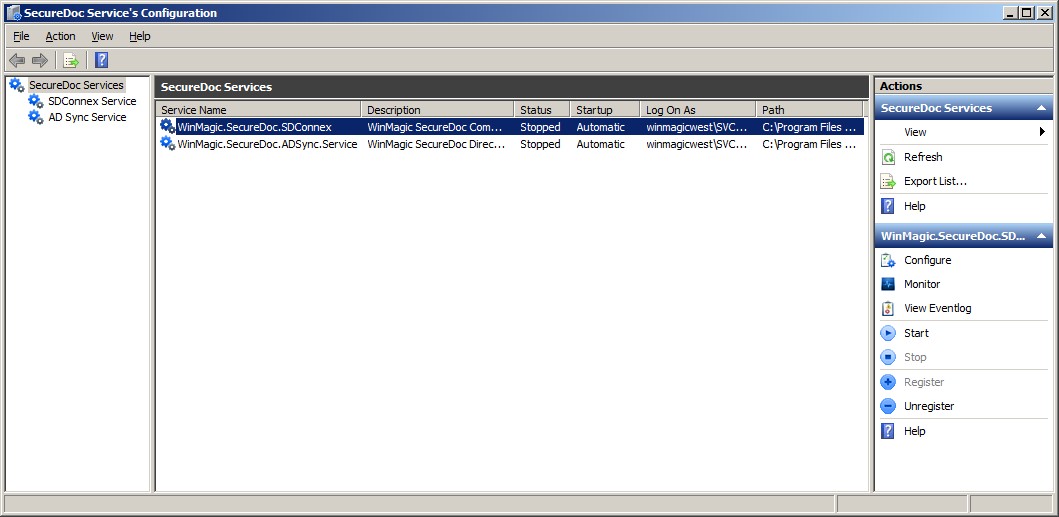
Take Note of the Service Account used to register the services (Under the “Log On As” column)
SDConnex:
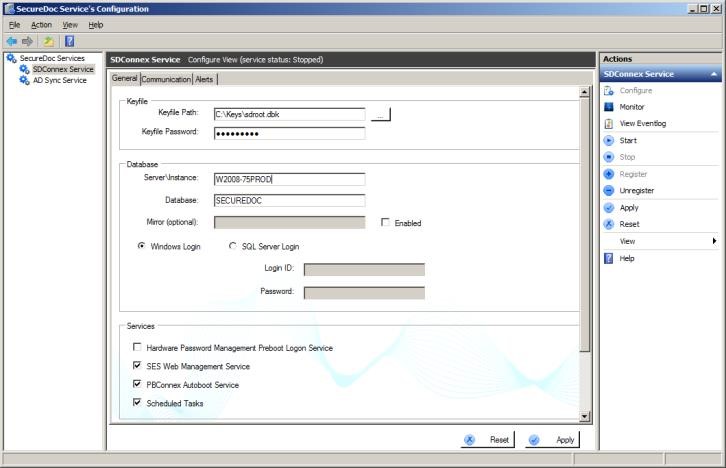
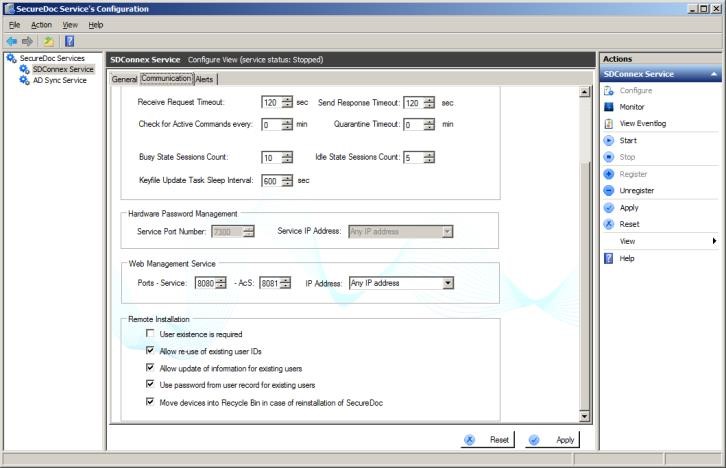
Backup the existing client installation packages (if required by your organization) These can be found under the following path:
%Drive%\Program Files (x86)\WinMagic\SDDB-NT\RemotePackage\%database%\
Where %Drive% is the drive installed to (C: for example) and %database% is your database name
Confirm that you know the password for the master key-file (Root User Account), and back up the key file itself
Open the SES Console and Login with the master (Root) user account and password:
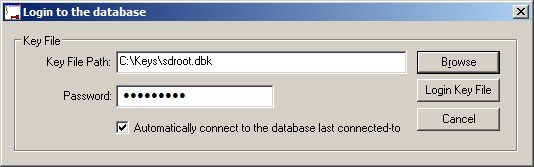
Confirm that you know the password for the AD service account
Sign out of the server and sign back on with the Service Account name and password:

License Validation Check:
If your organization is upgrading from SecureDoc Enterprise Server (SES) version 6.5 SR3 or earlier, it is highly recommended that you run a validation check of your SecureDoc License Key prior to starting the upgrade process. Due to changes made within the licensing methodology, a new license file will need to be obtained to utilize the latest version of SecureDoc.
To download and run the License Validation Tool, please reference the PDF file that was provided by WinMagic Support. This has a download link to obtain the validation tool. You will need to download and run the tool, and it will provide you with a new license key. This license key will need to be used to request a new license file, which can subsequently be loaded into your new SES version, once upgraded.
Performing the Upgrade:
As an overview, the upgrade process will replace the SecureDoc Enterprise Server software and services with the updated version and will require that the SecureDoc Database be upgraded as well. This requires that all the SecureDoc Services (SDConnex, ADSync, Analytics Engine) and the SESWeb site in IIS be stopped, and all connections to the database be disconnected prior to the upgrade. This can be done without uninstalling the prior version (in-place migration). The steps are as follows:
Open the “SecureDoc Services Configuration” screen on all servers running the SDConnex Service
Stop the SDConnex Service on all servers in the environment
Stop the ADSync Service (This should only be running on one server)
Stop the SecureDoc Analytics Engine service, stop the SESWeb site in IIS, and close the Console
If not already done in Phase 2, back up the master key file and the SQL database, and take the VM snapshot or bare-metal image now
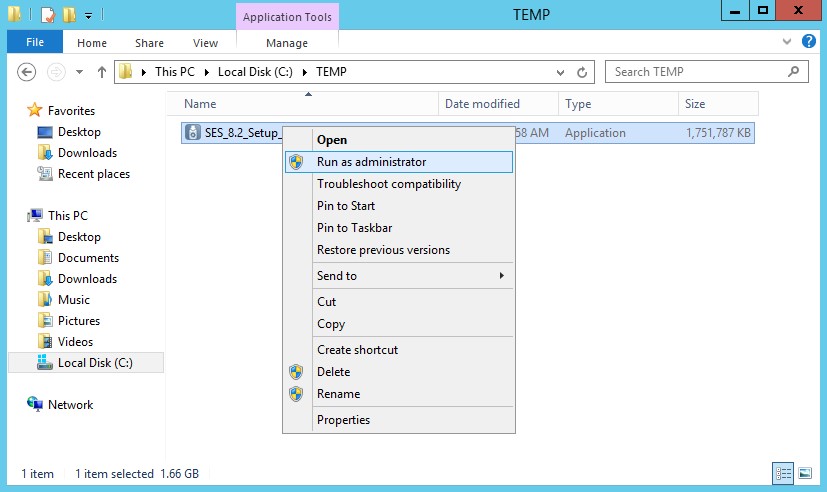
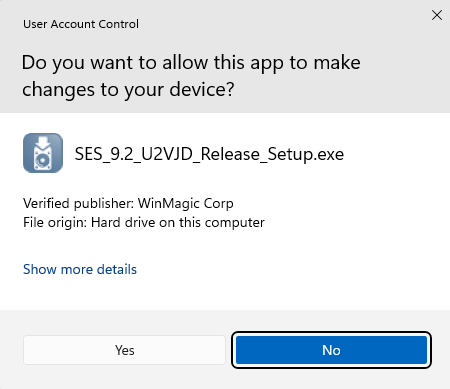
Run the new installer as Administrator
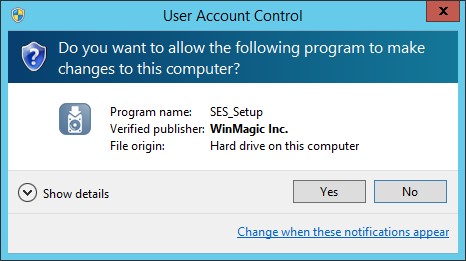
Click Yes:
The Installation will Start:
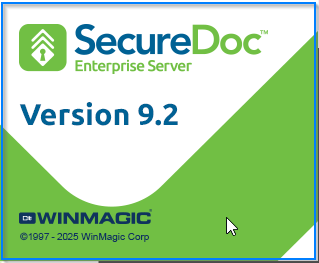
Click yes to continue
Click OK:
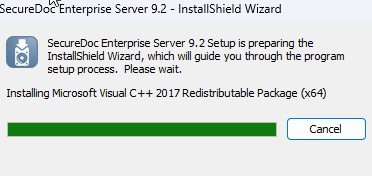
(For More information on the License Validation Tool, please refer to the beginning of this document)
Click Next:
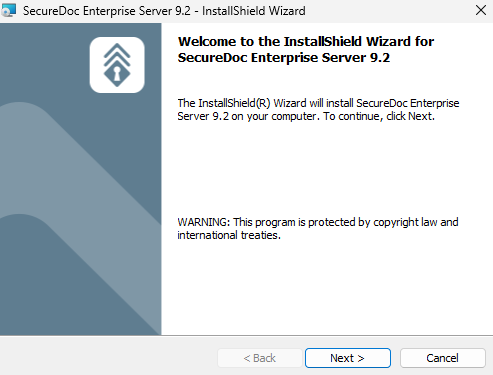
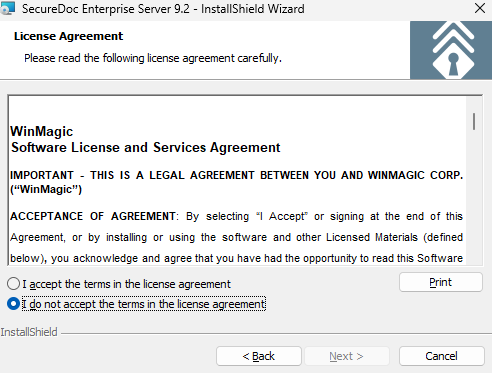
Read and accept the EULA:
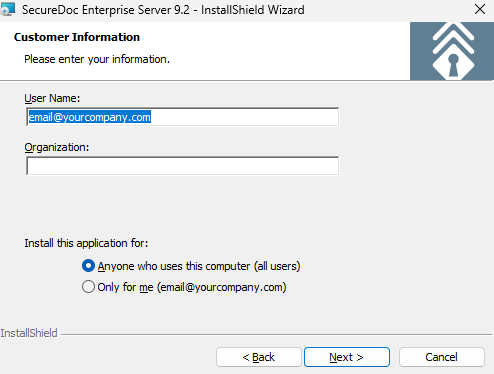
Enter the User Info (Or skip – this is not typically used as it is recommended to install for “Anyone”):
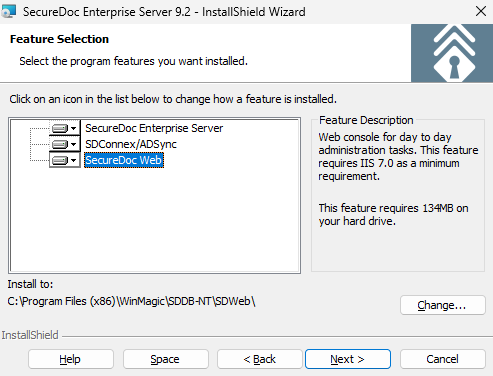
Confirm the Location to install the software to, and click Next:
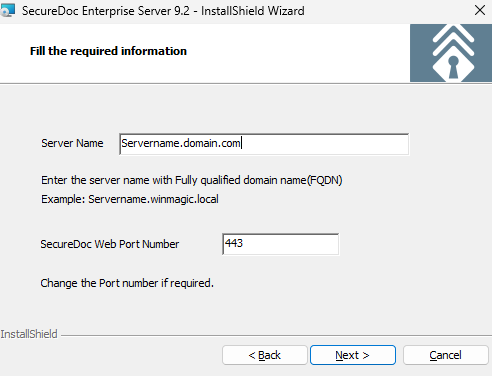
Enter the Fully Qualified Domain Name (FQDN) of your server, enter the port your current server uses (443 by default), and click Next:
Click Install:
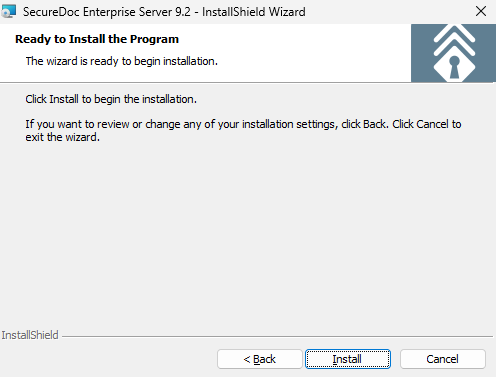
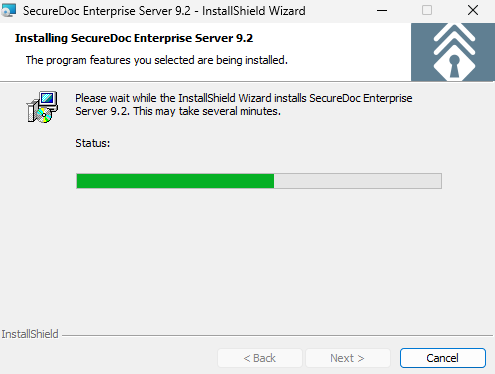
The installation will proceed by installing any necessary pre-requisites:
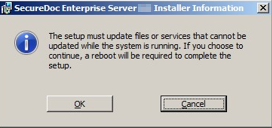
Click OK to accept that a reboot will be required after Setup is completed:
(Depending on your UAC settings, you may or may not see this message) The installation will continue:
Click Finish to complete the installation:
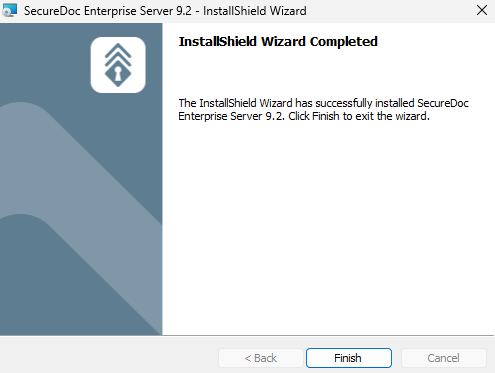
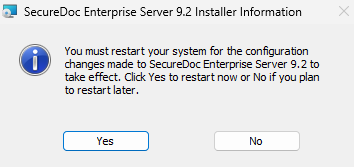
Click Yes to reboot now:
Note:
Once the server has rebooted, please sign back in with the Service Account used to begin the upgrade process. Please verify that the service account has elevated permissions to access the SQL Database. In order to upgrade the database, the account must have the SQL roles listed in Phase 2 (db_owner, dbcreator, db_ddladmin, SD_admin, SD_user and public).
If SQL access errors are encountered during the upgrade, please check the access level with your SQL DBAdmin or contact WinMagic Support for assistance.
Now that the server is upgraded to the latest SecureDoc version, it is necessary to use the master key file (Root SD User) to upgrade the database.
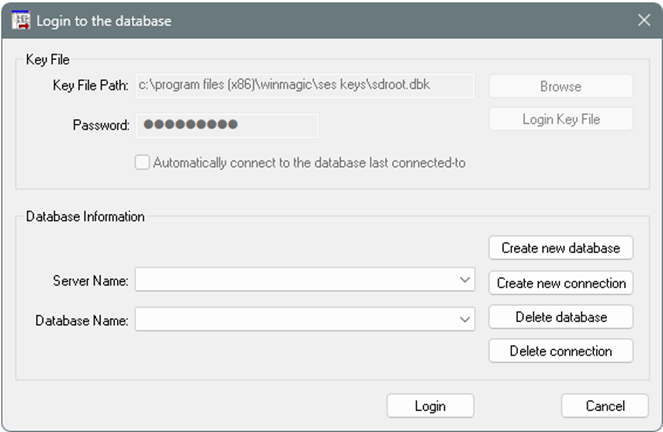
Open the SES console, enter the credentials for the master key file and click “Login Key File”:
|
|
You will be prompted that the database must be upgraded. If the information is correct, click OK:
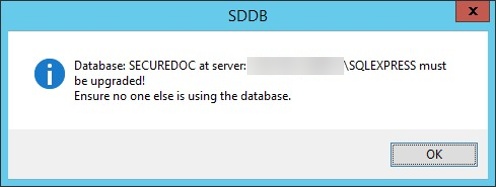
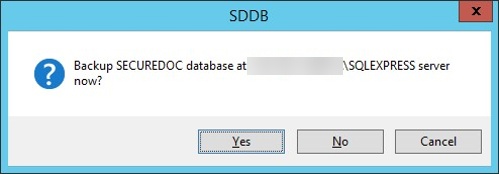
It is highly recommended to permit the upgrade installer to automatically backup the database for you, before the upgrade continues. Click Yes to proceed with this automatic backup, or click No if you have performed a recent backup through other means.
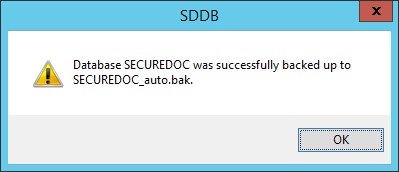
The backup is successful, Click OK:
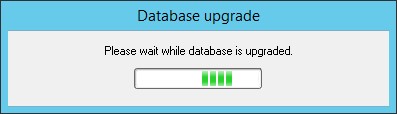
The Database Upgrade Will Proceed:
The Upgrade is successful, click OK:
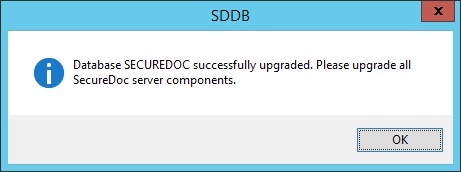
The Console will open, please minimize it for now as we proceed to the next step. 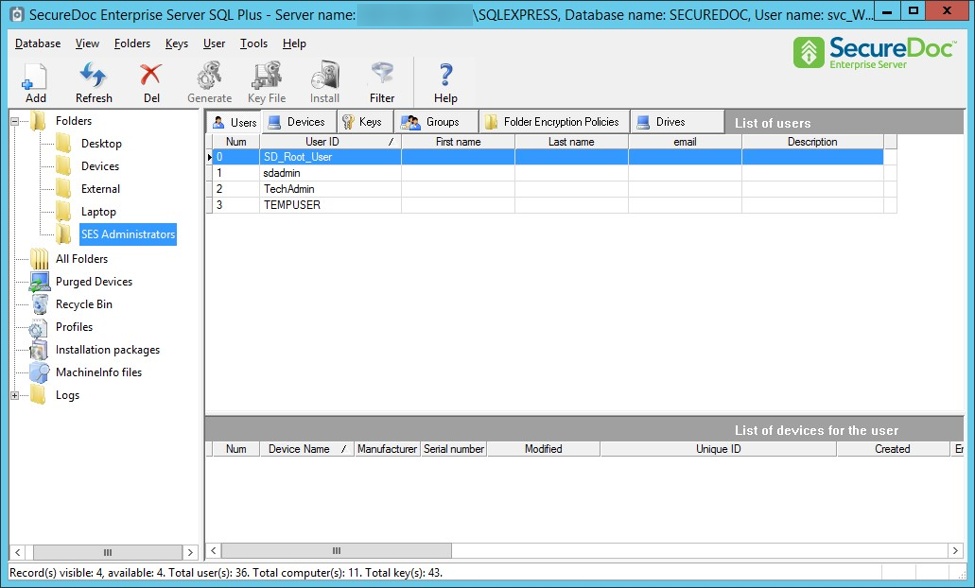
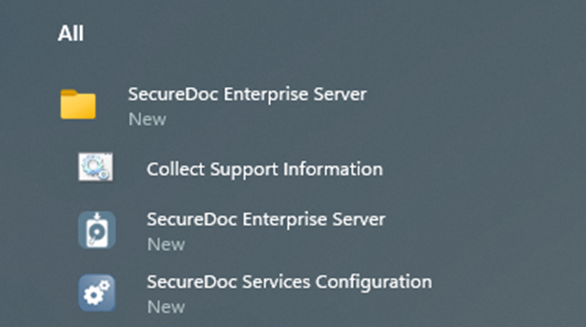
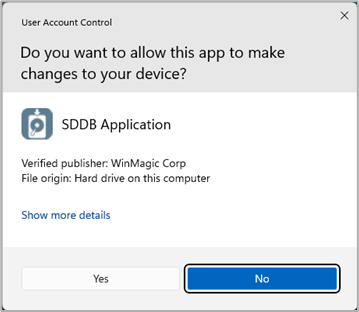
The next step is to register and configure the SecureDoc Services. In order to proceed, please launch the SecureDoc Services Configuration MMC Snap-in: Click Yes:
|
|
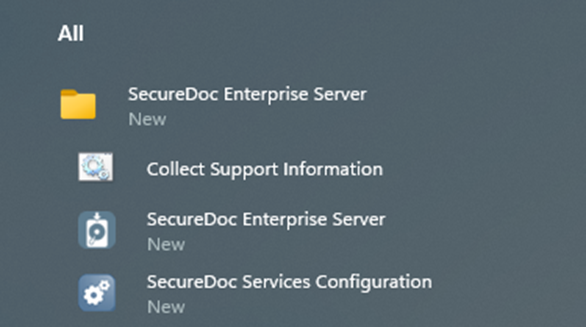
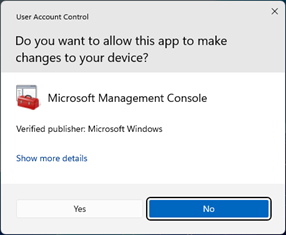
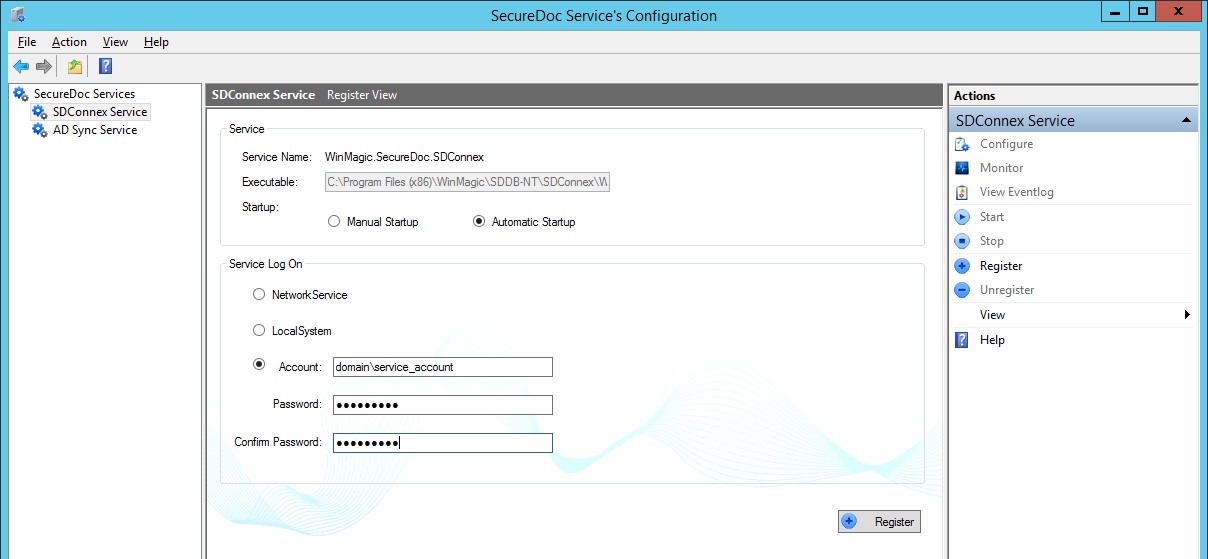
From the Snap-in, select the “SDConnex Service” on the right column to begin:
WinMagic strongly recommends registering the services using the AD Service Account that is used to perform the installation. Refer to your documentation (updated at the beginning of this process) for the registration details:
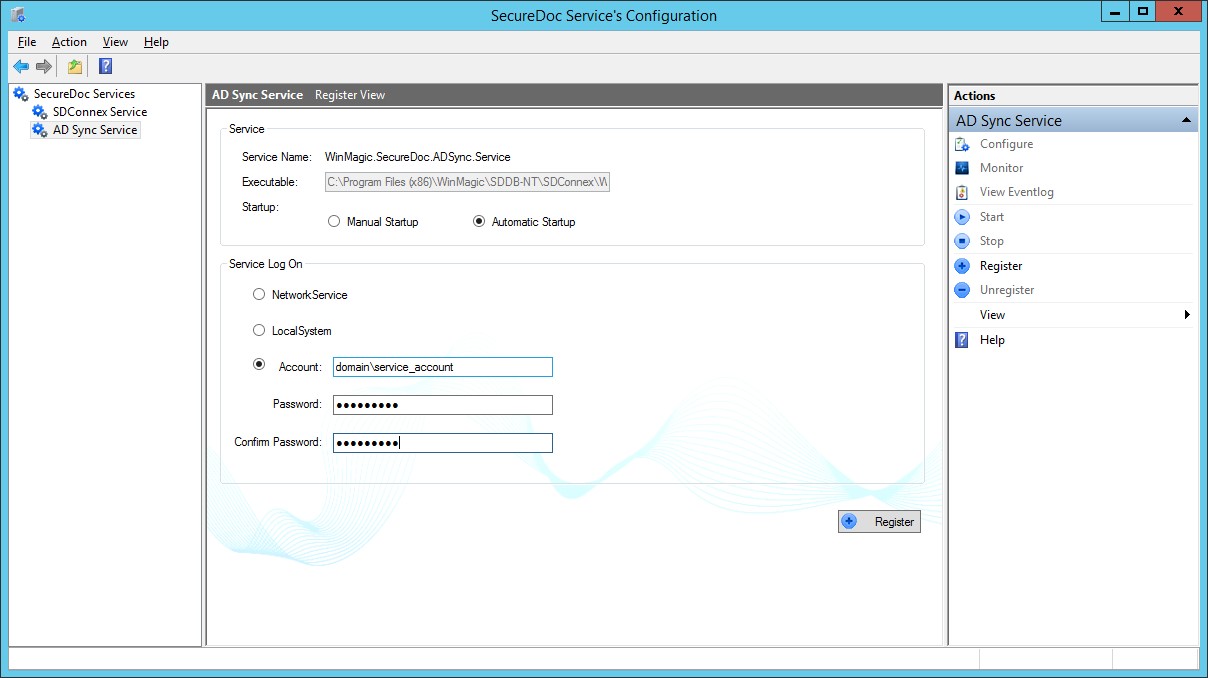
Repeat the registration process for the ADSync Service:
Once the Services are registered, we can proceed to configure and start the services. Refer to your documentation of the service configuration and replicate all configuration settings into the “General”, “Communication”, and “Alerts” tabs, and click “Apply”:
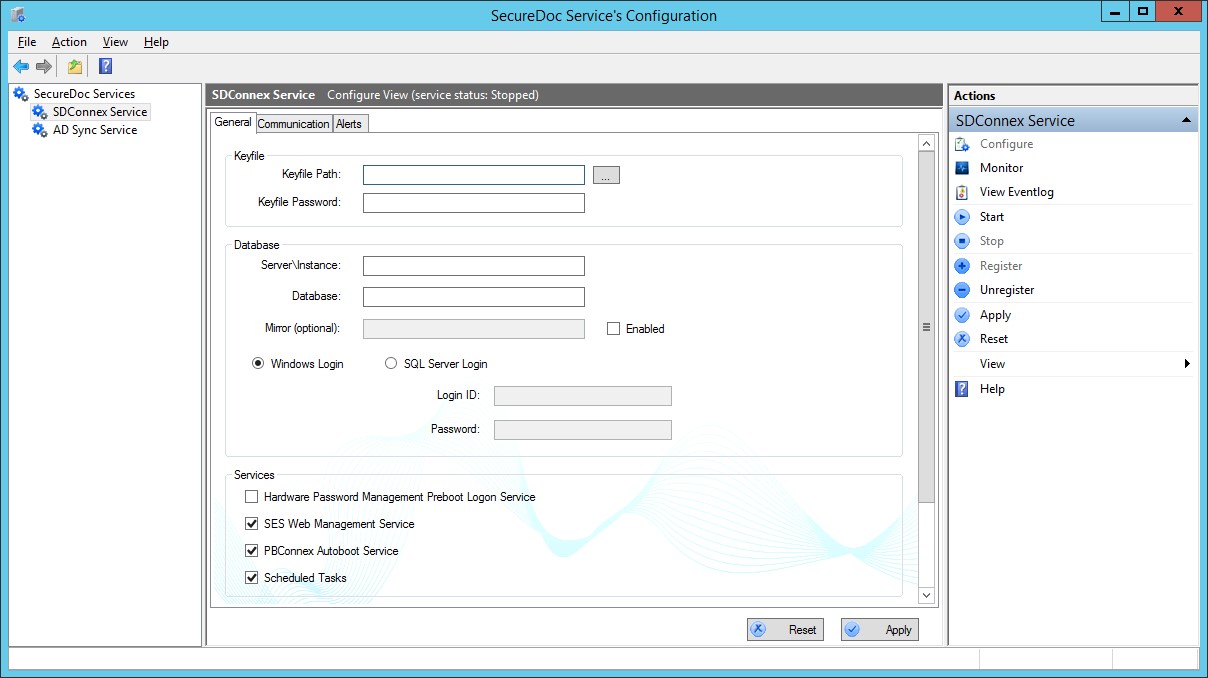
Once all settings have been applied, click “Start” in the right-hand column to start the service.
It is recommended to click “View Eventlog” to check for any database connection errors after starting the service. It is expected to see a “Successful Connection to the Database” message in the event log
Repeat this process for the ADSync Service
Then configure and start the SecureDoc Analytics Engine service the same way.
Next, we need to configure Internet Information Services (IIS) Run IIS from the start menu or search:
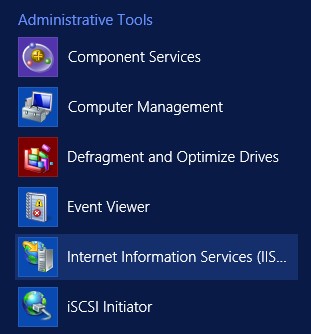
Once IIS is open, expand the server tree on the left column and click on “Application Pools”
From here, right click on the “SecureDoc AppPool” and select “Advanced Settings…” as shown: 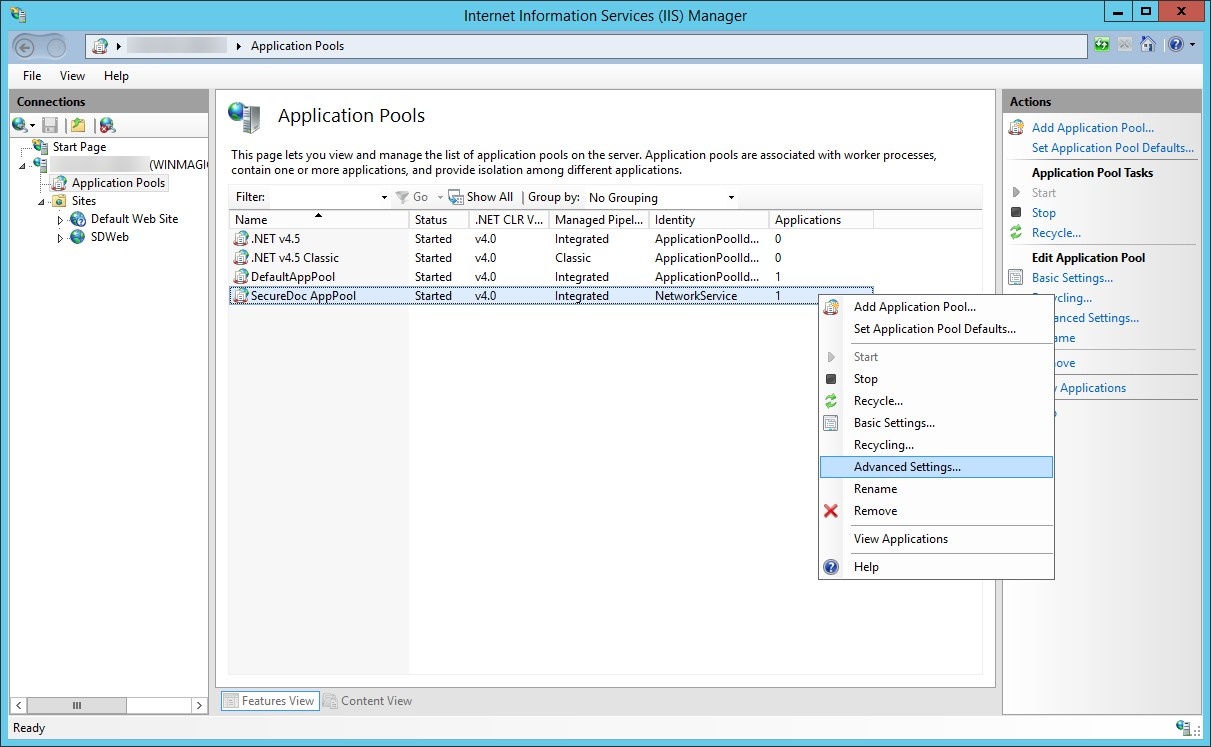
Once in Advanced Settings, set “Load User Profile” to true and for “Identity” (You may need to scroll down) click on the small button to the right with the three dots “…”: 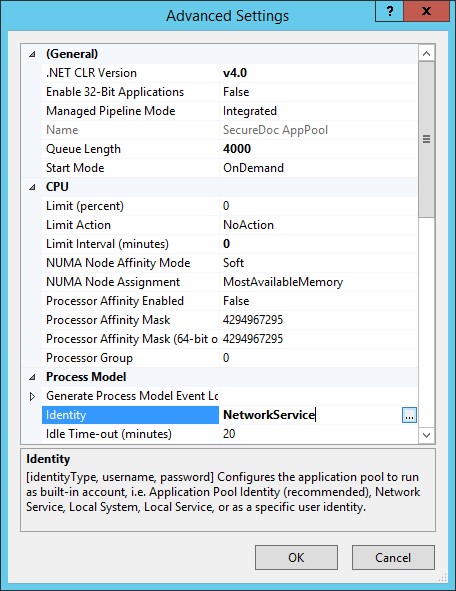
Select the radio button for “Custom account:” and click the “Set…” button:
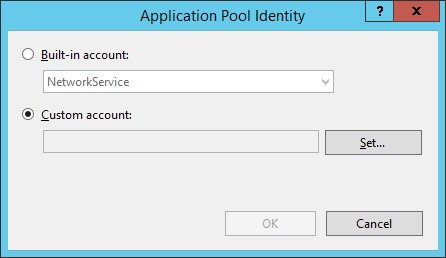
Enter the credentials for your service account (same account used to run SDConnex) and click OK: 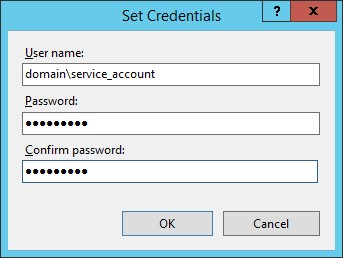
Back in Advanced Settings, set “Load User Profile” to True (under Process Model) before closing the dialog.
Proceed to Click Ok until you are back at the IIS screen. You should see the new account settings reflected in the AppPool:
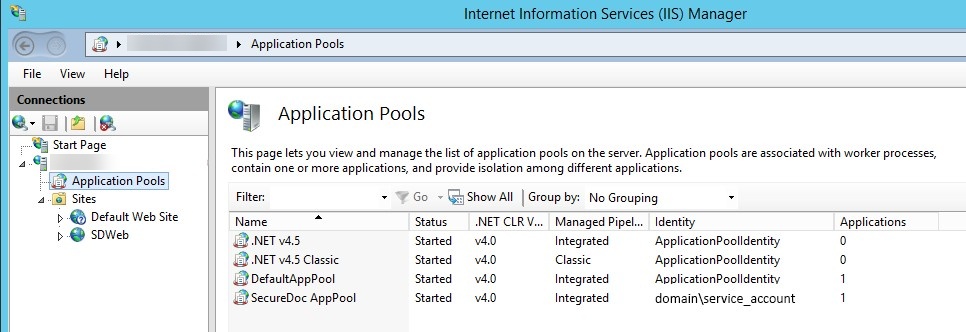
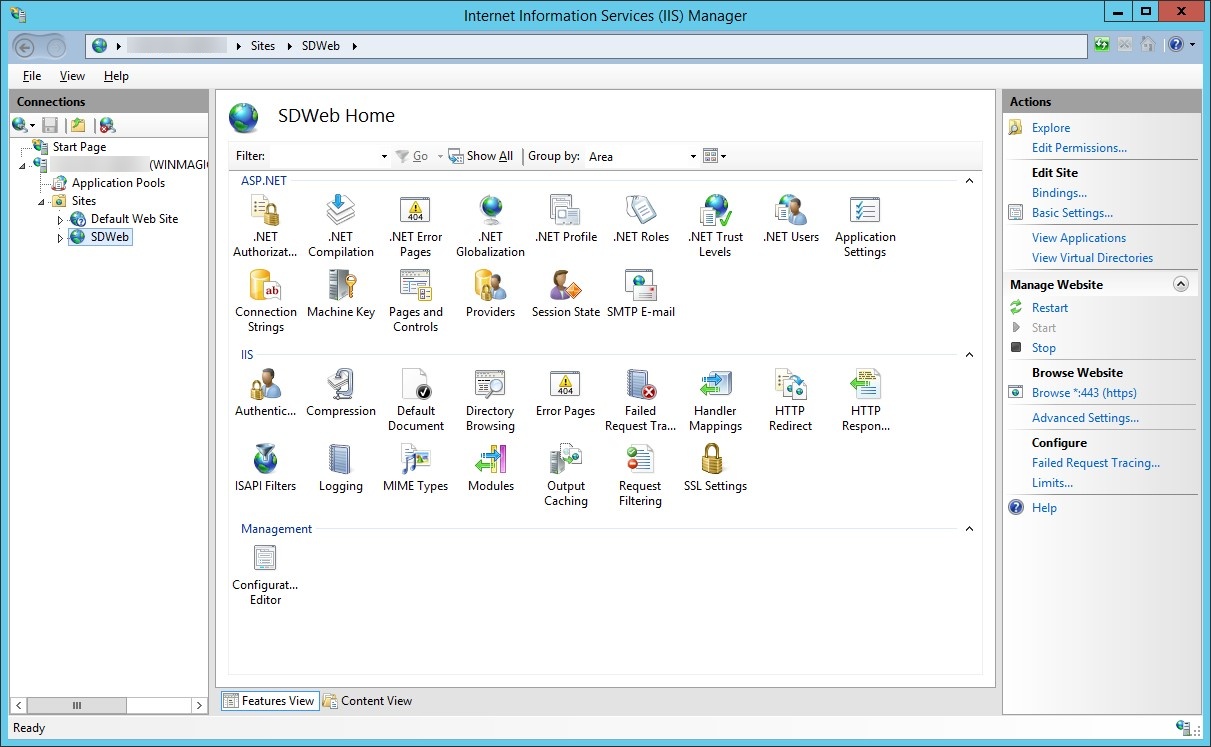
Next, we will check the bindings for the HTTPS certificate. Click on “SDWeb” and from the following screen, click on “Bindings…” in the right hand column:
Verify that the correct certificate is still bound to the website:
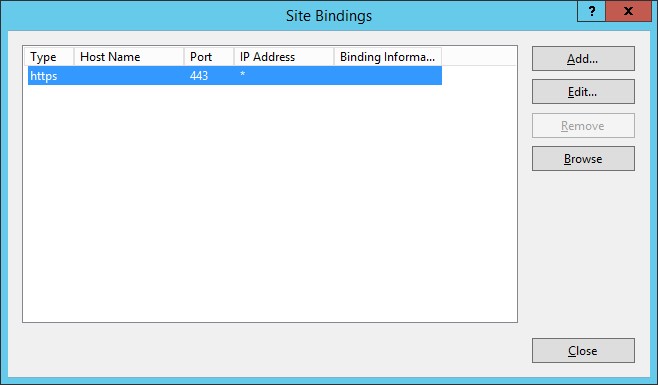
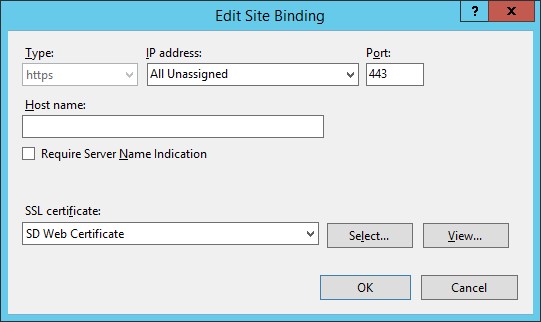
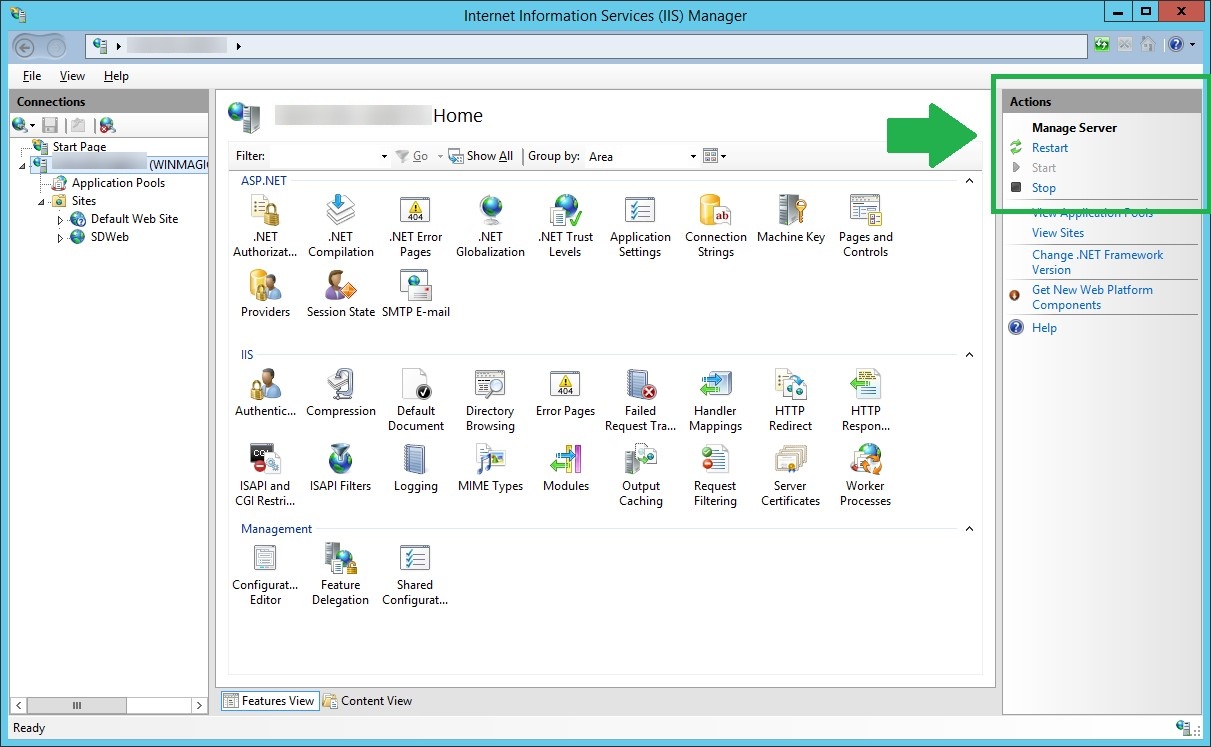
Once verification is complete, close out of the screens and return back to the IIS screen. Click on the server name in the left column and restart the Web server by either right clicking or clicking in the right hand column:
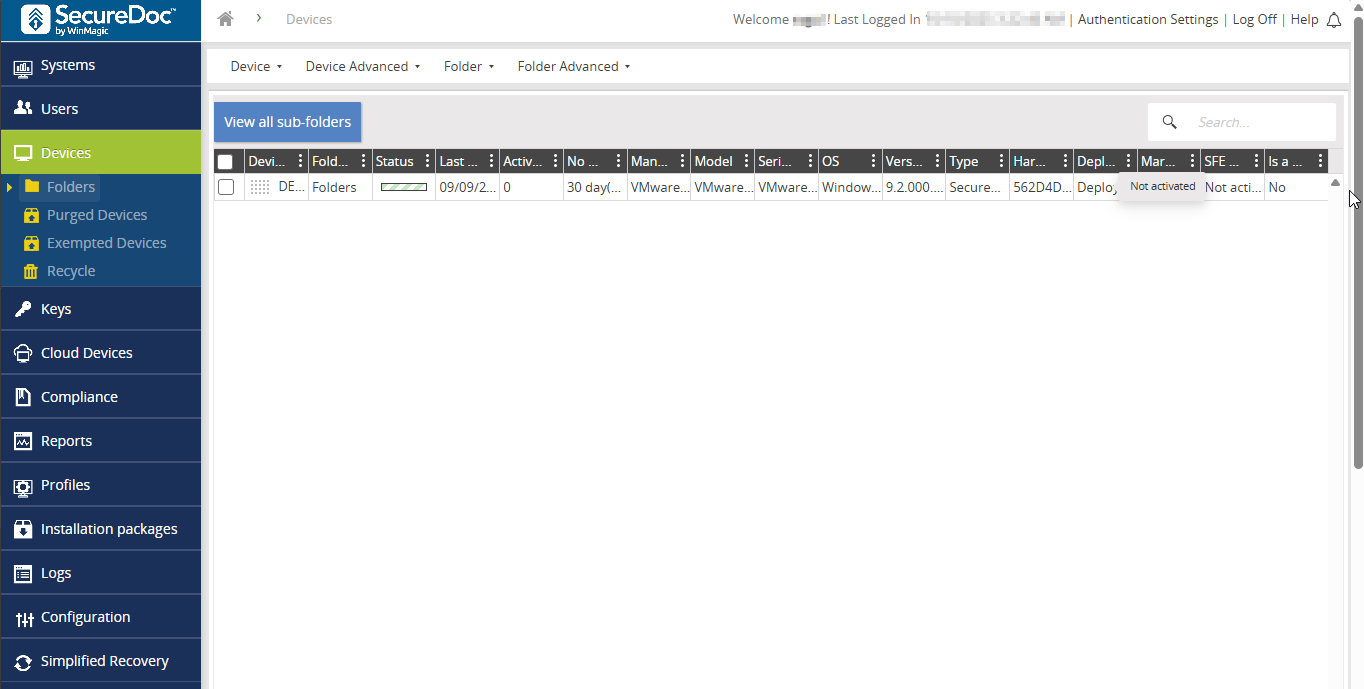
Verify that you can access the SecureDoc Web Console (SESWeb): 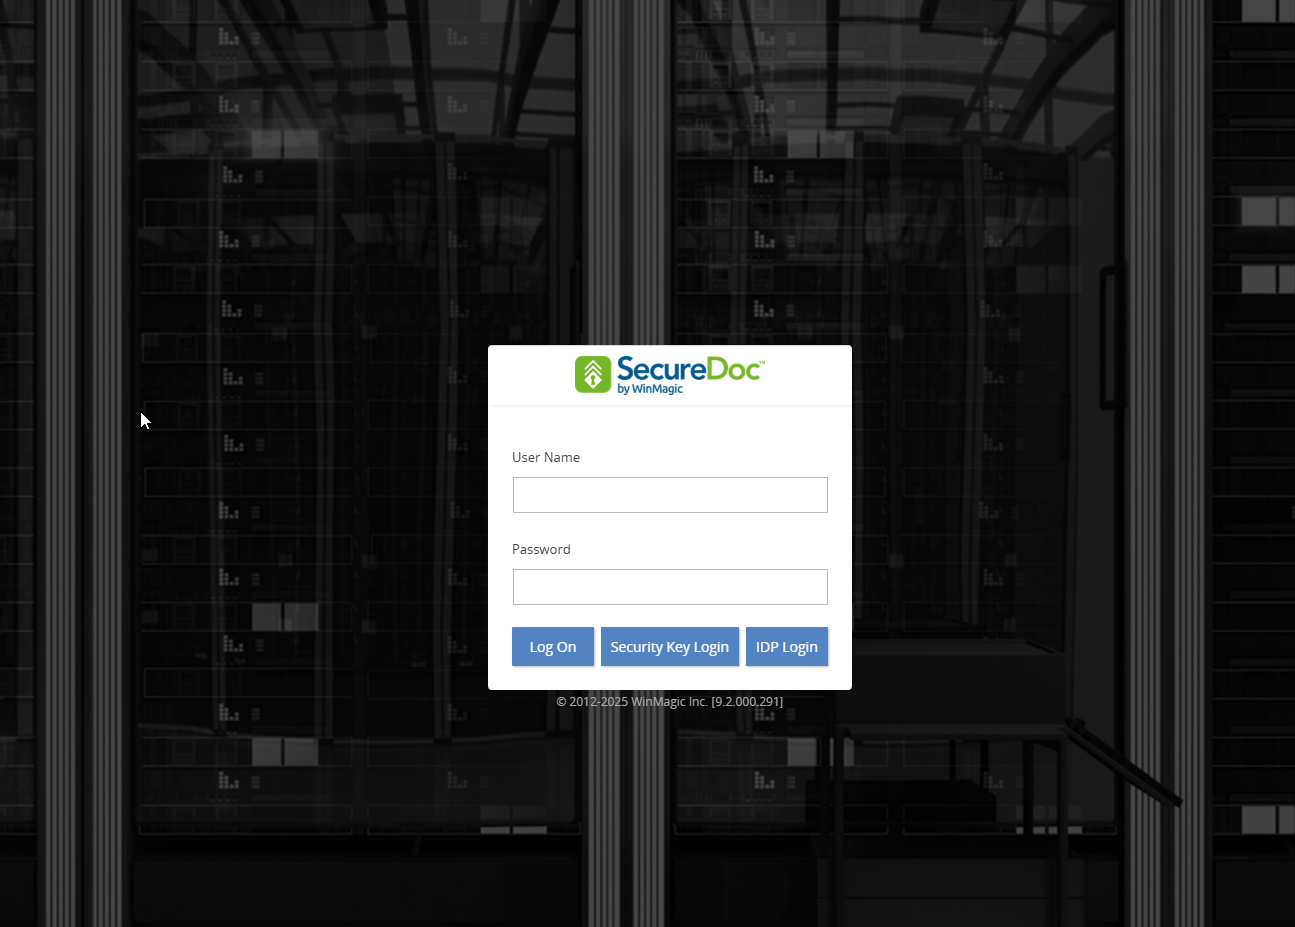
Upgrading Additional Servers:
Upgrade the remaining servers after the primary server is upgraded and its services are running.
SDConnex servers: Upgrade every dedicated SDConnex server before any DMZ server. Stop the SDConnex service, run the new installer as Administrator, then register, configure and start the service as described above.
DMZ servers: Once all SDConnex servers are upgraded, upgrade the DMZ servers the same way.
SESWeb servers: If SESWeb runs on a separate server or in a high-availability (HA) setup, upgrade each node, then repeat the IIS AppPool identity, Load User Profile and certificate binding checks on each.
Congratulations, the upgrade is now complete.
11-80 Galaxy Blvd.
Toronto, Ontario, M9W 4Y8
Tel: (905) 502-7000 | Fax: (905) 502-7001
Web: www.winmagic.com | Email: [email protected]