How to change the default user on an encrypted machine?
This article provides instructions on how a secondary user on a machine can be elevated to become the default user, so that at Boot Logon they can press <Enter> instead of having to type the username.
There’s 2 possible methods to change the default user:
- Using the local client
- Using SecureDoc Enterprise Server (SES)
There is no simple way to change the owner aside removing users that exist in both slots. Before performing that understanding of what user exists in which slot is needed.
-ensure communication exists between devices
Log on to control Center with administrative rights
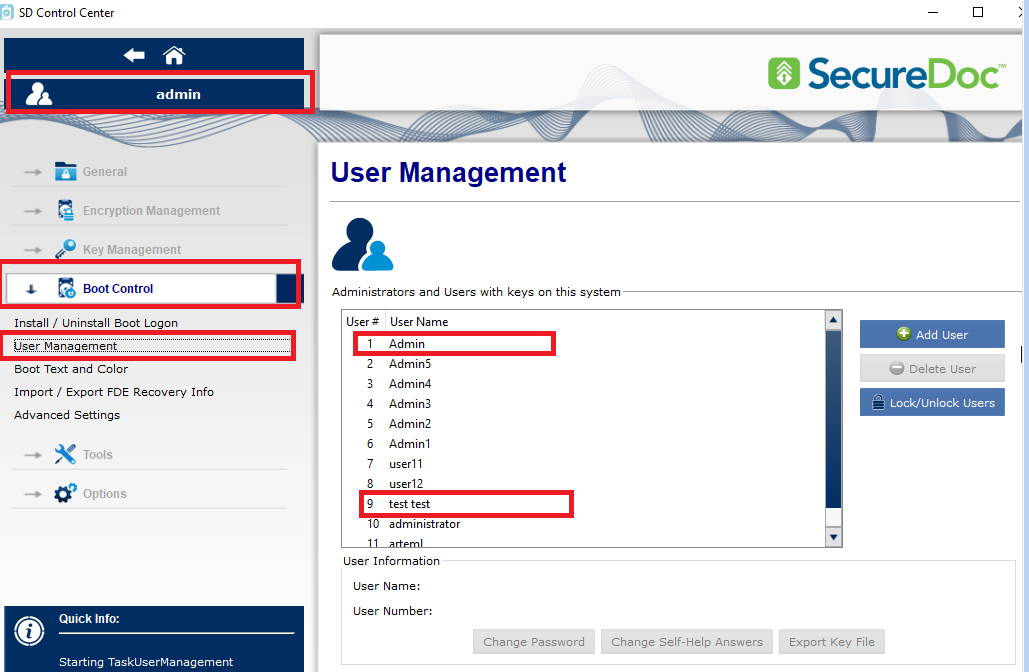
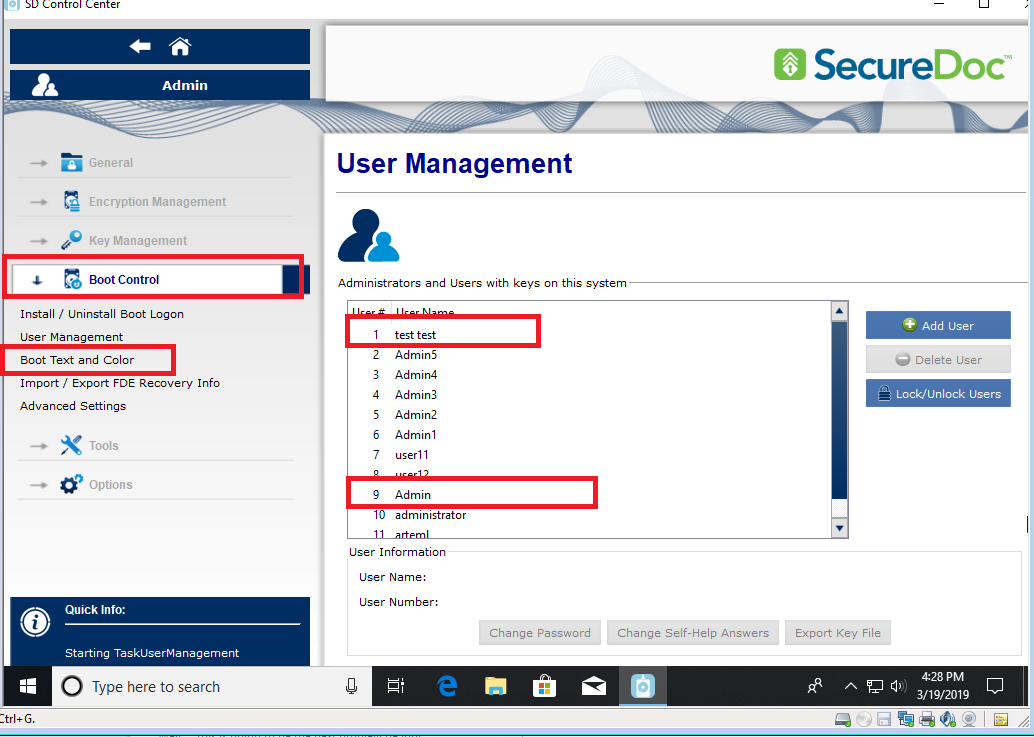
Navigate to Boot Control > User Management
User Management will list all users that exist on device and what Slot# they belong to.
User Admin sits in default Slot#1
User Test Test sits in Slot#9
Navigate to Securedoc Enterprise Server >Devices and locate the device that requires this change
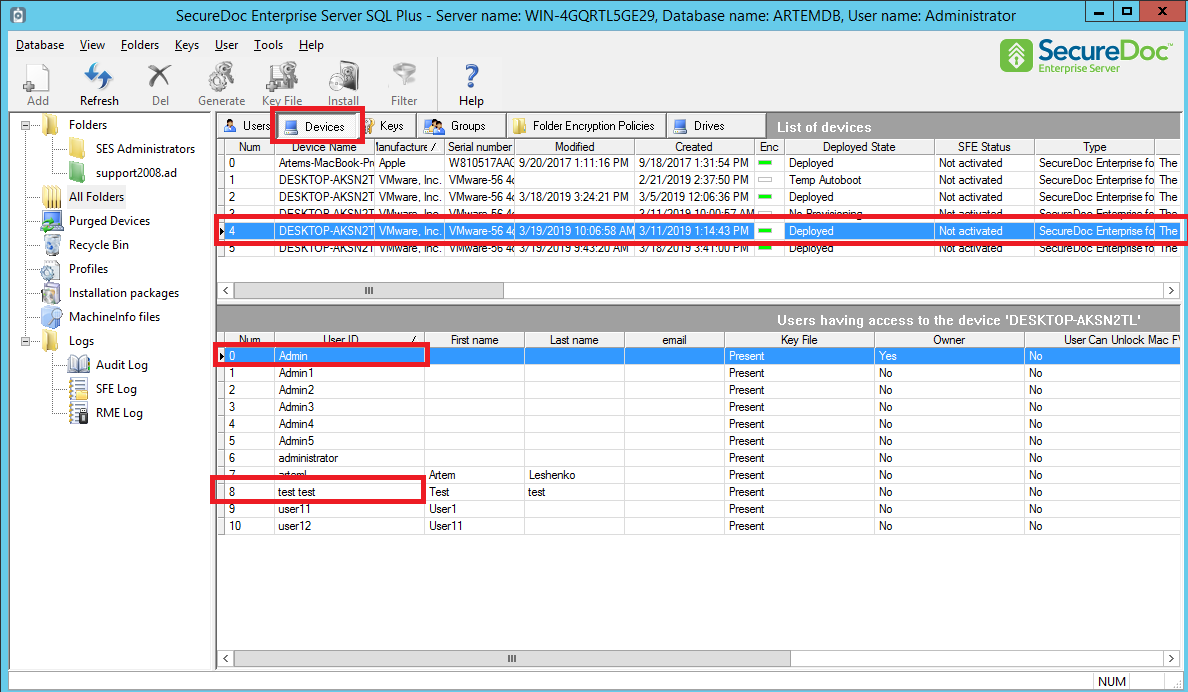
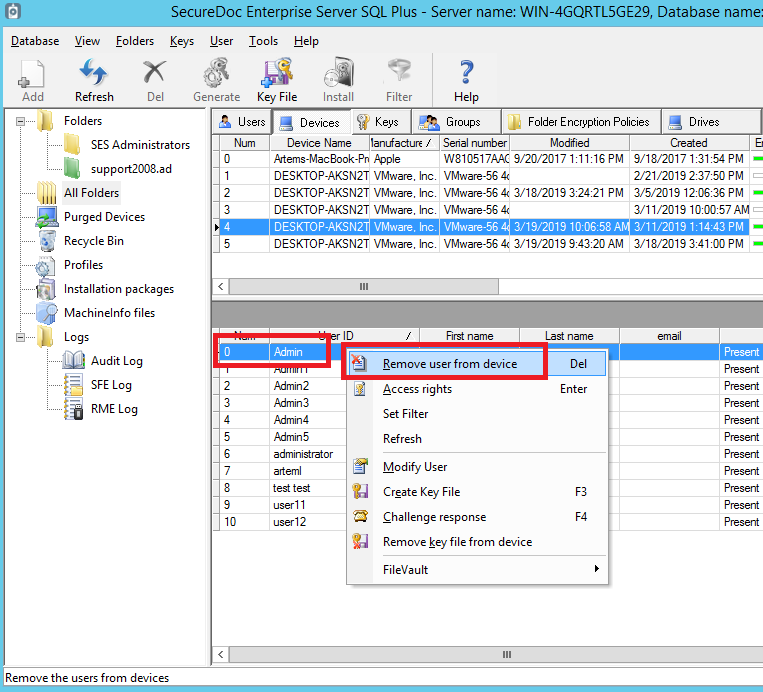
Remove both Admin and Test Test from device by Right clicking on each user and select Remove User From Device
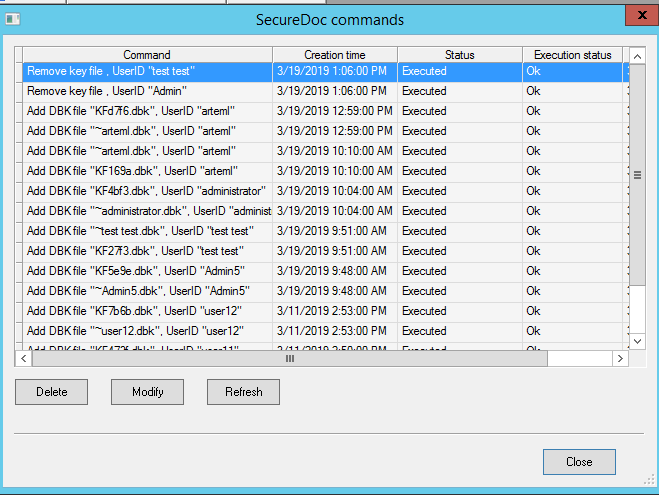
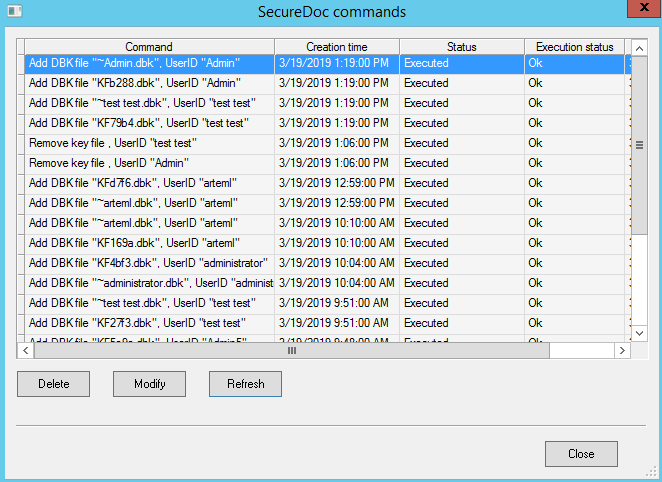
Once both users are removed ,Right click on device and select Show commands
-Commands to remove user are Sent>Active>Executed (commands have to be executed before next steps are taken)
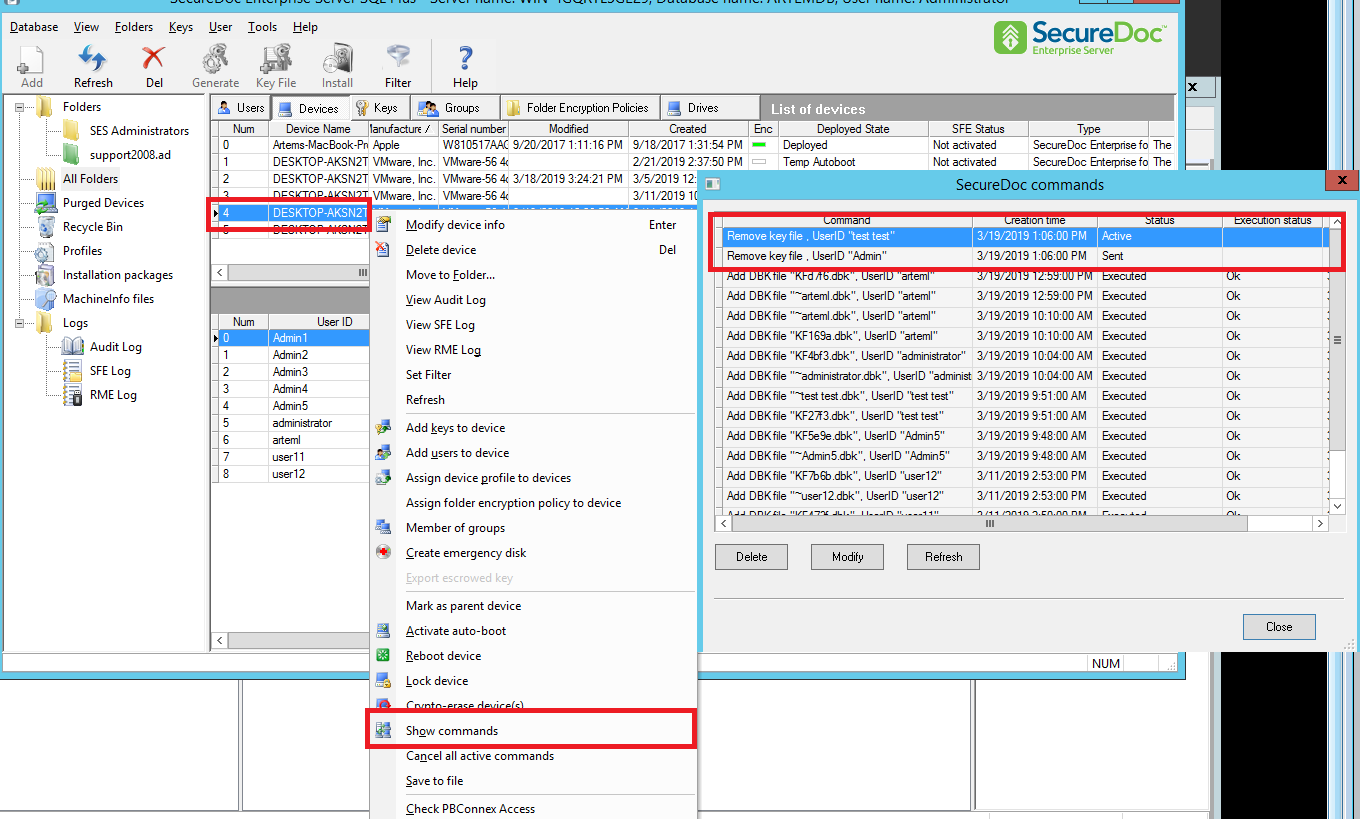
To speed up Execution status a Force Communicate per KB1513
After commands are executed the user will need to be added in right order
Adding User Test Test first and then Admin right after
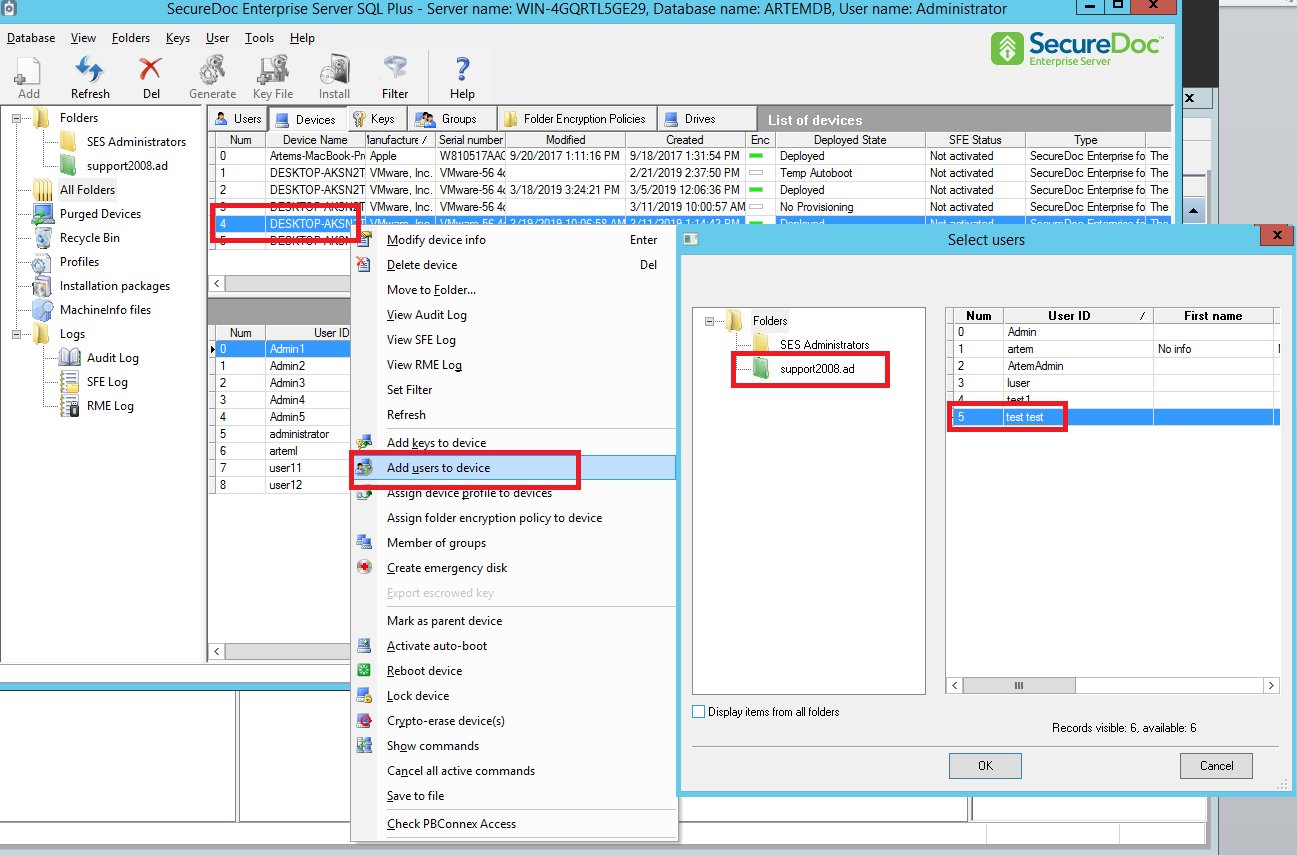
To add users to device > Right click on device >add user to device
If location of users is know then admins can navigate down AD folder structure and select the user
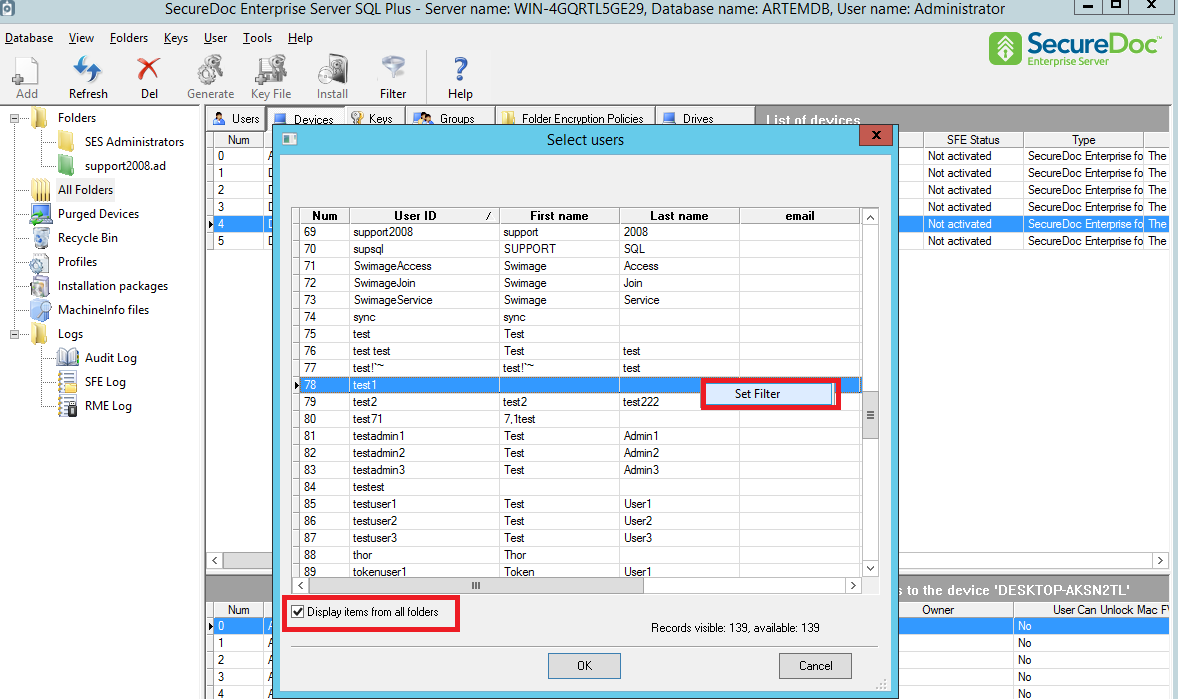
Or admins can select “display items from All Folders” and then Right click on user list and set filter
User Test Test was added first , User Admin was added right after
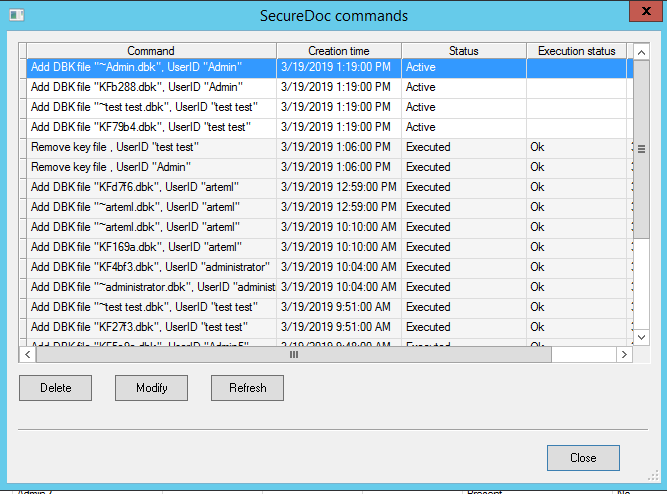
Perform Force communicate with server to ensure both commands are Executed and then perform system reboot on software drives or shut down on opal drives
If steps are properly executed then both users would have swapped their initial Slot#
Changing the boot order using the local client:
- You will need to create the key files and then save it to the desired location.
- You will need to Log in with an administrator key file in order to complete this case
(administrator rights are needed from SecureDoc Control Center)
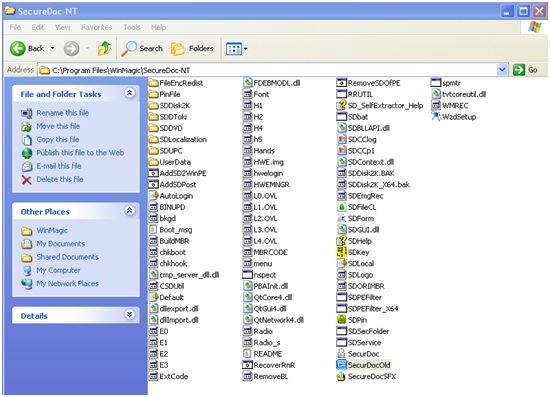
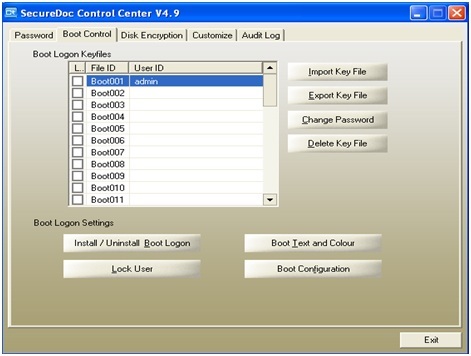
This functionality is only available in the SecureDoc Control Center v4 GUI.
The executable is found at: C:\program files\WinMagic\SecureDoc-NT\securdocold.exe
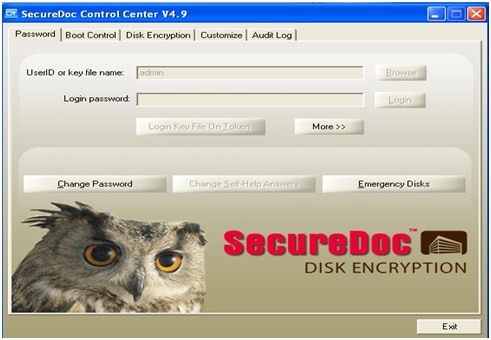
- Click on the Boot Control tab, highlight file ID and click on Import Key File.
- Select the key file that you want to be assigned to the first slot, then highlight the second slot and click on Import Key File.
- Select the key file you would want to be assigned to the second slot.
example
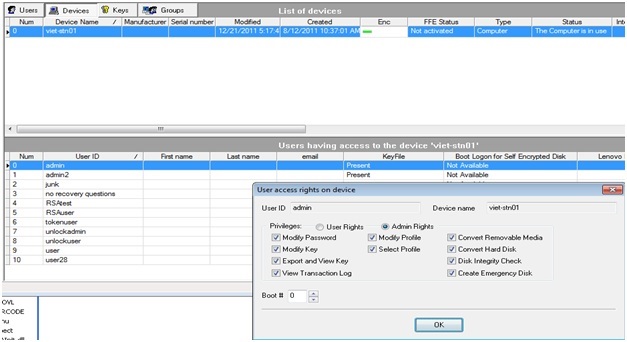
Changing the boot order using SecureDoc Enterprise Server:
- If the clients are the network:
- Locate the device and then double-click on the user listed in the lower pane of the device tab.
- Change the boot # for the user then click on OK.
- Next push down the key file to the client machine, and then restart it.
Example:
Custom Fields
Operating System: Windows
Product_Documentation: Yes
Version: SecureDoc 5.0, SecureDoc 5.1, SecureDoc 5.2, SecureDoc 5.3 SR1, SecureDoc 5.3 SR2