Installing SecureDoc UEFI Patch via SCCM
Applies To
The following table lists the products, platforms, and components this article applies to:
Applies to | Platform | Hardware | Article ID | Component |
|---|---|---|---|---|
WinMagic SecureDoc UEFI Patch | Windows 10, Windows 11 | UEFI-based systems | KB-SCCM-UEFI-001 | Pre-Boot Authentication |
Symptoms
Organizations need to deploy SecureDoc UEFI patch updates to client devices managed through Microsoft System Center Configuration Manager (SCCM). The deployment must ensure consistent installation across managed endpoints with proper logging and verification.
Cause
SecureDoc UEFI patch requires distribution through enterprise management systems to ensure proper installation, logging, and registry verification across multiple client devices. Manual installation is impractical for large-scale deployments.
Resolution
Follow the steps below to create and deploy the SecureDoc UEFI patch package via SCCM. This process involves three main phases: package creation on the SCCM server, content distribution, and deployment to client devices.
Phase 1: Create Patch UEFI Package on SCCM Server
Step 1: Open SCCM Console and Create Package
1. Open the SCCM console.
2. Navigate to Software Library → Application Management → Packages.
3. Right-click Packages and select Create Package.
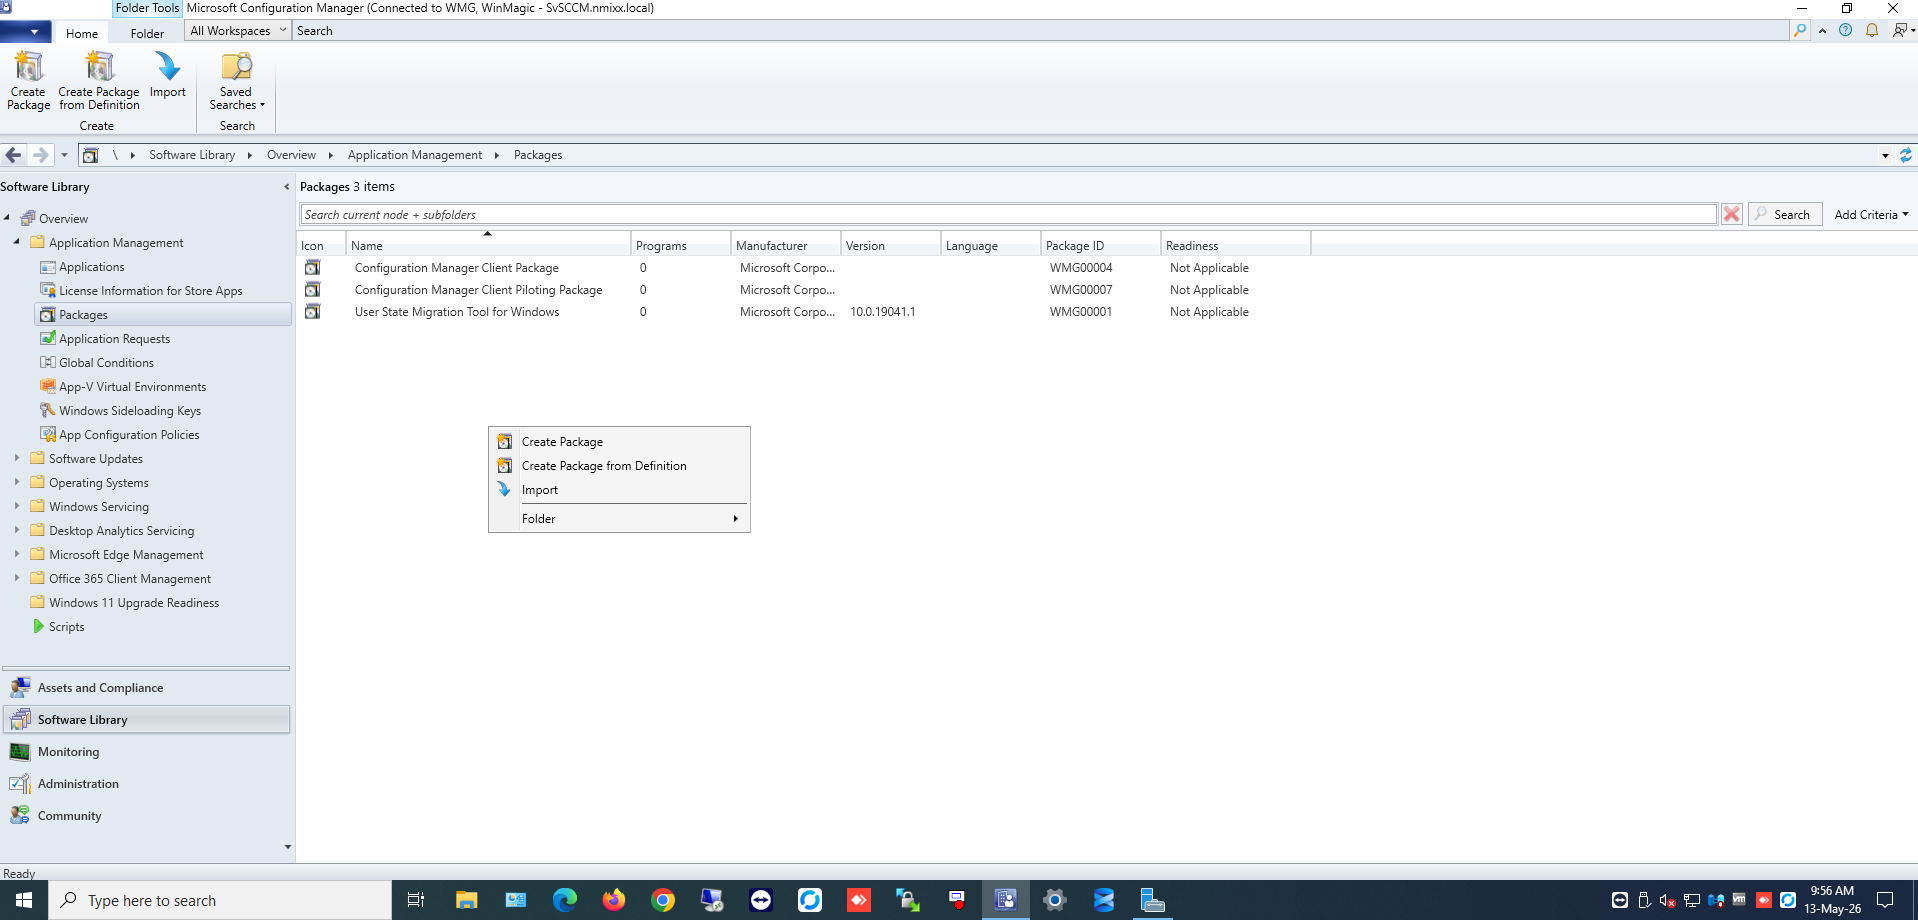
Figure 1 — SCCM Console with Packages node selected
Step 2: Configure Package Source
1. In the Package Name field, enter a descriptive name for the package (e.g., "SecureDoc UEFI Patch").
2. Check the box This package contains source files.
3. Click Browse and navigate to the folder containing the SecureDoc package files.
4. Click Next.

Figure 2 — Package configuration with source file location
Step 3: Select Program Type
1. Select Standard Program as the program type.
2. Click Next.
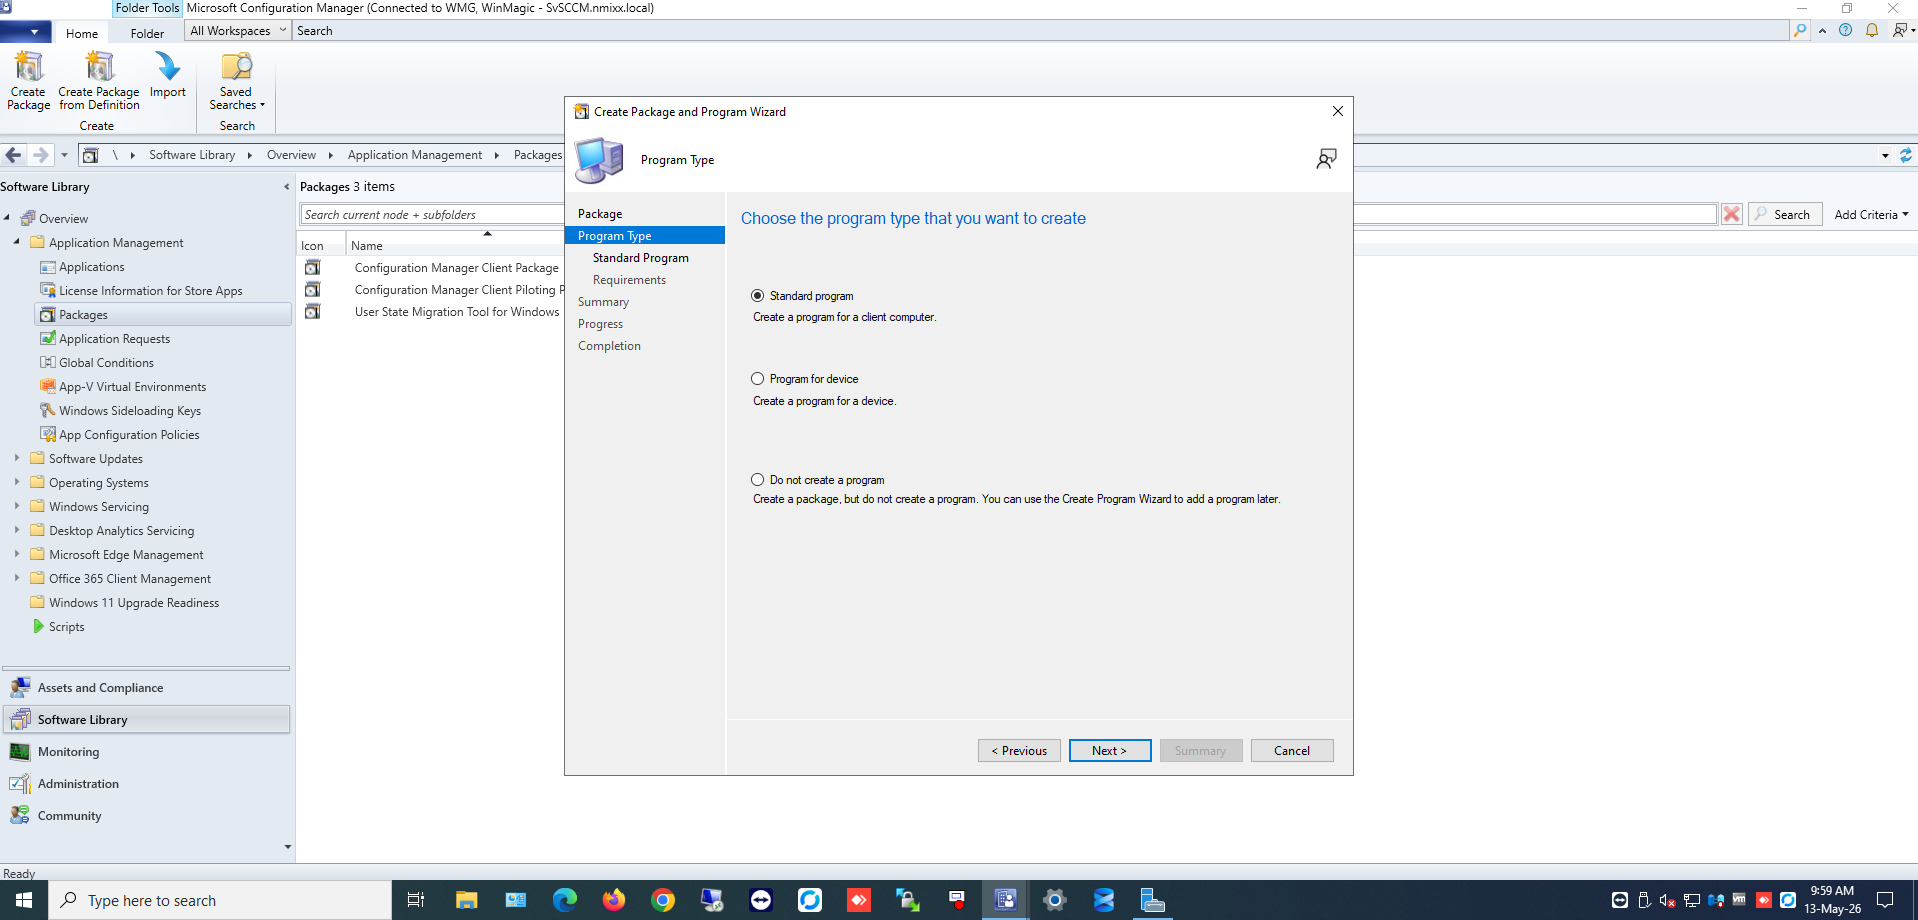
Figure 3 — Program type selection
Step 4: Configure Program Details
1. In the Name field, enter a descriptive program name.
2. In the Command line field, enter the following installation command:
SecureDoc_UEFI.exe /s /v"/qn /l*v \"C:\Windows\Temp\UEFI_Setup.log\" ALLUSERS=2 MSIRMSHUTDOWN=2"
3. In the Run field, select Run with administrative rights.
4. Under the User interaction section, select Allow users to view and interact with the program installation.
5. Click Next.
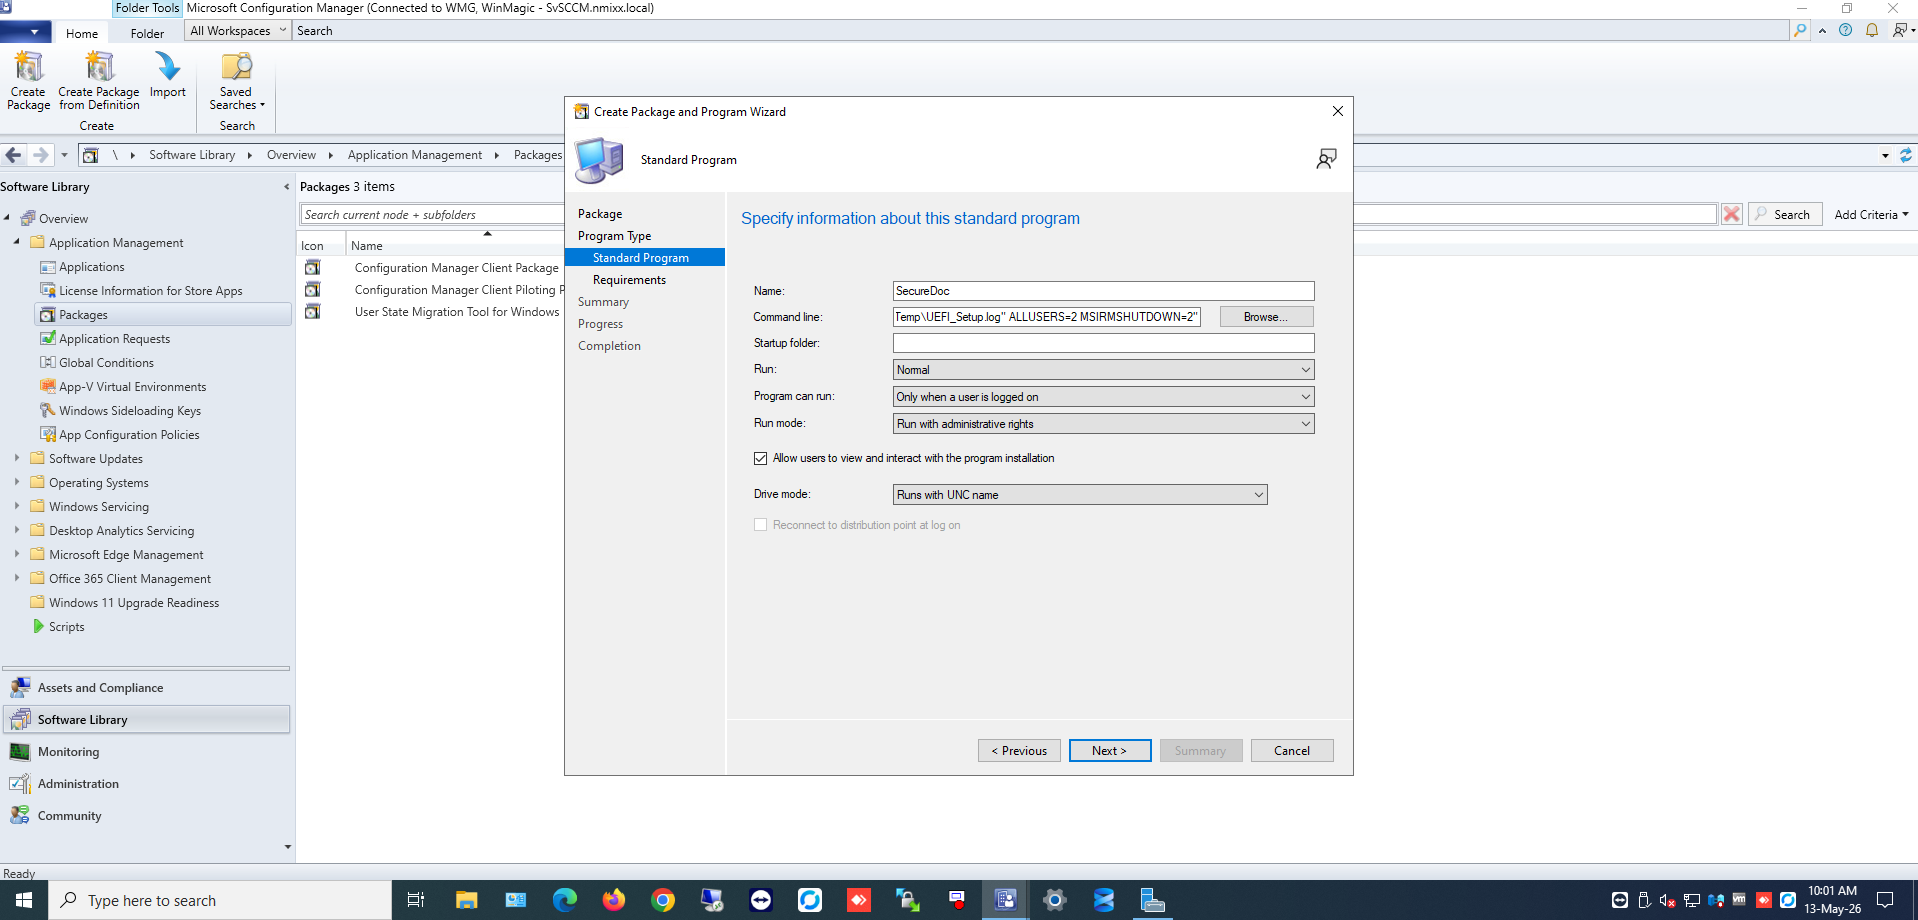
Figure 4 — Program configuration with command line parameters
Note: The command line includes silent installation (/s), quiet mode (/qn), verbose logging to C:\Windows\Temp\UEFI_Setup.log, and MSI shutdown suppression parameters. |
Step 5: Configure Requirements and Dependencies
1. On the Requirements page, leave the default settings.
2. Click Next.
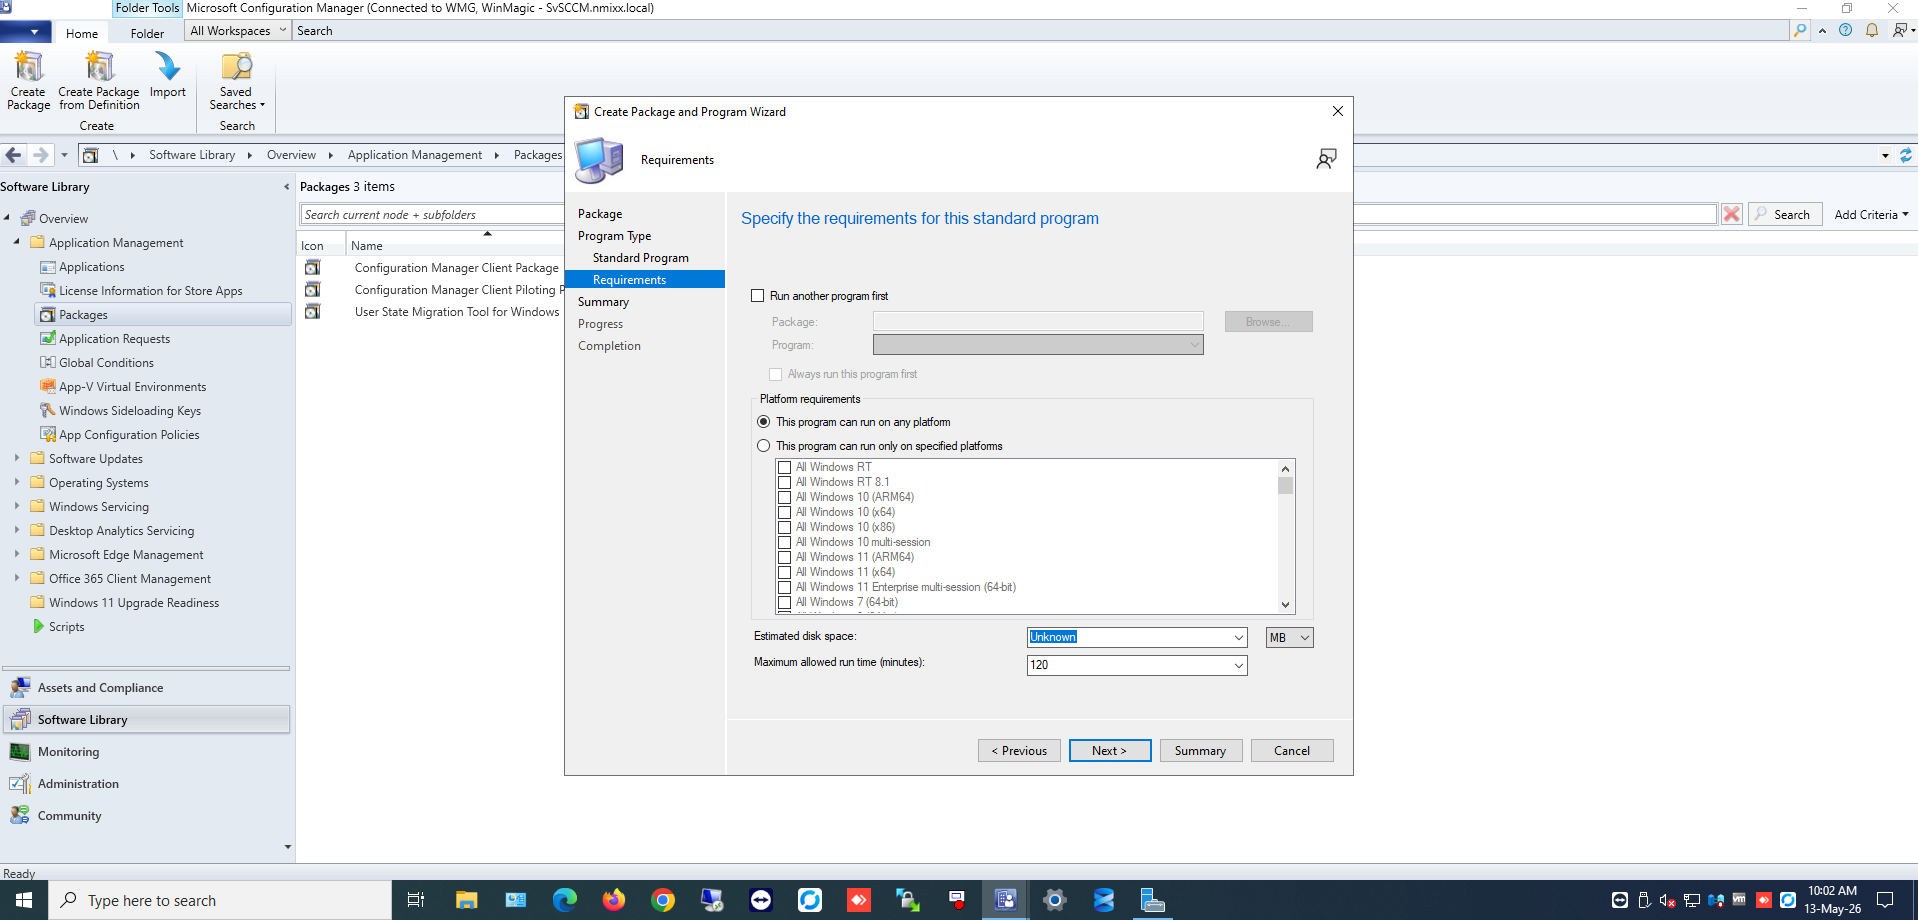
Figure 5 — Requirements configuration
Step 6: Complete Package Creation
1. Review the summary information.
2. Click Next to create the package.
3. Confirm that the package was created successfully.
4. Click Close.
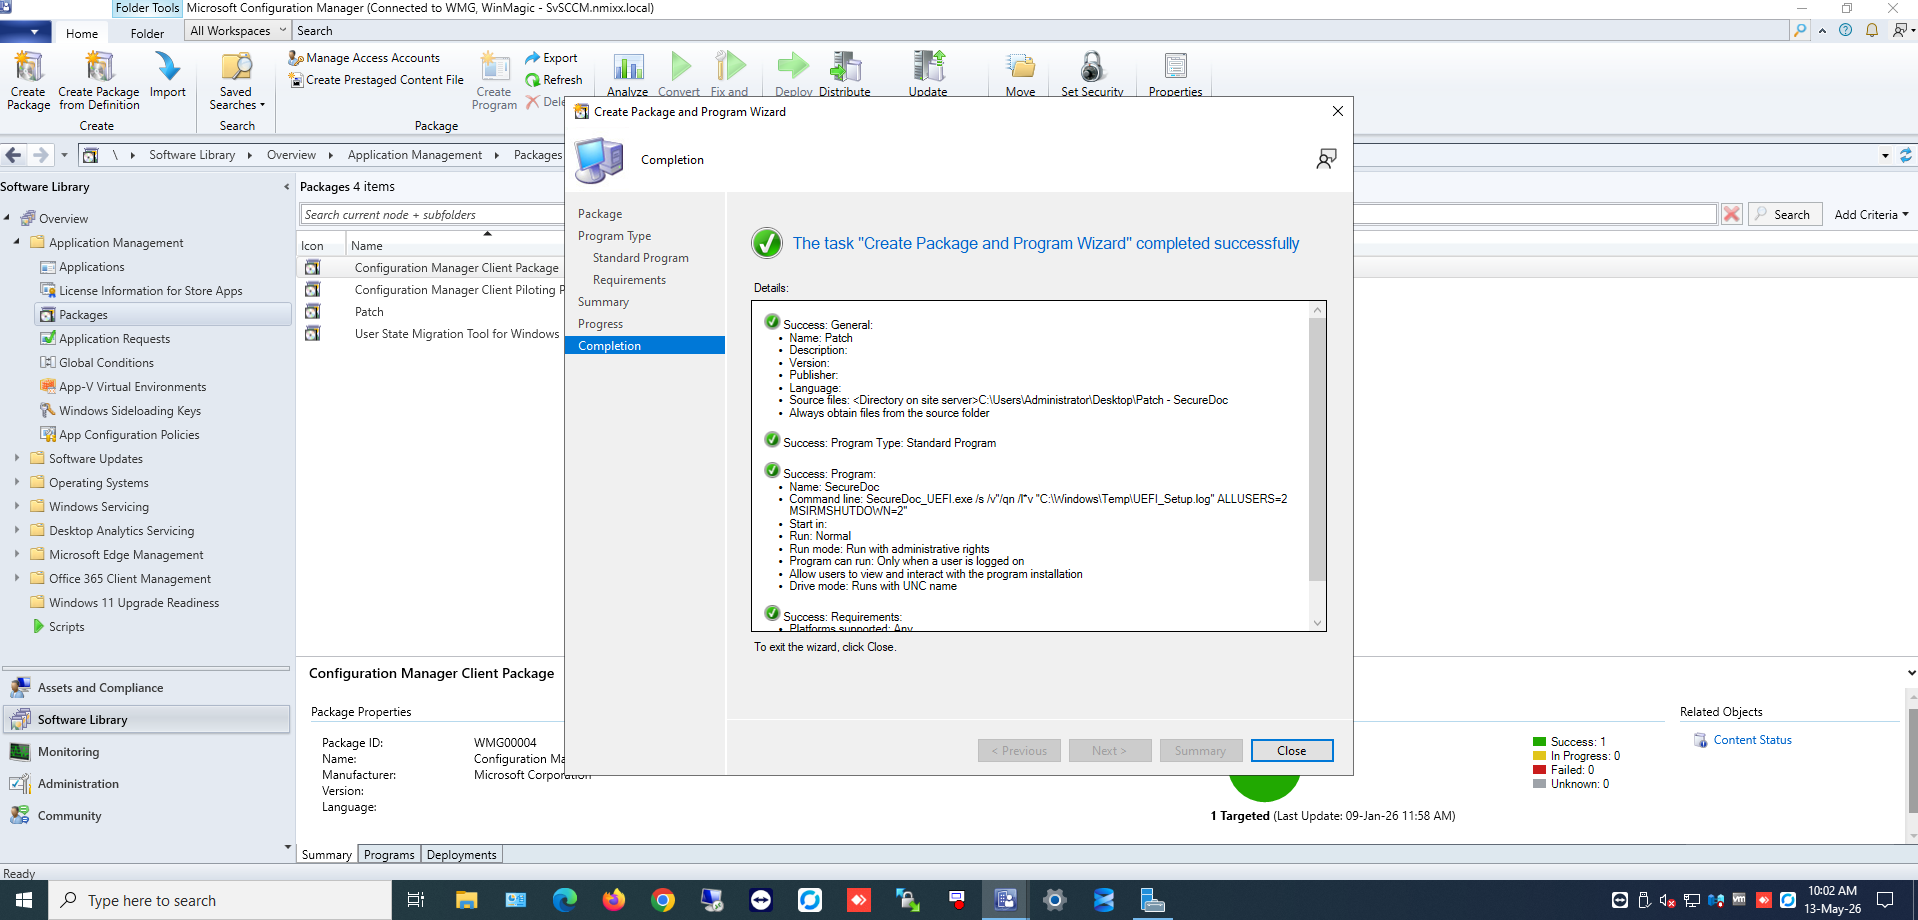
Figure 6 — Package creation completion
Phase 2: Distribute Content to Distribution Points
Step 7: Initiate Content Distribution
1. In the SCCM console, locate the SecureDoc UEFI Patch package you created.
2. Right-click the package and select Distribute Content.
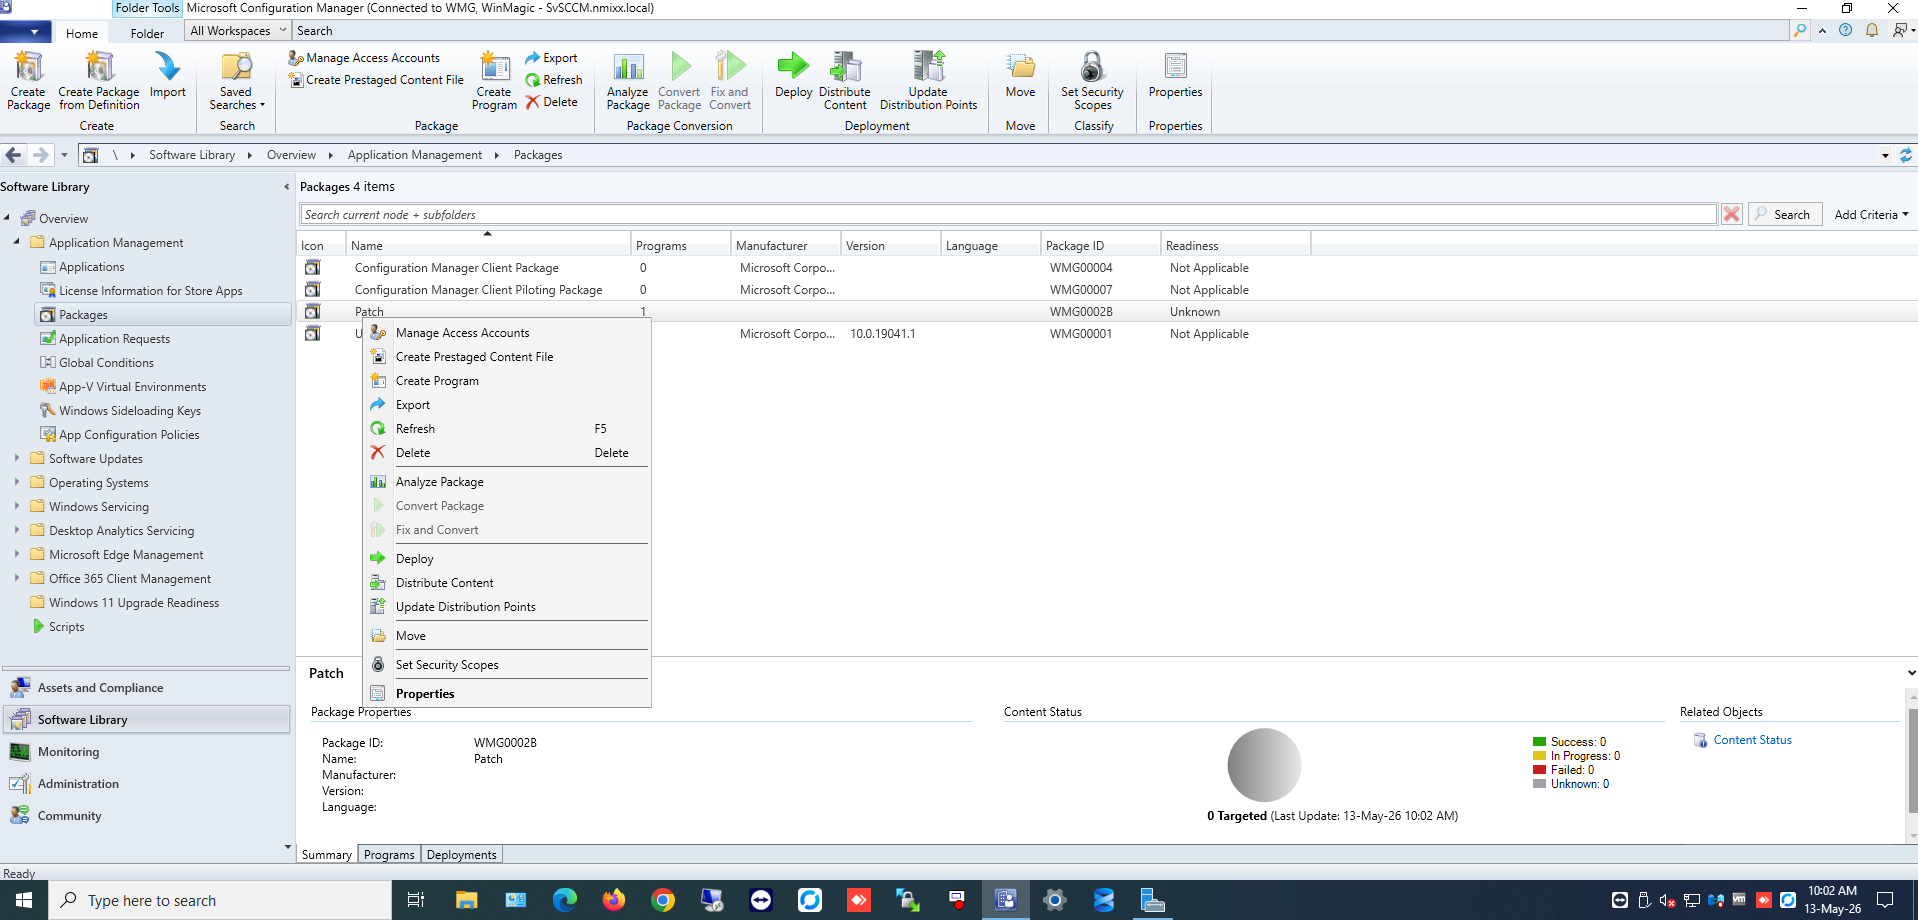
Figure 7 — Distribute Content menu option
Step 8: Select Distribution Points
1. In the Distribute Content Wizard, click Next on the Welcome page.
2. On the Content page, verify the selected package and click Next.
3. On the Content Destination page, click Add → Distribution Point.
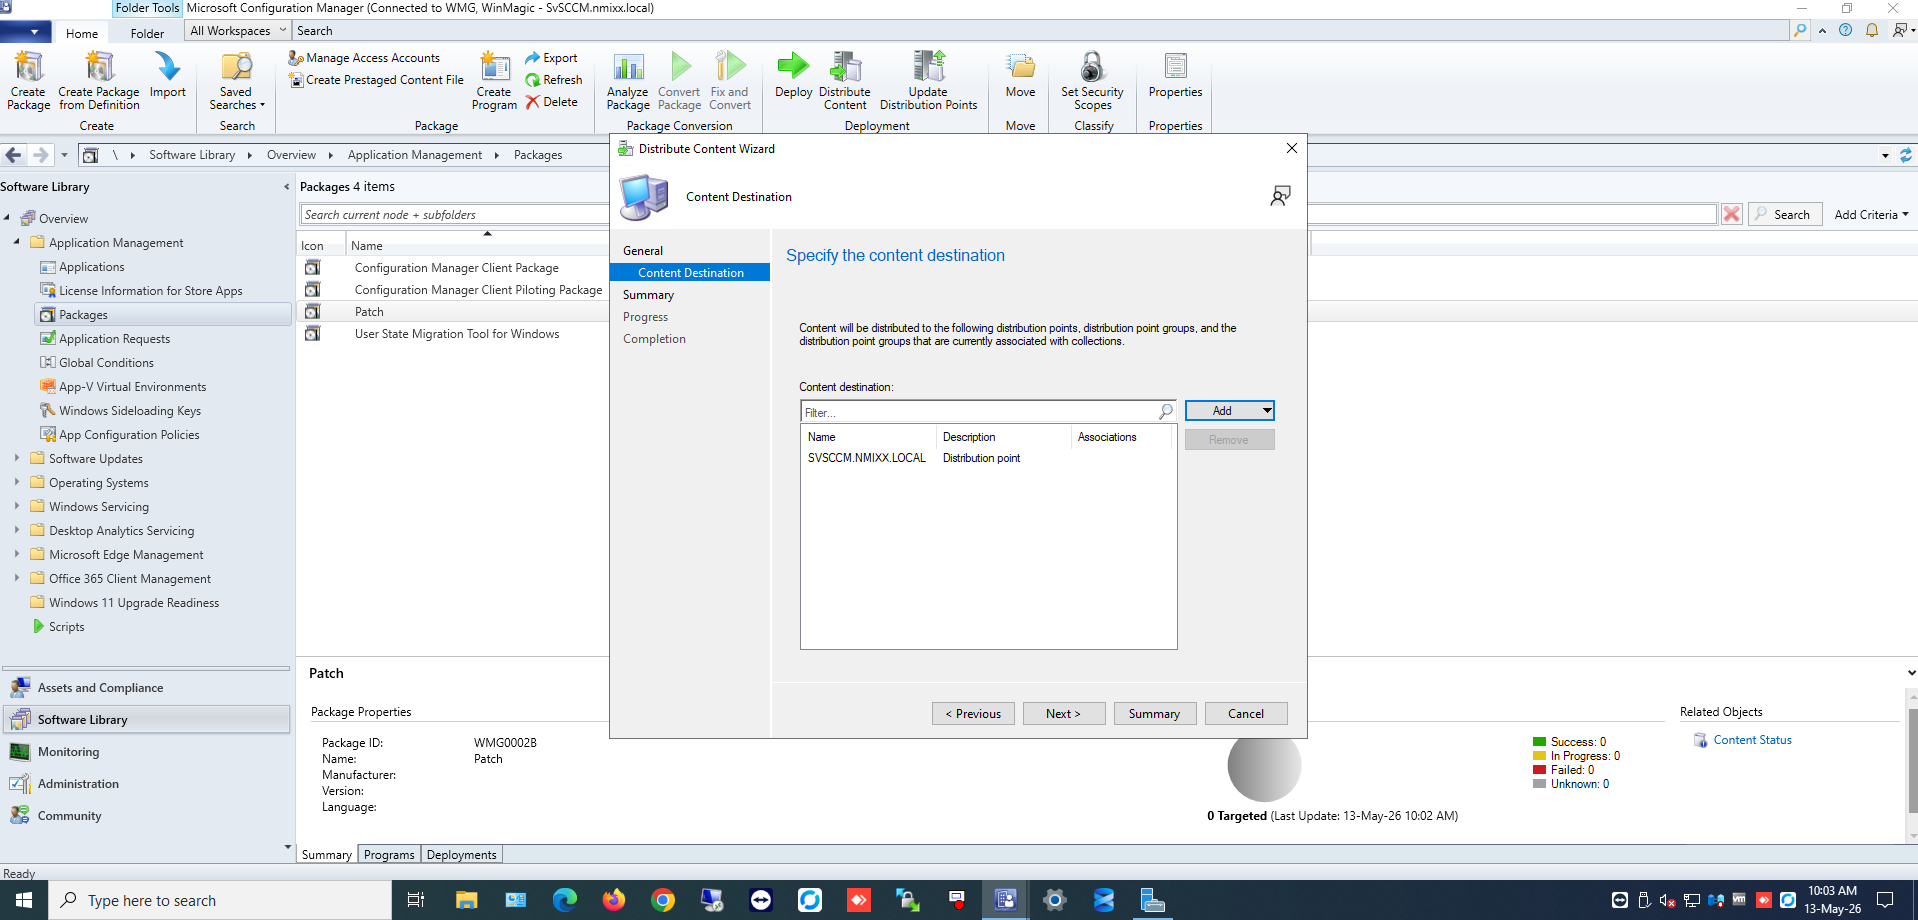
Figure 8 — Add distribution point
4. Select the appropriate distribution points from the list.
5. Click OK to add the distribution points.
6. Click Next.
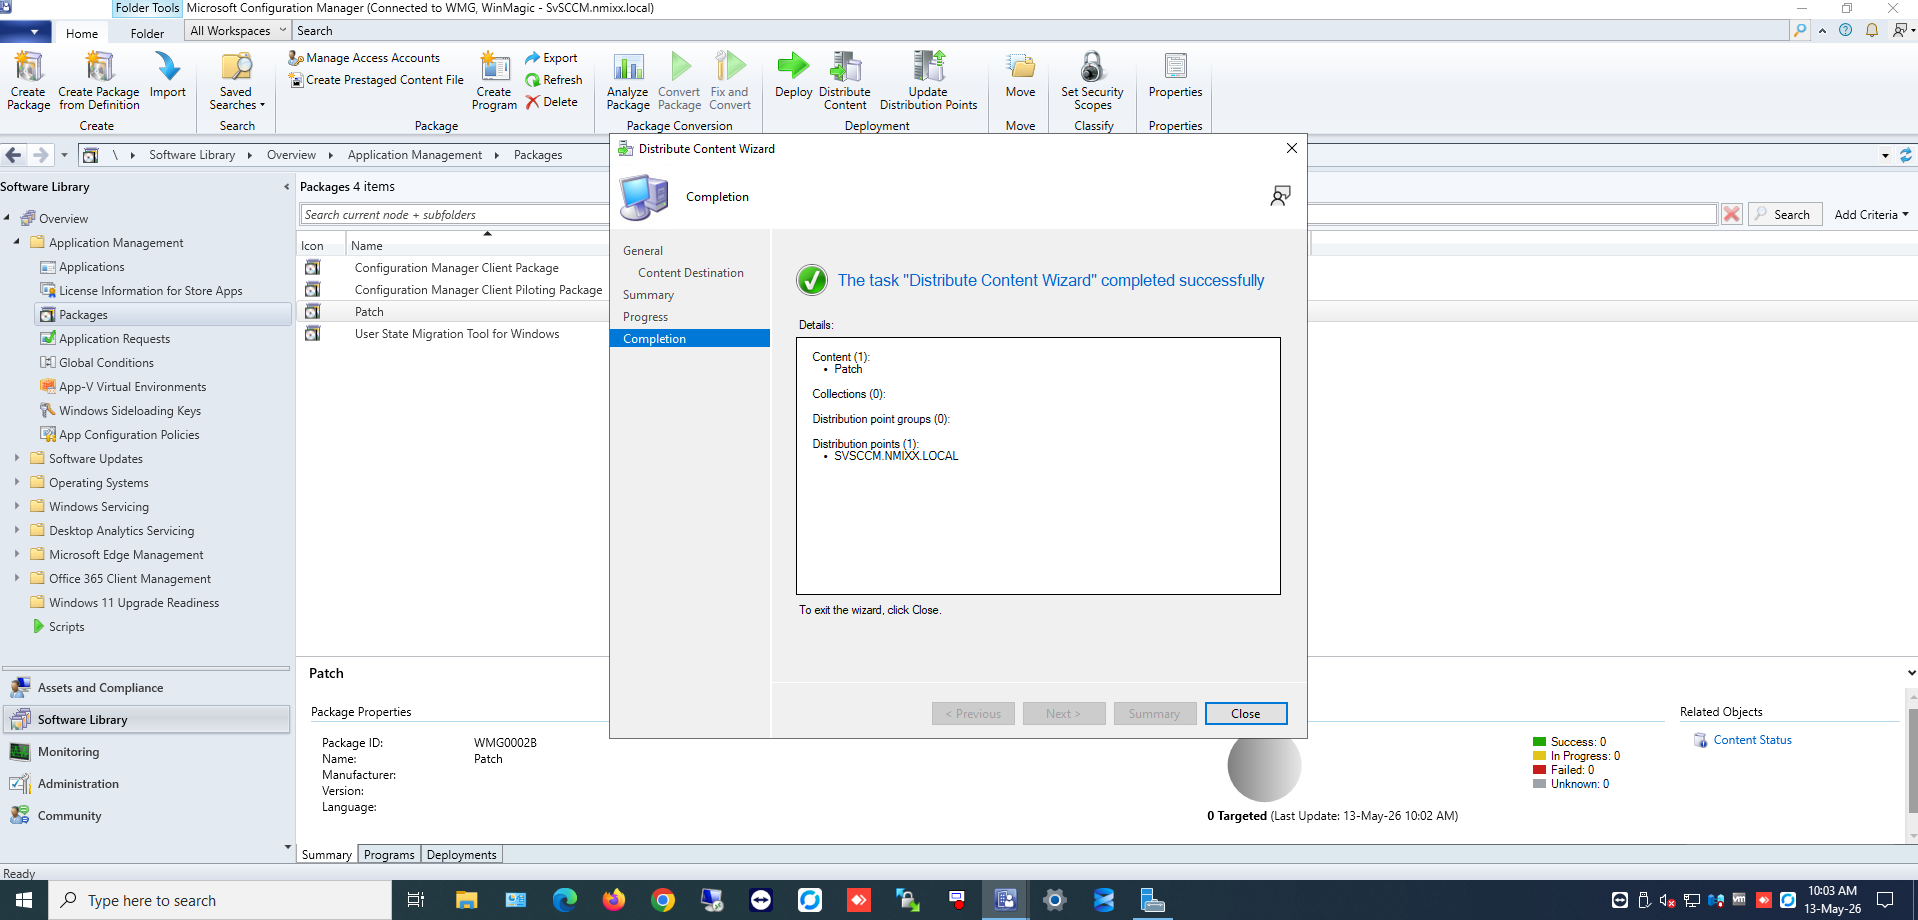
Figure 9 — Distribution points selected
Step 9: Complete Distribution
1. Review the summary information.
2. Click Next to begin content distribution.
3. Wait for the distribution to complete successfully.
4. Click Close.
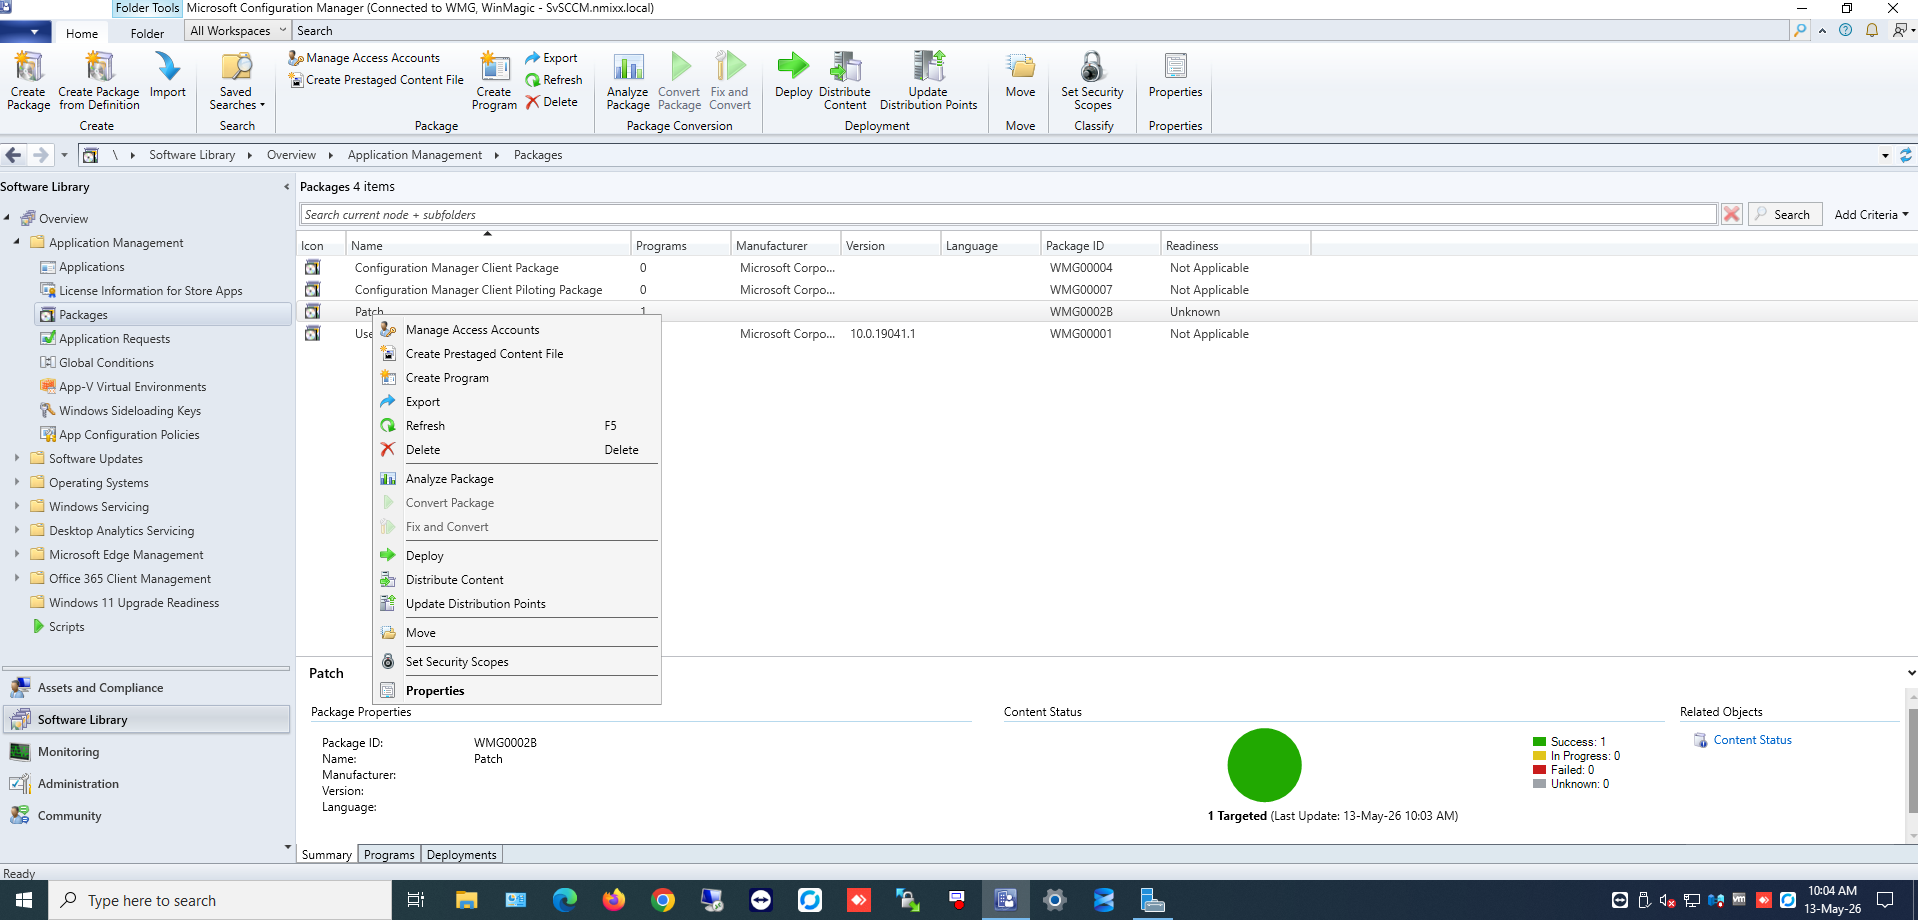
Figure 10 — Content distribution completed successfully
Phase 3: Deploy Package to Client Devices
Step 10: Initiate Deployment
1. Right-click the SecureDoc UEFI Patch package.
2. Select Deploy.
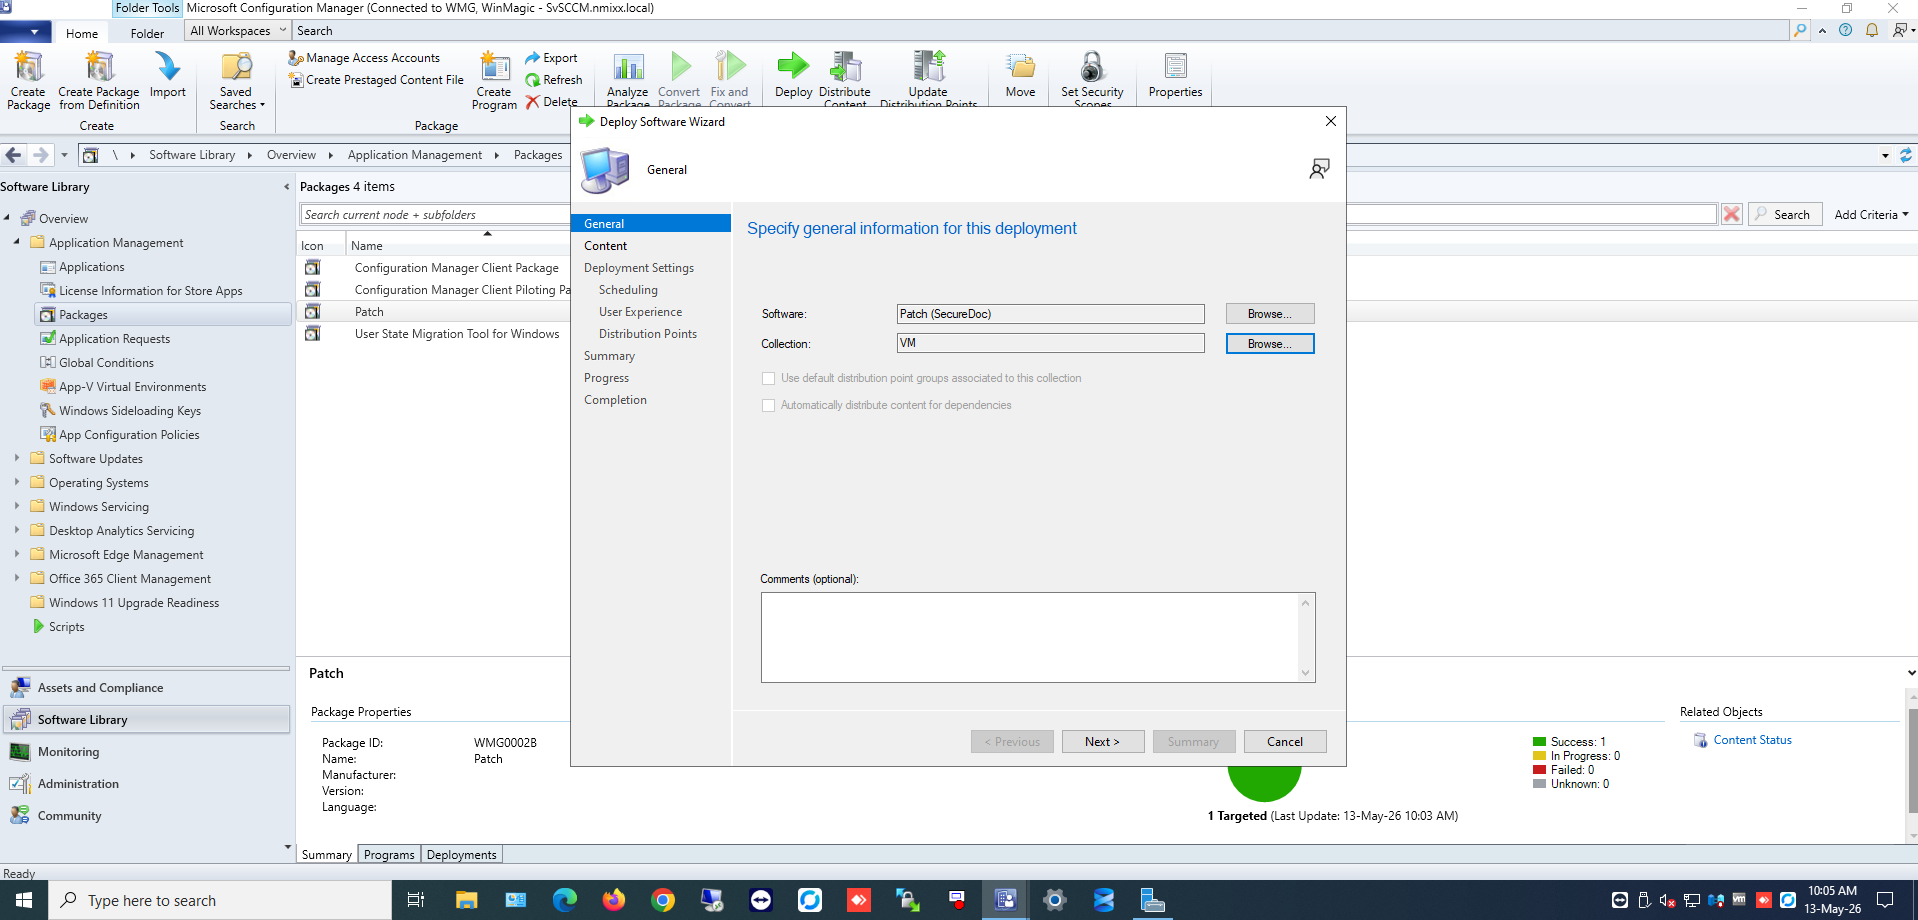
Figure 11 — Deploy menu option
Step 11: Select Target Collection
1. On the General page, click Browse to select the target device collection.
2. Select the appropriate collection of devices that should receive the UEFI patch.
3. Click OK.
4. Click Next.
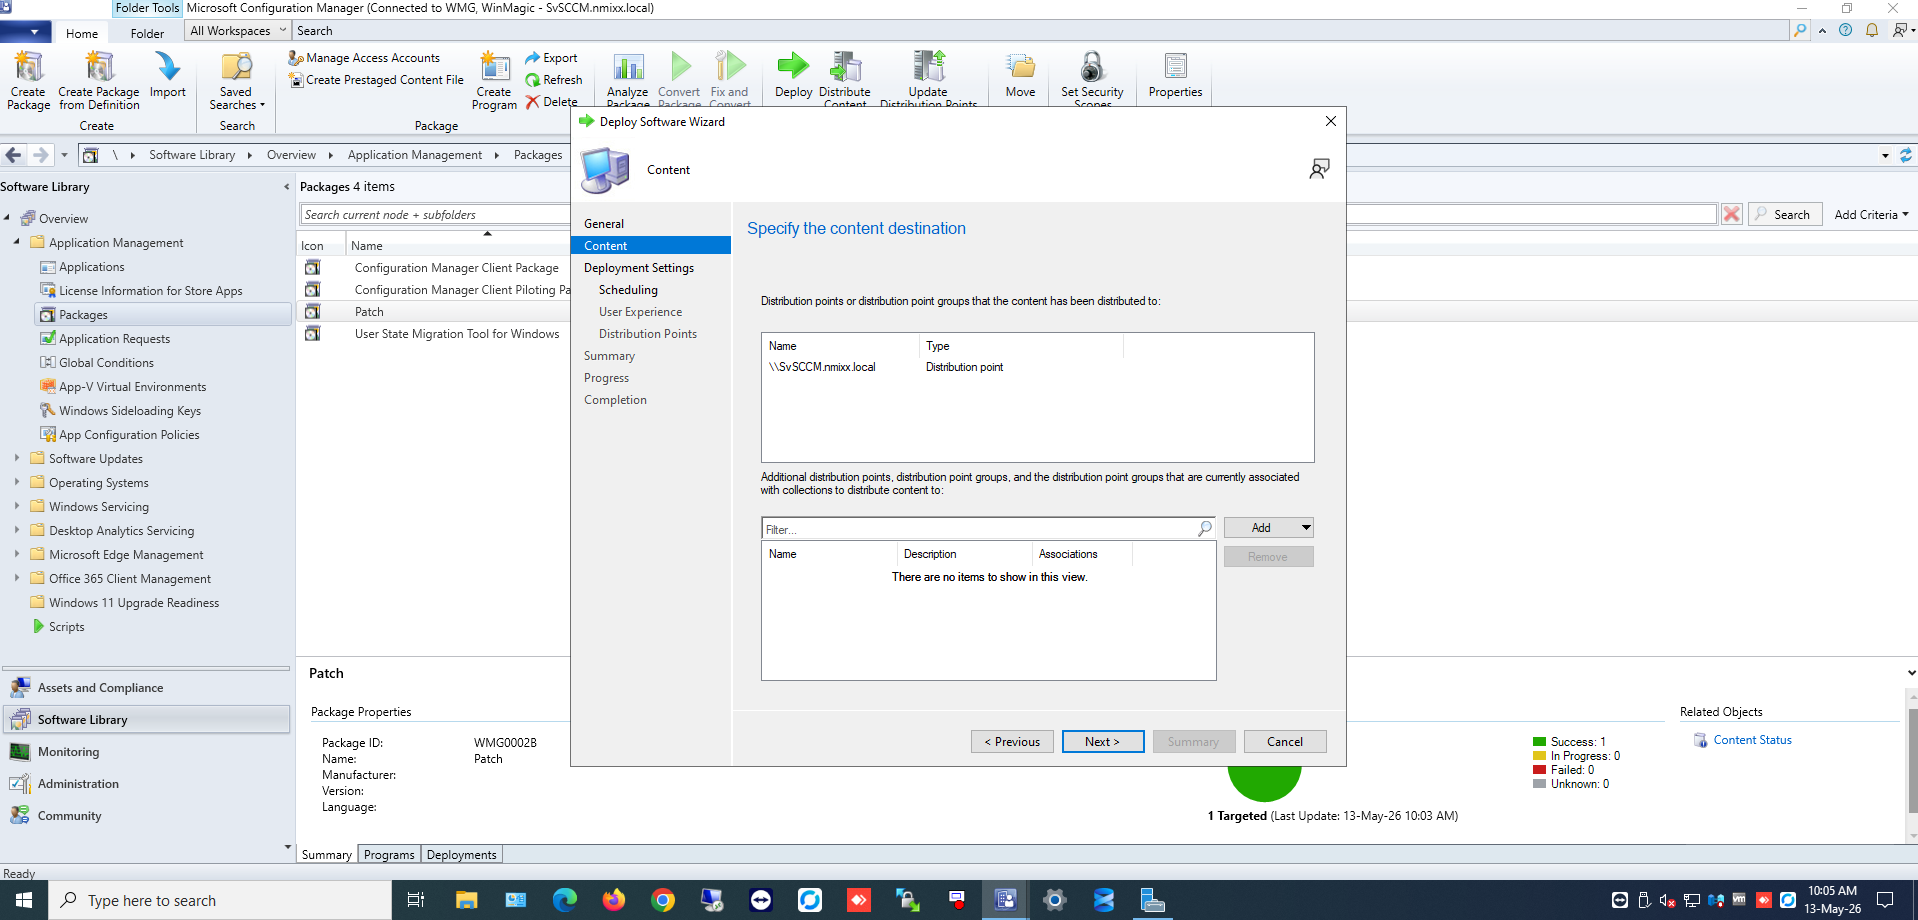
Figure 12 — Target collection selection
Step 12: Configure Deployment Settings
1. On the Content page, verify the distribution points and click Next.
2. On the Deployment Settings page, configure the following:
• Purpose: Select either:
– Available: Allows users to install at their desired time
– Required: Forces installation at the specified deadline
3. Click Next.

Figure 13 — Deployment settings configuration
Note: For Required deployments, the package will install automatically at the deadline. For Available deployments, users can choose when to install from Software Center. |
Step 13: Configure Schedule
1. On the Scheduling page, click New to create a schedule.
2. Select As soon as possible for immediate deployment.
3. Click OK to confirm the schedule.
4. Click Next.
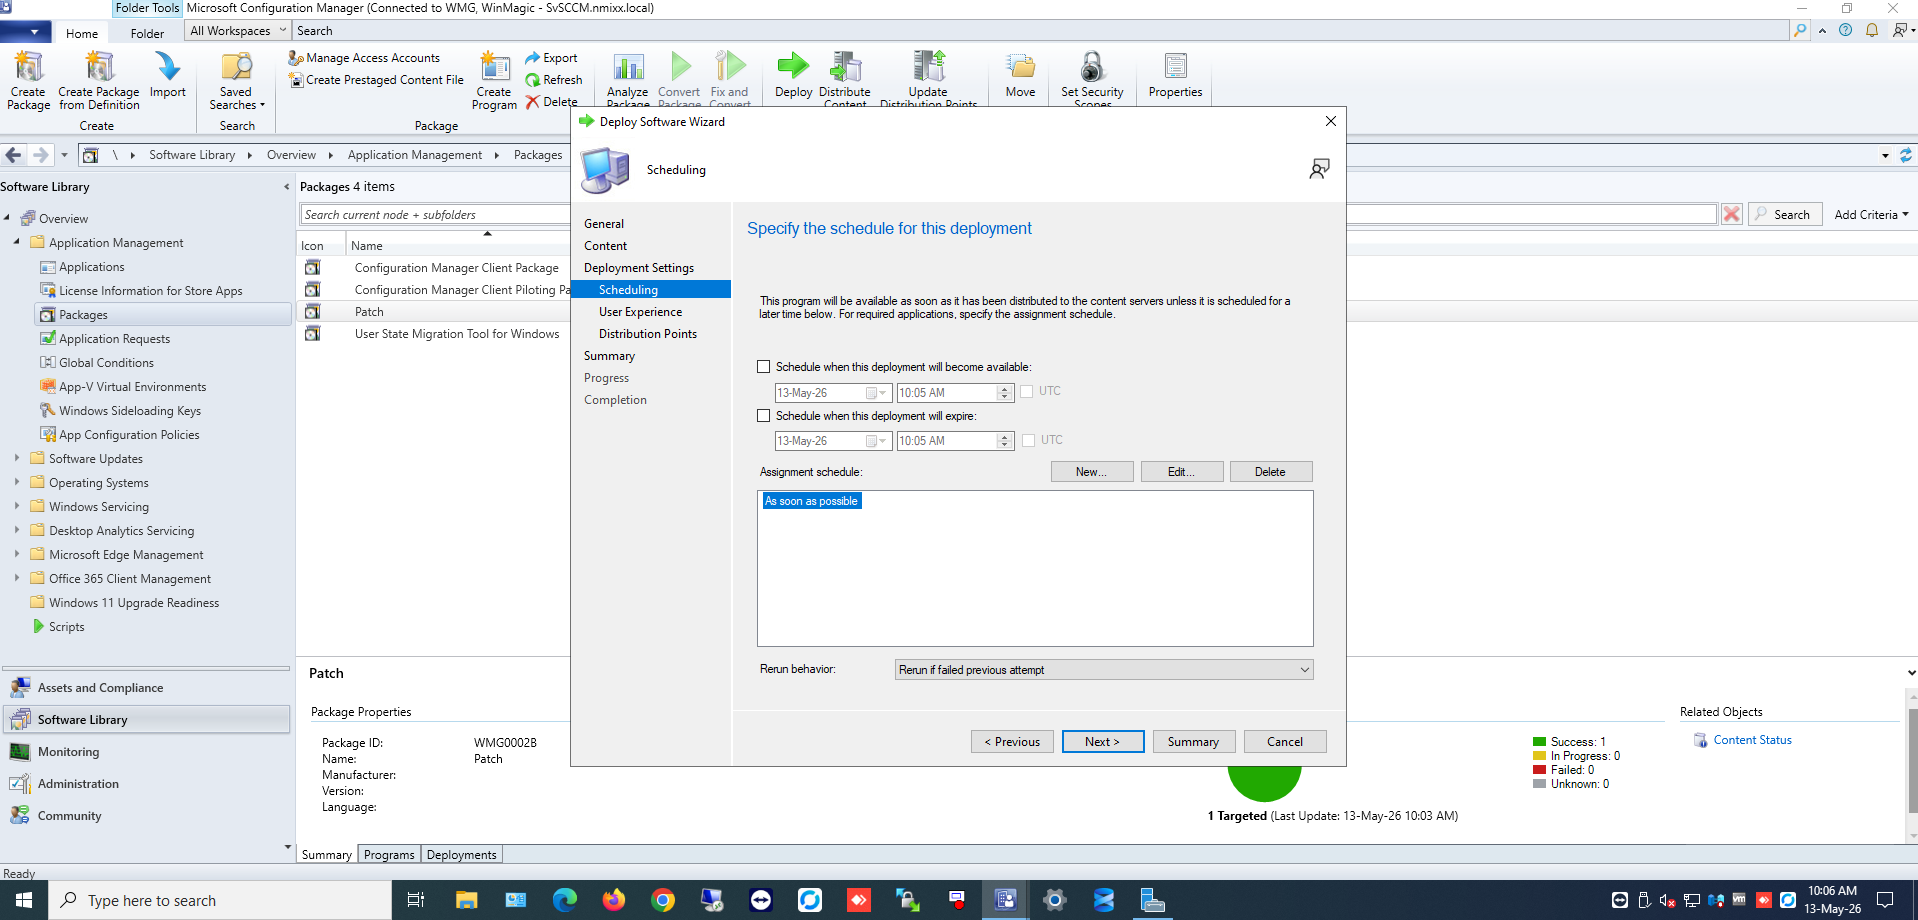
Figure 14 — Schedule configuration
Step 14: Configure User Experience
1. On the User Experience page, configure the following options:
• Check Allow users to run the program independently of assignments
• Check Software Installation
• Check Commit changes at deadline or during a maintenance window (requires restarts)
2. Click Next.

Figure 15 — User experience settings
Step 15: Configure Distribution Points
1. On the Distribution Points page, configure the following:
• Deployment options: Select Download content from distribution point and run locally
• When no distribution point is available: Select Do not run program
2. Click Next.
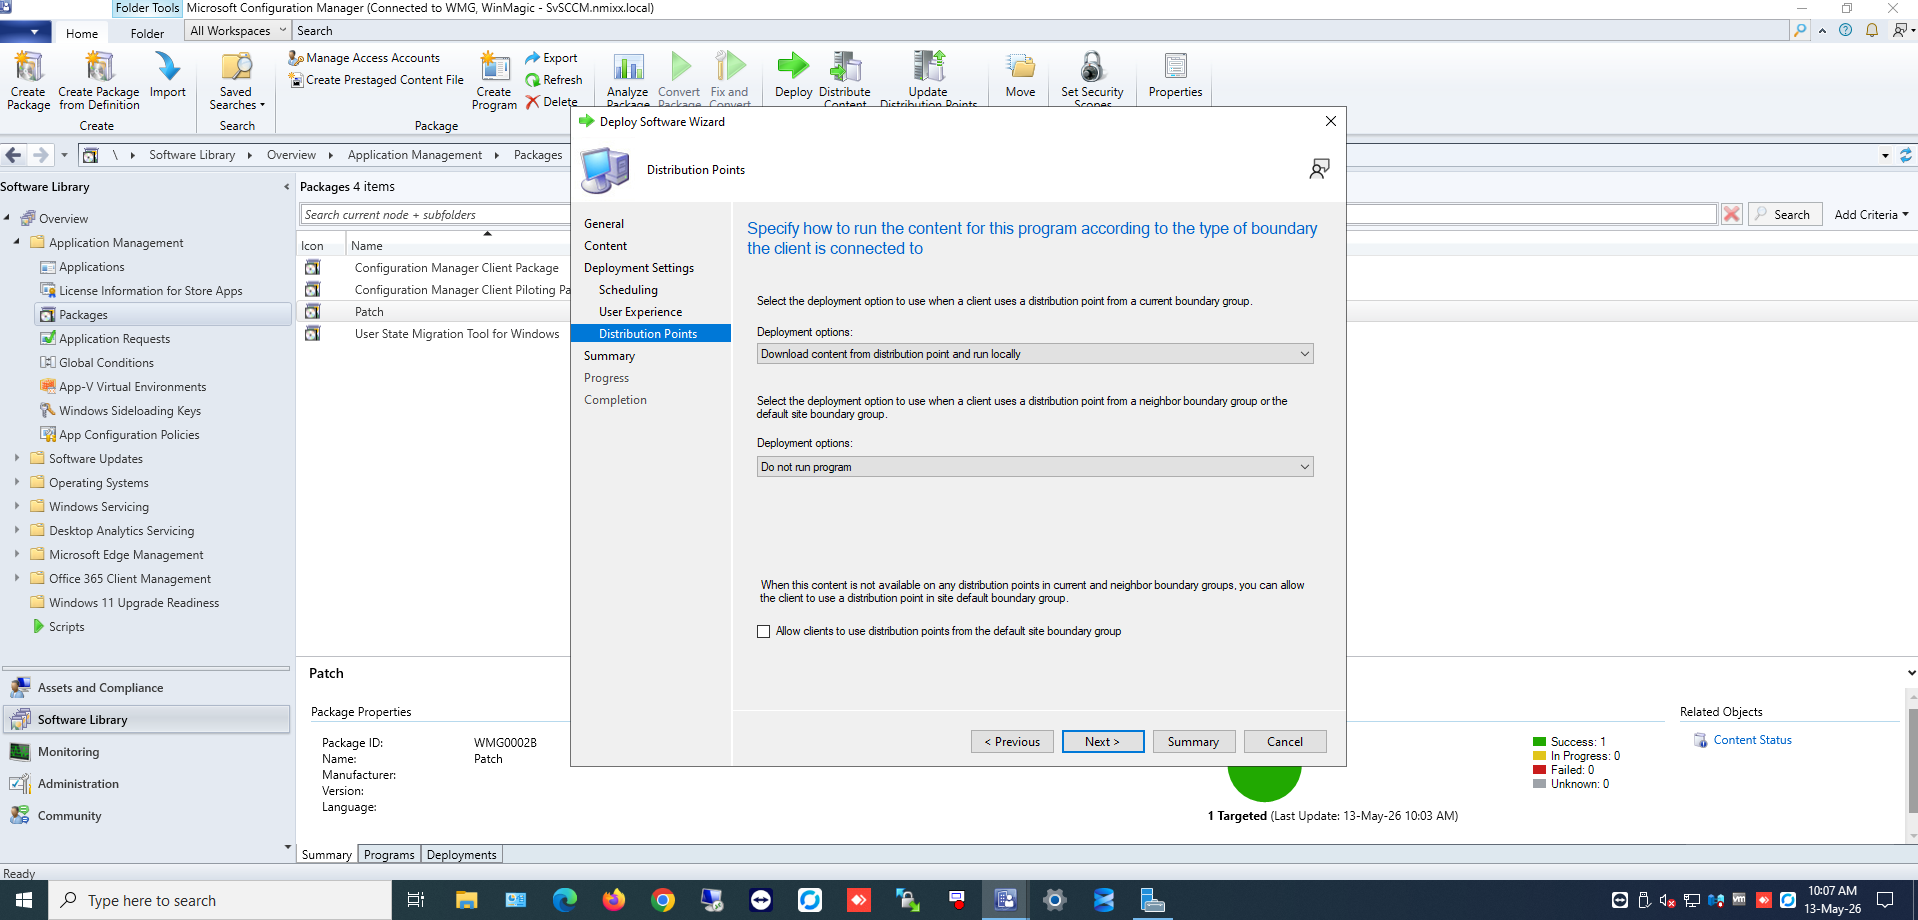
Figure 16 — Distribution point options
Step 16: Complete Deployment
1. Review the deployment summary.
2. Click Next to deploy the package.
3. Confirm that the deployment completed successfully.
4. Click Close.
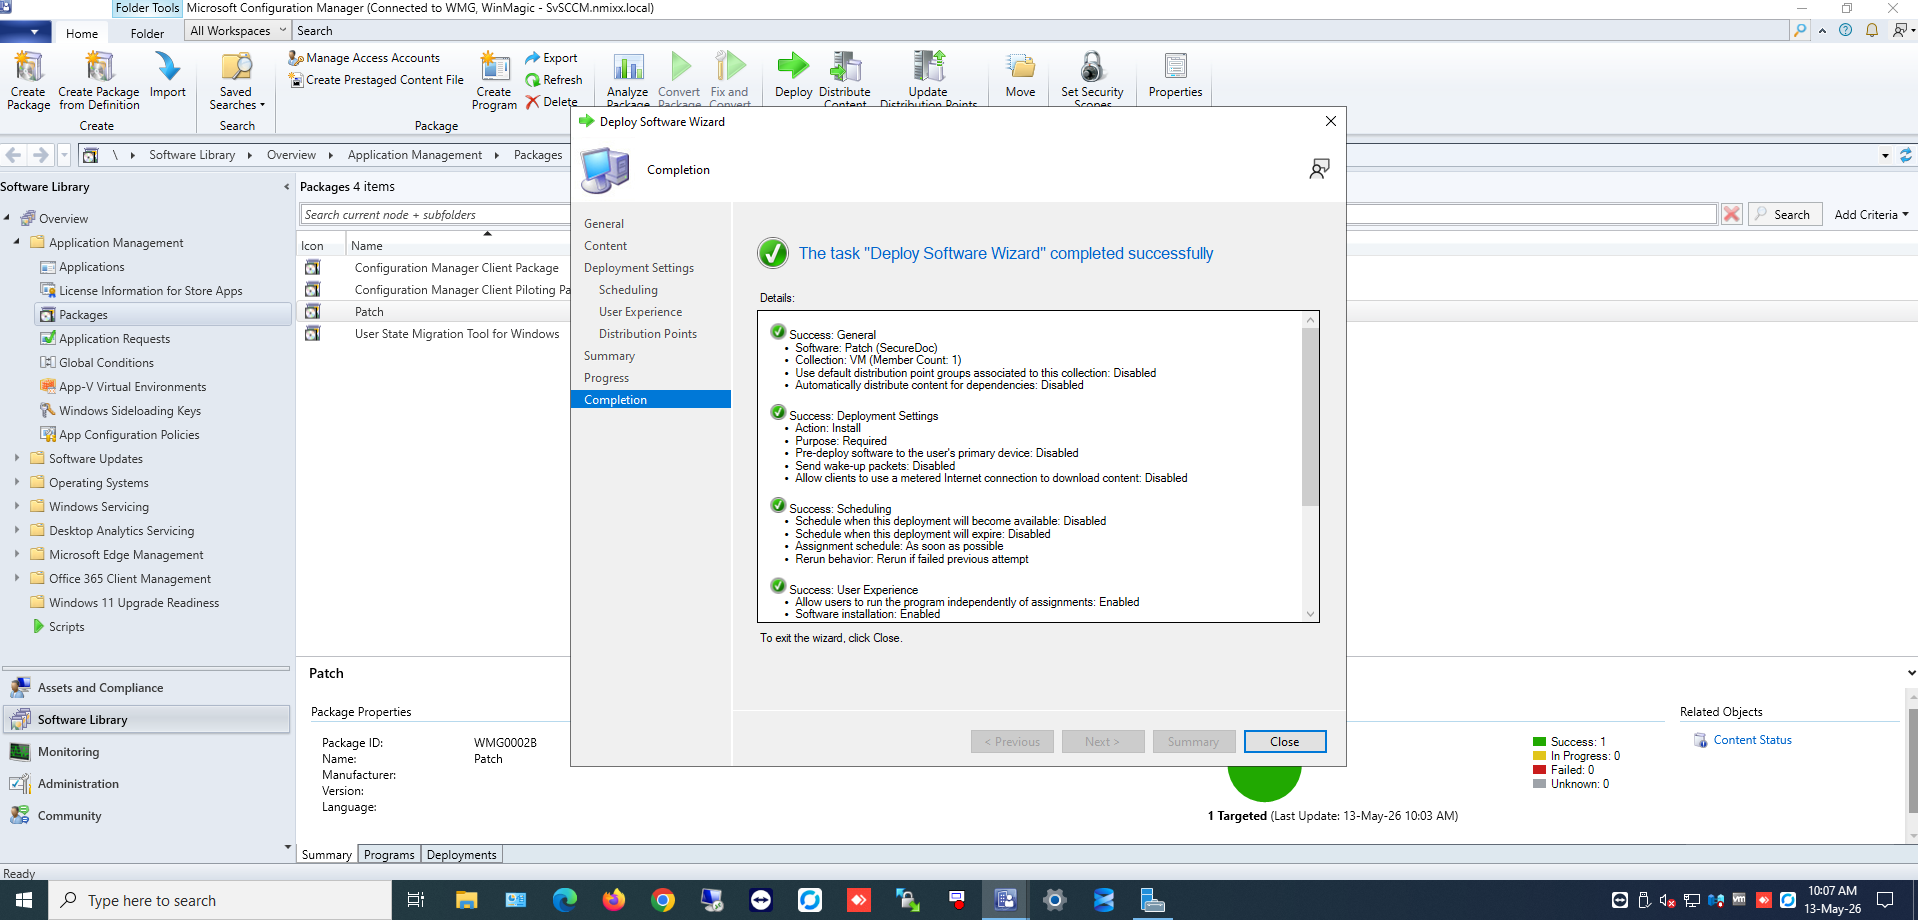
Figure 17 — Deployment completed successfully
Phase 4: Client-Side Verification
Step 17: Verify Installation via Software Center
1. On the client device, open Software Center.
2. Navigate to the Applications or Updates section.
3. Verify that the SecureDoc UEFI Patch package appears and begins downloading automatically.
4. Monitor the installation progress.
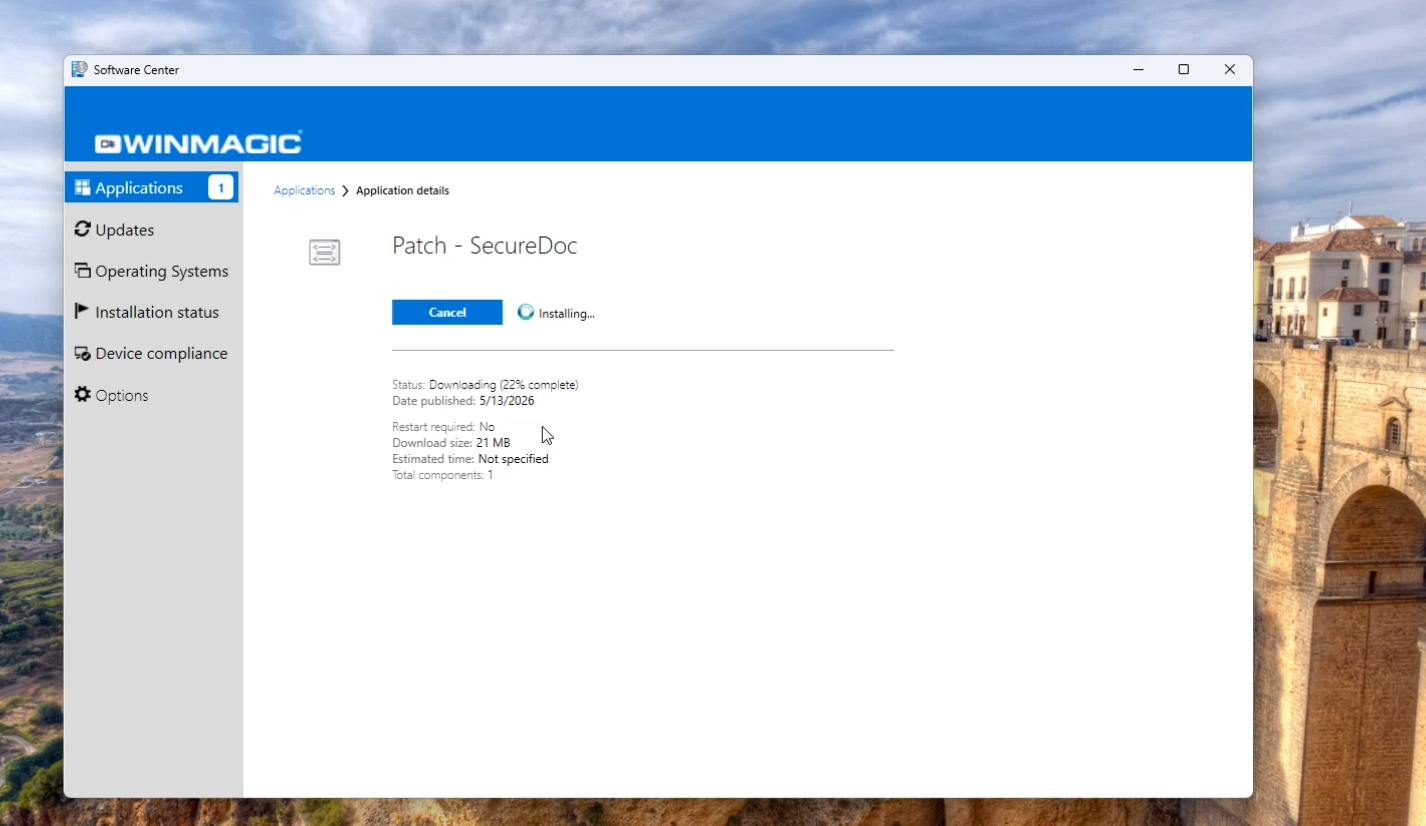
Figure 18 — Software Center showing UEFI patch installation
Step 18: Verify Registry Settings
1. Open the Windows Registry Editor (regedit.exe).
2. Navigate to the following registry path:
HKEY_LOCAL_MACHINE\SOFTWARE\WinMagic
3. Verify that the PBU2023Update registry value exists with a value of 1.
4. This confirms that the UEFI patch was successfully installed and registered.
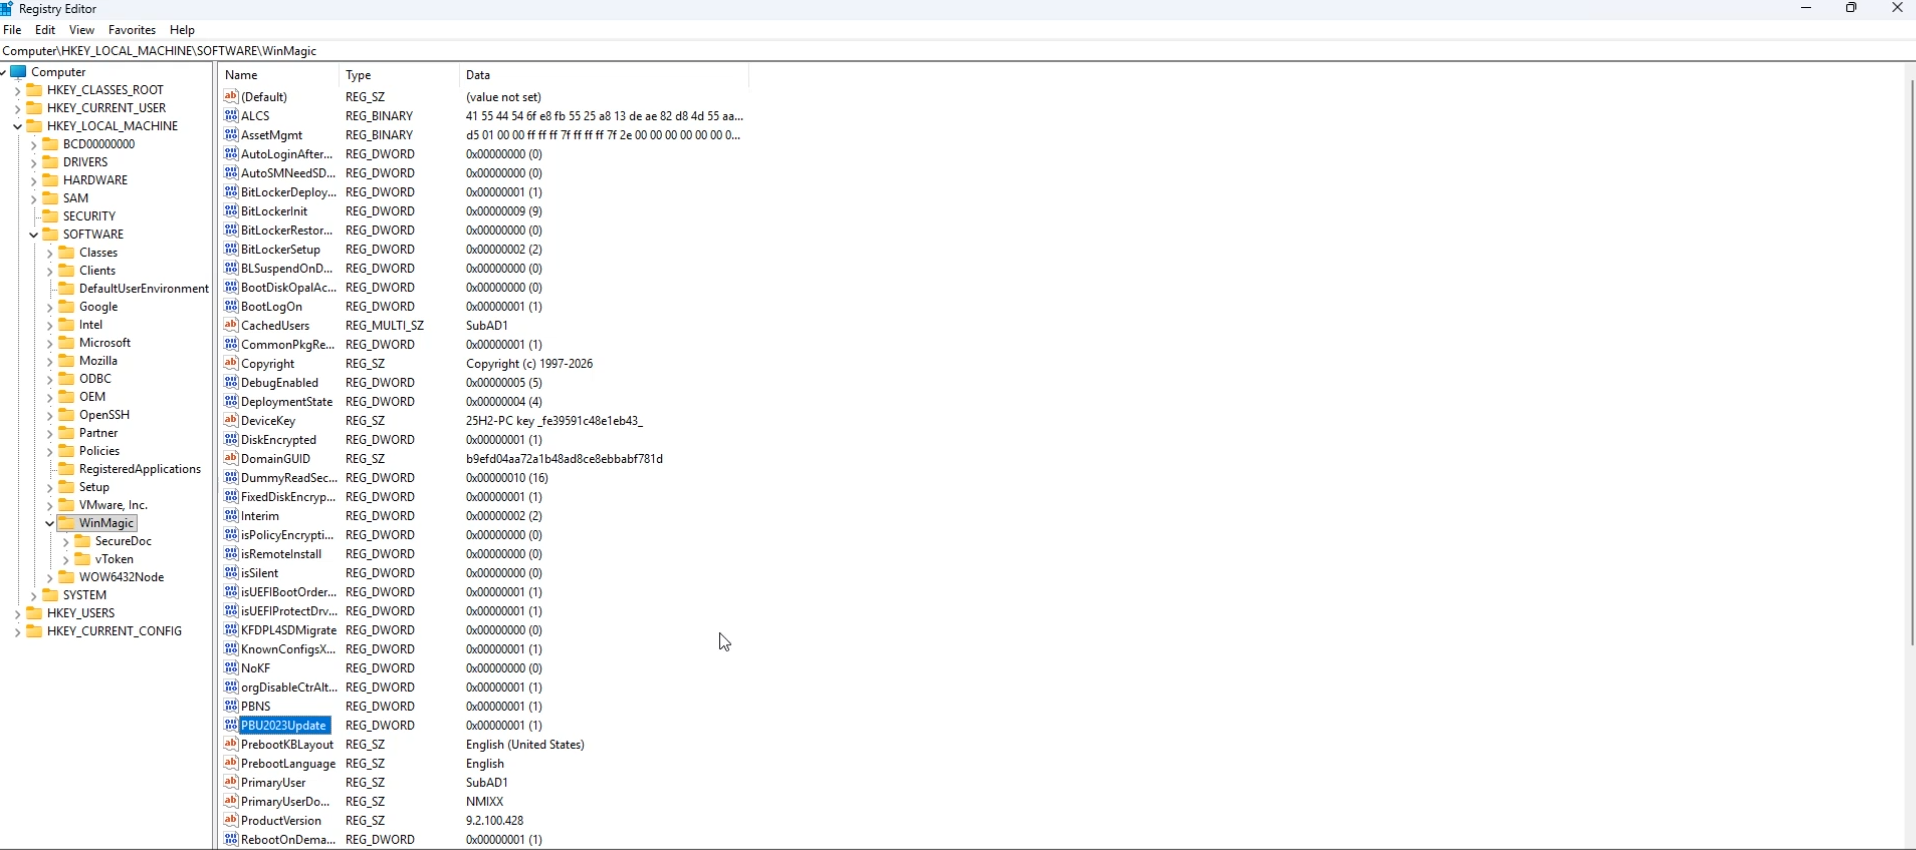
Figure 19 — Registry verification showing PBU2023Update = 1
Note: The presence of the PBU2023Update registry key with a value of 1 confirms successful installation of the SecureDoc UEFI patch. If this key is missing or has a different value, the installation may have failed. |
More Information
Related Information
• For troubleshooting installation failures, review the log file at C:\Windows\Temp\UEFI_Setup.log
• Ensure that client devices have UEFI firmware (not legacy BIOS) before deploying
• Verify that distribution points have sufficient disk space for the package
• For large-scale deployments, consider phased deployment to pilot collections first
Additional Resources
• WinMagic SecureDoc Enterprise Server Documentation
• Microsoft System Center Configuration Manager Documentation
• UEFI Pre-Boot Authentication Configuration Guide
SecureDoc, SecureDoc Enterprise Server, and related marks are trademarks of WinMagic Inc. Other products mentioned may be trademarks of their respective owners. © WinMagic Inc. All rights reserved. This document is for informational purposes only. WinMagic makes no warranties, expressed or implied.