How to migrate the SES database to a new SQL Server
Summary
This article provides step‑by‑step instructions for migrating the SES SQL database from one SQL Server instance to another.
Product Versions Affected
All SES versions
Environment
- SQL Server Edition: Express/Standard/Enterprise
- All SQL Server versions
Overview
Migrating the SES database is a critical task, as the database stores all configuration data for encrypted devices, users, keys, and certificates.
The recommended migration method is:
- Detach the database from the existing SQL Server
- Copy the database files to the new SQL Server
- Attach the database to the new server
Before beginning, ensure a full backup of the SES database is taken.
Prerequisites
- Full back up of the SES database
- Administrative access to both SQL Servers
- SES Console, SDConnex, and ADSync services stopped on the old server
Database Migration Procedure
1. Stop SES‑Related Services
Before detaching the database, stop the following services on the old server:
- SES Console
- SDConnex
- ADSync
2. Identify the Database File Locations
- Open SQL Server Management Studio (SSMS).
- Right‑click the SES database → Properties → Select Files.
- Scroll right to view the Path and File Name.
- The database consists of two files: .mdf (data file) and .ldf (log file)

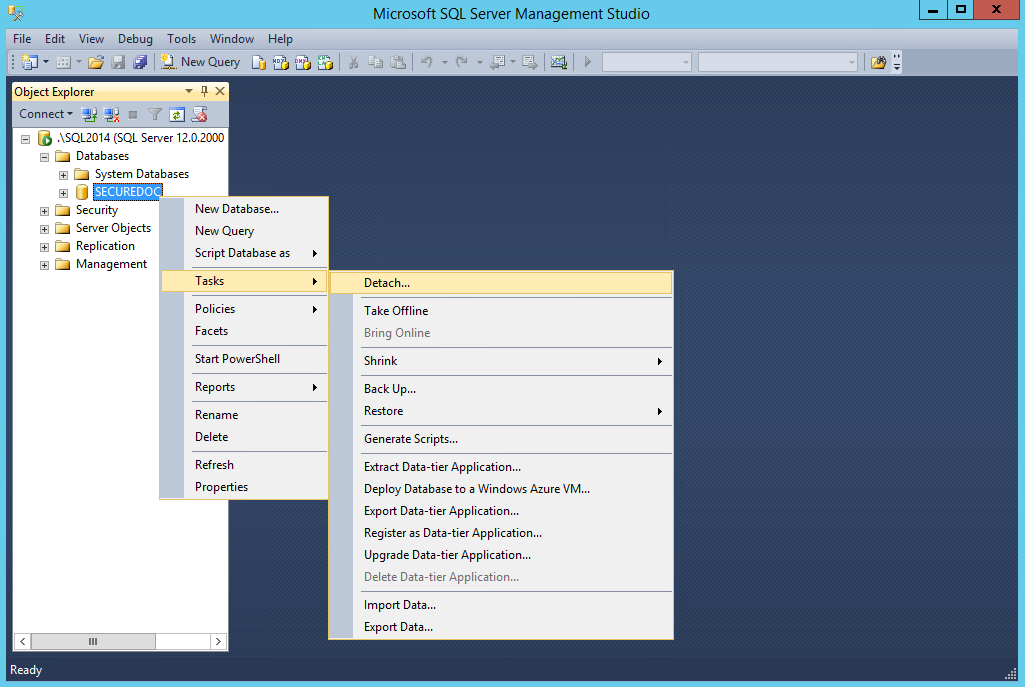
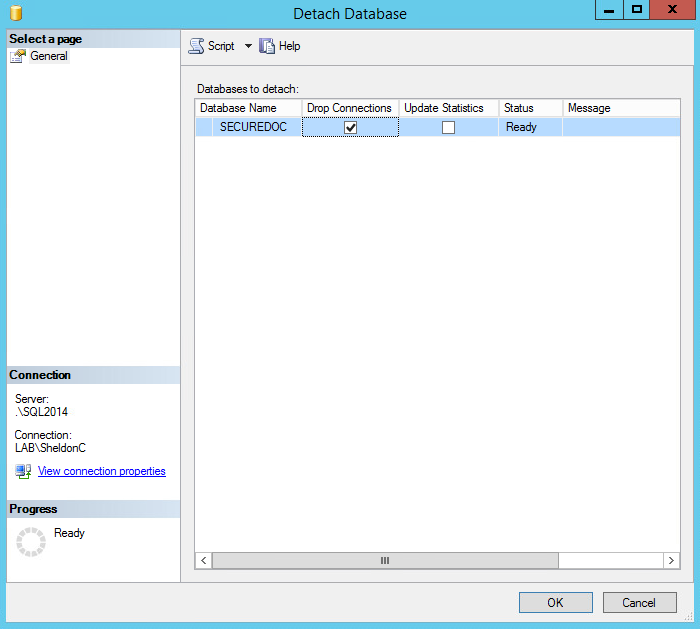
3. Detach the Database
- In SSMS, right‑click the SES database.
- Select Tasks → Detach.
- Check Drop Connections to disconnect any active sessions.
- Click OK to complete the detachment.
4. Copy the Database Files to the New Server
- Navigate to the folder containing the .mdf and .ldf files.
- Copy both files to the new SQL Server.
- If unsure where to place them, check the Master database properties on the new server to identify the default SQL data directory.
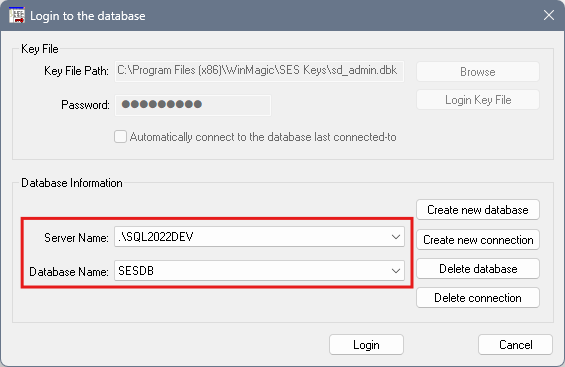
5. Attach the Database on the New SQL Server
- Open SSMS on the new server.
- Right‑click Databases → Attach.
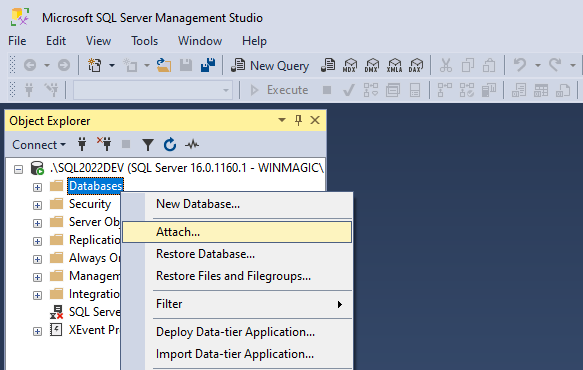
- Click Add and browse to the copied .mdf and .ldf files.
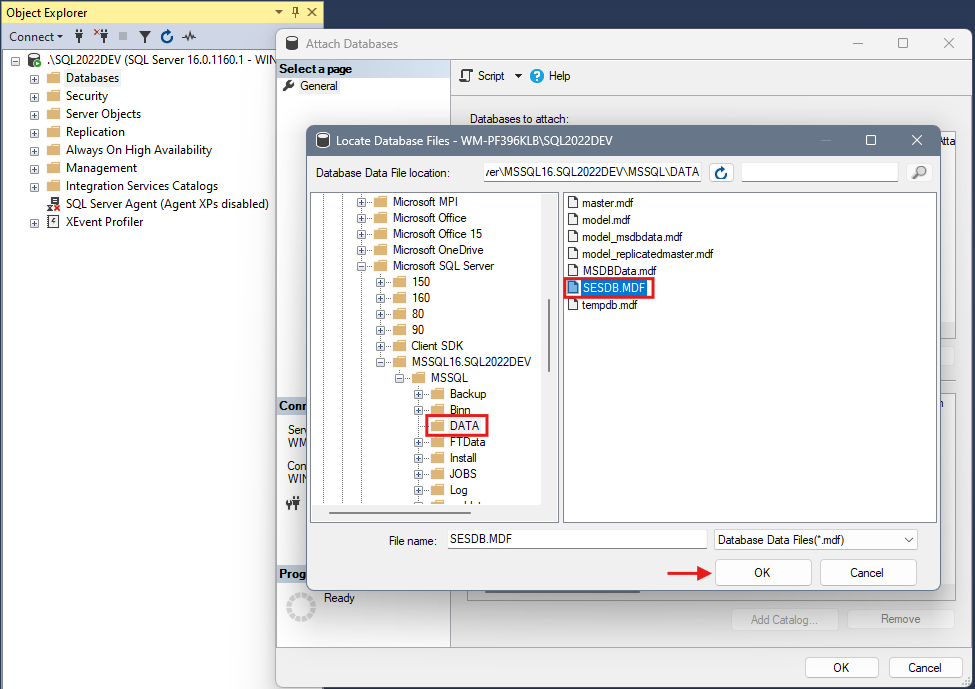
- Click OK to attach the database.
6. Install and Connect SES on the New Server
- Install the SES software on the new server.
- Launch the SES Console and connect to the newly attached database.
- If installing a newer SES version, the database will automatically upgrade during the first connection.
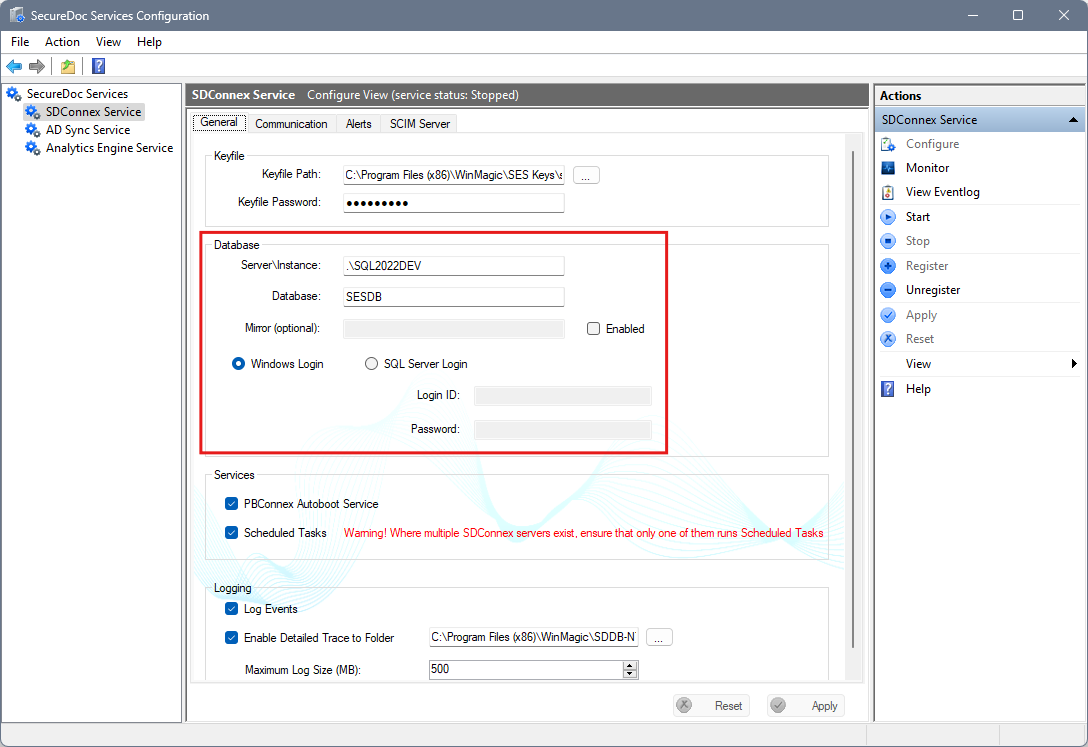
- Reconfigure: SDConnex, ADSync, SES profiles (update IP/Server name to the new server)
7. Update the Old Server for Client Migration
- Upgrade SES on the old server.
- Configure SDConnex on the old server to point to the new SQL database.
- Keep SDConnex running on the old server for at least one week (preferably up to one month).
- This ensures all client devices receive updated profiles and migrate successfully.
- After the transition period, identify devices that have not communicated and update their profiles manually.
Scenario: Moving the Database Without Upgrading the SES Server
If you are only migrating the database but not upgrading SES:
1. Record Current Settings
Document or screenshot the SecureDoc Services (SDConnex, ADSync, Analytics Engine) settings
2. Stop Related Services
- Stop all the SecureDoc service
- Close the SecureDoc Service Configuration Console
3. Backup the Database
Perform a full database backup before proceeding.
4. Detach and Move the Database
- Detach the SES database from the old SQL Server.
- Attach it to the new SQL Server.
- In SES, select Create a new connection and point it to the new SQL Server.
5. Update SDConnex Settings
Modify SDConnex to reflect the new SQL Server connection details.