How to Migrate SES server to new server
Topic:
This KB article is intended for clients who want to migrate their existing SES server to a new server environment:
Preamble:
SES is actually comprised of several components whose Server Names (if using DNS name resolution) or IP-address sensitive. All SES Server components would need to be reconfigured if, for example, the Database were to be moved to a different Server Name or IP Address.
For example: Client devices communicate with SDConnex directly, so if an SDConnex server is going to be replaced by one having a different DNS name or IP address (as appropriate), then device profiles must be altered and deployed to endpoint devices IN ADVANCE of the changeover.
If only the SES database is being moved from one server to another, then the SES components, such as SDConnex, ADSync, SES Consoles and SESWeb will need to be modified to point to the new database engine server. In addition a new License File will likely need to be created and deployed.
Product version affected:
All version of SES and SD
Environment:
Windows 7 and newer
Additional reference materials:
KB 1021 Upgrade path for migrating from older versions of SecureDoc Enterprise Server
KB 1548 Migrating Devices From One Server to Another
System Requirements - http://www.winmagic.com/support/technical-specifications
Steps To Follow:
1. Please review the system requirements for SecureDoc Enterprise Server from http://www.winmagic.com/support/technical-specifications
2. Please make a full back up of the SES database before migrating or upgrading the server.
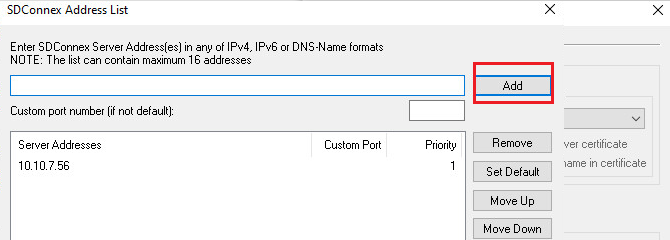
3. If changing (or adding additional) SDConnex server(s), consider if the new SDConnex server will be retaining the same static IP address and computer name of the old server or not.
4. If the new server will be using a new static IP address and computer name, please follow the instructions below.
5. Upon completing the migration of the SES server, please contact [email protected] to obtain a new license file.
- If the new server will be assigned a new static IP address, you must make sure to register these existing devices to have the new ip address.
- Create a new profile, or update any existing profiles. The new/revised profile(s) must contain the new IP address or Server Name (see below), along with the existing server IP Address (e.g. Client devices must know about BOTH servers for a period of time) so they know how to communicate with the new server as the old server is taken out of service. This must be done before upgrading the server.
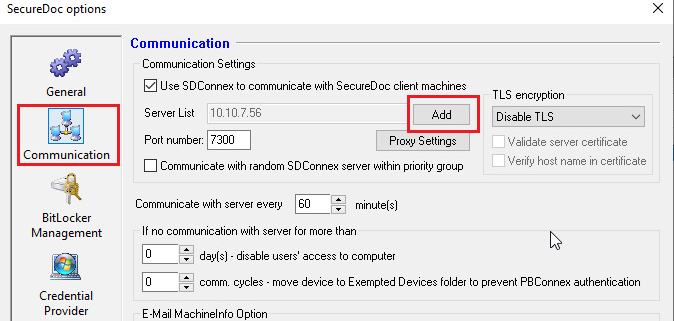
- Apply this profile to every devices and ensure that all clients can communicate with the current server. Verify that the clients have received the new profile with the new IP address (The client's will appear in the Devices Tab, having the words "up to date" in the profile status column.
- The database must be backed up before migrating from the old server to the new server.
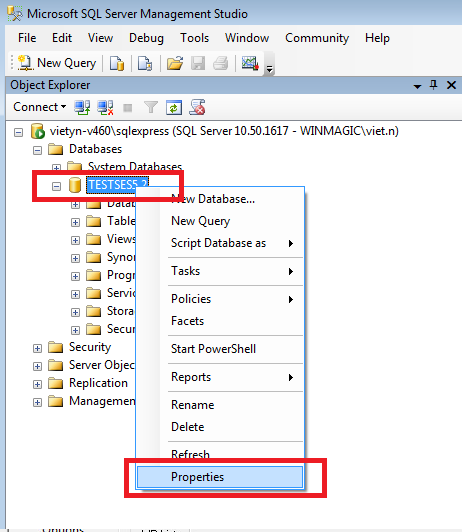
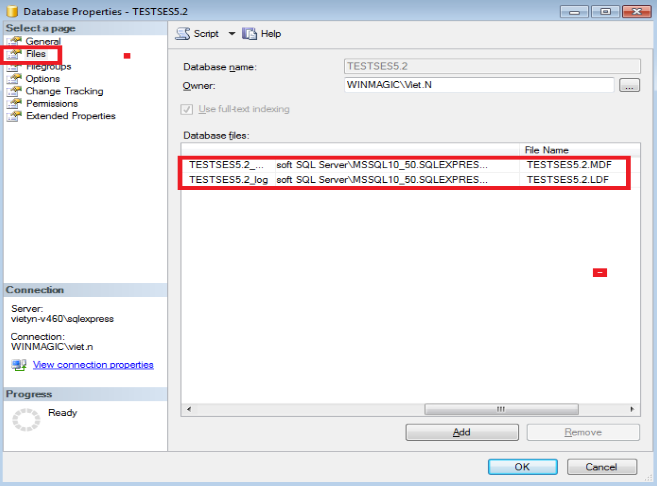
- IF migrating the database to a new server, before detaching the database make sure all SES Consoles, SESWeb, SDConnex, and ADSync Services are stopped. Look at the properties of the Database in the SQL Management Studio. Under the Files section of the properties page, after scrolling to the right the Path and the File Name can be found.
- After finding the Path and the File Name, the location of the database files will be needed to detach the database. The files are called *.mdf and *.ldf.
- From the SQL Server Management Studio -> Right Click on the DB -> Properties
- Highlight the Files
- Detach the database from the old server, copy the files to the new server and attach them. This will migrate the permissions and settings that have already been setup for the database to the new server.
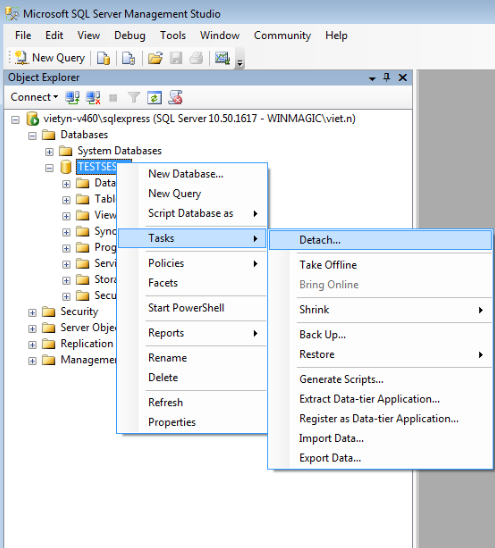
- To detach the DB -> highlight the DB -> Tasks -> Detach…
-
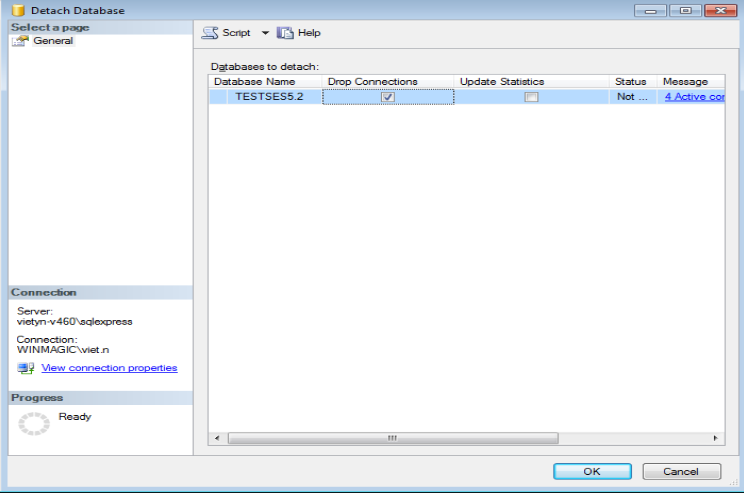
- Check off the option "Drop Connections” -> click OK. This check box will disconnect any remaining connections to the database.
- Go to the path where the database is stored, and copy the database files to the new server. From the properties of the Master Database, the path can be found for where the SES database files are stored.
- To find where to store the files on the new server, go to the properties of the Master database, and find the path, then copy the SES database files to that path.
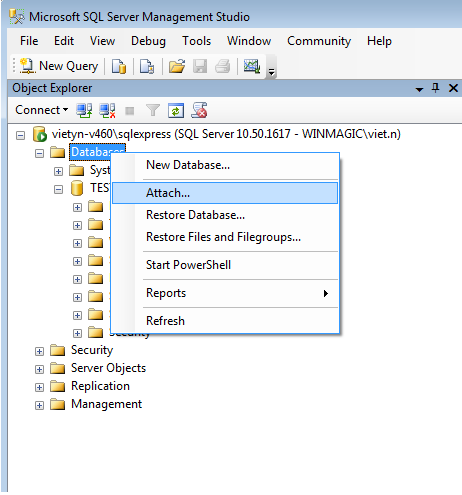
- When the new files have been placed to the new SQL server -> go to SQL server management studio -> right click on the Databases -> Select Attach
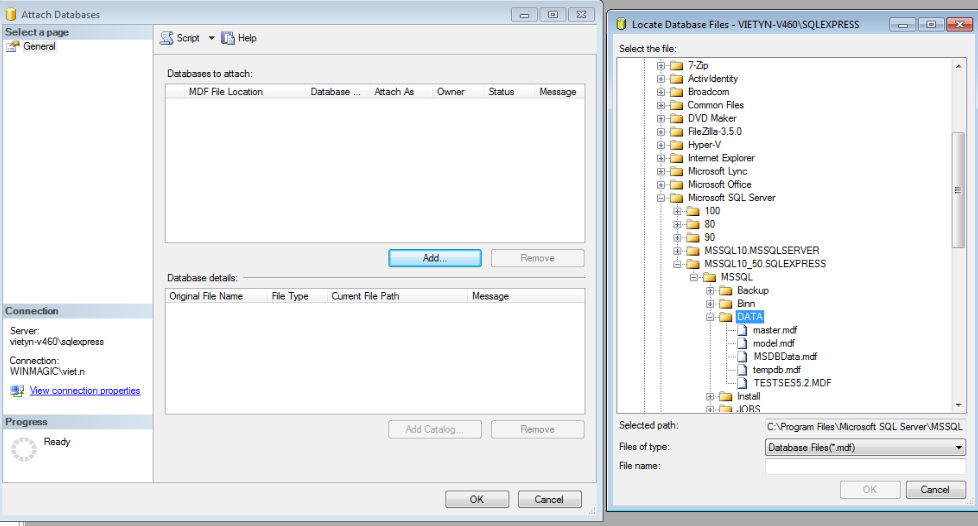
- Click on Add -> locate the two files -> Click OK
- Once the database has been attached, the original version of SES can be installed on the new server (if moving SES components) and connect to the database, or the existing components on other servers can be now connected to the database on its new host server (if moving the Database).
- After the system has been stabilized, if desired the version of SES can be upgraded, but it is recommended to ensure stability first on the existing version before adding the further complexity of a version upgrade (see other resources on Upgrading SES).
- Reconfigure SDConnex and ADSync settings to point to the new Database (if applicable).
- Once stabilized, you should re-visit the Device Profiles and remove any references to the old SDConnex Server ID (if appropriate). The SES profiles will then only reference the exact list of current, in-use SDConnex server(s).