Case Scenario:
Customer wants to create a non-AD SES web account with the following requirement:
- to view reports only
- to be able to change its' own password and no other users' password.
The article provides step by step instructions on how to configure a non-AD account user with limited access to the SESWeb console and be able to view reports only
To have this working correctly, customer would need to configure the environment in the following manner:
1) Create individual folders
2) Create and place user in each folder
3) Create groups and link each user to appropriate group
4) Assign default or customized roles to limit each user accesses within the group.
Note:
- The reason for assigning a user to a folder is to prevent the user from resetting other admin accounts' passwords except their own.
- This case scenario would not apply if the user has an AD account, and ADSync environment is setup as the AD password management would prevent user resetting other admin account passwords.
Product Version Affected:
SD 6.x to latest SES version with SESWeb
Environment:
SES Non-AD account
Steps to follow:
Step 1: The SES Web Administrator logs into the SES Web Console
Step 2: Navigates to Folders > selects Folder drop down to “Add Folder”
In the example, “test1, test2 and test3” folders are created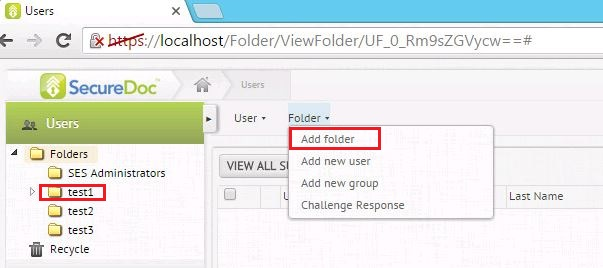
The following steps demonstrate the creation of group\user link
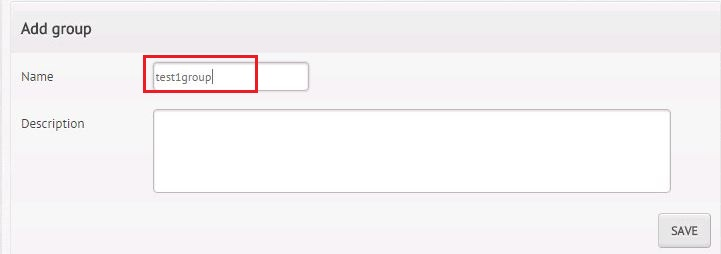
Step 3: Select “test1”folder then selected Folder drop down and click on “Add New Group”. Name the new group as i.e “test1group” > Click “Save”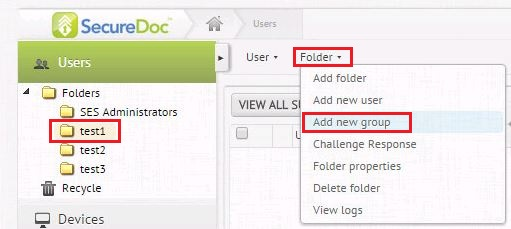
Step 4: Once the “test1group” group is created, navigate to “test1”folder and select Folder drop down to “add new user”.

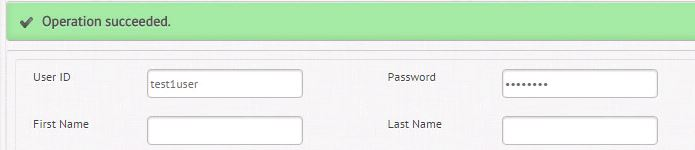
Step 5: Example “test1user” user will be created with a Default Password that can be changed later by limited SESWEB user. A message, “Operation Succeeded” after clicking the “Save” button to create the user account.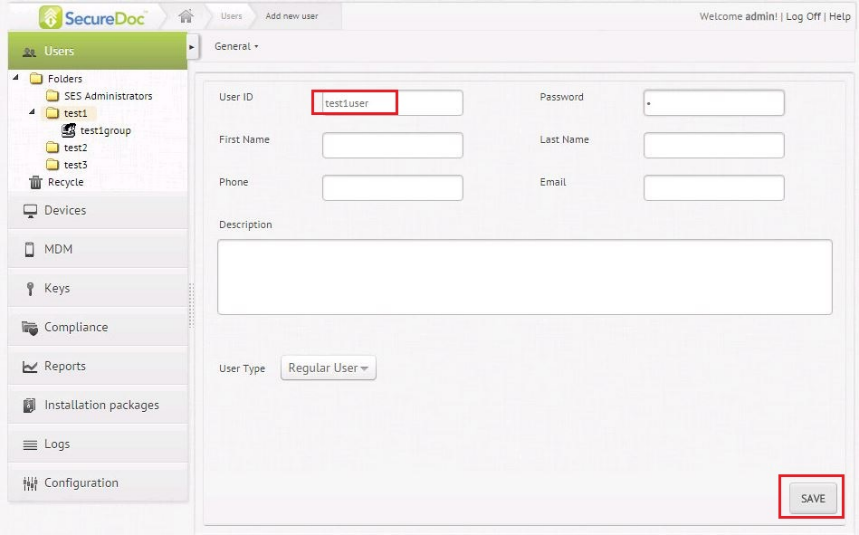
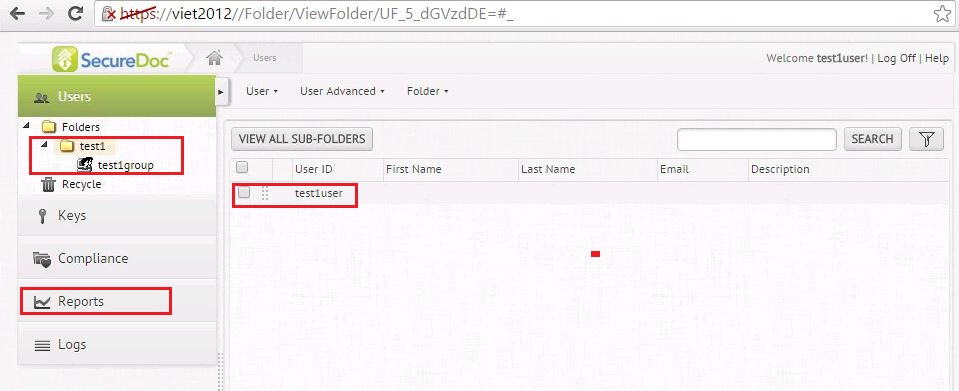
Step 6: Link “Test1user” user to “Test1”group
- Highlight “test1” folder, please checkbox “test1user” user and click User dropdown at the to select “Add user(s) to Group” will prompt us to navigate to location of appropriate group.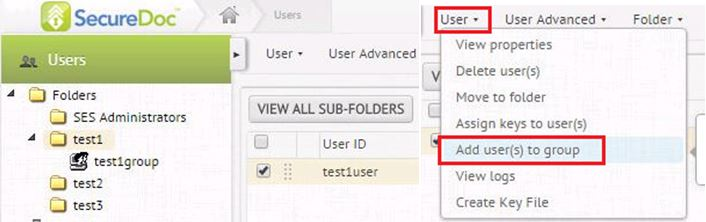
Step 7: Select the group, “test1group” > click “Save” button which is located at bottom of the page.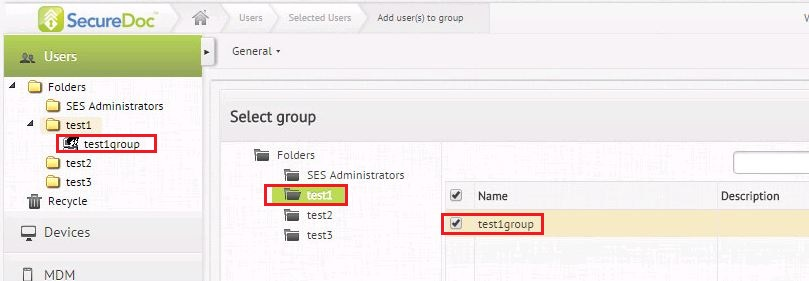
The image below illustrates the “test1user” account is now in the “test1group” group.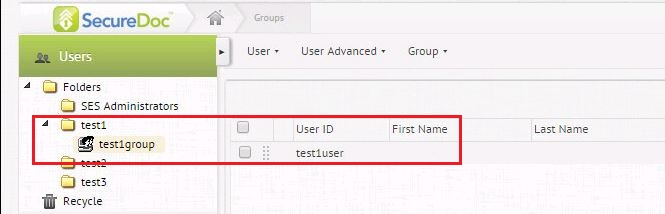
The following steps are to add the group to admin access and assign appropriate rights
Step 8: - Navigate to “Configuration” > “Administrator Management”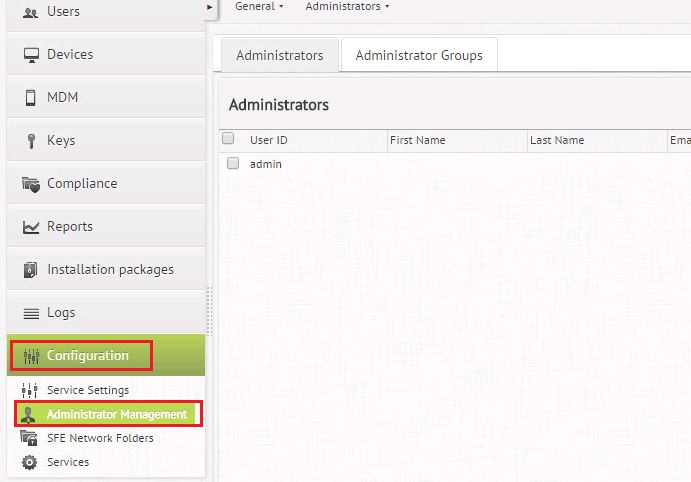
Step 9: From "Administrators" drop down, select "Manage Roles"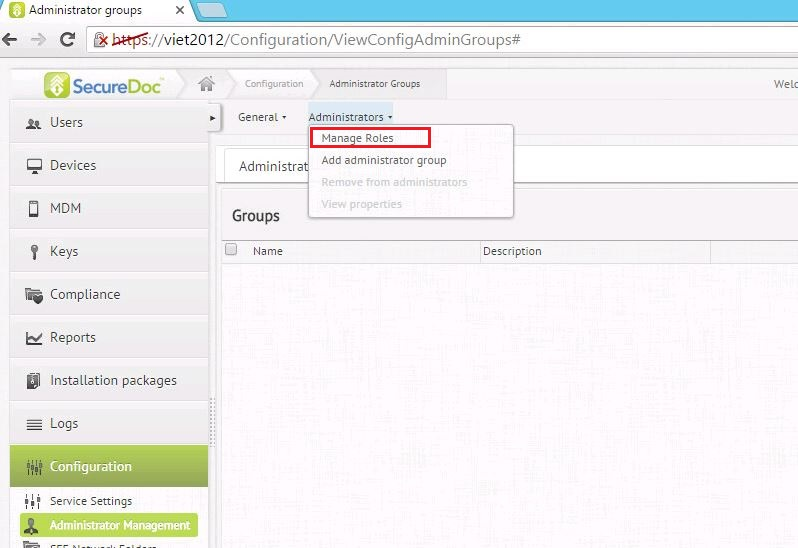
Step 10: From "Administrators" drop down list, select "Add new Role"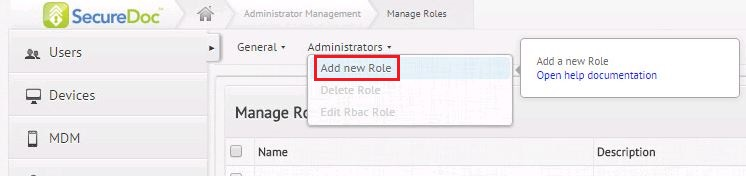
Step 11: Create a Rbac Role name i.e. "Read Reports Only" and select (checkbox) the following rights:
"Read Reports"
"Manage users"
"Read Administrators
"Read Users"
"Manage Settings"
Click "Save".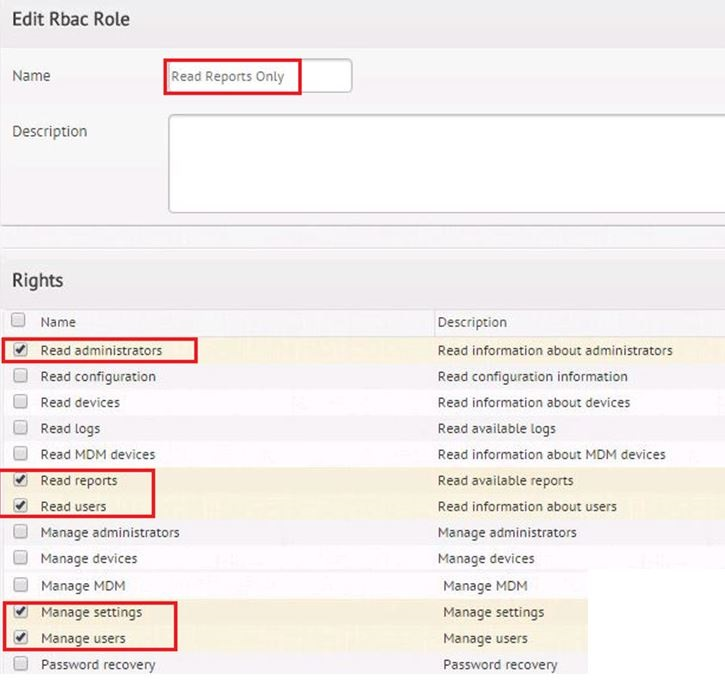
Step 12: Select “Administrator Groups” tab > under "Administrators" drop down, select “Add administrator group”
Step 13: Navigate to the “test1group” group under the “test1”folder and select “Read Reports Only" from the "Assign Role to the Admin” section.
A message, “Operation Succeeded” after clicking the “Save” button.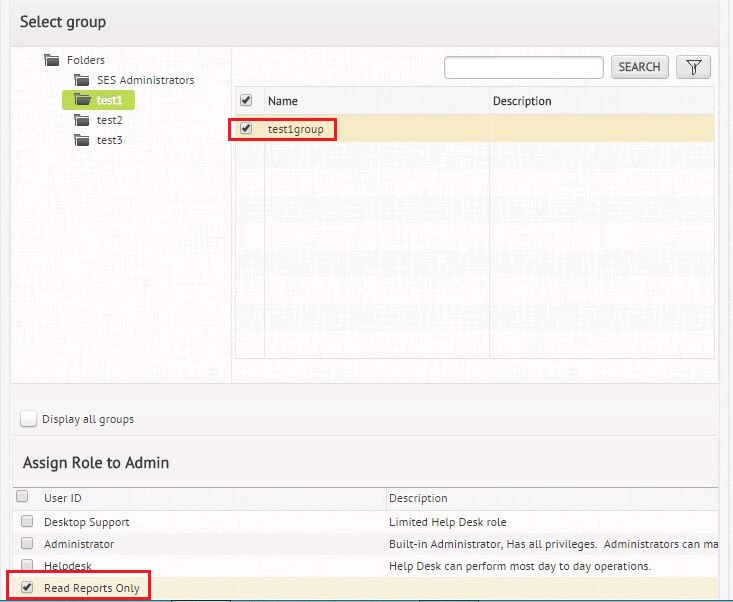
Step 14: Final step is to assign Folder access.
While under Administrator Groups, select the “test1group”, click on Administrators drop down and select “View Properties”.
Step 15: Switch to Folder view and only leave appropriate folder i.e. "test1" folder checked. Deselect other folders and click "Save" button.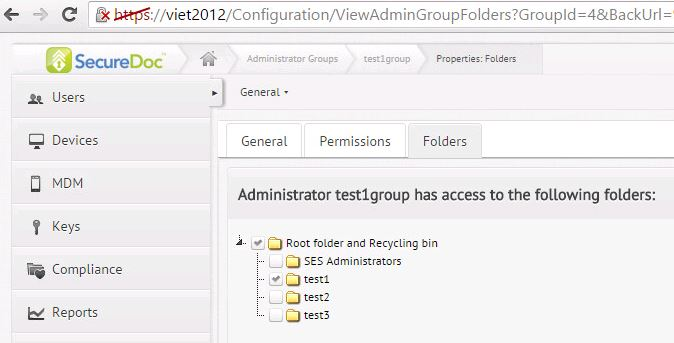
Step 16: Have the user logs on to SES Web to change password
Step 17: Navigates to appropriate folder where the user is residing
Step 18: Place check box beside the user and select User drop down. Select View Properties.
Under the "General" Tab the user can change the password. Click "Save" to commit the change.
The user should only be able to view Reports and the contents from "test1" folder