Overview
This article provides guideline instruction steps on how to configure PBConnex using "All Device" and "All User" Groups. The use of these built-in SecureDoc groups can provide self-updating access to devices for such purposes as a) providing a manageable means to access all devices by a specific group of users (e.g. IT desktop support staff), or b) access to a set of devices by all users - such as Loaner laptop devices. Other scenarios can as easily be configured.
The self-updating aspect comes from the facts that any new Users are automatically added to the All Users group, and any new Devices installed with SecureDoc are automatically added to the All Devices group.
Product version affected: 7.5 and higher
Environment (OS/hardware/software): Please refer to the latest system requirements from
http://www.winmagic.com/support/technical-specifications
Procedures:
Step 1 - Enabling Active Directory user authentication
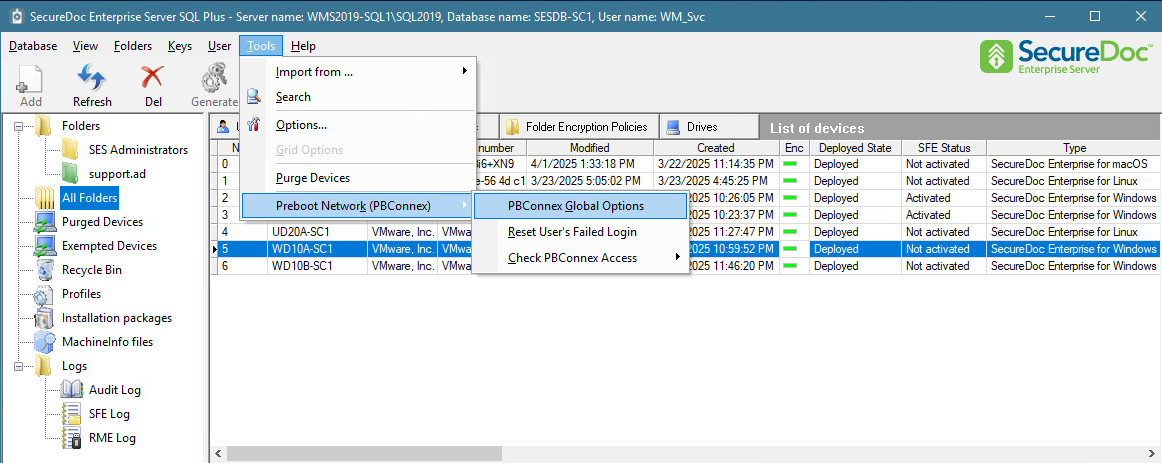
From your SES console, click on Tools 🡺 Preboot Network (PBConnex) 🡺 PBConnex Global Options
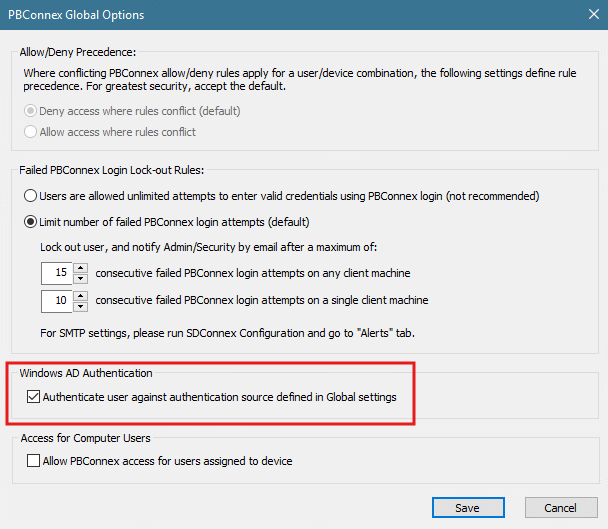
Step 2 - Configuring SES Global rights for PBConnex
For Active Directory users: Enable the "Authenticate user against Active Directory"
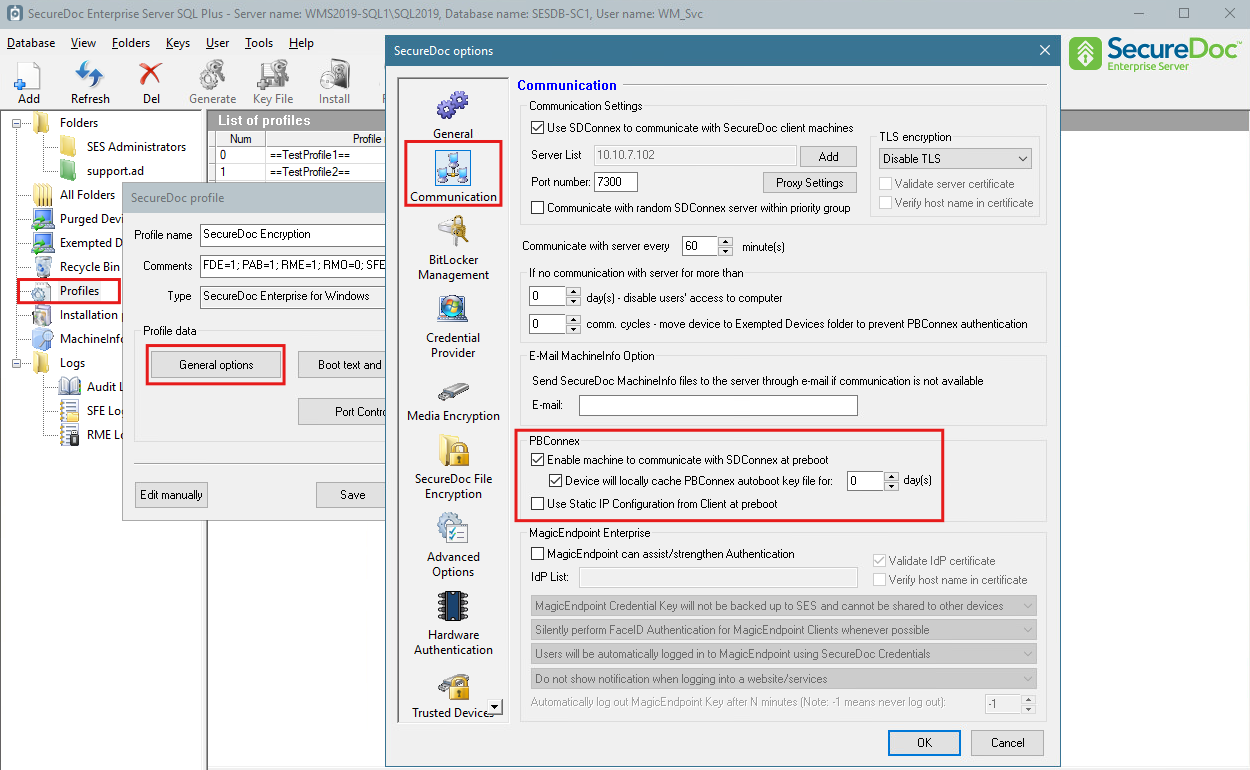
Step 3 - Configuring Windows profile to allow PBConnex
Navigate to Profiles 🡺right-click Add profile (or right click and Modify Profile)
Navigate to Communication, and under PBConnex select “Enable Machine to Communicate with SDConnex at preboot”
Step 4 - Creating Parent Group
To configure Group Relationship (the same process can be applied to specific Active Directory group only), current configuration will allow any user to authenticate on any device.
Select All Folders, and under the Groups tab, right click and Add Group
Specify a name for the group. (for this example, we've named it "Global PBConnex Group")
Under PBConnex Access Policies select policy that will allow validation (if caching is needed, ensure the option is selected )
Ensure that both Parent Groups (PBConnex Global Access) and sub User group ( All User Group) have identical settings.
Step 5- Linking User Group to Parent Group
Under Groups
- Select All User Group
- Select Member of Groups
- Click Add and pick Group that was created (in this example its Global PBConnex Access ).
Please ensure that PBConnex Access Policies match Step 4
Step 6 - Linking Device group with Parent Group
The final step requires that you link Parent Group (Global PBConnex Access) to all Device Group to be able to grant Active Directory users access to any device.
Navigate to All Device Group
- Select Members Of Groups
- Click Add then select Global PBConnex Access group
How to Configure PBConnex AutoBoot
PBConnex Autoboot will allow devices to bypass your SecureDoc preboot authentication as long as the device is on a reachable network.
Step 1 - SDConnex Configuration
Launch SecureDoc Services Configuration and select SDConnex Service. 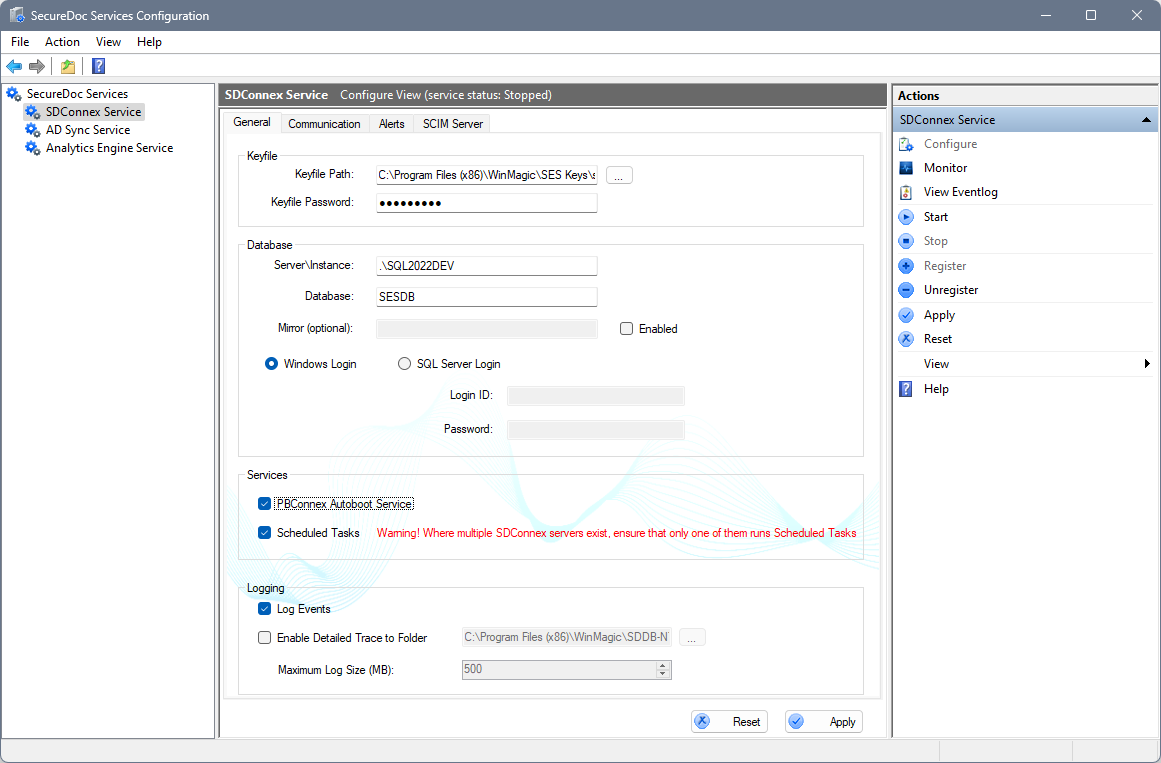
In the General Tab, check to confirm that the option “PBConnex Autoboot Service is enabled.
If this setting was not enabled, add check mark and apply change. You will need to then stop and start the service in order to activate this change applied.
Step 2 - Profile Configuration
- Navigate to Profiles
- Right click Add profile (or right click and Modify Profile)
- Navigate to Communication
-Under PBConnex select “Enable Machine to Communicate with SDConnex at preboot”
Note:
The option "Device will locally cache PBConnex autoboot key file for x days" can be enabled to help elevate some stress on SDConnex.
This simply caches the autoboot user on Server for faster client to server validation. If however the device is not able to communicate on the network
then the PBConnex autoboot feature will not work (this option does not cache autoboot user locally on device)
Step 3 - Configuring PBConnex Autoboot Group
If all devices on network need to autoboot then, changes will need to be made on Device Group:
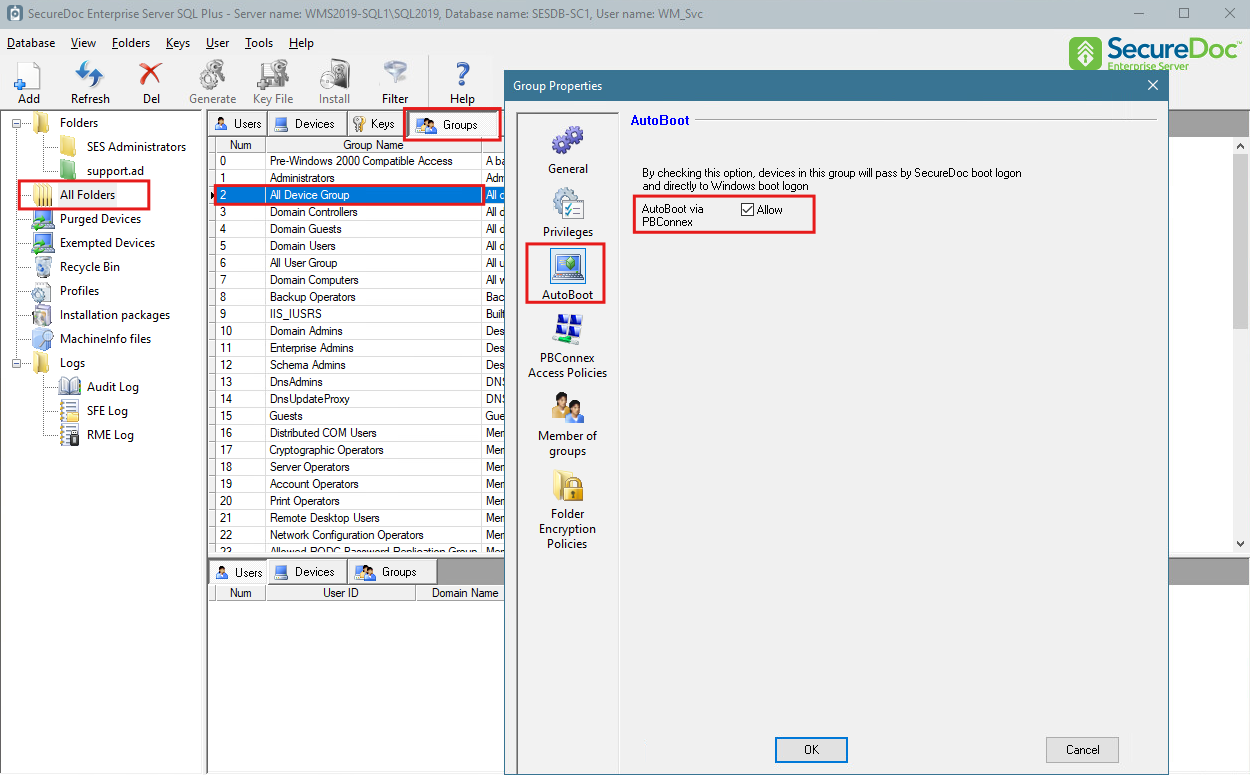
Navigate to All Folders
- Select Groups
- double click All Device Group
- Select Autoboot
- You will need to ensure Autoboot Via PBConnex is checked
- Click OK icon.
Step 4 - Advanced PBConnex Autoboot Group configuration
Certain environments may require that only specific subset of devices will autoboot (like servers) and the rest of desktops and laptops would require Active Directory authentication.
For such setup Folders(where devices are sitting ) and Group(with PBConnex Autoboot setting) can be utilized.
Navigate to All folders
- Select Groups tab
- Create a Group Custom Devices Group
- double click the Custom Devices Group
- click on AutoBoot
- ensure that Autoboot was enabled by adding checkmark
The next step will require that you link Autoboot Group to a specific Active Directory OU or a Custom Created folder where devices would reside.
- right click on Desired Folder and select Folder Properties
- Select Member of Groups
- Click on Add
- Browse to your custom Autoboot Group that was created.
Devices can be manually moved to a specific AutoBoot folder (if policy was created after installation) or, for a new deployments, a custom installation package can be created.
Navigate to Installation Packages
- right click then select create installation package
- Under Provisioning, select move to specific folder.