Configuring and starting the Active Directory Synchronization Service
Summary
This article describes how to configure and start the Active Directory (AD) Synchronization Service for SES. AD Sync enables SES to import and maintain user and organizational unit (OU) information from Active Directory. AD Sync does not sync the user’s passwords nor devices.
IMPORTANT:
Before proceeding, ensure a full backup of the production database is completed.
Prerequisites
Minimum Requirements for the AD Sync Service Account
The service account used for AD Sync must have:
- Read access to Active Directory
- Membership of the Local Administrators group
- DB Owner permissions on the SES SQL database
Configuration Steps
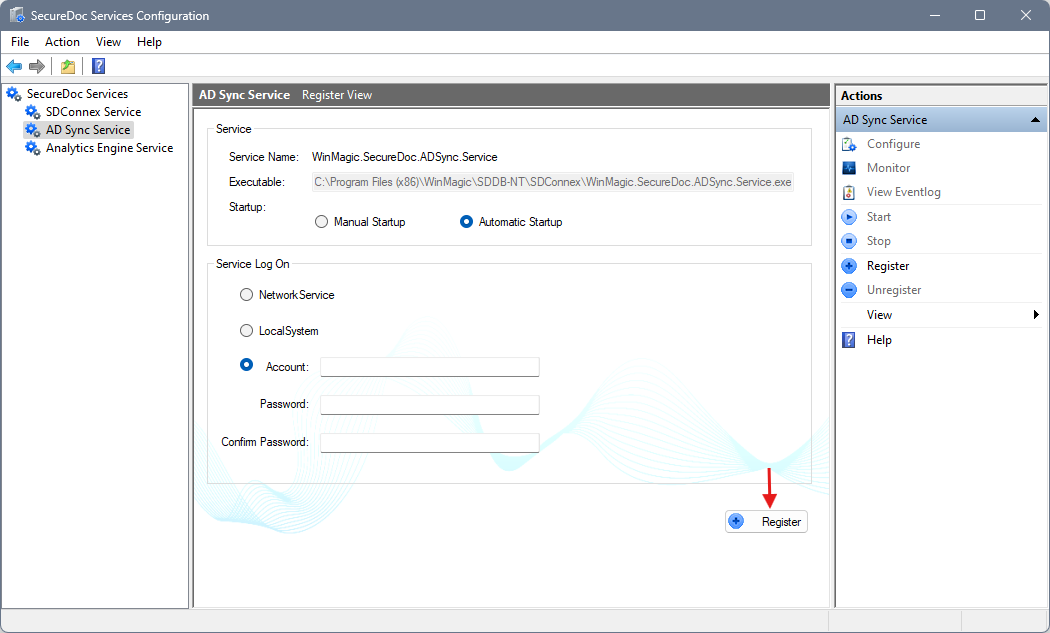
Step 1: Register the AD Sync Service
- Highlight AD Sync Service in the SES console.
- Select the account under which the service will run.
- Default: Local System
- Other options: Network Service or a specified User Account
- Click Register.
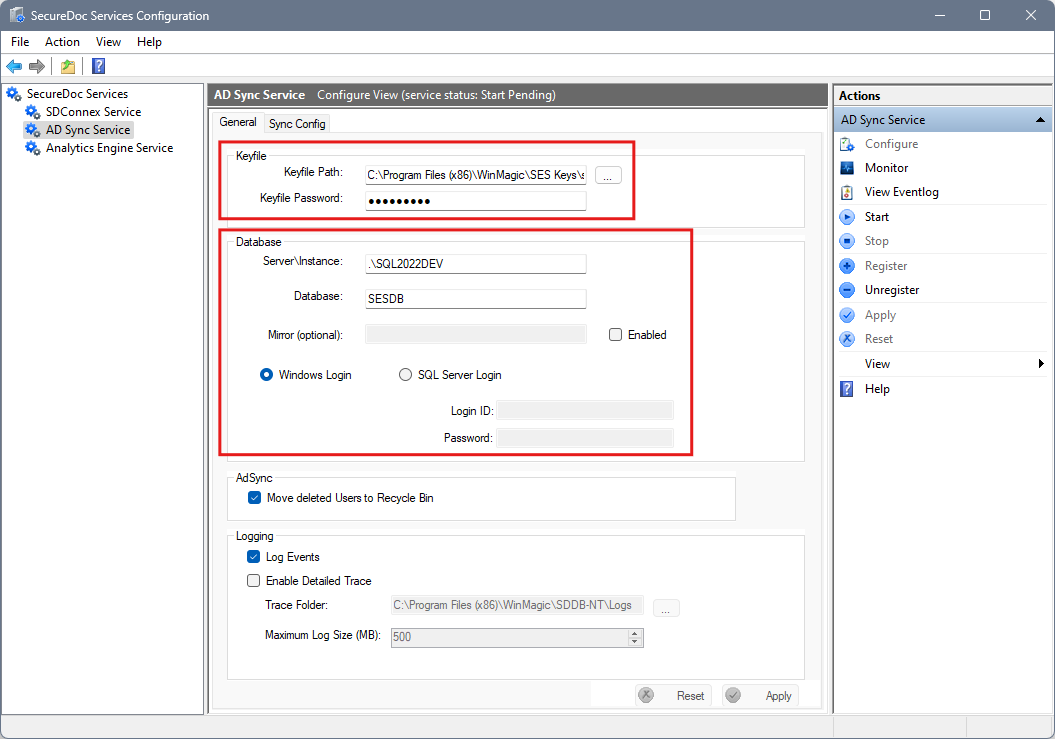
Step 2: Load the Key File
- Browse to the key file path.
- Select the key file and enter the associated password.
- Once authenticated, the Server\Instance and Database fields will auto-populate.
- Click the Apply button at the bottom of the page
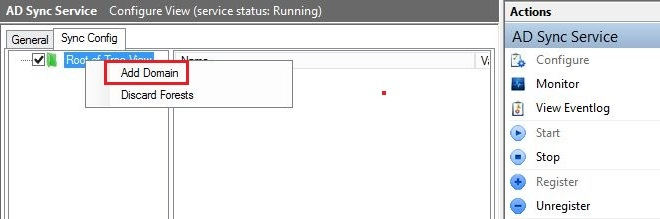
Step 3: Add a Domain
- Navigate to the Sync Config tab.
- Right‑click Root of Tree View.
- Select Add Domain.
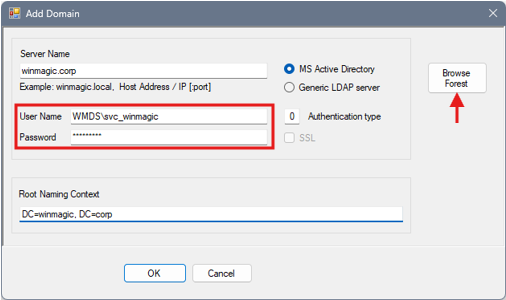
Step 4: Configure Domain Access
- Enter the Active Directory Server Name.
- Provide the domain account credentials that have read access to AD.
- Format: domain\username
- Click Browse Forest.
- If one or more domains are detected, select the appropriate domain and click OK.
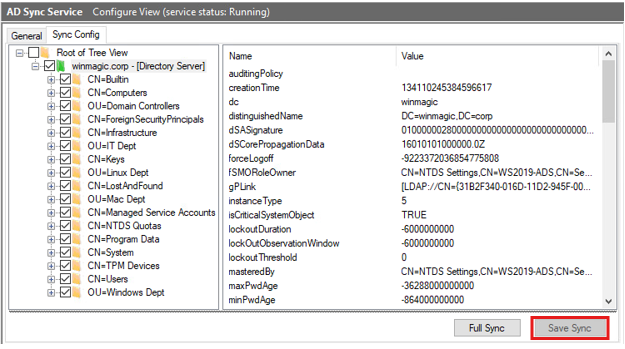
Step 5: Select OUs for Synchronization
- In the left panel, click the domain to expand the OU structure.
- Check the boxes for the Domain and the OUs that should be synchronized.
- Click Save Sync.
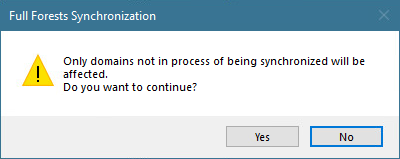
Step 6: Perform a Full Synchronization
- Click Full Sync.
- A confirmation message will appear indicating the configuration was saved successfully. Click Yes to proceed.
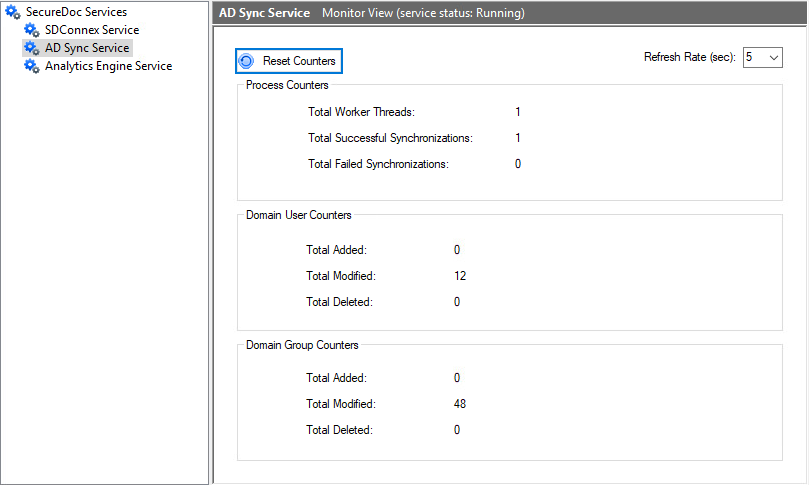
Step 7: Start and Monitor the AD Sync Service
- Click OK to save all settings.
- Right‑click the AD Sync Service and select Start.
- Click Monitor to view synchronization progress.
The synchronization is complete when Total Successful Synchronizations equals 1.
Verify that the expected OUs and users appear in the SES console.
NOTE: Depending on the size of the Active Directory environment, the initial synchronization may take a few hours. The service will time out after 4 hours, so if the domain isn’t fully synced within this time, the service will time out.