 Upgrading SES server to 6.x
Note: Please backup your SQL Database first
Pre-Installation:
Download and Save the SES installation file to your local machine. eg. c:/ [folder name]
Before proceeding with the upgrade, please review the product release notes for any limitations http://www.winmagic.com/knowledgebase/releasenotes.php
Proceed with writing down your current SDConnex and ADSync Settings: (Start>All Programs>SecureDoc enterprise Server>SecureDoc Service Configuration) settings in case they are removed after the update. eg.
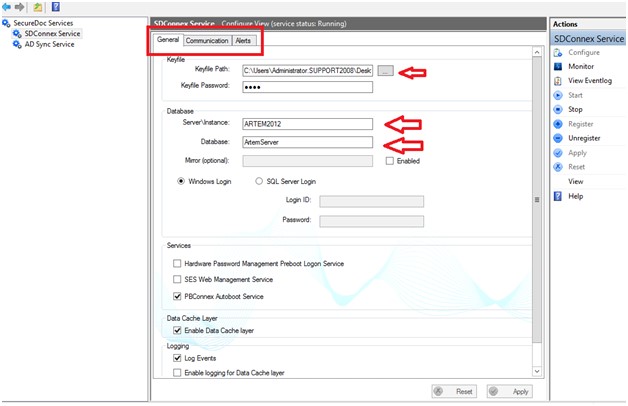
-Make a note of the following:
- where master DBK key file sits
- how connection to SQL is established
- If you utilize a specific Windows logon (with SQL rights) or SQL account
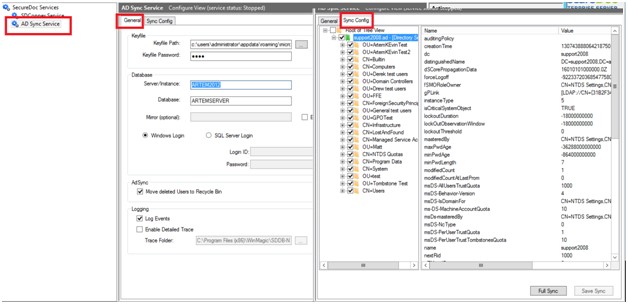
ADSync Service
Under General Tab, verify the connection\configuration
Under Sync Config Tab, validate what OUs are currently marked to be pulled\synced
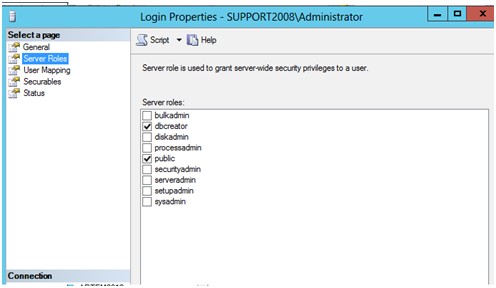
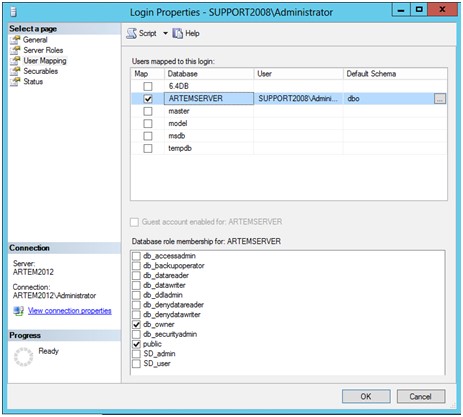
SQL Account that will run the upgrade
To perform SQL upgrade you need to have the following rights
Under Server Roles (ensure you have dbcreator)
Under User Mapping we would need (DB_owner)
Installation steps:
Execute the installation file with elevated rights (Run as Administrator) and follow the Installation Wizard.
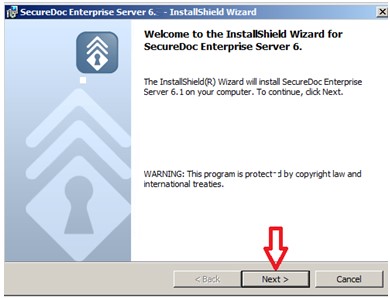
Click NEXT to continue.
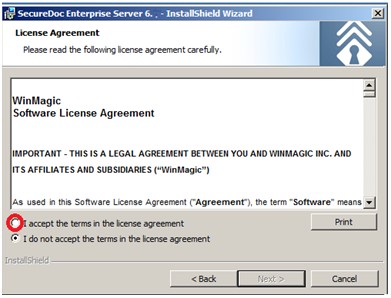
Check "I accept the terms in the license agreement" then NEXT.
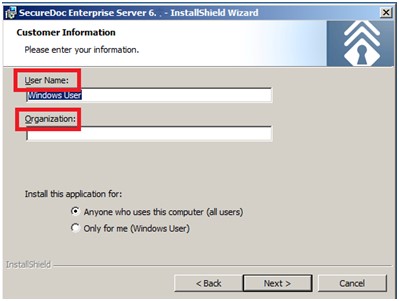
Enter the User /Organization name, then NEXT.
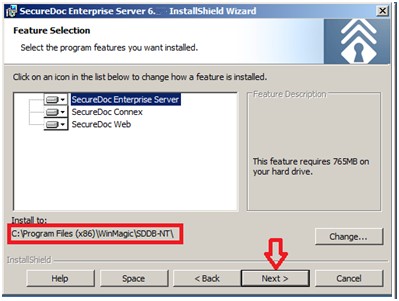
Click NEXT to install at the default path or change if needed.
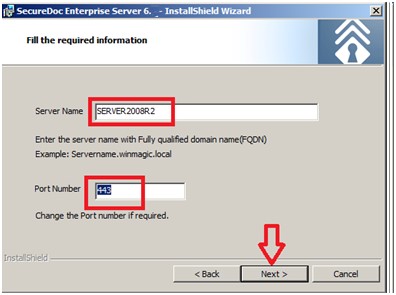
Verify the Server name /Port number or change if needed, then NEXT.
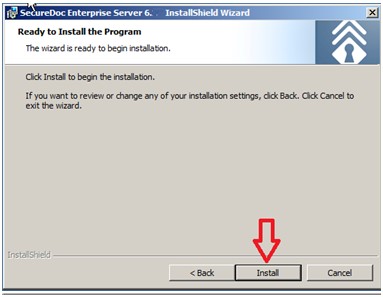
Click INSTALL . The installation will take several min. to complete.
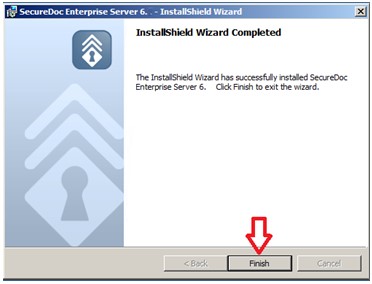
Click FINISH to complete the installation.
Post installation steps:
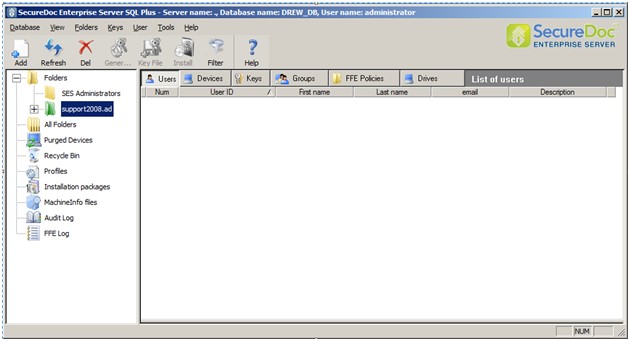
Launch Securedoc Enterprise Server .
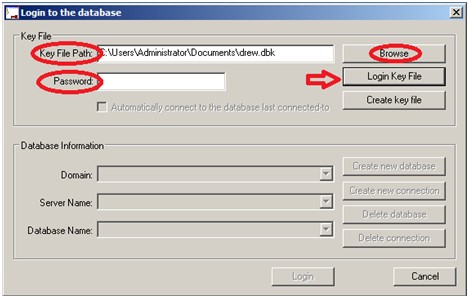
Confirm the key File Path or Browse to the file location if needed. Enter the password then click Login Key File. (Note: If you are upgrading the SES server, remember to use the master keyfile.)
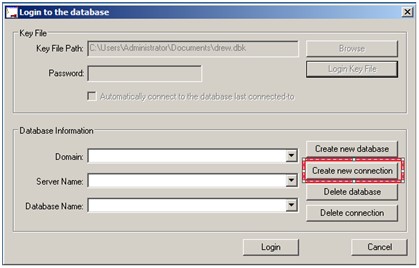
Click on Create new connection.
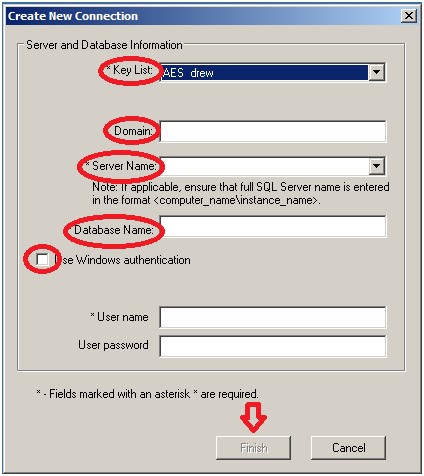
Confirm your Key List, type in the Domain if used, Server and Database Name. Check, Use windows authentication then enter the password if needed, then FINISH.
Confirm your Domain name if you're using ADsync.
Launch the SecureDoc Services Configuration.
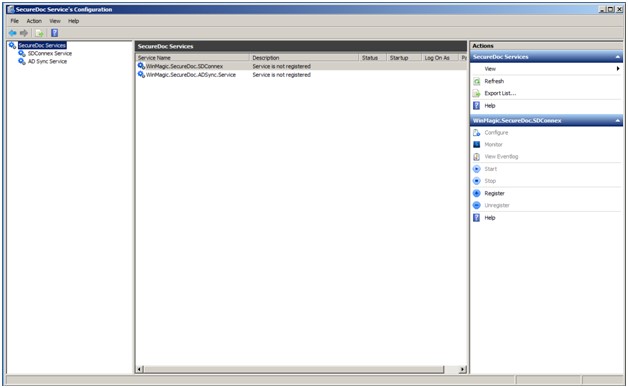
Click to highlight SDconnex Service
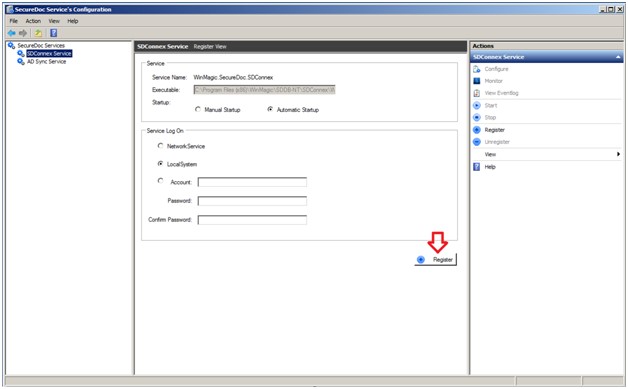
Click Register
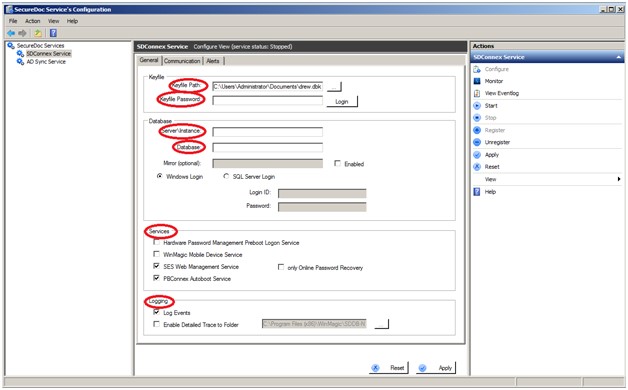
Enter the Keyfile path/passsword if needed, Database Server\Instance and Database. Confirm the Services and Logging options. Then click on the Communication tab.
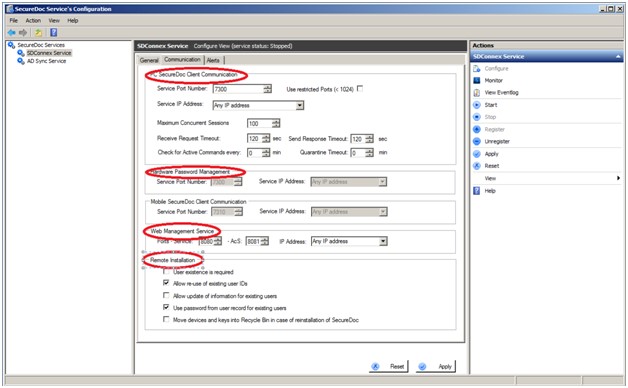
Confirm your PC SecureDoc Client Communication, hardware Password Management, Web Management Services and Remote Installation. Repeat this step for the Alerts tap, then go back to the General Tab.
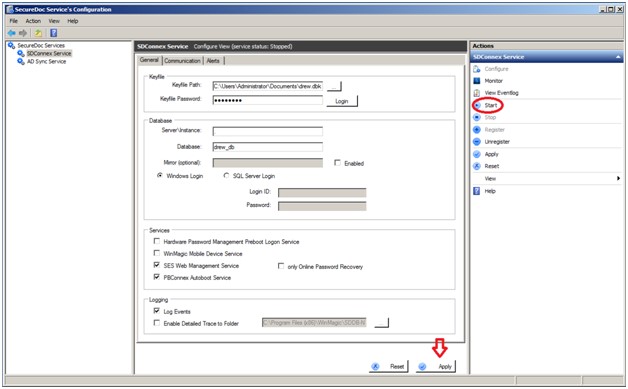
Click on Apply then Start to begin the service.
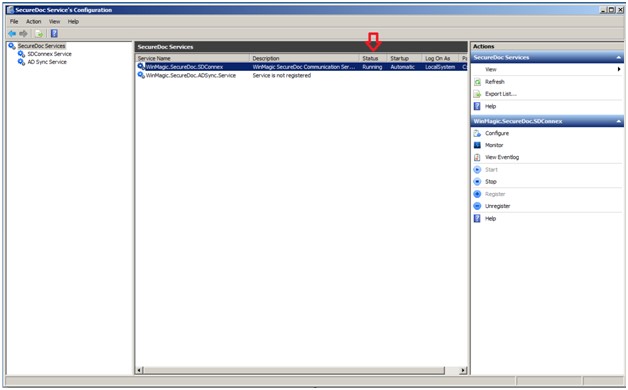
Verify the status to be sure it's running.
If you are using AD Sync go to the AD Sync Service option.
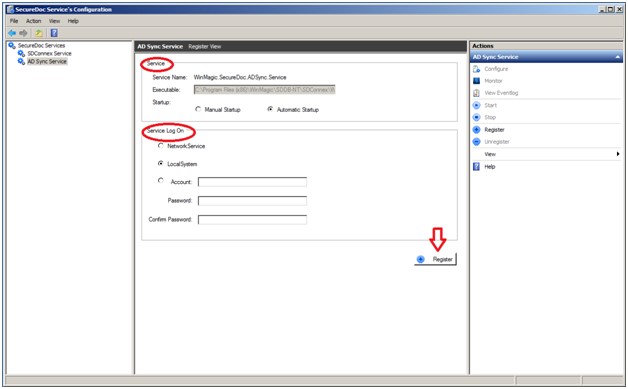
Confirm the Service and Service Log On, then click on Register.
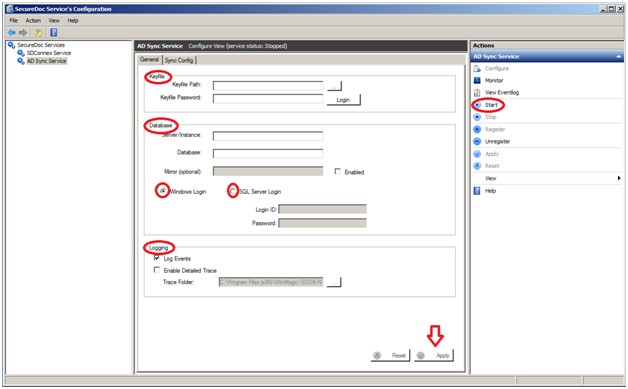
Enter the Keyfile Path/Password, Database Server/Instance, Database, select the Windows or SQL login options, then confirm the Logging Events and Trace. Click on Apply then Startto run the service.
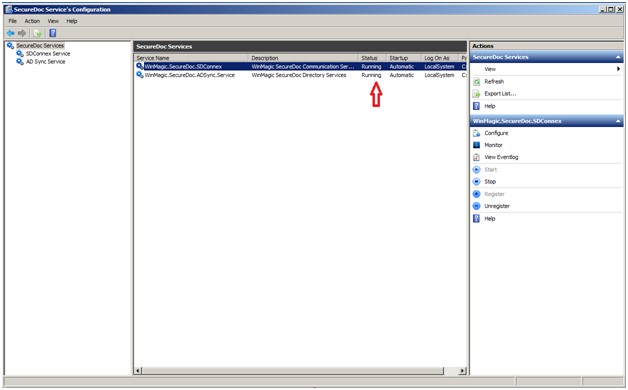
Verify the status to be sure it's running.
Then go back to AD Sync service and the Sync Config tab.
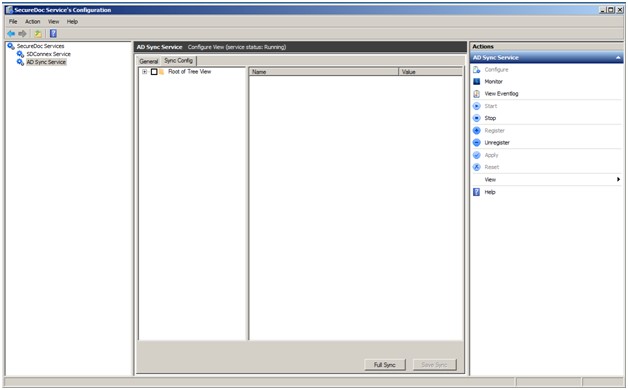
Click on the plus to open the view of your AD dir.

Enter your credentials the click on OK.
Click on Save Sync.
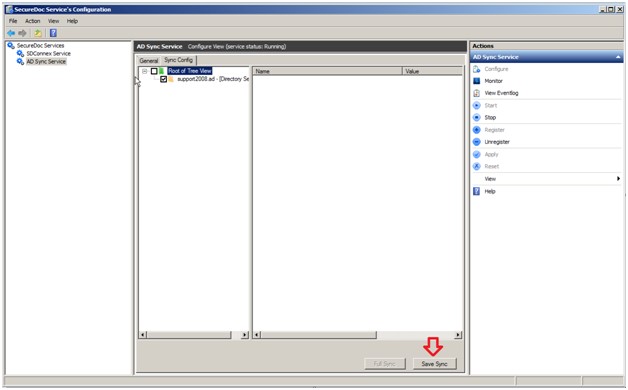
Click on OK then the plus to open your AD dir.
Check the info you would like to import then click Save Sync.
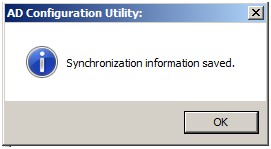
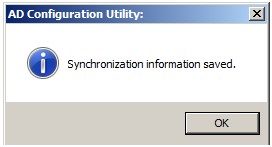
Click on OK.
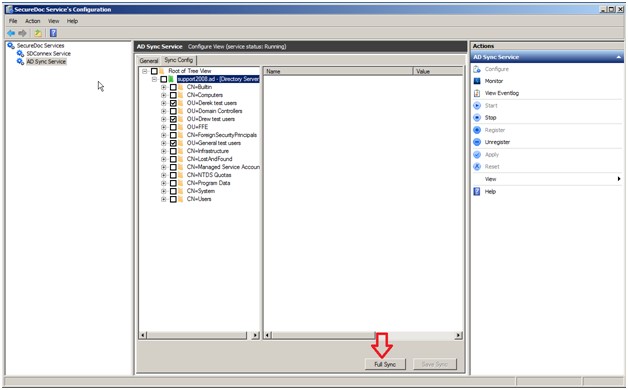
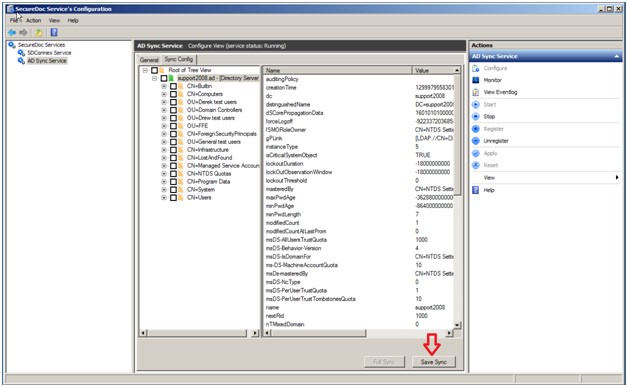
Click on Full Sync.
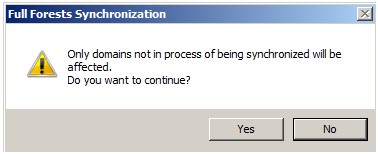
Click on YES. Then go back to SecureDoc Enterprise Server, you may have to re-enter your password.
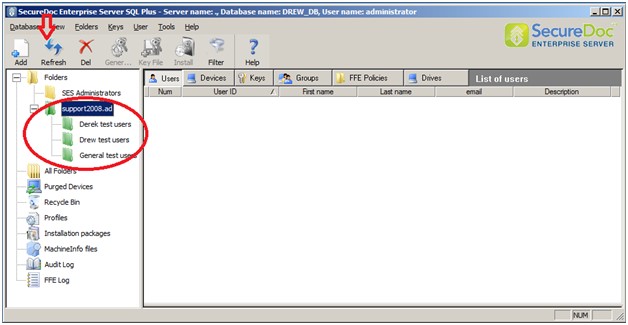
Verify the imported info from AD...you may have to click on Refresh to complete the synchronization.
DONE!
Custom Fields
Operating System: Windows
Product_Documentation: Yes
Version: Affects all versions of SD
Article
Document
Title Upgrading SES server to 6.x
URL
Upgrading-SES-server-to-6-x
Name