Prerequisites in Azure:
- A Directory ID, Application ID and Client Secret.
- API permissions: "Domain.Read.All", "Group.Read.All", "User.Read.All"
Gathering the Directory ID, Application ID and Client Secret:
- Create a new application in the “Application Registration” menu.
- Once created, you can now view the Application ID and Directory ID from the application’s “Overview” page.
- To obtain the secret value, you will need to create one via the “Certificates & secrets” menu > Client secrets > New client secret:

Note: The value of the secret only appears once. If you refresh the page the value will be masked and you may need to create a new one.
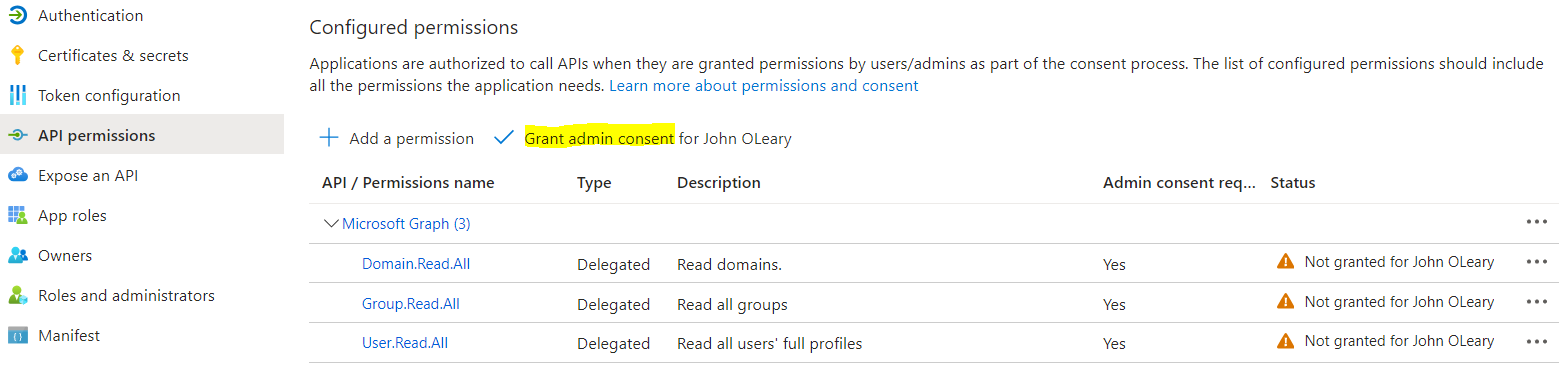
Setting the required API permissions in Azure:
- In the same application that you created in the above steps, go to the “API permissions” menu.
- Select “Add a permission” > Microsoft Graph > Delegated permissions and add the following permissions: "Domain.Read.All", "Group.Read.All", "User.Read.All"
- Once added, you will now need to select “Grant admin consent” for the permissions to come into effect:
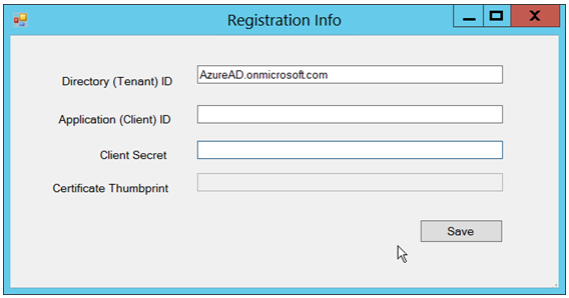
Configuring AzureAD in ADSync:
- Open the SecureDoc Services Configuration panel and select ADSync
- Go to the “Sync Config” tab and right click the root > Create Azure AD:

- A window will appear where you will enter your Directory ID, Application ID and the Client Secret:
- Once saved, restart SDConnex and ADSync.
- In ADSync > Sync Config, selct "Full Sync".
- A green folder should now appear in the SES console containing the Entra ID (Azure AD) users.