Details:
This article provides steps to disable Intel AT (Intel AntiTheft) on an encrypted SecureDoc-protected device from the SES Console.
Notice:
WinMagic will stop supporting Intel AntiTheft (Intel AT) at end of February, 2016.
Customers can anticipate that SES Version 7.1 will not have support for Intel AT.
Since Intel had cancelled support for Intel AT for all regions in April 2014, WinMagic anticipates that removal of support for Intel AT should have no negative impact on existing customers who would have suspended use of Intel AT functionality at the point that Intel took down their Intel AT servers, the communication with which had been necessary for Intel AT functionality to be enabled on endpoint devices.
Any remaining customers still using Intel AT functionality should not upgrade to SES Version 7.1 until after they have disabled any remaining Intel AT functionality that might still be in effect on any legacy devices. They are encouraged to uninstall Intel AT functionality and deploy non-AT SecureDoc profiles to all affected devices before they could upgrade to any versions of SES from V7.1 onward.
Product version affected:
All SD version up to 6.5SR3
SD 7.1 and up will not support Intel-AT feature
Environment (OS/hardware/software):
All devices with Intel-AT features
All Windows OS
Steps to Follow:
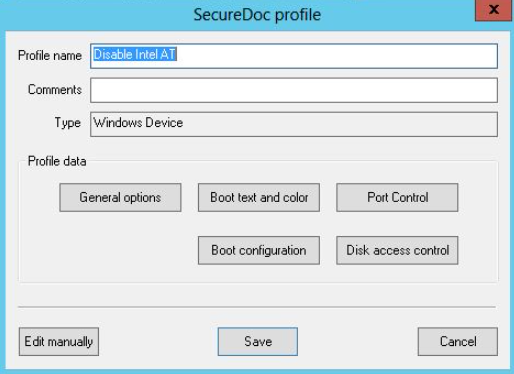
1. Create a profile to disable the Intel AT for each device that has the feature.
From the left Pane of SES, highlight "Profiles" > Right click "Add Profile" > Select "Windows Device" > Click OK > Provide a "Profile Name" i.e Disable Intel AT > click "General Options" Tab.


2. From "General" section > Uncheck the "Intel Anti-Theft" option. > Click OK

NOTE:
This message will appear if the SES console does not have the Intel AT license loaded to the SES server.

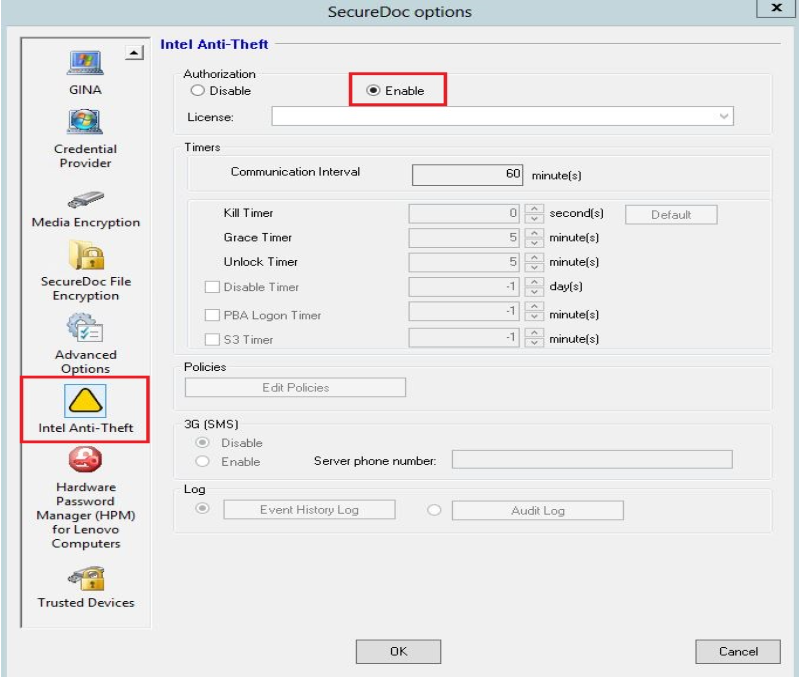
3. From the Intel Anti-Theft section of the profile, by default the "Authorization" is disabled.
Select "Enable" for Authorization > Click OK
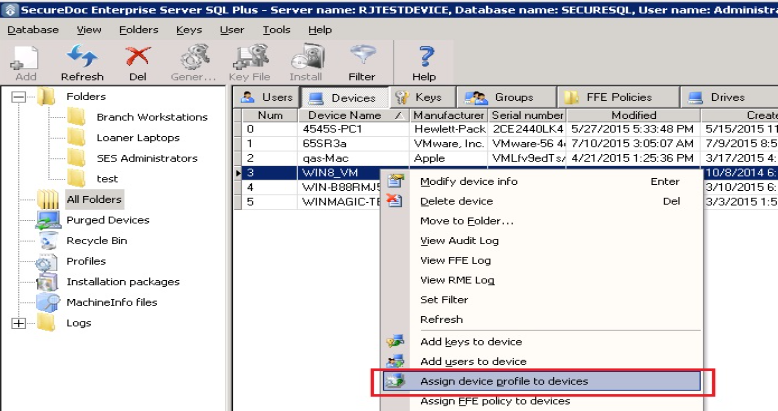
4. From SES console, select the Intel AT enabled devices.
Right click on the device > select "Assign device profile to devices”.
5. From the client device, right click on SD icon in the system tray to "Communicate with the Server".
Once the device has successfully communicated with the server, restart the device to allow for the change to take effect. 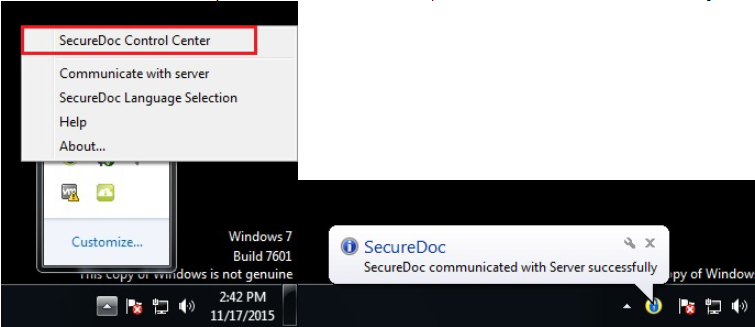
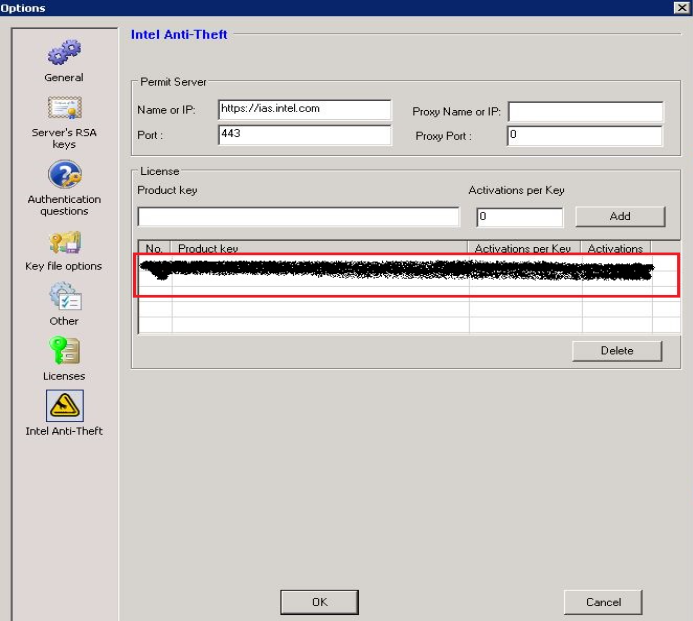
6. Once Intel AT has been disabled for all the devices, go to the SES console and select Tools, and then Options.
Delete all of the product keys from the SES server.