Issue:
This How-To article will demonstrate how to switch a device's Disk controller settings to AHCI mode using the registry editor, even after having installed Windows OS.
Product version affected:
All SD versions
Environment (OS/hardware/software):
Windows OS
Solution/Workaround:
In order to switch to AHCI after installing Windows 7, it is possible to modify them via the registry and boot settings. Setting the SATA controller to AHCI has many advantages. The main reason is that it allows for the use of hard drive features such as NCQ (Native Command Queuing) or eSATA-Hot-Plugging, which can speed up Windows 7 if using a RAID drive.
Step1:
Open regedit.exe (enter regedit.exe into search field).
Step 2:
Un-collapse the registry keys: HKEY_LOCAL_MACHINE\System\CurrentControlSet\services\msahci
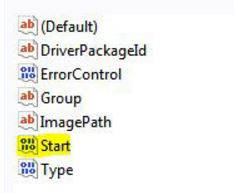
Step 3:
Change the "Start” key to "0?
Alternatively, one can create a registry file and insert the following text into Notepad:
Windows Registry Editor Version 5.00
[HKEY_LOCAL_MACHINE\SYSTEM\CurrentControlSet\services\msahci]
"Start”=dword:00000000
Then save the file with the file extension *.reg file and run it:
Step 4:
Next time the device is restarted, Windows 7 loads the default drivers for AHCI (msahci.sys) and uses them to queue AHCI-mode SATA-controllers and their drives. The next step is to switch the current SATA controllers from IDE to AHCI, otherwise Windows 7 will still queue them via IDE and not via AHCI.
Step 5:
Restart and press "del” during start up to enter the BIOS.
Find the SATA-controller (read your motherboards manual for instructions) and change the mode from IDE to AHCI. Keep in mind that some motherboards don’t even support AHCI !
Done. Once it is successfully switched to AHCI in Windows 7 the disk performance will increase significantly if RAID drive is utilized and AHCI. A RAID drive is basically a combined set of two drives (of the same type and size) for better reliability/performance.